All Activity
- Past hour
-

Trenton or Hay Budden?
Ridgeway Forge Studio replied to Ridgeway Forge Studio's topic in Anvils, Swage Blocks, and Mandrels
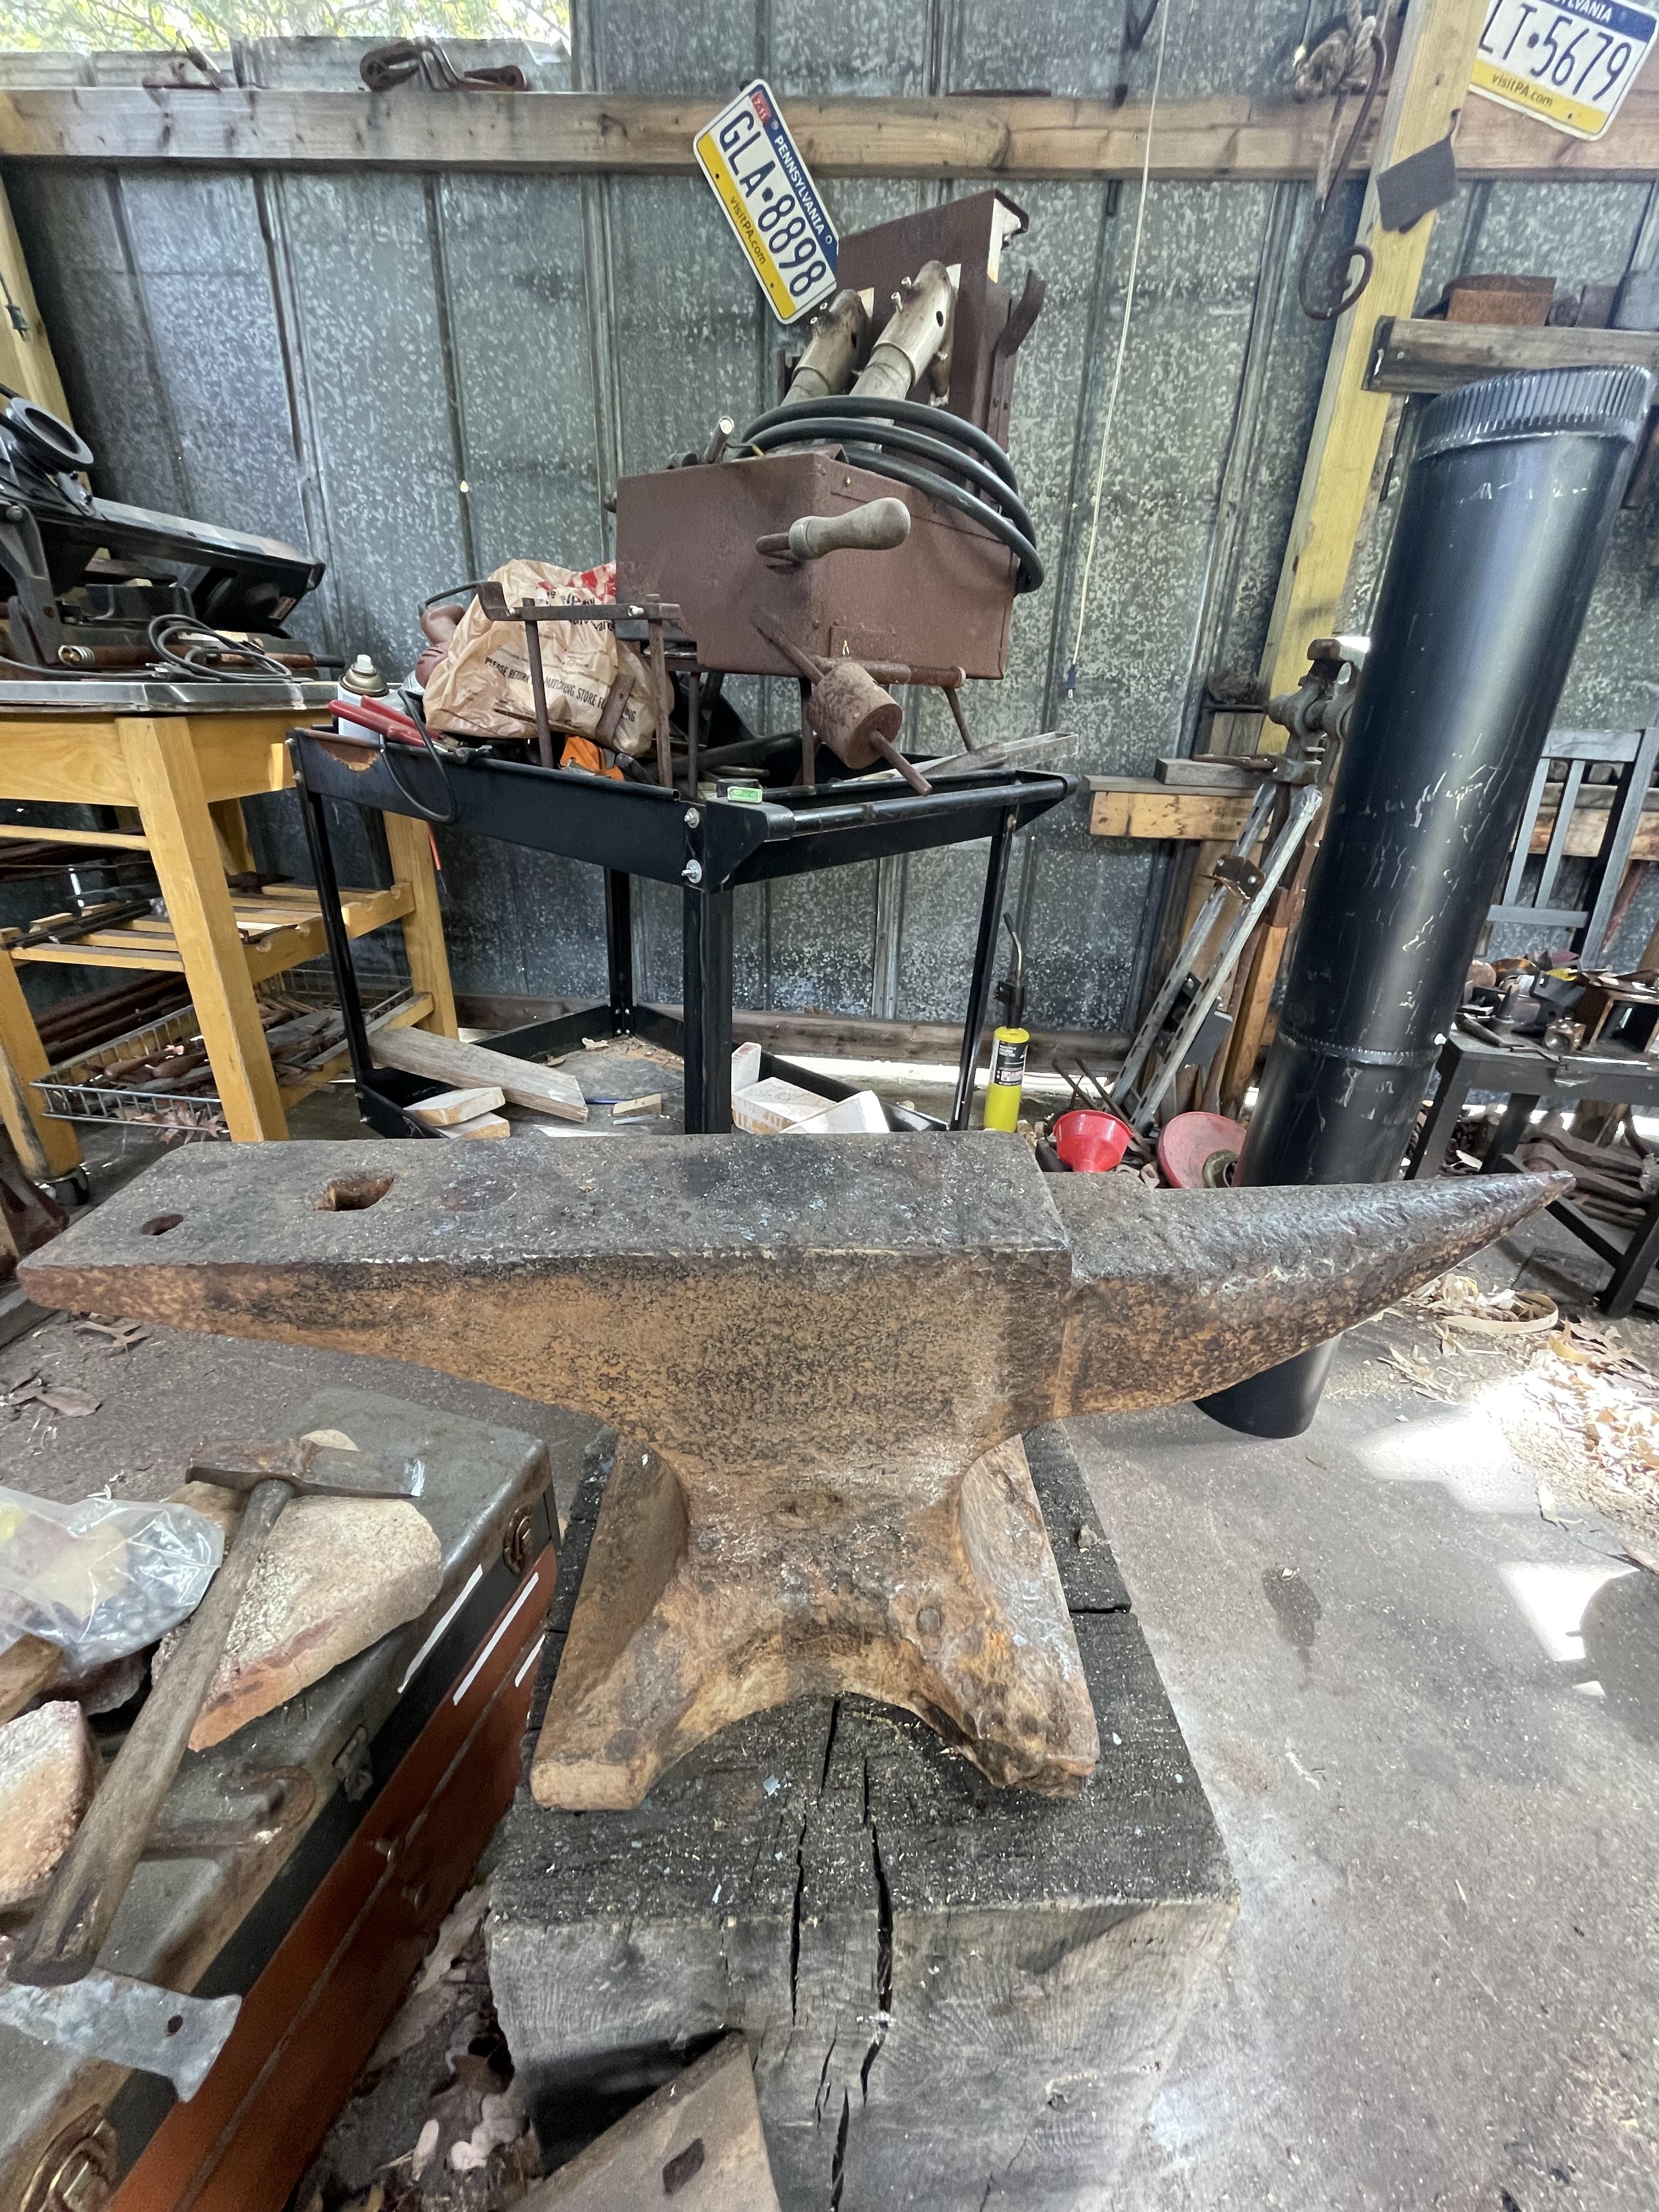
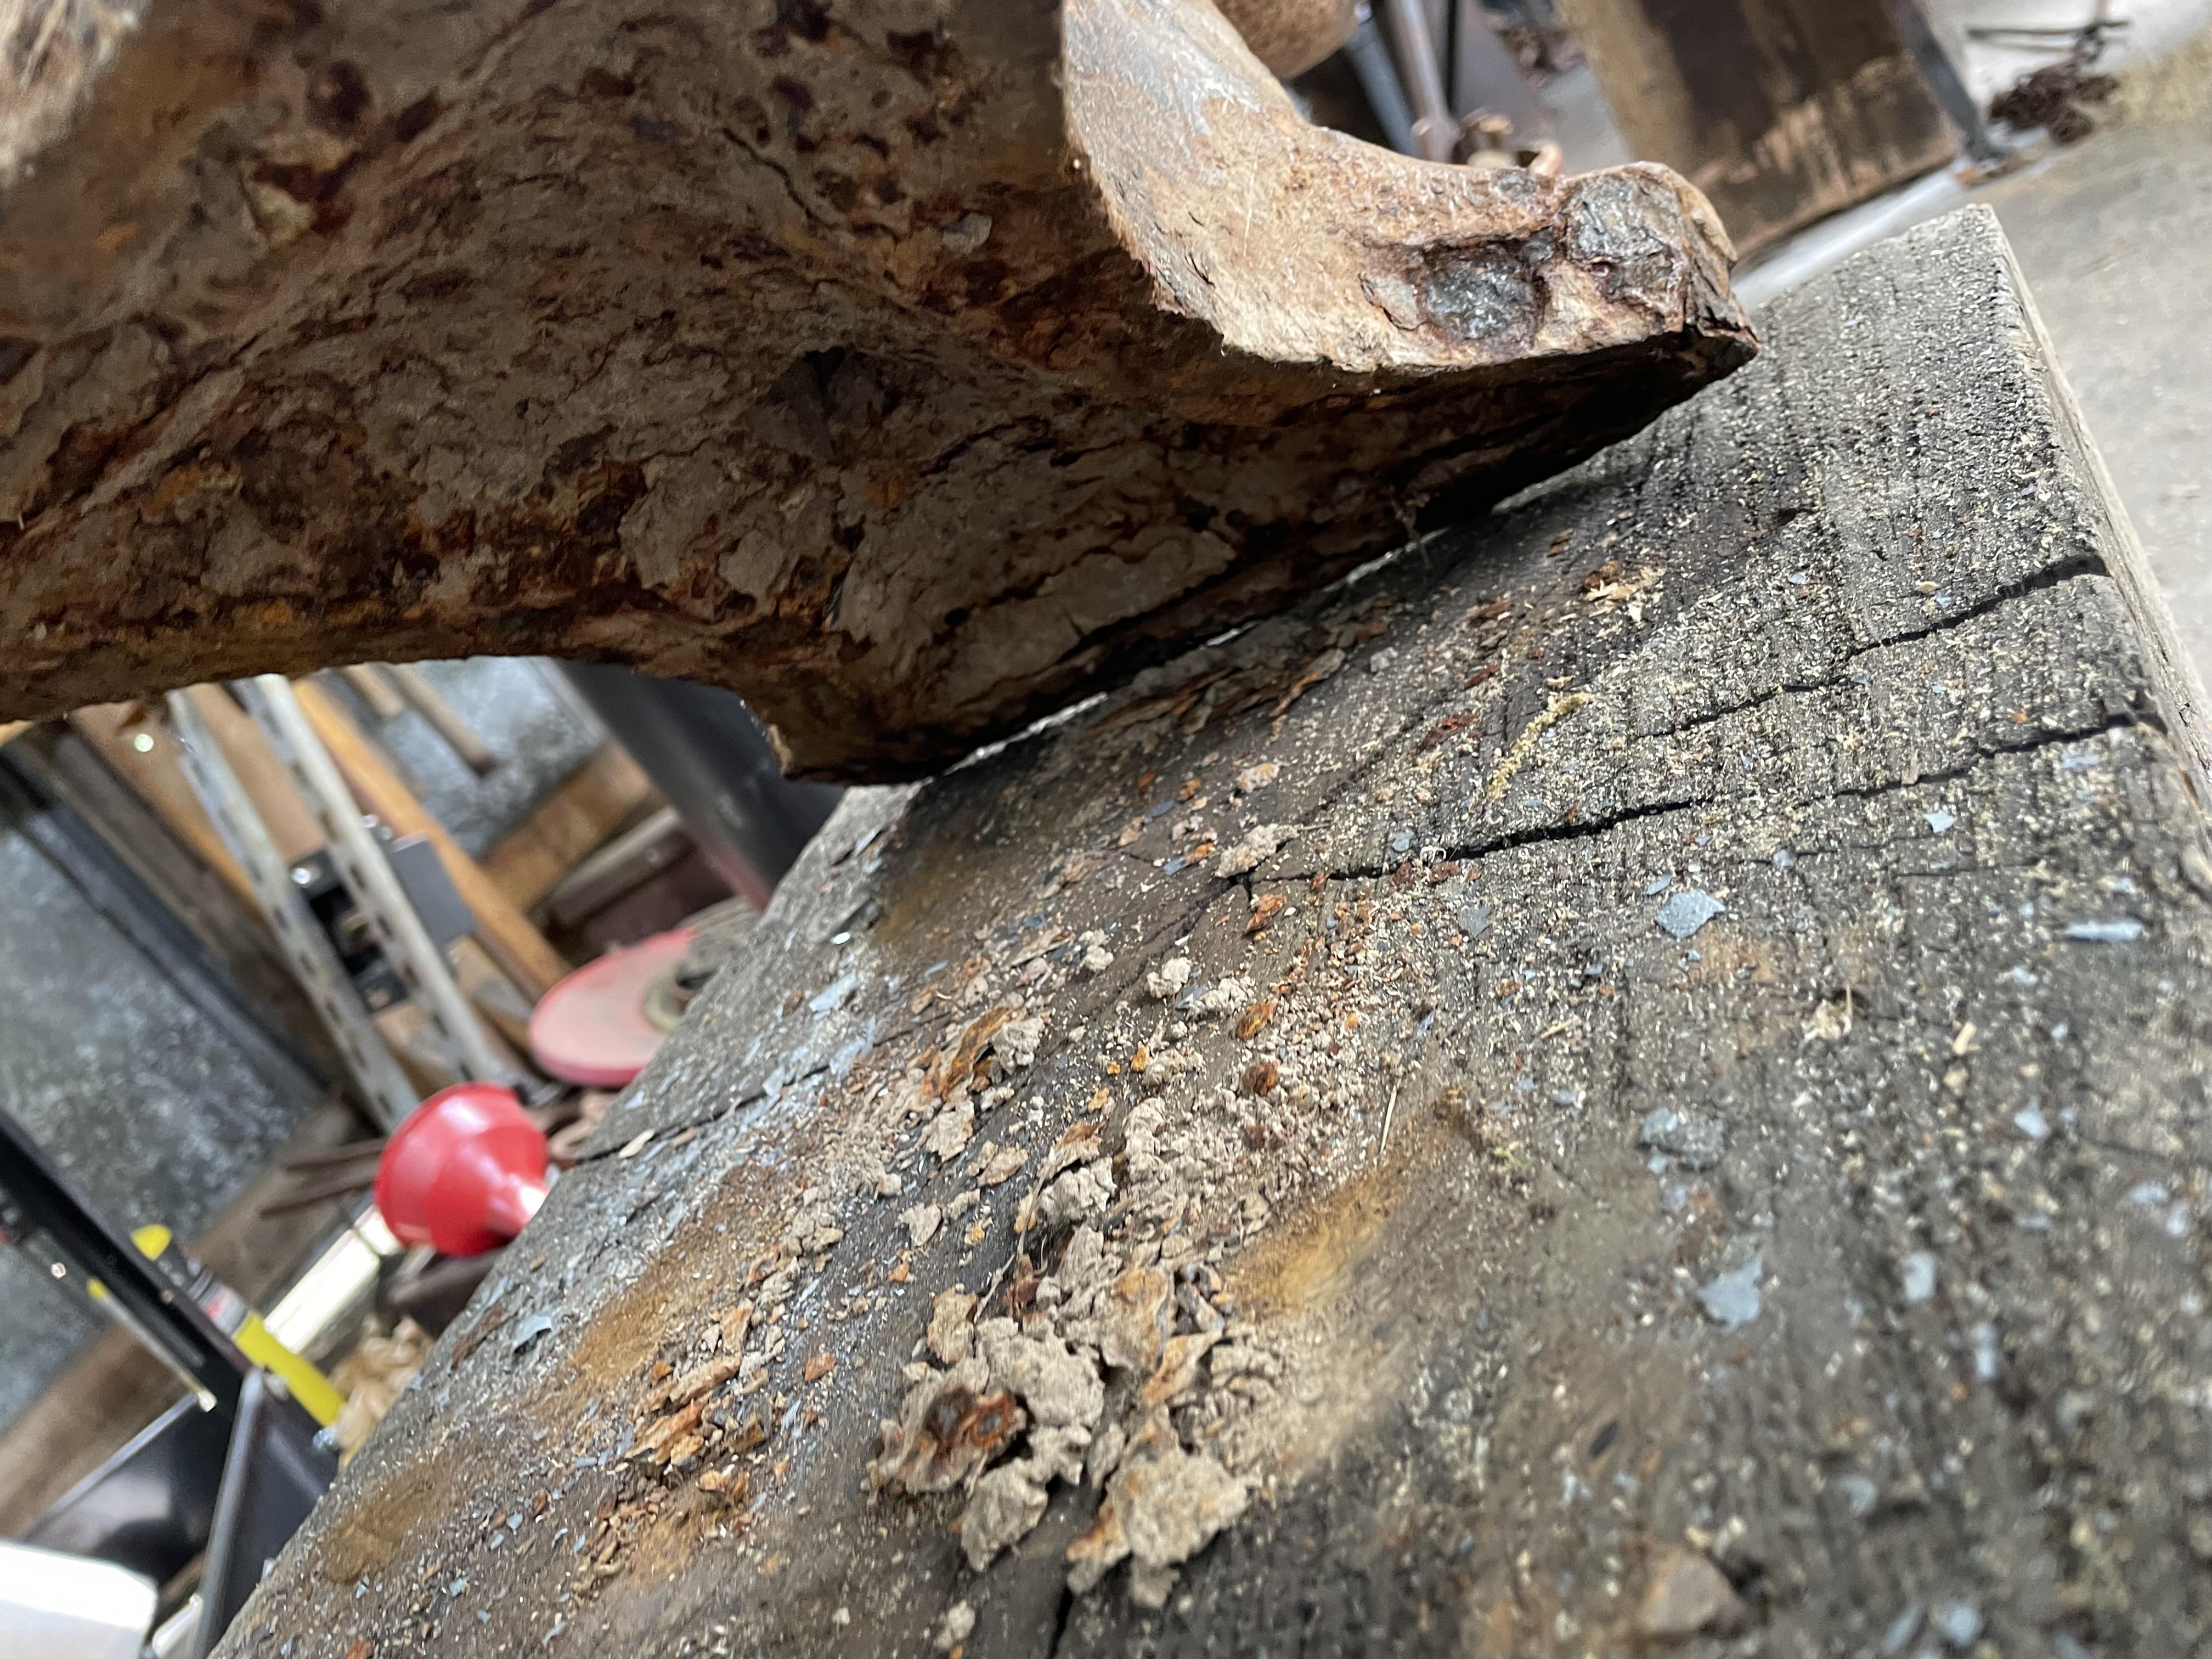
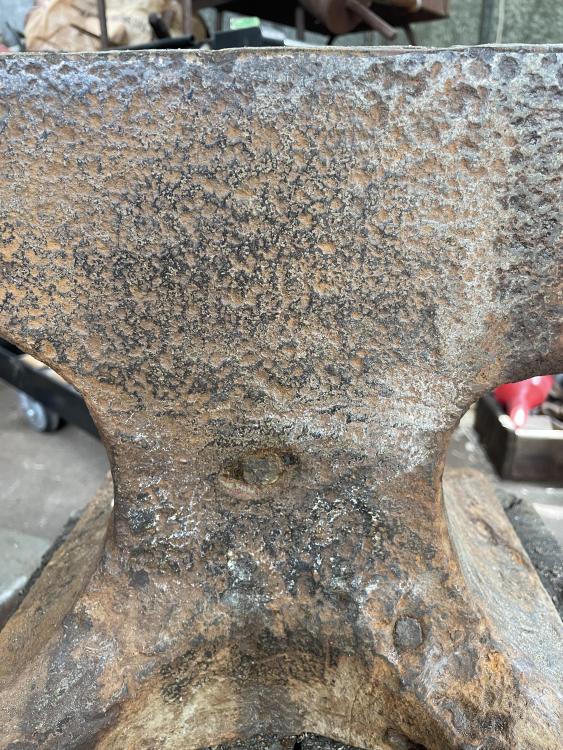
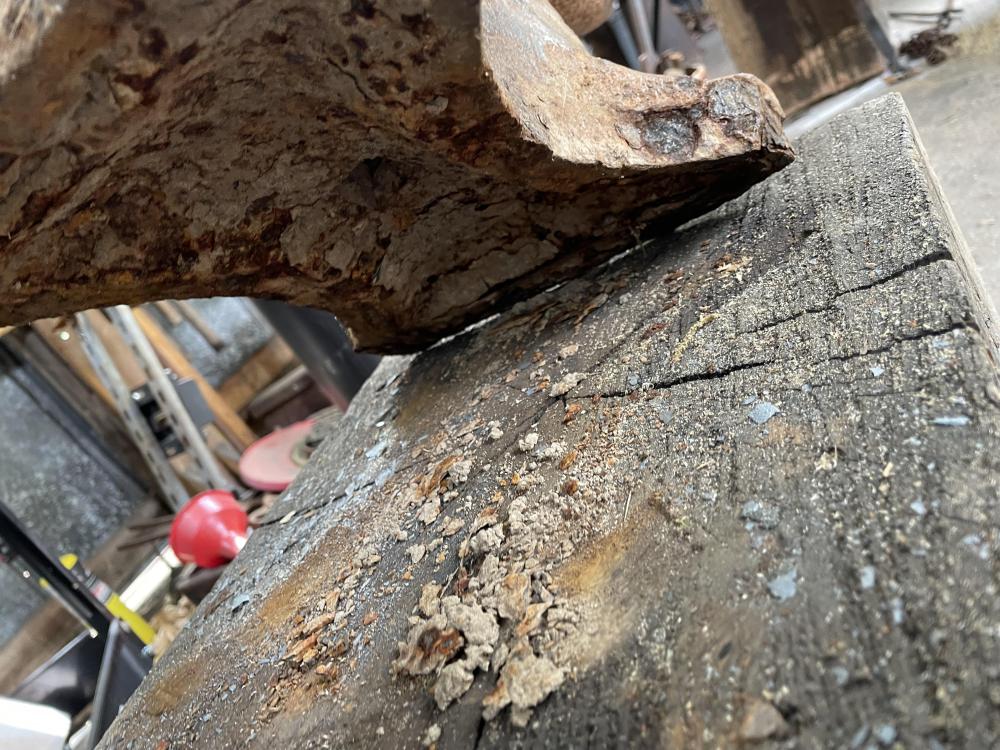
The indentation on the bottom is hourglass shaped - The squat, round horn and the long thin heel make me think it might be a later model hay budden, but I am unsure. I don't think it is a Peter Wright - not the right handling holes or the right feet. -

Protect the bottom of your foundry
Frosty replied to Florida Man Metals's topic in Smelting, Melting, Foundry, and Casting
When you say foundry it sounds like you're talking about the melter rather than the shop. No? Frosty The Lucky. -

Trenton or Hay Budden?
Goods replied to Ridgeway Forge Studio's topic in Anvils, Swage Blocks, and Mandrels
I’d say Trenton based one the caplet indentation (if I’m seeing it correctly) in the bottom and what looks like the remains of a Trenton diamond stamp on the side. Keep it fun, David -
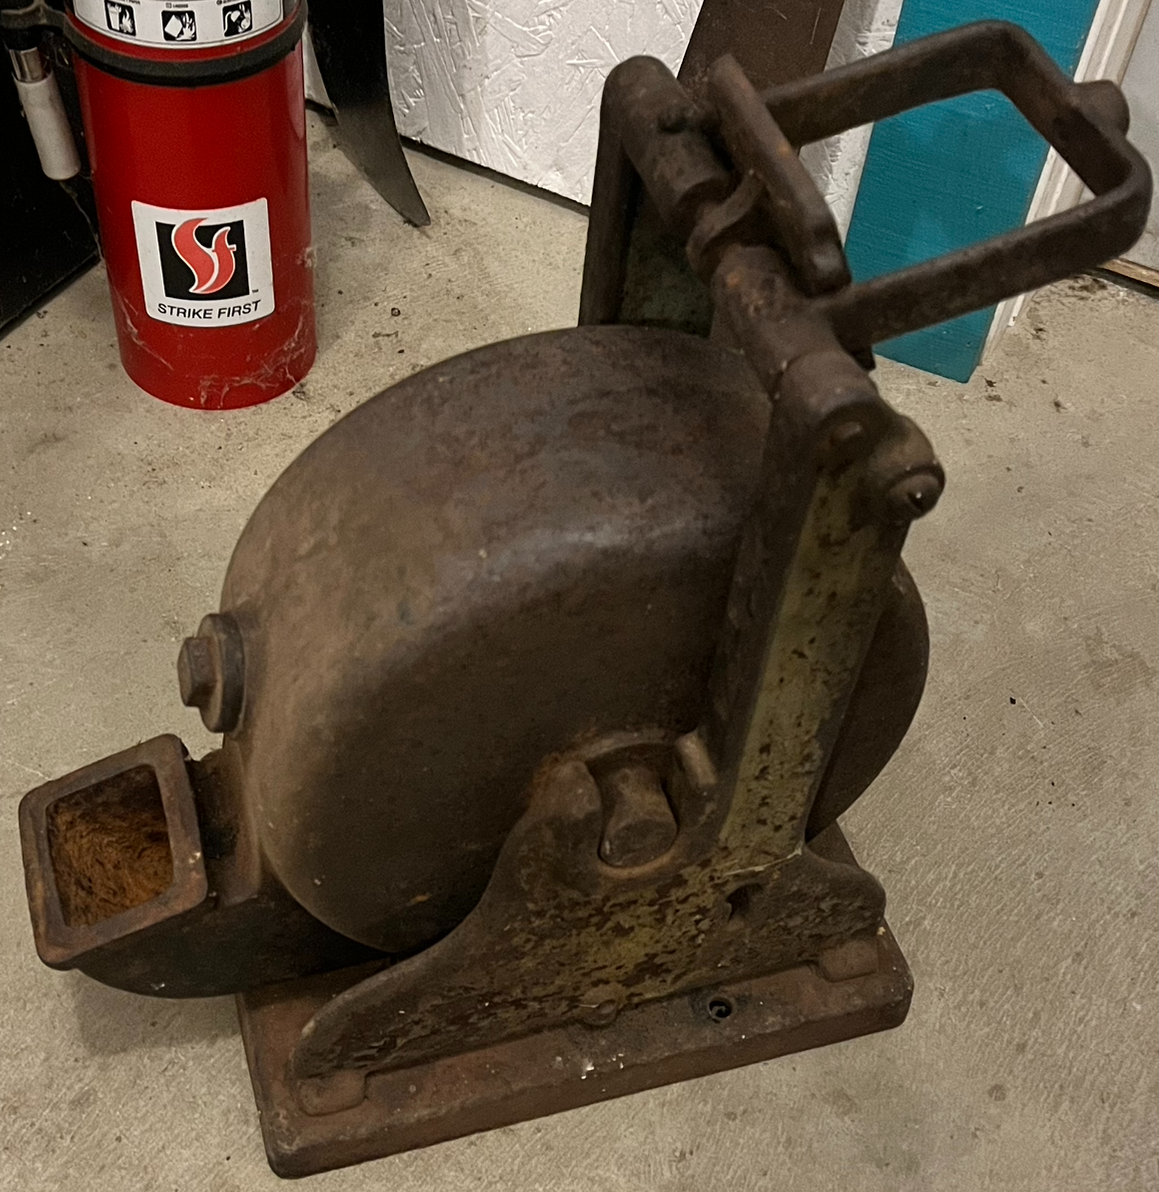
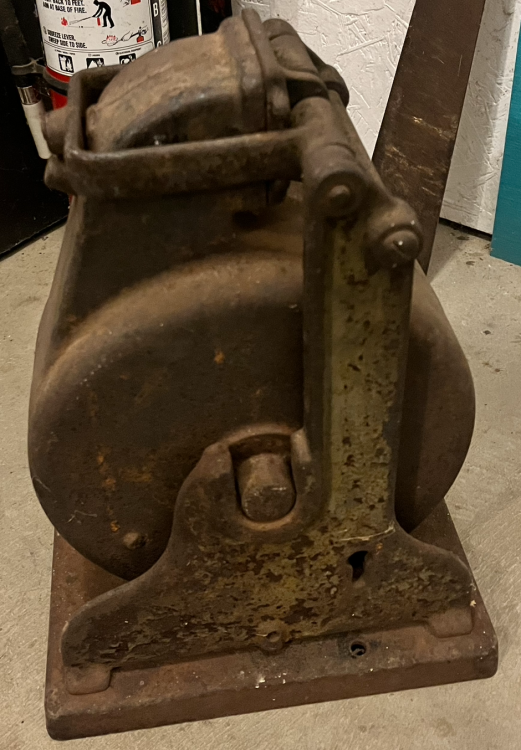
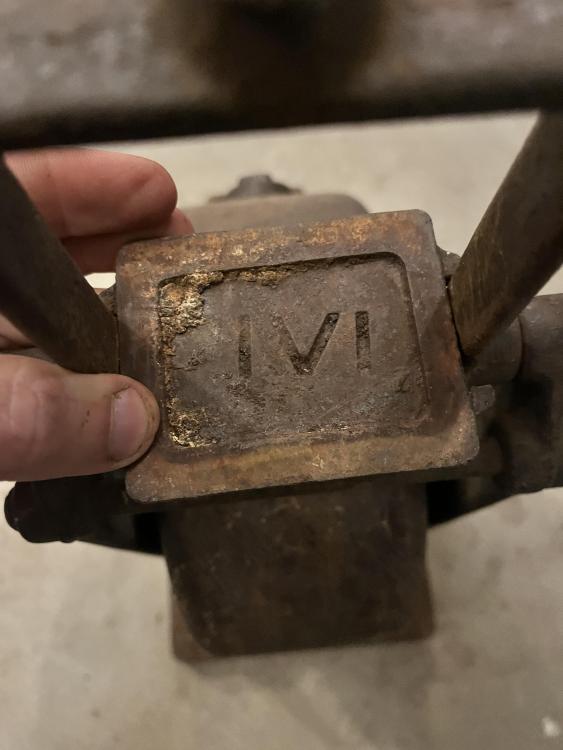
Welcome aboard Den, glad to have you. If you'll put your general location in the header you'll have a much better chance of meeting up with members within visiting distance. Branding plate? Do you mean like a label or data badge? I think that is highly unlikely, the body is looks to be intended to hold a liquid, That appears to be a level or fill plug and if it were to stamp labels, etc. it wouldn't need the big reservoir or body in general. It would probably have a vertical press and compound lever if it were for stamping labels, tags, badges, etc. IVI isn't a Roman Numeral. You might try one of the vintage tools or machinery sites. I'll be interested in what you find out. Frosty The Lucky.
- Today
-

What did you do in the shop today?
Chad J. replied to Mark Ling's topic in Blacksmithing, General Discussion
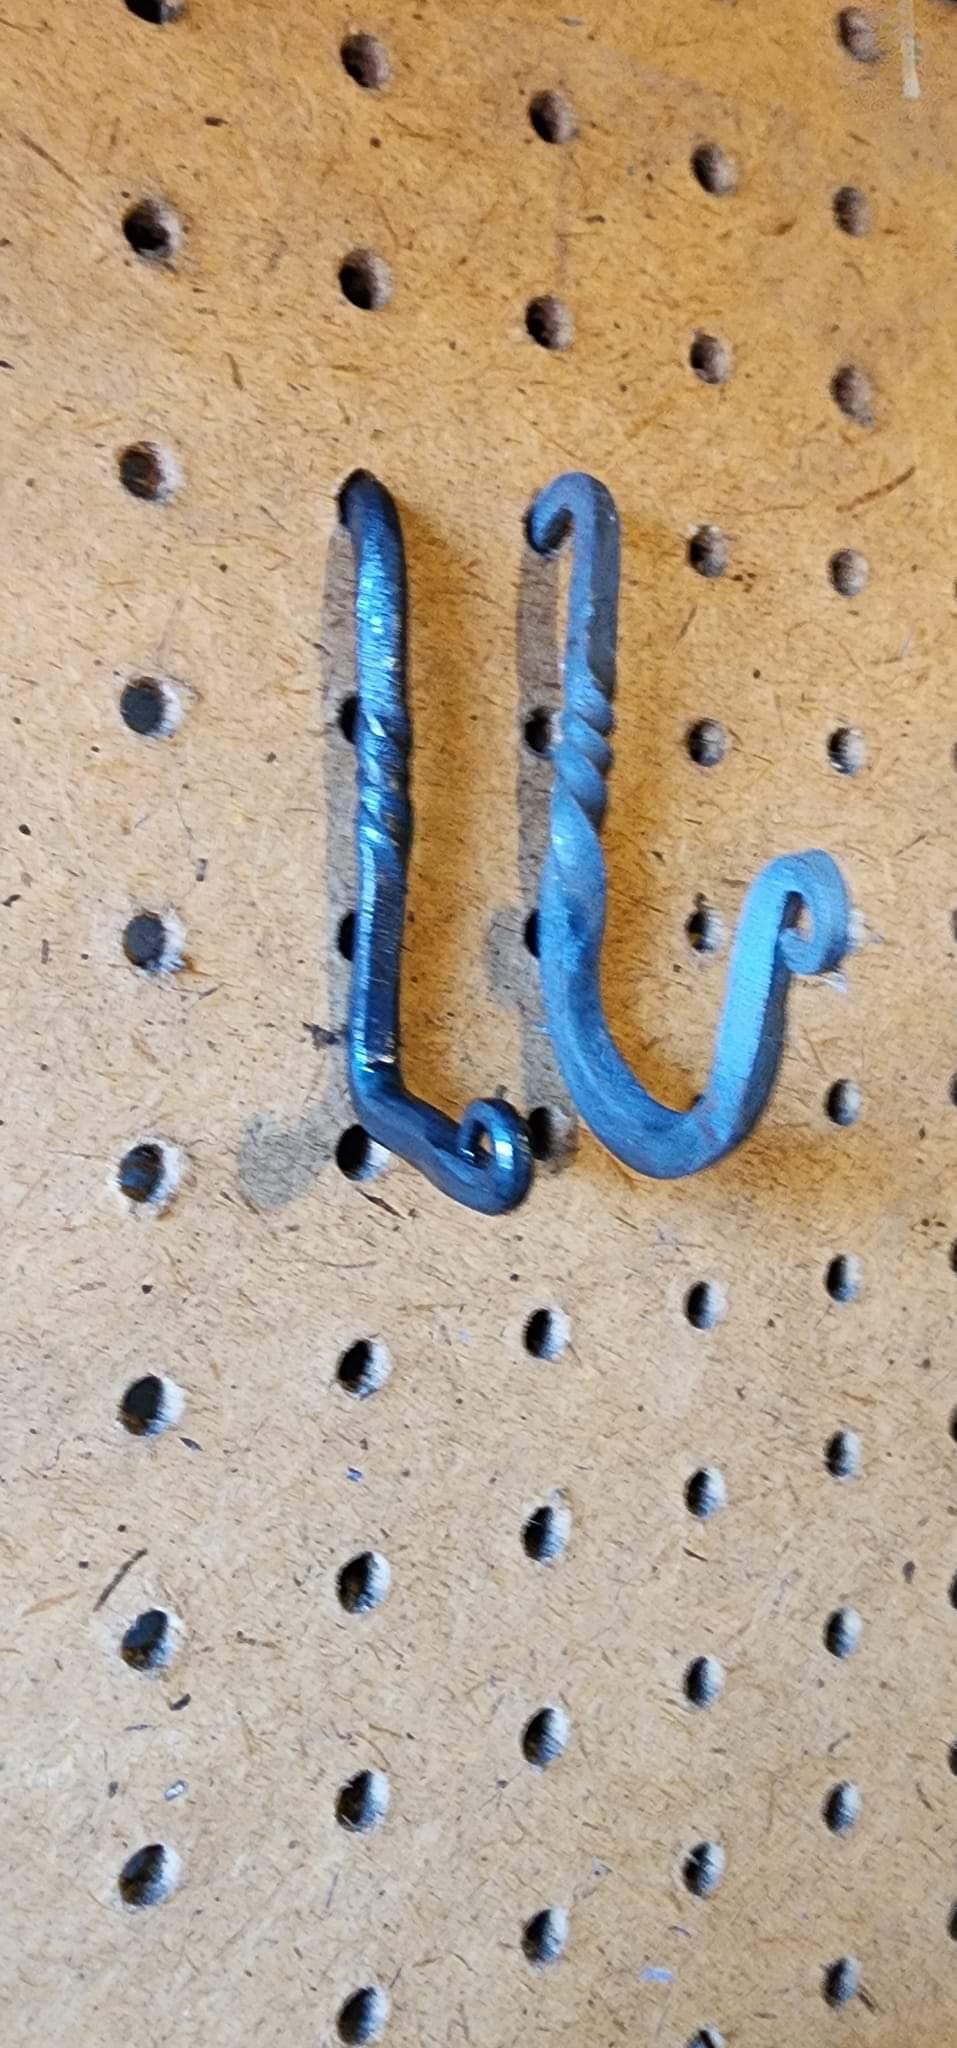
Thanks Frosty, I once had another smith over and she commented that she could get months of projects out of my rejects on the floor. For the hook, I didn't, I just went down. Most of the hooks I made in the past didn't fit well, a little too big on the hook, so they didn't turn much. What I think I may play with now is putting a tight s bend in the hook to keep it from twisting. Maybe I'll do one tonight and see how it looks and do the offset upward hook. Might as well pay with the designs, Father's Day is coming up and what Dad didn't like hanging tools nice and neat on pegboard. -

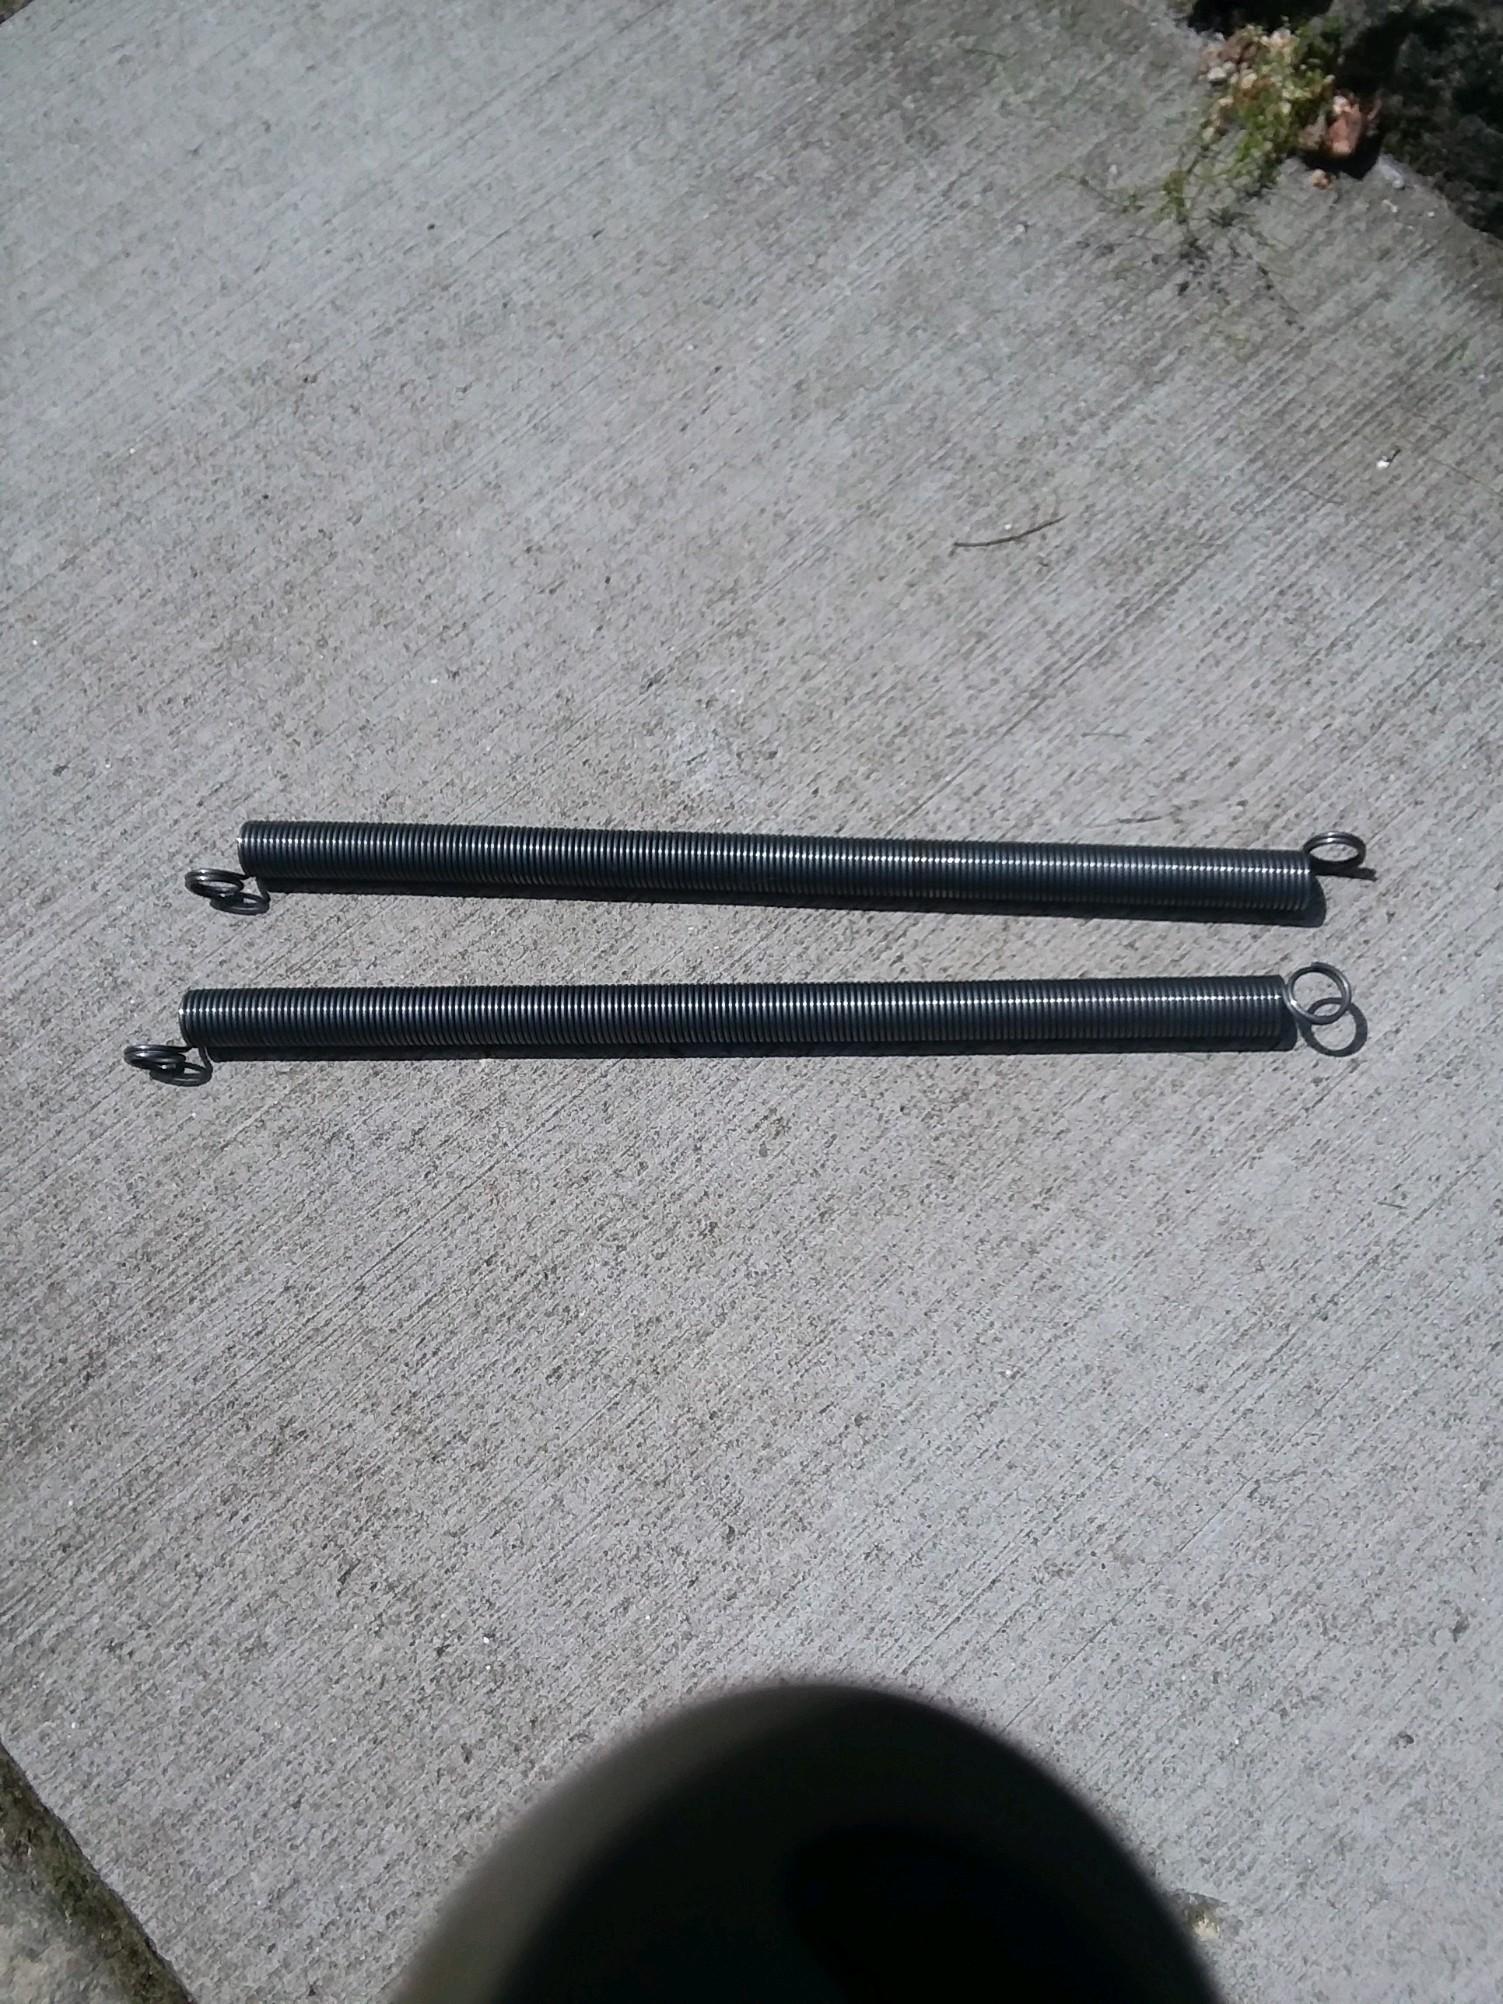
Steel from old garage door springs
yt12 replied to Ronin66's topic in Blacksmithing, General Discussion
had i only known------ive bored this board with my auction finds, but, anyhoo-----you may want to check your local on-line auctions-----they range the gambit -----i have had good luck with one that usually handles personal/household items, but often has odd-ball industrial items. most auctions have an opening bid of $1 ----whether a 2 dollar screwdriver or a $ 20,000 forklift-----some items generating huge interest-----some zero. have ended up with half a dozen car spring sets ....all brand new all for a buck----did pay up $3 for a set of 4 springs with all the air shock hook-up------would have sent ya these door springs, but they moved on down the line......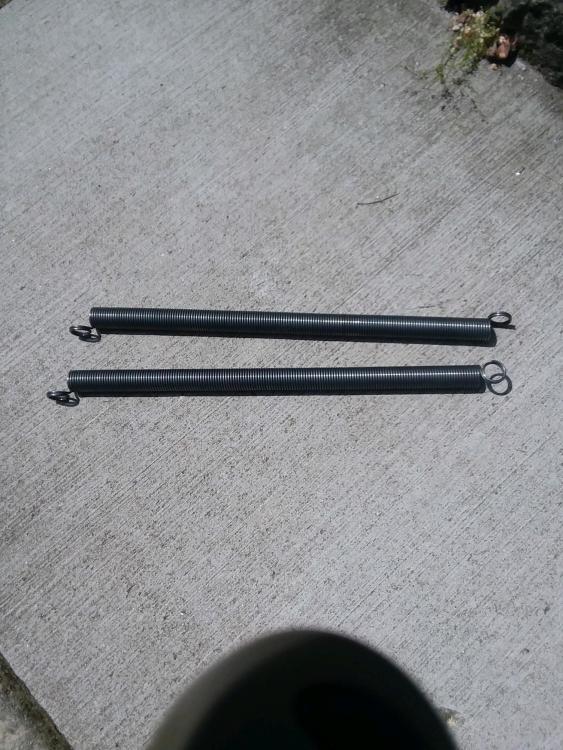
-
Trenton or Hay Budden?
Frosty replied to Ridgeway Forge Studio's topic in Anvils, Swage Blocks, and Mandrels
Trentons tend to have longer horns but it's not too short to be one. Try a web search for images, I'd link what I just skimmed through but it's several pages and too much bandwidth when anybody can search it. It could be a Peter Wright too, there are a couple anvils listed in the images that clearly have the name stamped in their sides. A couple on Iforge for that matter. Frosty The Lucky. -
What did you do in the shop today?
Frosty replied to Mark Ling's topic in Blacksmithing, General Discussion
Good job Chad, a clear floor and bench gives you so much MORE room to lay stuff down! While drying off after this morning's shower I saw the snow blocking the man door on my closed up for winter shop looks clear enough to shovel my way in. Cleaning it though . . . <sigh> Nice peg board hooks, did you put an upwards curve on the peg so it's locked in when there's weight on the hook? It doesn't take much but it really stabilizes the hook. Not taking much time to turn out things like simple hooks really improves them. When I'm just warming up right after I open the shop in spring I make leaf coat hooks, in part because I use them as a forge product #1 for beginners. When I get my self back up to speed I spend about 7 minutes from cutting the stock to brushing and waxing the finished hook. I start with 3/8" sq. hot rolled, twist the shank, draw the hook, leaf, vein the leaf, counter punch the screw holes, brush hard and apply my Trewax finish at a temp that makes it smoke so it comes out black. Later I may use a leaf die so the veins stand proud but I'm not so crazy about the dies I've come up with. Surprisingly it's more work than drawing and veining by hand. Anyway, in spring it takes me 15+ minutes to make a leaf hook and they're okay. Later when I'm cranking them in 7mins. or so they start coming out looking and working well. I think I have a peg board in the shop maybe I'll have to clean a path and make some hooks. Do your hooks want to turn sideways in use? Commercial peg board hooks have multiple pegs and or a spread bar to keep them facing straight. Turning has always been my issue with making peg board hooks. It's not insurmountable but it is unsatisfying having to add chachkas to keep them straight. An old acquaintance made little snake pegs that looked like they were slithering down the wall, neck and head raising into hooks. As I recall he said he spent 10+ minutes on them. Frosty The Lucky. -
Uh HUH and the English book replied, "Go figure." That doesn't add up to a good joke either does it. Sorry. Frosty The Lucky.
-

What did you do in the shop today?
JHCC replied to Mark Ling's topic in Blacksmithing, General Discussion
A little Repoussé-on-the-Road.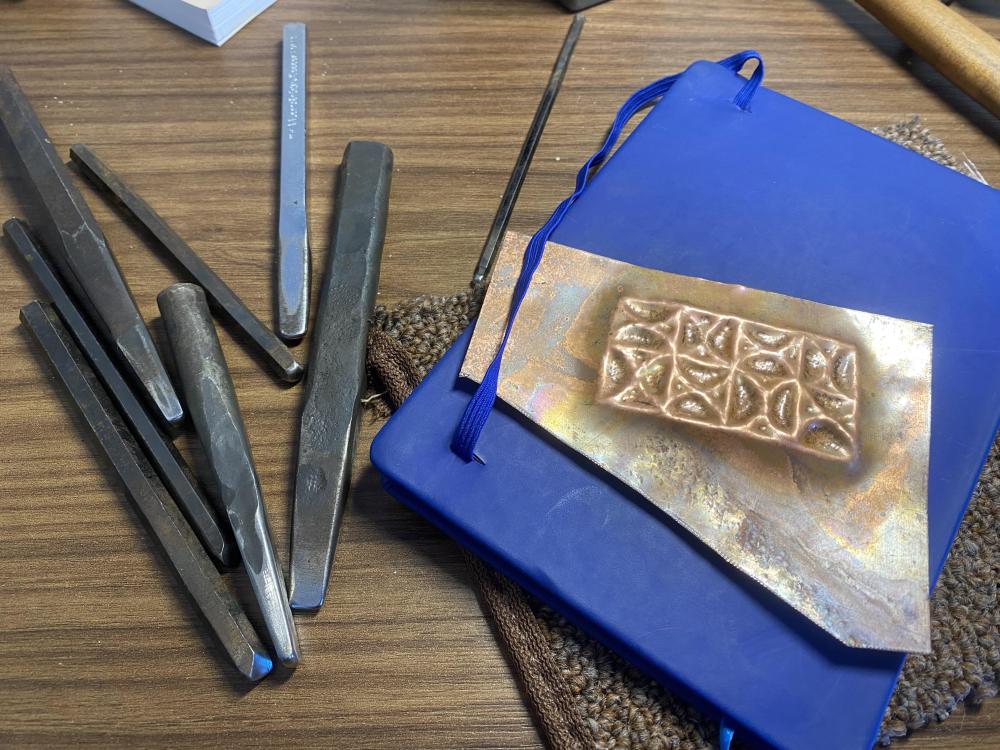
-
What did you do in the shop today?
Chad J. replied to Mark Ling's topic in Blacksmithing, General Discussion
Yesterday I found; the floor to my shop, a counter top, a pan that I had used to hold water next to the belt grinder, the stand that the pan stood on, my tablesaw, a place to put my snow blower, several half finished knives, my first attempt at a towel hanger, and space to set the coffin bookshelf back up so I can finish it now that it's warm again. I also rearranged my tool peg board so I can actually hang tools on it and made a quick hook for it. It used to take me hours, maybe exaggerated, to make a single hook for the peg board, yesterday the one I knocked out quick as a reward to myself for cleaning took maybe 5 minutes and looked much better. Still just as proud of the early ones.
-
Rusty, crusty and pitted- I’ve had this anvil since I bought it from the antique mall 8 months ago, finally mounting it. it is 180 lbs (approx) and seems to be in good shape other than the rust and pitting. is it a Hay Budden or a Trenton? Any marking has long since disappeared…

-
What did you do in the shop today?
Ridgeway Forge Studio replied to Mark Ling's topic in Blacksmithing, General Discussion
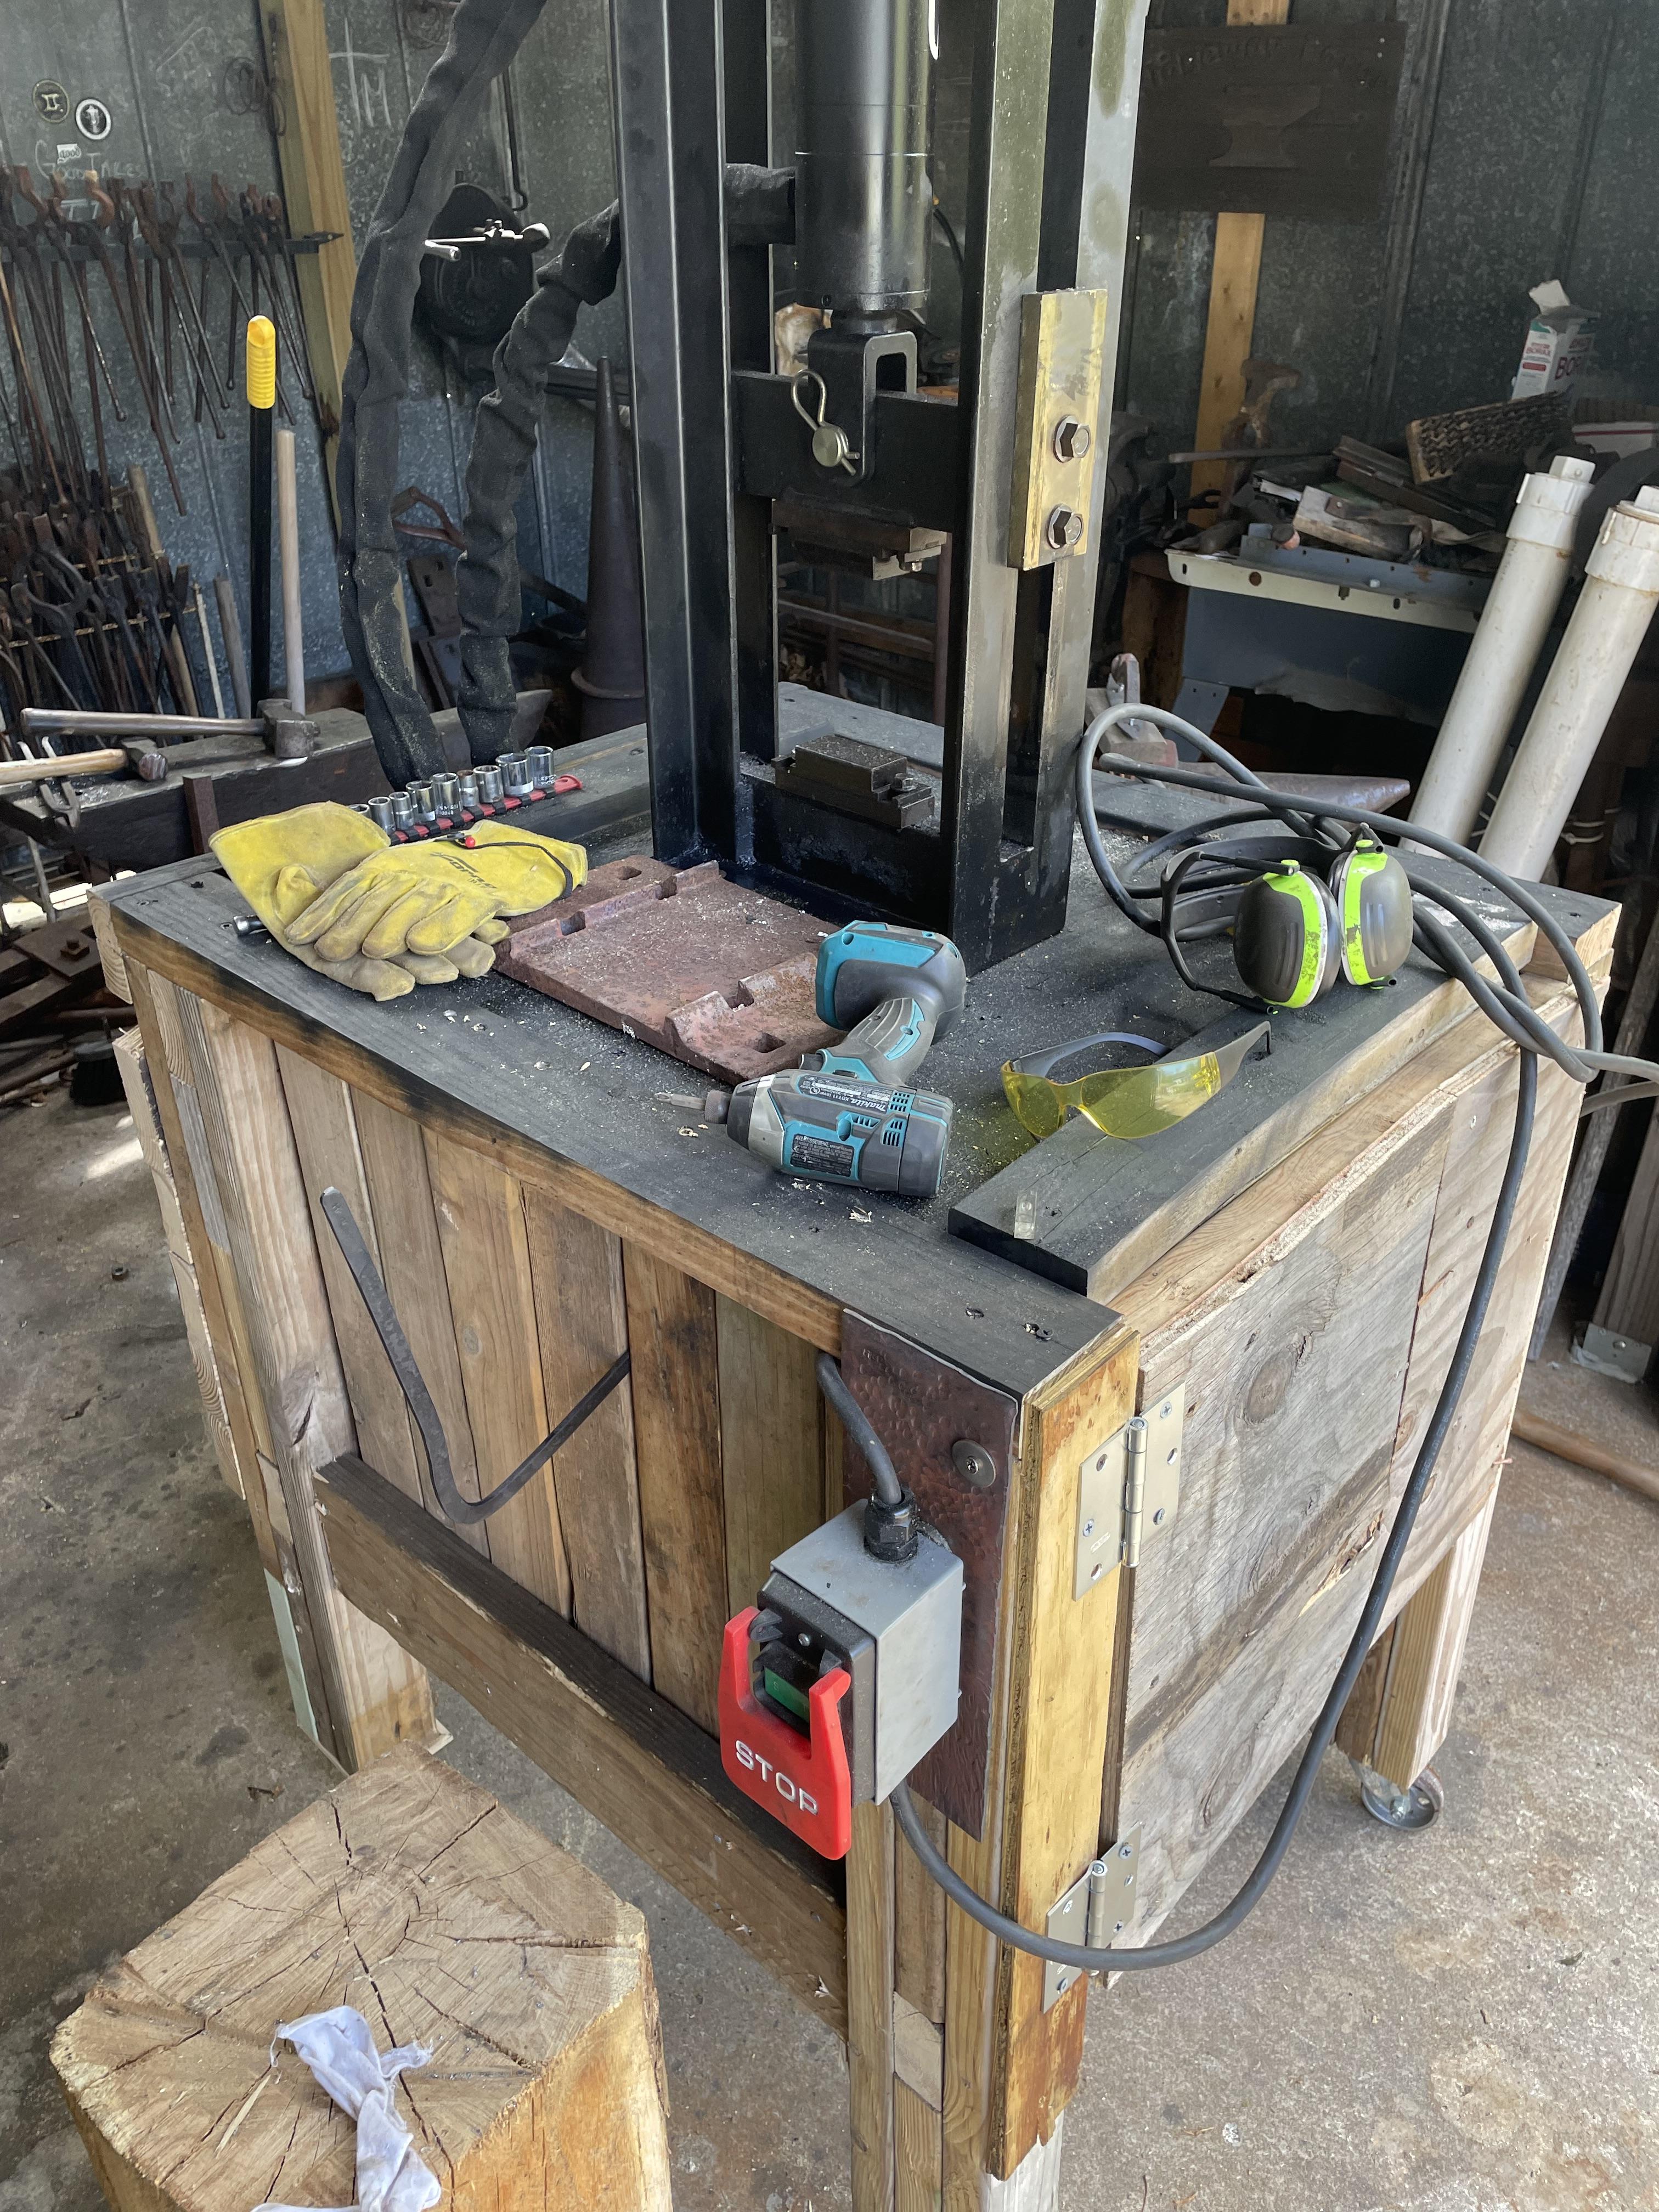
Finally finished the new stand for my 12 ton hydraulic press. I mounted the power pack and tank below the H frame to save space and keep things cleaner. One step towards cleaning up my shop!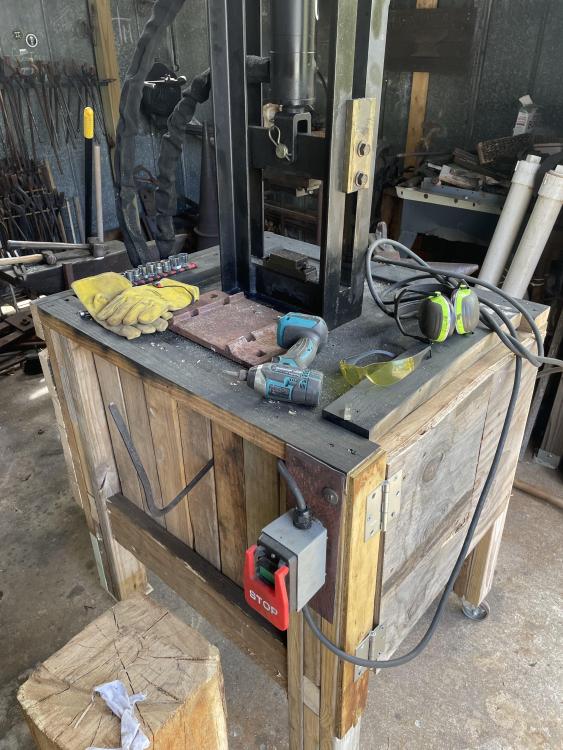
-
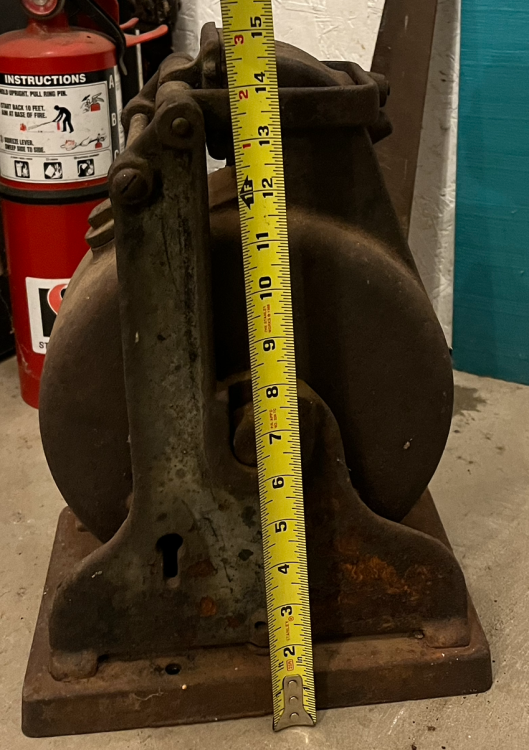
This looks like it may be some kind of branding plate maker, or maybe not. If anyone knows what this item was used for, I’d love to find out.

-
 DenM joined the community
 -

why did my angle grinder stop working
lary replied to GhostTownForge's topic in Grinders, Sanders, etc
I've had a couple of the cheaper angle grinders start cutting out at the switch. There the type that have a plastic switch that slide to a locking position. Sometimes on sale at Harbor Freight for $9.95. I've had the best experience with the 15 amp paddle switch 4 1/2 inch grinders from Dewalt. I'm not talking about the name brand angle grinders when it comes to the slide type switch. -

why did my angle grinder stop working
Mike BR replied to GhostTownForge's topic in Grinders, Sanders, etc
I think the last one I took apart had crimped connections between wires. Those are worth checking as well. -
 wendysfoodie joined the community
 -
why did my angle grinder stop working
Nobody Special replied to GhostTownForge's topic in Grinders, Sanders, etc
I would tend to think bad connection in the cord, switch, or less likely, the brushes getting a crap connection. Frosty may well be right, but I don't think any of mine have a cutoff for overheating, so I'm not experienced with it. The cord you can jiggle (carefully) to see if it cuts out, or test for resistance. Switch you pull out and test for resistance. Brushes you take out and look at them and while you're at it, make sure the commutator is clean and not scored. And if you've got them out, why not replace them. You can clean a commutator by sanding with a VERY fine grade of sandpaper, lightly, then cleaning out the grooves with a probe or thin screwdriver. I just had an old favorite, a Bostitch start making popping noises once in awhile, acting weak, and getting hot while using the cutting disc, so I'm guessing I've fried the brushes and it's arcing to the commutator (the bit of the armature that the brushes touch). Or maybe some of the carbon has got down in there and is arcing. I'd fix it, even if it costs more than new. I've had that thing for around a decade and love it. You kinda get attached to them. I've got three, one Bostitch, one Dewalt, and an $11 HF Chicago Elecric special that just will not die no matter what I throw at it. I've bought three of the latter over the years, almost more out of morbid curiosity than anything. One lasted about 30 minutes before the windings started smoking, one lasted maybe six months before the brushes went and I gave it away, and the other has been going for maybe eight years now, zero maintenance. It's the Nash Rambler of angle grinders, clunky, awkward, and people look at you funny when you use it, but it just will not die. -
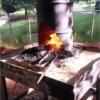
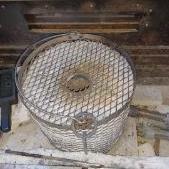 It is important to protect your foundry from metal spills and flux. Putting a 3/8 inch or so layer on the bottom makes for easier clean up of any spilt materials and prolongs the life of your foundry. I used to use a layer of fine silica on top of my fire brick to protect them from spills. I recently switched to bone ash. It is much finer than silica and works better. More of a powder than a grain consistency. Technically the books calls for calcined bone ash. I used bone meal from Lowe's garden department. Initially it turned black upon the first firing, then turned into the desired white ash.
 -

The most useful blacksmithing ideas
SubterraneanFireForge replied to Glenn's topic in Shop Tips n' Tricks
I have a little gas forge that I use now. But before I did I would melt and cast aluminum and zinc in a ladle with progressive amounts of things around it to hold the heat better. id like to get get/make some sort of furnace for casting eventually. -
why did my angle grinder stop working
Dogsoldat replied to GhostTownForge's topic in Grinders, Sanders, etc
I've had switches and brushes fail. Also something to check is if the wire in the cord is broken. Most likely spot is right where it is pinched entering the body of the grinder. -

why did my angle grinder stop working
GhostTownForge replied to GhostTownForge's topic in Grinders, Sanders, etc
is there a possibility that the shut-off switch malfunctioned? because I had only been using the grinder for a few minutes. -

Champion #1 Power Hammer
Francis Trez Cole replied to MRB's topic in Power Hammers, Treadle Hammers, Olivers
I to have a 65lb #1. Philip I wrote an whole page on the adjustment of the head distance as well as up keep. I have been using mine for 15 years. Love it. it may be the angle your are shooting from but it seems that your spring is off center. If not the spring could be the adjustments on the hammer guide. Info from other users The only place you should not oil is on the drive belt surface area. One main thing to do. Make sure the toggle arms. The four arms that conect the ram to the spring arm, are drawn up so they are almost level. Not level. About 3/4" slop. you can measure this by holding a straight edge across the pins holding the arms at the spring, and the main pin through the ram should be about 3/4" of an inch below the straight edge. Play with this to find the optimum stroke for your hammer. This will also be affected by how far down you set the whole ram and spring arm assembly. To start tunning I would set that halfway with the double set screw holding the main pin. Going back to the toggle arms. If they are too sloppy, the hammer will skip or double hit. When they are too tight you stand a good chance of snapping the toggle arm at the spring pin junction. One other member recomended not over driving the bottom die wedge. RIGHT ON! My hammer was repaired due to this long before I got it. It is much better to re tighten the wedges every so often than to crack that front piece out. When mine was repaired they set the cracked piece back in place, drilled and tapped for three 3/4" bolts, bolted the 3 bolts after that, then they ground a V all the way around the 3 outside planes and welded it. I have had no problems with it, but I baby it there. As for other suggestions make sure the arm pins fit well in the spring arm holes. Where the spring wraps around the pin. Those pins should be no more than a 1/16" smaller than the spring holes. If they are sloppy the hammer won't hit right. One of the #0's I tunned had like 1 1/4" pins in a 1 3/4" hole. WAY to sloppy. The dovetail ways should be a little looser than you might think. Very scientific sounding, I know. But the best thing to do with them is after you have the hammer up and running. Move them in and out with the set screws until they are snug but not so snug as to stop the ram mid way in its stroke. That Champion is in super shape. The guides are like new in the thing and with that overhead jackshaft it should give very nice control. One thing that was wonky on that hammer was the brake did not engage when the treadle was up, It might return back to where it should be one the motor is in place and under tension. What I would do with that hammer is carfully scribe the outline of the smaller die onto the bigger die and then take them into a machine shop that can mate them up and flatten them out. I would do a combination style die with the fuller at front. if you change the motor its pretty critical to get the speed right so take note of the pulley diameter on that 5 horse. I ran my last one with a 110V 1.5HP motor and it worked perfectly. If it was going to be in severe use I would step up to a 2HP Once you get it timed right, the brake engaging and the toggles adjusted that hammer should give you single blow capability. One thing that will help down the road is make your self up a set of wood blocks to set the working hight of the upper die. at rest you want that die to be about a 1/8 above the thickness your working for the best control and hardest hit. I kept mine adjusted so when you rolled the machine over by hand the upper die would come within about 1/4" of the lower die and I didnt move it up until I got over 3/4 stock unless I was going to do real fine work.. should clarify in the earlier post about setting the die position... that 1/4 clear between the die is with the crank on its lowest possible position on the flywheel and with the toggle arms pulled good and tight on the spring and a very well adjusted hammer... Most hammers with a little slop in them you would need more like 3/4 of a inch to get a solid wack but yet have a light touch... and thats if your forging 1/4 or 3/8 stock... if your forging 1" bar you would need more like 1 3/4 clear at idle and the lowest position... Thats one of those things that really impacts performance and you just need to play with your hammer to see what works best... start with half a dozen 5/8 or 3/4 square bars that are a foot long with a center punch mark at 8" ( if you dont want to hold it with tongs make them as long as you want I guess) get them all up to temp and consistently forge out as long of taper as you can in one heat from the center punch mark... make an adjustment and go to the next one.... listen to how and where in its stroke the hammer hits and how hard of blows it lands... and it it is double tapping or missing a beat (way out of tune) its surprising how drastic of change you can get... also it will show you directly what your adjustments do Also I said I would do combo dies on that hammer and the only reason for that is because unlike a little giant the center of the tup weight is centered in the skinny of the die so working on either end has much less of a negative effect on the hammer.. and since it sounds likely this will be your primary hammer and its relatively small ( but capable ... a 65lb Champion that is well tuned will almost do the work of a run of the mill 100lb little Giant though) its sure nice to have fullering dies to quickly break down material and blend transitions..... If you have any questions Id be happy to help... I have owned two #1's and done some pretty major work on them including pouring new bearings in one.... oiling use SAE 30 for all contact points After doing a lot of research the original dies had three round swedges in the die 1/4”-3/8”-1/2” one of my dies had been refaced with hard facing rod and the swedges were filled in so I opted to fill in the top die as well and make all my tools clamp on to the bottom die. Like Clay Spencers method. Makes changing out fast I use a C clamp with a piece of angle iron as the base to all my tools so far I am pleased with how it works, -
why did my angle grinder stop working
Frosty replied to GhostTownForge's topic in Grinders, Sanders, etc
It over heated. Cut off disks require a LOT more power than grinding or sanding so unless you have a light touch the motor gets hot. When an electric motor reaches a set temperature it shuts off until it's cooled below the limit. Frosty The Lucky. -
That's pretty cool though I don't think unusual for mice. Buy better tasting tools maybe? Frosty The Lucky.
-
why did my angle grinder stop working
GhostTownForge replied to GhostTownForge's topic in Grinders, Sanders, etc
update: now it works. I poked around the switch mechanism, and now it works somehow. i would still like to know why it stopped working