Black Frog Posted December 26, 2013 Share Posted December 26, 2013 I was asked the process of how I forge my hefty wrought iron bottle openers. So here is my method for getting my favored design of bottle openers. They average looking about like these when they are done, either in a black oil finish or flame colored. I found I like them around 5.5" length the best. In no way am I saying this the correct or proper way of getting the end result, it is just the best method I've found for the way I do things after making lots of these. When I'm doing a lot of these, I can get the forging of the openers to averaging about one hour each. Then you have to add one the time to complete them of drilling the lanyard hole, and applying the desired finish. The pictures below are not all of the exact same opener as it goes through the process, so you'll see some variation of the body shape a bit. I was snapping pictures here and there as I was doing a batch. I'm starting with original wrought iron fencing pickets that are 1/2"x1/2" square. But the openers I wanted are beefier than that original stock dimension. It took me many variations and attempts to finally get the finished proportions that I like from the original stock, and then figure out how to get there repeatably using the 1/2" square picket. I start by upsetting a length of the wrought iron fence picket for form a thick taper. Much thicker than the final fat end dimension is going to be, but I've found it is easier to have more material upset and work your way forward than it is to try to get it perfect on the original upsetting. Gives me some of 'wiggle room' to get them all fairly uniform. I would imagine if you were doing this from modern steel you could start with a thicker square bar and work your way down, but I wanted to use wrought iron, and the 1/2" fence pickets is all I have to work with. Here's the original W.I. fence picket on the left, and two pieces after upsetting: I like to visualize how things are progressing by 'roughing in' some features which helps me gauge what is happening as I go. I'll smooth the taper of the fat end, getting the end fairly even and square, then I'll bevel the for sides on the end of the opener. I'll touch these up later so not too concerned with getting them perfect: Next is a few rotations around on the hot cut to define where the end ball will be. Make this cut line a bit nearer to the end than you think, because when you come back and do the final work and corner bevels it lengthens this ball: Once I have my ball end defined, I forge it down a bit closer to my final dimension. I square up the sides and start smoothing the body out. Turn it around, smoothing the body and taper down to the eye end: Lengthen the body with a nice taper, start preparing the end pad for making the slotted hole, I snub the corners a bit to: I narrow up the sides on the horn to neck down the area just before the eye end: Sometimes this is where the wrought iron will show you that it is going to split out when you punch the slot for the hole. That's why I don't spend too much time on the back end, I want to get to this point fairly quickly to know if it is going to split out or not. If that all works ok, I start finishing up the back half. I bevel the corners of the body nicely and touch up the bevels on the end of the ball: Define the end ball crease bevels for a purdy appearance: I consider the handle and body forging done at this point. Now time to drift the hole and start forging the eye to the desired diameter. Add the cap tab for the correct shape and spacing within the eye. I install my frog stamp and any personalization stamping, then form the arch in the handle. I like a tad more arch than this, but you get the idea: Let it cool, drill the hole for the lanyard and do any finishing work. Very important to do a strict quality control functionality testing of every opener before it is sold! :) Quote Link to comment Share on other sites More sharing options...
Jim Coke Posted December 26, 2013 Share Posted December 26, 2013 Greetings Frog, Thank you for the very nice step by step how to.. I would like to see your drifts and punches.. Fantastic work, Forge on and make beautiful things. Jim Quote Link to comment Share on other sites More sharing options...
Black Frog Posted December 26, 2013 Author Share Posted December 26, 2013 Sorry about all the misspellings in my post! ....I suck at proof reading. Jim- While I'm sure you have 10 or more variations of any tool I could possibly have, I'll snap a pic of the tools I use for these. ;) Quote Link to comment Share on other sites More sharing options...
Ted T Posted December 26, 2013 Share Posted December 26, 2013 Nice, Very Nice in deed! :) Thank You for posting! One picture is worth a thousand correctly or in-correctly spelled words! Again "Thank You" Quote Link to comment Share on other sites More sharing options...
Borntoolate Posted December 26, 2013 Share Posted December 26, 2013 excellent. I like the ball end and made with the Hardy. I was thinking it would take another tool. One I don't have. Hardy makes total sense but I had not thought to use it like this. Hardy. More than just a hot cut! Quote Link to comment Share on other sites More sharing options...
greenskpr Posted December 27, 2013 Share Posted December 27, 2013 Thank you. Quote Link to comment Share on other sites More sharing options...
Black Frog Posted December 27, 2013 Author Share Posted December 27, 2013 Jim, Attached is the slitting punch, drifts, and my tool to make the tab. Boorntoolate, I don't use my hot cut to finalize the ball end crease. I have a top/bottom hardy spring tool I cobbled together that makes the proper crease (for me) for the ball end. I only use my hot cut to mark out where the crease will be, and that also makes a nice 'feeler guide' for the latter step of finishing the ball end on my spring tool. I forged three more after work today and kept track of the time. I was done forging the three in about 2.5 hours, but realized more than 1/4 of my time was spent just in upsetting my wrought iron pickets. I would think if you were using modern steel of thicker square stock you could cut that time quite a bit. Quote Link to comment Share on other sites More sharing options...
Fe-Wood Posted December 27, 2013 Share Posted December 27, 2013 Nice tutorial and design! Thanks for posting!!! Quote Link to comment Share on other sites More sharing options...
VaughnT Posted December 27, 2013 Share Posted December 27, 2013 Awesome work, BF! Thank you very much for the pictorial. I also have some of those WI fence pickets and thought they'd be great for this, but I couldn't figure out where I was going wrong in trying to duplicate your openers. Never thought to try upsetting the butt end! Great job, hoss. Totally have a new project to try tomorrrow! Quote Link to comment Share on other sites More sharing options...
Black Frog Posted December 27, 2013 Author Share Posted December 27, 2013 VT, You'll have to experiment with the length of WI picket that you start with vs the final length of opener you are shooting for. Quote Link to comment Share on other sites More sharing options...
divermike Posted December 31, 2013 Share Posted December 31, 2013 Hey pal, that was just what I wanted to see, I have a bunch of the same wrought pickets, and been wondering what to do with some of it, now I gotta give it a go! Thanks for taking the time to put that together, I may just fiddle with your design a bit so as not to be a full copycat, just a real close copycat!! heh heh.. If I pull it off, I will swap you one of mine for one of yours!! Quote Link to comment Share on other sites More sharing options...
Veditelia Posted December 31, 2013 Share Posted December 31, 2013 · Hidden by jeremy k, December 31, 2013 - spam Hidden by jeremy k, December 31, 2013 - spam There are so many girls who desire to have larger and more appealing breasts but do not need to undergo any surgical operation. They regularly only use some goods that would help spark the growth of the boobs. One of these is the use of Brestrogen Reviews . Link to comment
Black Frog Posted January 2, 2014 Author Share Posted January 2, 2014 Mike, I'd love to see it! I always seem to be stealing ideas from everyone else, people copying my stuff is a new one on me. ;) Quote Link to comment Share on other sites More sharing options...
Black Frog Posted June 3, 2014 Author Share Posted June 3, 2014 I've tried making openers like he showed in his tutorial, and they never ever ever come out looking like he says they should….Here’s a video of forging a batch of three bottle openers, hope this helps VT!Rather than have a super long video, I let it run in fast motion while doing 3x of each step, then showed the result after each step.Fast motion audio is incredibly annoying, so a little SRV seemed to fit the bill. :)These are from 1018 steel, but the wrought iron ones are the same process once you upset the fat taper from the original fence pickets that will match the tapered steel in the first step. The order sequence of the steps is different than this original thread, as I got more efficient in making them I was more comfortable knowing how things were going to progress and changed it around a bit. But the order is not all that critical, you can get to the same end by several different roads.I didn’t have my anvil anchored down to the stump, so you’ll see it move around a bit when doing the horn work. I moved it so that I could get a decent video angle in my overly-filled garage. Forgot to do some wire brushing here and there for the step result, but you’ll get the point…. You’ll notice in the first few steps I have some chalk marks on near the end of the anvil. Those are my reference marks when I’m forging the taper to get the correct taper length, and keep them all uniform. When someone wants to purchase several openers at once, it is nice when you have looking all about the same, yet they all have a bit of their individual character.Video was stopped before adding any personalization or putting the arc in the handle. I can forge lots of them to this point and leave them like that to build up a supply of "80% pre-made” ones. Then if someone wants a personalized one all I have to do is add the personalization stamping on the sides, form the arch, touch up anything that needs tidying up (sometimes the bevel edges need some cleaning up) and then do any finishing work. Quote Link to comment Share on other sites More sharing options...
JimsShip Posted June 3, 2014 Share Posted June 3, 2014 AWESOME! I was wondering what you used to form the loop, I thought you'd have a special mandrel or something, but it's just the anvil horn. Nicely demonstrated. You use the wooden mallet for finishing, or is that to get the beveled edge on the loop? (I don't use a wooden mallet, i think i'm missing something important!) Also- I love the music, I could just listen to that all day. Quote Link to comment Share on other sites More sharing options...
Black Frog Posted June 3, 2014 Author Share Posted June 3, 2014 That's a rawhide mallet. I use that to tweak the outer rim to the correct finished shape after the cap tab has been forged in. Using the rawhide mallet lets you maneuver the rim around (or straighten/flatten the body) without leaving any hammer marks, and without messing up your nicely forged rim. That beveled rim edge all comes from forging the rim out on the horn, and keeping that 45 degree tilt as you swoop the opener around the loop. Quote Link to comment Share on other sites More sharing options...
Wroughton Posted June 3, 2014 Share Posted June 3, 2014 Wish I could forge that fast black frog! ; ) Quote Link to comment Share on other sites More sharing options...
Tubbe Posted June 3, 2014 Share Posted June 3, 2014 Nice! Thanks for sharing. Quote Link to comment Share on other sites More sharing options...
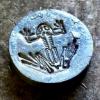
ausfire Posted June 3, 2014 Share Posted June 3, 2014 Good to revisit this thread. I learn some more each time.Incidentally, I really like your touchmark. It seems fairly large - I imagine something of that area would take a pretty fair smack to indent the metal. Done hot obviously. Quote Link to comment Share on other sites More sharing options...
VaughnT Posted June 3, 2014 Share Posted June 3, 2014 Excellent production, Frog. I was just working on a pierced opener this evening. Quote Link to comment Share on other sites More sharing options...
Black Frog Posted June 4, 2014 Author Share Posted June 4, 2014 Recording, editing, and production all done on my phone. :) 15yrs ago that was $15k in equipment to do the same..... Quote Link to comment Share on other sites More sharing options...
mitch4ging Posted June 4, 2014 Share Posted June 4, 2014 Great video, and thanks for the Little Wing...great together! Quote Link to comment Share on other sites More sharing options...
Black Frog Posted June 4, 2014 Author Share Posted June 4, 2014 Yup, sometimes left, sometimes right depending how I can stuff everything into my garage, or when it all has to get moved to get access to something in the back. I'm not too picky......someday, a real shop will occur. :)Aus- that is a 1/2" stamp of the frog skeleton. It does indeed take a decent whack, and at the correct temp range.Too hot and you lose the definition, too cold and it doesn't go deep enough for my liking. Quote Link to comment Share on other sites More sharing options...
JimsShip Posted June 4, 2014 Share Posted June 4, 2014 Rawhide mallet. Hmm. I never knew they made them and now I need one! Quote Link to comment Share on other sites More sharing options...
Black Frog Posted June 4, 2014 Author Share Posted June 4, 2014 I use mine constantly when making openers. Quote Link to comment Share on other sites More sharing options...
Recommended Posts
Join the conversation
You can post now and register later. If you have an account, sign in now to post with your account.