bluerooster
-
Posts
567 -
Joined
-
Last visited
Content Type
Profiles
Forums
Articles
Gallery
Downloads
Events
Everything posted by bluerooster
-
I was wondering how often ya'll have to replace the grate in your fire pot. (coal forge) Mine burned out today, Or mabe I was a bit too enthusiastic pickin' out a clinker. I noticed it when the blower started blowing holes in the fire. I try to keep the hot stuff about 4" deep. All my fire was dropping out the ash tube. I hadda stop, rake out the fire, and replace the grate, then start again. I have several pieces of cast iron grate that I've used. It fits the bottom of the fire pot and has wide enough openings, to get plenty of air, but not let the fuel fall out.
-
no home remedy here, but I know first hand what a burning thumb smells like. Just quit hammering, was going for a re-heat, moved the stock, wiped off the anvil, with a sweeping motion as I was turning toward the forge with still orange steel in other hand. It happened so fast, and burned so cleanly, there was only the smell of burning skin, and a off color spot on my thumb, No pain, or burning sensation, as the nerve endings were instantly destroyed in that spot.
-
But I saw the reply, and it was right along with what I was thinking.
-
I cut a wide deep bevel on mine, and used many many 7014 rods, at about 120 amps. It performed very well with good penetration. But took a while, as at that amperage my machine is only about 60% duty cycle. Welds burned right in, nice and flat, with very little grinding.
-
What did you do in the shop today?
bluerooster replied to Mark Ling's topic in Blacksmithing, General Discussion
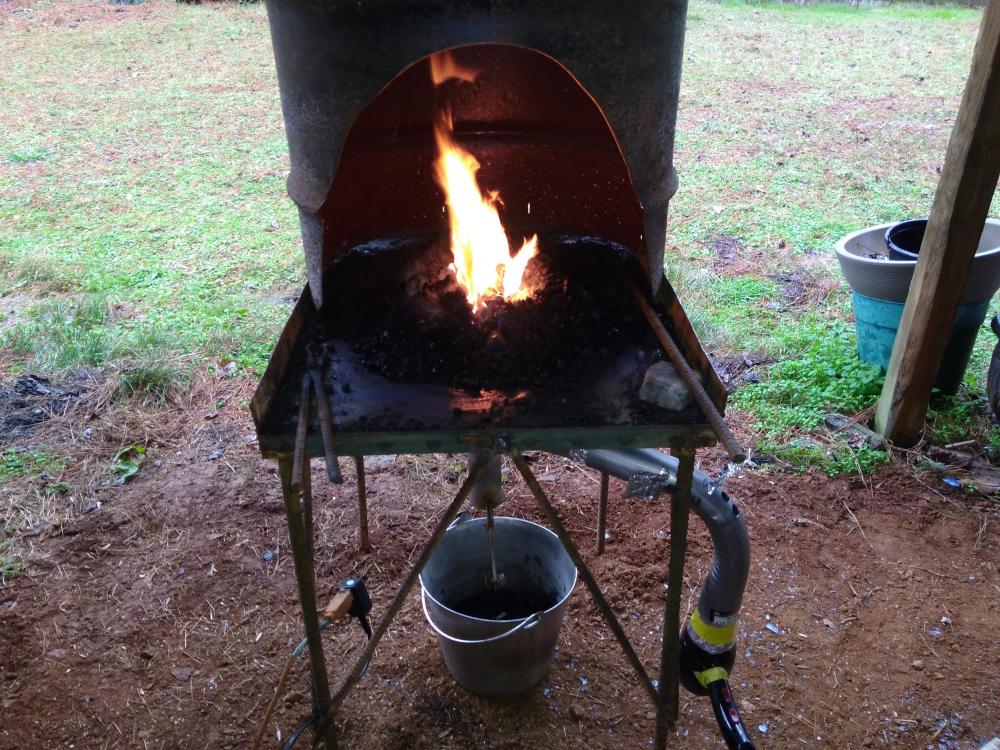
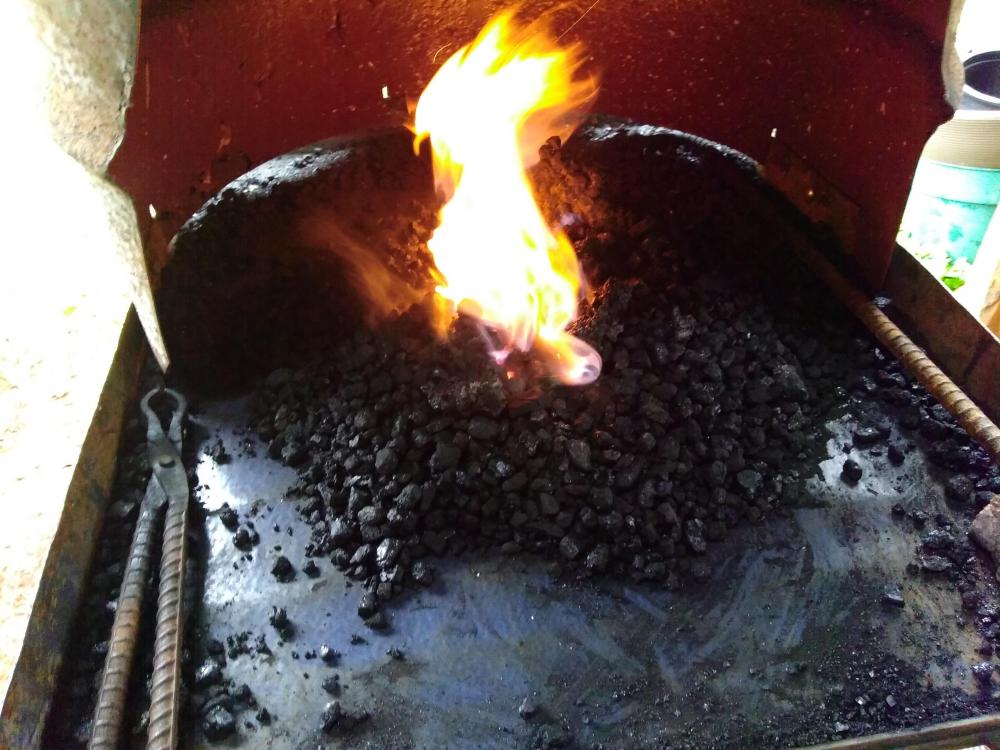
What I did, is learn that if you're low on fuel (coal in my case) don't start the project. Or be ready to switch to a different fuel, mid stream. After watching a video on forging a thumb latch handle, I got the idea that I can do this. So after playing in the hills for an hour or so, I came back and fired up the forge. I knew I didn't have enough fuel to complete the project but figured I'd get a start on it anyway. I had a sway bar from my tractor that I figured to be decent stock to use. It's about 2" wide and about 3/8" thick. So I knew I'd be drawing it quite a bit. which requires heat, many times, to get to the desired width, and thickness. So I figured I had enough fuel to get it drawn, and mabe a start on the flared out whatchamacallit on one end. I got it drawn to about 3/16"x1" and the end gizmo to about 2"x1/8". I wanted to do a simple square, rather than an arrow point or acorn. But my square turned out to be more like a trapezoid, But at least the small part is where it needs to be. I've no clue what alloy this steel is, but it seems to like a lot of heat to move it. And of course as it gets thinner, it takes more re-heats, more often. So ya gotta be quick, and accurate with your strikes. Well, with the re-heats, and what all, I used up the last of my coal, to the point that ash was blowing out of the forge. (I wasn't too concerned about a minor burn or two, just wanted to get hot) But when the level of coal was even with the top of the fire pot, I called it quits. Also, my slack tub has developed a hole in it, and caused a muddy mess. Another thing I learned is that I need a "leroy" to hold the end of long stock level in the forge. What you see in the pic, is the last dab of coal that I have. I'm well pleased with how long it lasted. Charcoal would have been gone after the first heat. Oh, I also had the opportunity to utilize my new hot cut. It worked quite well. :D.jpg.36055b8c499ecf3043dd4cc992aebba1.jpg)
-
I did pretty much the same thing. It came out to be 4"x8"x12" and ~109 pounds. I left it alone, (no attempt to harden) and have been using it with good results. It's a medium carbon steel, mabe 1030 or so.
-
Well I now know what my next project is. Thanx for the video (s) very informative.
-
What did you do in the shop today?
bluerooster replied to Mark Ling's topic in Blacksmithing, General Discussion
Made a hot cut, and put a too fat looking handle in the crosspeen peckin' hammer..jpg.1d1a180f973921935c01e313f22213e6.jpg)
.jpg.88f84b20f557521bfa76ccc5bd146f13.jpg)
-
Only stainless I have is tubing. And a bunch of it is rusty (exhaust).
-
Looking at that list, I see several like items, bearings for example. Ball bearings listed as 52100, and roller bearings as 4815. So, I suspect the reverse could also be true. Same with springs, and various other components of similar ilk.
-
What did you do in the shop today?
bluerooster replied to Mark Ling's topic in Blacksmithing, General Discussion
I started a hardy for my new hardy hole. It will be a hot cut when finished. And also started a light cross peen hammer. which still needs work. Oh, and the new hood, and flue, will suck the hair off your head.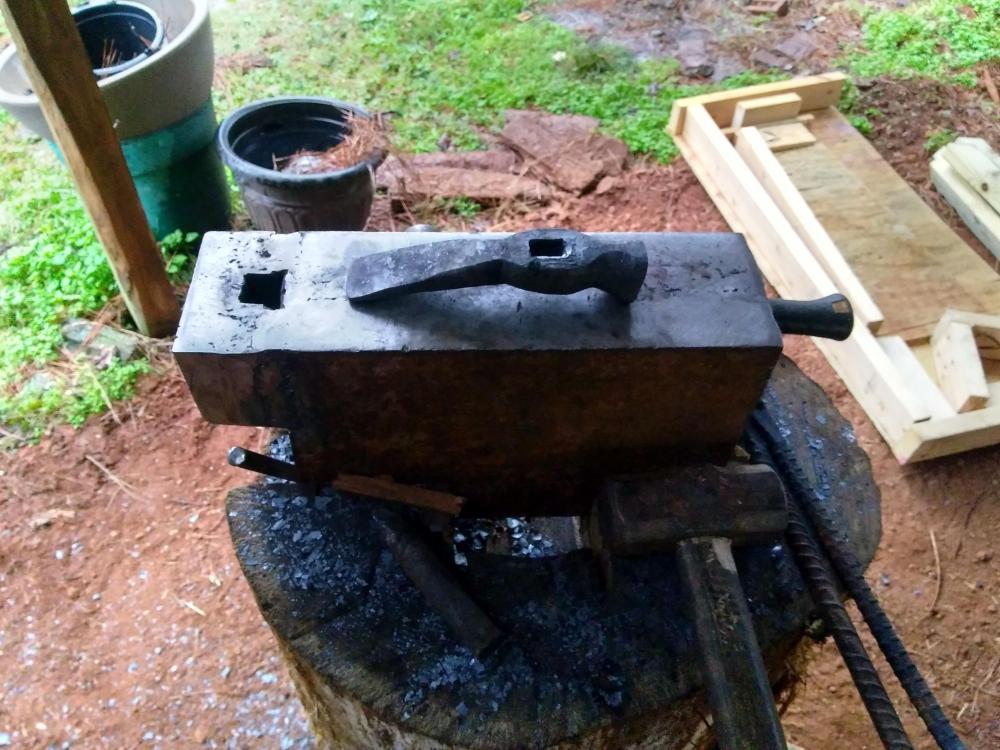
-
How hot is your coal forge chimney exhaust gas?
bluerooster replied to AlmonteIron's topic in Chimneys, Hoods, and Stacks
I've no clue as to the temp of the exhaust gasses. But today after forging for about four hours, the hood, and flue were surprizingly cool. While warm, I could hold my bare hand there indefinately. But it's a rather cool day today. -
A sort of dragon just today.
-
Re bar from HD or Lowes is bottom of the barrel stuff. OK for homeowner projects, but for DOT, or other heavy civil projects, it requires specific alloys, with lot numbers and other documentation to track quality control. They don't want the rebar to rust and cause cracking too soon.
-
Well, I guess corn is about 1/2 the BTU/ton as coal, at about half the cost per ton. So, about 2 tons of corn to do the same job as 1 ton of coal, for about the same price.
-
What did you do in the shop today?
bluerooster replied to Mark Ling's topic in Blacksmithing, General Discussion
That will be nice when you get it finished. I moved the charcoal forge to the barn, and installed a flue on the coal forge. The new smithy is just about to the point where I can start forging. The charcoal forge still needs a hood, and flue. -
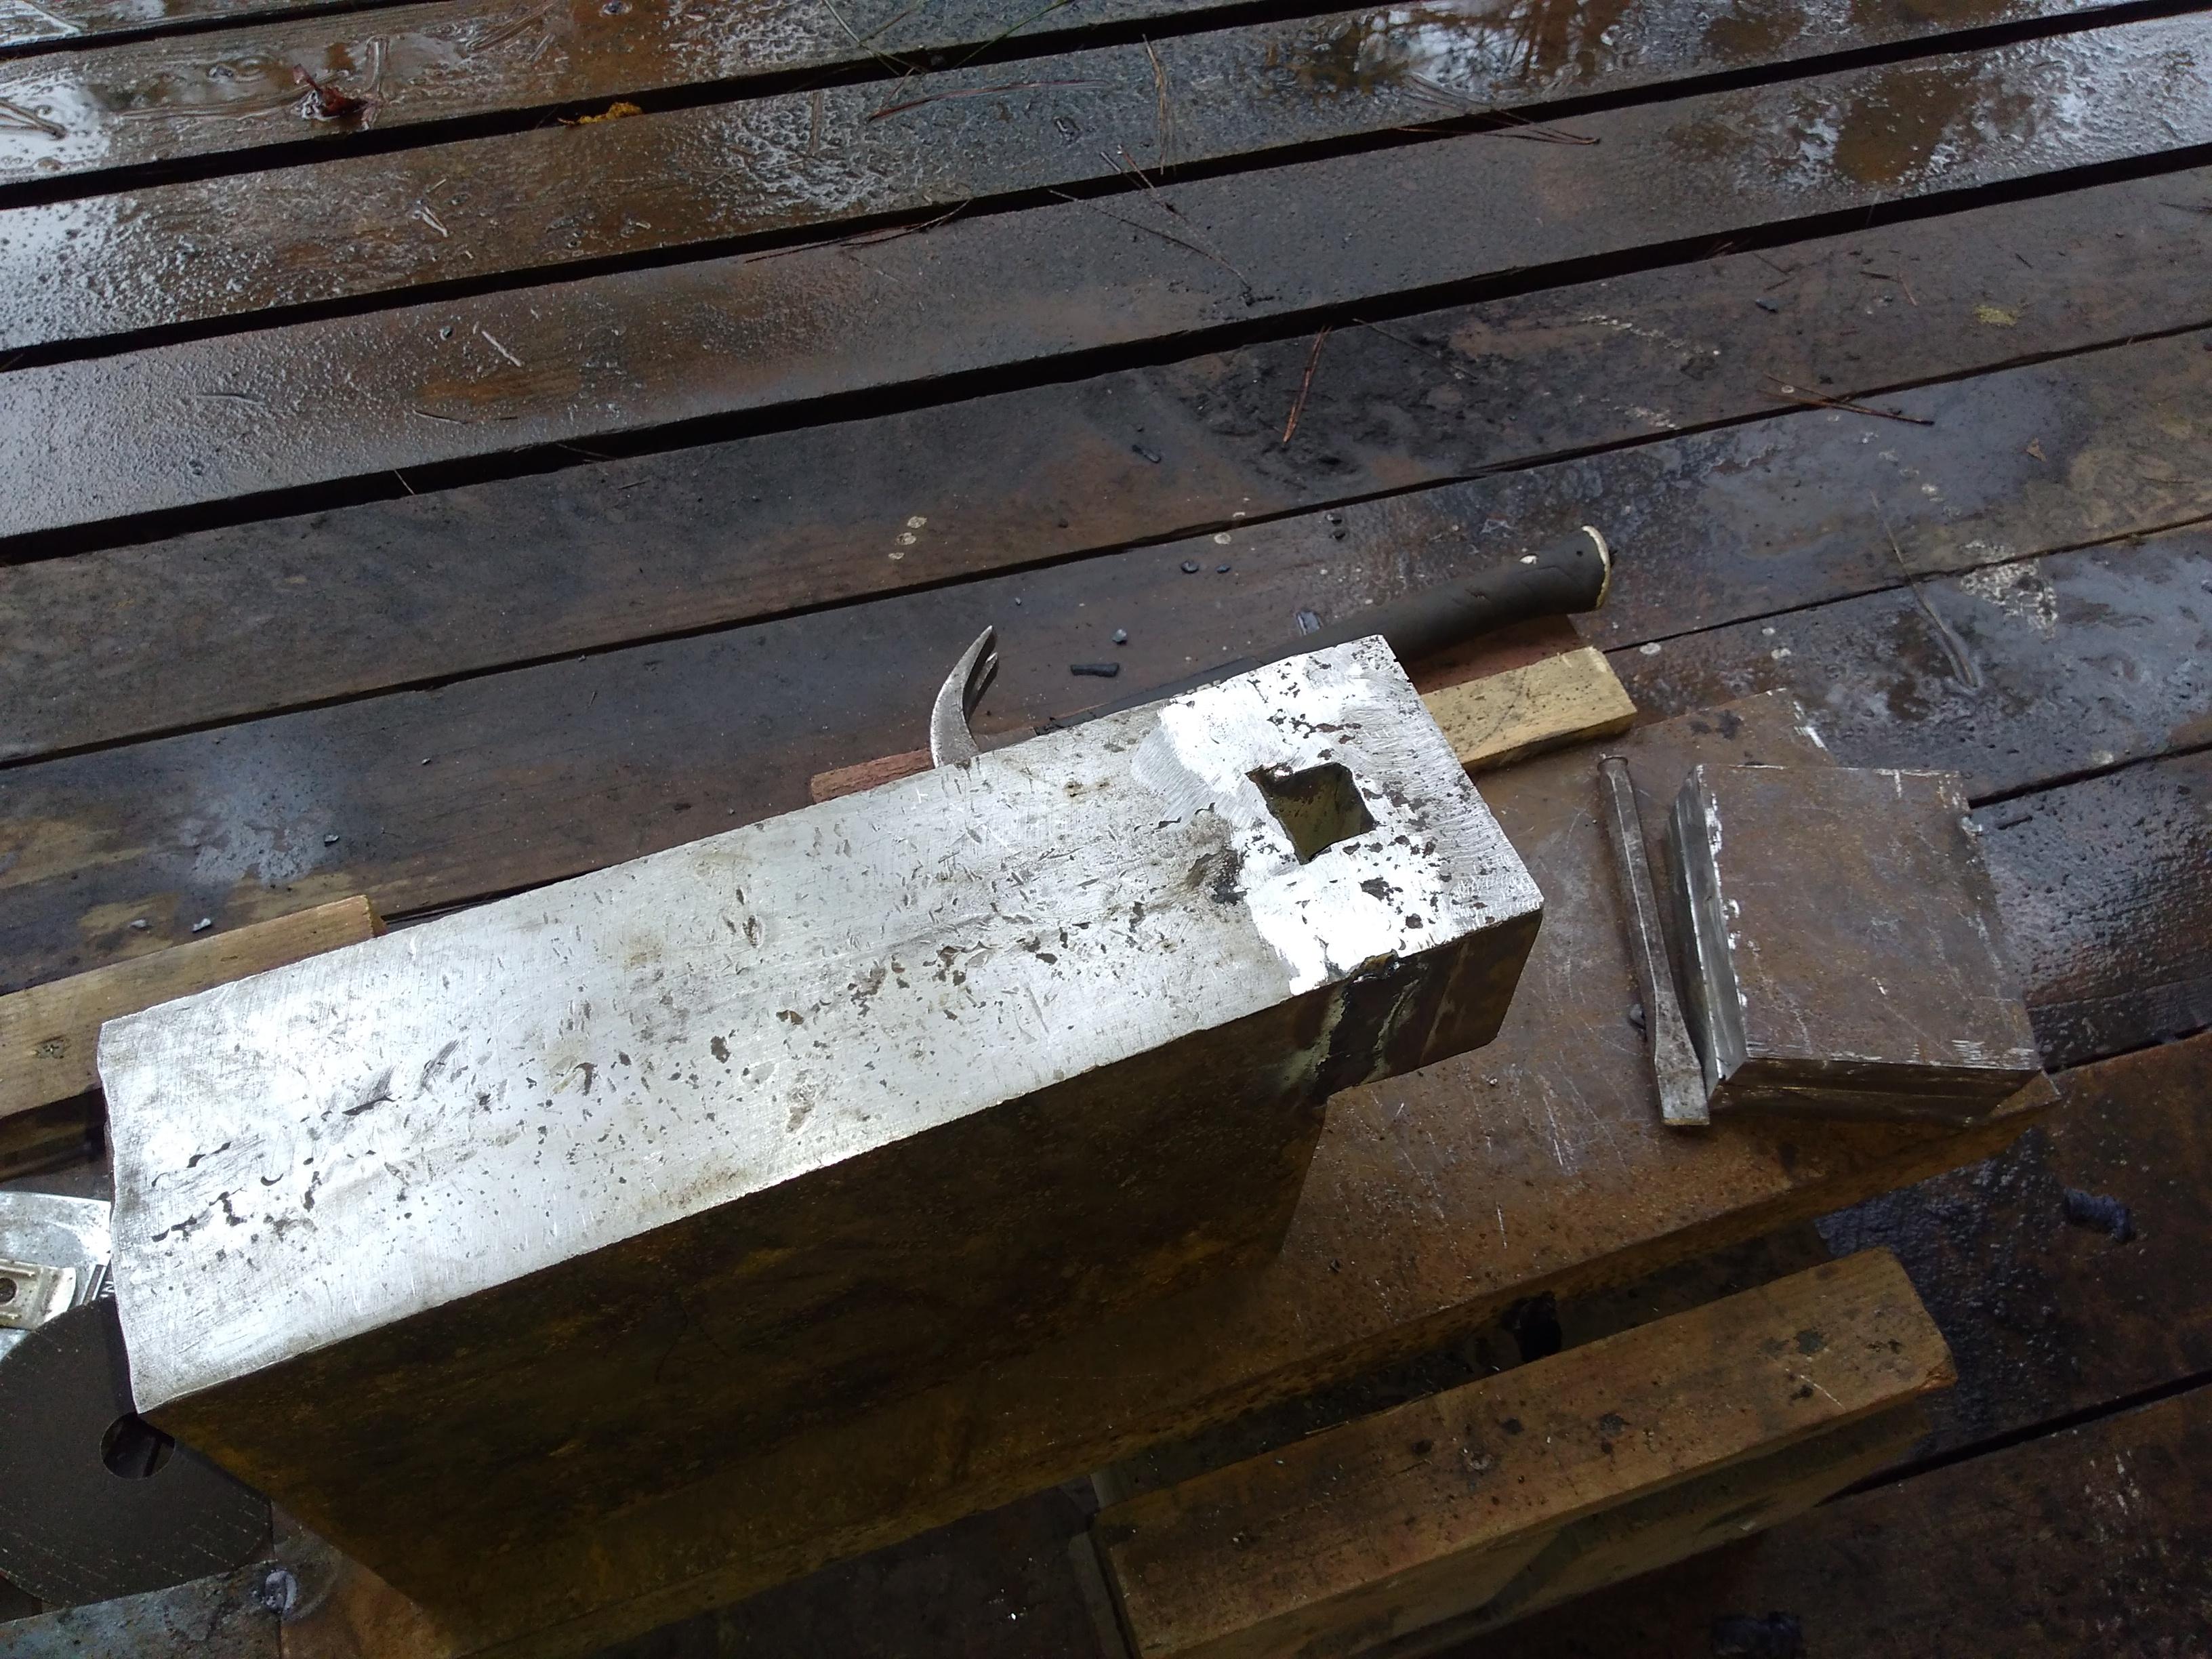
Well, I got my hardy hole. I took a piece of the same material that the anvil is made of, cut a dado in it, and welded it to the anvil. We'll see how it works. I guess a horn will be next.

-
Best to practice on a piece of scrap. Get your settings, and use both hands to keep the "stinger" steady.
-
What did you do in the shop today?
bluerooster replied to Mark Ling's topic in Blacksmithing, General Discussion
Thanx, it's just a homebrew. -
Stainless / Galvanized corrosion?
bluerooster replied to edennis's topic in Chimneys, Hoods, and Stacks
My fireplace in the house is double wall flue, stainless liner, with galvanized outer, no worries. -
I got kinda worried about a month ago when The wind got up just as I was adding more fuel to my open charcoal forge. It's outside, sitting in a pile of dry leaves. :O Charcoal will give "fireflies" when adding more fuel, sometimes.
-
What did you do in the shop today?
bluerooster replied to Mark Ling's topic in Blacksmithing, General Discussion
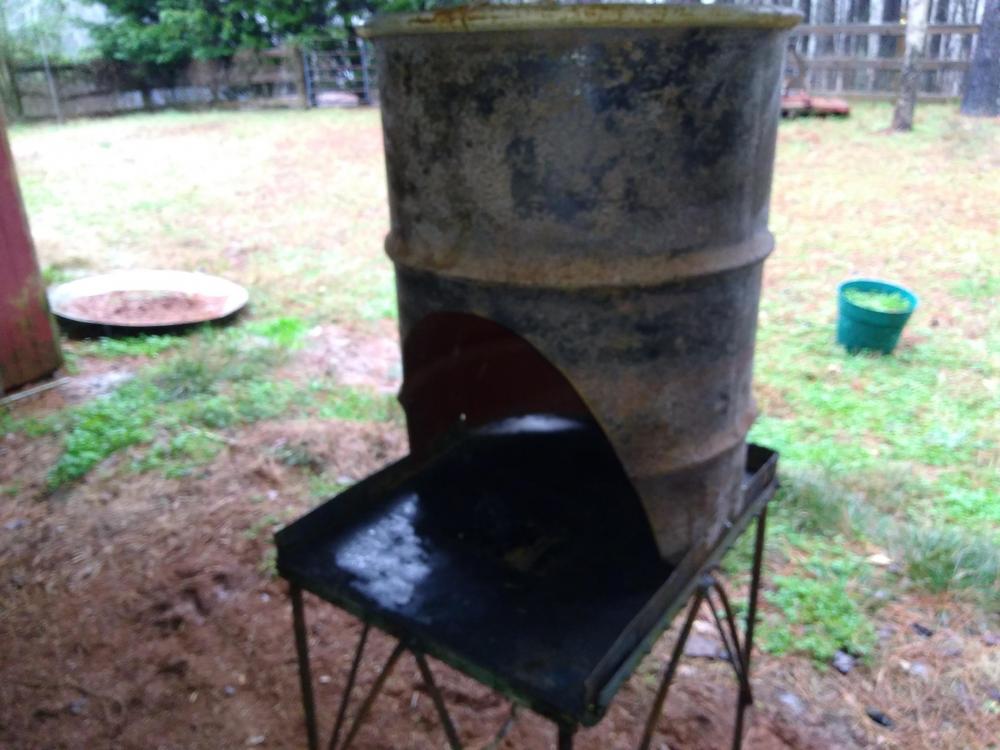
Well the rain set in. My forge is outside, (shop has wood floor). So, I spent part of the day making a hood from an old 55 gallon drum that we used to keep horse feed in. Got that done, and moved the forge to the barn where the fly pens used to be. Then I moved the stump out there too. I've yet to move the other forge, and build a hood for it as well. That done, I came back to the shop, and added a hardy hole to the anvil. It came out a bit lopsided, but it will keep a hardy from spinning. Got that done, and set about the task of a horn for the anvil. But I got tired of cutting 2x8 stock, so I gave it a rest for the day/week/month/(?). Tomorrow, if rain is still in the forecast, I'll get a flue installed.
-
Quenching in old motor oil
bluerooster replied to Glenn's topic in Heat Treating, general discussion
As to the flamability of used engine oil; I've found that used aircraft engine oil is quite flamable way more so than automobile oil. I've no clue why. It will ignite easy with a match. -
In my improvised anvil I would like a hardy hole. What would be the easiest way to do that in a 4x8x12 chunk of steel, with limited tools? I had thought about welding a piece of square tube to the side, and offset my hardies to sit on the face. Will that work?
-
what I did with mine. I can use all sides depending on how I turn it in the stump: