bluerooster
Members
-
Joined
-
Last visited
Everything posted by bluerooster
-
Shaina, your work looks good on the bottle rack. As to the welding of the burner gizmos to your forge. Could you have used your torch rather than the stick welder? I think it would have made a nicer job, because you could work a bit slower, and not have to use as dark of a lens. Alexandr, your work is impressive as usual.
-
When I built my vise, I upset into a tee shape. then bent it to form the jaws. If I had it to do over I would not have bent it as far. I can un bend it, but I'm lazy, and it works OK.
-
Our county seat, Canton, was named after Canton China. "The silk capital of the world". The town was founded on planting Mulberry trees, to attract the web worms. The idea was to harvest the silk. It didn't pan out. So, cotton mills took over. But the name stayed.
-
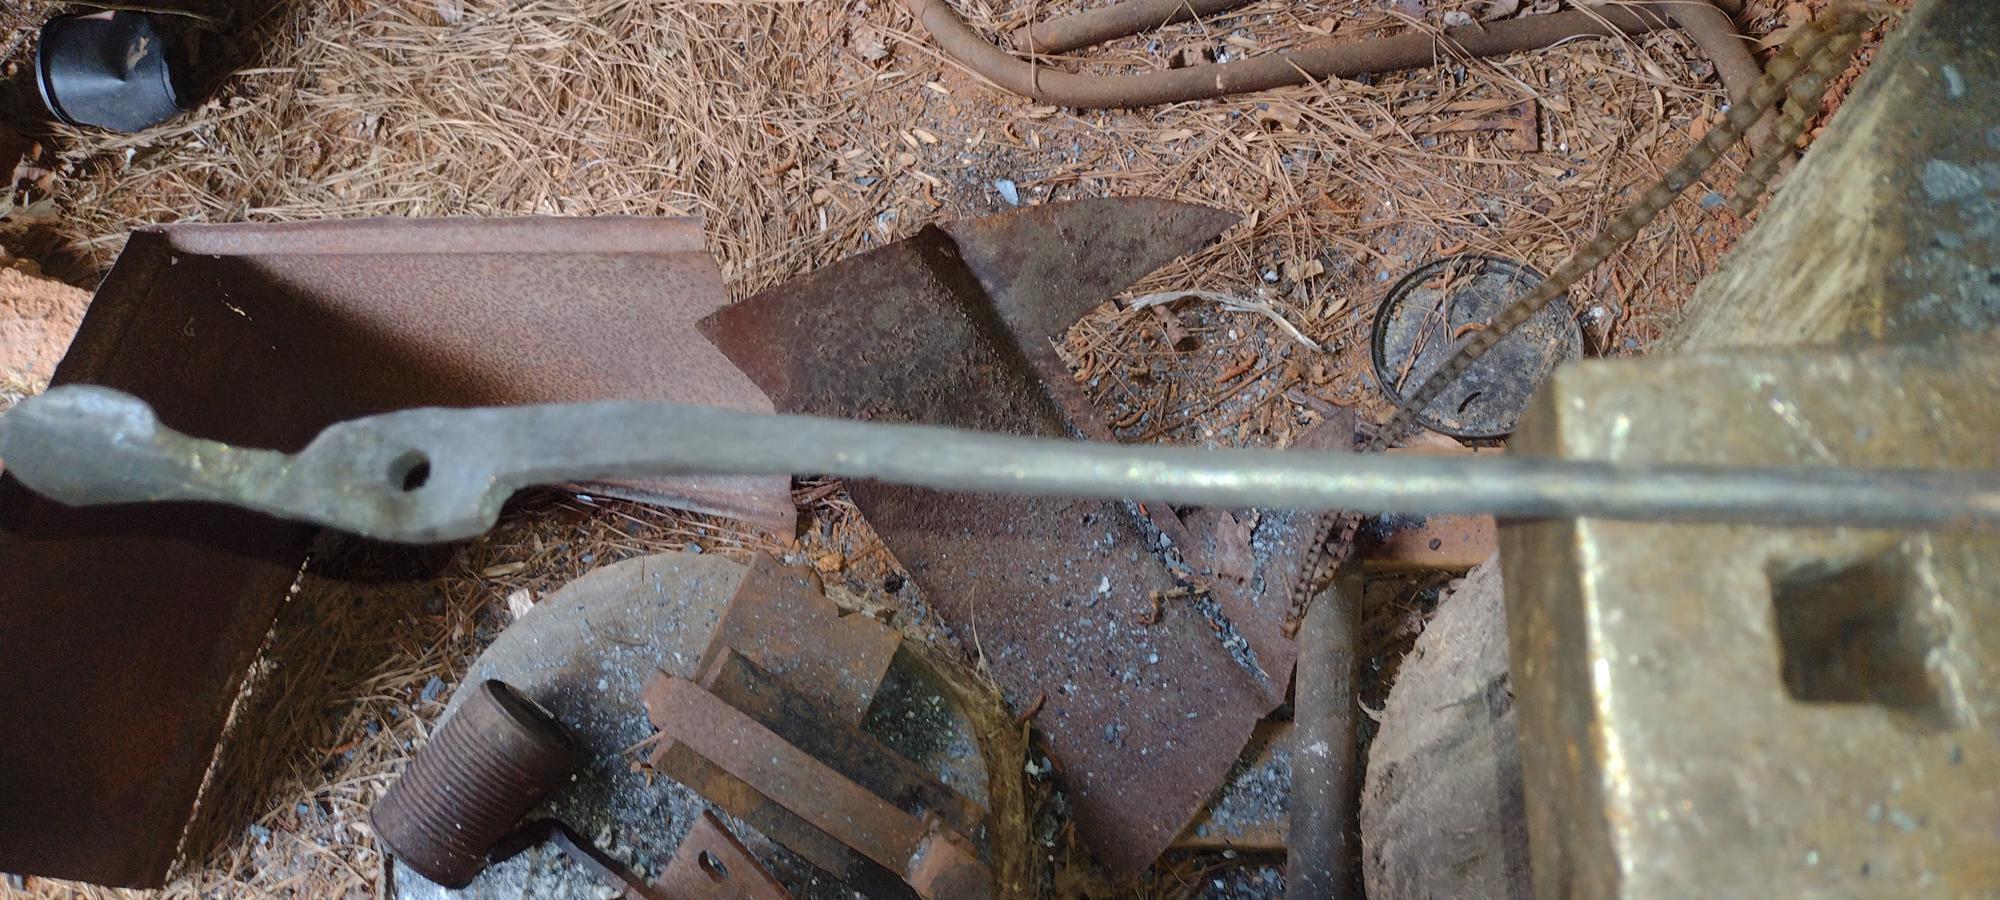
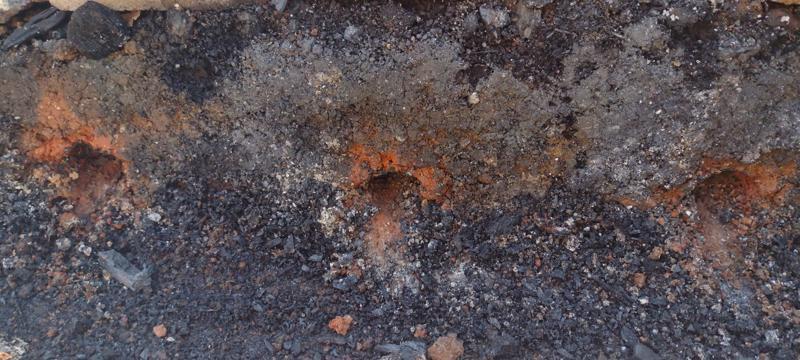
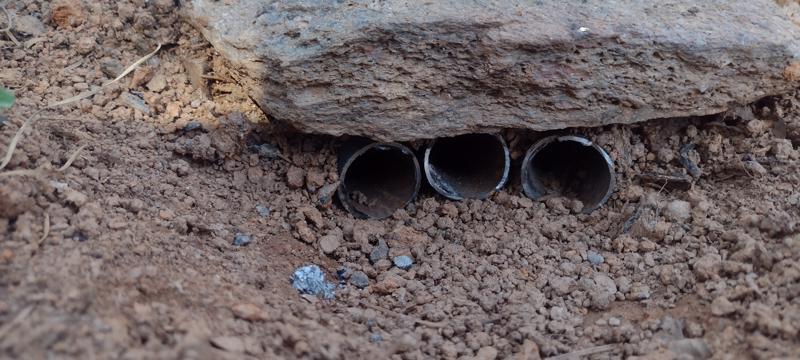
I cleaned out the "fire box" to get a picture of the tyure. You can see the three openings in the bottom of the "fire box". And here is what is under the rock. I found that I could turn the hairdrier left, right, center, to control the blast over the length of the fire. and could move it closer, or farther to control the amount of air. Nothing fancy, and works very well.
-
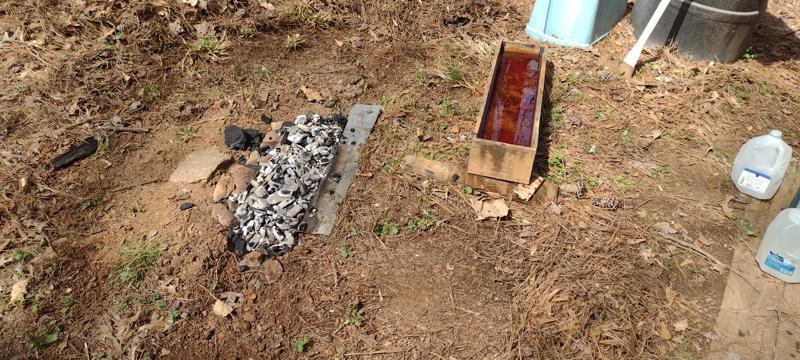
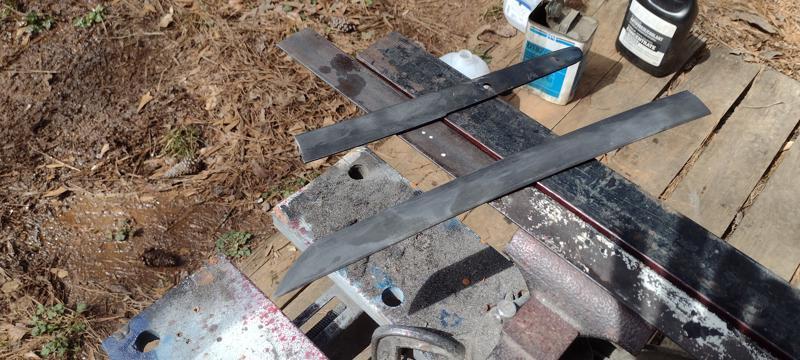
You all have heard of the JABOD forge, Well for those without the "B" in JABOD. There is an alternative. JAHIG (Just A Hole in Ground) forge. Today, I had a need for a forge that could heat the length of a 20" blade. Evenly, without having to slide it back and forth through the fire. So, I dug a trench in the ground long enough to accommodate the blade. I used a three legged tuyre to allow even airflow over the length of the fire. 3 pieces of 11/4" tubing about 14" long, installed like chicken toes, in a side blast. Fired it with charcoal, and air was a hair drier. Worked very well. Forge on left, quench tank on right. The large flat rock to left of forge is where the three air pipes meet together. Hair drier rested on the chunk of charcoal to the far left, pointing toward the flat stone. Heated the blade to non magnetic in about 15 minutes, with a very low blast. Quench tank is wood box, with water, and an inch of oil on top.
-
What did I do in the shop today? I managed to ruin yet another blade. So, that makes four or five on "The Wall of Shame". Three broken ones, and two with cold shuts. This will make the fourth broken one. And it's not only broken, but has several cracks. It came out of the quench with a severe hook to the left, so while still smoking, I clamped it in the vise. When it had cooled to "room temperature, I took it out of the clamp, and it was perfectly straight. I set it down, and that's when it came from together. I don't have any trouble with shorter blades. (8"-10") But 20" or more causes me all manner of issues. May be the steel that I'm using. 90 year old leaf spring.
-
Shaina, looks like you're expecting lots of goodies in you stockings! Alexandr, Your work is impressive as usual. Billy, I'd never thought of backwards tongs, but I can see them being handy for some things. Jennifer, I need to get some welding instruction from you. My weld require all the planets and stars to line up just right for it to take. You're not planning a trip south are you? Spent some time yesterday at the forge working on the latest project. Got it forged, drawn, shaped, and punched. Then spent better part of today getting the hammer marks out of it. Sanding belts are worn out to the point where they just heat, more than cut. New belts will be here on Tuesday. But the forge thick, grind thin, is working well for me. Once I get the marks fully gone, I'll be ready for heat treat. That red stuff is DyKem. Dyekem is your friend.


-
I have 3 projects out to the forge. none finished. Thought about doing that today, but I'm sore all over. Spent the past two days wiring a work shop for a friend of mine. I haven't worn a tool bag for about 4 years now, and I didn't realize back then just how much weight I was carrying around for 12 hours a day. Then, up and down ladder. It was taxing. I've grown soft.
-
Wow! That was outta left field. He will be missed for sure. Rest in peace.
-
Spent a couple of hours out to the forge. Cut off a chunk of coil spring, straightened it out, drew it down to about 5/16" thick, and about an inch wide, for a future project. Then worked on a wheat twist for a handle. Got one end welded with the help of my spring swage, Got it started on the taper for a curl, then set about the weld on the other end. For some reason the weld won't take. It acts like it set nicely, then when I go about finishing it , it blows apart. Now it's been squished down to a point where I've got to upset it before I can try again. Or just add it to the "wall of shame".
-
Billy, you reminded me of yet another set ablaze scenario. I was working in a mechanic shop. Had a relatively new Chevy pickup come in for head gaskets. As I was putting it together, I was down to hooking up the fuel and return lines. I got them threaded on, then went to lunch. Came back, hooked up the battery, and fired it up. It lit right off, and ran perfectly for about 15 seconds, then, WHOOF!! It lit right off alright. Did no damage as I had it extinguished quickly. But a big mess of soda to clean up. I'd forgotten to tighten the fuel, and return lines when I got back from lunch. Then, a couple years later different shop. Guy had a Jeep cherokee on the frame rack. Making a pull on the left rear rail next to the gas tank. Was heating the rail, and WHOOF!! I thought he'd melted the plastic gas tank. Either way, he was pretty well singed. I put the fire out while everyone was running 'round looking for a water hose. Come to find out, some yahoo had replaced the fuel filter, but didn't remove the old one, which still had fuel in it. It got hot, and boiled out. No major damage, but lots of singed hair, and a red face for a few days.
-
I made a bunch of gas keys a while back. I drilled then hole, and drifted to size with a square drift.
-
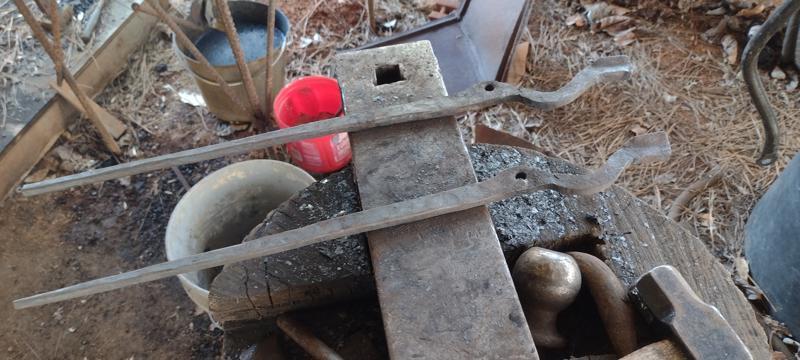
Got some forge time in today. got a start on V bit tongs. I cut blanks out of some 3/8" flat stock yesterday. The notch cut in was due to the plan for twisted slot jaws. But i changed my mind, and found that it caused me problems later on. That problem really stands out in this pic: I'll weld that spot together and see how it works out. As it stands its a weak spot, and I'm afraid it will snap off when I go to adjust the jaws. And I may draw the reins a bit more.


-
At work I work with mostly sheet steel. .040 and thinner. lots of sharp edges, tiny hair splinters, and devils horns. Needless to say, I wear leather gloves. When working with hot steel at work, 3/16" and thicker, I wear leather gloves. At the forge at home, I wear a leather glove on my holding, not hammer hand. That said, any glove that I wear fits such that I can pick a dime off the floor. I can also remove the glove with a single shake of my hand, while holding hammer in the other hand. There are times working with metal, and machinery, I will not wear any glove for safety reasons. Even though OSHA requires it. I've done other jobs in the past where the wearing of gloves is required by OSHA, and accidents happened due to the use of gloves. Leather gloves heat slowly, and transfer heat slowly, but by the time you notice that it's getting warm, it's time to remove it, due to the slow transfer of heat. the outside of the glove is still super hot, even though you have removed the heat source. That heat is slowly (slowly is a relative term) being transferred to your hand/fingers. The ability to remove the glove with a single shake of your hand is the difference between "that got warm", and "WOW 2nd degree burn, that was fast!" Or a hot scale jumping in your glove with you, quick shake, and you're good. If you can't work with a glove that you can shake off, don't wear gloves. Working around hot metal, whether welding, forging, casting, or whatever. There will be glowing hot things flitting about, and they will jump into pockets, gloves, ears, noses, etc. Clothing that doesn't melt, doesn't fit too closely, and can be quickly removed, or at least separated from the body with minimum effort is a good thing. Cotton, wool, and leather come to mind. I guess that's about it.
-
I would think the smaller the faster it liquefies, thus, less fuel used.
-
Looks nothing like the 'late model" slag. My driveway is paved with slag from the steel mill in Cartersville. Lot cheaper than gravel, (slag is free to haul off, and just have to pay for the transport) and packs in very well.
-
I managed to catch a few things ablaze. #1 was when I was welding in a new rear body panel in a mustang. I elected to gas weld it, that way I wouldn't have to gut the interior. (no sparks as opposed to all the fireflies from a MiG) The procedure is to weld a little, then, peck a little with hammer, to reduce warpage of the sheet metal. So, I completed about an inch of weld, and as I was pecking, I caught a flash out of the corner of my eye. I looked over and saw my foot ablaze. I was a young buck in the 80's, and was wearing tennis shoes. Shoes made of Nylon, rayon, dacron, or some blend thereof. I stomped the fire out with my other foot. Now a days, I wear 100% Cotton, 100% Wool, or 100% leather. Synthetics are very bad where fire is involved. #2 S-10 Blazer. Drivers door striker. Notorious for cracking, and breaking out the "B" pillar. I was welding in a new piece, when I noticed smoke. Apparently, a MIG spark had gotten into a batch of sound deadening material, the pillar acted like a chimney and drew air to feed the fire. Burned the headliner out of the vehicle. #3 Not me, but some folks I know, one of which I'm now married to. They were coon hunting. Dogs chased a raccoon into a dead hollow tree. They got the bright idea to smoke him out. built a fire at the base of the tree, which acted like a super sucker flue. drew the flames up the trunk, and out the top. Coon, bailed out of the top of the tree, with his fur ablaze. running through the woods, late fall, hasn't rained in a month and half. Managed to set fire to about 100 acres. Never got the coon. #4 Years ago we raised game fowl. One evening in the dead of winter we were in the barn exercising some roosters. had a heater going. Courtney was wearing "parachute pants", standing next to the heater, managed to catch herself alight. She also, no longer wears synthetics. Just a couple from the past.
-
Thanx for the info. I'll save my pennies. I could use one for sure.
-
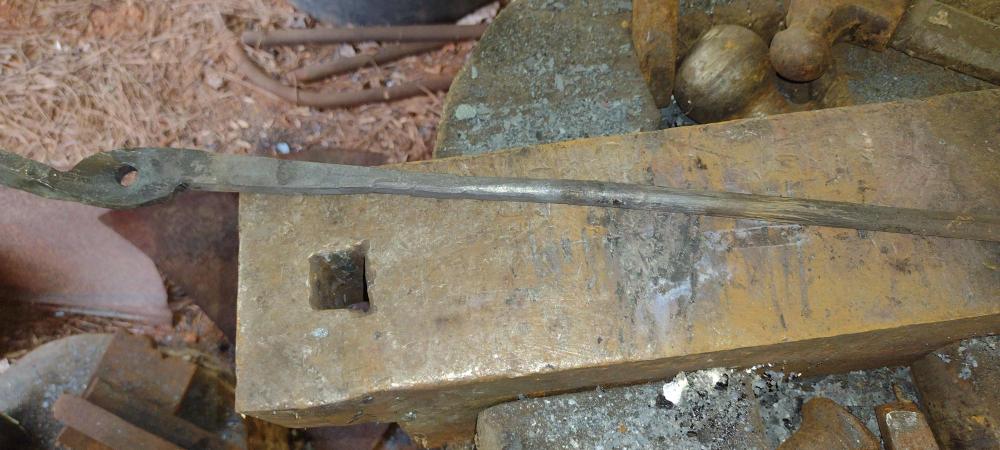
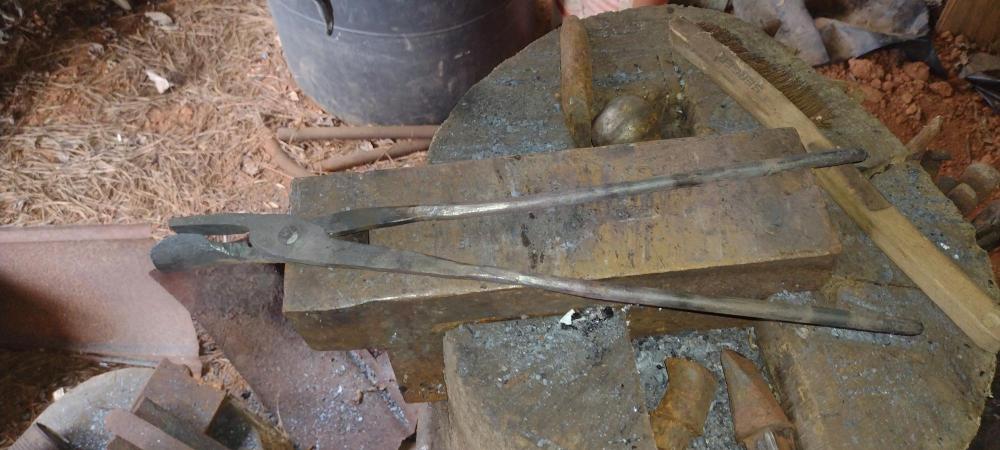
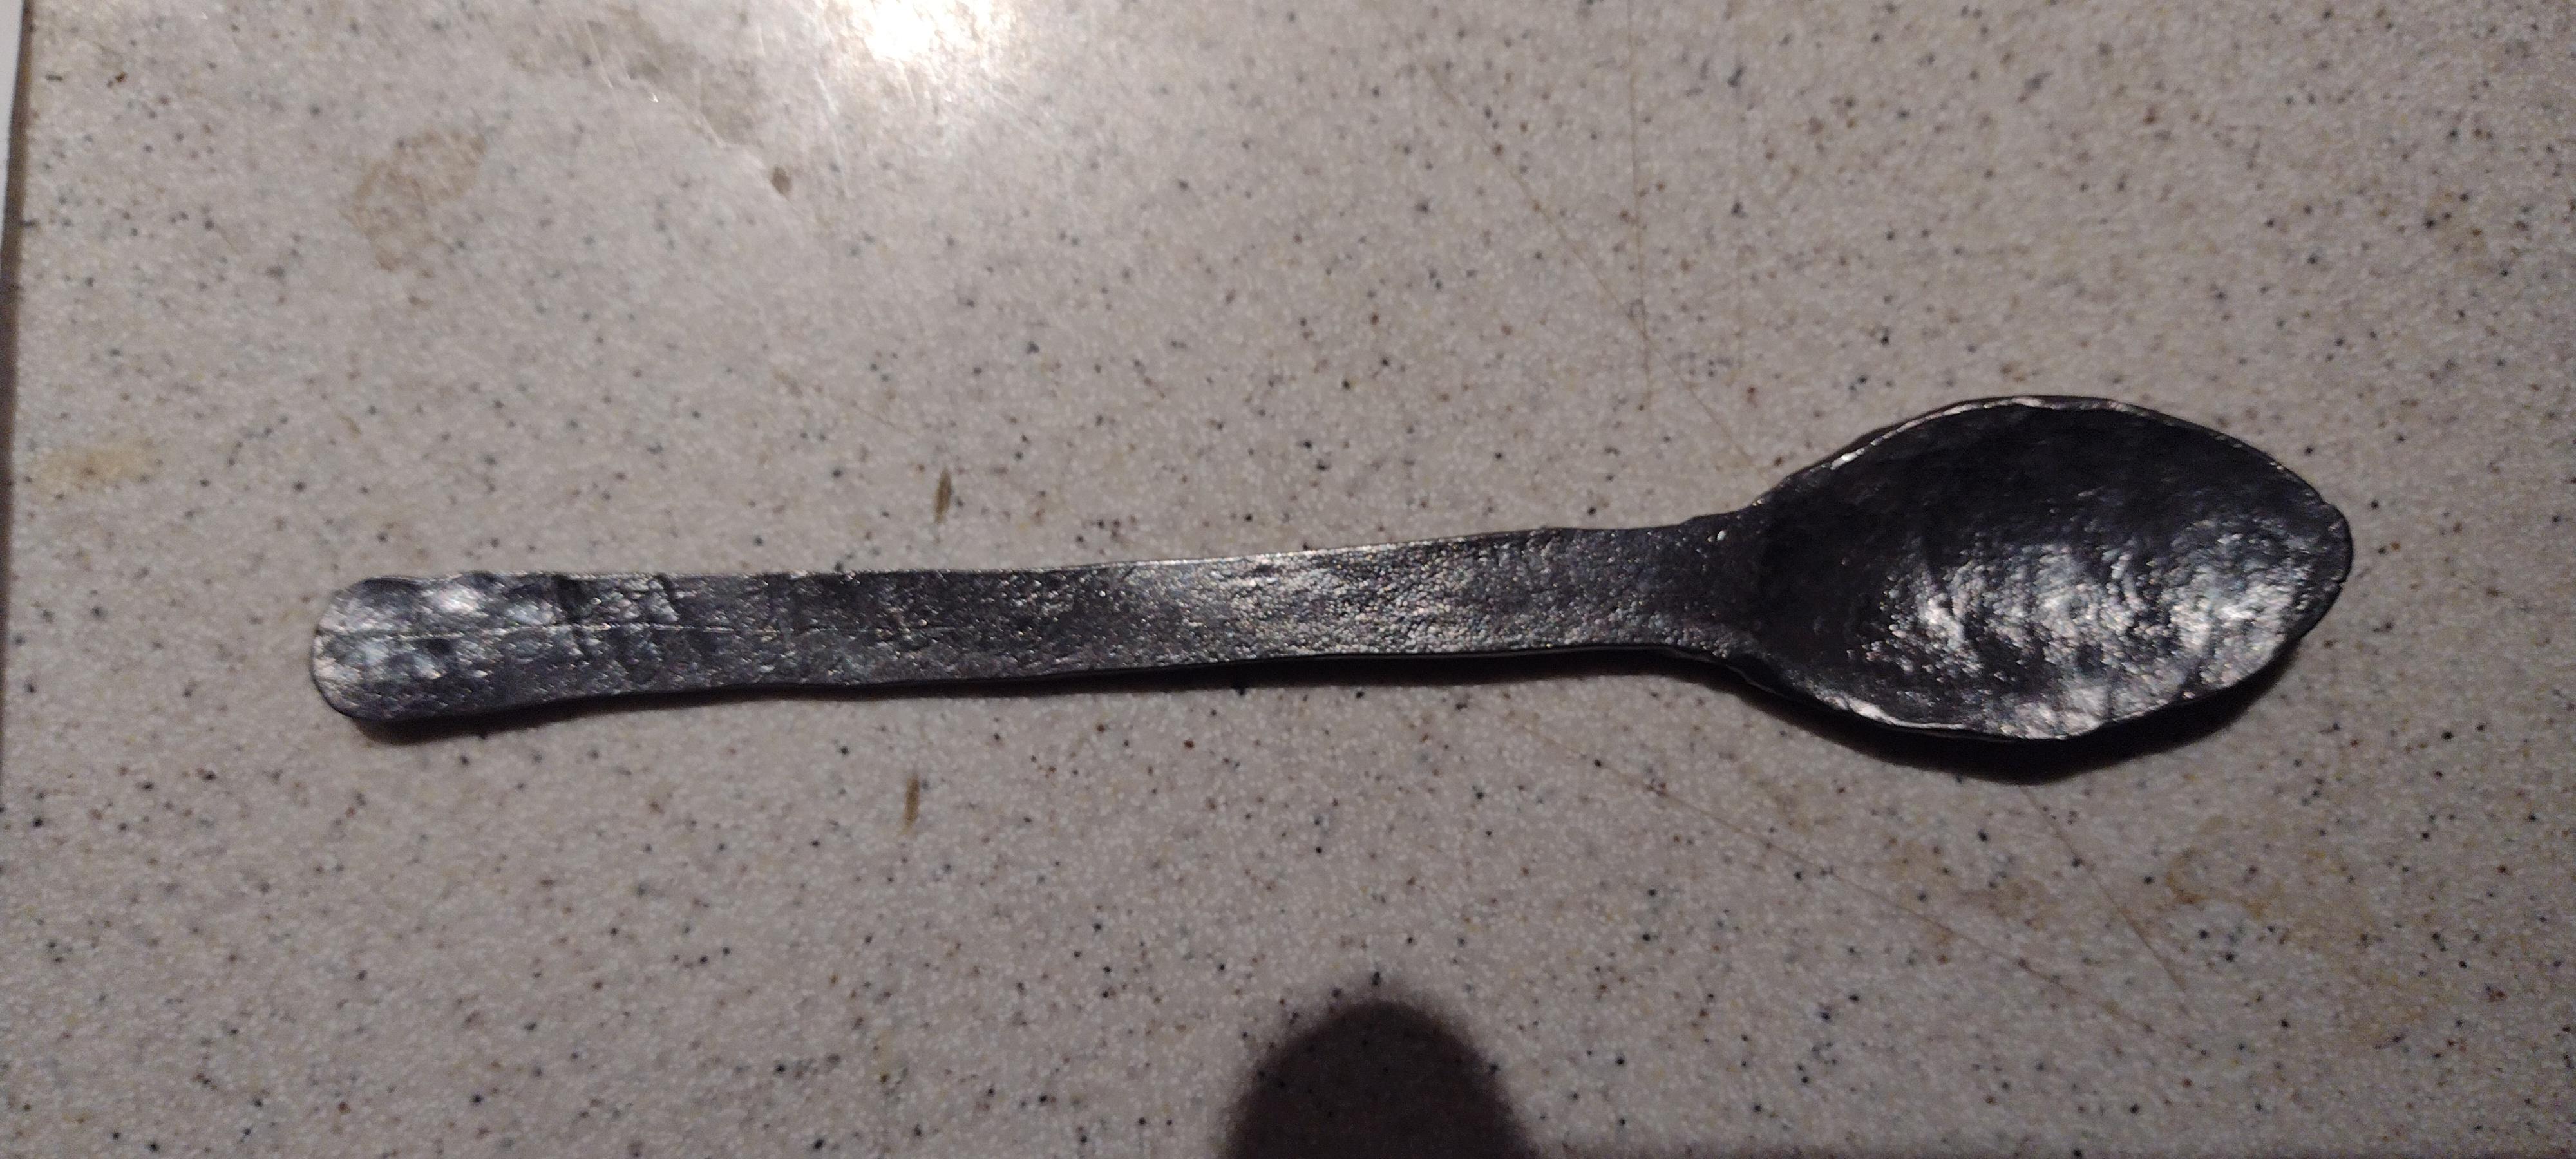
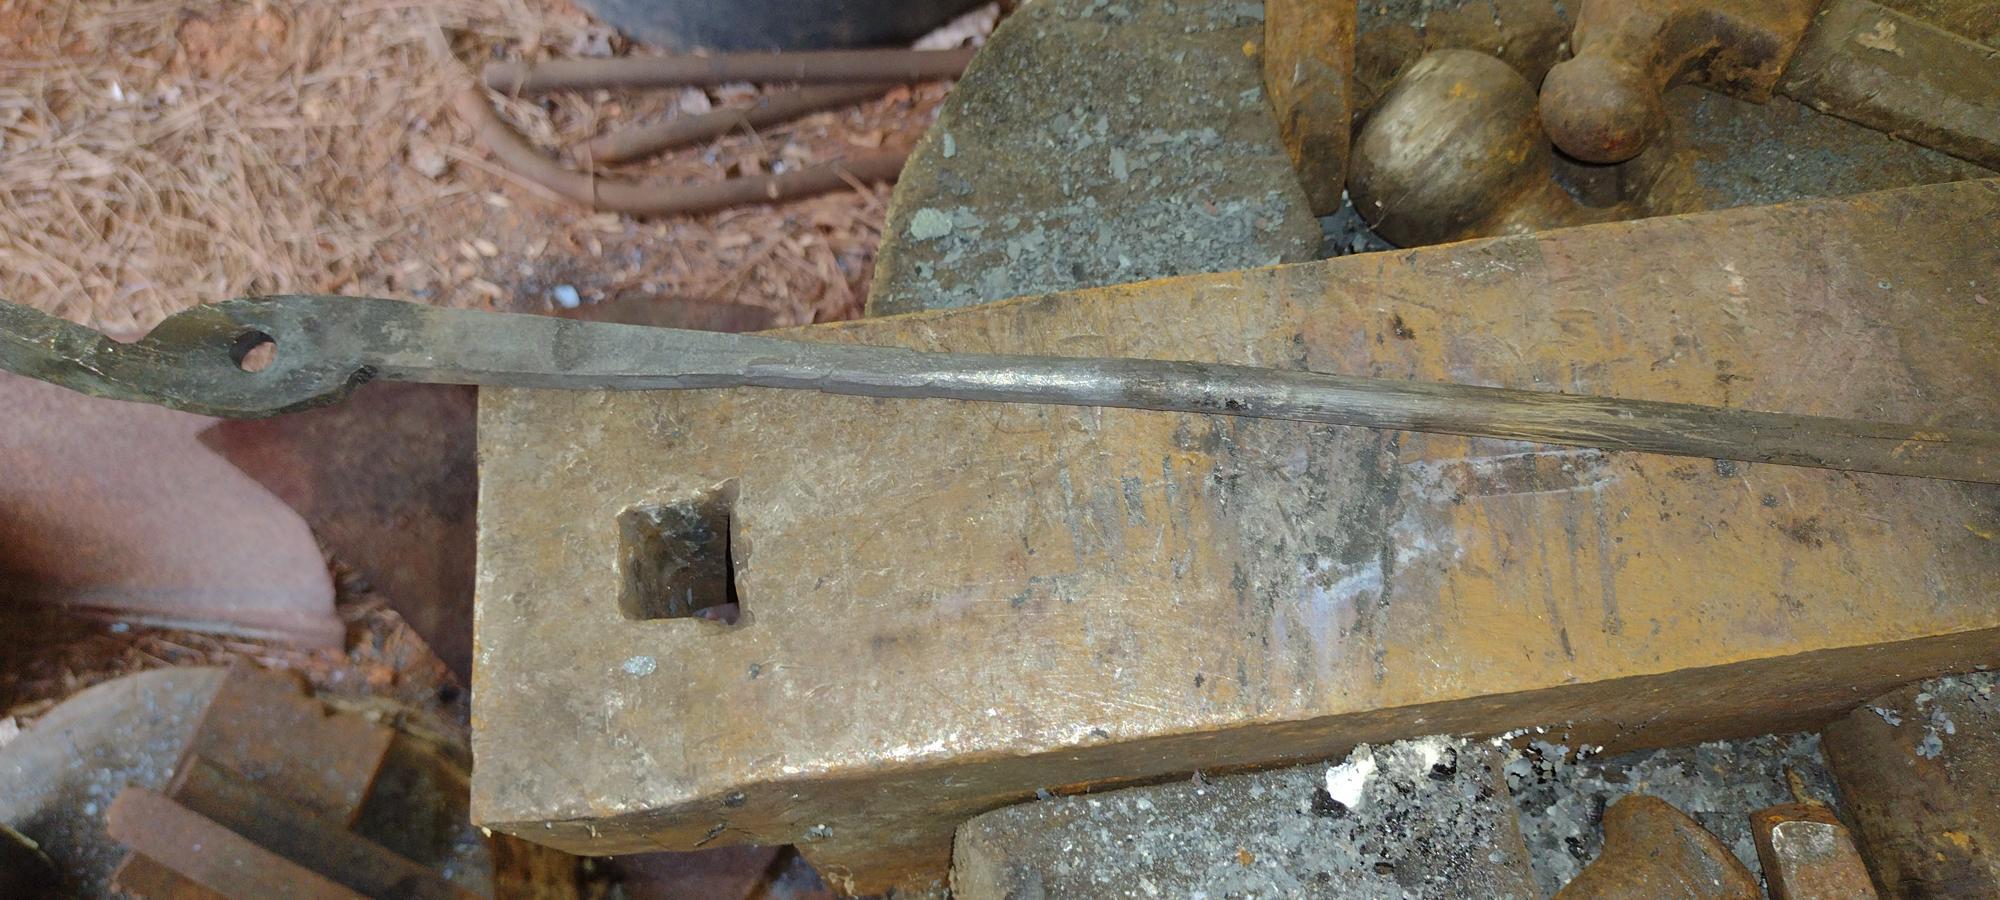
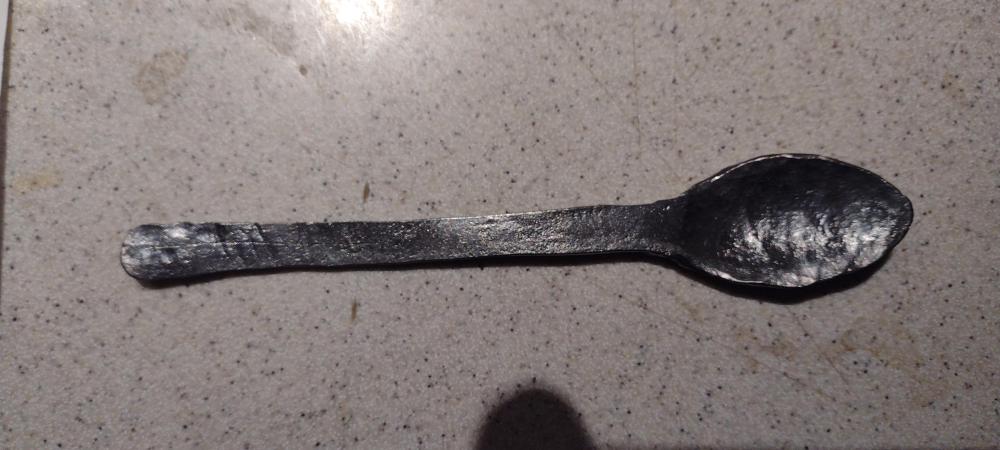
Got some forge time in. Just playing around with various things. Found that rebar doesn't like to be forge welded. (I didn't expect it to) Then did some destructive inspection of a failed blade, and found that the hotdog didn't get welded to the bun in places, and in the process, the bun got way too thin anyway. So, I'll be re visiting that procedure some time in the not too distant future. Then got a chunk of 5/8" square stock, and just heat and beat until it decided to show me what it wanted to become. I started out with the cross peen, and flared the end after drawing it some, and flattening it a little. Thought it might be a spade like you would find on a drawer pull. But it was a bit too rounded for that. Then, a handle started taking shape. By that time my shoulder was beginning to let me know that I needed to swap to a lighter hammer. So, I went with my 2 pound ball peen to finish it up. The little thing must have thought I was hungry, because it turned into a spoon of sorts. It's only the second spoon i've made. The first was a botch job that serves well as a flux scoop. I need a dishing form of some sort. That would help with making spoons. I guess it needs some planishing to smooth it out
-
Shaina, Not being a structural element, what's to stop you from drilling the holes, as opposed to punching? You can then drill the holes, insert the tenons, head them, and continue on.
-
Dad never wore any kind of jewelry, except a wrist watch with a breakaway band. For me when it comes to gloves, I found that tight fitting ones, while easier to handle small stuff, if they get grabbed by machinery, your hand will go where the glove does. I prefer to work bare handed around large machinery, and when using trigger operated tools, such as nail guns, drills etc. I've been hurt due to the glove more times than I've been hurt without gloves. If i do wear gloves, they fit loose enough that all the machine gets is the glove. Have you ever had slag jump into your snug fitting welding glove? I have, But with my gloves it's one shake of the hand, and glove is on the floor. OSHA requires gloves to be worn in places where they create more hazard than safety. So, some folks wear some kind of surgical gloves, which are technically gloves, but fit like a second skin, and do nothing except meet the osha requirement for gloves. Got some forge time in. I cut a few coils off of a spring, and straightened out two of them. One became a slitter, the other became a hot punch for rivit holes in tongs. I hardened the edge on the slitter, or so I thought. Then tempered. I didn't think about the rest of it becoming brittle, as it cooled in the air as I was working the rest. So after I got the punch made, I set it aside to cool, and took the slitter for a test drive. Went through from one side, then I flipped it over, and one whack the slitter broke in the middle. After that fiasco, I decided to normalize the punch. It's buryed and cooling right now. Back to the slitter, I think I should have drawn a longer taper on it. It gets pretty thick fairly quickly. So, I'll remember that on the next one.
-
Dang Shaina, I had something similar happen many years ago. Totally my fault, durn near cost me a thumb. Yes loose clothing, hair, jewelry, etc. is a no no in the shop. Back in the day, everyone at NASA, Rocketdyne, Grumman, Northrop, Boeing, et. al., were required to wear suit and tie, even the folks in the shop. machinists, and engineers alike. My uncle was a team leader at NASA, and had his whole crew wear bow tie, instead of the usual long neck tie. Company couldn't do anything about it because they were wearing a tie. I don't know what it was about the aerospace industry back then, with their dress code. None of the other industries had that kind of dress code. except for those in the office jobs. I need to build a coal bin. I have bags of coal broken open, and spilled out on the ground. I'll have clinker for a while now. I have a bent axle that I need to cut into manageable chunks, and a coil spring to cut for making punches and such. Then I need to get to work on them. I need to make two hinges, and a gate latch. I may get started on that tomorrow. Alexandr, cryin' shame you can't ship to the U.S. at the moment. But mabe things will improve some time in the near future.
-
Alexandr, Fantastic work as usual. That Chandelier is being shipped to Georgia, U.S.A. right? I have the perfect spot in my living room for it, or one like it.
-
Looking for a smith in or near Hanover county VA. Guy on another forum (about as far from smithing as you can get) is in need of some hinges, and pintles for his shutters. I could probably do it, but I figured that someone more local to him would be best.
-
Speaking of standing in a circle, and shooting rabbits. A guy that I used to work with was on a 203mm self propelled howitzer when he was in the army. While stationed in germany they had some time at the firing range, which was circular, and every one fired toward the middle. Well, some how, one bag too many got loaded, and they blew up a Colonels Jeep. Got a little forge time in today. Finished up the box jaw tongs. My first box jaw, and my first welded reins. As I was welding the reins, I was thinking how I really enjoy drop tong method. When you bring the two pieces together, they either stick, or not. If not, brush, flux, and back in the heat. If they stick, grab hammer, one tap, brush, flux, then back in the heat. It's neat, because you can feel them "grab" each other when you bring them together. I wasn't sure if the round stock was long enough for both jaws, so I welded one jaw to each end. Then cut it in the middle. First weld Second weld And finished product I hope I re-sized the pics to an acceptable level.