
Irondragon Forge ClayWorks
-
Posts
11,891 -
Joined
-
Last visited
Content Type
Profiles
Forums
Articles
Gallery
Downloads
Events
Everything posted by Irondragon Forge ClayWorks
-
I'll have to remember that analogy JHCC. One time I made a pair and did the mirror image (head slap) so I made another pair just like the first and swapped both sides. Came up with a pair of right hand and a pair left hand tongs. I hate throwing stuff on the scrap pile.
-
My new restoration project
Irondragon Forge ClayWorks replied to SmithingWitch's topic in Bellows, Blowers
Have you tried wetting the warped section and putting weight on it to straighten it out? I've had success doing that several times on projects. If you have a way to steam it that works even better. -
13 Year old Son building forge - Dad has questions!
Irondragon Forge ClayWorks replied to doubleaa's topic in Gas Forges
I have to agree about the heavy pipe. I think it is pulling the whole burner out of alignment. What you could do is eliminate the long vertical section and make a vertical bracket to support the shorter horizontal run and attach the hose to the elbow. Another fix would be to use 3/8 in copper tubing from the burner to connect the hose, using compression fittings. Adding more screws lower like the top ones will also help holding the burner firm. I had to do that with our forge.
-
problem with forge. Welding temp
Irondragon Forge ClayWorks replied to Mikishelby's topic in Gas Forges
I agree and should have pointed that out. Sometimes what's in my head doesn't come out of my fingers. I was referring to setting the welds as I've seen many folks try to set the weld with a power hammer. Now using a press is another thing. I wish I had a press, maybe some day.. -
Not all knowledge comes from college.
-
To speed up the drying, put an incandescent light bulb inside (preferably lighted).
-
The Importance of PPE
Irondragon Forge ClayWorks replied to psacustomcreations's topic in Personal Protection Equipment
I find the best way to stop glasses from fogging while wearing a mask is to make sure the mask fits tight around the nose and cheeks. -
25lb LG Rebuild
Irondragon Forge ClayWorks replied to Branding Iron's topic in Power Hammers, Treadle Hammers, Olivers
That too. -
Iron Bloom for History Class
Irondragon Forge ClayWorks replied to Chris the Chicken Smith's topic in Metallurgy
Not mentioned are chives and garlic, it's just not right to cook without garlic and a baked potato with butter, chives and sour cream is hard to beat. -
Grindstone wheels
Irondragon Forge ClayWorks replied to Smeden gegen's topic in Grinders, Sanders, etc
I got a replacement for mine on eBay. -
25lb LG Rebuild
Irondragon Forge ClayWorks replied to Branding Iron's topic in Power Hammers, Treadle Hammers, Olivers
I wouldn't, afraid the paint might deteriorate due to the oil and leave too much clearance or bearing spin. -
Canedy forge blower - pics and questions!
Irondragon Forge ClayWorks replied to Peter R's topic in Bellows, Blowers
I use an old squirt bottle like ketchup or other condiments come in. -
Sharkbait's Projects Post
Irondragon Forge ClayWorks replied to SharkBait's topic in Member Projects
This is how I made the channels. Tac welded angle iron together to make a channel wide enough to hold the soft fire brick, then welded them to the body.That way the opening front & back stayed the same but can be closed down easily.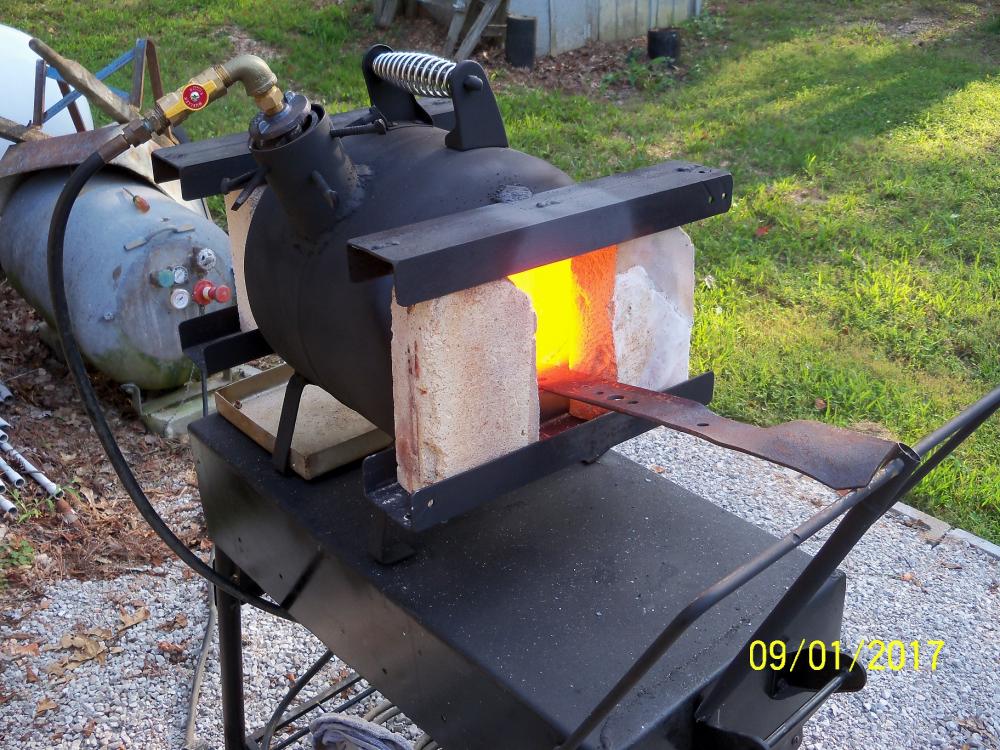
-
Sharkbait's Projects Post
Irondragon Forge ClayWorks replied to SharkBait's topic in Member Projects
The yellow may be the refractory curing, give it a little time then make just one change at a time, changing more will make it hard to tell what is working. -
Show me your anvil stands
Irondragon Forge ClayWorks replied to pkrankow's topic in Stands for Anvils, Swage Blocks, etc
That will make a good stand. I'm of the same mind and fancy stands are low on the list for me, cut logs have worked for all our anvils for more than 30 years. -
Blacksmithing gems and pearls
Irondragon Forge ClayWorks replied to Glenn's topic in Blacksmithing, General Discussion
"the difference between a master and a beginner is that the master has failed more times then the beginner has started" ~Deimos -
It followed me home
Irondragon Forge ClayWorks replied to Glenn's topic in Blacksmithing, General Discussion
Save it, the motor may be good and they have been used for belt grinders. The tread mill will come in handy cut up for under an anvil or other stuff. -
Help identifying anvil?
Irondragon Forge ClayWorks replied to Ashtu's topic in Anvils, Swage Blocks, and Mandrels
I agree with arkie. Where in the world did you find such a pristine 119 pound M&H Mousehole anvil? Just wait till JHCC has a look at it. BTW: the slight sway is a plus in my book, better than a dead flat anvil. I hope you have read about not doing any grinding, milling or welding to the hardened face. That's a good looking stand too. -
Gloves !! grrrrr
Irondragon Forge ClayWorks replied to Mark Ling's topic in Personal Protection Equipment
Or as in our case the mice like to eat them. -
shoes or boots
Irondragon Forge ClayWorks replied to masonred's topic in Personal Protection Equipment
We have a club member (Master Swordsmith) who forges in tennis shoes, with a pair of deerskin spats. How cool is that. -
Tip forming issues
Irondragon Forge ClayWorks replied to Adodero's topic in Knife making Class General Class Discussion
Whenever I have to cut a wonky tip, I use the hot cut and continue shaping the blade. -
Any general tips for a beginner smith
Irondragon Forge ClayWorks replied to Flawedone318's topic in Gas Forges
You should have told them the secret to making a knife is practice, practice, practice. -
problem with forge. Welding temp
Irondragon Forge ClayWorks replied to Mikishelby's topic in Gas Forges
Before we knew about Kast-o-Lite 30 we coated the fiber with a 1/2 inch layer of Satanite and then a coating of Bubble Alumina. It has worked very well for us so far. You might check to see if someone near you has or can get it. -
As of yesterday, it was $1.49 a gallon here, just went up from $1.29.
-
Golden cudgel
Irondragon Forge ClayWorks replied to Birace latino's topic in Blacksmithing, General Discussion
Not to nit pick, but you do realize a cudgel is a short club, quite different from a bo staff

