psacustomcreations
Members
-
Joined
-
Last visited
-
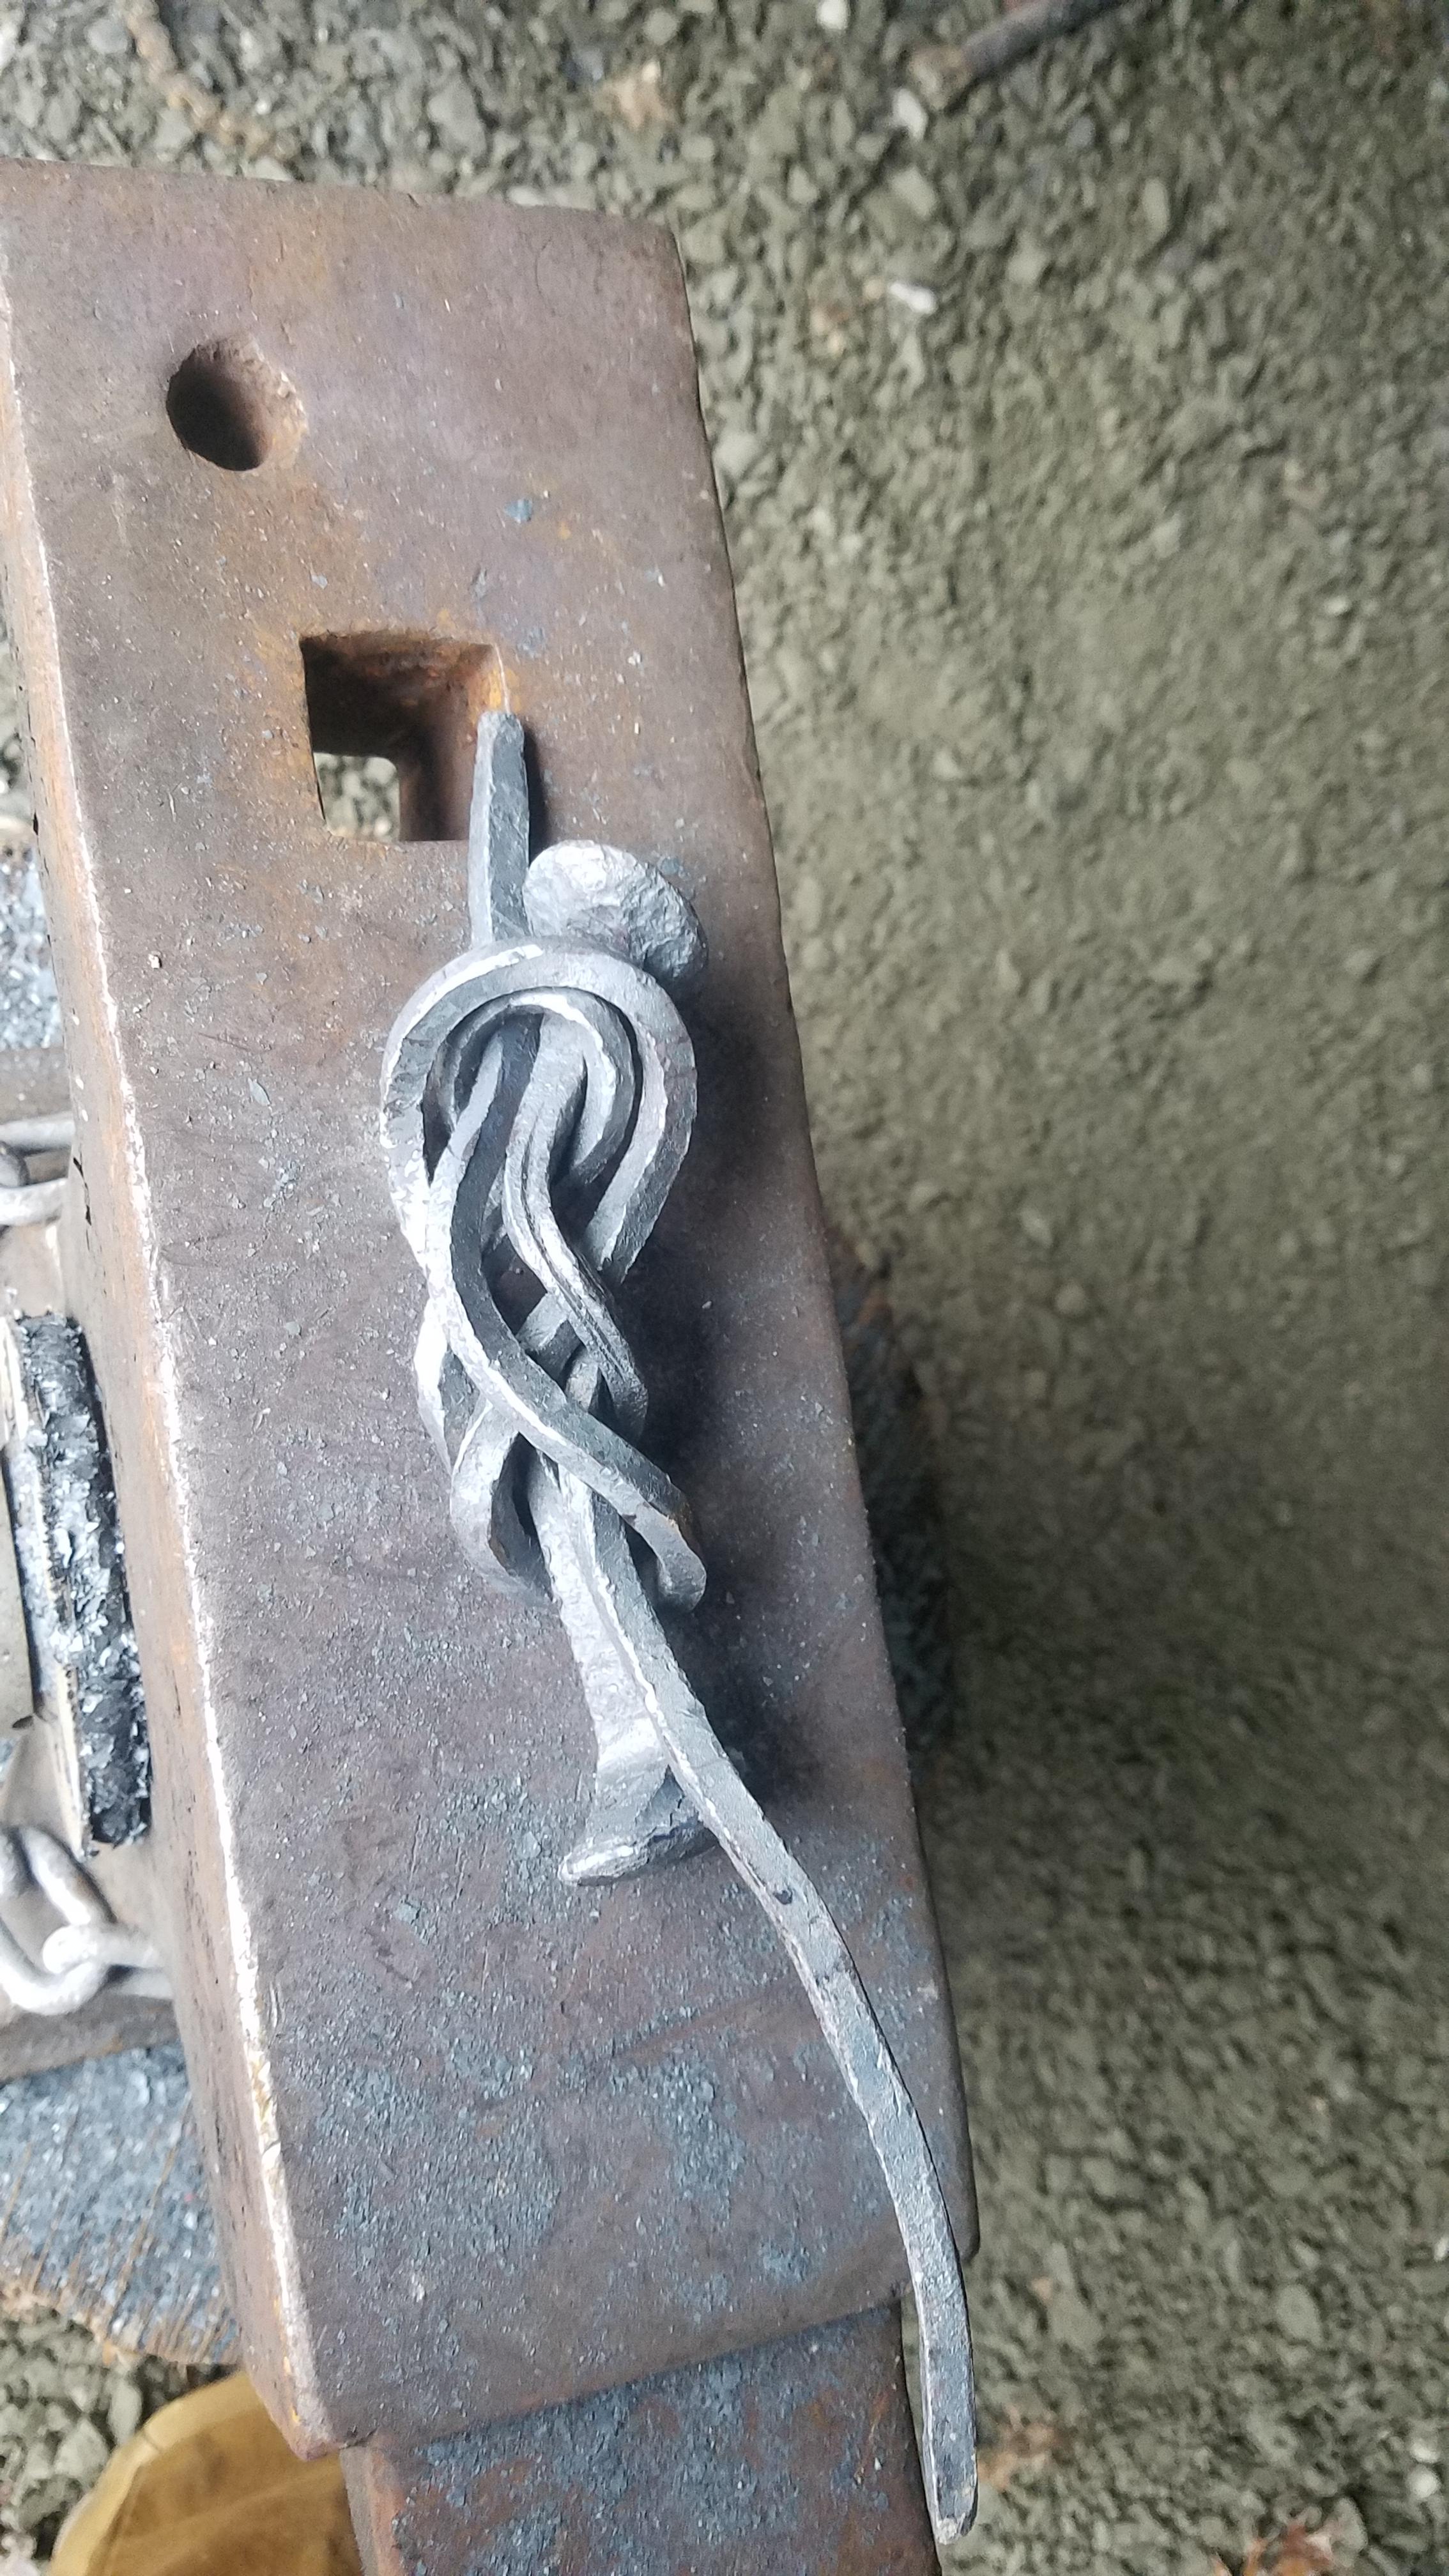
That is similar to the technique I was using to tighten my overhand knot. For this one, the first knot was not too bad to make. It was trying to weave the second knot and fit the pieces in the forge at the same time that made it challenging. I was going to break out the OA torch for some localized heating but wanted to try this using only the forge. That probably made it harder on myself but I still have a lot to learn.
-
I was a hard hat diver and the Carrick Bend is always on the front of the old fashioned helmets.
-
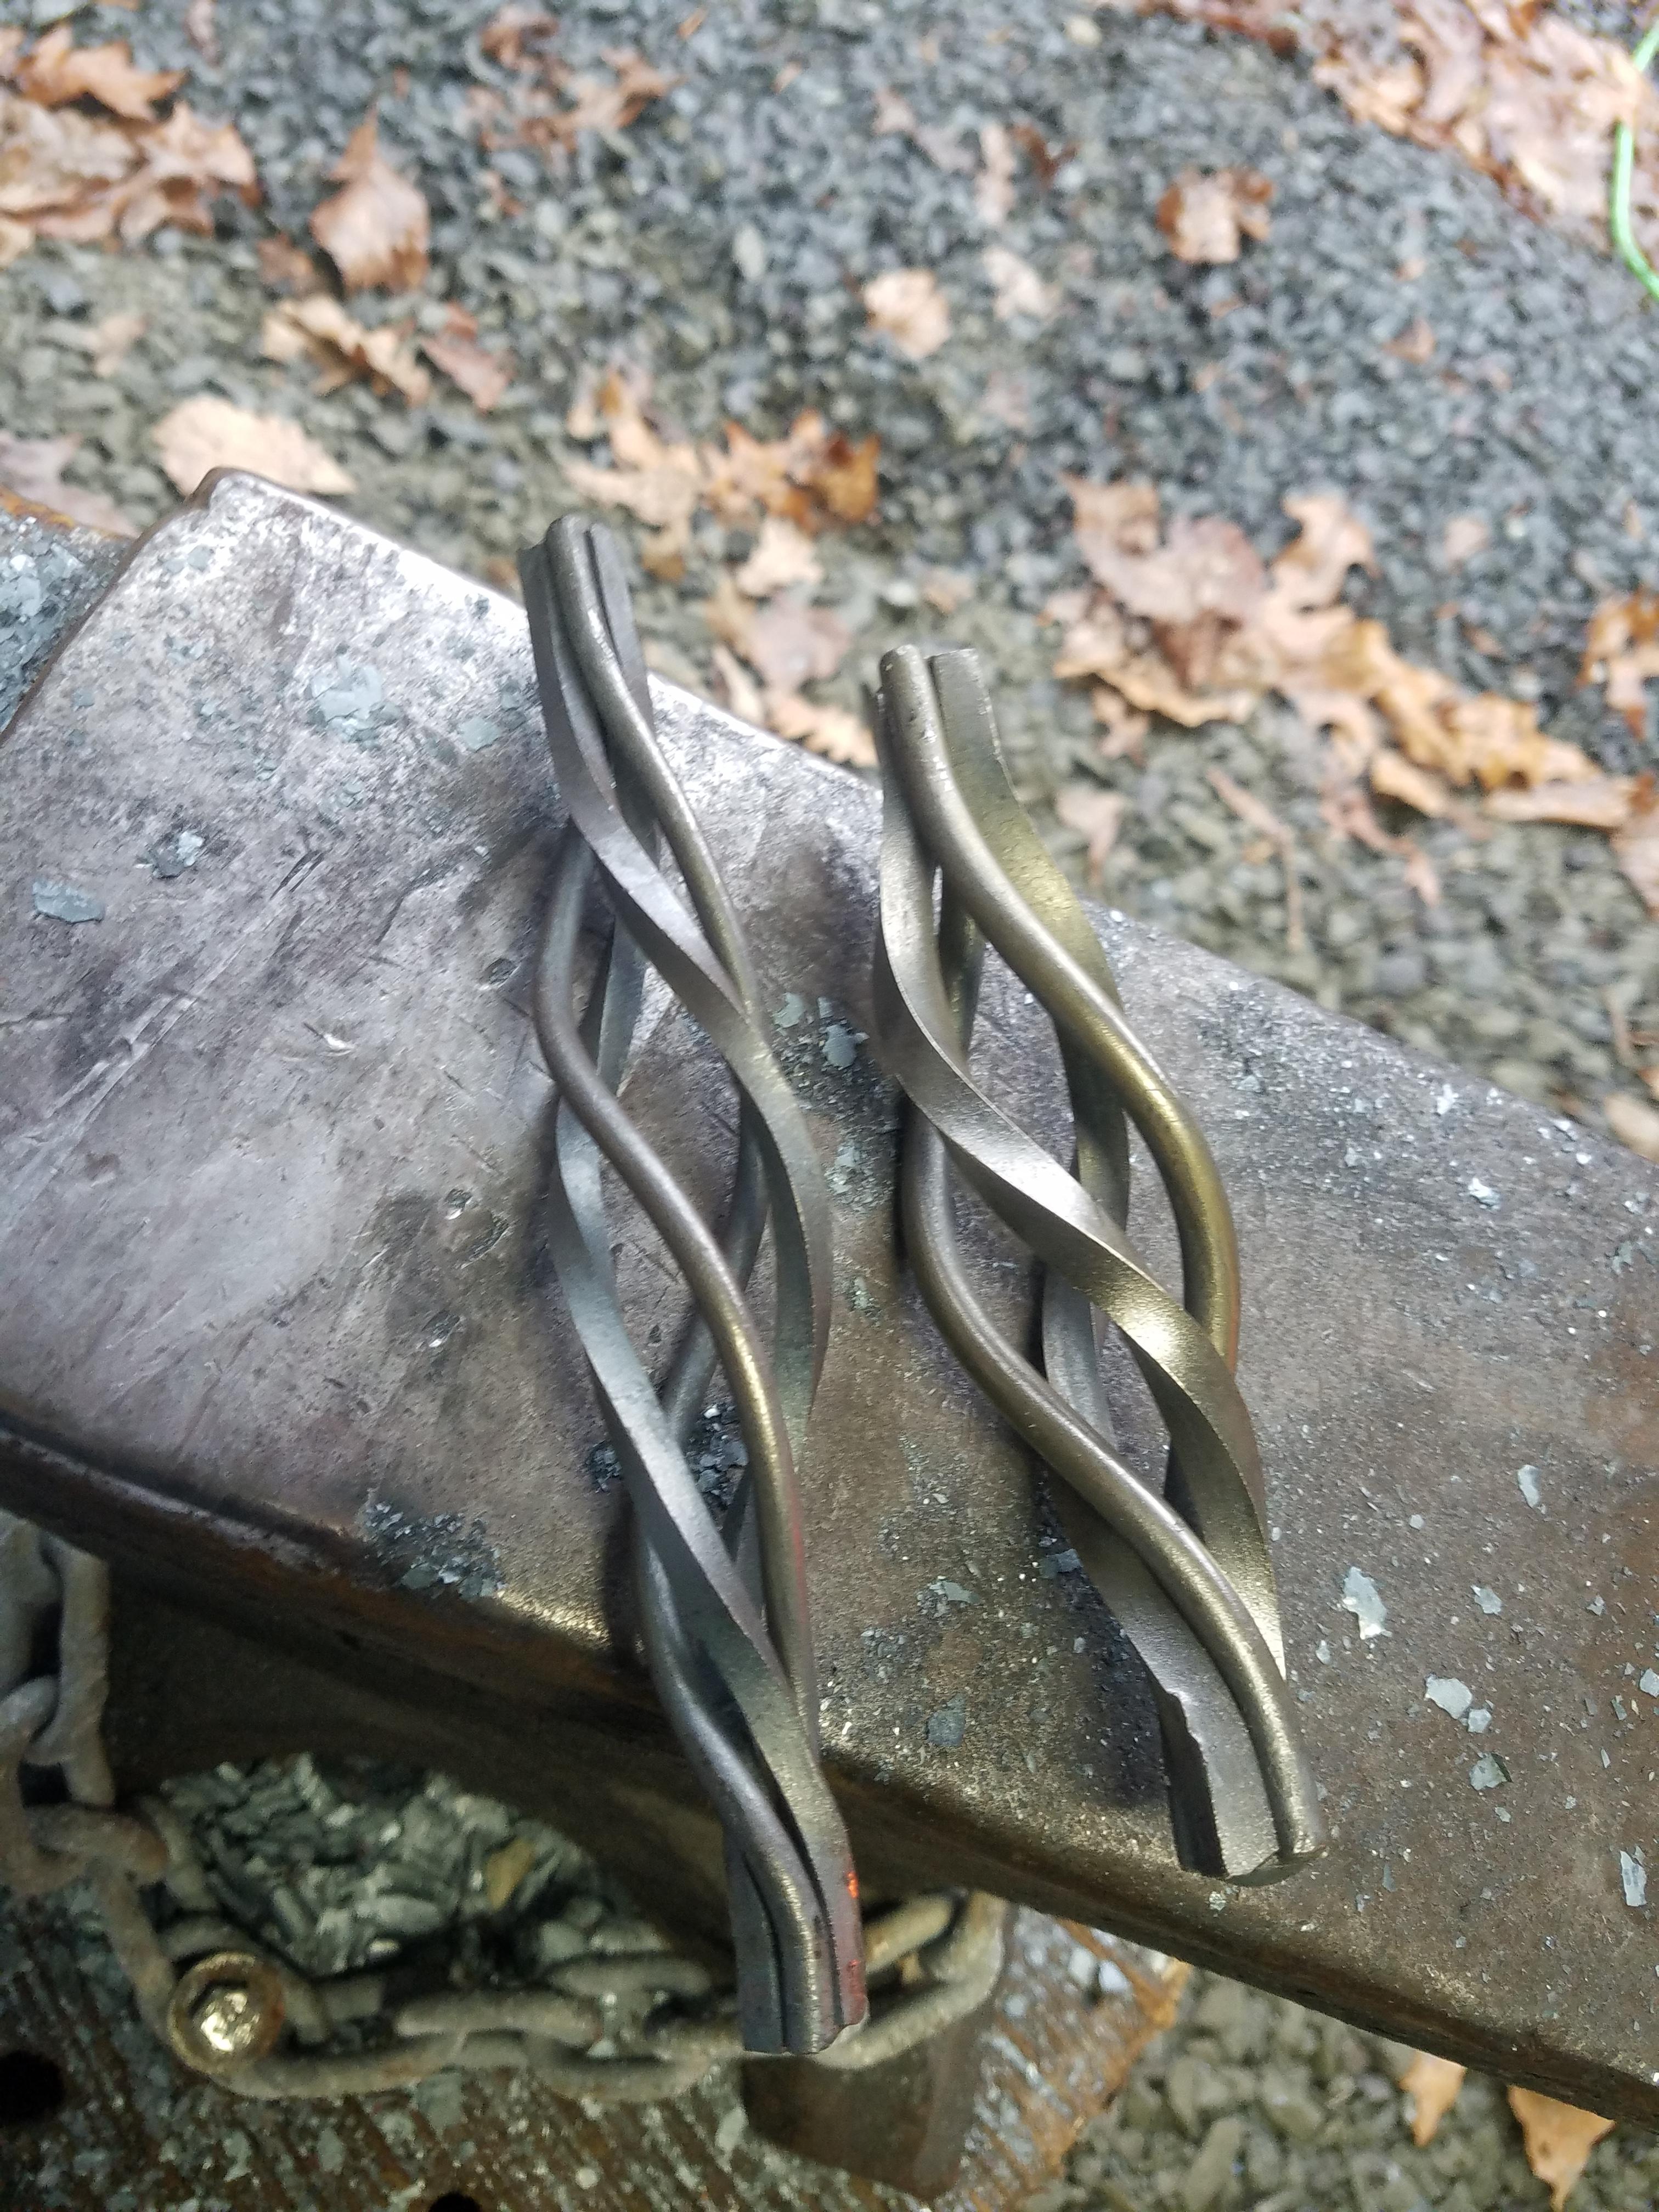
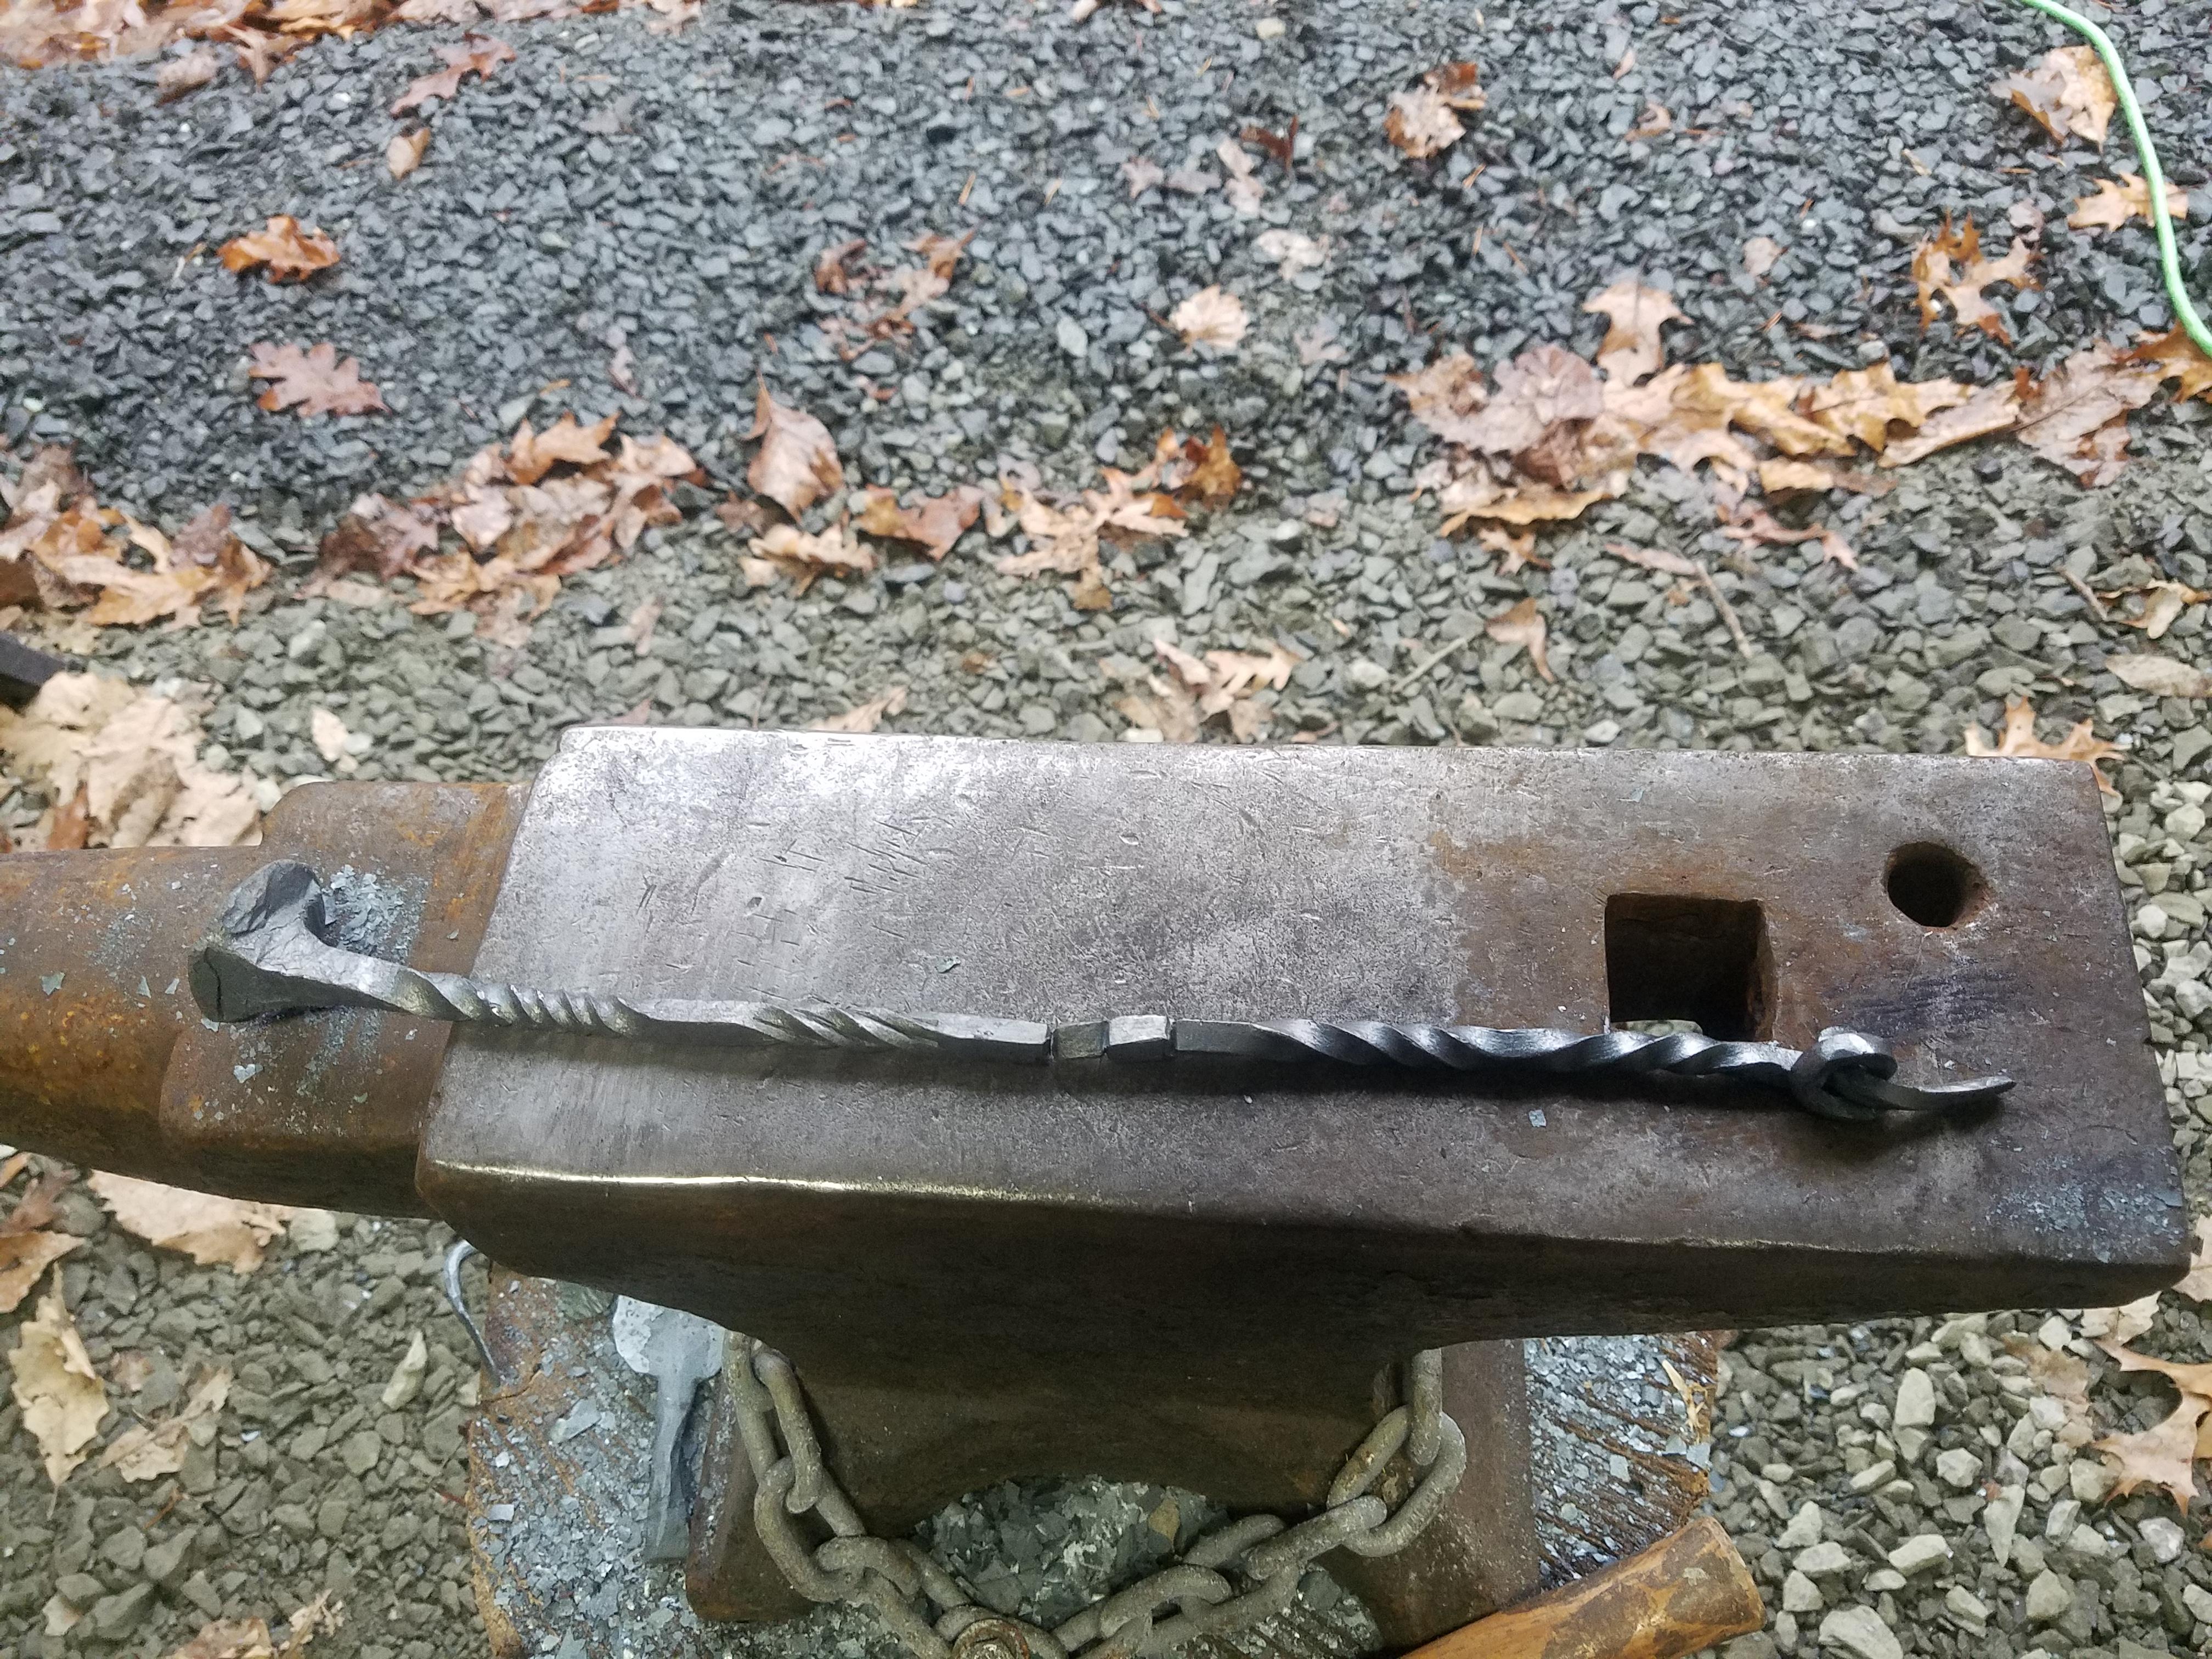
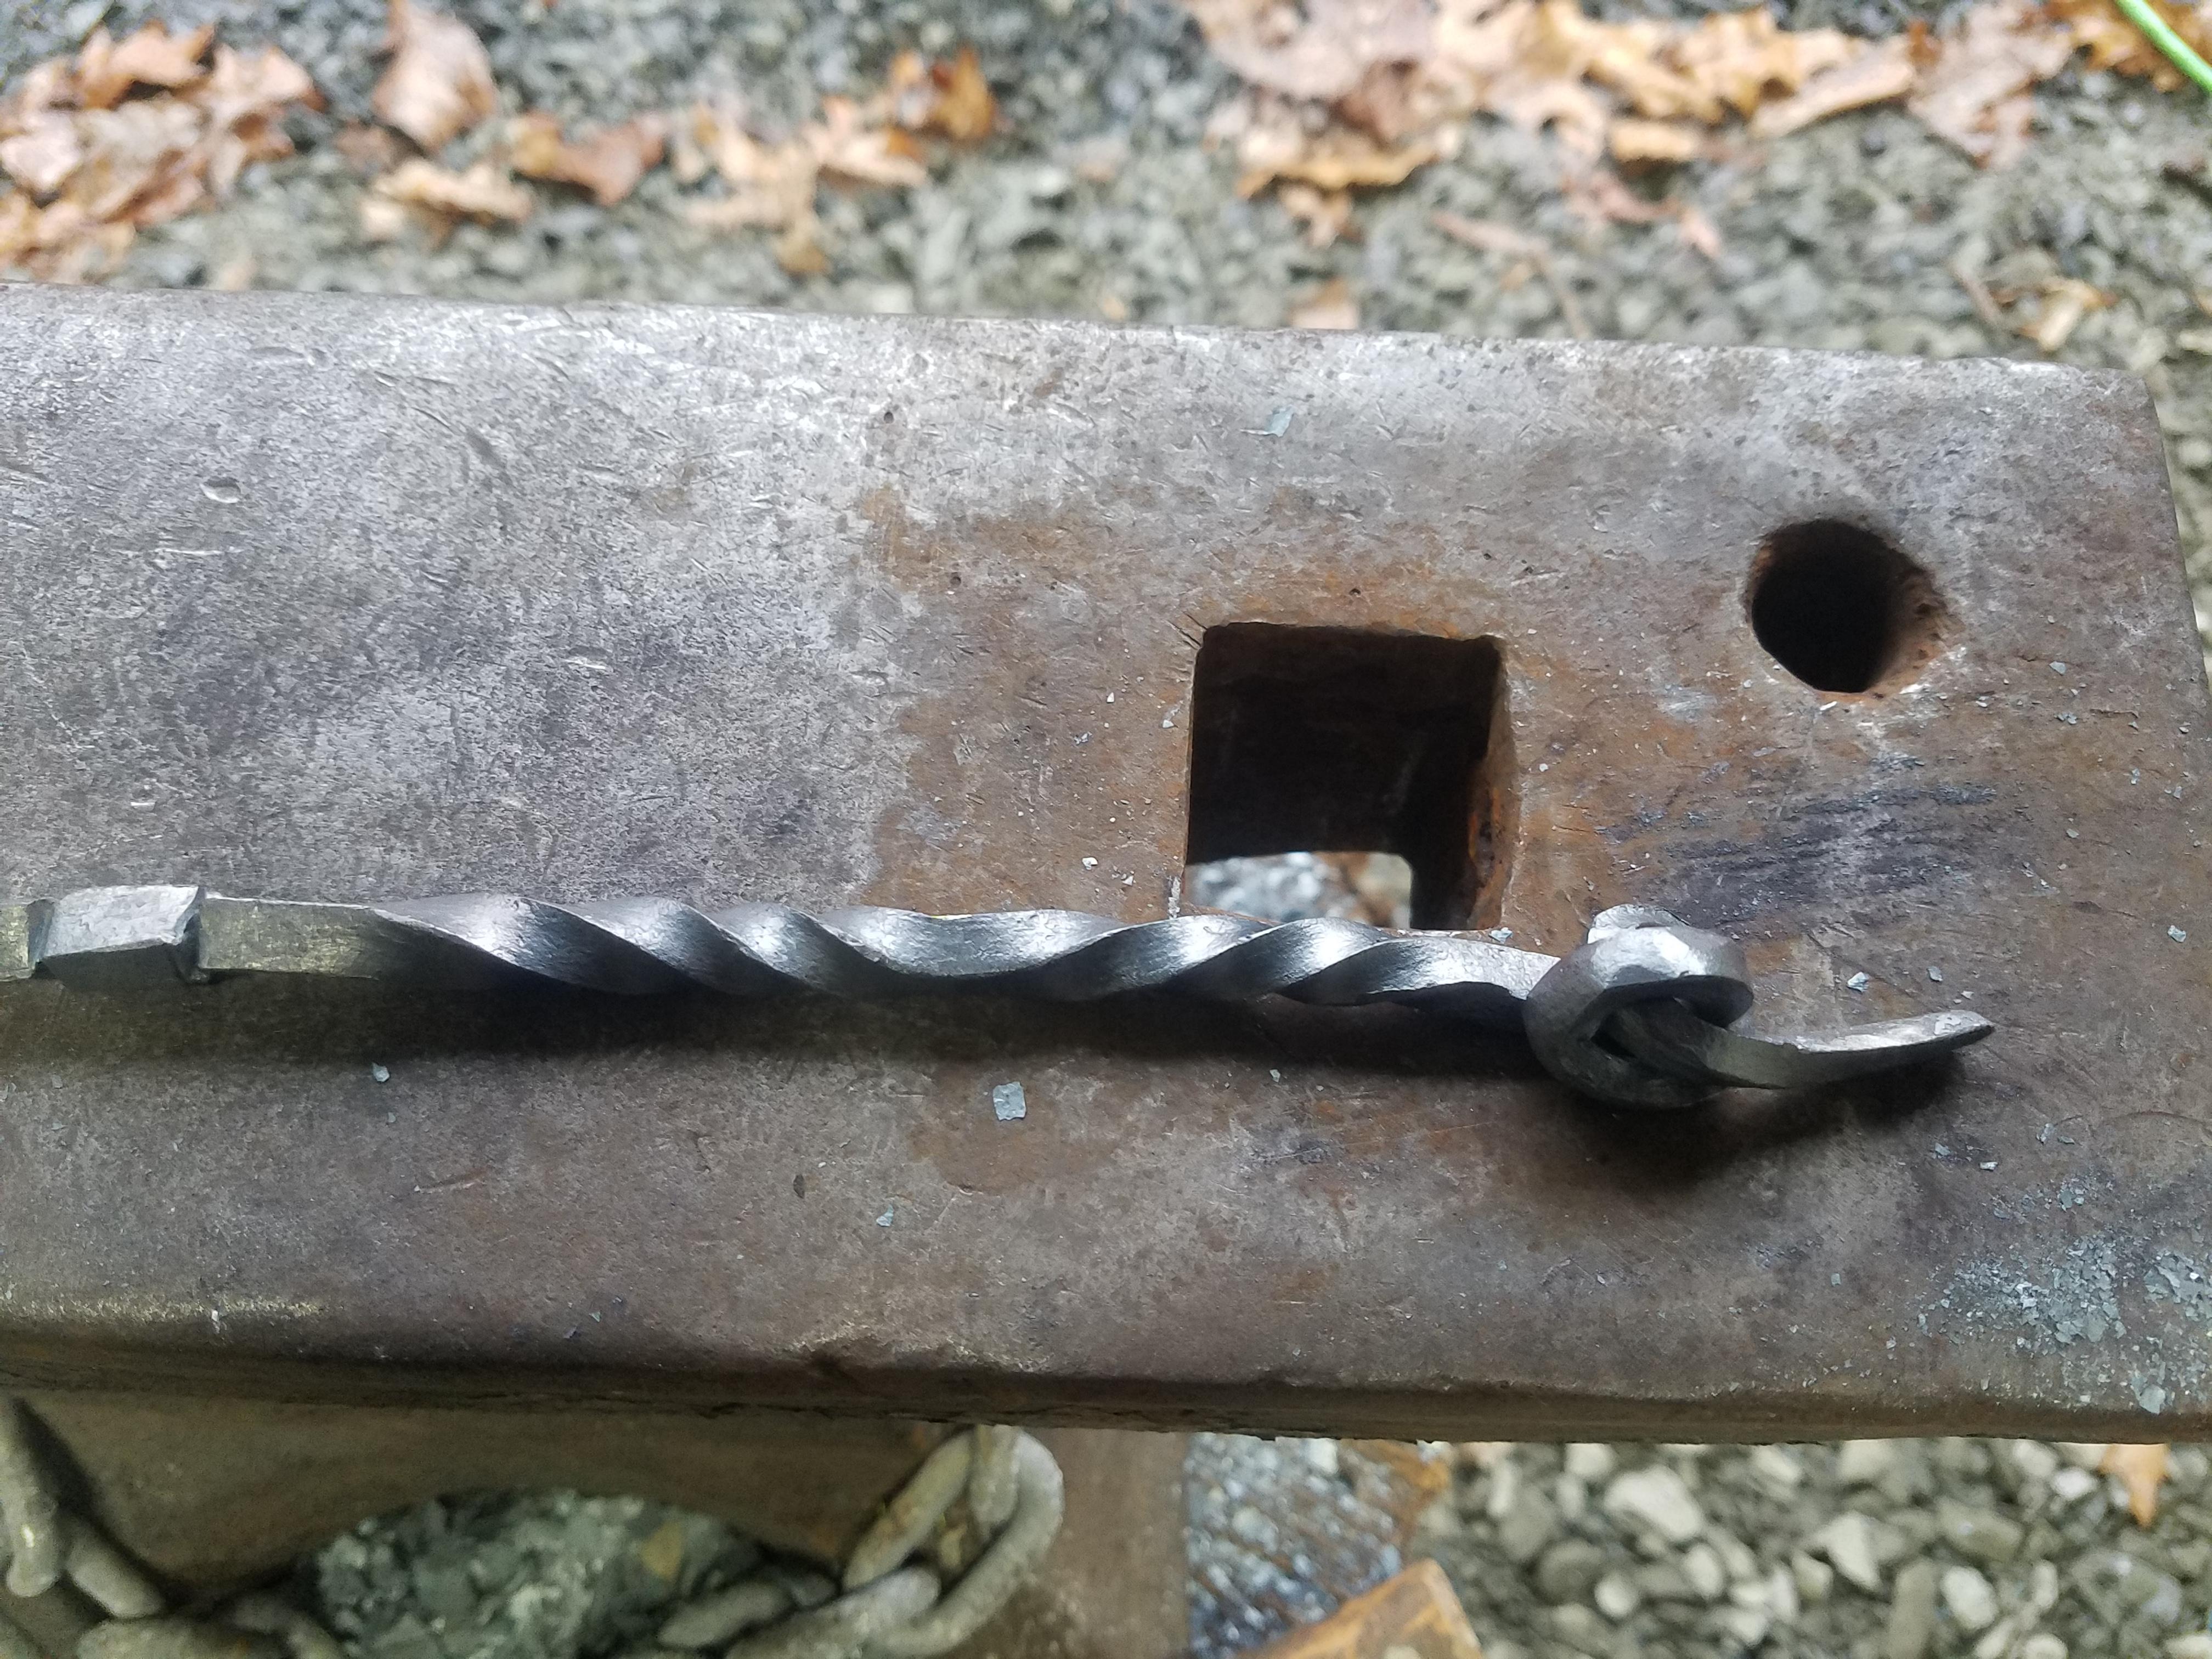
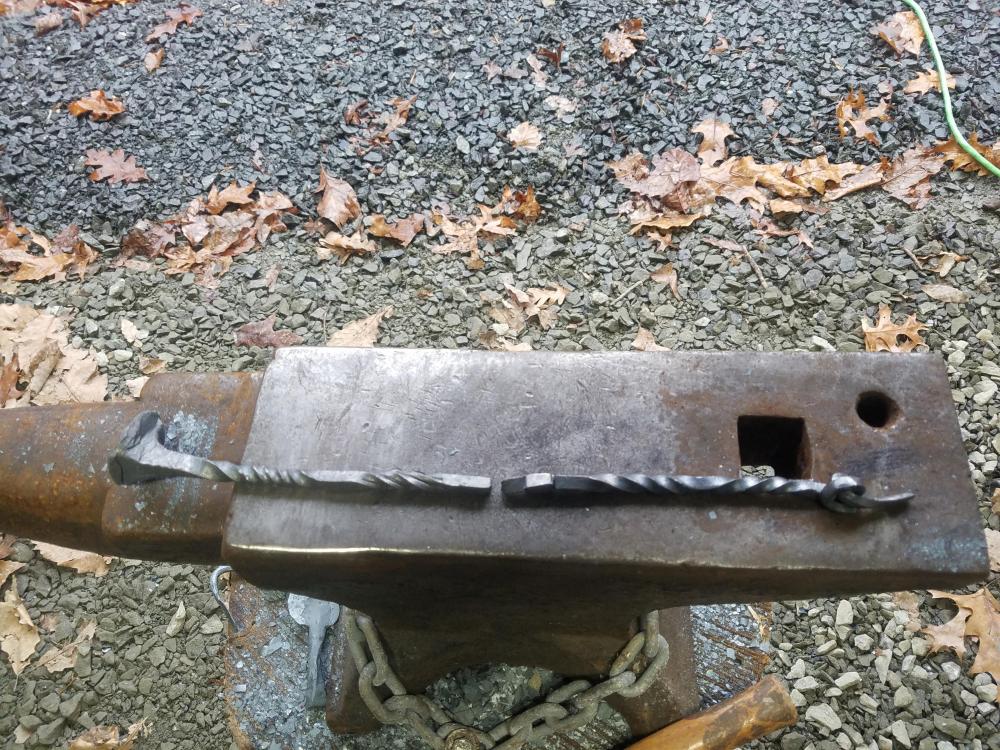
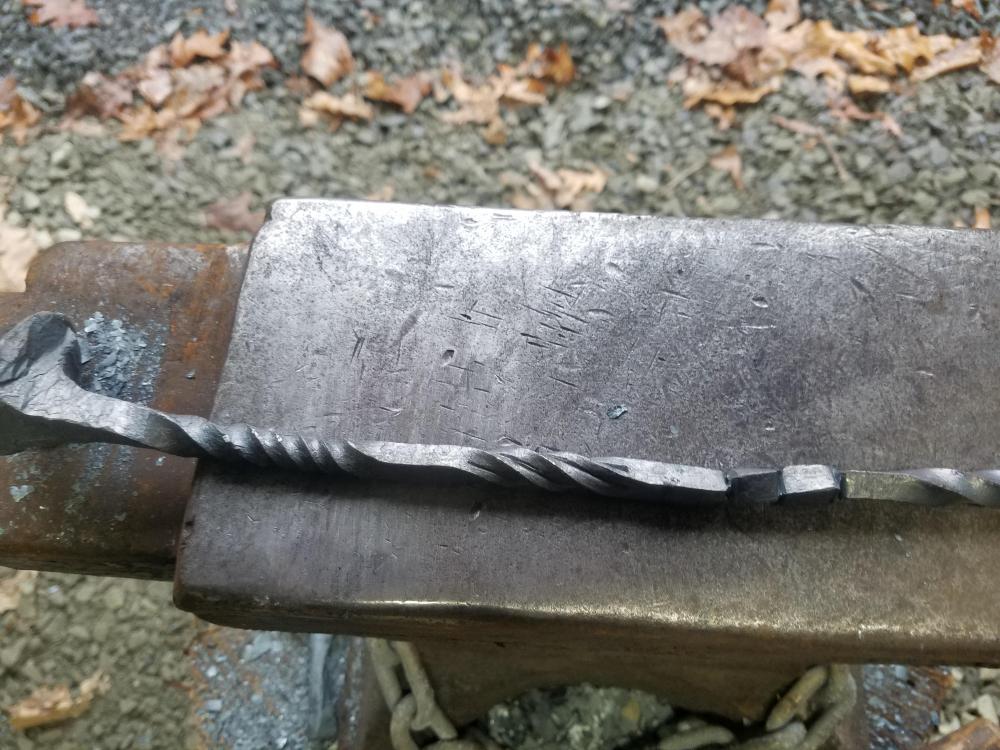
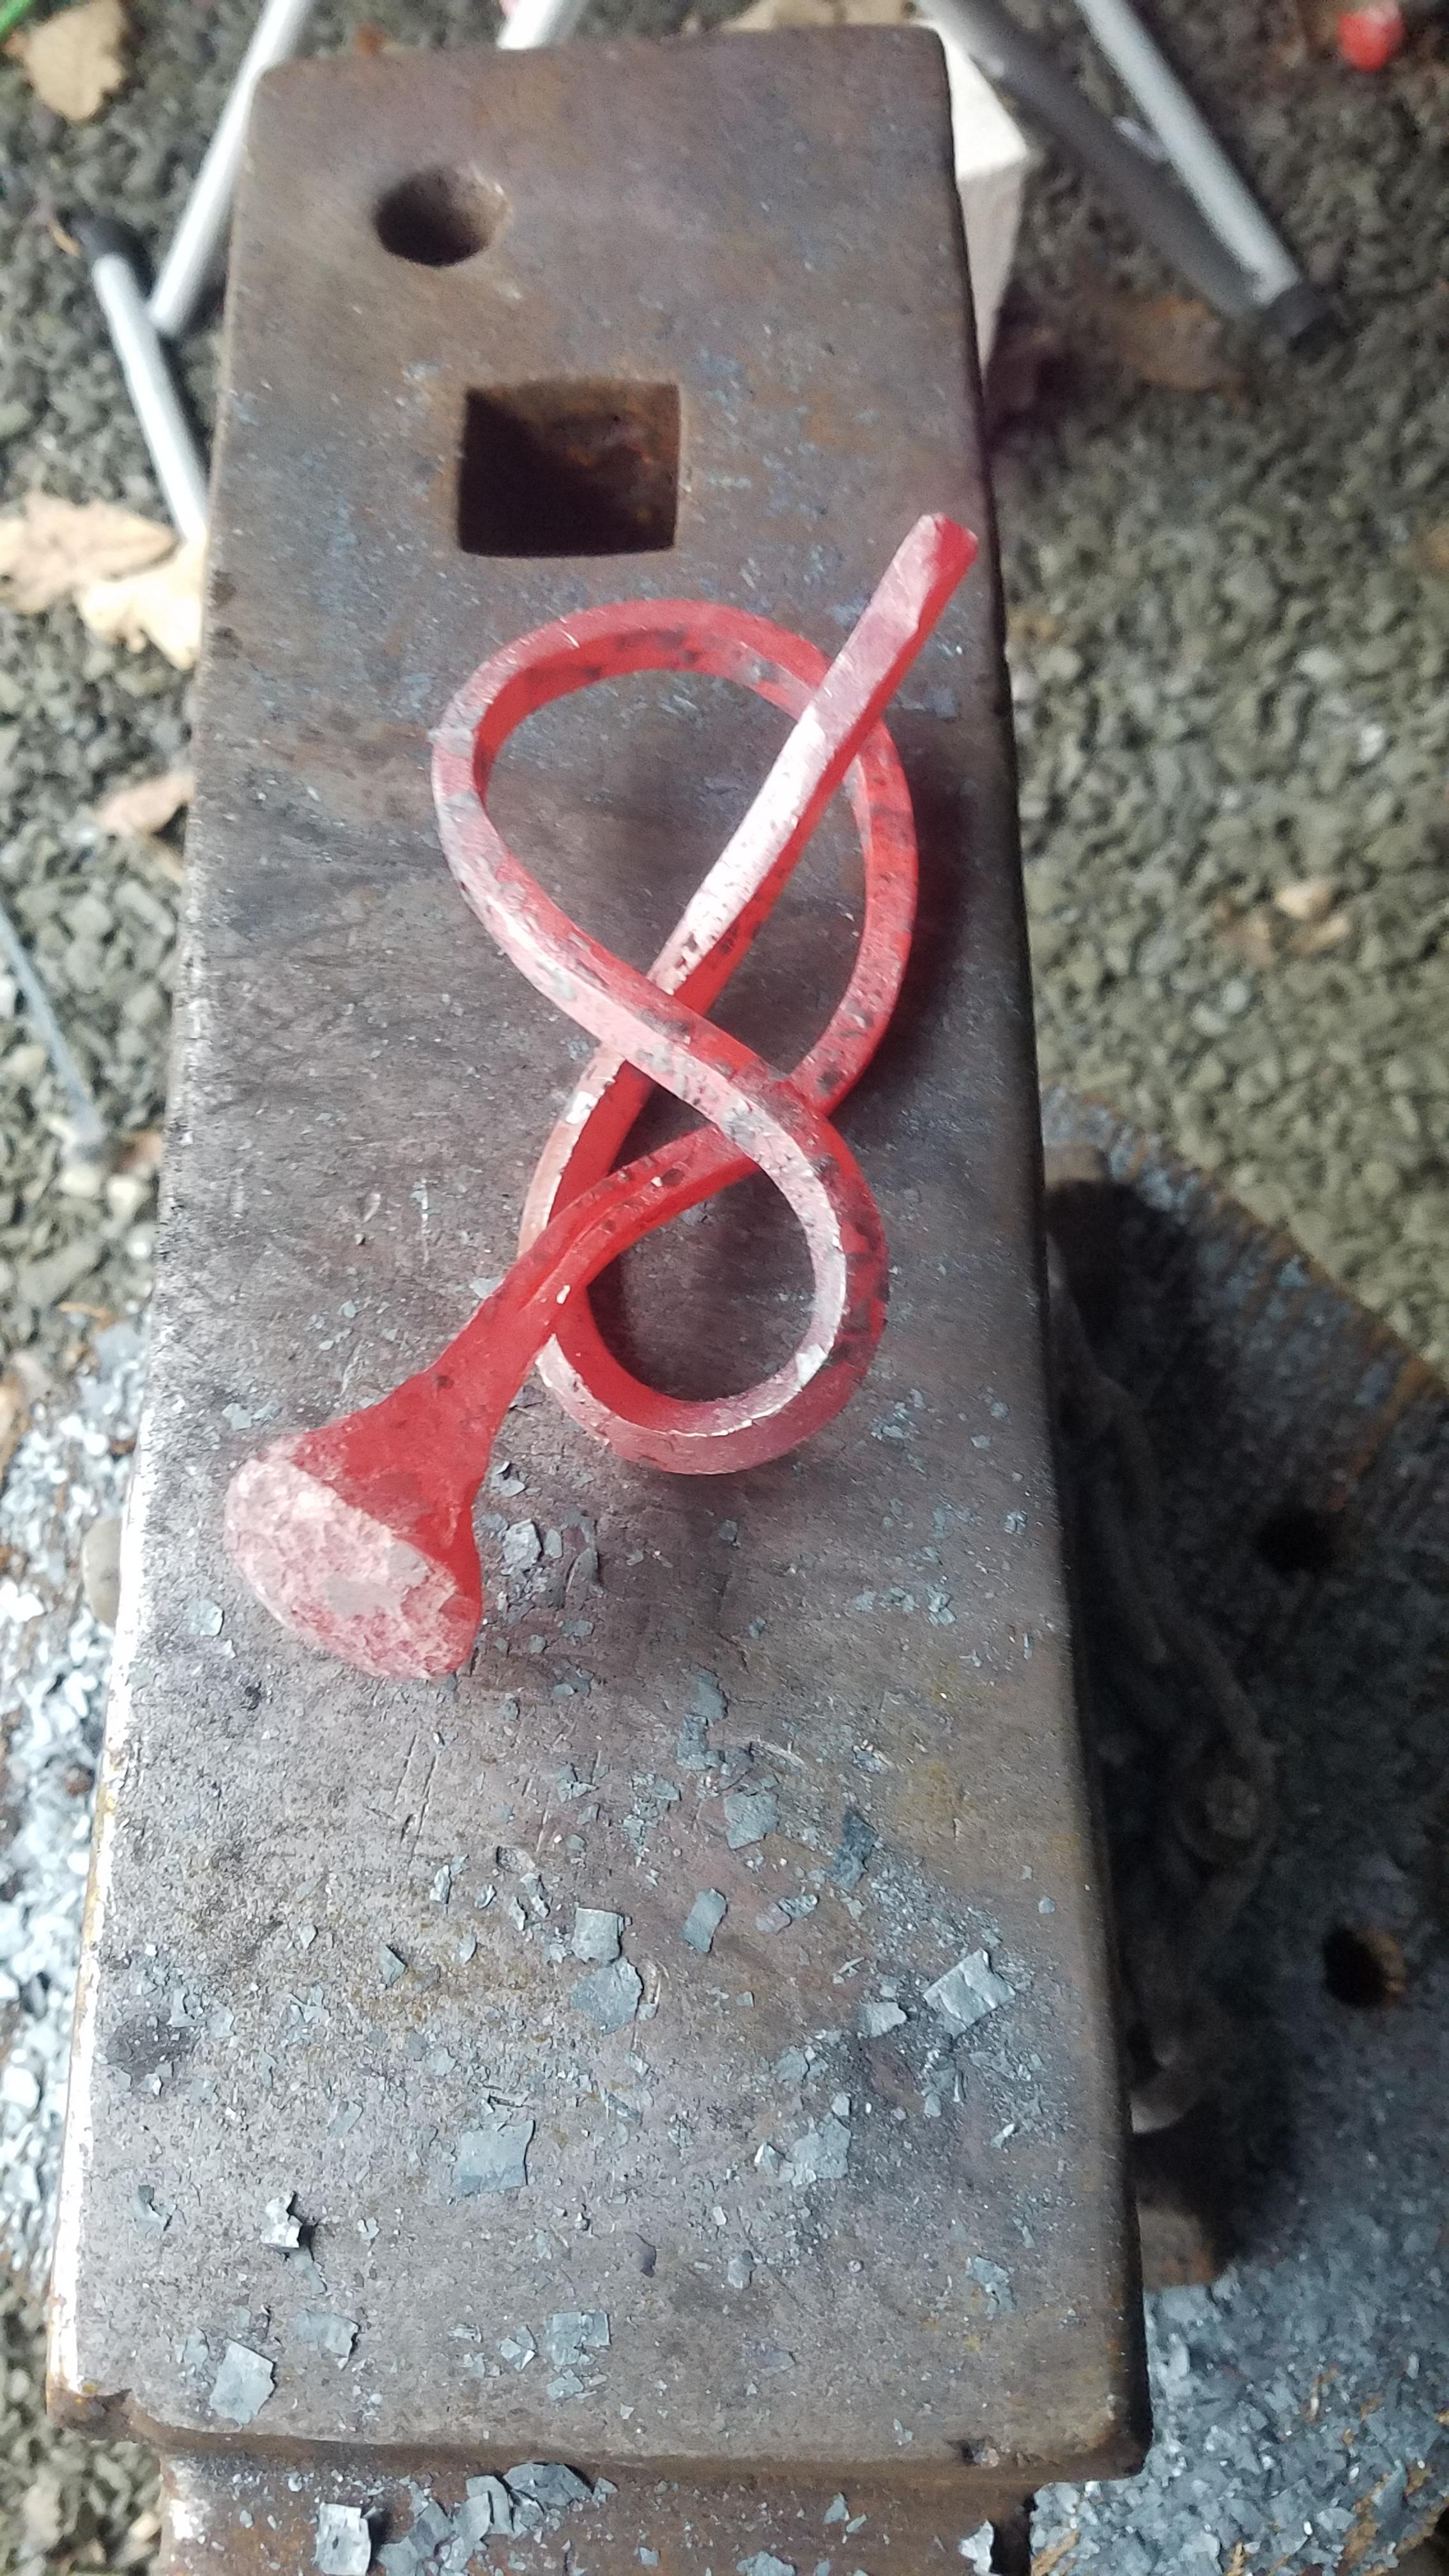
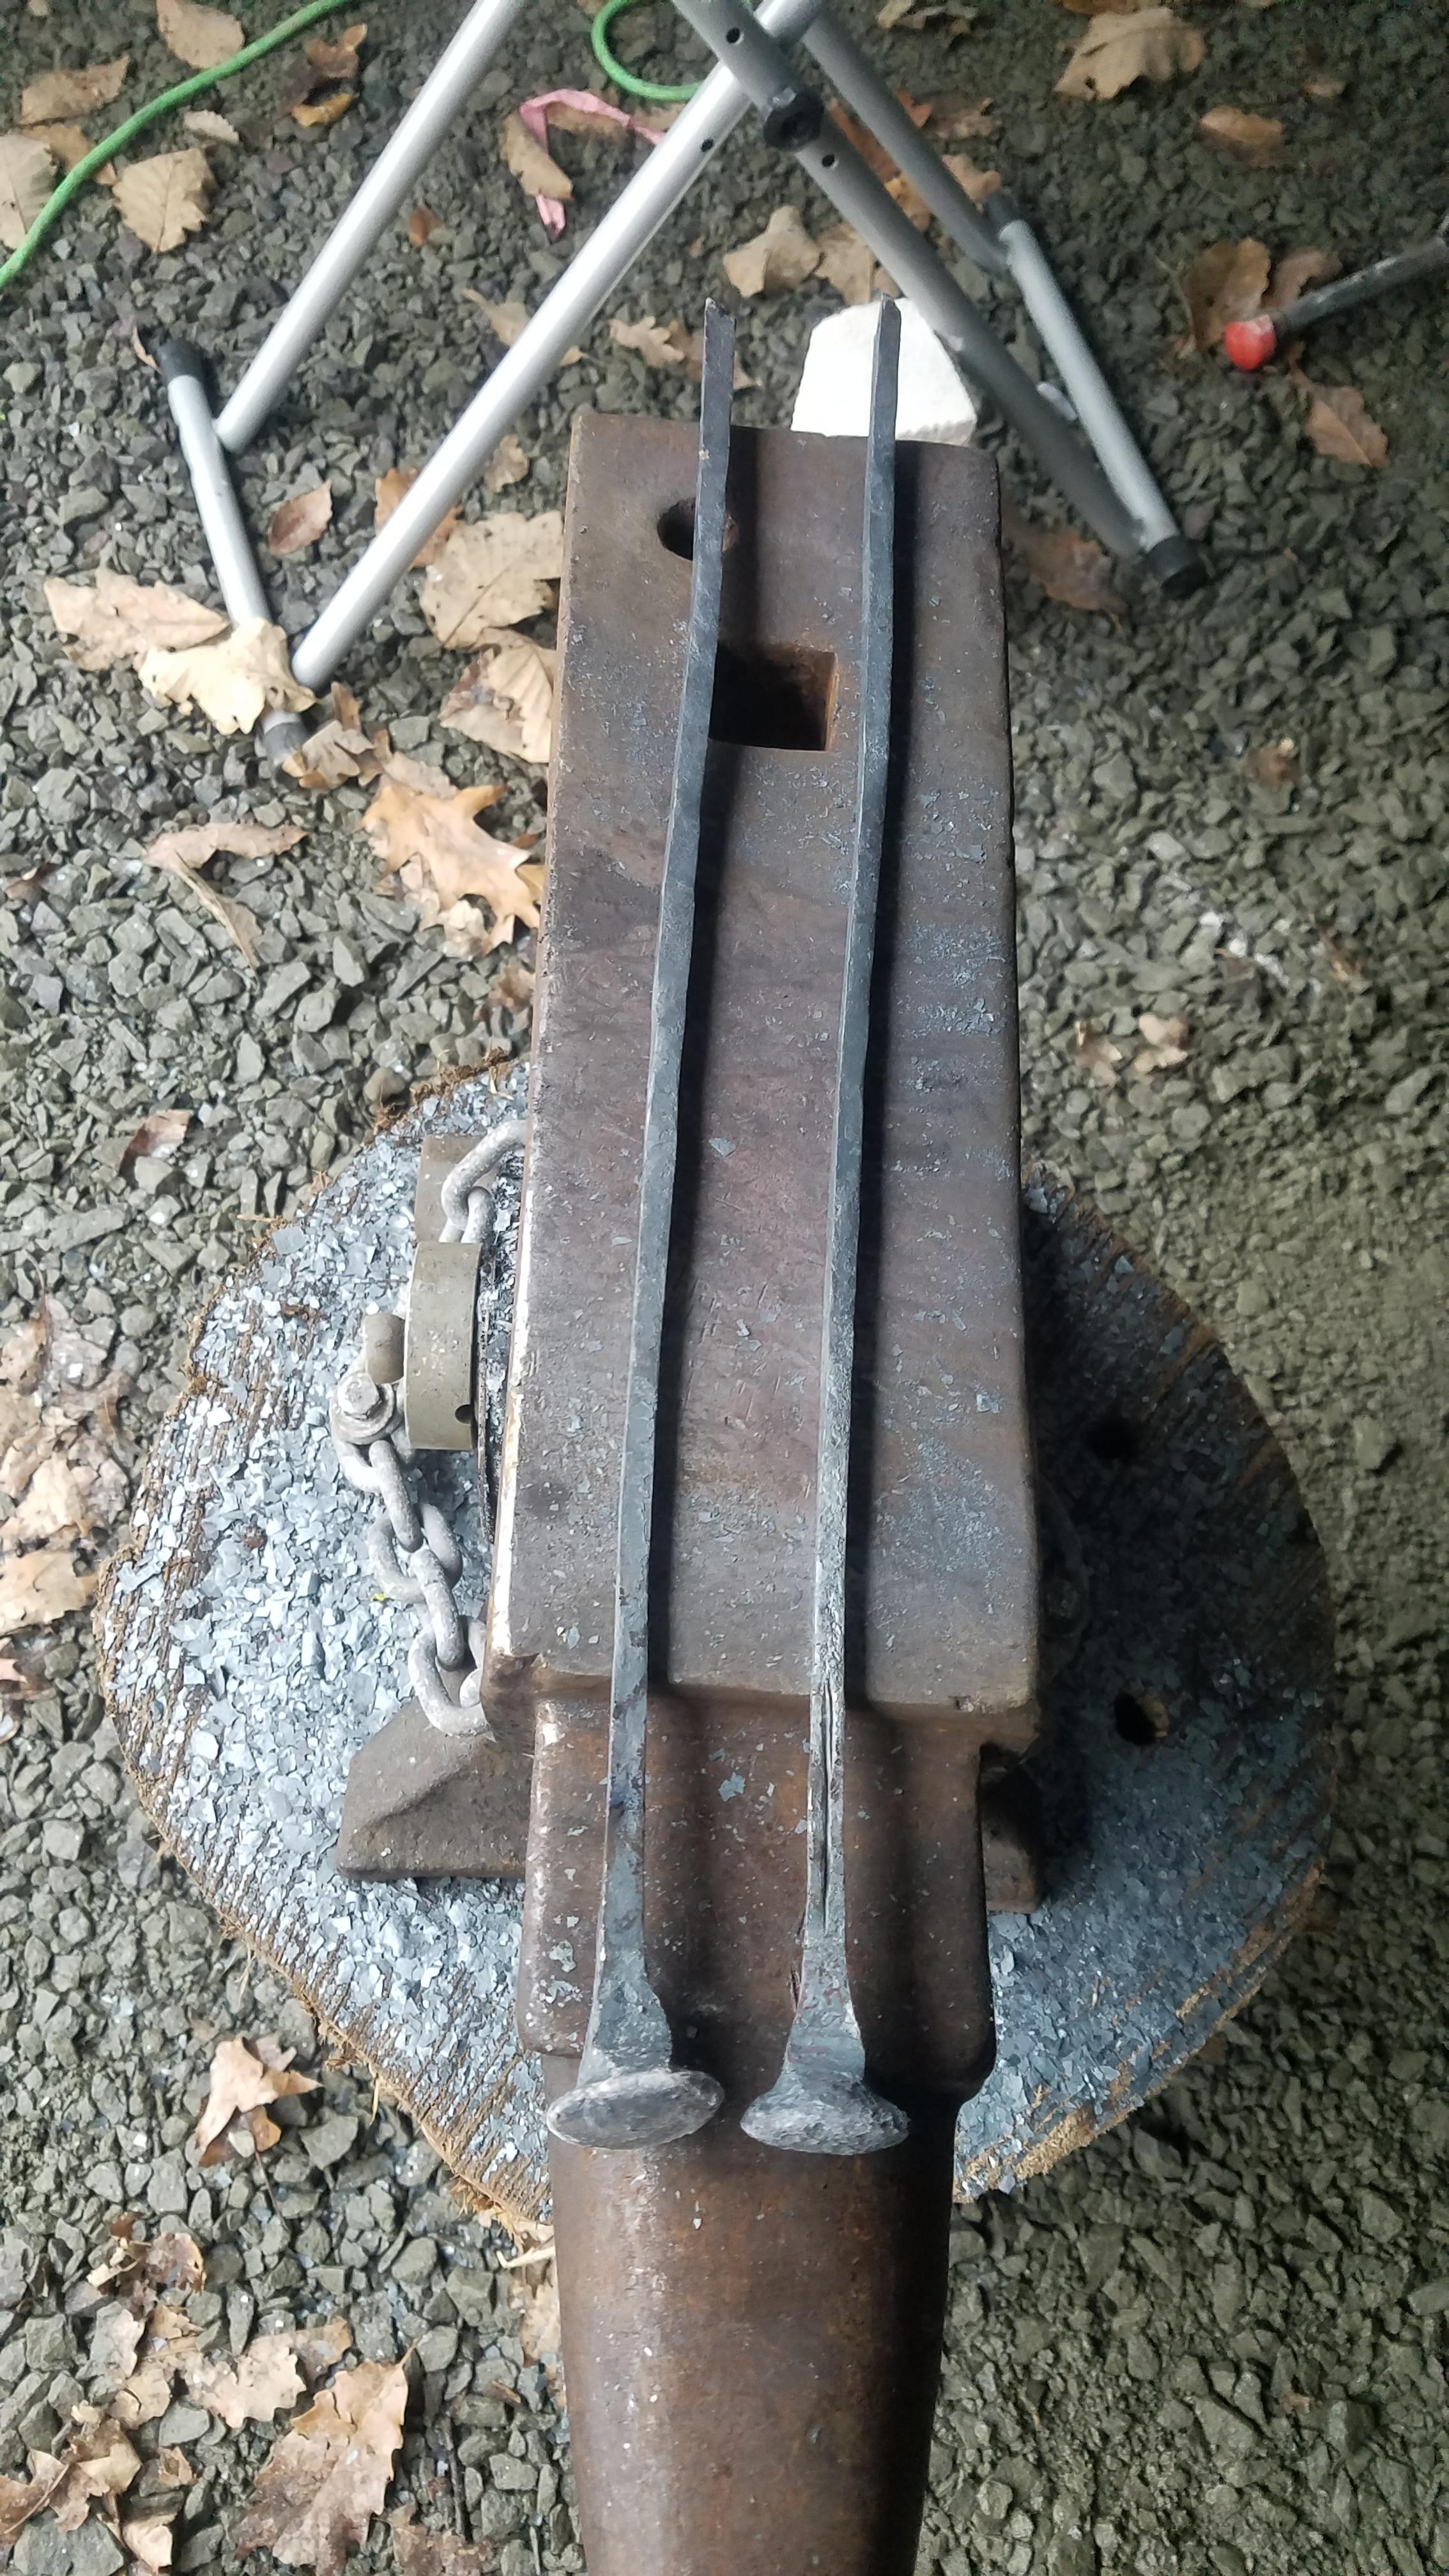
A couple of weeks ago I posted some twists and an overhand knot in a railroad spike. I was challenged to make a figure 8 knot. Challenge accepted. A figure 8 retrace. Why do something simple when you can overdo it. This was mostly work with the tongs and pliers/visegrips. That was good since I had aggravated an old tendon injury in my forearm using a heavy hammer to taper these. This was a chance to get in the shop without much hammering. I still need to dress it up a bit and tighten the coils.


-
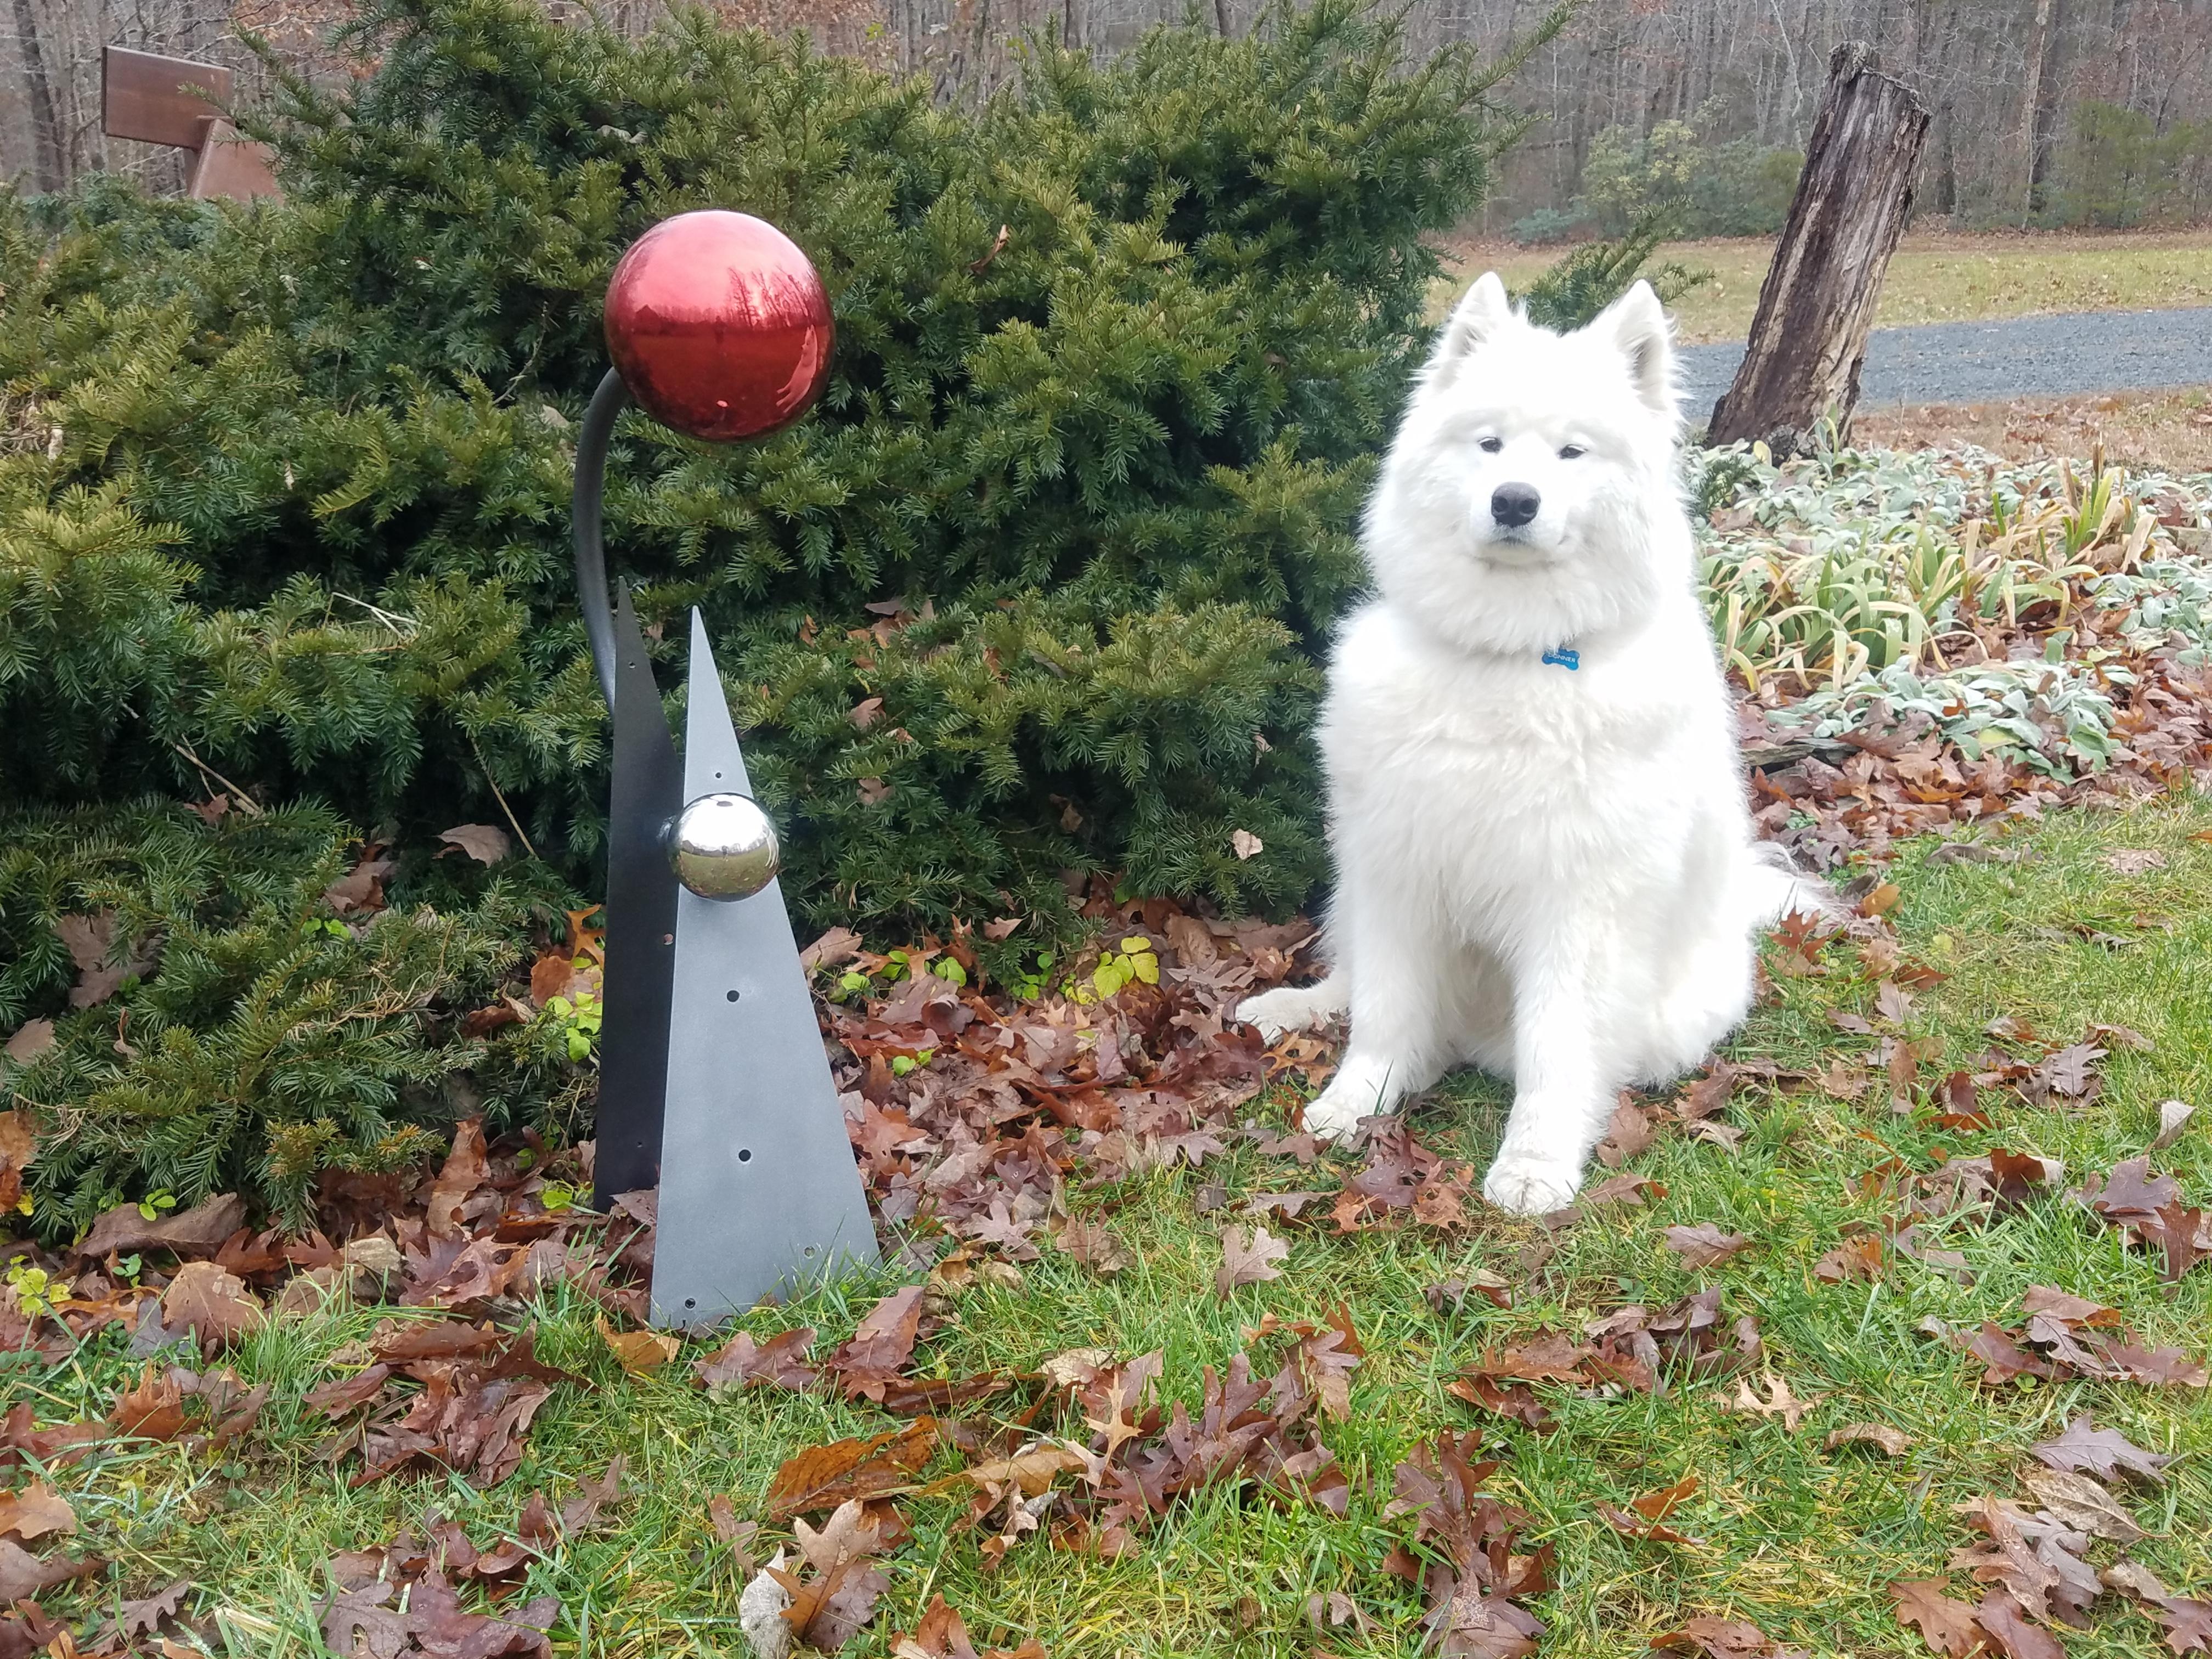
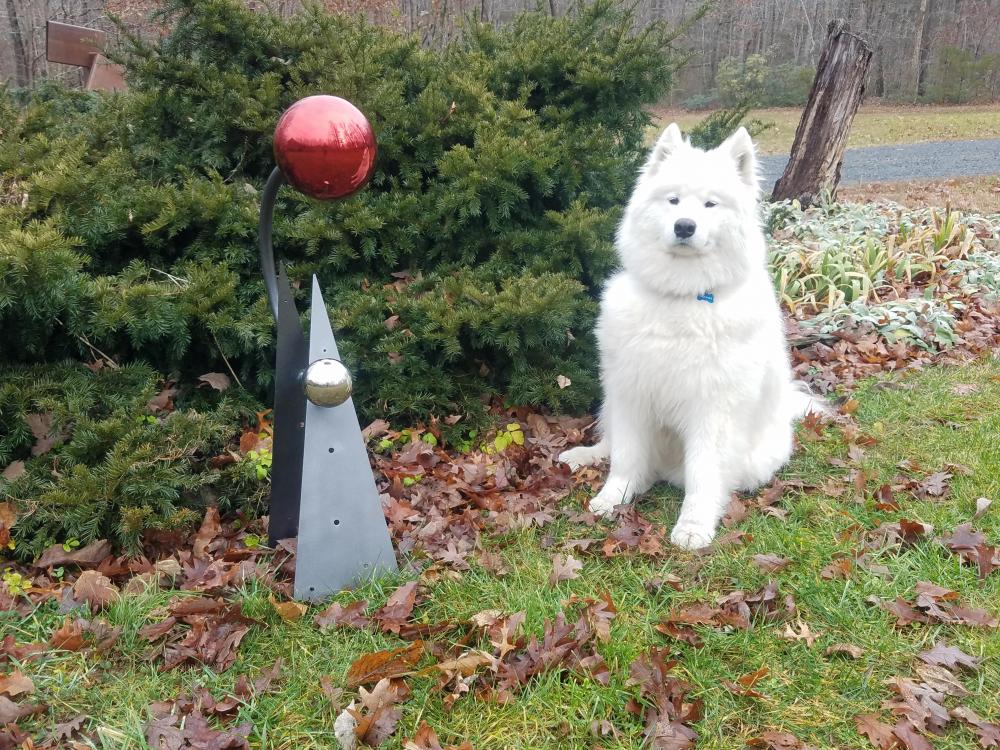
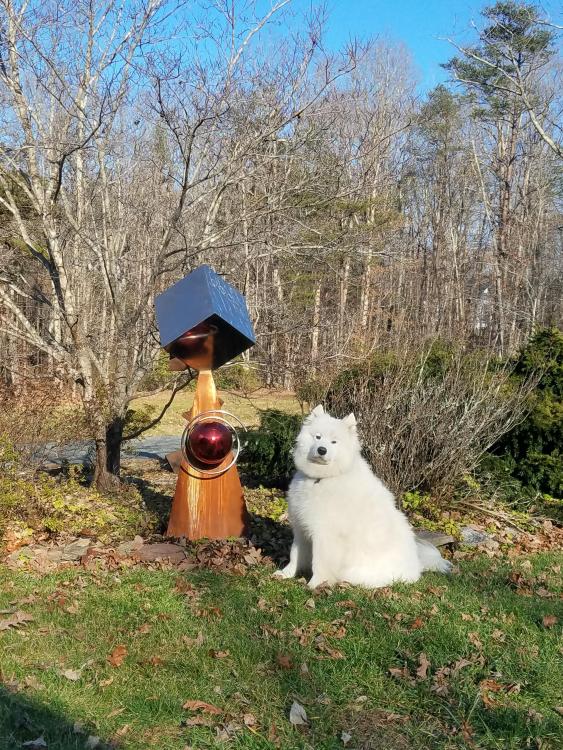
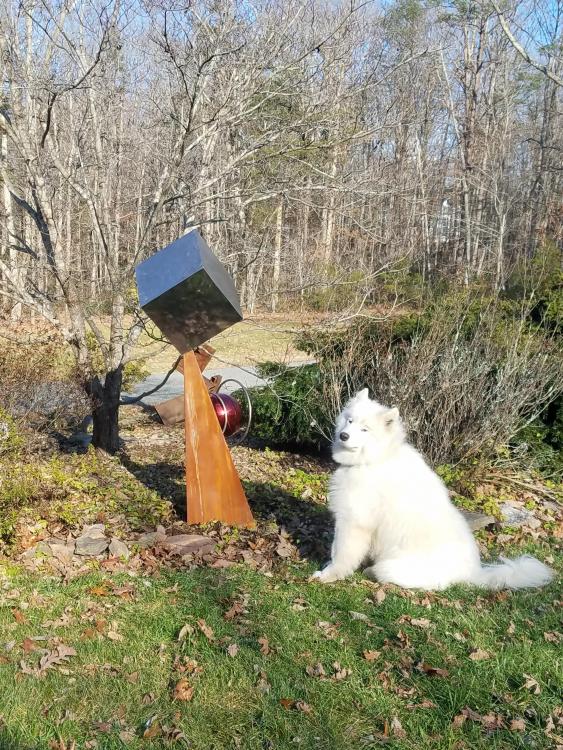
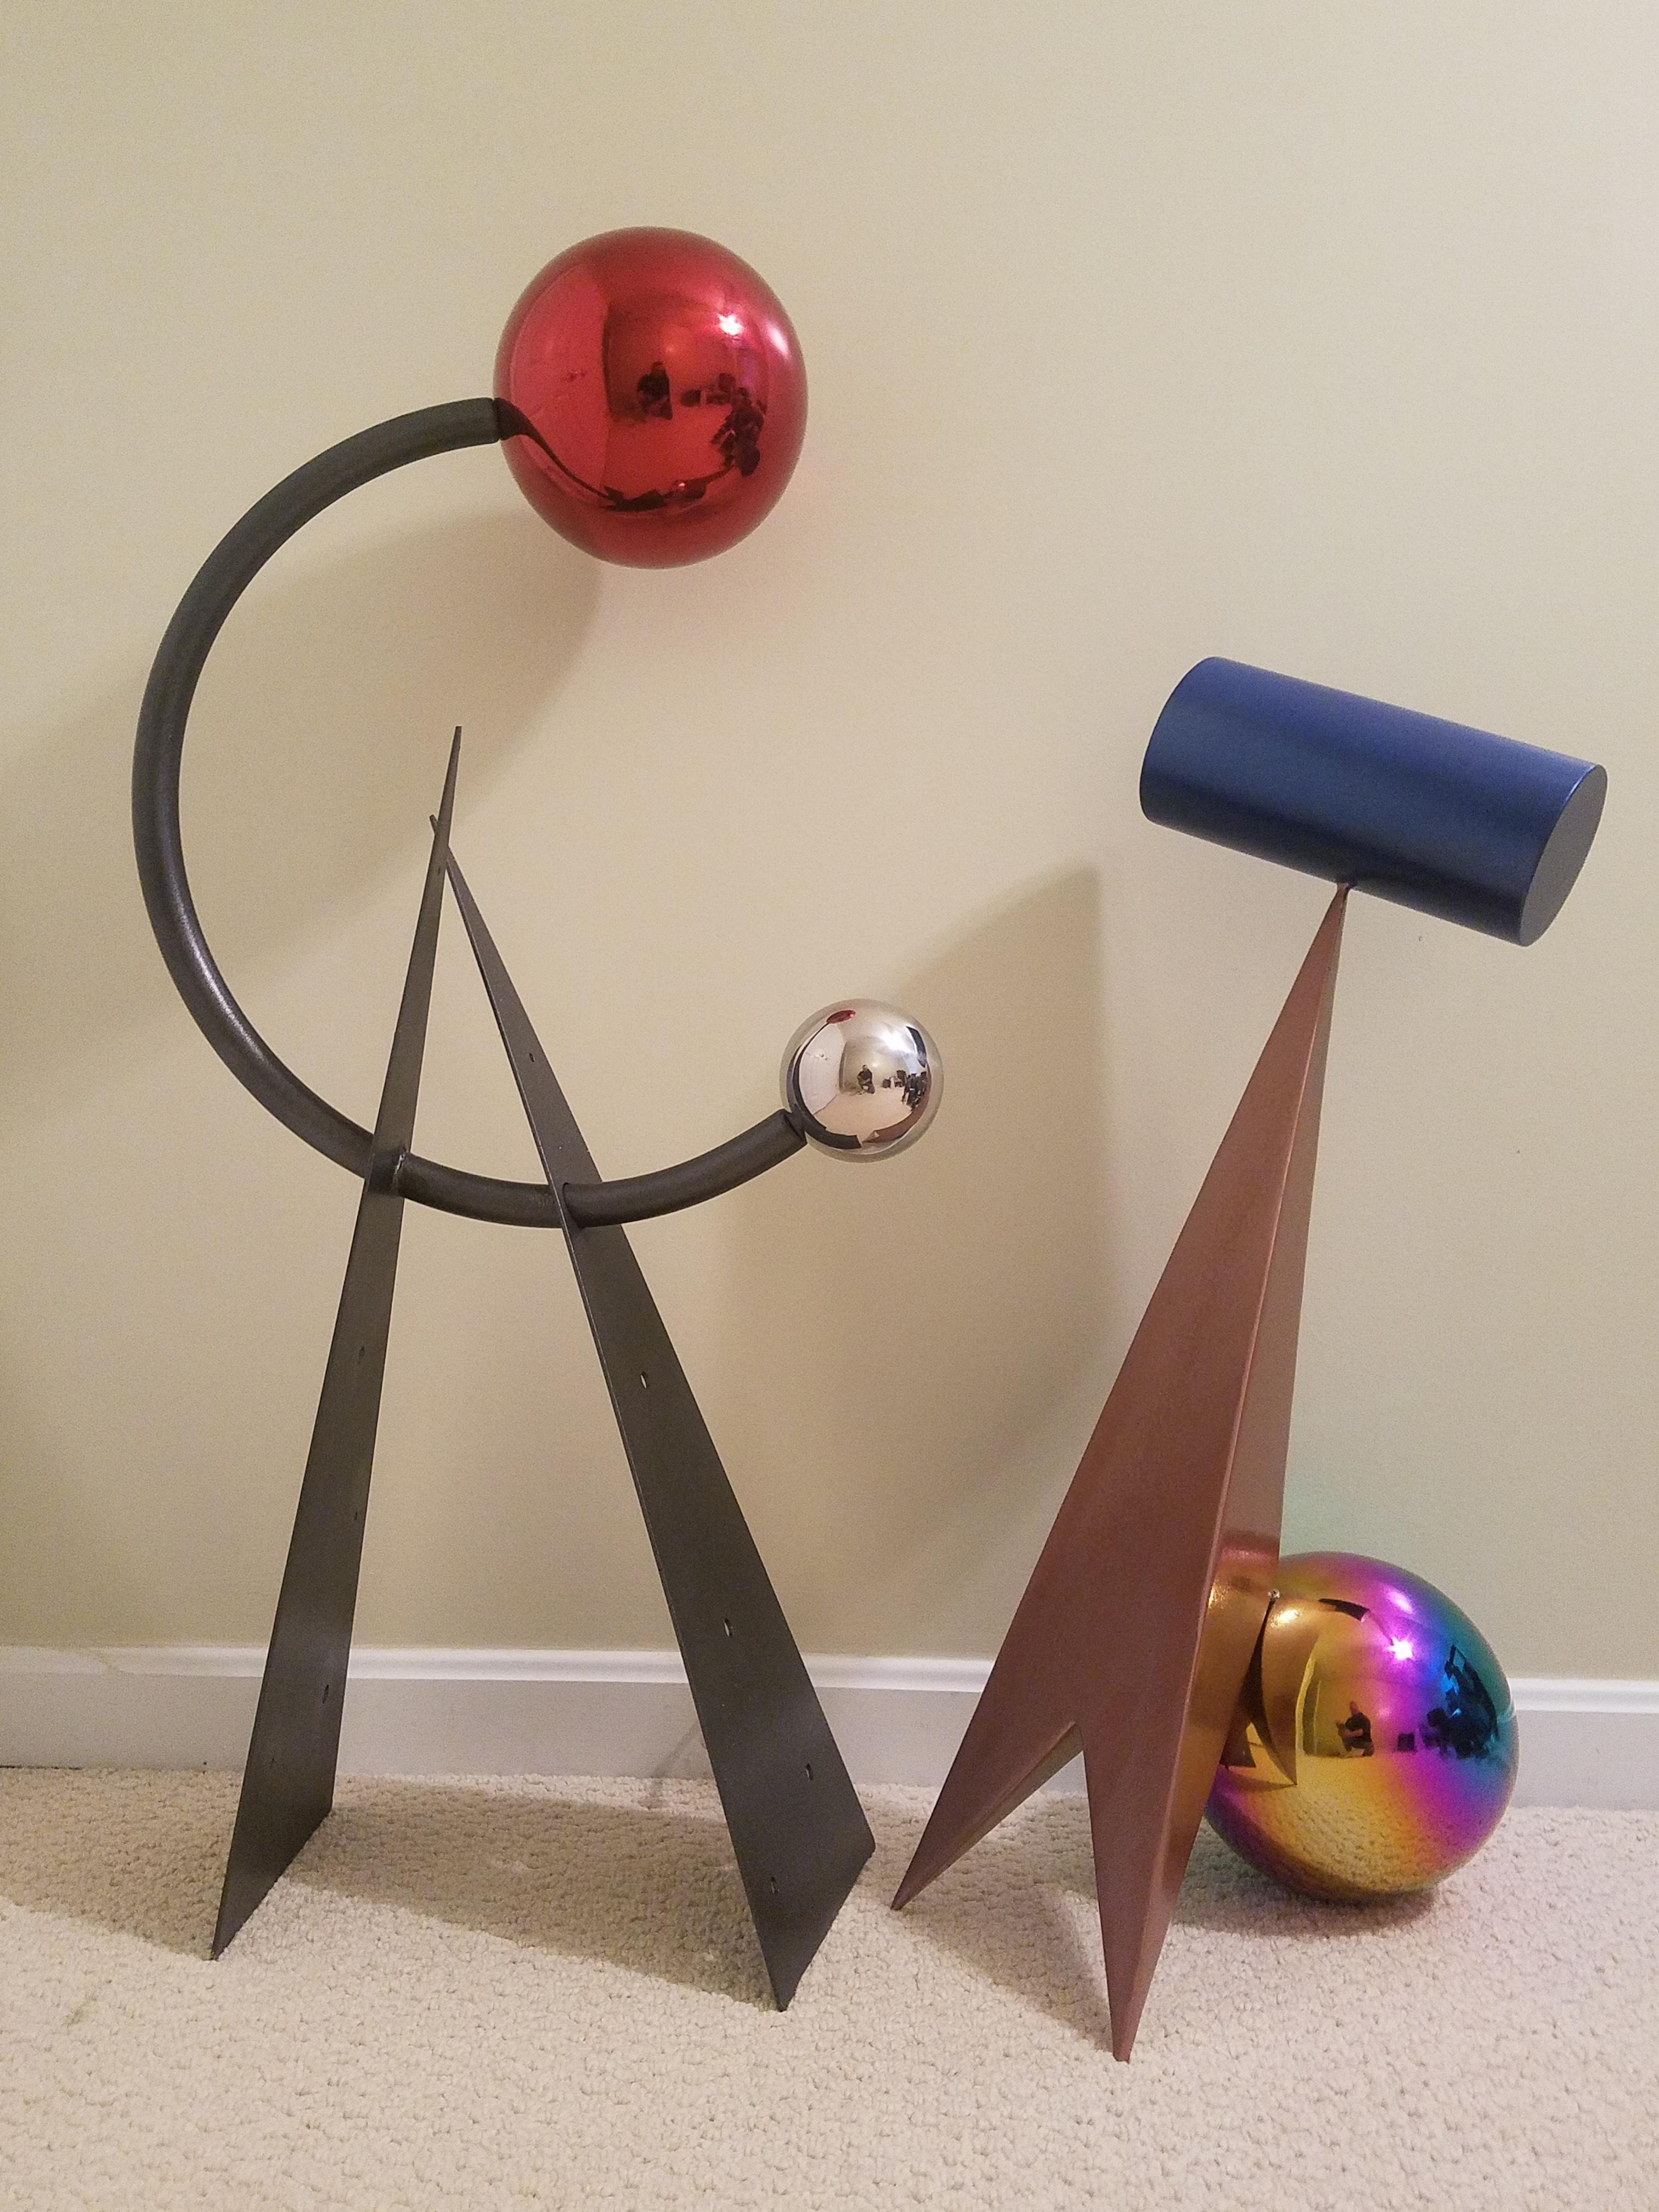
Another one complete in the triangle and sphere series plus I took advantage of the snow to try another pic of the first one.


-
Very nice Das. Sometimes an artist needs to know when to quit. Just as music has its pauses or blank spaces, art pieces sometimes require empty spaces to make them look better. There are of course times and styles when you cram as much stuff as possible into a piece so the observer can spend a lot of time noticing the details.
-
The guitar looks great Das. If you do any tig welding or have access to tig rods, you could use 1/16", 3/32", then 1/8" filler rod to simulate the different gauge wire of the strings.
-
I was on a bit of a triangle and sphere kick so made another sculpture.
.thumb.jpg.644b1b646604aff0e9acb249f78ee37b.jpg)
-
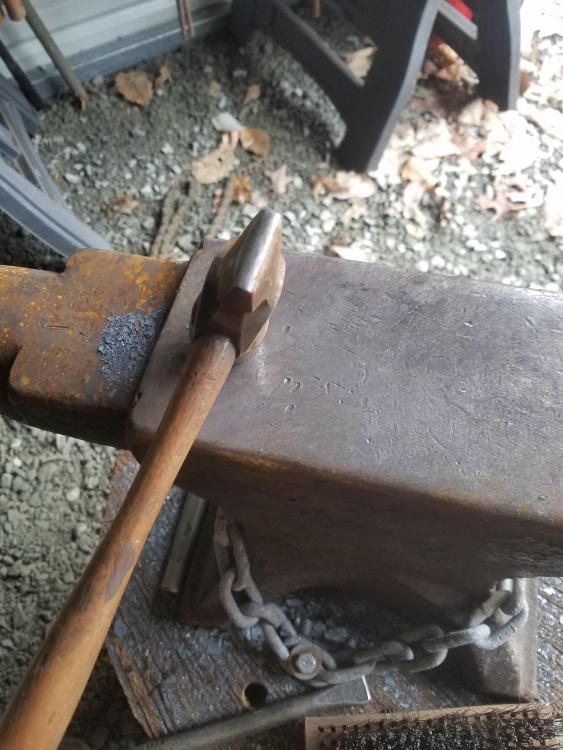
Thanks. I was using the horn and rounding hammer as well as the near and far rounded edges of the anvil yesterday. I have watched your video before and it helps to understand what to do. Now I just need my hands to do what my brain is trying to tell them to do. Like, hit the metal not the anvil, or hit in that spot not this spot, hit with the hammer straight when you want it straight and angled when you want it angled. Not angled when you want it straight and vice-versa.
-
Thanks JLP
-
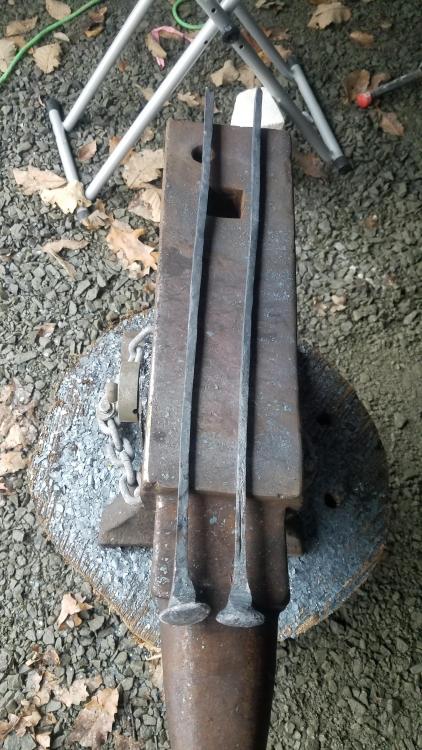
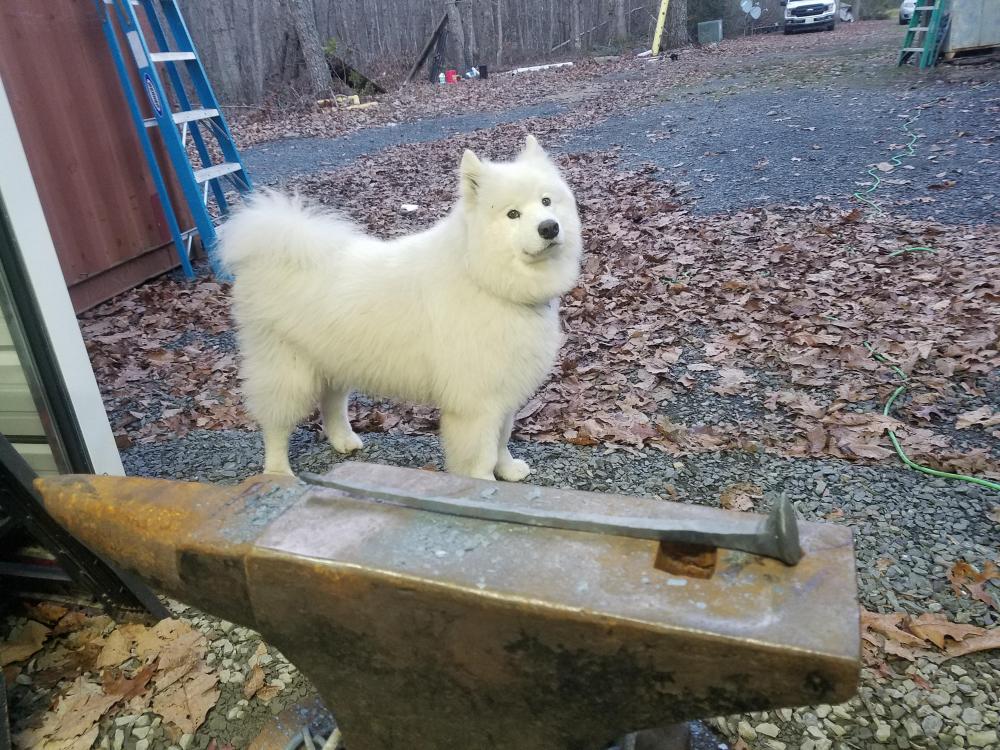
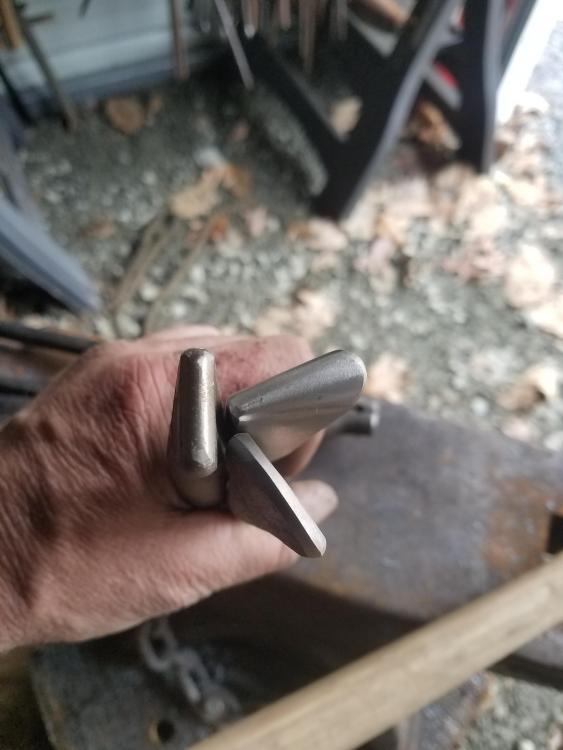
These were over the last day or two. No particular goal in mind except to enjoy myself. Taking a couple of twists made from round and square bar then making my first basket twists. Then just practice drawing out a taper and trying different twists and a knot. Most everything was going pretty well until near the end of the knot. I guess I was flipping it around too much and it broke at a cube twist. I am also practicing drawing out tapers on round bar and making leaves so I can make some curtain rod holders. They are still ugly so not much point in posting them. Suggestions for improvement are always welcome.


-
Thanks. My little buddy always a good model. When I first drew it out I was going to use gloss black. In that design, the coil was going in a different direction. Once I made it this way, trying to mask all those parts off and prime and paint around changed my mind. Edit: Plus it is a high of 44 degrees or so now, I dont have an indoor paint area, and painting is not my favorite hobby.
-
I decided to acid wash the mild steel and let the pyramid rust. I still need to polish it again, but I like it so far.
-
Thanks for the tip JHCC. I will give that a shot. I have plenty of wood to make a dishing bowl. Another project added to the list to make.
-
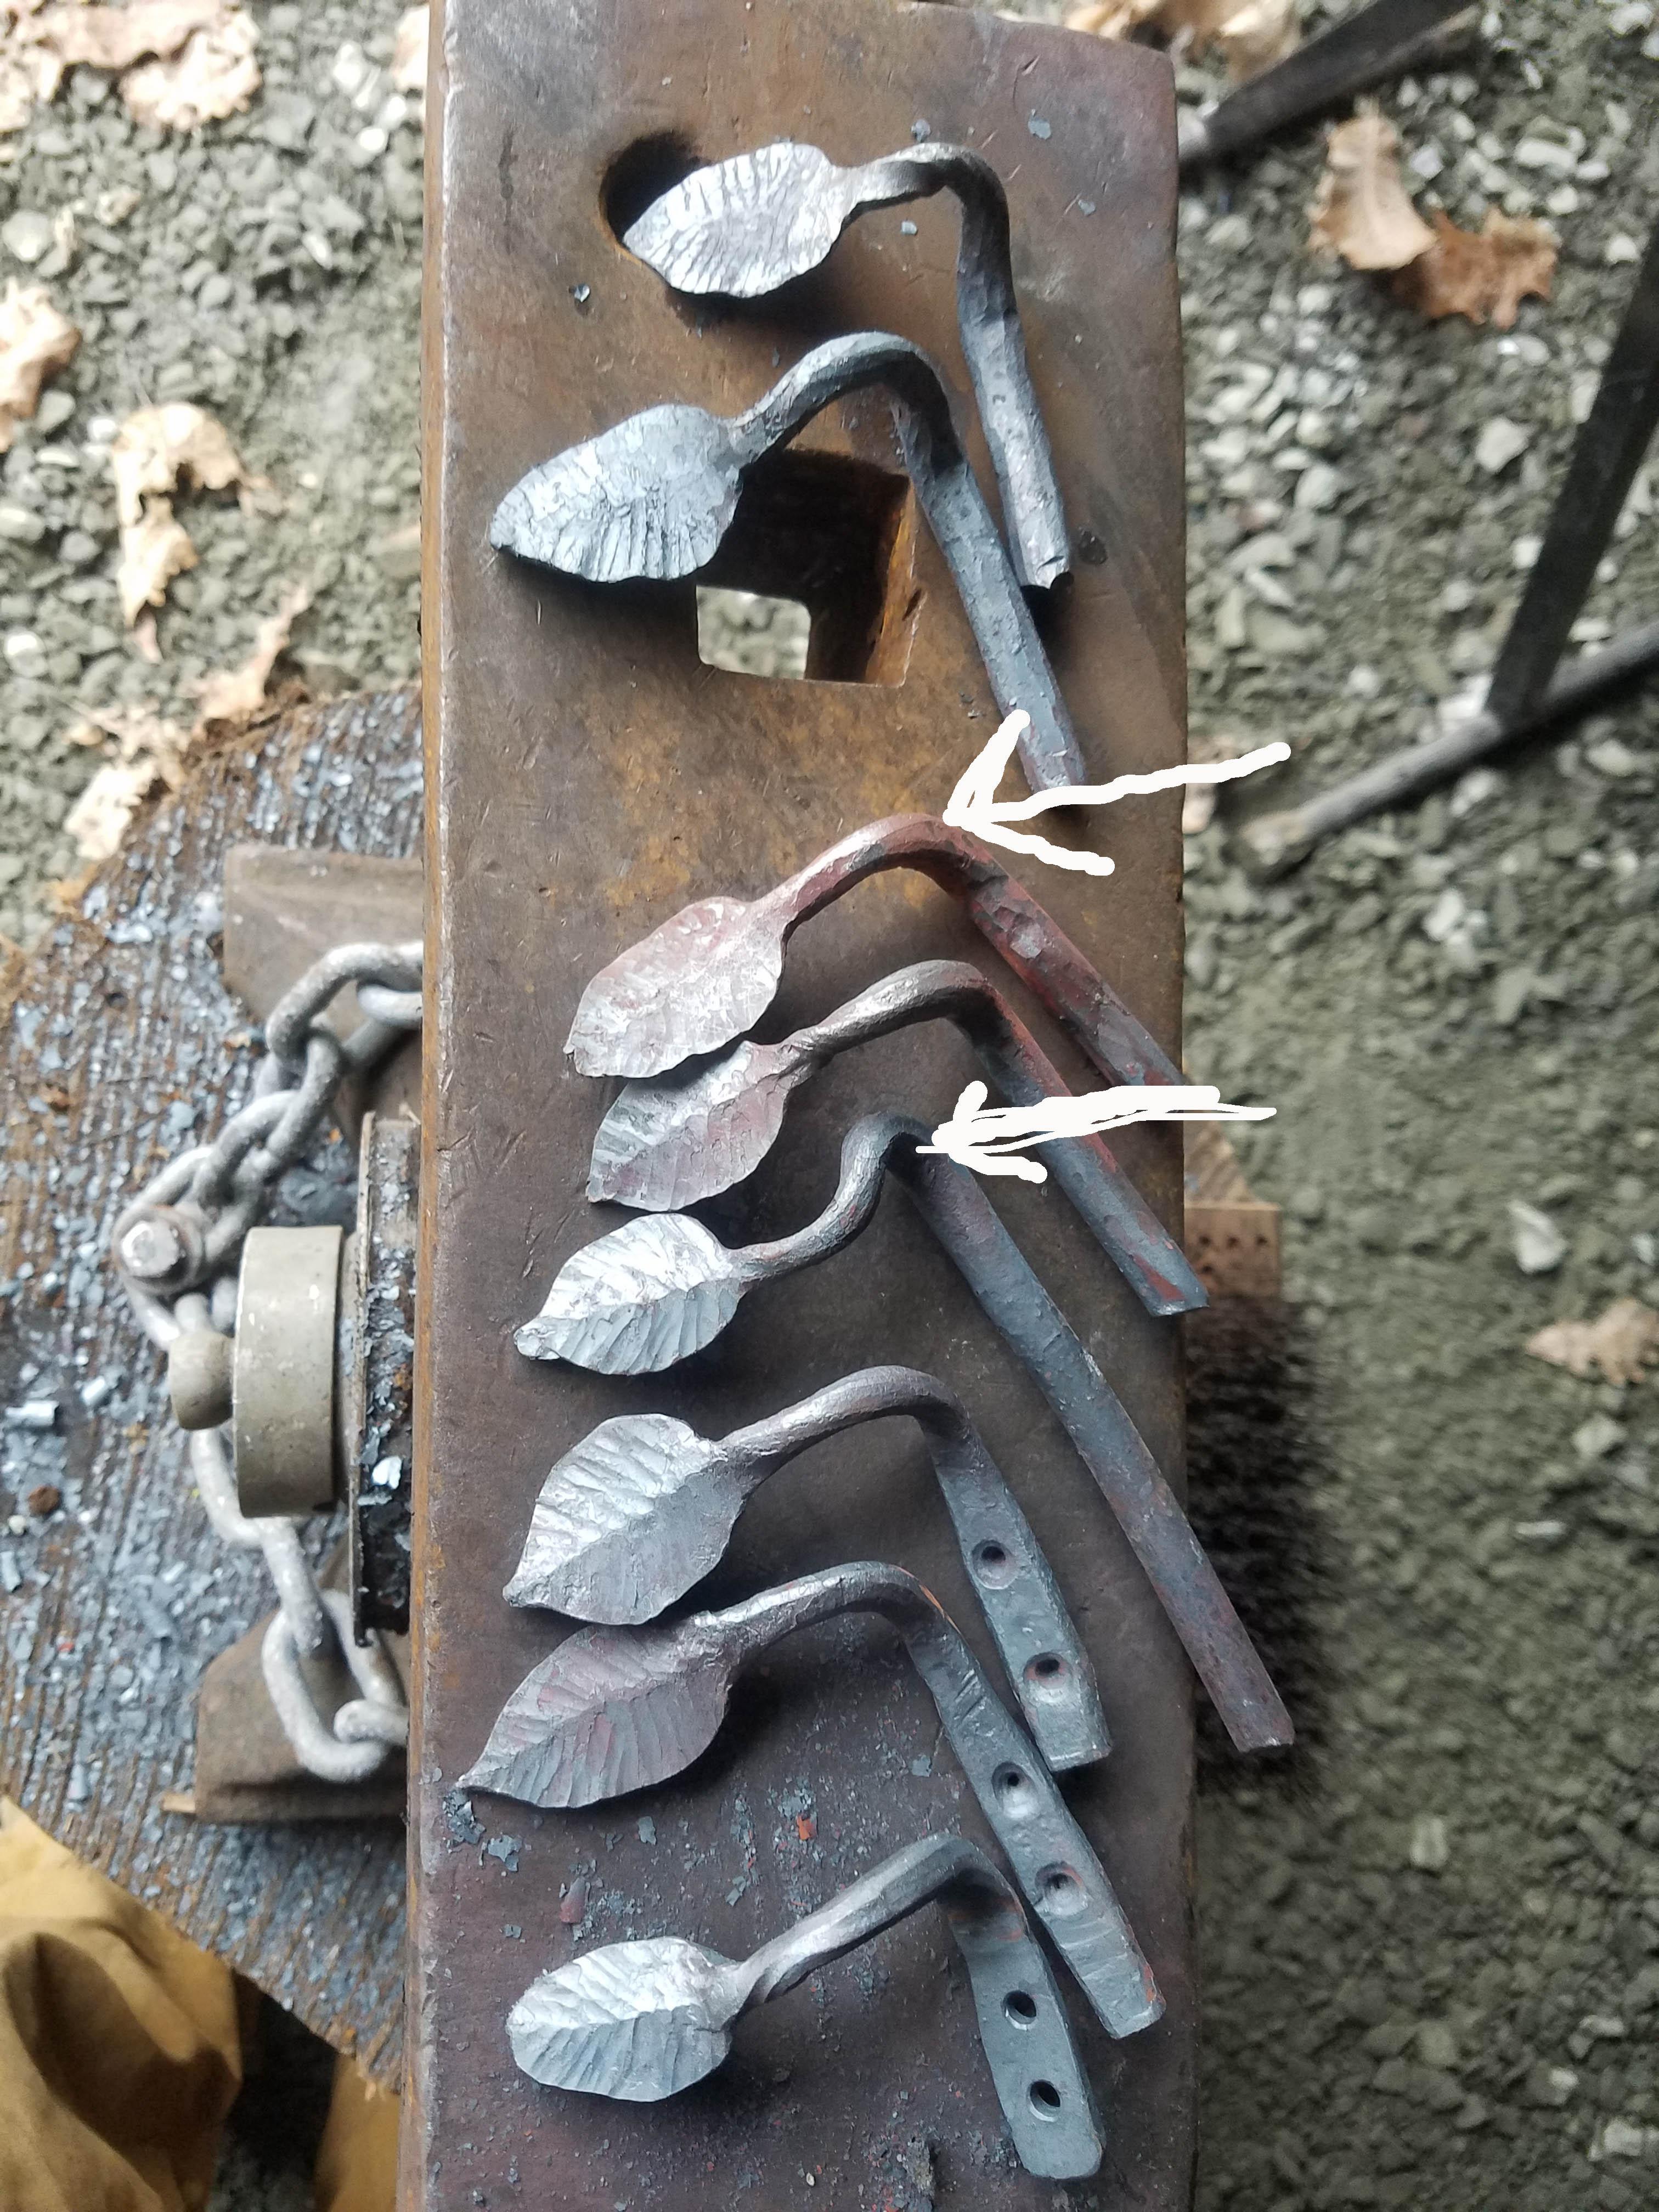
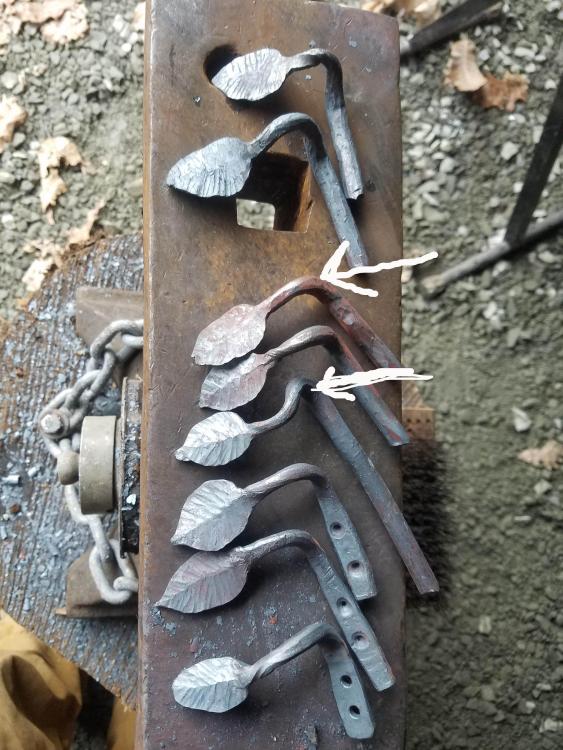
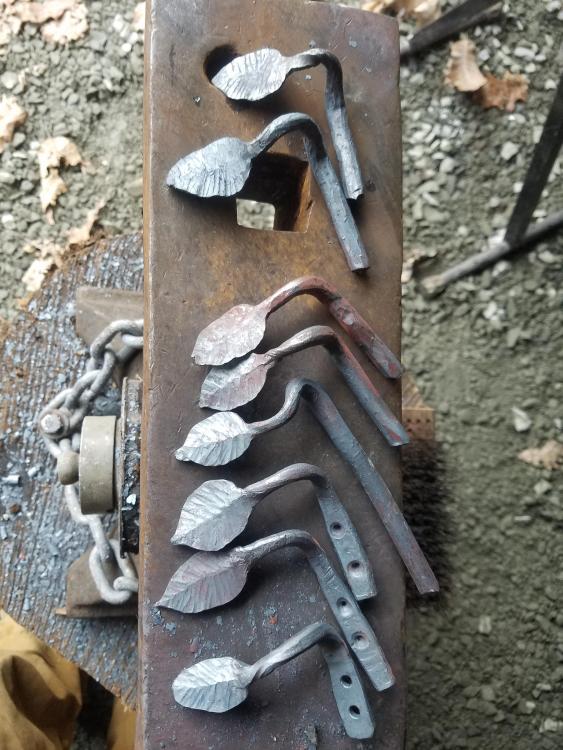
In regards to these curtain rod holders. I have some pics of the process but am still not happy with how they turn out. I would like them to be attached to the wall, come out about one inch them dip down into a slight "U" for the rod to rest in. This will keep the rod off the wall/window/molding, etc. After that, they can turn up into the leaf. I have not been able to figure out how or when to make the "U" the rod rest upon. The last pic with the arrow is where I want the holder to dip down so the rod rests upon it. Suggestions on when/how to do that?
-
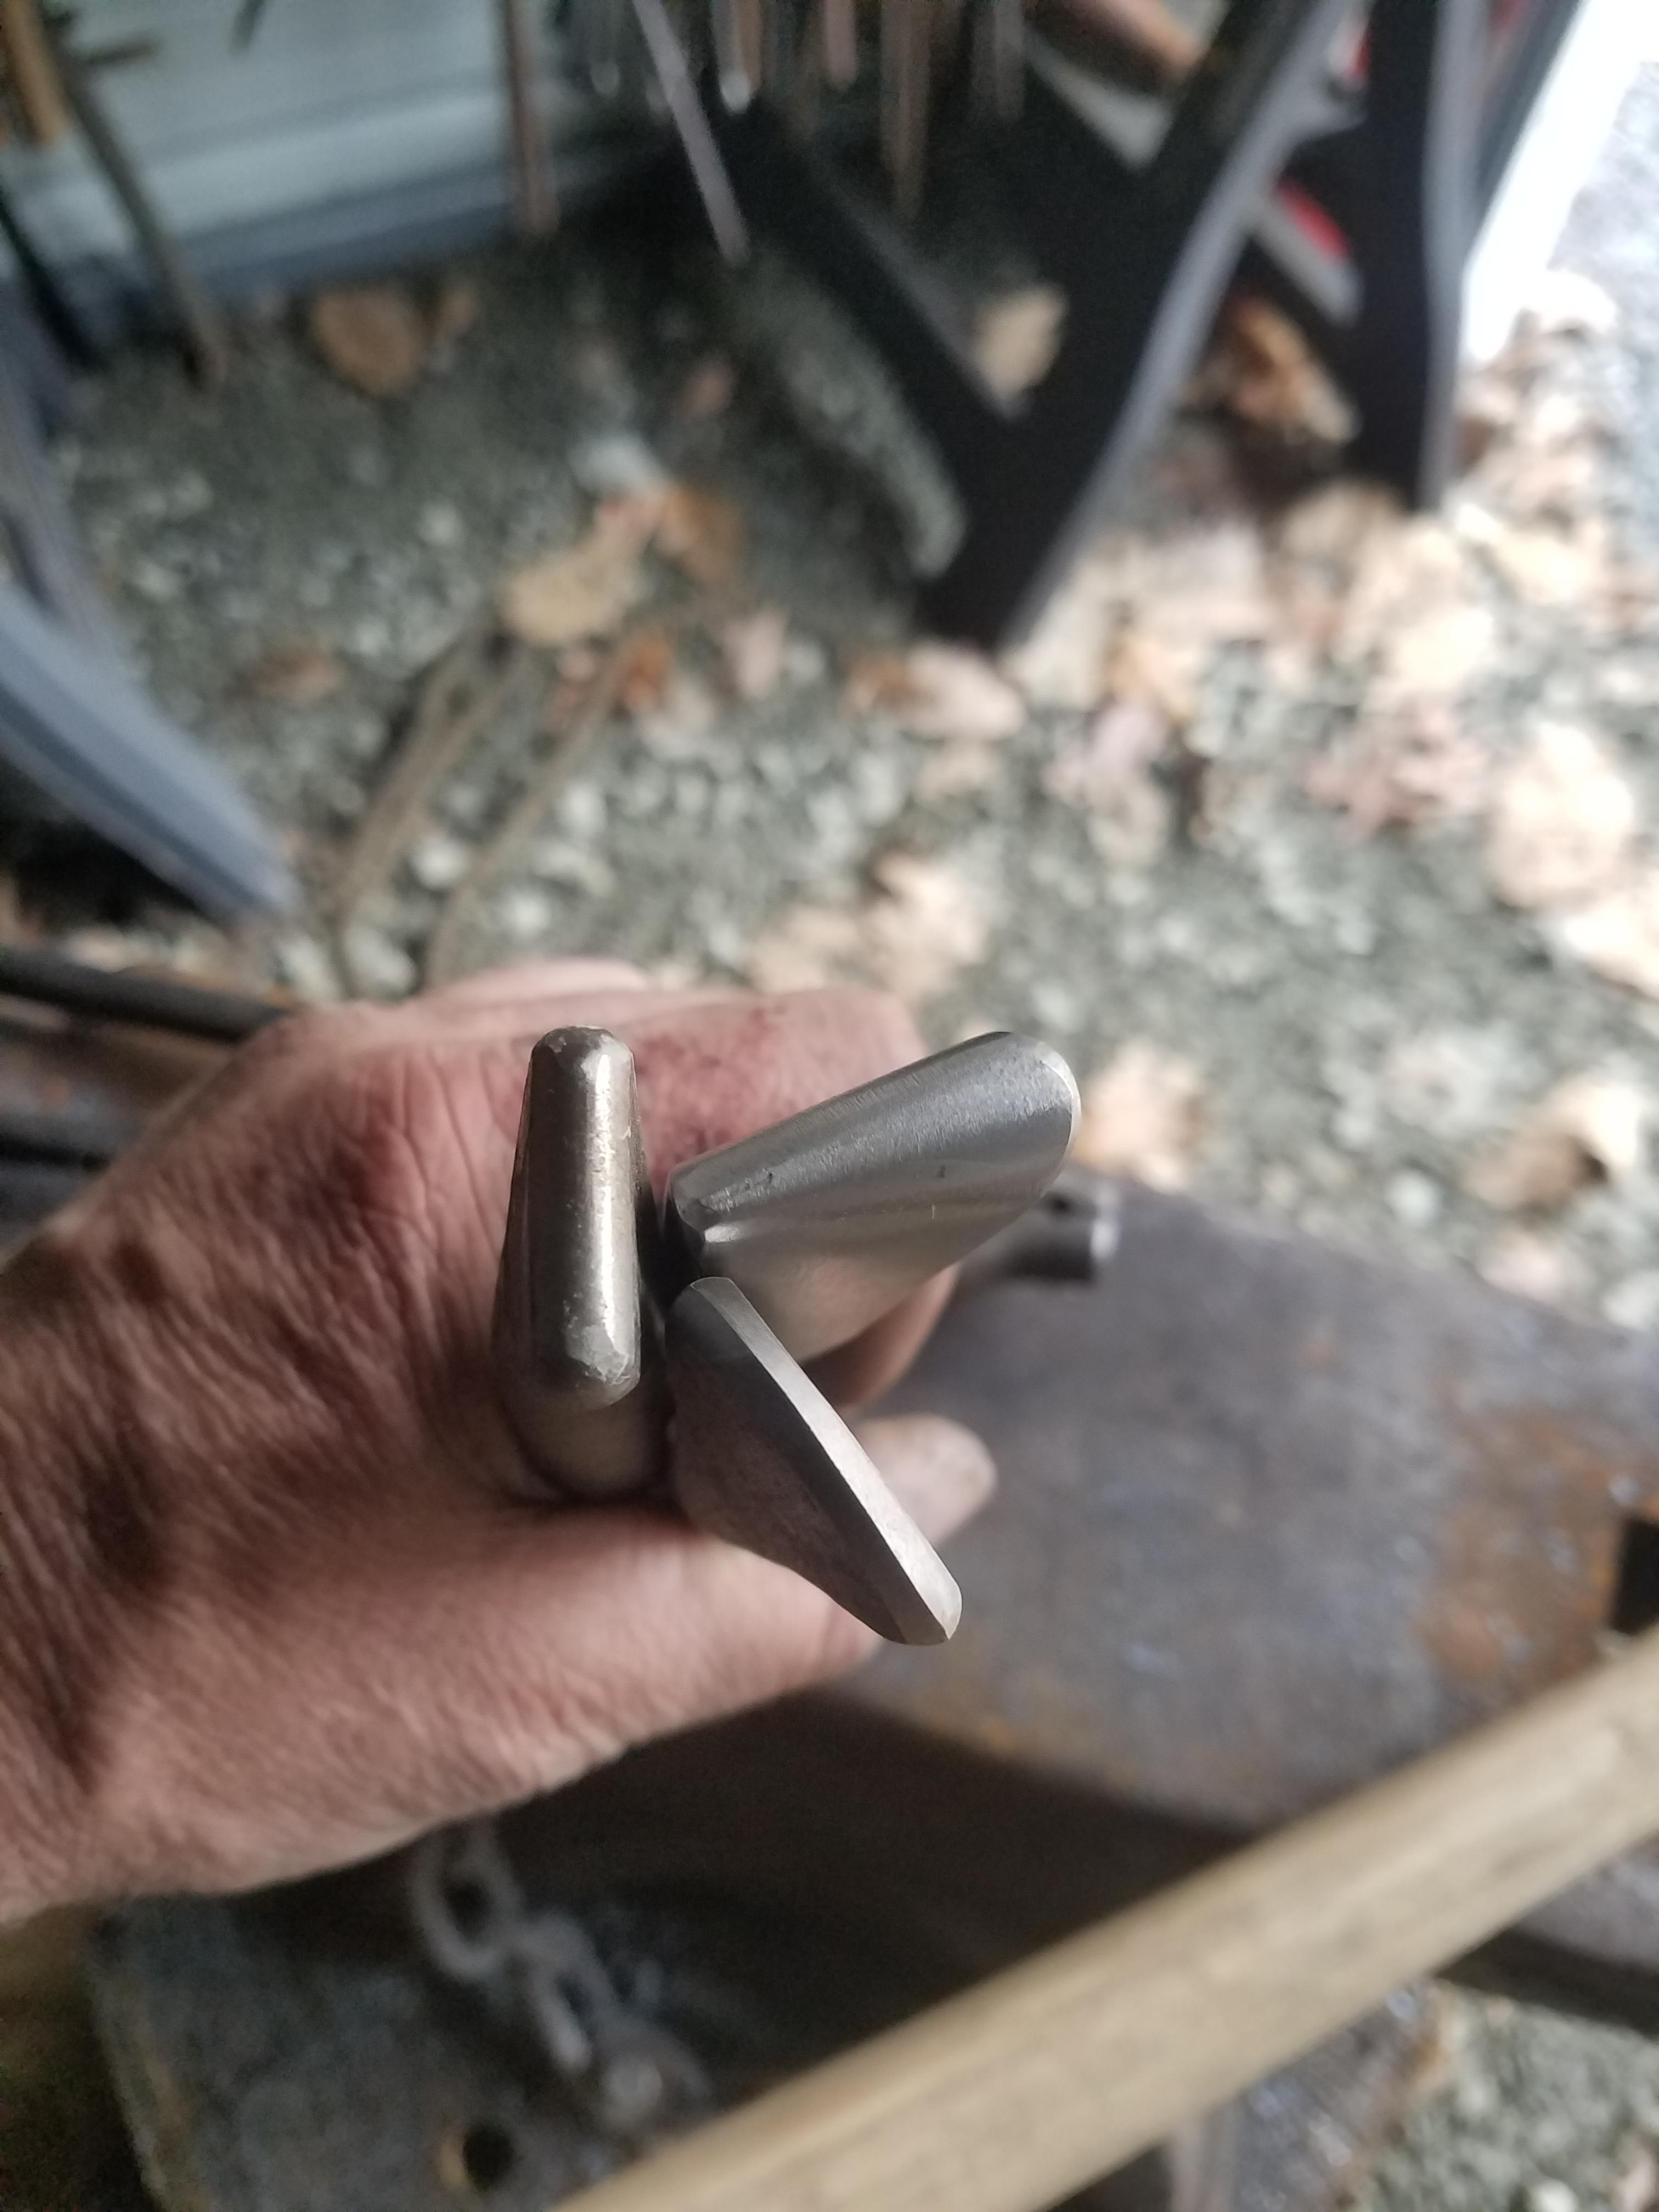
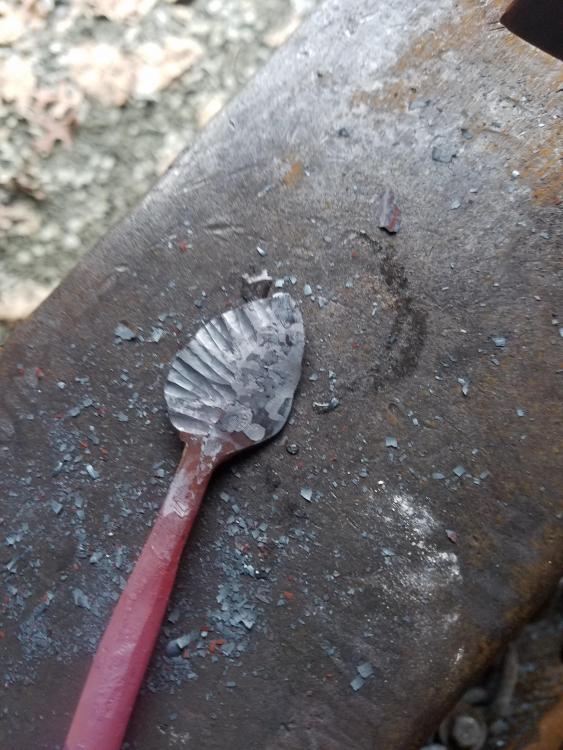
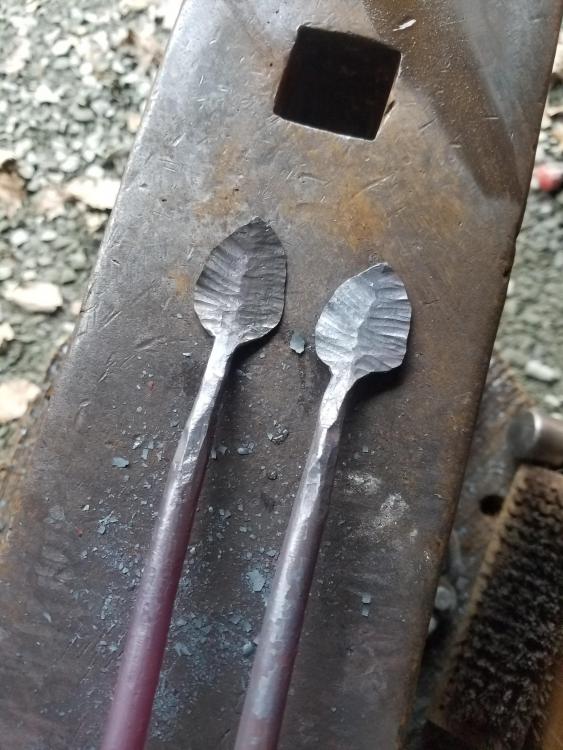
I decided to try to texture the leaves from my previous post. I also made two more to keep practicing. I have several chisels and punches which could have been used. I gave it a shot with them but kept dropping the leaf after each strike. Since these previous leave were already bent into a shape that did not help me being able to hold them while striking. I then went to the straight peen hammer. I am not a fan of the straight lines from chisels on some leaves that I seem to see from a lot of beginners, but I still suck at making them so that may be part of it. As usual, comments or suggestions for improvement are encouraged.


.jpg.48f5fb994a05ecab73e549f83f27abe7.jpg)