Adodero
Members
-
Joined
-
Last visited
-
No, I found it was fairly quick. Not shockingly fast, but not shockingly slow either, on average with the other forges I've used.
-
I have a Chile Habanero I've been using for a while now, so I can't really speak to the long term use of the forge. During the time I used it, I thought it held up great and I still recommend it to folks asking about their first forge. I kept it as something more portable and as a backup in case I have an issue with the Chile or my HT oven. I'm sure Atlas can speak better to it, but I am not sure I'd block the back of it off. I don't think it would do much to help it get any hotter or reduce scaling at all, it might also cause issues with a backdraft into the forge. If you watch the way the flame spirals through the forge, I would imagine it could cause some issues, I also could be totally mistaken. In either case, I do not think it is necessary.
-
Be careful doing this. There is nothing protecting the stuffing box and the ring that retains it from the ram slamming into it if the dies are too short, it could rip it out. I wouldn't go modifying them to be shorter without being certain of how much space is between the top of the ram and the stuffing box with the ram at full extension, and accounting for a fair margin.
-
I experimented with this a bit and may be able to help a little. For starters, the blower needs to be on higher than you think it does. At 20psi it was near full speed for me to keep it lit and from sputtering. There is a range of each gas pressure setting you can use, but the full scope of the blowers adjustment range isn't available at every pressure setting. At 20psi, you should be near full speed with it, but I wouldn't light it that way. I'd try setting the blower maybe a little over half speed, then slowly turning on the gas while lighting it. Initially it'll sputter a bit, but if you add a little more gas then you will get it lit. Doing it this way ensures you only have one adjustment for the mixture and don't miss the optimal mixture for it. I also found it may sputter a little bit until it warms up, but not a ton. The depth of the burner also makes a big difference. If it is too far in, then it will sputter and not light. Too far out, same thing. Getting this right takes a bit of experimentation, what I did was find the optimal position and then mark a line on the burner with a sharpie to know where it should go each time. Basically you want it pulled in about a half inch from the top of the hole inside of the forge. So from the edge of the insulation to the end of the burner, there should be a half inch on top (it is round so there will be more space on top than bottom). You don't want it poking out into the chamber.
-
Figured I'd update this since it's a somewhat common question. I decided to build a 'temporary' (temporary, in that it isn't attached to the house and can be moved) enclosure of sorts using 5/8 drywall panels, 2x4 8x8ft studs, and Rockwool batts. The process was a lot easier than I anticipated and took almost no time at all to get them stood up. The biggest challenge was finding Rockwool in small quantities, places like Lowes and Home Depot wanted large ($1200+) orders. I managed to find a vendor online (Acoustimac) that carried it in smaller quantities in the dimensions I was after (48x24x4in). I ordered an extra set of batts to make panels out of and hang on the walls. I positioned the 'walls' in a v shape around the power hammer, they are 8ftx8ft, so fairly large compared to the size of the hammer. They also cut the garage in half, which provided some nice isolation from the rest of the stuff we keep in there. Not noise related, but I painted the opposite side with chalkboard paint, so I can have some space to write on, take notes, draw, etc. There seems to be a noticeable reduction in noise on the other side of the panels, but not massively dramatic. I measured about a 6-7db reduction, even though that wasn't the goal necessarily. More importantly, the echo has been reduced a fair bit and it's reduced the sound of other tools/equipment in the shop (anvil, grinder, etc). The end result being its more tolerable in the house, my wife says it sounds more like someone knocking on the door rather than clanging pots together, so that's progress. I still haven't handled the top of the enclosure and may expand it further, but for right now, it seems to be doing its job and was considerably less expensive than a professionally assembled enclosure. I may look at doing something with blankets for the 'ceiling', like what Frosty recommended, but I need to take care of getting electrical sorted with my growing collection of 220v tools...
-
I think I'm putting the enclosure on hold for now in favor of addressing the echo in the garage. Interestingly, the sound coming from the hammer is less of a thump and more of a sharp "twang", so a much sharper, less dense sounding noise. From what I understand, bass noise is really difficult to mitigate, but the others can be reduced, I may be wrong though. The issue is my garage has no insulation in it and the sound just echos, which I think makes it reverberate worse. Even clapping your hands is loud and echos through it. I'm hanging some acoustic paneling in the garage in spots where I can, I also spoke to Oeler on the phone and they seemed confident that they had some solutions that would work to reduce echo and absorb sound on the 3 exterior walls, then a solution for the interior wall that contains mass loaded vinyl, that can prevent transmission into the house. I'm waiting on pricing but the cost isn't that high judging by their website and the materials he recommended. I'm also insulating our uninsulated ceiling, either way blown in insulation or, ideally, Rockwool batts depending on the price. I realized after I posted my original message that our ceiling is not insulated, but there is also an attic vent of considerable size and I think a lot of noise is leaking out that way, as well. If, after that, the noise levels are still too high, I will reconsider the enclosure. I'm not trying to eliminate it, just reduce it and show effort. Thanks for the advice on the neighbor relationship too, I've been over to chat with them a few times and may invite them over once I get everything put in. They are super nice folks and don't seem bothered by it, but I don't want that to change.
-
I have an Anyang 55 and live in a residential area, I'm looking to reduce the noise somewhat to avoid neighbor complaints. We have a lot of foliage around our house and haven't had any issues so far, but I'd prefer to prevent complaints rather than respond. I also worry about it just from not being disruptive and would rather work without being concerned about bothering people. I evaluated having our shop insulated in various ways and everything I found indicated it wouldn't be very effective without stripping out the drywall. I measure ~85-87db outside our door with everything closed (I have a fairly extensive ventilation setup that lets me work with the garage door shut, but will obviously result in some noise transmission). I'm taking other precautions like sealing doors, as well. As an alternative to insulating the whole garage, I'm considering building or purchasing a shroud or enclosure to hang around the hammer. On the purchase front, I've seen several noise reducing enclosures that use a sortof foil covered blanket that hangs around the device claiming a reduction between 10-15db for partial enclosures. I'm awaiting price quotes on this option. On the build front, I was considering setting up studs along the outside of the hammer that would extend the full length of the hammer with enough space on either side for me to work with the dies (several feet at least). I'd put something like Rockwool Safe and Sound inside of the studs, drywall the interior and exterior of it, then use additional drywall on the outside and/or inside with Green Glue between it. I may also put some sound absorption near the back to dull the echo a bit. Where the hammer is, the end of the enclosure would only be able to extend outward from the dies ~1-2ft before it gets too close to the forge (less about heat more about having space for me to move around). One side, facing the forge, would obviously have to remain open for me to access the hammer properly. Has anyone seen anything done like this before? Was there a noticeable difference in noise around the hammer?
-
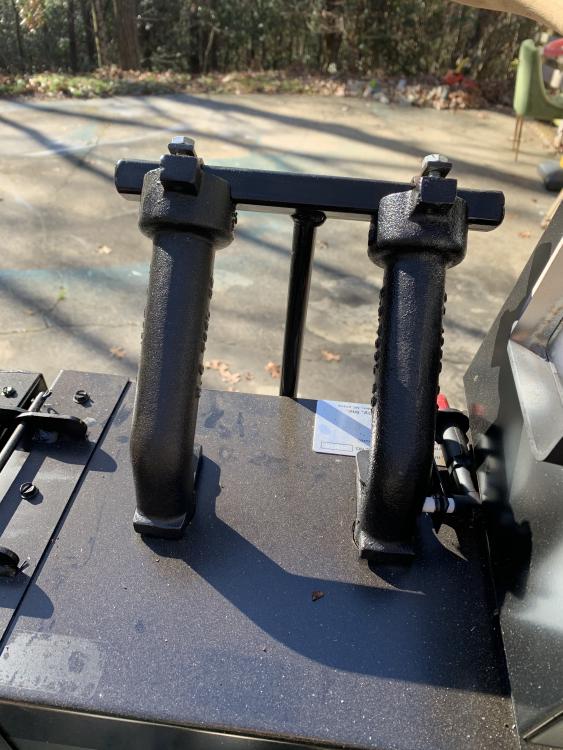
I considered trying this, but was concerned blocking the back off would result in some back pressure that would disrupt the vortex inside. There is a bit of air that exits the rear of the forge, but I'll give it a shot and report back when I get a chance. Anecdotally, yes, it seemed lower for the temps I was trying to work at. I didn't really go to the point of trying to measure actual usage, but it seemed like I was able to run longer forging sessions without refilling the tank. It was less "I can't figure it out", more "This is something to consider if you are buying it". It's not a huge deal for me, I have plenty of room in the shop, but I've been in others that were considerably smaller and bumping into it or knocking it off would be more of a risk. Generally when I'm purchasing something, I like to have everything with me when it arrives so I can get it prepped properly, so it was just something to consider. It's also a lot easier to just have bolt holes already in place. You can work around it, but it's nice when you don't have to. It's a minor gripe or point.
-
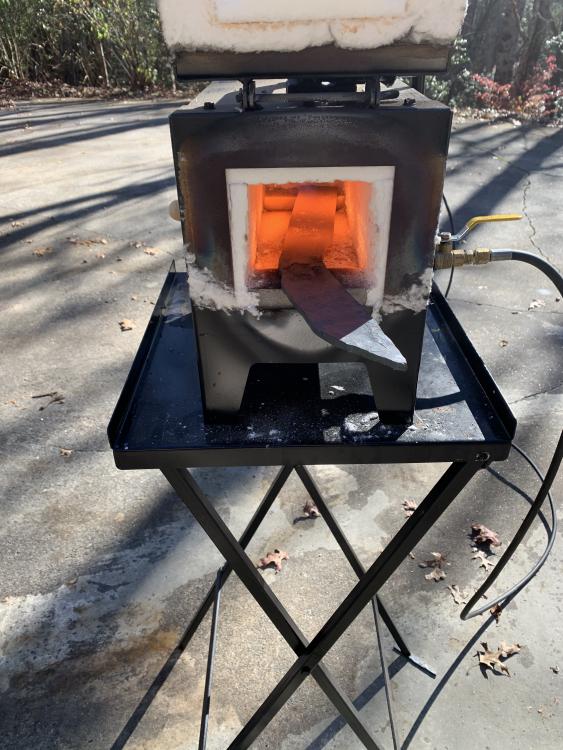
One thing I meant to add is that the forge heats much more evenly with the doors closed. It, of course, gets a lot hotter, so you won't be able to use this to soak, but it does make it easier to get a more even heat across the work piece. There were a few times I did this with rods and just kept the door shut, the entire rod came out roughly the same color. If you require even heat on your work piece, it's basically required to keep both doors shut. I'd also add that there is a 'shelf' of sorts by the door. Unlike the Chile, there is an elevated piece of fire brick on either end, which is visible in the photo of the opening above. It can make fishing pieces out of the forge a little tricky if they fall down in there. I made a poker to pry pieces up when removing them, but also made a habit of resting the work piece on the side to make it easier to get out if I was sticking the whole knife in the forge. The insulation was definitely concerning. You could light the forge and watch it shoot out the front. I didn't think much of this until I started reading around and discovered the health issues surrounding this. It's kindof surprising because NC is a well established company and have made farrier forges for some time, but I found some old message board/forum posts where folks talked about the same issue, so I doubt it's isolated to mine. They do explicitly mention this effect in the manual. I could be mistaken, though, I haven't seen another one. As for why it hasn't been raised before, I can't speak to that. There isn't really a good consolidated resource for product reviews that I've found, likely because people purchase a forge and then stick with it for years or decades. I plan on making similar posts (I already posted my Graham review) for all three forges I have owned, but it'd be nice if there was a more consolidated resource with product reviews. I got to use a Whisper Mama a few days ago for the first time and it seemed better. I think the smaller opening combined with the larger side door made for a much more efficient forge. It was also considerably quieter and I noticed the chamber seemed to heat much more evenly. It seemed more suitable IMO especially for general blacksmithing. I read another post here some time ago where a user railed on NC forges as being 'modified farrier' forges and aren't suitable for making knives. I didn't understand what he meant at the time, but think I do a little better now given the heavy oxidation and lack of even heat. That said, the Whisper Mama seemed to have fewer of those issues. The Knifemaker for me just seemed like they cut some doors in and slapped the same burners on, but didn't discuss with knifemakers what their needs were. The previously mentioned ledge is a good example of this, I don't really want to have to dig around in the forge to pry up a work piece because it dropped behind this 'ledge', yet knives are frequently of a size that would fall behind it easily. All that to be said, you might be better with the Whisper Mama, but I can't say for certain.
-
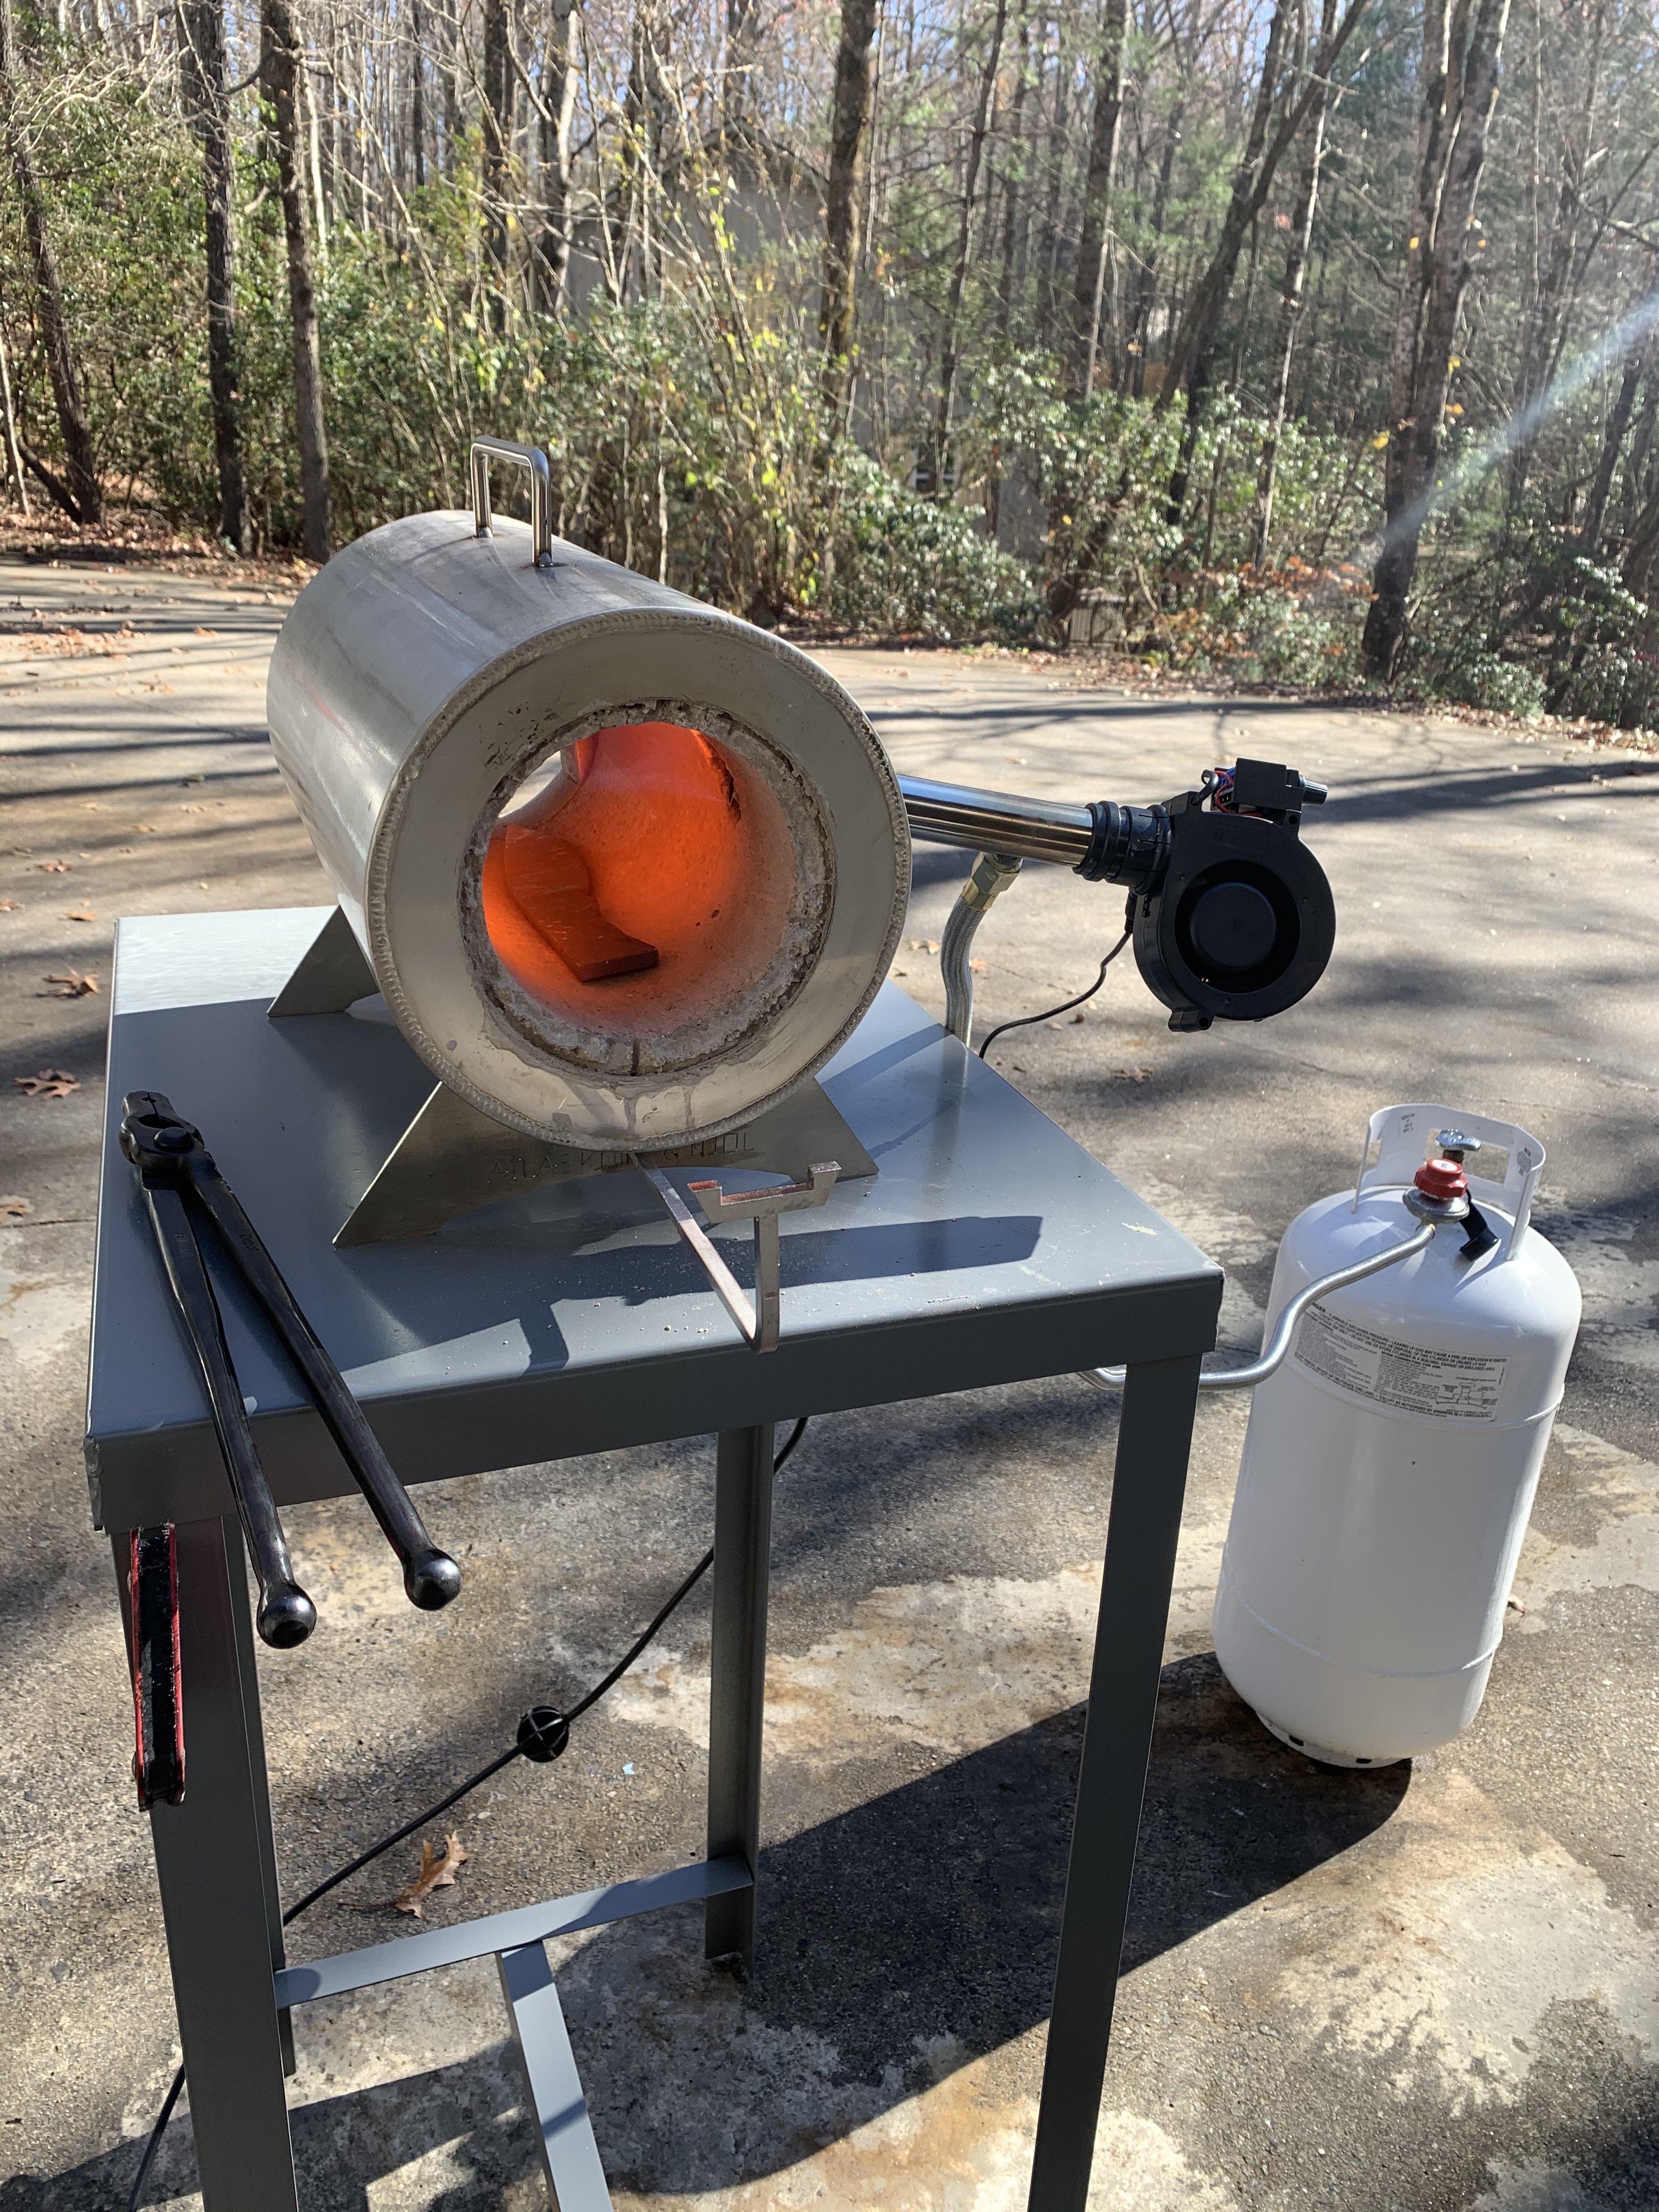
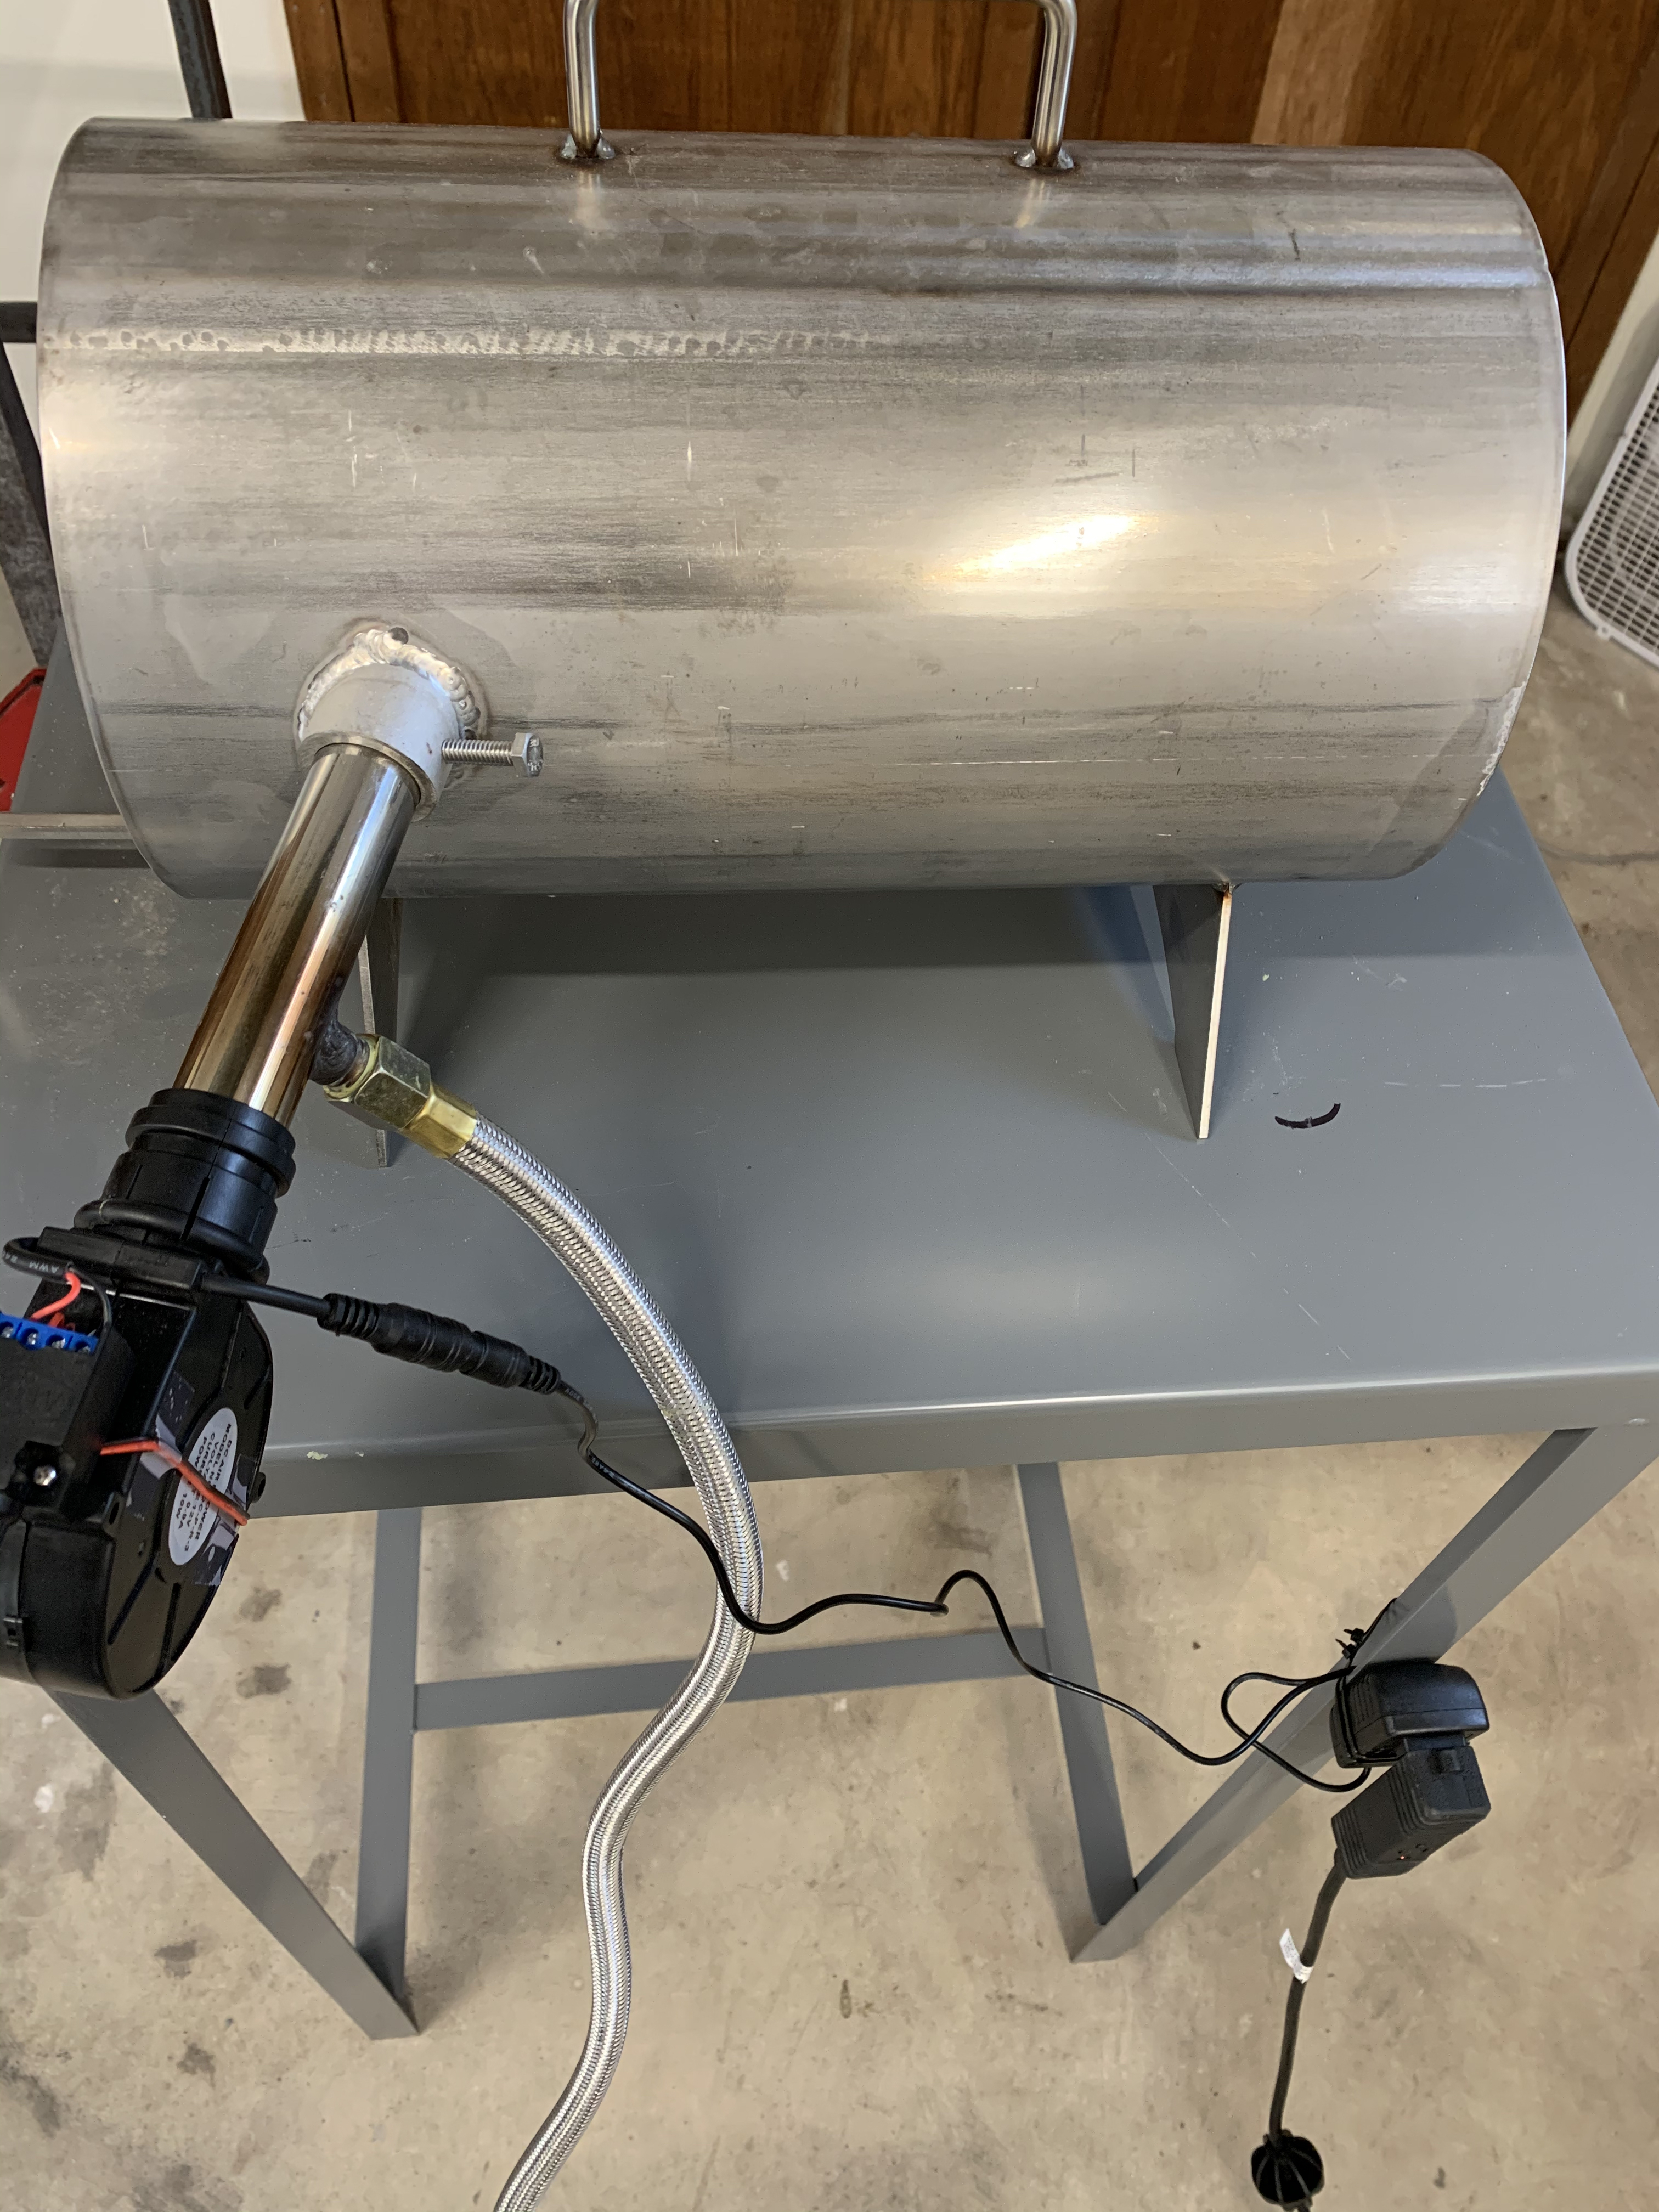
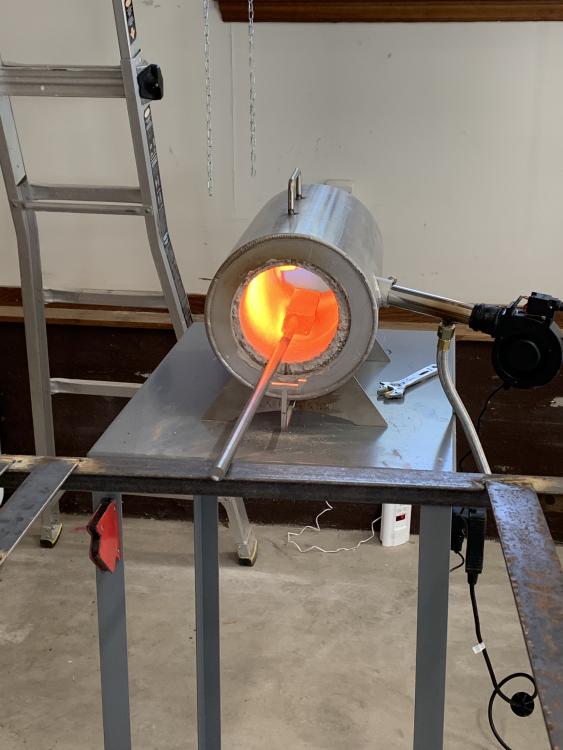
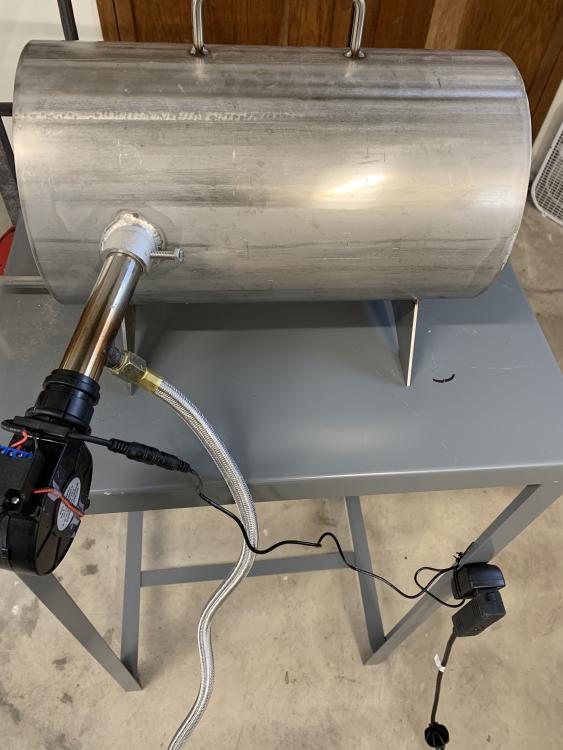
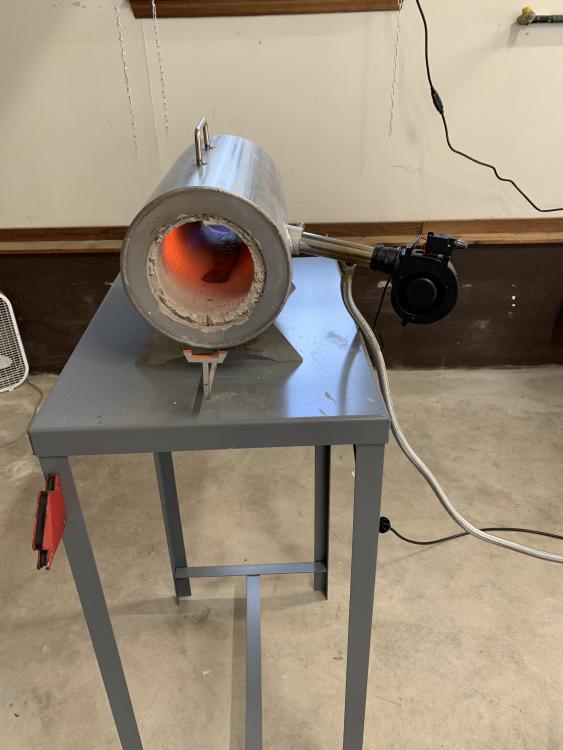
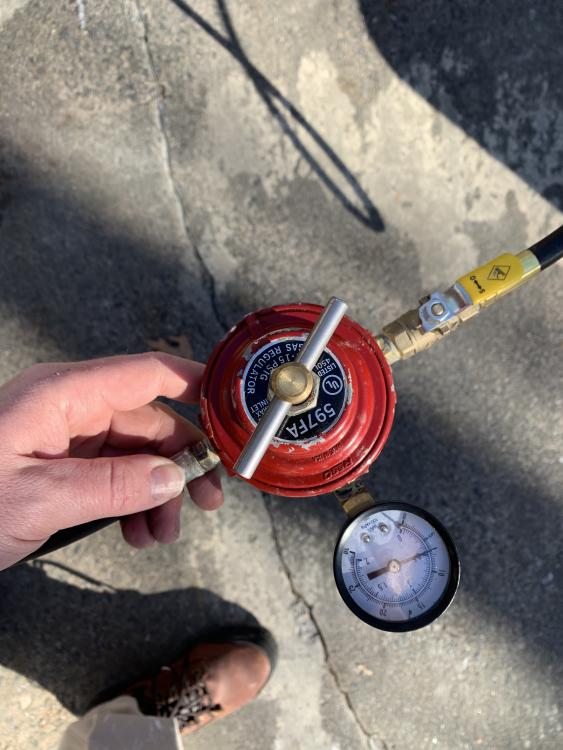
I previously wrote a review of the NC Knifemaker forge, thought I'd cover the Graham I've been using, as well. Construction The forge has a round exterior and interior chamber. A friend of mine commented it 'looks like a coffee can forge', but the fit/finish are obviously better, that's just a comment on it's shape. The stainless legs are sharp and, unfortunately, have no way to bolt the forge down. There is a sliding rest, which is a nice feature, although it looks a little spindly at first glance. I was worried it would flex or bend under heavier bars, like a 1in 52100 round bar, but it doesn't even when it's near full extension. The only issue I had with this on mine was that it was slightly bent, so I had to try and straighten it out. I do work with metal, so I'd imagine that's in most people's wheelhouse...or hope anyway. The burner is blown using a fairly inexpensive fan coupled to a controller. They attach to the burner using a plastic ring that 'grabs' a flange on the fan, you then adjust the fan with a small knob. The fan doesn't exactly inspire confidence given its size and purpose, but it never failed on me and did the job fine. I guess i'm a little leery of something so small and inexpensive doing such a critical job, but it didn't fail, sputter, or cause any problems, so I guess I can't fault it. The only issue I did have is the attachment to the burner is a bit easy to remove. If you knock it wrong, it'll fall out. It's not super loose and floppy or anything, but it's not bolted in either, so you have to be careful when messing with the burner not to accidentally pull it out. Other than make adjustments to the fan speed, I probably wouldn't touch it and would be careful to avoid knocking it out. Again, I had no issues with this except when I was trying to pull the burner out, but I imagine it would happen eventually. Thankfully, the cable to the power supply is fairly tight, so pulling it out on accident would be difficult. The regulator doesn't have a gauge, but the hose is stainless, which is nice, but I would worry about the potential for the power cable to chafe over time and electrify the shroud around the hose. HIGHLY unlikely, but I'd try to keep them separated, despite what my photos above show. I would like to have seen the hose be a bit longer, as the distance from the tank to the forge is fairly short, I ended up having to replace the hose and regulator to fit onto my 125# tank plumbing. The fitting on the burner is a standard 3/8 flanged fitting, so I found a 3/8 hose that was 12ft long and attached a 1/4 NPT regulator to it using an adapter, which also allowed me to use a gauge. Burner adjustment The burner is adjusted using a combination of the PSI from the tank and speed of the fan. As you increase the pressure from the tank, the fan speed will also have to increase. If the fan speed is too high, it'll blow out. If it's too low, flames will sputter out either end. I wasn't aware of this phenomenon and it took me a while to figure out how to start it without flames coming out either end. I made a few marks on the original regulator with a sharpee: the lowest setting I could feasibly run without flaming out and a 'start' point to fire up the forge. This made getting to those points easy (the first is important for HT, but which I'll discuss later) while I didn't have a gauge. I also kept a notepad with corresponding fan speeds for those settings. I found even at the lowest setting (which, according to my crap gauge, was ~.5-1psi), it had to be around halfway on the fan adjuster to work. It took some time to figure out the optimal setting for the burners, but it seems like you can go based on the 'shadow' or lack thereof on the wall of the forge. As you increase the fan speed, you'll notice that a dark spot forms directly in front of the burner and it grows as you increase the speed, unless you increase PSI from the regulator. As you decrease it, that spot goes away, but a PSI or two below that point and it'll start sputtering flames. It took a few forging sessions, but I eventually got the hang of it. I found the range, again based on my crap gauge, to be around .5-15psi or so. Operation Unlike the Knifemaker, I did a fair bit of forge welding in this one, but I also did some HT soaks to see how it all worked. On the low end, I ran the forge as low as it would possibly go. I couldn't get a pyrometer to work due to the shape, but I noted that I could soak a 1/4 piece of 80crv2 for 15 minutes at the lowest setting and it still remain magnetic. A SLIGHT bump in PSI would take it above non-magnetic temps. I soaked and HT several pieces of steel for a long period of time to see how steady it would keep the temps, some as high as 20 minutes, and it would keep it around that still magnetic point fairly easily. The downside at these lower ranges is that you really have to stay on top of the fan, it's finicky and will blow out. The vortex in the chamber will also be interrupted by larger pieces, causing it to sputter a bit and require you to dial it back, then increase it again. At high temps and fan speeds, this is not an issue, but at the bottom end of the range the forge is capable of, it can cause it to flame out. If you are outside, wind will also negatively impact the ability of the forge to stay lit at the bottom of the temp range. You also start getting a cold spot near the end of the forge, however that's to be expected, as the chamber is fairly small and lower fan speeds won't blow the fan as far back. At higher temps, the first thing I noticed compared to the NC was the amount of scale or lack thereof. My NC would flake and scale like crazy. After hours of forging, I had less scale around my anvil than possibly one or two heats on the NC, it was a dramatic improvement. I was also easily able to 'dry weld' a 360 layer billet, which required a number of folds, with ease and without oxidation issues. There is a small hot spot right in front of the burner, but if you leave the piece to soak long enough, the heat will transfer down as long as you aren't really close to the rear opening. The main part of the hotspot, as you can see above, is higher up on the forge, so it doesn't typically touch the workpiece as much as one where it was blowing directly onto it, but it does seem to have an effect on the work piece, although more minor than others I've used It doesn't shoot out massive amounts of dragons breath or even heat out either side, although the blower does seem to cause the heat to move further out than other forges I've used, which may be an issue if you use a ventilation hood like I do. Conclusion Don't mistake my minor complaints above, they are nitpicking, I REALLY like this forge compared to my NC and even others I've used. I have a Chile Habanero that came in today, but I plan on keeping both. The value for the Graham is great and I wished I had gotten it instead of wasting money on the NC the first time around. Aside from chamber size and length, the Graham is better in every way and considerably less expensive. I can do HT soaks with it and forge weld, both with relative ease, all in a forge that costs $400. I was out another $80 or so by the time I bought a longer hose and regulator, I would've liked to have seen more options there, but even still, you have more features and functionality than you do with the NC and a lot more flexibility. I think if I had started out with this forge, I may not have ended up buying a kiln or the Chile for some time. I felt they were more essential purchases with the NC, but with the Graham, I feel I could get by easier without them. I'm still glad I have them, but the Graham makes them less of what I felt to be a necessity. That said, the interior chamber is smaller than the Habanero and the Habanero does seem to get hotter, although it has a more noticeable hotspot. The price difference between the two is massive, though. I'm glad I have both, but question whether I'd have bought the Habanero for anything other than chamber size after using the Graham. That's not a knock on the Habanero, at all, the fit/finish on it are fantastic and it works REALLY well, but the Graham is more flexible for making knives and the price point is more attractive starting out.

-
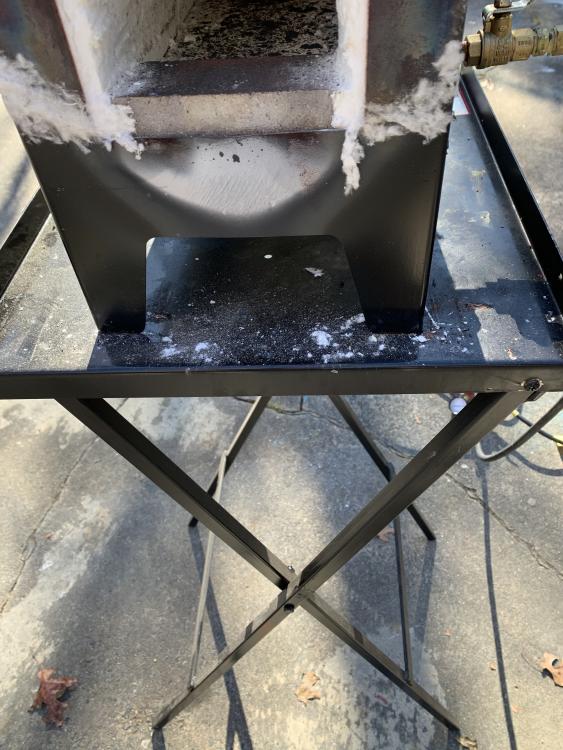
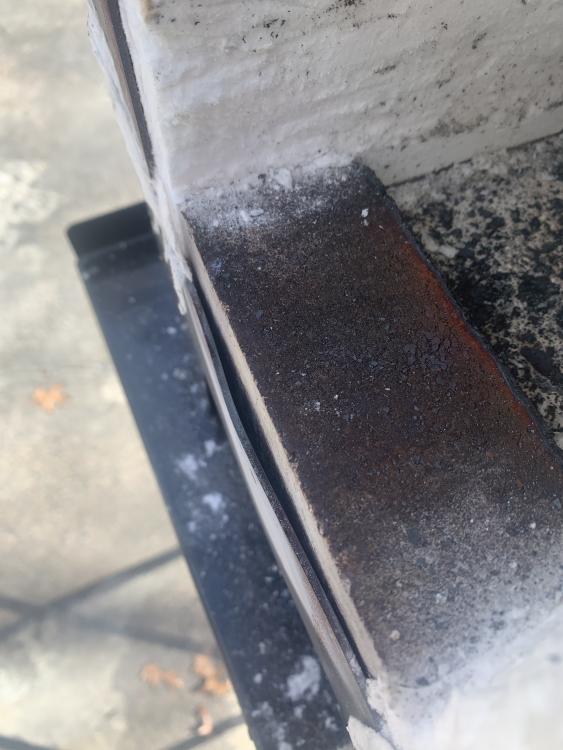
I see a lot of folks asking about this forge, so I thought I'd share my impressions of it, since there isn't a lot of conclusive information on it. A bit of background...I'm fairly new to forging, I've been at it about 6 months and have forged maybe around 15-20 knives total. All but 3 were in the Knifemaker forge. I ran the forge atop a NC tool stand and connected to both a 25lb and 40lb tank (meaning I tried both, not connected them both at the same time). Construction The forge itself is fairly heavy and sturdy feeling. It isn't super easy to move around, but I don't think any of them (Graham excluded) really are. It's heavy and stays in place. It's a square interior surrounded by some form of insulation, which doesn't appear to be sufficiently rigidized, as it blows out every time you light the forge. The two doors are similarly coated in the same insulation, which also blows out if you move them at all while you are using the forge. I'm sure I could've coated it in something to address this, but should I really have to do that on a $650 forge? Somewhat more frustrating is the manual does not mention anything about how this is a safety issue aside from one line about carcinogenic fibers, yet this is one of the biggest no-nos I found online people discussed when insulating their own forges. It makes me wonder how many people are running this forge without any kind of refractory or rigidizer to prevent insulation from being blown out. The burners are bolted to the body of the forge using a single bolt. The gas distribution is delivered through small brass valves threaded onto a 'T', which sits on the burner and is bolted in place with a strap, which is then connected to a 1/4in 90 degree bend and ball valve, which goes to the regulator. I forgot to look if there are holes to bolt it down, but I don't think there are, looking back at the photos. This was always a temporary forge for me while I waited for my Chile to arrive, so I didn't consider bolting it down. One thing to note is that I observed the lip of the chamber started to deform after about a month or so, as shown in the photo below: Burner adjustment Rather than detail this process, here is a video they publish on it: https://www.youtube.com/watch?v=SlhyECVG0Bg This is one of the biggest knocks on this forge that I have. Compared to other forges I've seen, this process is janky, you are basically bolting it all together and hoping it holds in place. You have basically no refined adjustment of the burner or atmosphere, it's the bare minimum of making sure it works and that's about it. My initial firing of the forge had a really strange, clearly overly rich flame, which I was able to address, but you don't have much more control of the atmosphere outside of making sure it burns (I'm comparing this to the Graham, which isn't really fair since it's blown, and other burners that use a sliding cylinder to adjust the mixture). Making the adjustment itself is tedious and it often moves out of place, requiring you to try it again. Operation I tweaked this a fair bit and was able to run as low as 2.5psi and up to around 10psi. I never tried to forge weld in it, so I didn't really try to exceed 10psi. I used a pyrometer at the lowest setting and it showed ~1750f, I doubt you'd be able to get it below that. If you were interested in HT, like I was, then that's probably worth noting, along with the pronounced hot spots (more on that later). You can move the blade in/out to keep it a bit more even, but if you expect to soak it and let it sit, you can anticipate two very obvious hot spots. It uses a lot of propane compared to the Graham I'm currently using. I was forging maybe ~7-10 hours with it before I had to refill my 40lb tank, I've done probably close to twice that, including 4-5 hours of forge welding in the Graham and still have plenty of fuel in the tank. Again, Graham is blown, so probably not the best comparison. The forge has two massive hot spots on it, you can see them in the photo below. It actually makes bringing it up to heat a little difficult if you are trying to work the center of a piece, you really have to try and position it under the burner to get it hot, because the inside of the forge doesn't seem to retain temps high enough to apply even heat to the work piece. The amount of scale produced by this forge is, once again, much higher than the Graham. I have worked a 2-3 pieces on the Graham from stock to rough shape and the amount of scale on the floor or around my anvil was not even half of what it would have been with the Knifemaker on the same piece of steel. I'm assuming this has to do with the atmosphere in the forge, but all the tweaking I tried, I couldn't get it to produce less scale esp if it sat in the forge a while. Conclusion After working with a few other forges now and owning the Graham, I don't think the Knifemaker is terrible, but it's way over priced for what it is. The $650 price point for the forge is excessive given its size, the fact it blows insulation out both doors everywhere, and the rudimentary burner design. For me, this forge was between one from Atlas and the Chile, I ended up ordering the latter, but it has a 10-12 week wait. Having used, and now own, one of the Atlas forges, I would strongly suggest one of their options compared to the Knifemaker given the price point, propane usage, and overall design. The Chile is a step above both, but comes with a price that reflects that. The Knifemaker gets very hot and the opening doors is a nice feature, which I used, but I struggle to find the justification for what they are asking given there are better options with similar features for ~$400. I ultimately feel the value isn't there for the price they are asking, although I could start to find more value around the 400-500 price point. Granted, my main point of comparison is the blown Graham forge, so it probably isn't a fair comparison, however I've used other forges in recent weeks from Atlas and other companies, all of which were more efficient and at a better price point than the Knifemaker. I have briefly used my Chile Habanero and it provides a larger chamber, better fit/finish, easier atmosphere adjustment, and no insulation issues. That said, the Habanero does have similar hotspots, although they are less noticeable than with the NC I'll give special mention to the stand. Someone locally warned me about it and I didn't heed it. It's a piece of junk. I can't believe they charge $165 for this thing when it looks like a folding stand you could buy at Lowes for $30. It's wobbly, the legs are uneven, and there is nothing to keep the legs together except the weight of the forge, so if you hit it hard enough the wrong way, it could collapse. Do not waste your money, instead buy a Little Giant or similar machine stand for the same cost that's more stable.

-
Thanks for the info. TBH hearing the Anyang on videos was a little concerning, it sounds like a higher frequency, 'sharper' noise than the heavier, duller thud of the 65, but cameras pick up noise differently and it's never a good indicator. I'd prefer the smaller size and footprint of the 33, it would also avoid my having to remove the cylinder like I would with the 65, to get it past my door. The foundation is a concern with both hammers. I spoke with both companies, Anyang indicated that 33 owners have done all sorts of things from leaving on the pallet to bedding it on a rubber mat, but no special base should be required. Blu recommended bedding the 65 in silicon and bolting it to the floor, but said it'd be fine as long as my slab is at least 4 inches thick, which I'll have to verify. They similarly said some folks leave them on plywood and a few others on the original pallet, provided you don't mind moving it back in place every so often. Thanks for the info on the compressor, also. I ran it by Big Blu and they confirmed it would work for the 65. I was a bit concerned until I talked to them, they said the compressor I had could run it all day without any issue (based on cfm, tank size, and hp). It's also rated for 100% duty cycle, that was something I was careful to do since I use it for a blast cabinet. Thankfully it's quiet enough that you can't hear it outside with the doors closed, I can barely hear it with the closet door I keep it in shut, so that won't be a noise contributor.
-
I'm looking at picking up a smaller power hammer pretty soon, primarily for forging knives. I've looked at a few options and the Anyang 33 and Blu 65 both seem like the most appealing for my shop size and what I'm doing. The 65 is a bit on the big side for what I'm doing, but Big Blu is local to me and the price is really close, I also figured going a bit larger wouldn't be the worst thing in the world. My compressor can handle the 65 fine. Has anyone used both of these hammers and can offer some comparisons between the two? I'm particularly curious about the noise differences. I am not in a super noise sensitive area, but I do work in an attached garage and would like to keep my wife happy, but we do have neighbors that aren't terribly far away. I can work with my shop closed up due to ventilation, which cuts noise down a lot, but I'd prefer the quieter of the two. I know they aren't quiet, but the quieter of the two would be preferable. From what I can tell in videos, the Anyang is more of a fast 'tap' whereas the Blu sounds more like a thud, but videos are hard to tell. If anyone has any insight, that'd be great.
-
I've seen a few folks blocking the rear opening of their Chile forge with firebrick or insulation. Has anyone done this and found if it causes any issues with the forge or burners?
-
That's something I hadn't considered, I'll look into that. Thanks. I had considered extending the hood itself, but it would be a lot of work and I am not sure it's something I wanted to mess with. My current setup is somewhat temporary, as I'm waiting on my Chile forge to be completed and sent out in the next week or two. After that, I plan on creating a more permanent setup for that forge, where my current forge will remain a bit more portable, as it's easier to move around and is more versatile due to it's smaller size.