jlpservicesinc
-
Posts
5,800 -
Joined
-
Last visited
Content Type
Profiles
Forums
Articles
Gallery
Downloads
Events
Everything posted by jlpservicesinc
-

Food Safe Bronze?
jlpservicesinc replied to GandalftheGold's topic in Smelting, Melting, Foundry, and Casting
Sorry about that.. Auto correct using the smarter phone.. What book did you find the trivets in? -
Hardening a CR-V based hotcut hardy tool
jlpservicesinc replied to CheschireCat's topic in Heat Treating, general discussion
The steel is a chrome vanadium steel.. It is a red short steel.. In other words the steels heating and work at temperature has a narrower range.. These steels make great chisels with proper heat treat.. One of the largest problems with alloy steels and newbie smiths is the lack of understanding what temperature they need to be worked at, as well as how to figure out what needs to happen nearly precisely with Alloy steels.. This particular steel might not need a hardening cycle as pointed out and if might actually be an air hardening steel.. Without getting my hands on it directly and running testing it's hard to say.. The mushing over of the edge is because it's not hard.. I harden all my tooling for the anvil as well as punches and such.. The few years I was away the promotion of not hardening high carbon or alloy steels for hot work has come on board.. All my hardies are fully hardened as is all the hot chisels and such.. So are Swages.. Anyhow, this winter I will be producing a video "How to" on deciphering mystery metal.. For the time being do lots of reading and video watching.. -
congrats.. You decided to drill than punch the header?...
-
Food Safe Bronze?
jlpservicesinc replied to GandalftheGold's topic in Smelting, Melting, Foundry, and Casting
Nice.. post up a pic or 2-5 when you get it done.. The parameters were no forge welding.. and for ease of making 2" pipe cut the width of the forged slots with the centers forged in would work just as well.. One could all So bend up the feet as you pointed out and this would lock the swivel collar in place also.. What book did you find the drivers in? I'm always looking for more reference materials.. Oh one other thing about the trivet.. if you need more height you can slip 3/4" pipe on the legs the required height.. -
Food Safe Bronze?
jlpservicesinc replied to GandalftheGold's topic in Smelting, Melting, Foundry, and Casting
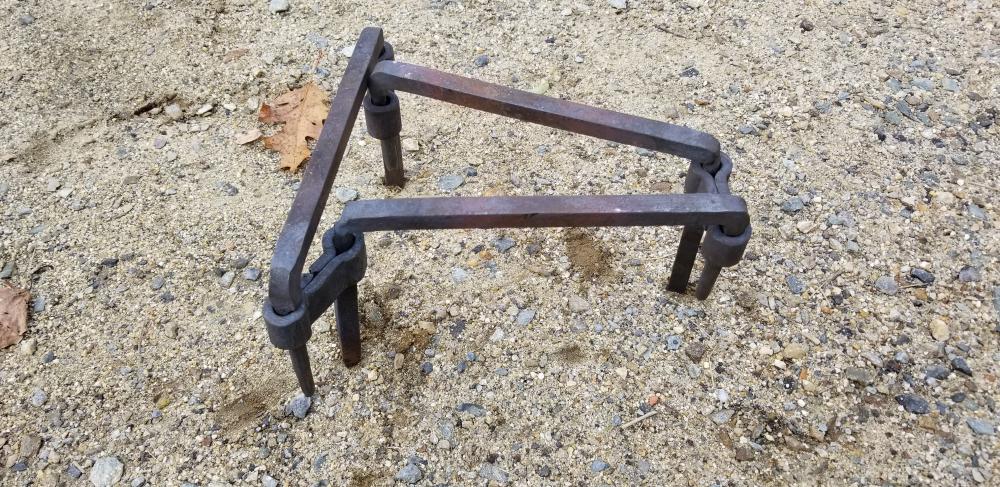
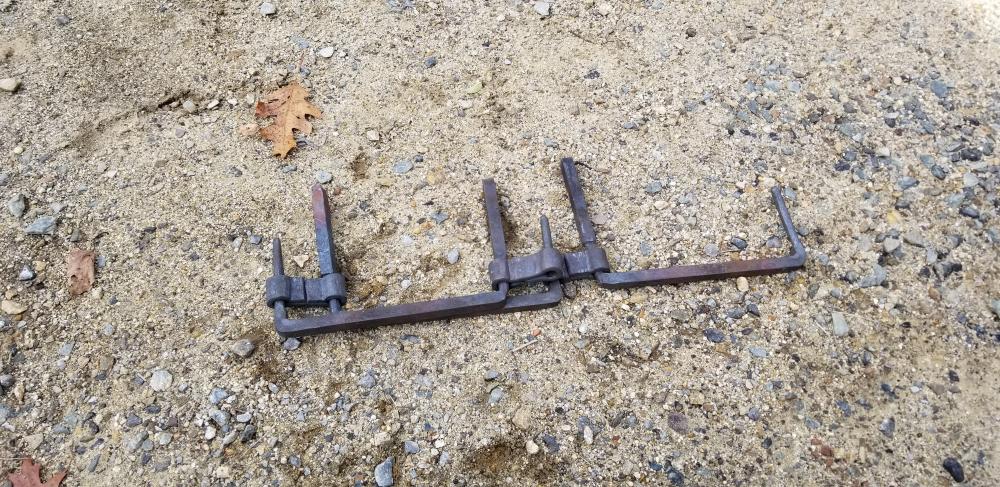
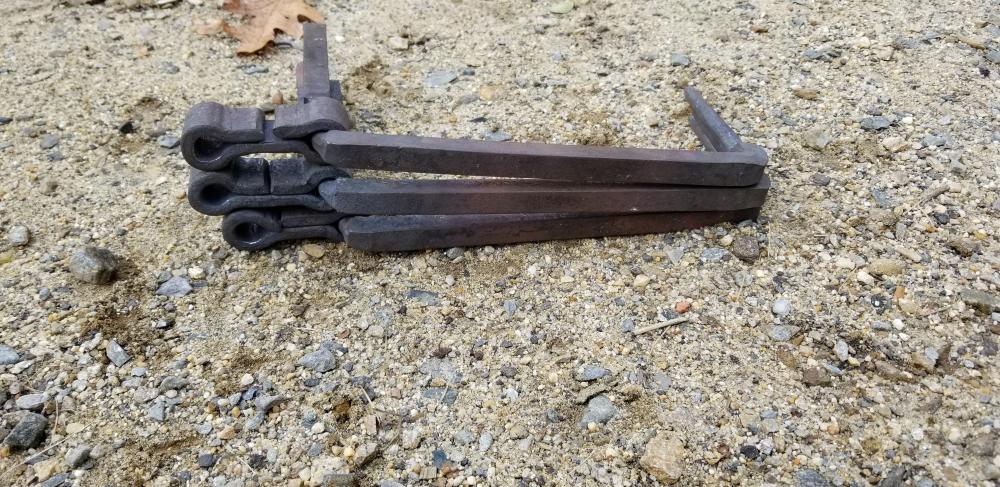
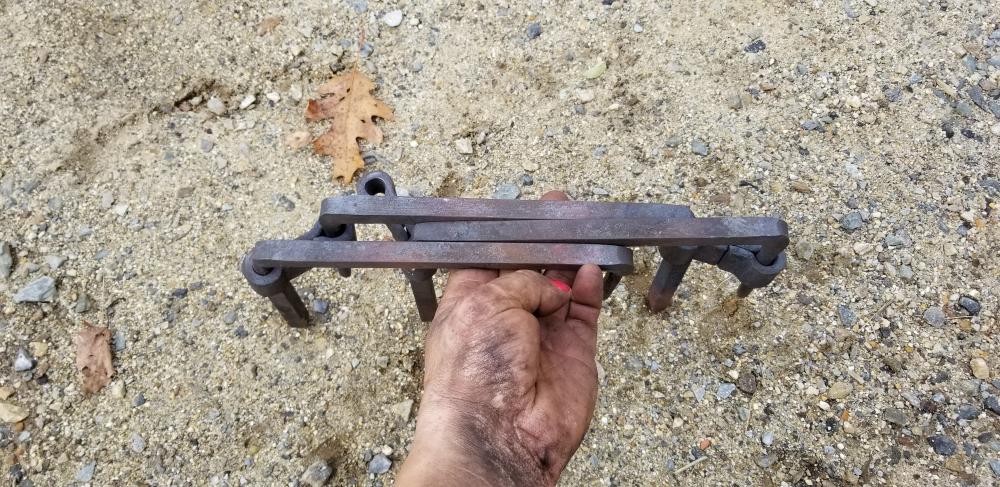
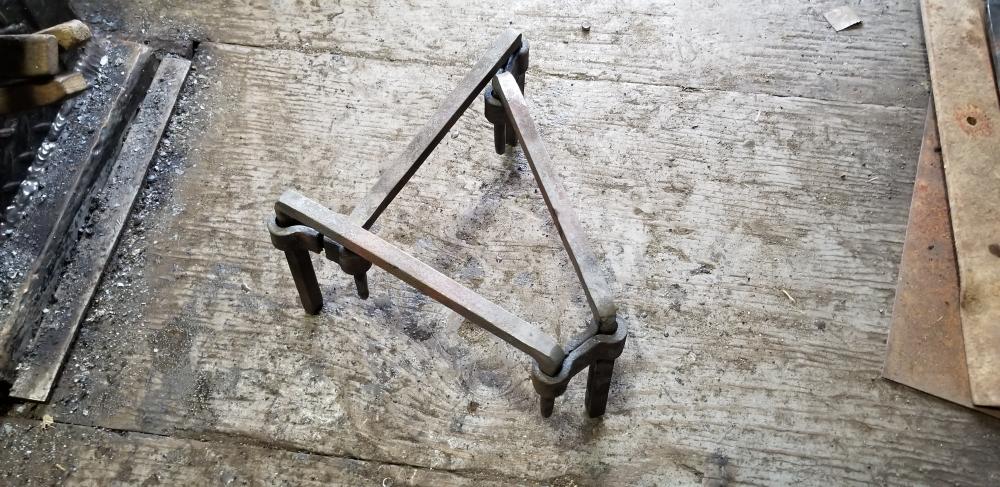
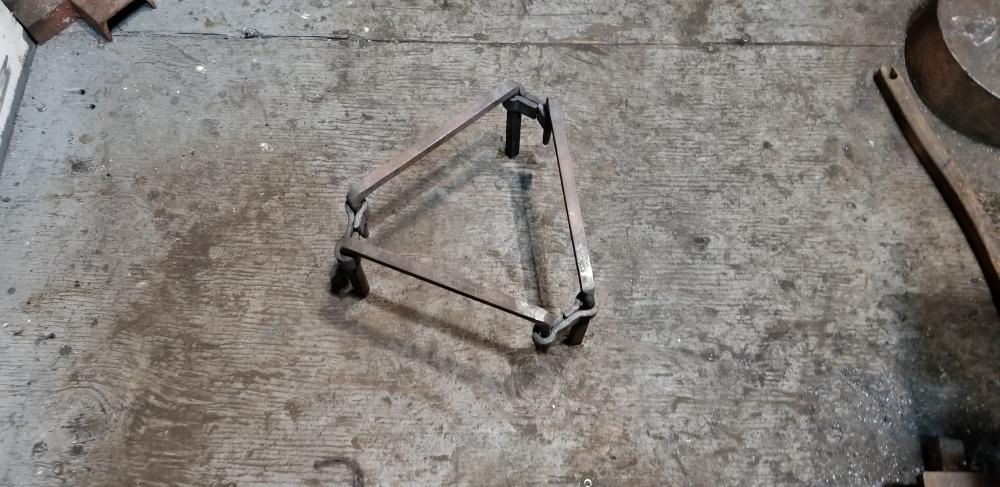
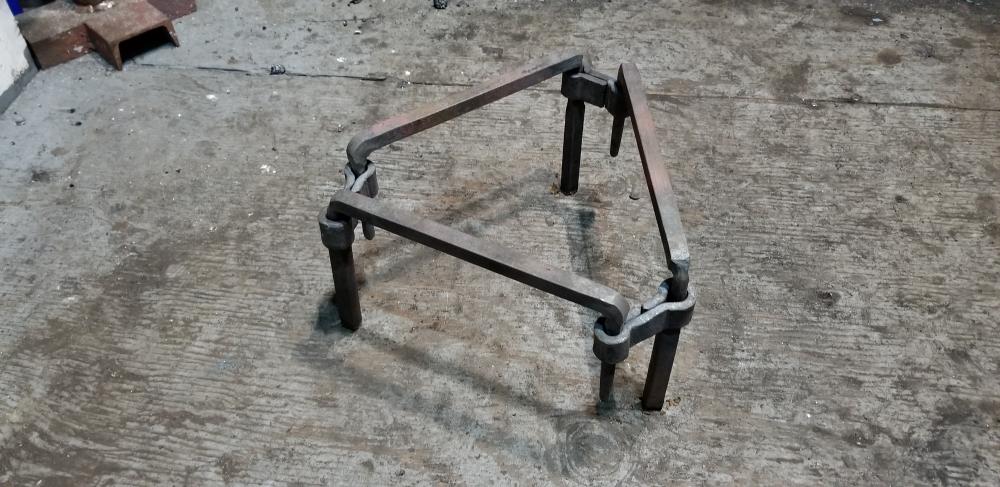
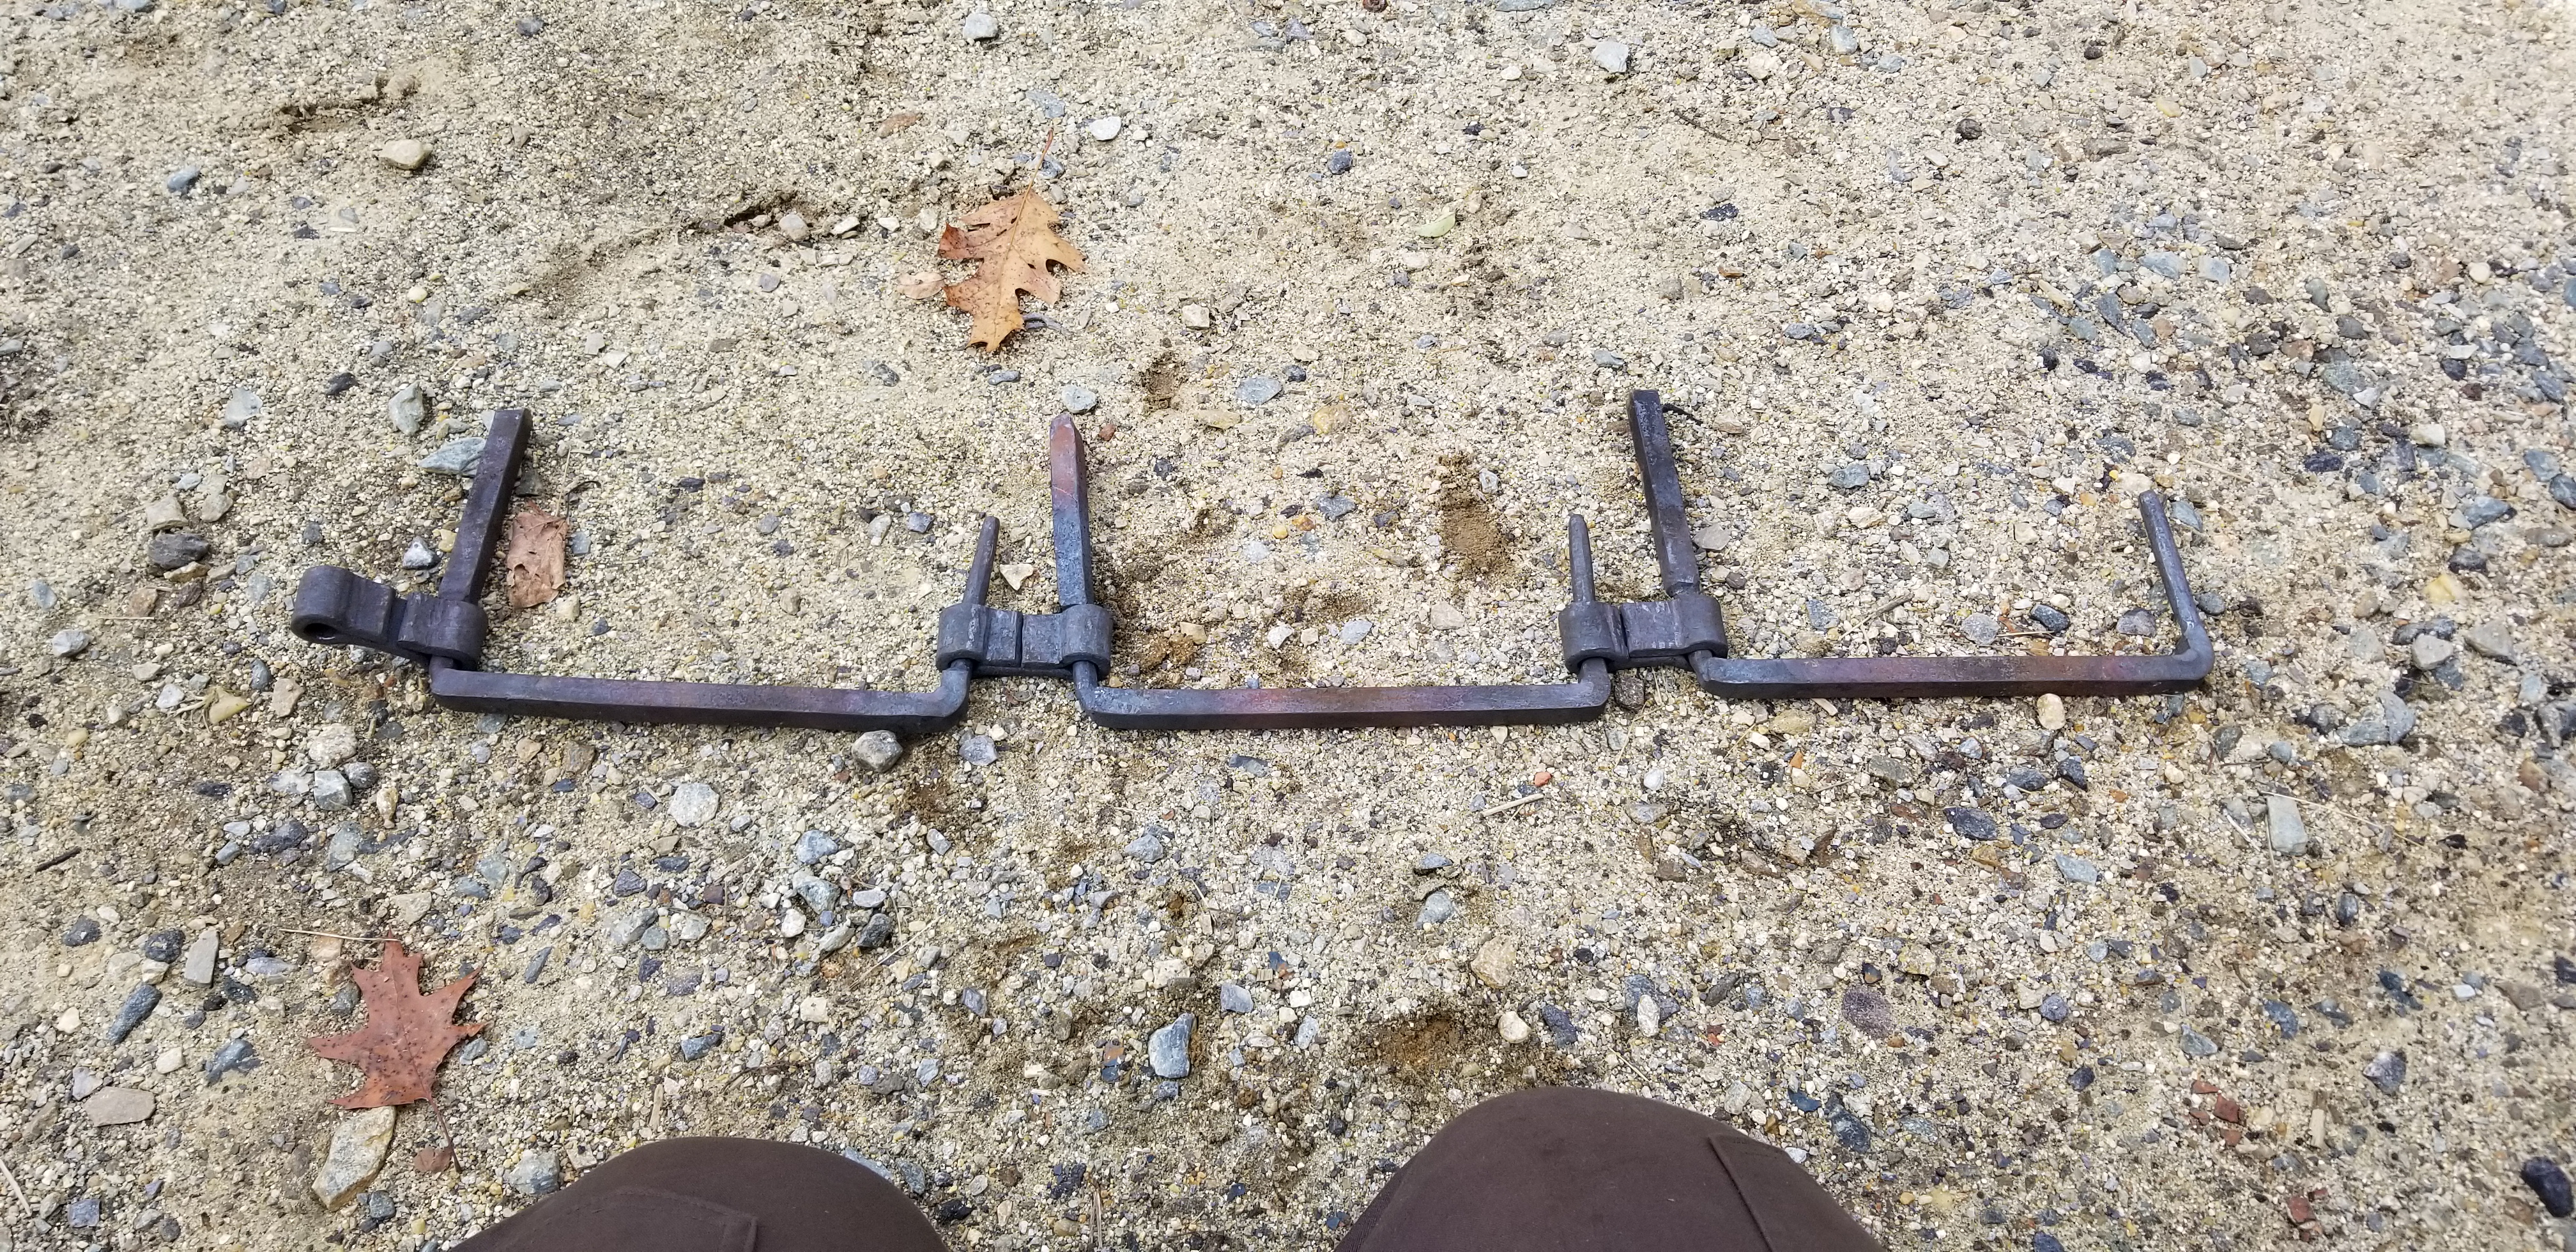
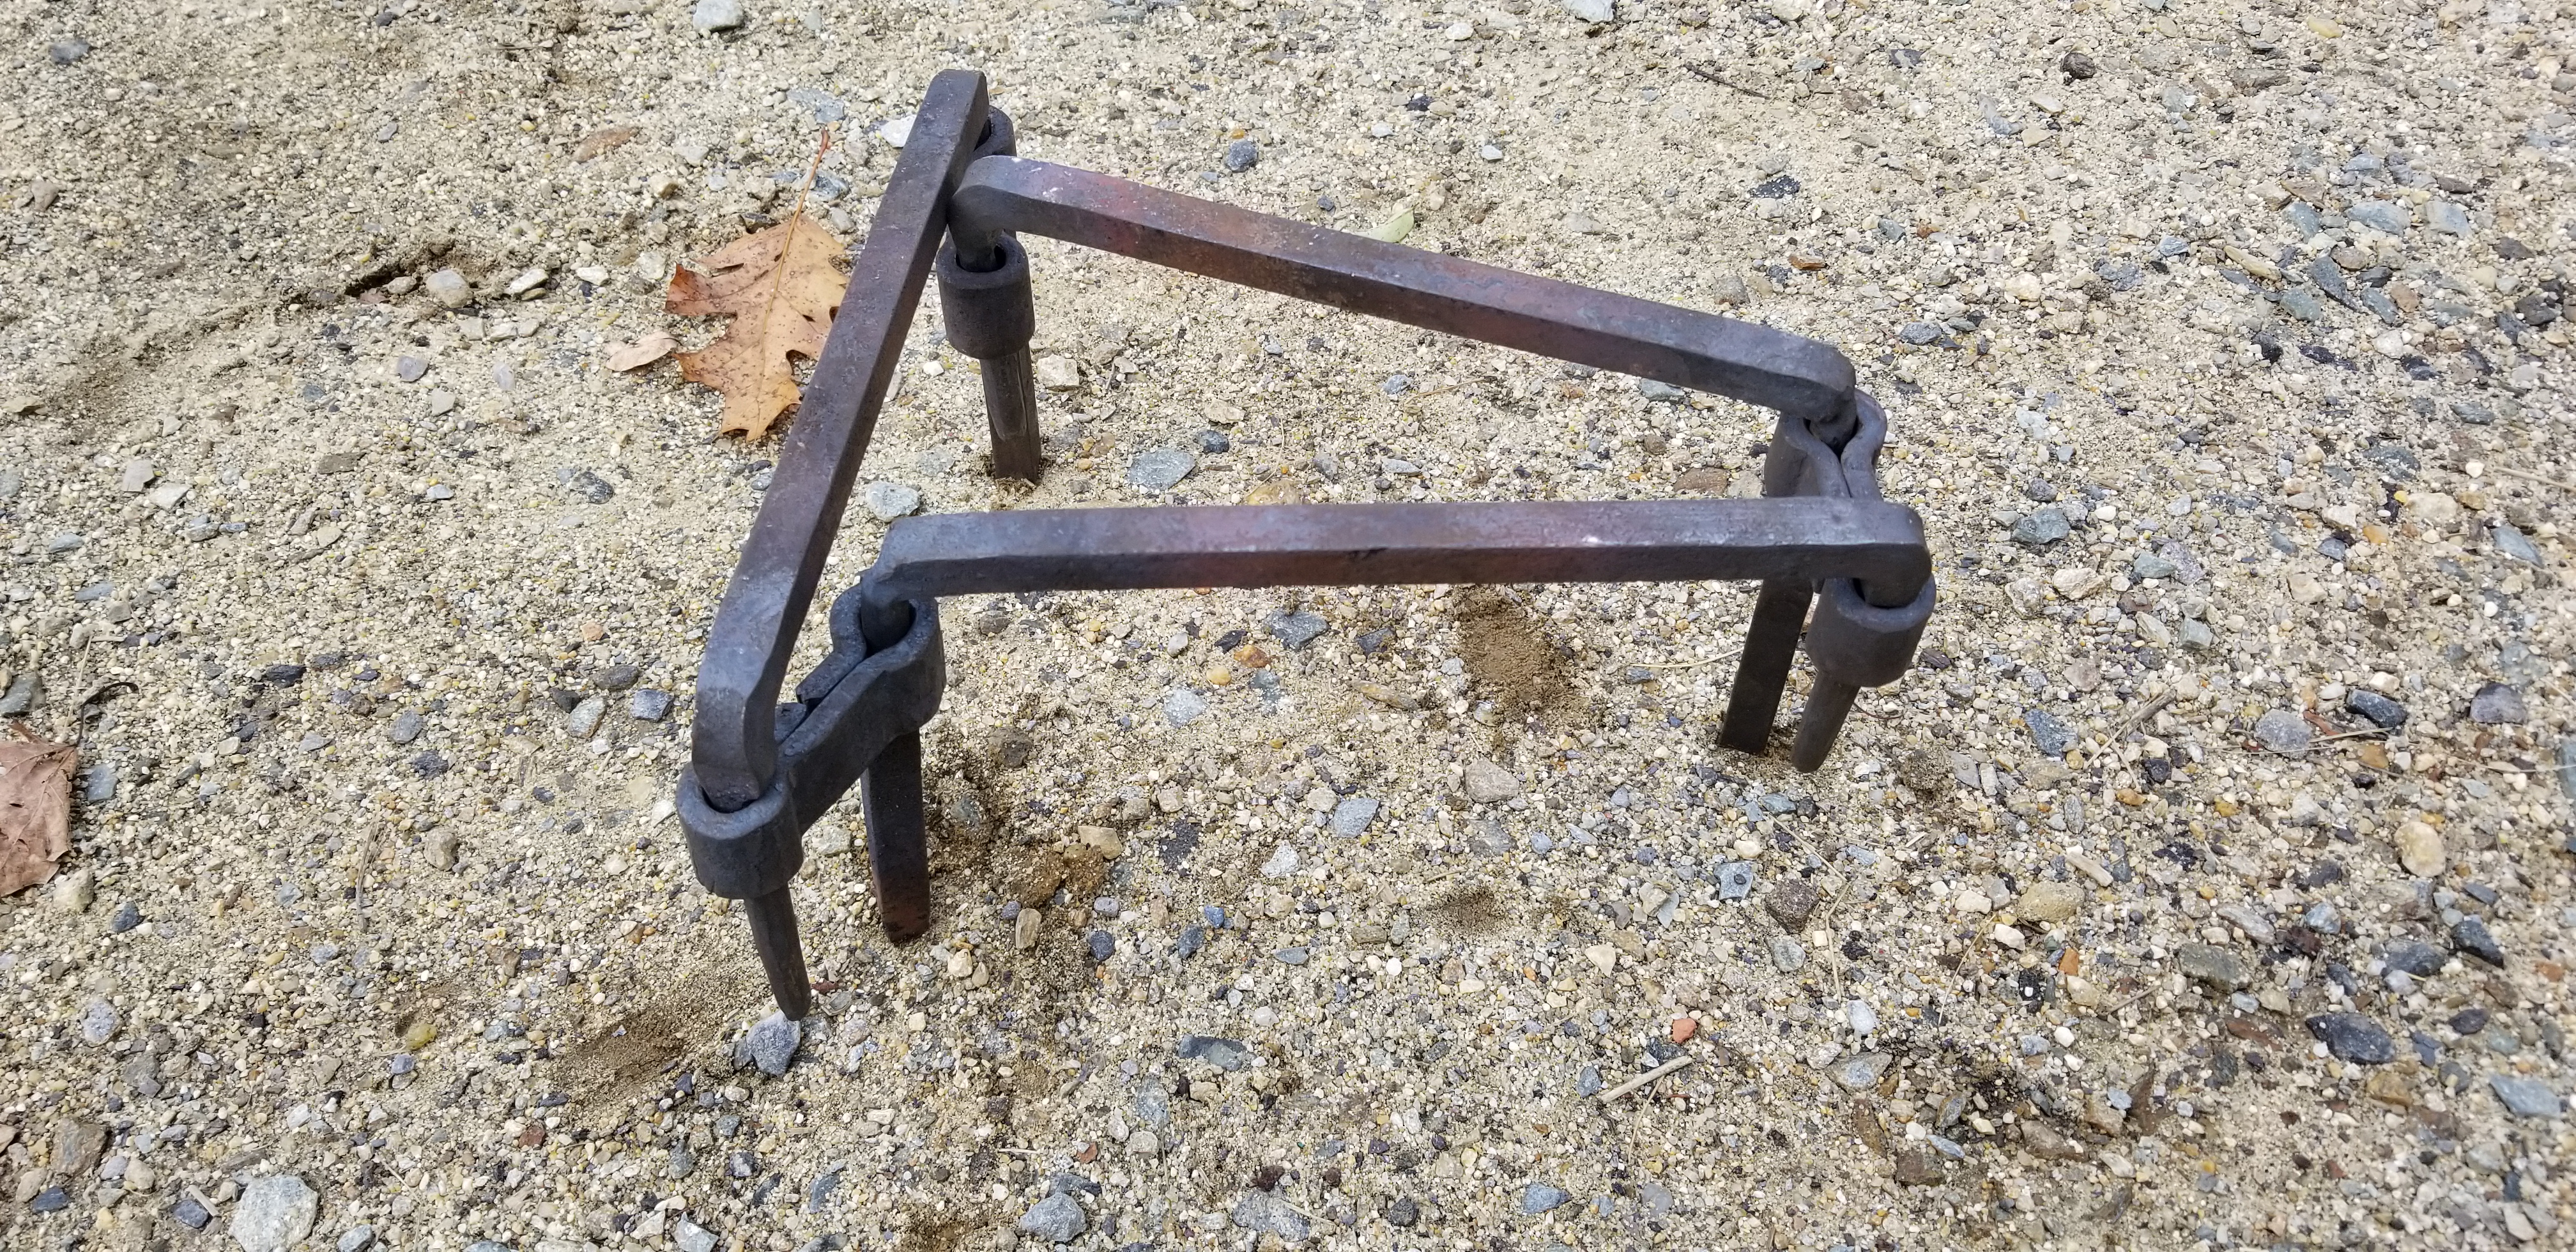
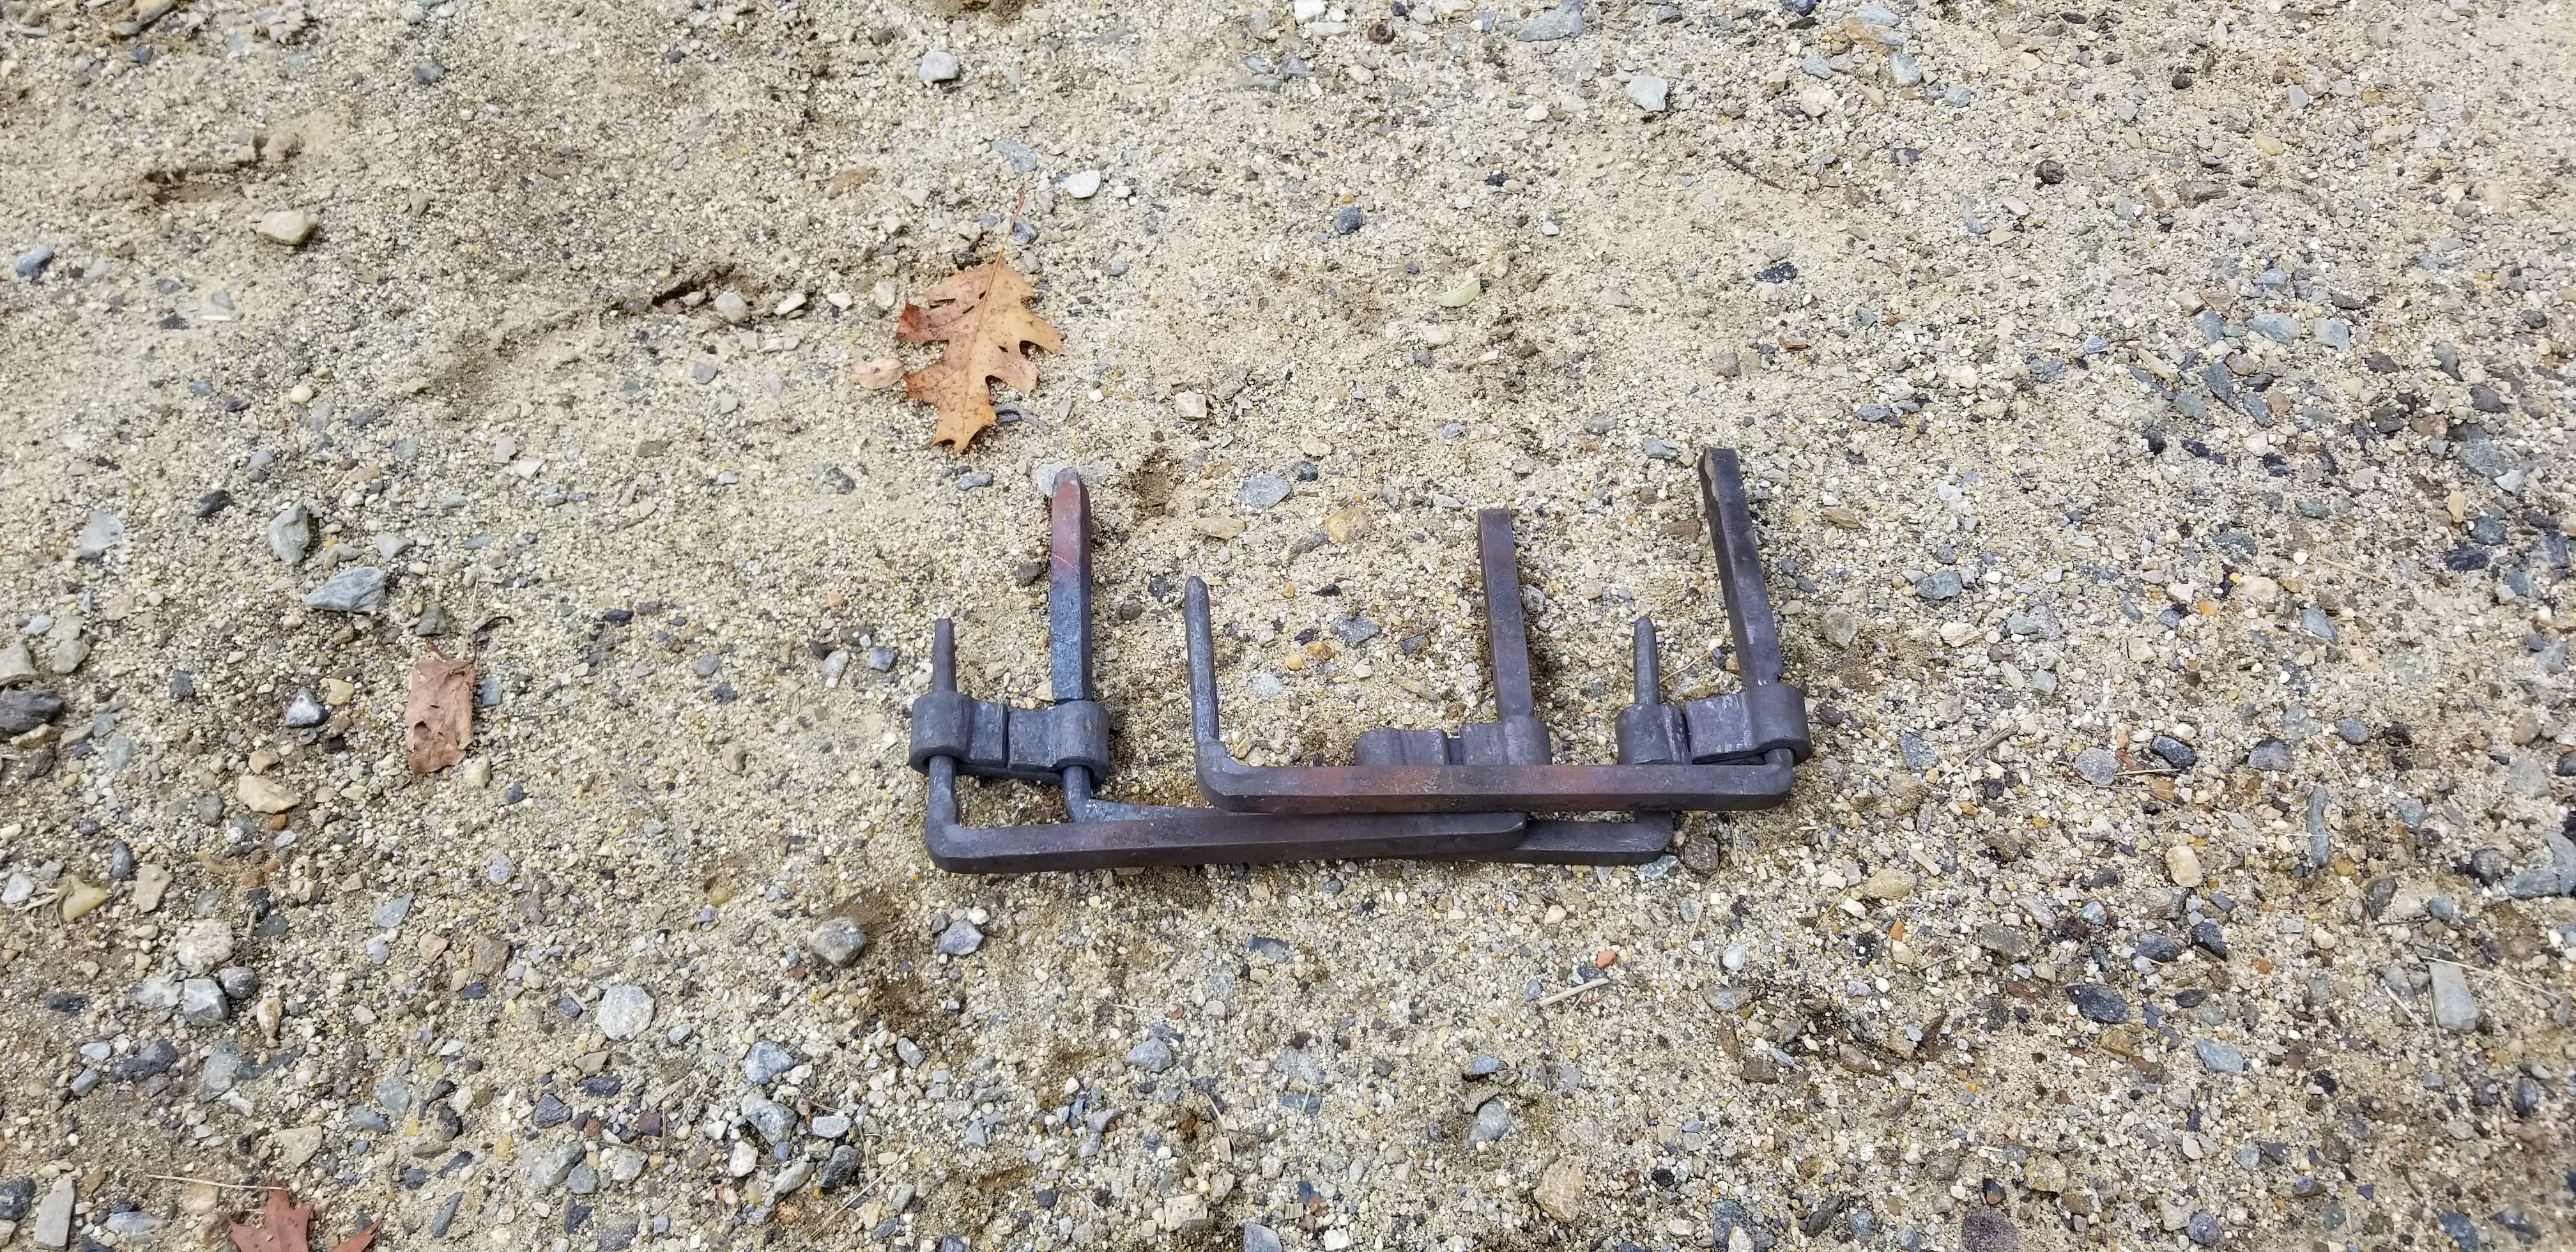
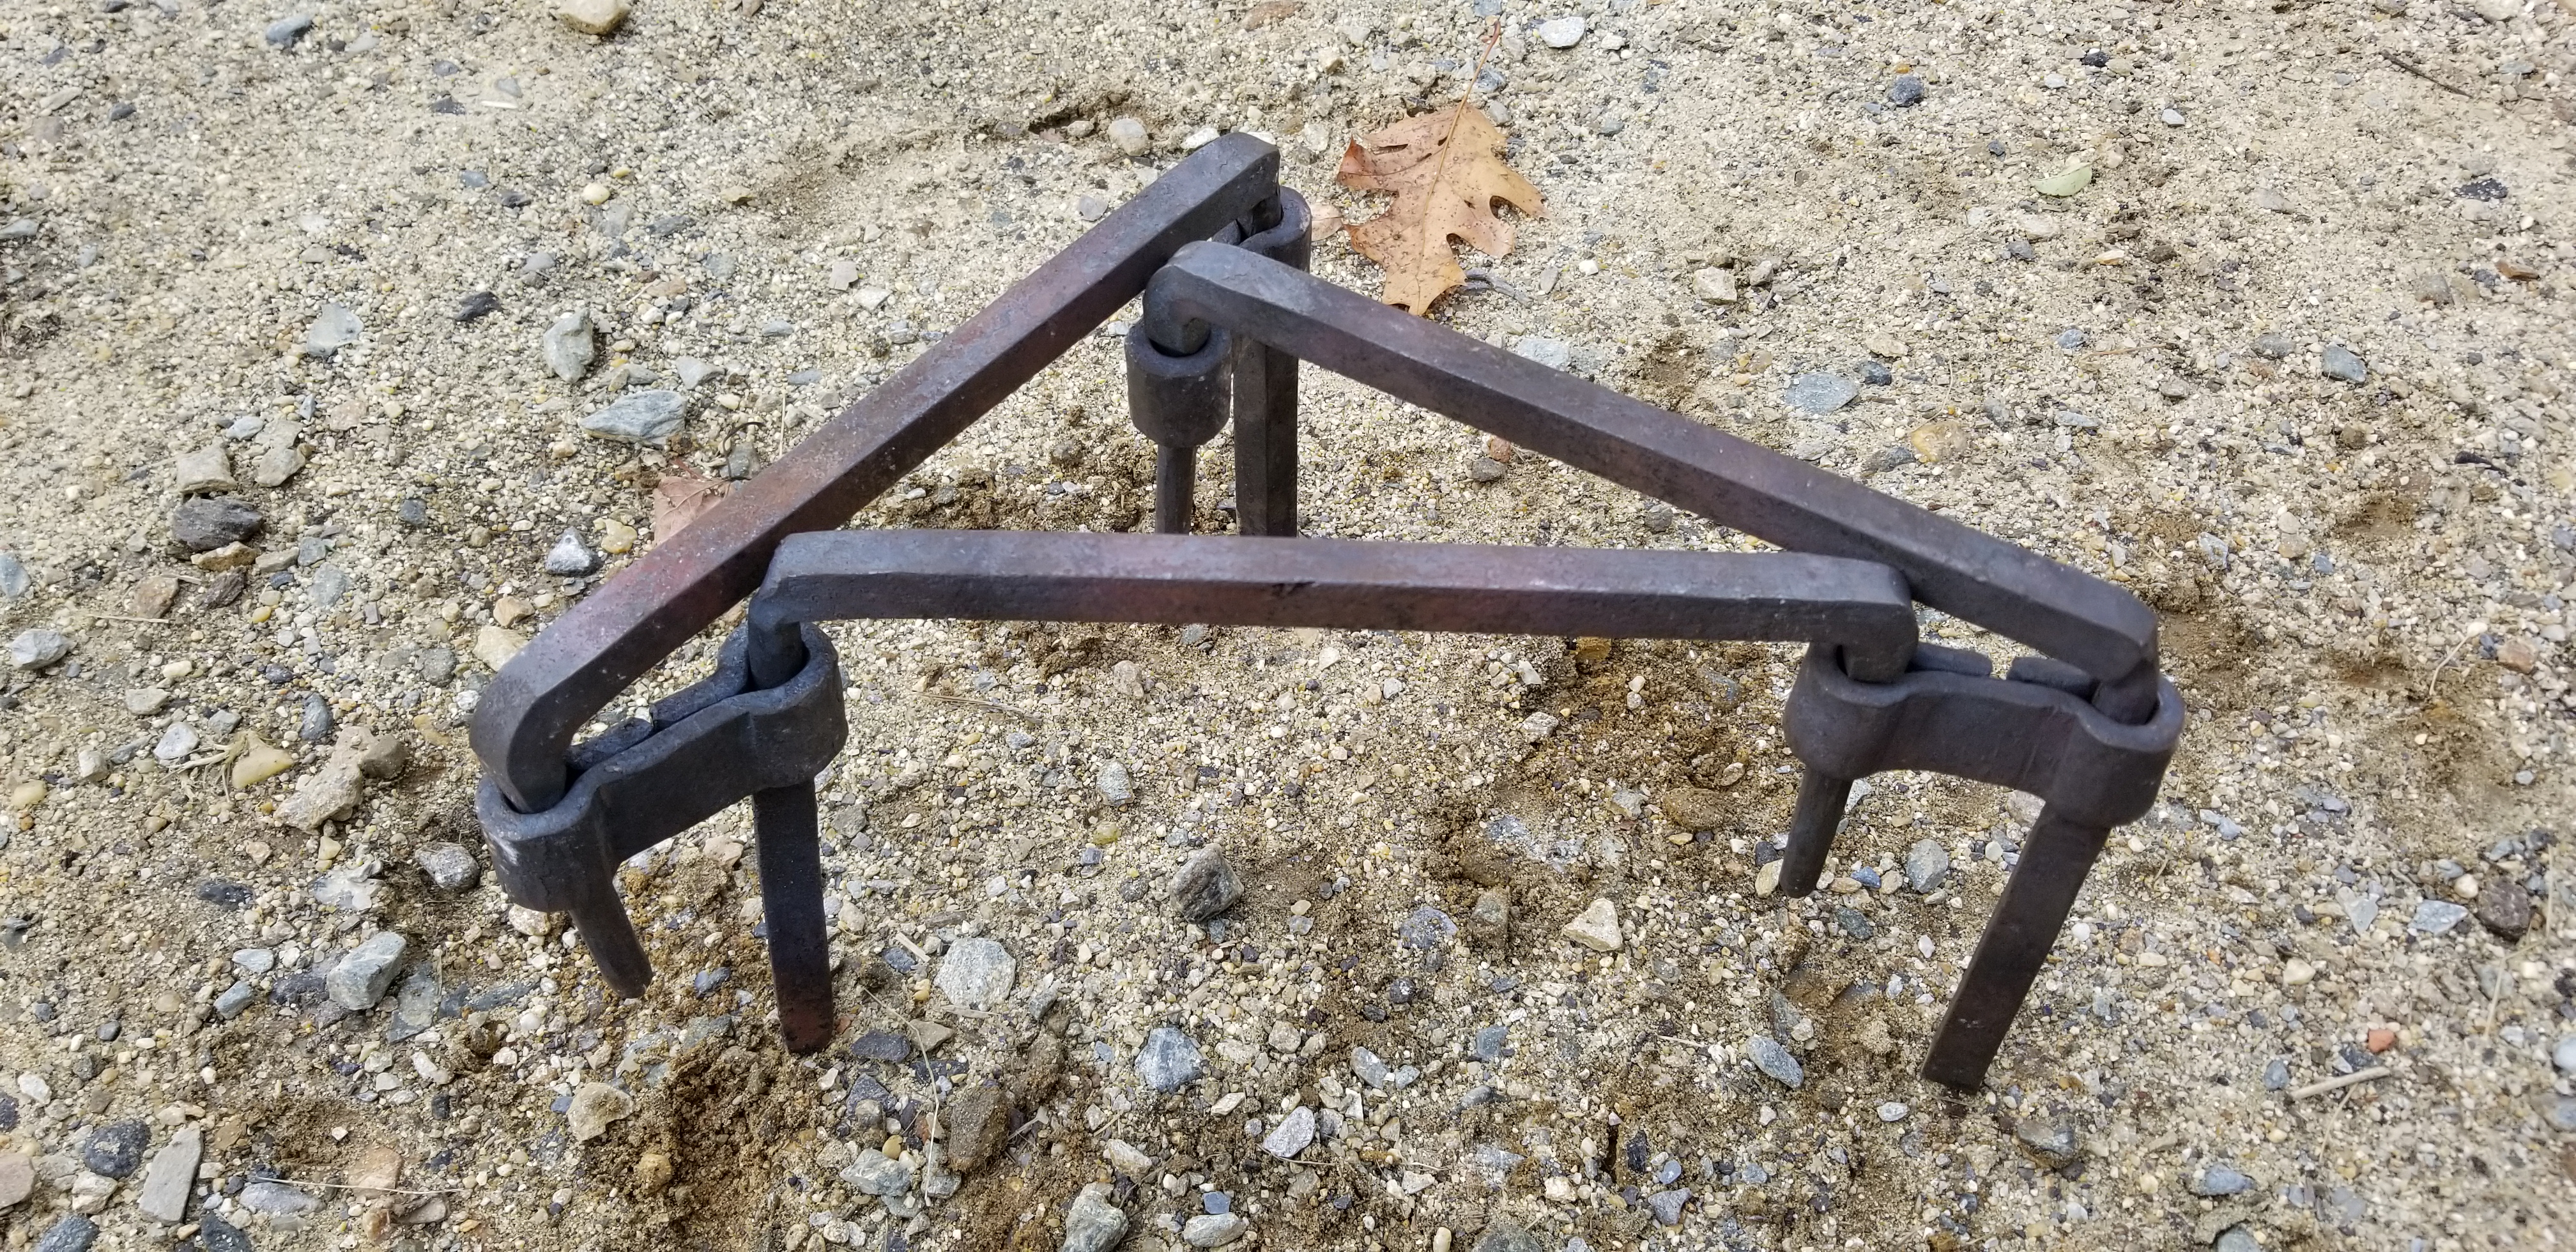
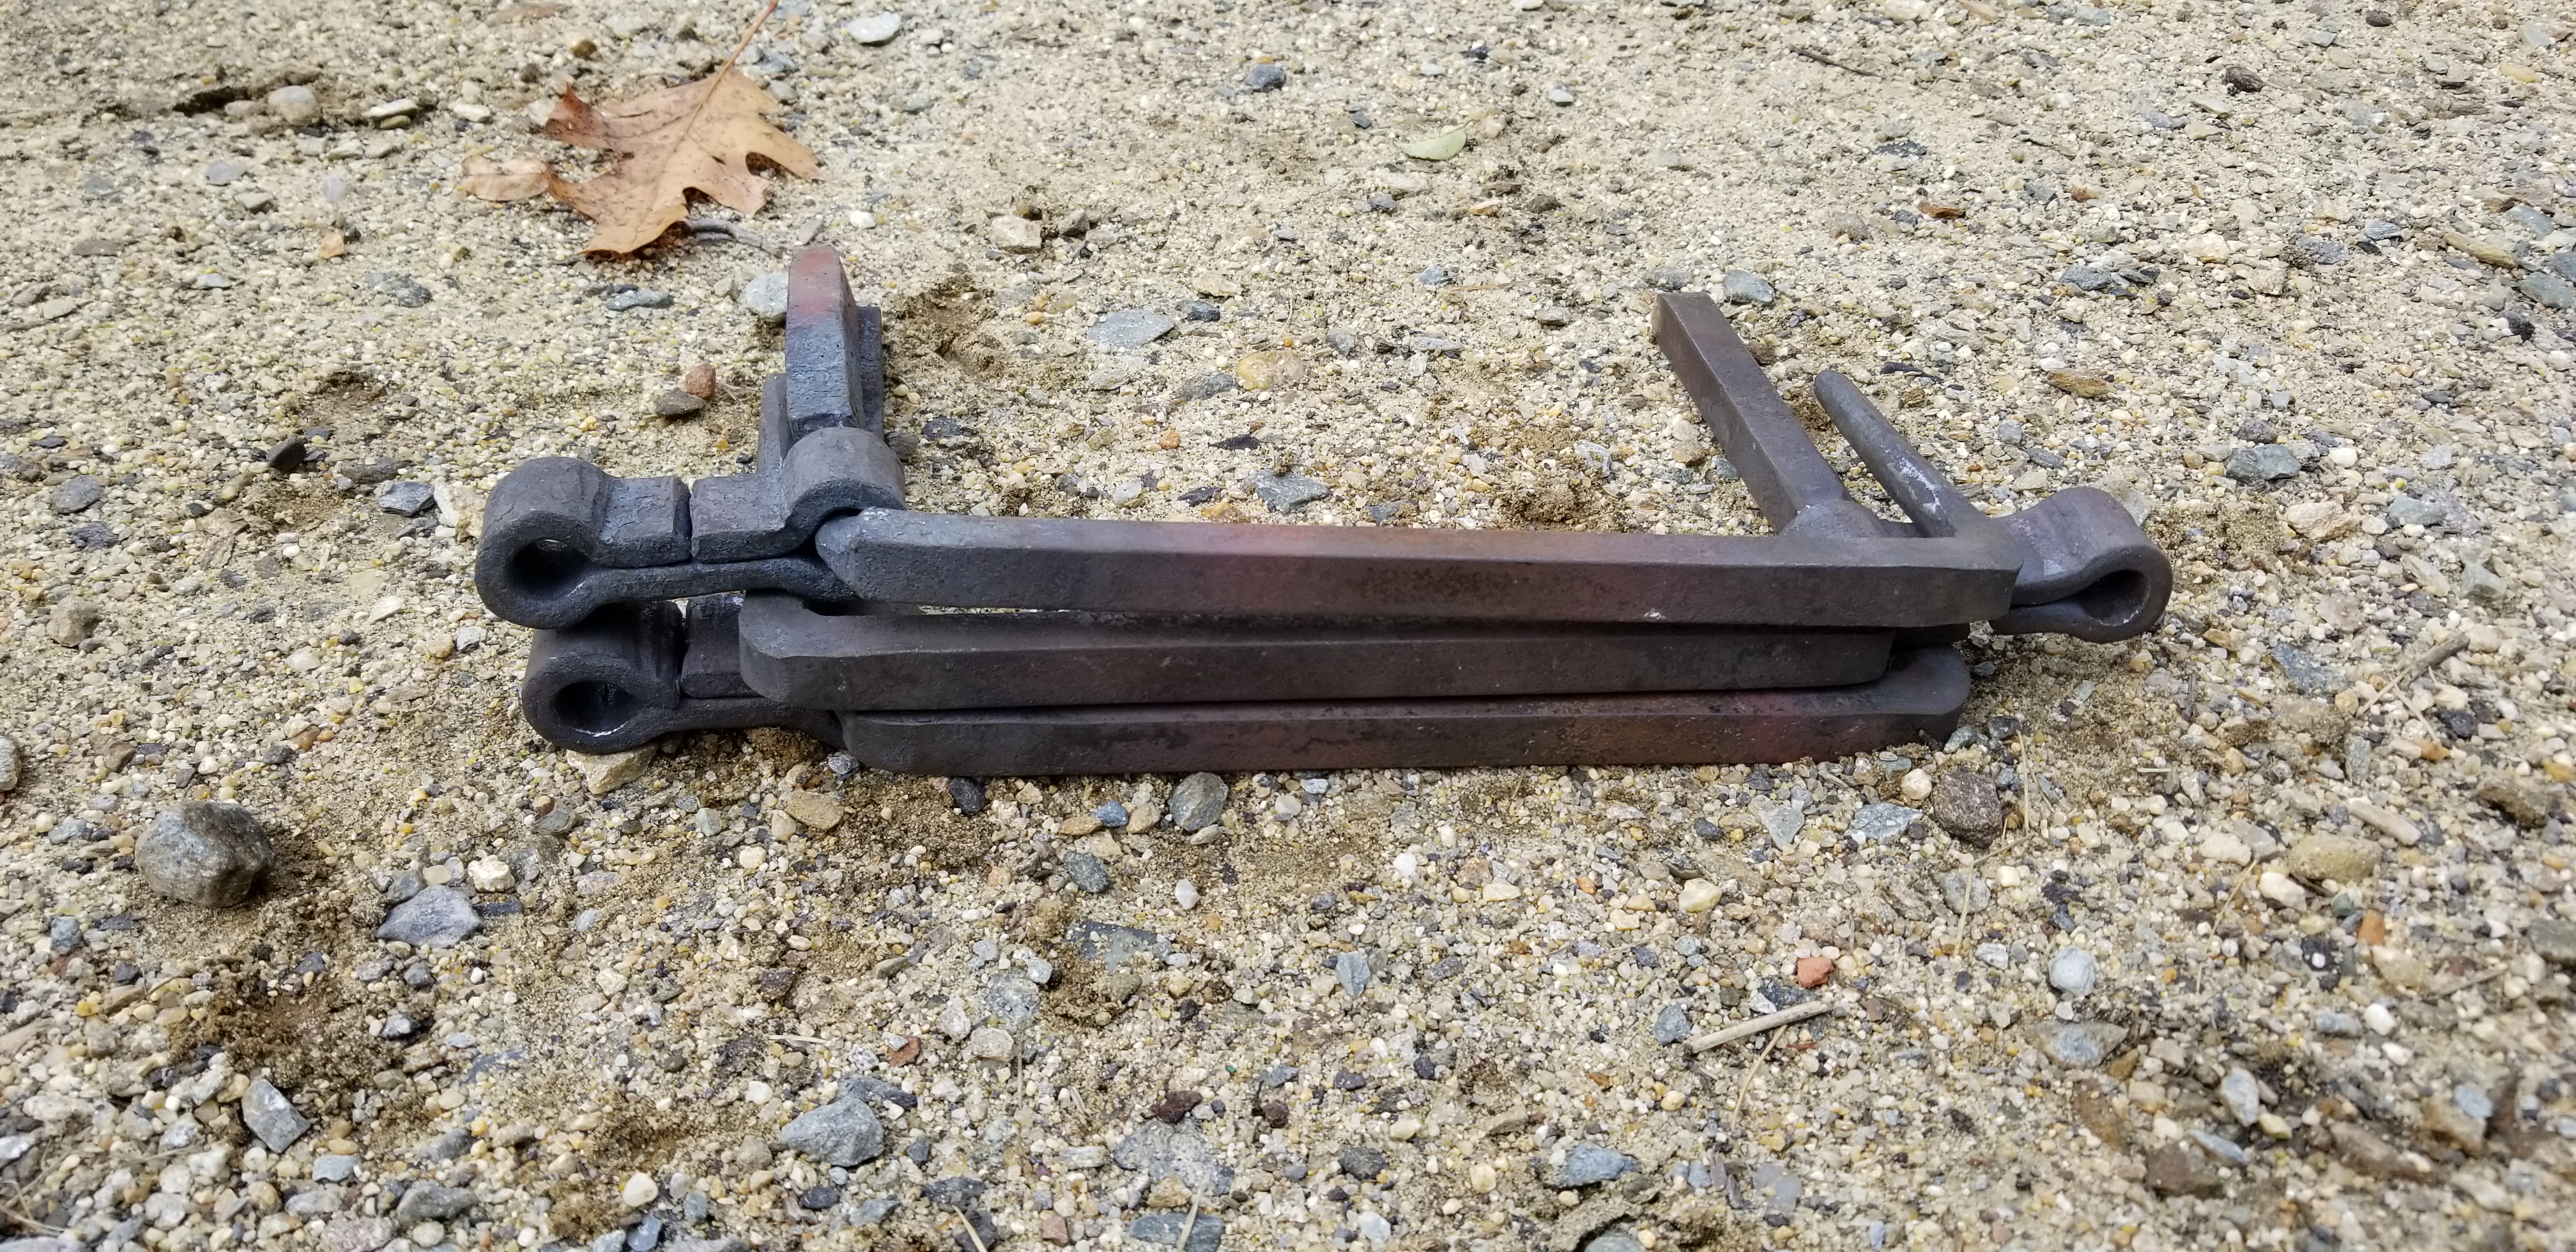
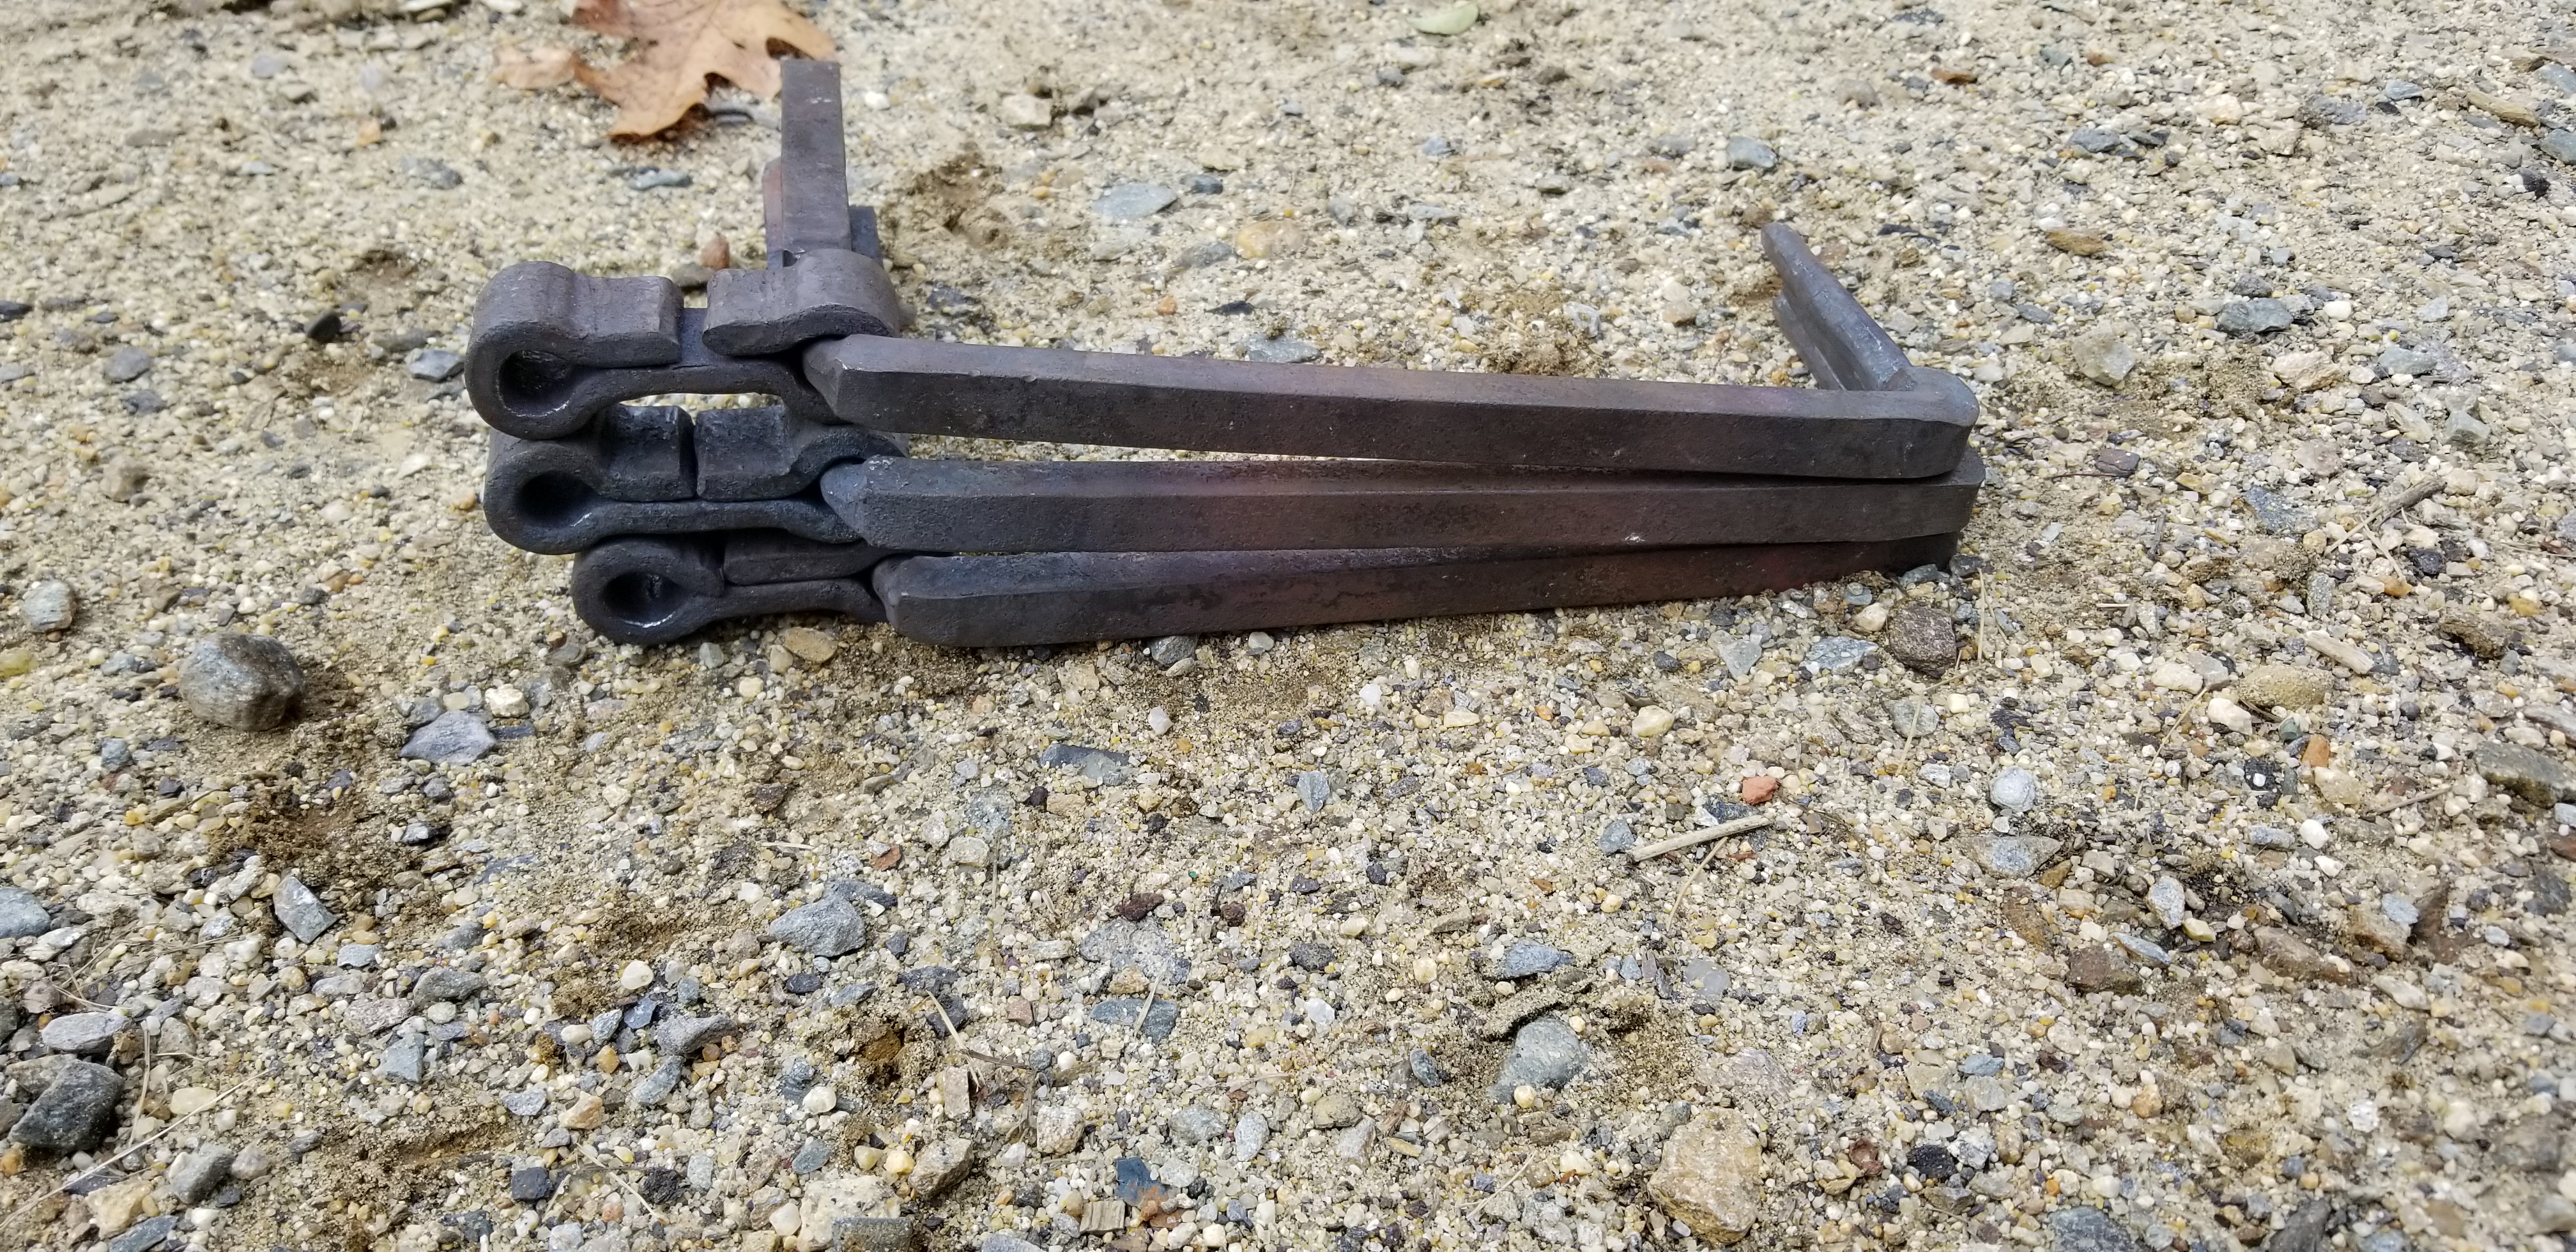
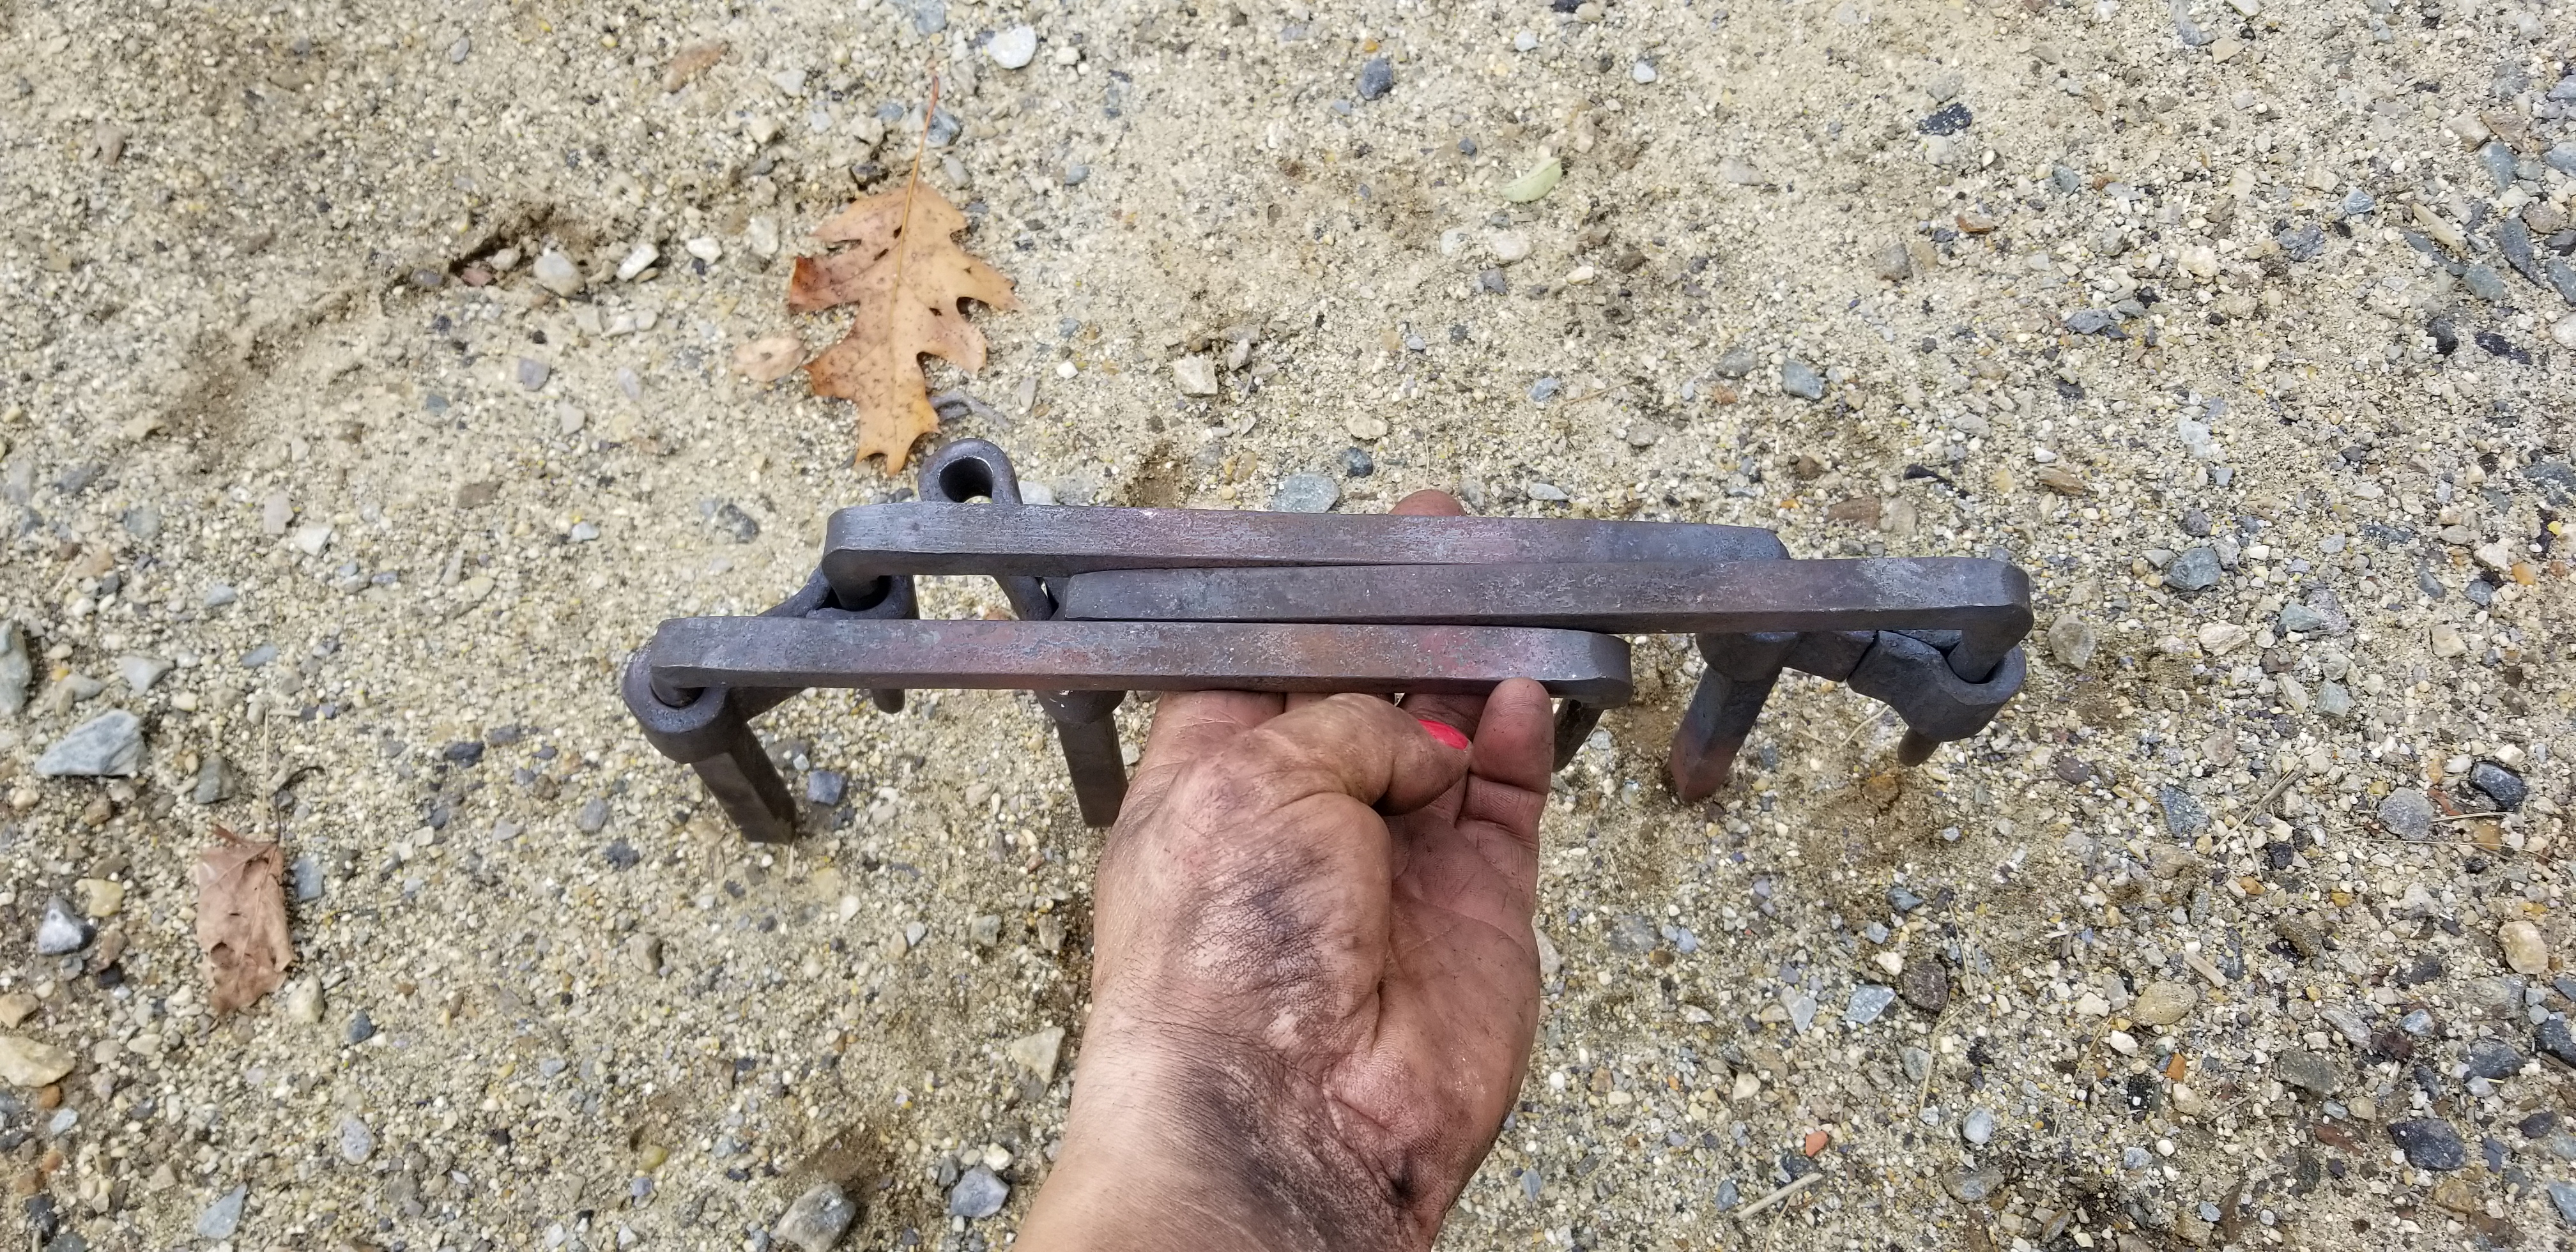
Thanks.. what is your definition of collapsible? If you mean nesting.. no it won't nest but it does fold up of comes apart easily to stack.. You can also see it will hold something as big as 16" down to just a few inches across. Fun right..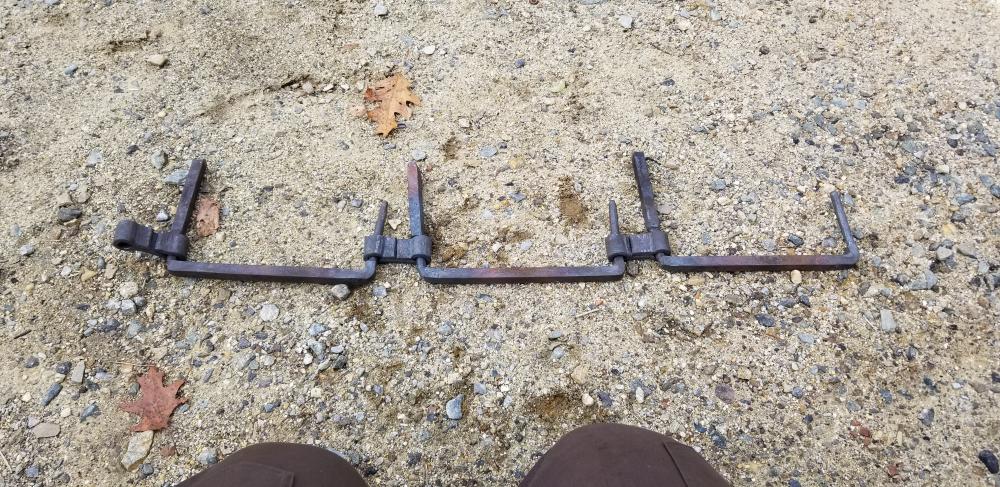

-
Years back when I was doing my investigation work I was lucky enough to find a very old burnt out colonial era home that was still partially standing.. It was an abandoned property and burnt back in the 80's more than likely it was kids that were partying in the house... anyhow, I spent countless hours there looking at all the nails or I should say all the variety of nails... The thing that really stuck with me is the consistency between them all.. When the house burnt it was like it smoldered and only removed the first 2" or so off all the wood nearly everything for 2 walls and then moved away from there was more damage with the farthest part away had fallen into the cellar.. Yup, it had a root cellar.. Every single nail that was exposed was nearly identical to the next.. they were all a Roset T head and they were all nearly perfect both in shape, length and shank size.. I must have pulled 50 nails and I was always expecting the next one to be different as I had only seen modern smiths At OSV make nails and each nail was different, but nope all the same.. I then moved into siding nails, trim nails etc, etc and every one of them were the same for the style of nail.. I might still have a jar of them hanging around somewhere.. I pulled 50 of them to have as a reference but even after sitting exposed like that with only 2 walls and nearly completely burnt away that last inch of nail had holding powers like I had never seen.. After pulling off 25 heads I gave up figuring I'd get back there at some point with more than a claw hammer.. 2 months later they brought in an excavator and completely filling in the whole thing.. I later found out the property had been seized as an abandoned property when the owner passed away and had no Aires.. and it was bought from the town with 100 acres for little money... They built a house just to the side of the old foundation stones.. It one of those things where I wish I had spent the extra time pulling out everything I could of.. I have had that happen on 5 different occasions.. one was an old creosote plant, this house, and old factory building, an old water powered dam site and another burnt out house.. Every single one of them fell victim to someone buying the property from the town and building new..
-
Food Safe Bronze?
jlpservicesinc replied to GandalftheGold's topic in Smelting, Melting, Foundry, and Casting
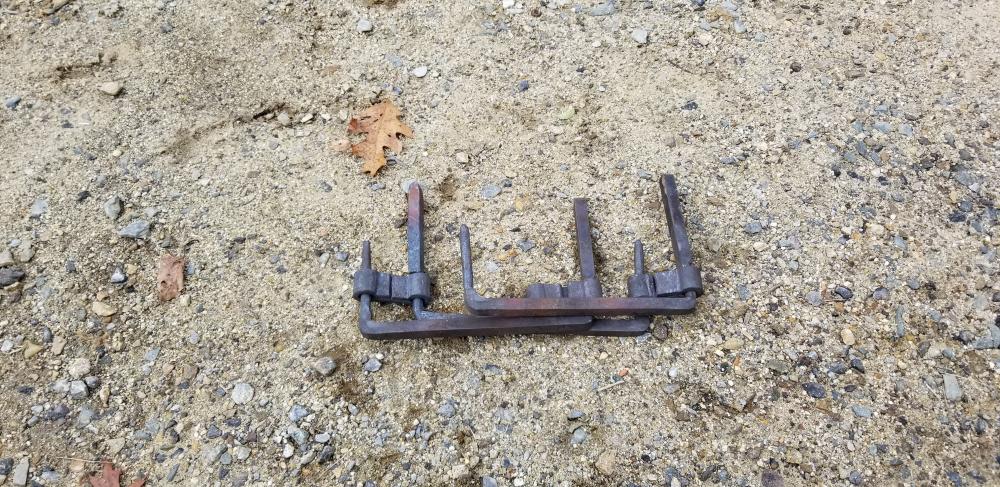
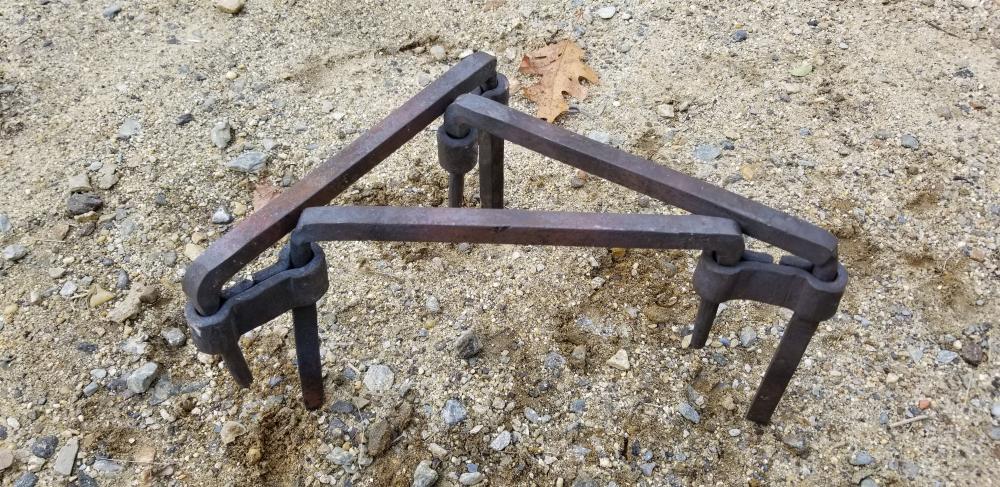
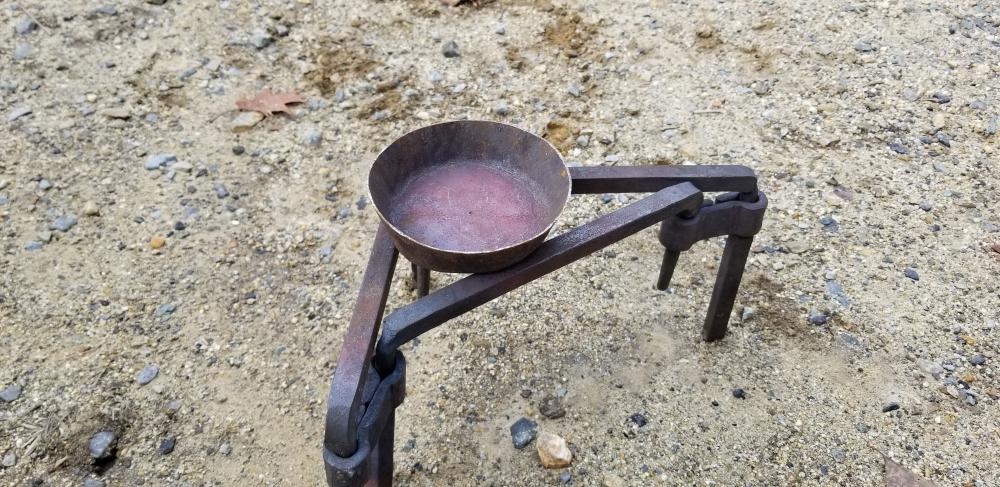
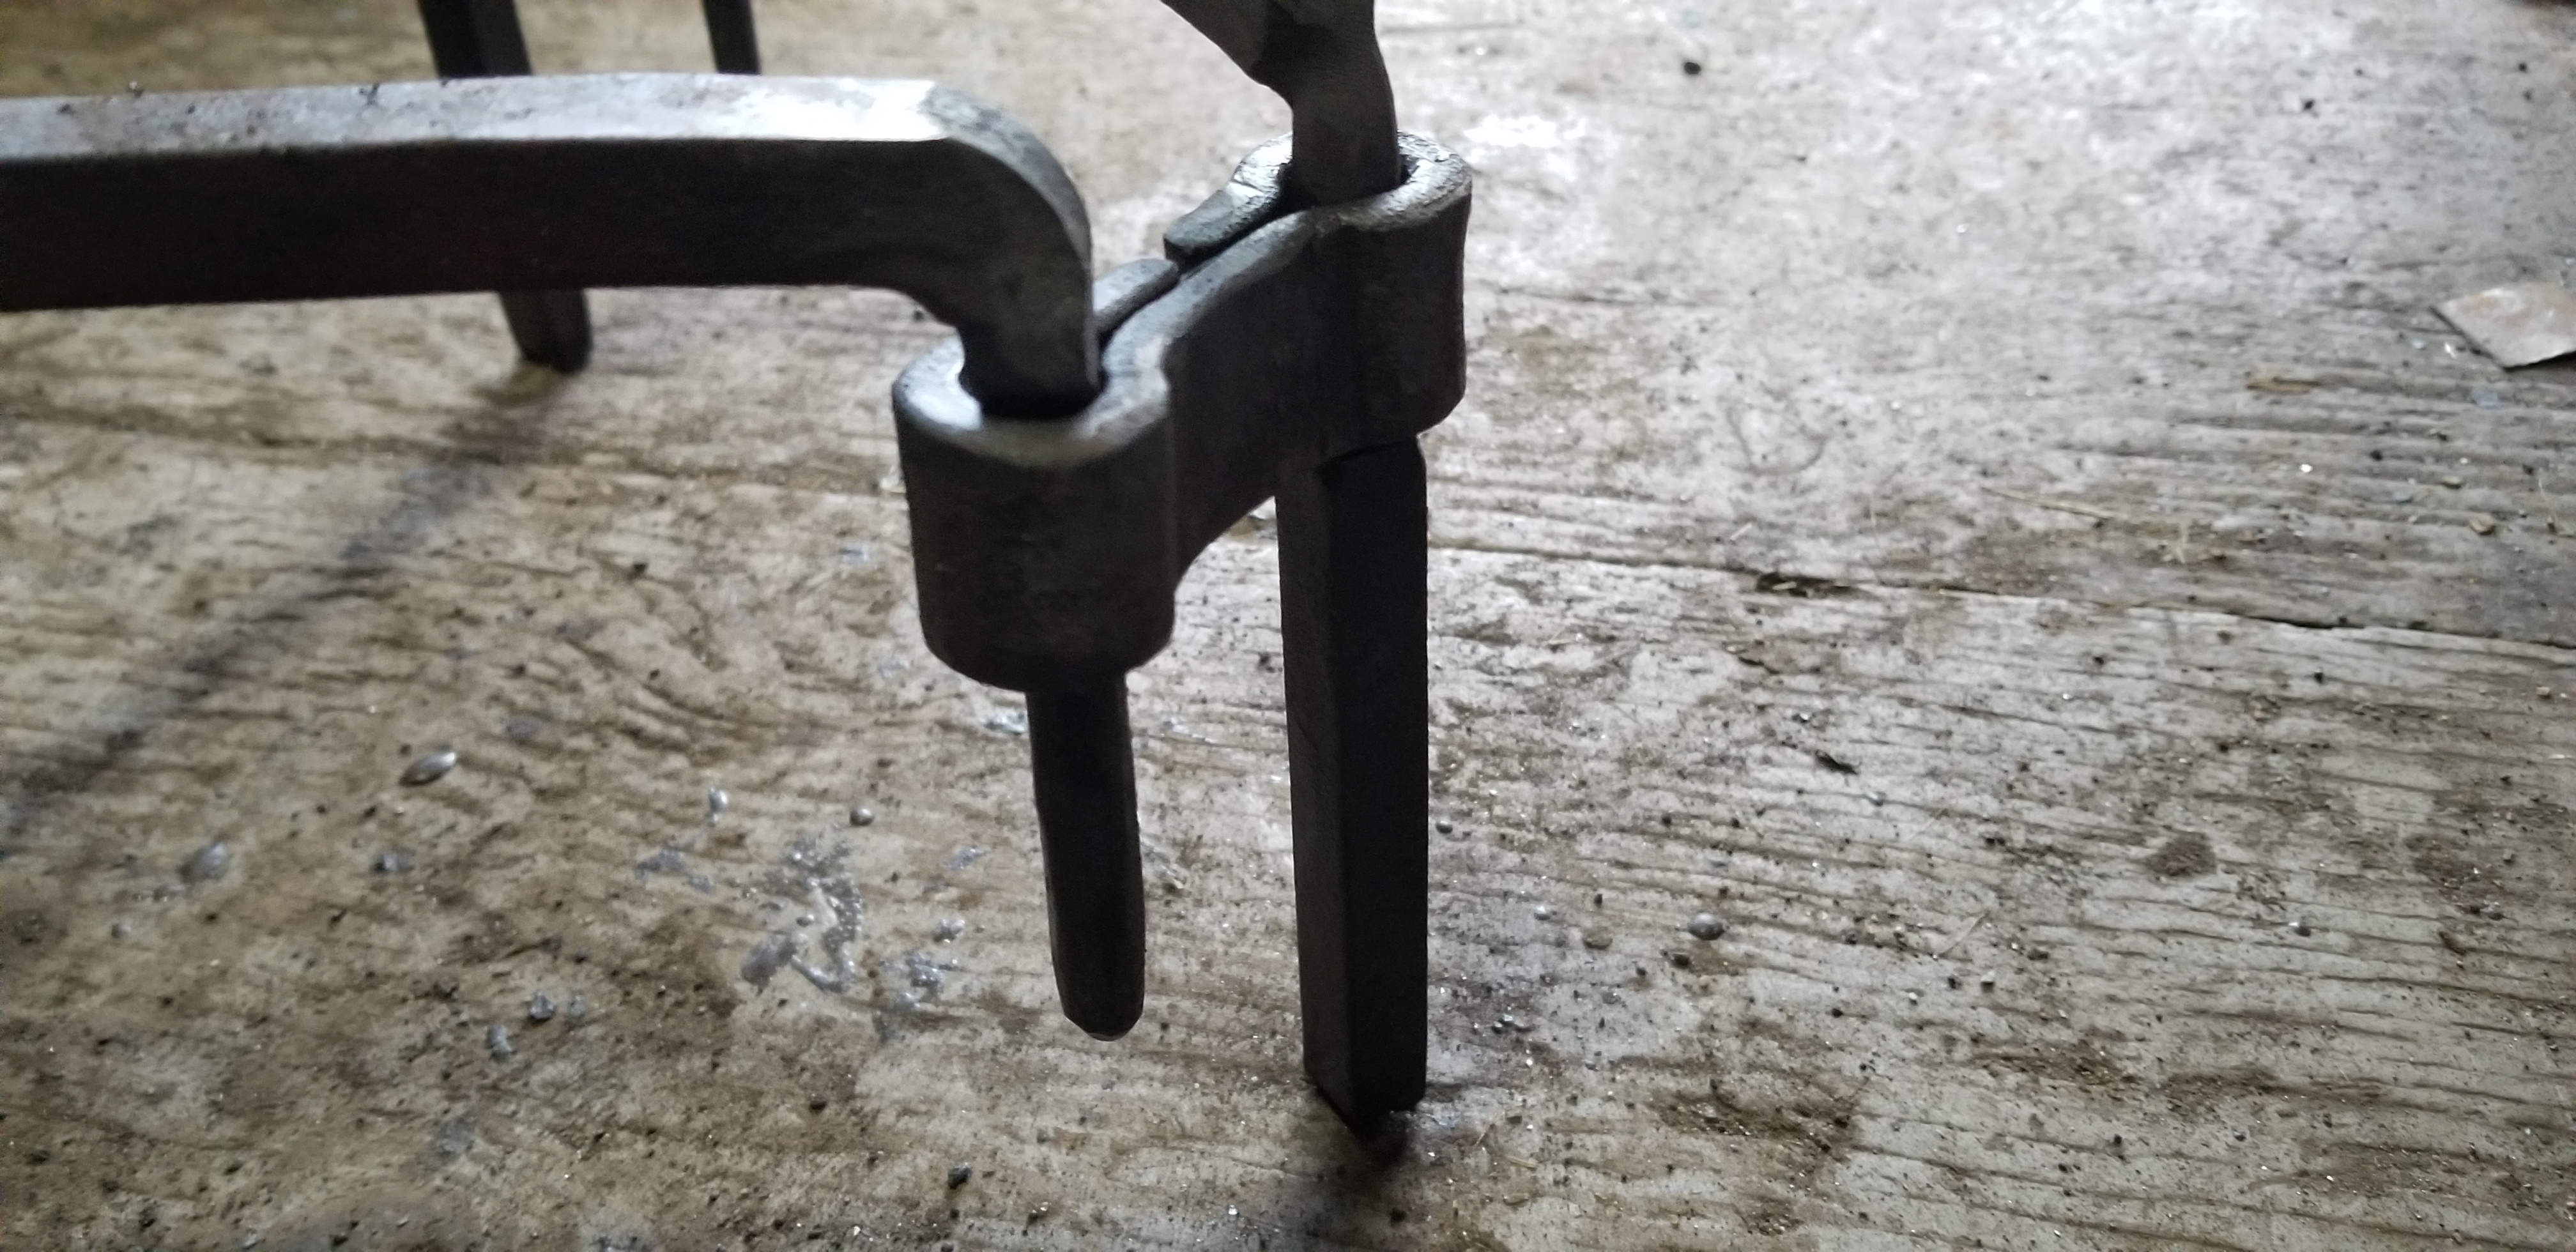
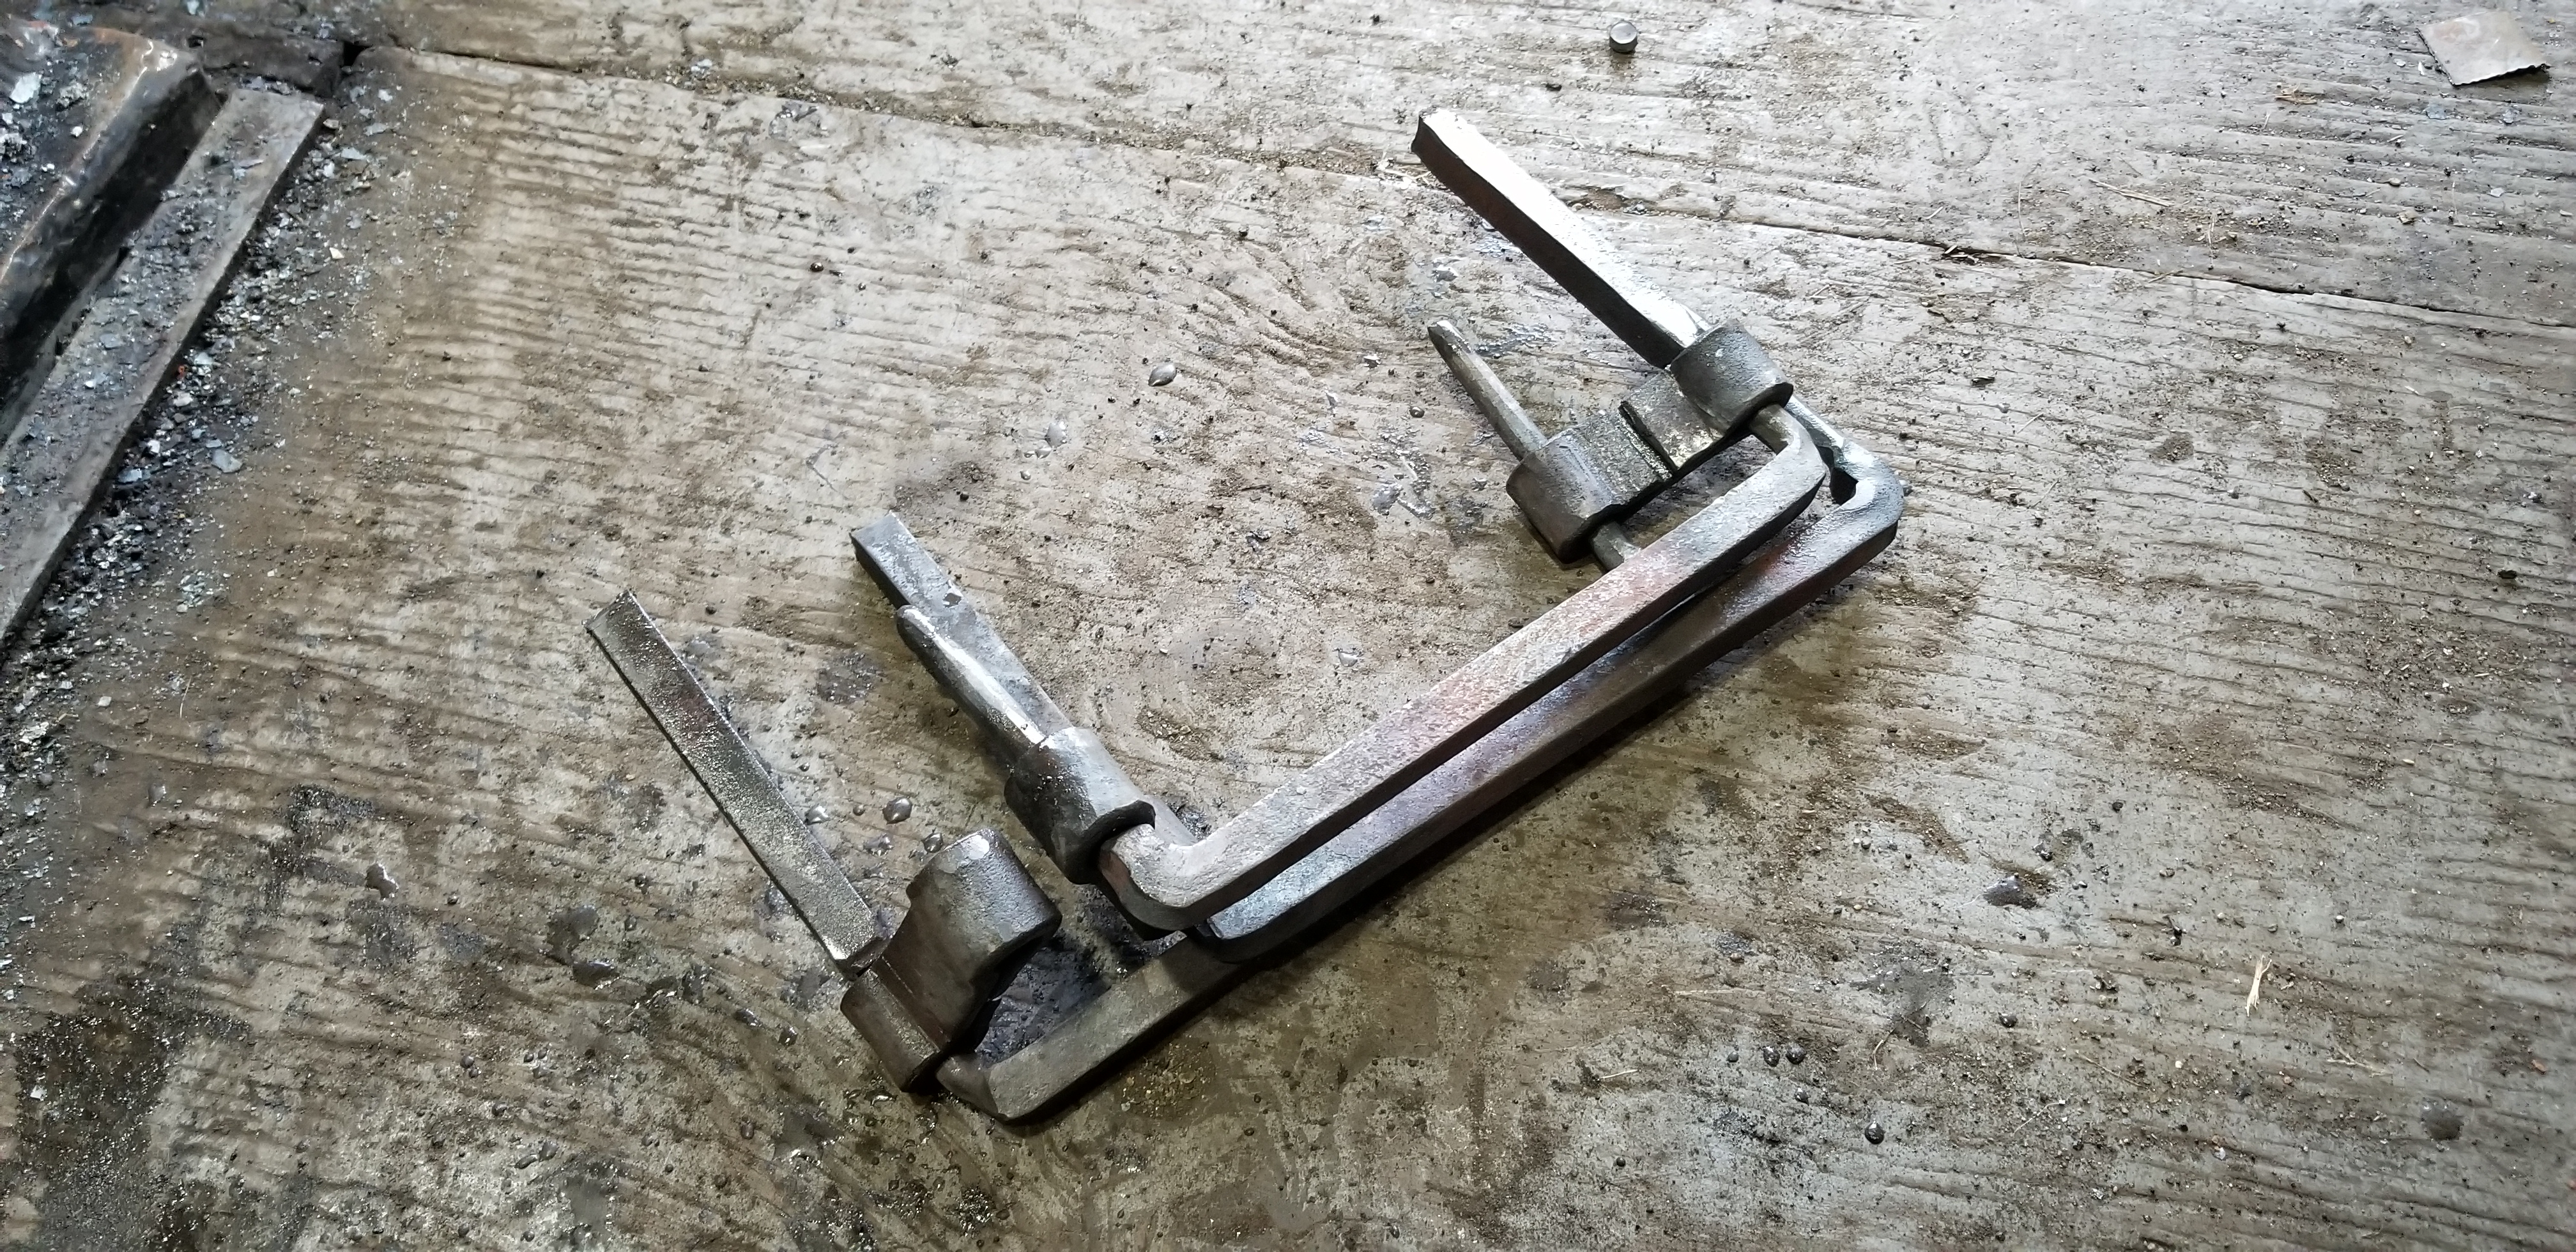
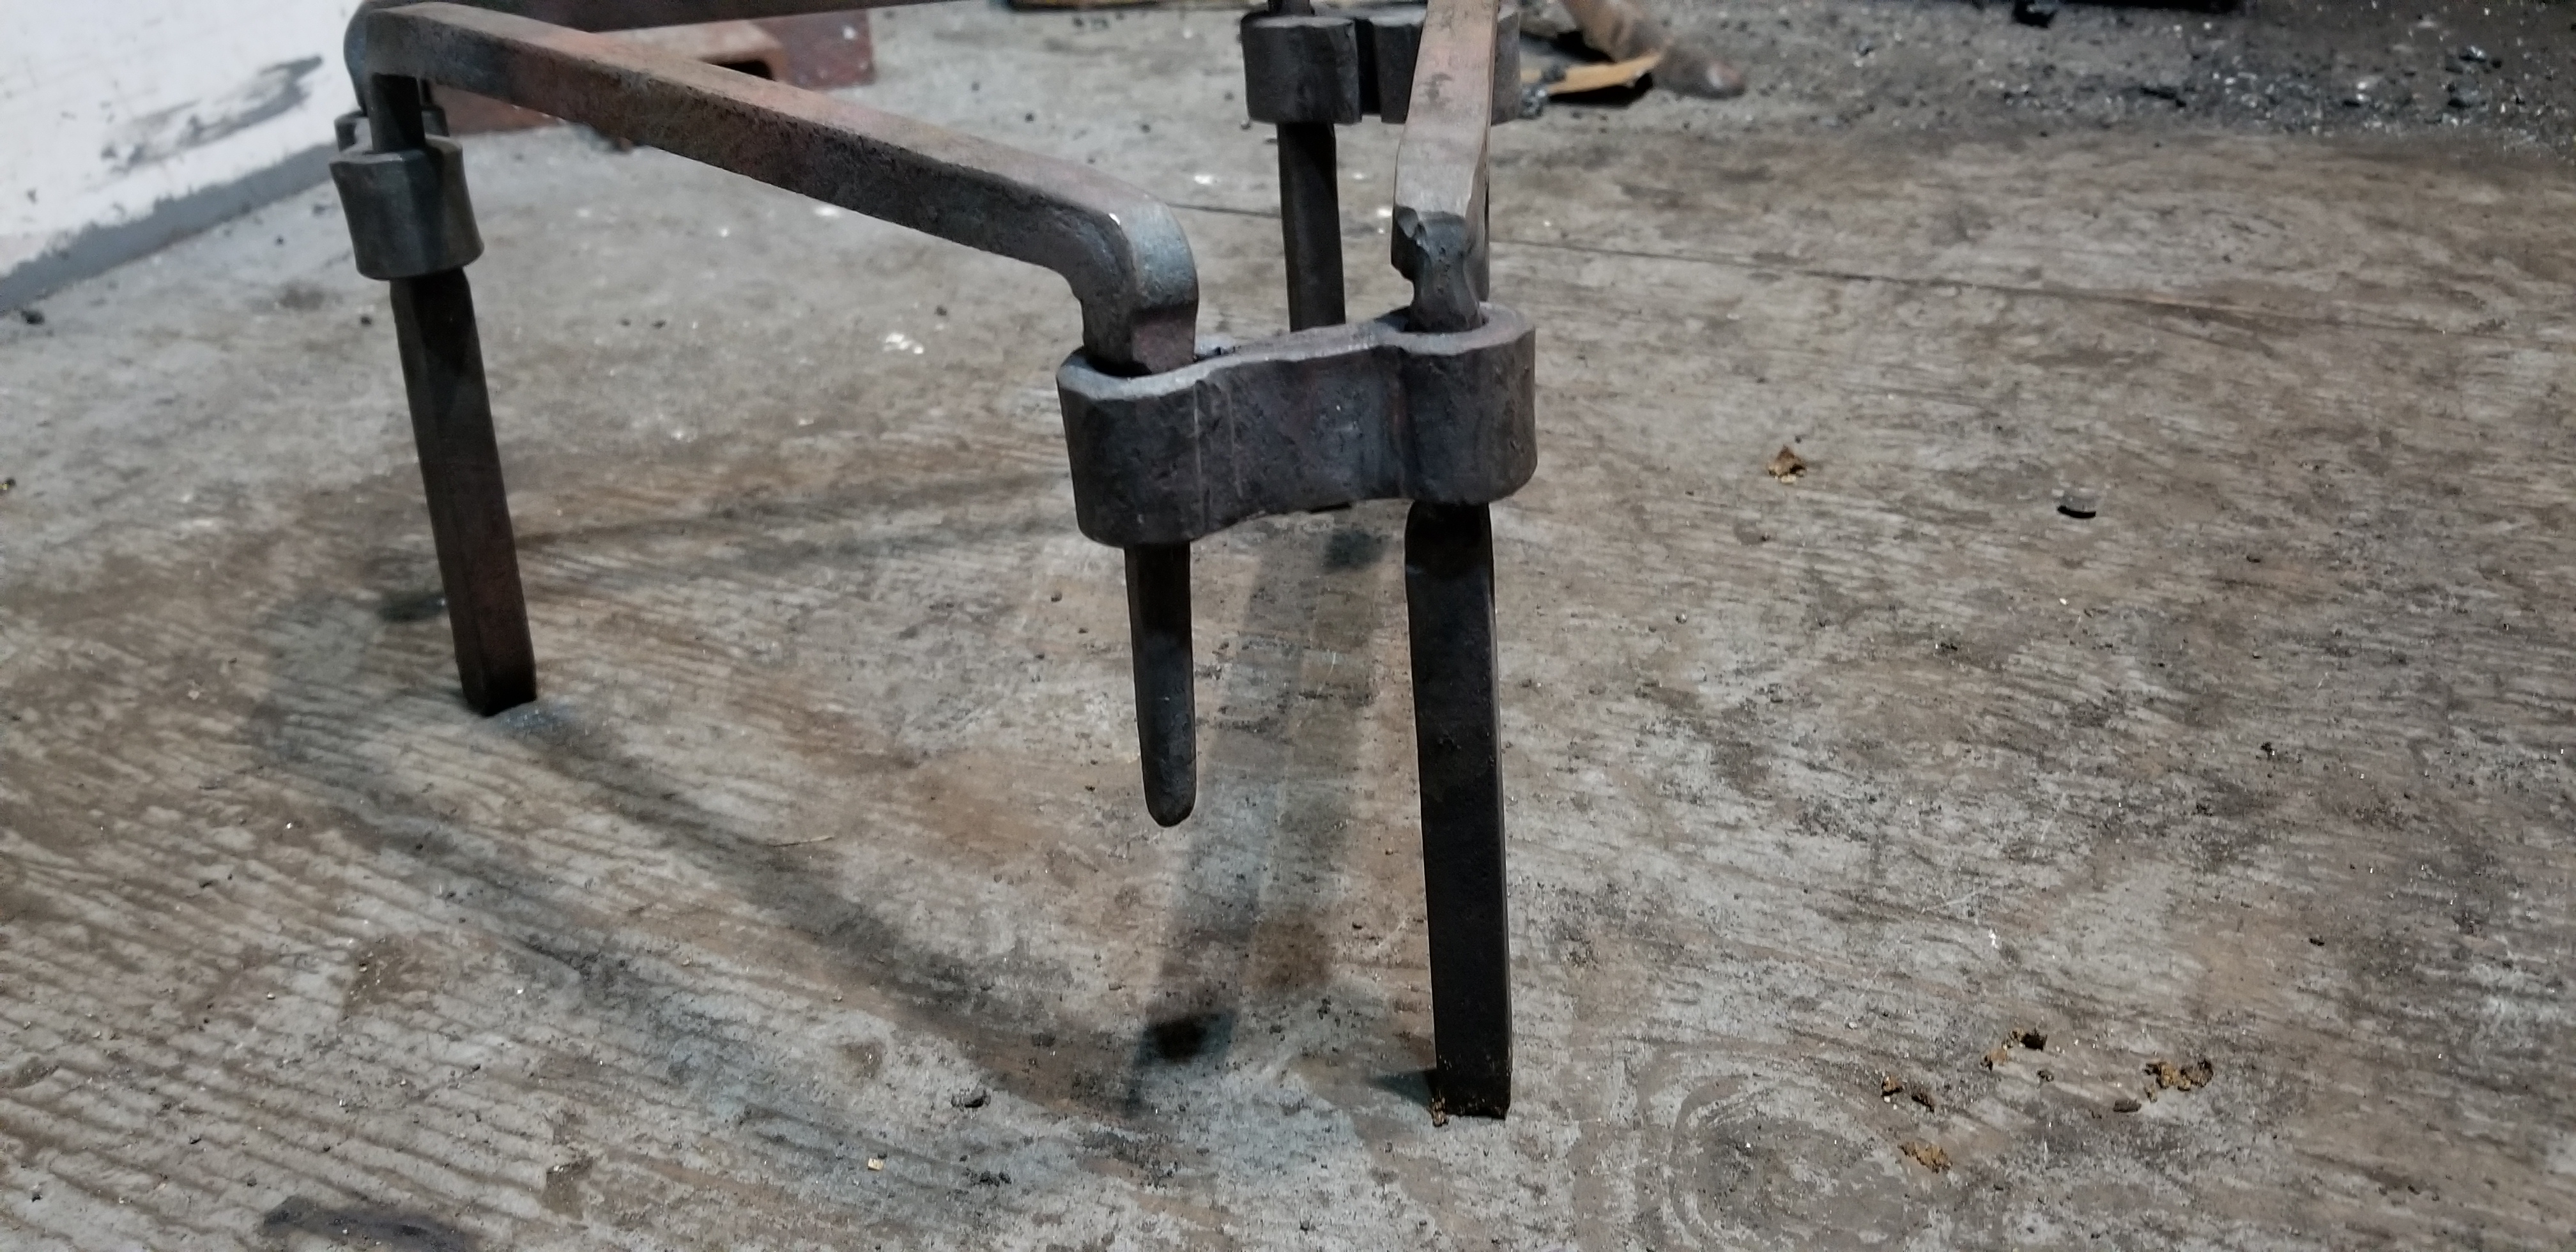
Ok, since this was an interesting idea. I spent a little time in the shop today and forged out a camp fire trivet.. It can fold up or it can be taken completely apart.. it's made from 1/2" sq steel, the side brackets are 1/4X 1".. I filmed the making of it so will set down and edit the footage sometime in the next few days.. Tomorrow I have demonstrations to do in town from 10am to 2pm so I doubt I will get to it tomorrow.. This could be made extra simple.. The bars could just be round stock or even rebar..((but I remember you saying you had some 1/2" square) I only have brand new rebar and it was buried in the steel pile from the move)) the swivel brackets could be made from a section of 2" black iron pipe.. then simply collapsed to form the same as what is shown.. To keep it from sliding down a could of wings could be forged just below it verse where I actually forged a round section into the square.. The secret on something like this is to keep the hinge areas tight.. It will hole 300lbs on it easily.. I would consider this project much easier than the frying pan..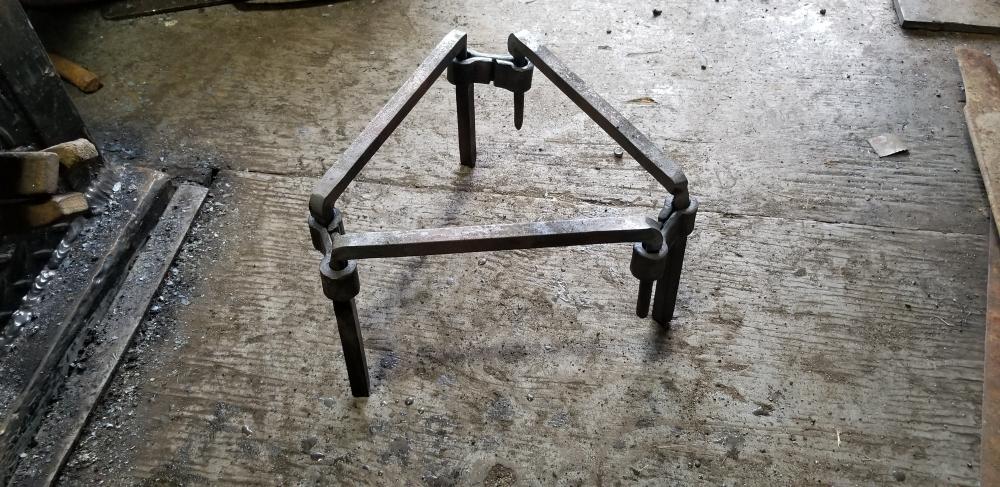


-
Food Safe Bronze?
jlpservicesinc replied to GandalftheGold's topic in Smelting, Melting, Foundry, and Casting
No, I don't have any resources in this area of the 1570's Italian.. LOL. I had a book on armor once. Good or bad, I stopped reading anything that was Blacksmithing related when I retired.. I was so burnt out, I wasn't sure I was ever going to pick up a hammer or fire up a forge again on a regular basis.I had no interest.. It was all gone. I dropped it all and walked away.. Previous to that I had read mostly about colonial American fare (lighting, hardware, wrought iron work, flint lock, knife making, etc, etc.) and spent a huge amount of time driving from place to place looking at how vintage things were made by looking at them and then reverse engineering them as this is what I was interested in the most and was a voracious reader.. All of my Blacksmithing and metallurgical books are still packed away and some I let people borrow and never got them back.. I do thumb through the NEB journal and the ABANA mags now.. But that is about it.. Not to sound like an elitist but eventually I became less interested in theory or what they did 500 or 1000 years ago as my skill set started to mature and I was a full time smith working daily at producing forged items.. You also have to remember I was self taught.. The reason why this is important is because I tried to Make one thing 50 different ways as I had no one to tell me it would or wouldn't work.. I eventually found what worked consistently and the fastest to accomplish the forging task at hand.. I had a 200lbs hammer Which was setup for only a brief time before walking away so nearly 99% of the items produced over the 16 years were hand forged with only a sledge and a hand hammer.. Historically with reference material you are the MAN!!! Besides that you must have a photo graphic memory to be able to pull all the info out like that.. Pretty amazing.. I for the most part like to come onto IFI.. Lots of friendly folks and the informational resources are great.. One of the things I do find lacking is that there are a ton of Newbies willing to share their work with no regards other than needing help.. Kudo's to you guys, it's so important.. But at the same time the guys who have great knowledge or skill sets share very little in terms of pictures.. Pictures speak a thousand words and if all the experienced people never share photo's of their work and all the new guys and gals only see other examples of mediocre forgings how are they to know the difference between a good forging or a bad one? Its like the pan video.. It's not a great video but it conveys a technique.. Not the only one but.. Someone I had this conversation with said " We don't want to discourage newer people with fancy looking goods".... -
Food Safe Bronze?
jlpservicesinc replied to GandalftheGold's topic in Smelting, Melting, Foundry, and Casting
Thomas, again remember we are talking with people who might not have the ability to forge weld.. The people who are here which are skilled and proficient aren't the ones these comments or instructions are for.. It's for the people who need help.. By the way if you noticed the trivet is a nestled affair.. And rather short in the legs as well.. This particular one is not intended for use in the fire.. This was made for a friend of mine and her husbands anniversary.. Sadly She passed about a year later to cancer.. This gift was/is a representation of how I felt about her.. Also this type of foot or finial is period correct and yes they used to fall off.. they had moons, rounds, etc, etc, not all of them were straight rods. I'm not clear on what you mean by "Adjust" the legs with my screw press? If you mean leg length to make it even, then perfect.. I just forge them to the same length and then it doesn't matter which finial or twist or what ever is used.. They just get riveted on (heads proud or sunk and smooth) There are just so many different ways or options when it comes to making or forging these items.. -------------------------------------------------------------------------------------------------------------------------------------- Gandalthegold As for setting the rivets as a shrink fit.. If the object is going to be exposed to heat the shrink fit will only last a little while.. What you can do though,, Is punch a partial hole, slightly less deep than you want the finished hole to be.. (not all the way through).. Then forge out the feet and completely cool off.. With the parent material hot, Orange works well.. Insert the leg into the hole and drive it down only a little bit (just like in punching the hole).. Now give it a second or 2 to absorb the heat and then give it a few whacks.. This will upset the end of the leg material inside the punched hole (just like using a punch for to long without cooling it) and this will lock the leg in place as the metal upsets inside the hole.. It will take a little experimenting to get the results consistent but it will work and you will never get the parts to come apart again.. The feet will eventually loosen but they will not come out.. This is one other point.. A Trivet has 3 feet....... if you make 4 feet for a given object it will never sit flat and will always rock.. Trivets are always with 3 feet.. A fire basket or cooking grill or fire cook screen will have 4 ft but these are designed to offer a flat cook surface as the pieces are designed to work together and support each other so offer a flat surface to put your pans or pots on without it being all wobbly. -
Food Safe Bronze?
jlpservicesinc replied to GandalftheGold's topic in Smelting, Melting, Foundry, and Casting
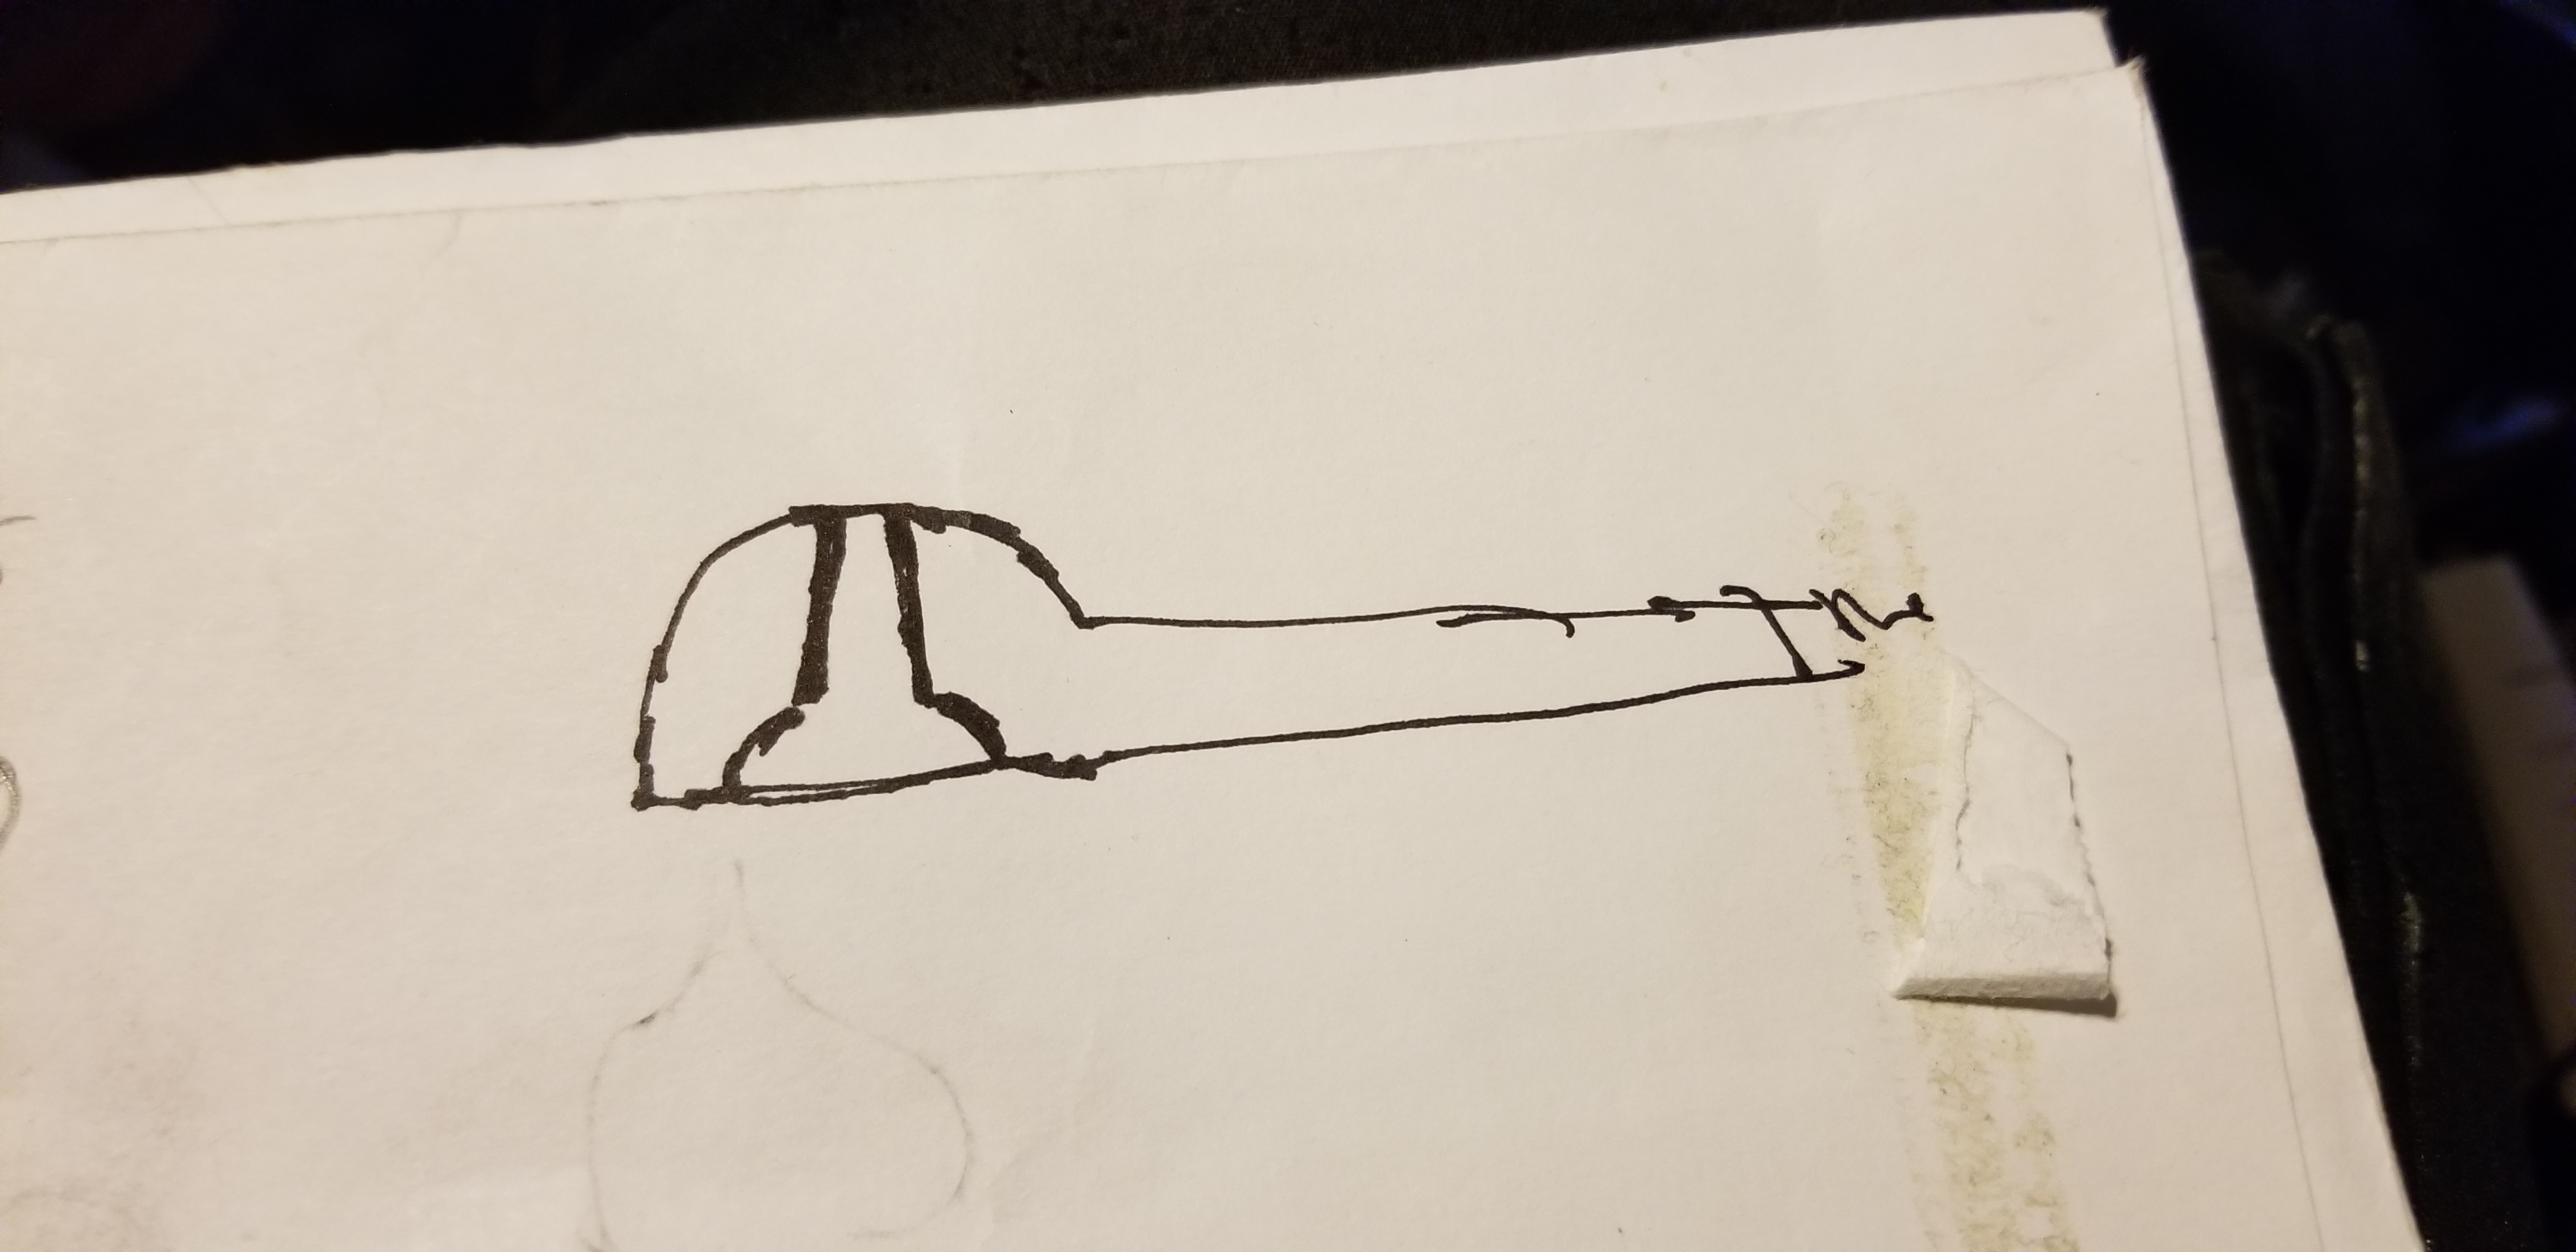
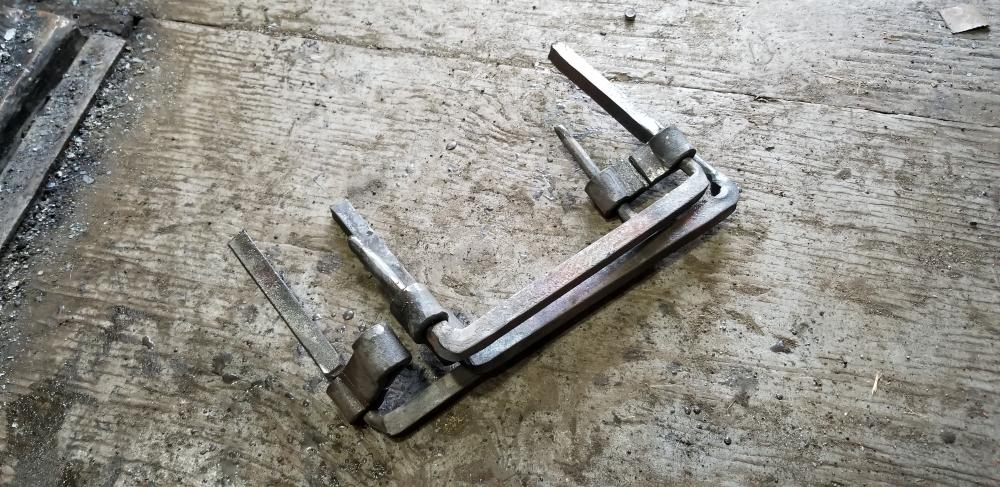
Here is just some food for thought.. FYI, it certainly will work..and I'm not trying to talk you out of it, but that can be a lot of work.. A traditional trivet uses a minimal amount of material to get the job done.. You would be better off with using straight bars with a 90D bend at each end with collars on them.. If you forge a groove around each bar , just below the bend you can fit the collar into this and then it will make the trivet able to fold up for storage as well as add some uniqueness to the trivet.. if you didn't feel comfortable making collars you could forge down the ends and make it so one end of the bar has a short section which fits into a slot or collar and then you can take it completely apart.. Maybe I'll make one of these as there is no forge welding and it could be a fun project.. -
Food Safe Bronze?
jlpservicesinc replied to GandalftheGold's topic in Smelting, Melting, Foundry, and Casting
No, they will be riveted feet.. Trivets can be very elaborate both riveted and welded designs but have found that the riveted feet type to be more popular in the area.. (this type survived better) The simple welded feet triangle ones were or I should say popular I guess because of the ease to make.. (but you see a lot less) maybe I'll make 3 examples as they all take forge welding which for a lot can be a problem.. Collared trivets are much more popular today and is usually what is shown in examples in magazines and such.. I was thinking of a round trivet to start with as it only needs the one forge weld and even if the person can't weld they can still successfully put it together even if the weld doesn't take, simply because they can still punch the scarf and then rivet it together..(2).thumb.jpg.747c94b839feb268a4b285b5a5f51f90.jpg)
(3).thumb.jpg.a4a5bc79e226124c835221ffefa39617.jpg)
(1).thumb.jpg.743c7411262c7dc41e047c1a7d5edc11.jpg)
.thumb.jpg.48f13551ad89b91380c970b3da561c2e.jpg)
-
Yes, it's not needed.. One certainly can as a blacksmith design and forge what every they want, but it would just mean more time making it with little benefit gained and usually a smith is trying to be time efficient.. If the nail header is designed properly the sliding around of the header is not a problem but you have to remember also that todays smiths are mainly hobbyist an produce a limited amount of nails.. For most hobbyist once they have made a few and the novelty wears off, the thing will sit in a box till they demonstrate or want to impress their friends. Last hardware order took 50 nails with a size 8 shank(1/8")X 1.5" shaft length onside pyramid head.. .
-
Naturally Aspirated Ribbon Burner. Photo heavy.
jlpservicesinc replied to Frosty's topic in Ribbon Burners
Certainly looks interesting.. -
Food Safe Bronze?
jlpservicesinc replied to GandalftheGold's topic in Smelting, Melting, Foundry, and Casting
I will be doing a "How to" on trivet making in the next few weeks.. Maybe tomorrow I'll film it depending on the day.. I'll make a round one first, then a heart shaped one.. -
The nail hole tapers from the bottom.. Ideally it should only be slightly larger at the base vs at the opening at the top for the nail shank size.. If I had to say a taper I'd say 1/8" over 1" In other words the taper should be about 1/8" larger over the taper if it is 1" long.. I had experimented with different length to width ratios and found that the longer the taper over a given distance gave me the best nails and with the straightest shanks and were simple to remove as they shank had more support and even if I was heavy on the hammer with offset blows the nail was still easy to get out.. The other reason for this is the nail headers will wear in use and while most people look at nail making as a cool, show your friends kind of thing.. I used to make maybe 1000 to 2000 a year if the taper is to great the nail header will fail sooner.. I'll look for the nail header i used the most and you can see where the metal started to erode away and it has maybe 4000 nails put through it.. You got it exactly right.. I made 2 nail headers at the last NEB meet.. One for a demo, donated to the group and the other for someone who wanted one and really wanted a lesson.. You punch all the way through once you bottom out on the anvil.. This will create a bulge on the top and this is rasped off.. If done right it is amazing just how clean the shoulder is .. Go what the nail series of videos would be my suggestion.. All the info is there so you can produce both a sucsessful nail header and then watch the nail making video. It's got them all.. LOL..

-
I'm sorry Glenn, but I don't agree with the double taper on the hole.. There should be a long taper from the work side all the way to the bottom but with no double taper.. Reason is if the nails is worked hot and you move the header sideways against the pritchel hole you can actually bend the shank of the nail into the bottom taper and will be tough to get out. on larger nails there is usually enough shank cross section to not cause as much of the problem but on smaller sizes used in hardware and such it really can make it a problem to get the nail out of the header, never mind having the nail remain intact in the process of removing it.. I speak this from experience as my early nail headers were of the double bevel variety.. After getting a few stuck during money jobs I changed into only one side taper.. Works worlds better..
-
Food Safe Bronze?
jlpservicesinc replied to GandalftheGold's topic in Smelting, Melting, Foundry, and Casting
3/16" is perfect for pans if limited in size.. 8" or 10" and if you are cooking on open fire or coals then 12" or larger it works great.. The only thing is getting the rim forged down enough (ideally less than 1/2 the thickness) so it has a good feel to it.. When you shrink the side wall back in it will gain back some of the thickness.. A 40lbs pan is no fun to use unless it's a big or fire used frying pan.. -
Food Safe Bronze?
jlpservicesinc replied to GandalftheGold's topic in Smelting, Melting, Foundry, and Casting
This technique is actually called shrinking.. Or in blacksmithing terms you are upsetting the metal back into itself.. The parts that are around the ripple support or hold it so it (the V) can be forced down back into itself.. this was a very basic video but there are some short cuts or techniques which can speed it up as well as get you out of trouble if you go to far.. The V's if to sharply formed will cut themselves off with cold shuts.. Sinking is when you use a form like wood or metal and drive the metal into it till you get the correct depth or shape.. Raising is when you hit the metal downwards but the metal detail moves upwards because of the displacement of the metal just lowered... This can be seen in Repousse work, and chasing.. The Rail road track stood on end would be perfect for this as it moves you into a standing position upright.. I had to bend over to use the heel of the anvil.. Ideally doing this over a round block with rounded corners (radiused edges) will offer you an easier method.. Things to avoid are sharp corners or edges on your anvils.. What I did in the video was okay for me with a starting object because of the level of experience.. Reason why I am saying this is : I did not true up the circle once it was cut nor did I smooth off the edges of the disk.. These are safety things as well as giving you a good point to start from.. I just pulled more metal into the area that wasn't round but it's not something you will even notice in the video.. With that being said, be sure and clean up and debur the edge of the pans or pots before you start.. Also another little tidbit.. This method shown used a tapered side wall.. This is important to realize as the taper round the bottom helps keep things in proper position while shrinking.. If you are doing this on thin flat sheet the bottom will distort and unless it is tensioned properly will warp as soon as you go to cook food in it though it was pretty flat when made.. The bottom of the pan I made is 1/8" thick while the sides at the top were 1/16" when started and because of being shrunk the metal got thicker.. -
Food Safe Bronze?
jlpservicesinc replied to GandalftheGold's topic in Smelting, Melting, Foundry, and Casting
Well, here is also the other part.. It's nothing but money.. It just depends on where a person chooses to spend it.. No matter how you cut it, it's an investment and the people who are making videos daily or every other day are doing it for the money to be made vs just quality videos.. Anyhow, Yes the technique is not new and it's very handy for such things.. As pointed out before this technique is known as shrinking vs sinking which is a different process and is covered in Jymm Hoffmans videos pretty decently.. Hi Robert, sorry if the blurb was sounding needy or unappreciated wasn't meant to.... I was really hoping it would offer food for thought and discussions based on the information.. Me saying this is how to do it and having so many other talented smiths I figured would open the door for discussions on technique or suggestion or such.. As for videos and no time, It will just mean you will have more sit time when yours free's up.. In the video "How to" Que is trivet making with both a round trivet and a heart trivet, a true frying pan video, a pot making video, a hot hardie video, and a forge welded hardie swage with welded steel face.. This will fill out the time this winter I figure all of these will take around 120hrs worth of film editing if not more with about 20hrs of forge time.. . It will all work out.. Please report or question anything you come up with.. The idea is to share and there are no bad questions.. -
Food Safe Bronze?
jlpservicesinc replied to GandalftheGold's topic in Smelting, Melting, Foundry, and Casting
Thanks for acknowledging the post @JHCC.. Wow, i figured there would be more than 1 response after this much time elapsed, either positive or negative at least shows someone is thinking about it, Or even saying I'm a hack or it's exemplary or offering others suggestions on how it was done or could be done, but nope.. All dried up.. As for the other pan, your better off just to start again unless you have sentiment tied up in the old one.. I have found that I can massage the metal into just about any shape but at some point it would have been better use of the time to start over.. -
Old world anvils, stump anvil
jlpservicesinc replied to genesaika's topic in Anvils, Swage Blocks, and Mandrels
yes, big time, then set it into a tree stump.. Perfect.. -
Food Safe Bronze?
jlpservicesinc replied to GandalftheGold's topic in Smelting, Melting, Foundry, and Casting
Oh, it also has some editing mistakes towards the end with the PIP being in the wrong place.. I usually do a watch through the content to make sure everything is where it belongs, but skipped it to process this as quickly as possible.. Just had a chance to watch it so found the PIP errors just now.. Best. -
Food Safe Bronze?
jlpservicesinc replied to GandalftheGold's topic in Smelting, Melting, Foundry, and Casting
So here you go.. This is a basic overview It's not a great quality video but will show one method of making a pan.. Larger pans in the normal range are easier to make, but this is the scrap I had handy.. Ideally a round piece for an anvil makes the process easier.. I used what I had handy for the essence in showing how to create or follow the formation of the ripples which then are flattened.. The center punch mark as well as the scribed line (outlining) the bottom should be on the outside... This wasn't scripted or story boarded.. It was just a forge session with your question in mind.. All feed back is welcome.. Be sure and watch it soon as I'm not sure how long it will be left up as it was made simply to help you one your journey.. Took 50 minutes with setting up cameras, starting the forge, picking out metal, marking and cutting.. it took 6hrs to edit and another 2hrs to upload it.. This is the reason why videos or quality videos are hard to come by.. this comment it in regards to another thread. -
"How to watch a YouTube video" collaboration
jlpservicesinc replied to JHCC's topic in Reference Materials
I agree to disagree with the certification process.. I think for the most part it is a waste of time if it is propagating crappy non fitting or outdated information.. A certification is only as good as the guy or gal applying their trade.. Anybody can pass a test.. It becomes do they prefect their craft or simply fall into line with what everybody else is doing.. Certification can be a good way to start but after that it can fall apart.. What everybody else is doing doesn't mean it's right.. So you either work at changing it or you join the club and drink the cool aid.. I personally don't like to wear eye protection.. In nearly 40 years of blacksmithing 5X wearing PPE I've gotten metal in my eye which had to be removed at the hospital.. In that same time frame I have had to go to the hospital 2X while not wearing eye protection and in all the years of working I only wore PPE 5X and each time I got stuff in my eyes.. One could argue they were ill fitting or what have you.. Personally things happen just because.. Unless you are there, you ain't got a clue.. I don't condone nor do I suggest anybody else not wear PPE..And require it for all teaching/lessons.. I always wear hearing protection and now with the " Video series" I have on youtube I wear Eye protection but it's only because I finally found eye protection that works pretty decent.. At least decent enough not to get stuff in my eyes.. In the early videos on hinge making I don't wear any PPE.. Personally I started making the "How to" videos because of the lack of good information posted and was lacking in content.. I couldn't find any really good video's on real blacksmithing other than the vintage ones.. (with that being said there are a few good smiths that take the time to put out good information but also found there was a lack of full content).. One of the largest problems with any of this stuff is: Time is money.. To make a quality video it takes a lot of time and with the PIP it takes 2X the normal amount as it has 2 or more film tracks that have to be edited.. I also film in 3D which shows even greater detail.. These also get YOutubed but you have to have a 3D enabled TV or computer.. If one is invested in all the lighting, mic's, and cameras it is a huge investment.. Technology is updating constantly.. This plays into how much one can invest in equipment unless it becomes a full time job.. Personally I have found that there are thousands of objects to make, but there are only so many forging techniques that need to be taught and once these instructional videos are produced there really isn't a need for more of them as all the skills are there.. It's just a matter of someone watching the videos and then practicing what was taught in the video to get good or even great.. So instruction vs entertainment becomes a very large factor.. Anyhow, Lighting is key but if one is into making professional type videos then it's really not a Youtube gig as its more serious than that.. Most people who are making quality Youtube videos are getting income from such ventures.. I have also found the really good videos are "Free" usually with no advertising.. This is because it's about content not revenue but I can see why it's such a strong draw.. it's passive income.. And now a lot of the free good ones have paetreon and advertising now.. As for my videos: the lighting is terrible.. (there are no lights as it was filmed in the demo trailer in the middle of winter after my regular work so roughtly between 3pm and 5Pm when the sun is setting and 200ft from any electrical (the water is completely frozen in the tub with no heat in 2F weather.).. 2, No story board: I just fired up the forge with both cameras running and taped the whole process.. then edited out all the time spent at the forge heating/reheating the metal.. Every video was done that way but the knife video as I had to figure out how to tape the polishing and handle work this added substantially to editing and filming time.. Personally I like the way the videos came out and is the reason why I posted them.. They are in no way perfect, nor production quality.. But they do give the information in a proficient and timely fashion... Besides that.. As pointed out in many other posts.. I just like to be different or difficult depending on subject.. That being said.. I don't care if the person is wearing PPE, is certified, running shoddy equipment as long as they know what they are doing and their skill set and the video shows that.. Good lighting, a story line and a complete saga is certainly extra helpful.. -
Food Safe Bronze?
jlpservicesinc replied to GandalftheGold's topic in Smelting, Melting, Foundry, and Casting
I personally like the funky look of both the Gremlin and Vega... I also like the pacer if that means anything. But there again I have owned European since my first real car which was a 1970 SAAB 96 V4.. I then moved in the 99 turbo, 900 Turbo and then to the older 2Strokes with a GT850 and a Monte Carlo 850.. I love them old SAABs..


(2).jpg.6d6d4d19bb05ead637f2a49d7d145b81.jpg)
(3).jpg.eae920bfdae184245b4b7b833f0f7737.jpg)
(1).jpg.dabce0344324a829a521b468f40fbefc.jpg)
.jpg.8429cd3fa4a404ca4b0cd7d6a580f0db.jpg)