jlpservicesinc
-
Posts
5,761 -
Joined
-
Last visited
Content Type
Profiles
Forums
Articles
Gallery
Downloads
Events
Everything posted by jlpservicesinc
-

What did you do in the shop today?
jlpservicesinc replied to Mark Ling's topic in Blacksmithing, General Discussion
-4F here this morning.. what I would give to be complaining about the temps being to hot.. -
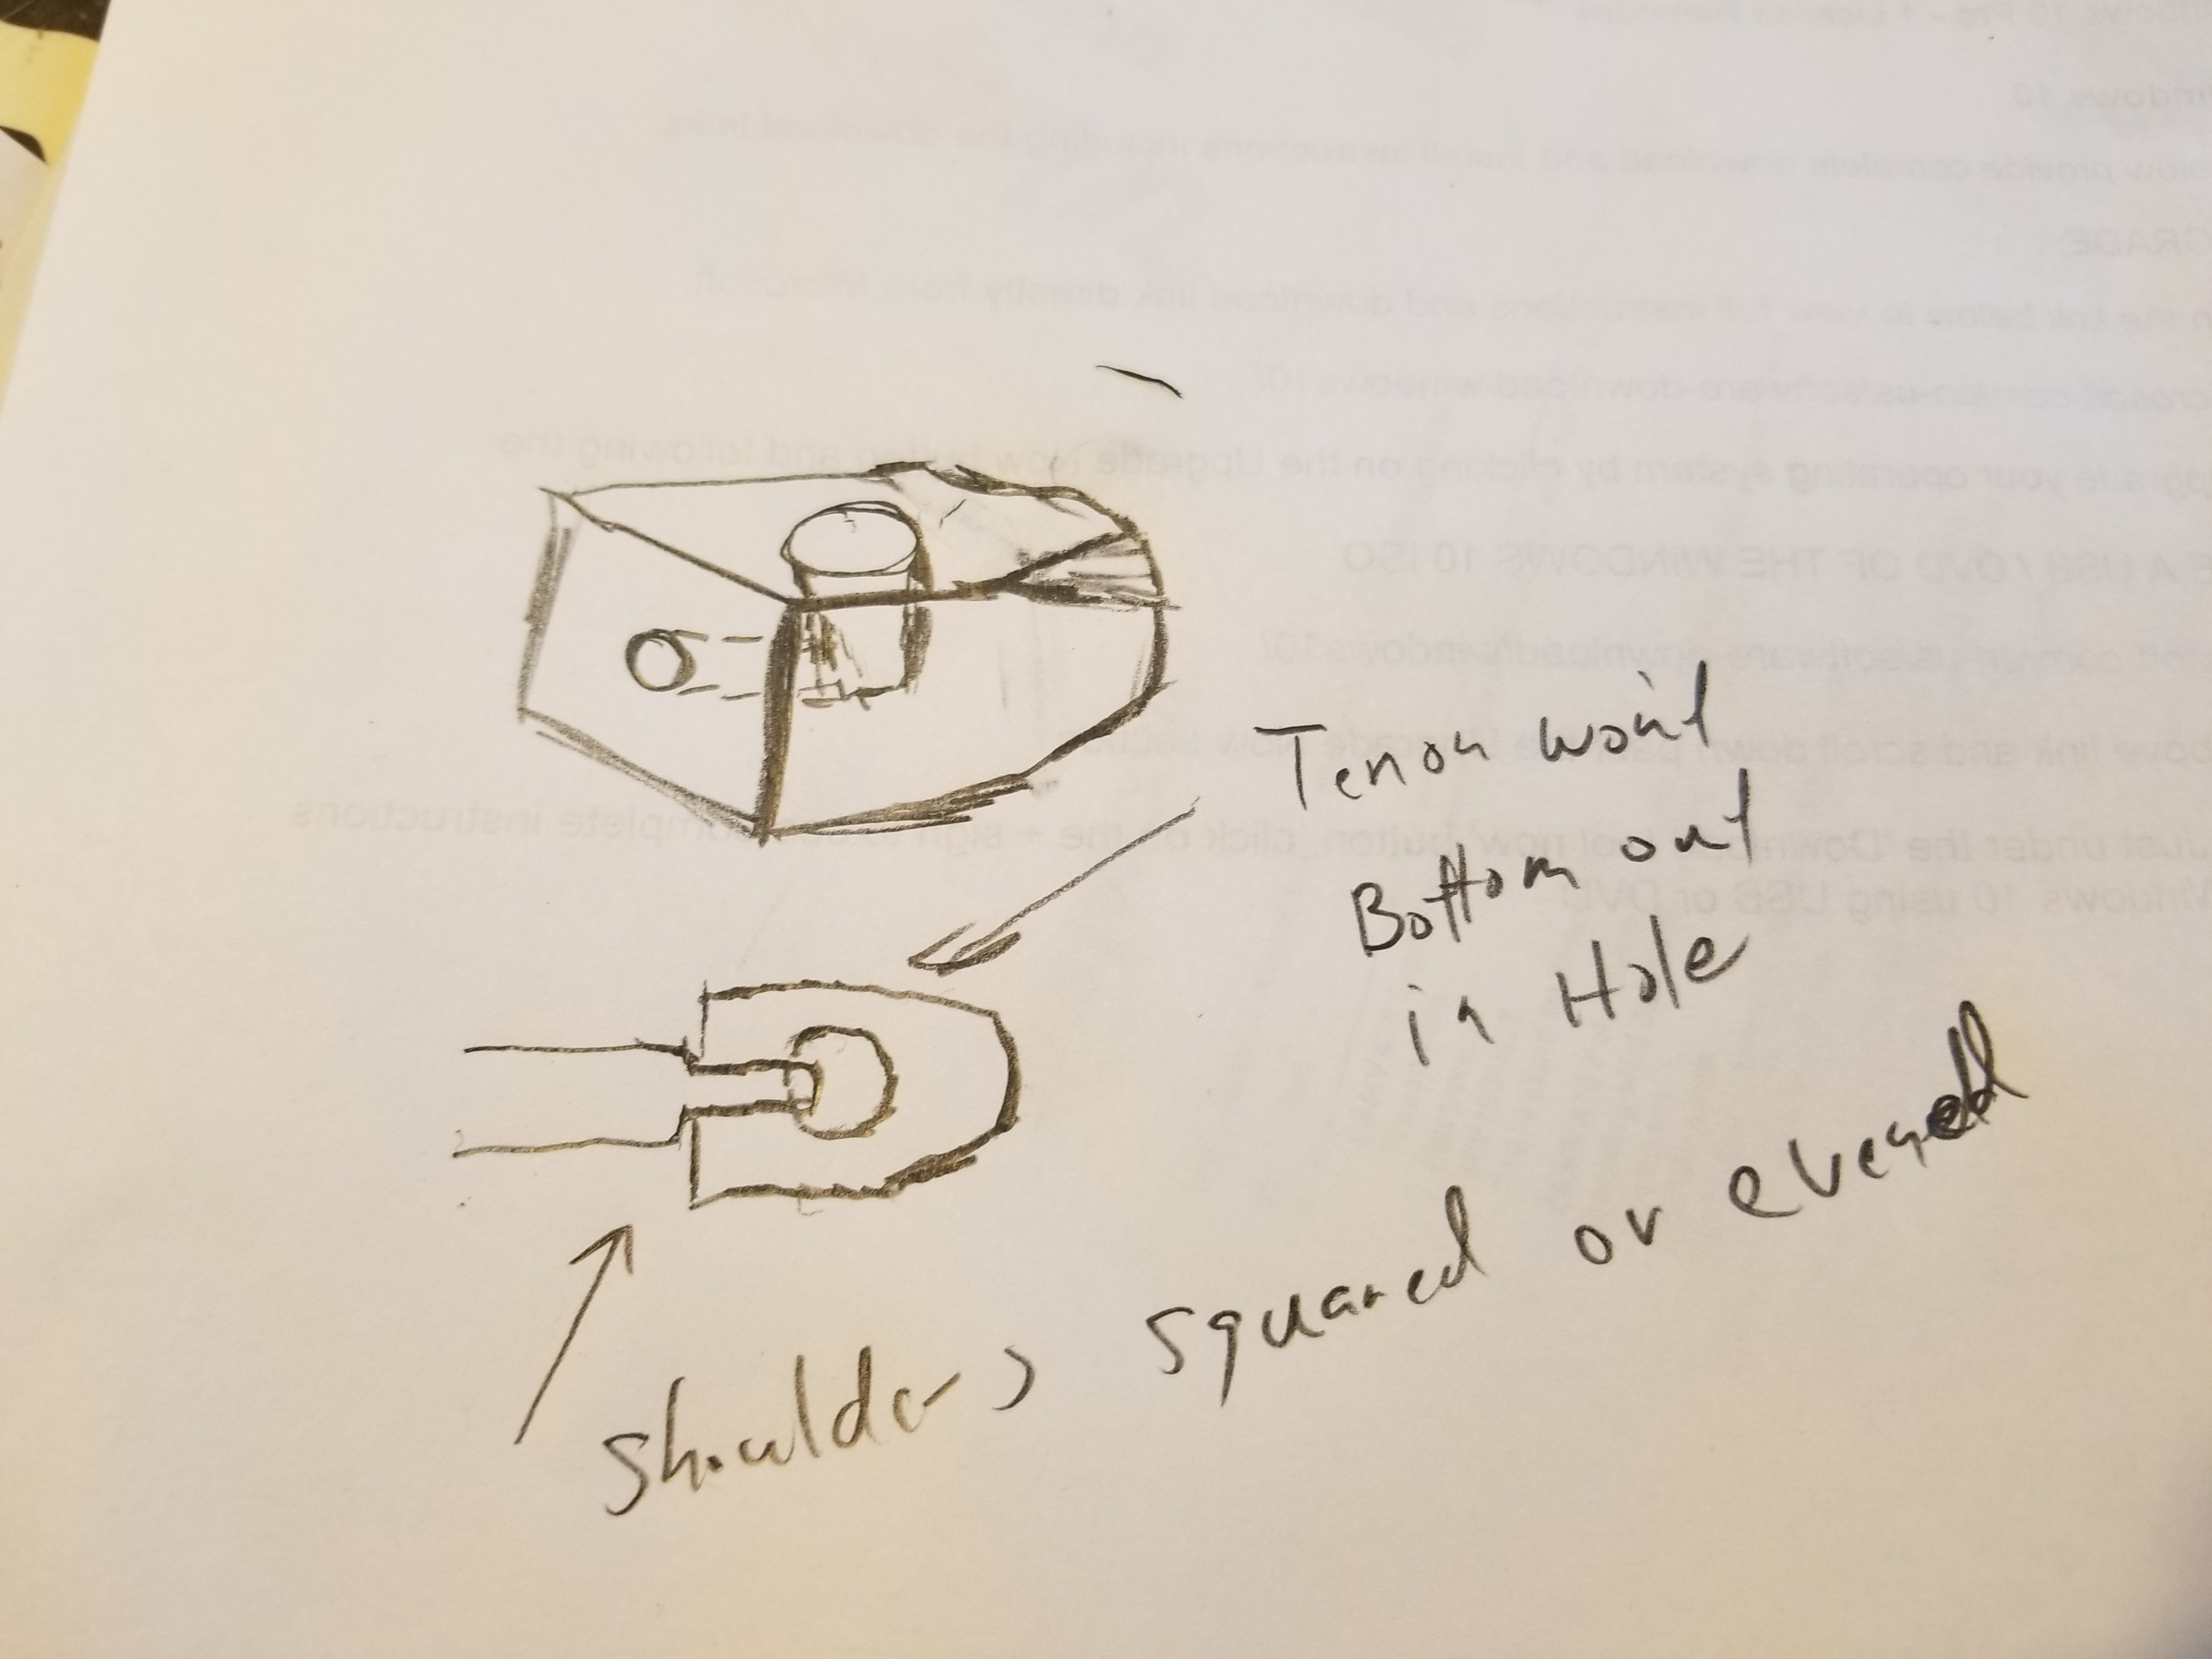
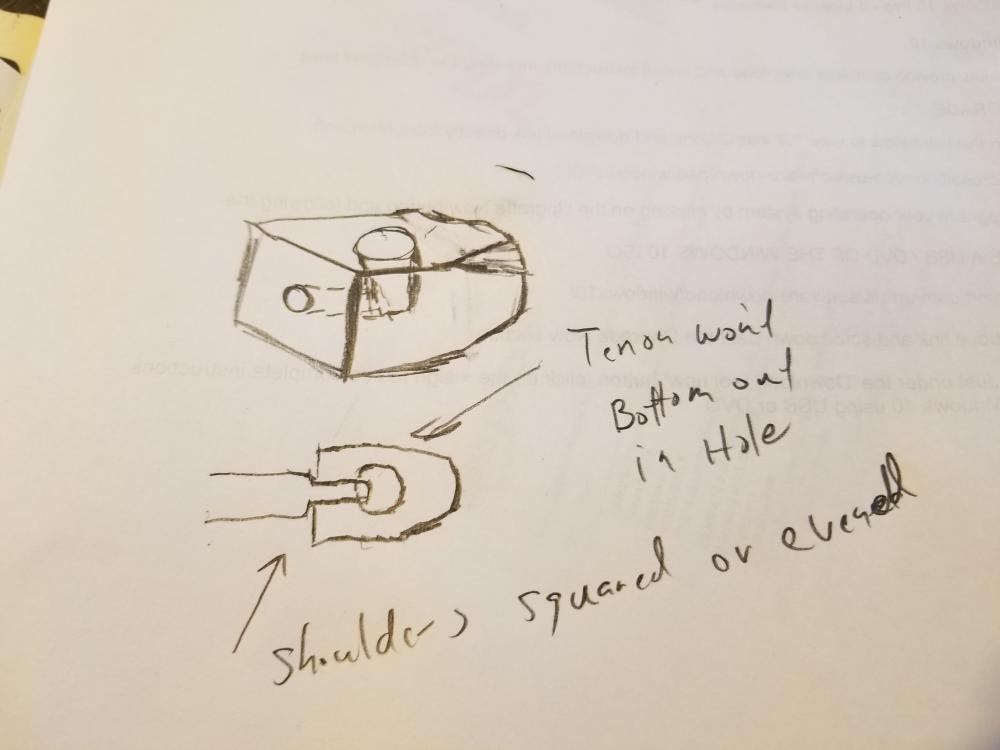
If you are making a real Monkey tool, you need a side hole to see where the tenon is... Nothing against you, but I think a lot of people misunderstand what a monkey tool is actually used for.. It was used to square the shoulder on a mortise and tenon assembly like wrought iron work and such and was struck on the end against the bar.. IE the monkey took was struck with a hammer. A bolster plate was used for general shoulder work and the metal being work was struck against the plate, much like a conventional heading tool but had different shaped holes and then a good old header.. Traditional monkey tool
-
A set tool is typically flat faced with a square faced edge.. But, they also made them with radius edges as well.. It was typically used with a bottom set.. I radius the off sides so I could use it as a multi set.. If the radius of the face is large enough it would actually move into the realm of fuller.. A set tool is designed to make a flat face up to a square shoulder.. A very particular function.. Nice work.. for the feathers a spring swage would offer the best advantage..
-
The Buffalo Silent 200 series is my favorite.. That is a later model with stamped steel fan case.. this model has the cast gear case so it's not the newest which has both a stamped gear case and a stamped fan case.. I prefer the cast iron gear case myself.. The last models had everything in stamped steel and the case got a little smaller.. As to the Cannedy Otto blowers they are filled up to the oil level drain and are a dry blower.. One of the only completely oil sealed blowers produced from day 2 of production. the Gear case gets filled with a light oil up to the drain.. There is also a hole in the crank handle boss that gets a drop here and there.. I own 6 Buffalo silent 200s ranging from late 1800'd to about 1910 with 1 a later unit from around 1930.. They range in Model size from 12" with 14" being the most widely produced size.. They also produced a 16" model for 2 years and then it became a special order item at a premium price.. Right round this time frame they switched from a double roller radial bearing (Magneto bearing) to a setup more like a ring and pinion the the bearing only on one side of the spur gear.. I prefer the models with both sides of the spur gear with bearings.. The years of production of the Buffalo blowers is funny because what they used for a size reference is beyond me as there is not one measurment that means anything.. The 12" doesn't measure 12", the 14" has the same case and fan case as the 12" with a larger fan blade.. The 16" is huge in comparision but its really only like 14".. I also own a Cannedy Otto Western Chief which is one of the highest quality blowers made and again.. Does not leak oil.. Every other blower maker Champion, Buffalo, etc, etc. are all oil leakers.. I've been looking in a way to put oil seals into the buffalos to stop them from leaking.. Eventually I'll post my findings..
-
I had seen in several books.. one was industrial forgings and the other was on vintage forgings either a train shop or the like.. In each of them they had pictures of forges that were mounted on the ground with only a slight lip with a back wall maybe 6'X8' or more with back blast setups.. the forge itself was 6-8ft or more in widthXlength.. Basically same setup as you had mentioned.. They also had centrally located work platform and from what remember in the pictures were basically a round wagon wheel affair with a center forging location with forges surrounding this area in a circular pattern.. Later on I had seen a video on Anchor making where it became apparent why the setup this way.. I'd be guess as to my assumptions but in the video it showed the Main forging as they added stock to it to gain in bulk and once the main body was up to welding temperature,, and the forge welding started they would walk up with bars at welding temp and they would be welded on, one after the other without adding back to the forge for a new welding temp.. Adding the bars in rapid succession kept it at welding temperature and was amazing to see.. Anyhow, it's all pretty neat.. Be great if there was more early movie footage of such mundane acts..
-
@eseemann NO.. I'm not Mr Charles.. but the simple answer is no.. You have to look at how steel moves or doesn't move (flexes).. There Is more mass in a linear function at the end of the rail if looking at the cross section ( T ) verses the side.. Go look at a power hammer.. Or as a great example a Spencer tire hammer.. These are all mounted standing up verses flat as you get the most resistance this way.. This not only applies to anvils, but splitting blocks or stumps etc, etc.. If you want an easy example go out and take a small sapling about 2 ft long.. Hold it in one hand at the top and put the bottom against your boot on the ground.. Now push on the middle of it.. It will flex easily.. If it took a set straighten it.. Now with it straight up and down.. Just push on the very end of it.. It will resist your pressure much better now.. Steel has a lot of flex to it just not as much as wood..
-
He's not saying it sucks.. He is saying there is a better way to mount it so it is more effective.. Please try to remember there are a lot of people here who have been there and done that on their way to finding a better way with less energy... Standing that rail on end, and welding on a larger diameter for the horn if really needed..
-
Big fan of saving the pile for shop use.. do they sell to the public? most of the cost with Coke around here is the shipping..
-
Coke around here is hard to come by as there were no steel mills and no real use for it.. Gas furnaces won out... I know a few people who stumbled into a coke supply but they refuse to give out any contact info.. I think the suppliers are smiths who passed away and they ran into it when looking at equipment..
-
Very nice.. When you form or upset for the rivet you are looking for about 1 to 1.5 times the diameter of material in the upset before setting the base at the shank.. Really about 1.25 to 1.5 is closer to the mark.. 1X leaves the heads a little thin.. With the open die method (open swage method) you really need the 1.25-1.5 with a good shoulder at the shank to upset material junction.. The good shoulder just makes everything a little easier.. Last tongs I made the rivet head came out a little to tall.. but it all worked out.. Nice work..
-
yeah, its what I thought.. What are you using for base materials?
-
yup, I really like it..
-
This is a great thread you setup.. I love the anvil.. I missed how much it weighs? Your work is coming along nicely..
-
@arkie that came out great.. Thanks for posting it.. Not to put you on the spot as you all ready went out on the limb to post your trivet but, Was there anything you discovered while doing the ring that was not covered clearly enough in the "how to" video? I like the idea of the feet as well..
-
Why not? You don't want to contaminate the weld pattern?
-
While the tumbler is a great idea I don' want the flux to fine.. I like it chunky so the heat doesn' carry it away... I've been to a few places that have 20 mule team or processed anhydrous and you use it and the next thing you know there is particles of flux hanging in the air.. Takes me 30 or 45minutes to process that whole tub the old way.. the new grinder should be even faster..
-
Really a person doesn't have to do any other than scarf correctly, apply flux (20 Mule Team is fine), take welding heat, and weld.. It's actually a very simple process with no black magic.. It really does come down to a few simple mistakes everybody makes.. Stick with a 1018 hot rolled or wrought iron for your first welds.. 1018 cold rolled as well as A36 can be a little bit more finicky. . There is a thread here somewhere that talks about proper placement in the fire (if using solid fuels)... I used commercially sold Hydrous borax for years and years before I switched... But when I am out teaching I use what every they have on hand..
-
Nice job.. That will work great for heading.. Plenty high off the anvil.. And thanks.. I"ve found with the new Peddinghaus the face is over 1" wider than the 175HB and the swage sits a little to low or to close to the anvil face so I had to adjust the way I was hitting it.. For me ideally I like a swage that goes all the way across the face for a bottom tool.. This give perfect edge to edge coverage and comes in handy with drop legs and such.. Be sure to put about an 1/16" radius on the inside round corner so you don't end with cold shuts as the rivet head forms.. I have one side with 1/16" radius and one with a little bigger radius..
-
iron oxide is scale.. I can send you an envelope of it the next time I have a major forging session.. Just posted a new video on how I do flux. It's in the alchemy section.. https://www.youtube.com/watch?v=jXYIYnLyXVk
-
Welding Flux video (Hydrous to anhydrous)
jlpservicesinc replied to jlpservicesinc's topic in Fluxes used in blacksmithing
Your welcome.. -
This is a fast video on how i make up welding flux.. I started doing it this way back in the 80's and the main advantage is " it is a condensed product).. IE : Denser product.. First off it's a : To each there own video".. Wanna discuss fluxes or likes vs dislikes go for it.. This particular subject as to which is better. has and is beaten to death.. This is simple a video for the curious at heart.. . It takes 3-4 pints of hydrous borax to make 1 pint of anhydrous borax.. This means it weighs a lot more per volume and it has a higher coverage ratio vs 20 Mule team or oven made Anhydrous which never gets to the melting point.. Of note: The pan is carbon steel and the flux eats it as it's heated thereby introducing iron into the mix.. Years ago when I was experimenting after seeing a box of Climax and then again with EZ weld. I noticed they have little pieces of metal swarth in them.. so I grabbed a bunch from the band saw and threw them in the cold mix.. I eventually disliked it enough that I melted it down as in this video.. When I did this the little chips completely disappeared into the borax..
-
All great points and so true.. My point was to use a flux.. But also to keep in mind scarf design which can be equally important especially on some of the trickier welds like butt (jump) welds or T welds where maximum strength is needed at the joint..
-
+1, no problem here as the stack sucks everything up and out..
-
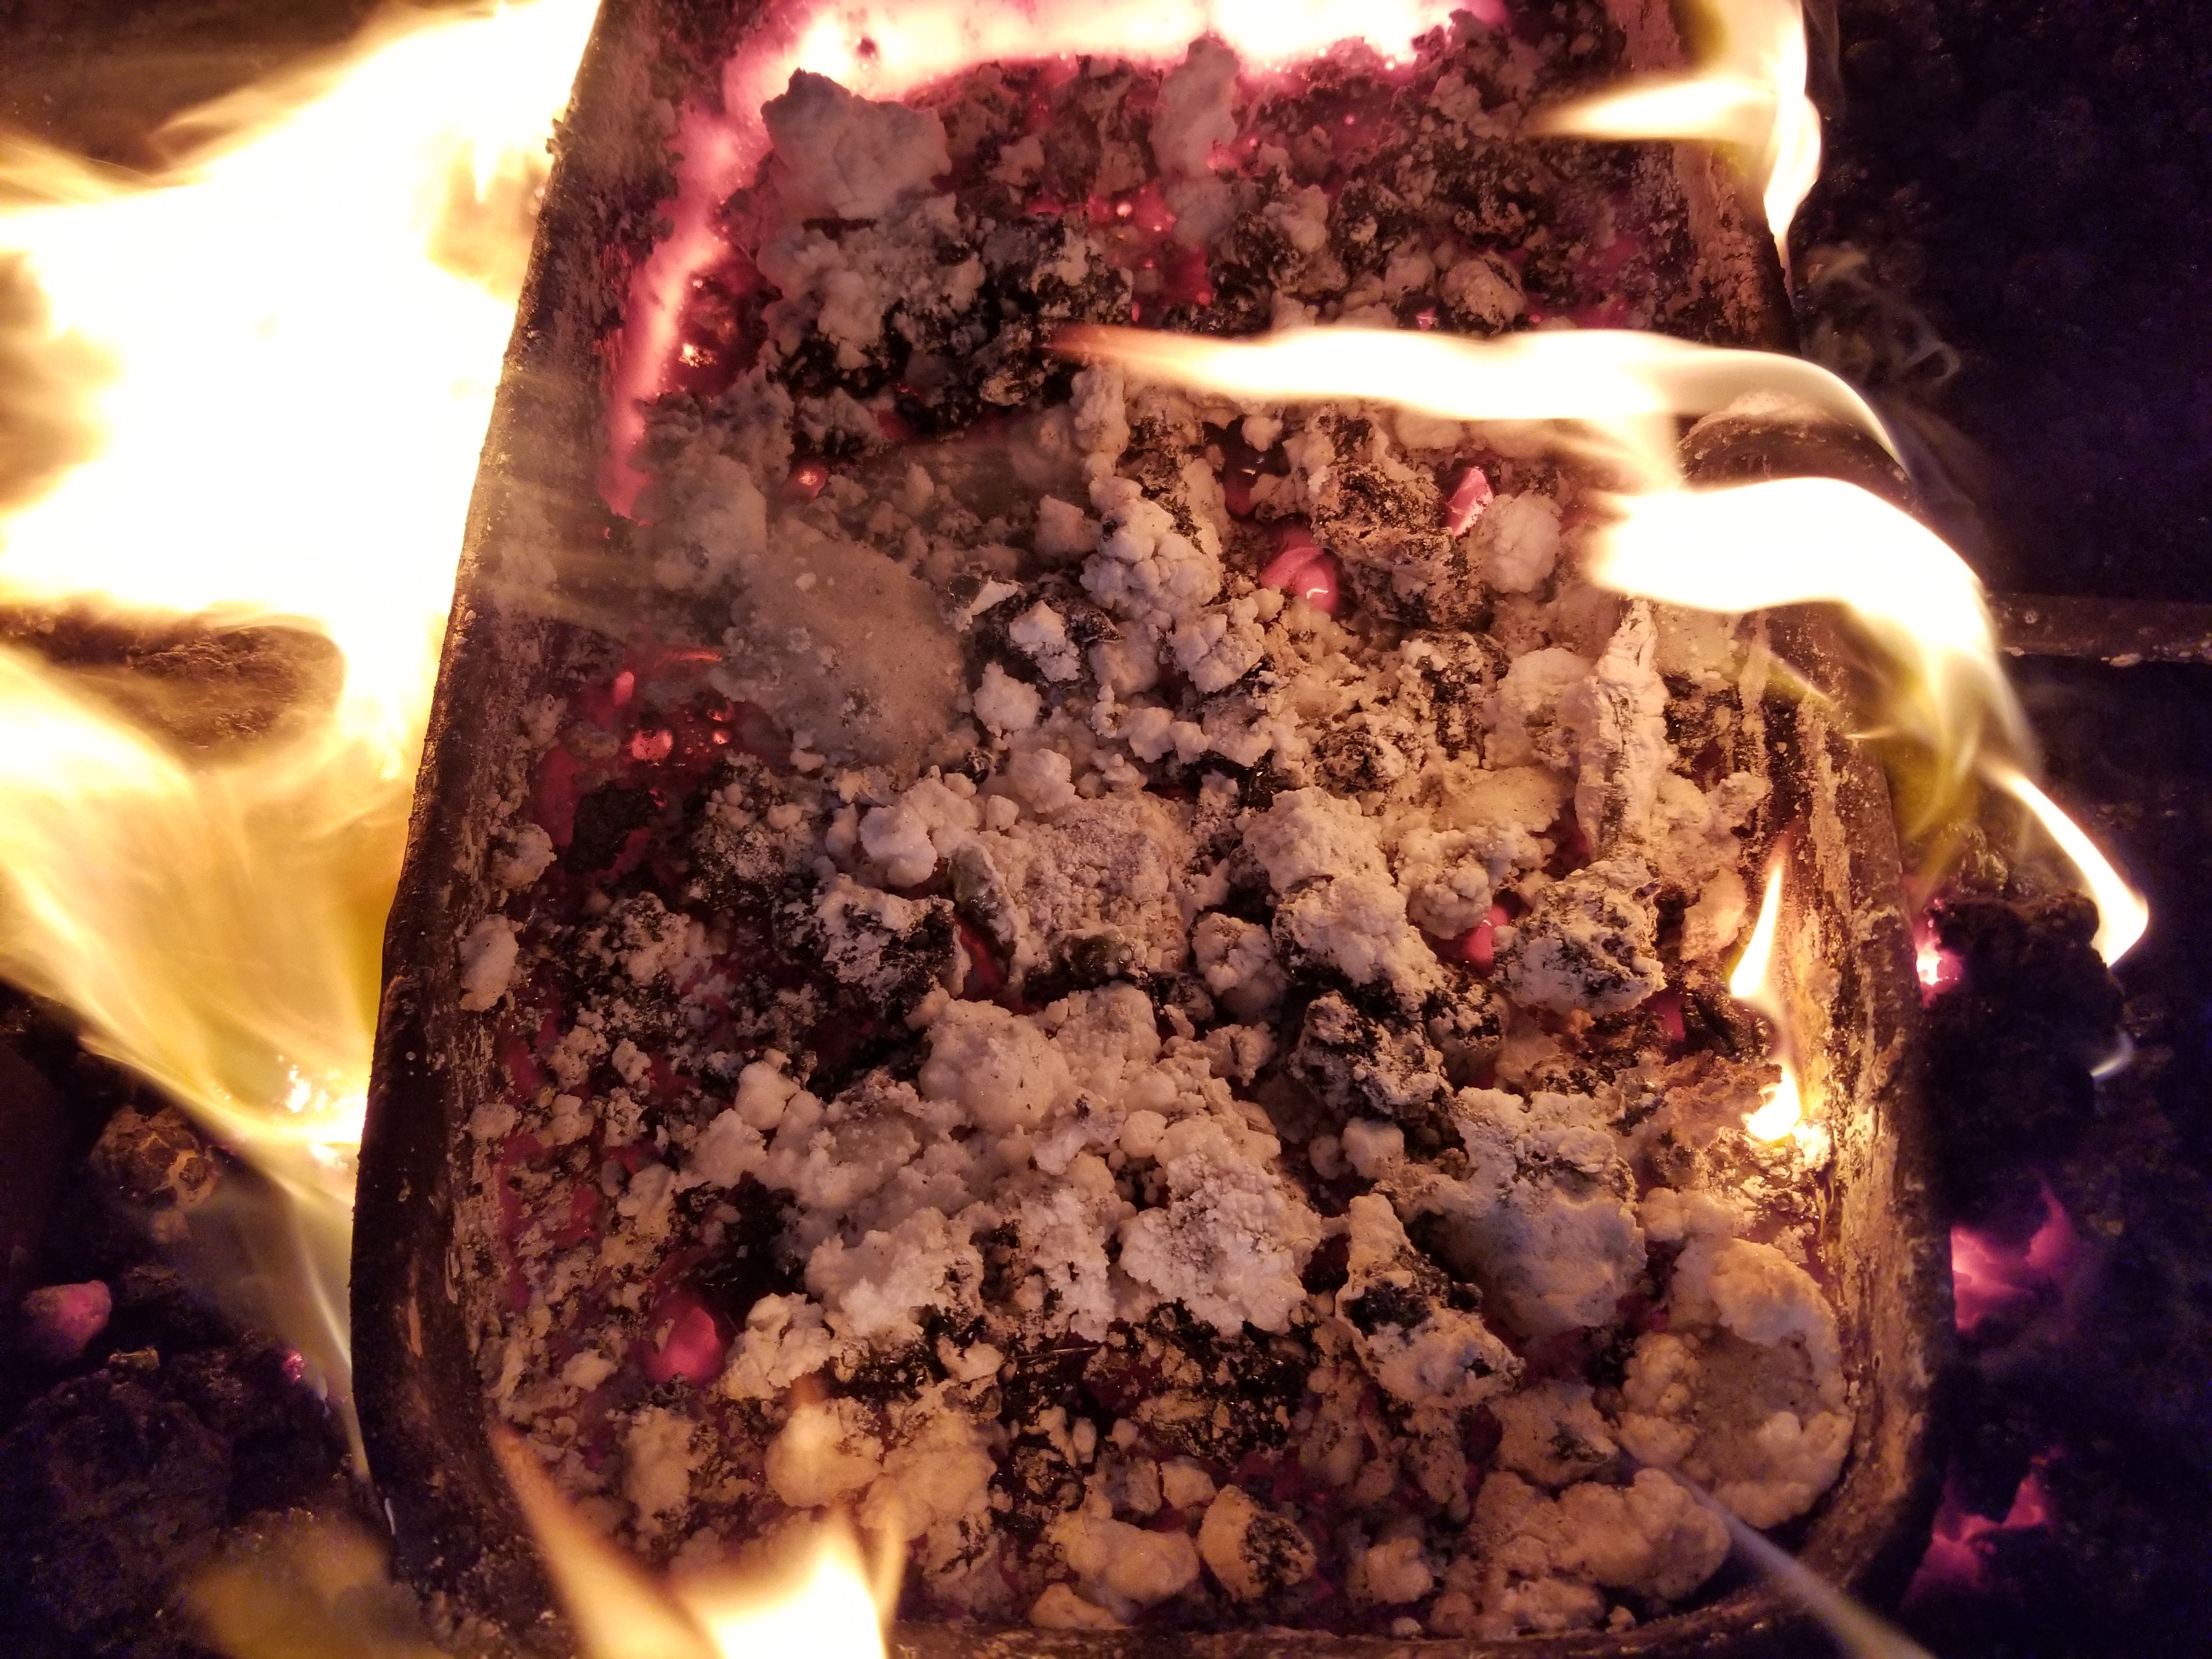
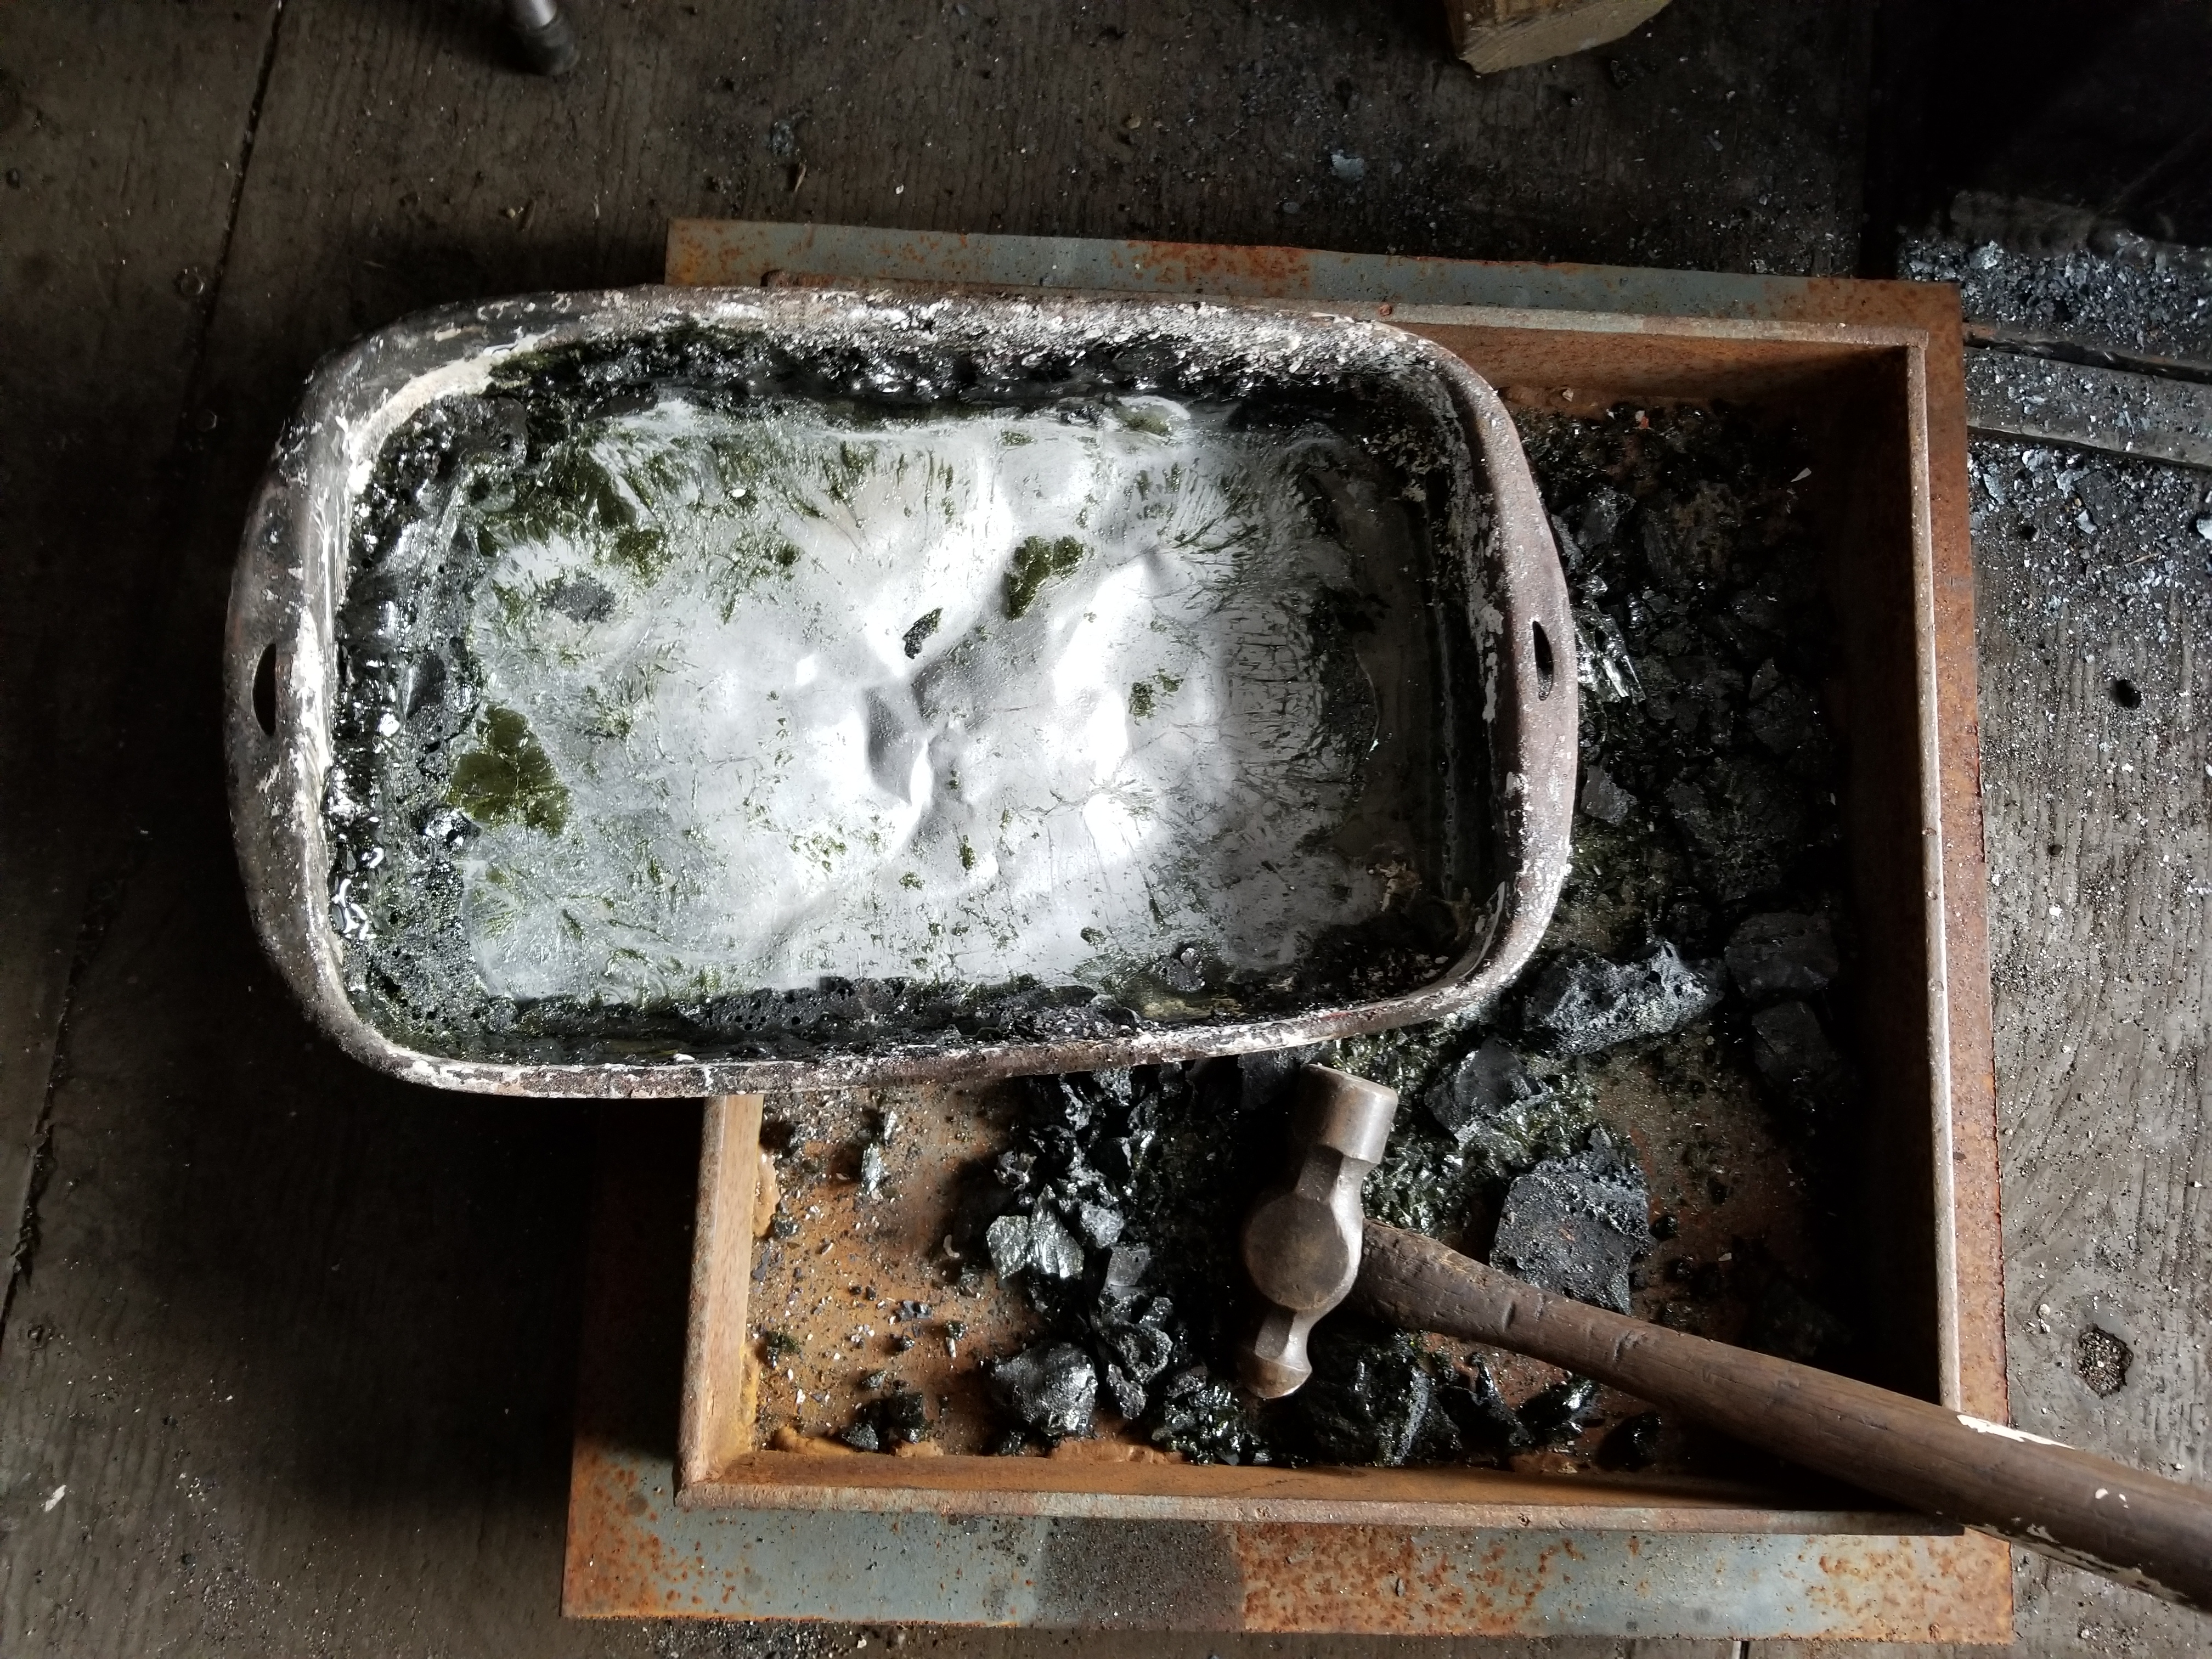
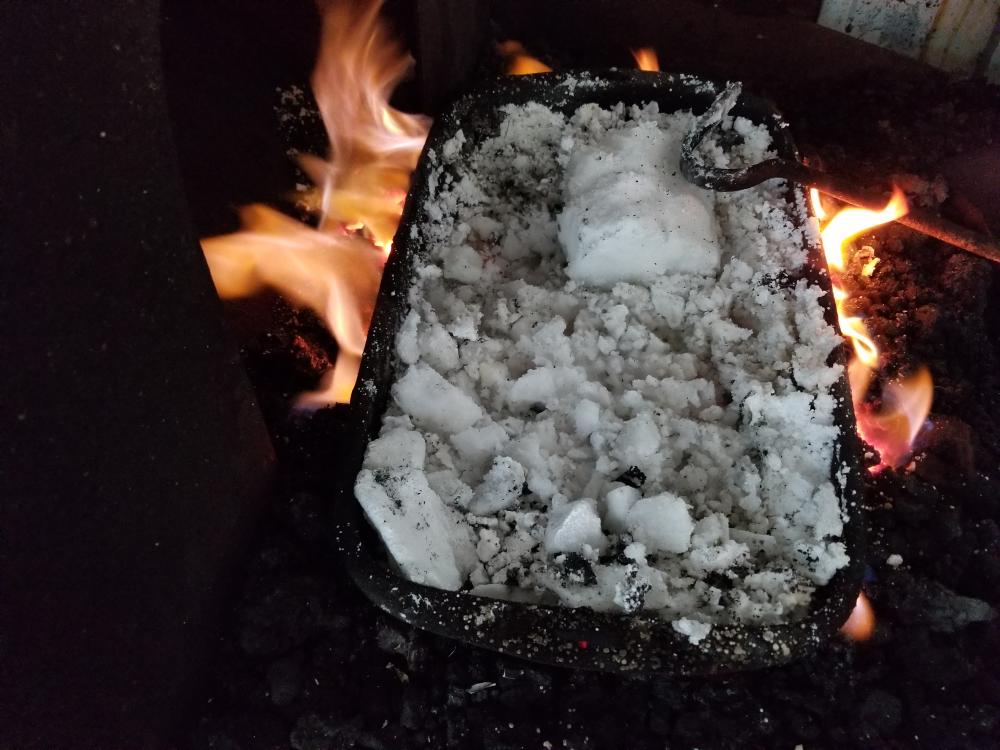
You don't need to add anything, But if you wanted to you can use dust from the bandsaw.. If you use a cast iron and steel sheet metal pan it will pick up all the iron oxide that is needed.. 99% of the people out there feel that adding or melting borax is simply un needed.. Personally I melt all my borax then crush it all back up.. It comes out to about a 3.5 to 1 ratio.. In other words it take about 3.5Pints of hydrous borax to make about 1 pint of anhyxrous borax.. I just recently bought a hand operated grinder as I go through more flux now.. This means for a given amount it will cover/coat the steel or what ever better with less product (as you are actually using more) I wanna say about 20 or so minutes in the last ( Rutland Historical day demonstration) video on the tube, I show where the flux is applied and you can see just how clean the is under the flux.. It bright and shiny.. In the good ol days they did not stop and grind off the scale or flux before the next welds.. They had a clean fire, fluxed well and the job was done.. Here is is in a large baking tray during and after.. The reason for the color green is because of the iron it has picked up from the pan.. yOu can see just how clean the pan is when the flux is removed ready for crushing.. The video is 70 meg so fairly large.. for those that can't veiw this let me know and I'll tube it as well.. Video of the melt.. This might be a big No, NO.. If it is Moderators just delete and let me know.. I'll post it to the tube instead.. 20170918_171442.mp4


-
Use flux no matter what material you are welding.. Start off with chain making or fireplace poker making.. https://www.youtube.com/watch?v=uS0CqaXwNNc&t=1081s In order of mistakes they run about like this: The biggest problem with new people and forge welding is not having the both pieces of metal at the same temperature, bad scarfs, to hard a hit, not fast enough with the hits. or to low a temperature.. biggest thing is.. If the metal does not stick on the first hit of the hammer.. Stop, clean and reflux and take another heat.. Ideally as soon as both pieces touch if you give it a little wiggle you will feel it stick, then light fast taps to tack the weld solid, then clean, flux and take a full welding heat and finish up.. Scarf length plays into how long it will take to finish off a weld.. A short scarf will finish out faster than a long scarf.. With that being said a lap T joint can be a long scarf but if the scarf is forged properly it's a 2 heat deal.. The most important part of the scarf is the tapered out ends.. These should be tapered right out with no square edge.. One other thing.. is stock selection.. I have found that a material that ='s about 3/8"-1/2" to be about the easiest for a beginner.. Square or retangular is best vs round.. = is 1/8"X1 has nearly the same mass per foot as 1/2 sq, 3/8sq, so it won't roll if welding 2 bars together or 1/2" round if making chain (will not roll as it's bent into the U before welding..