jlpservicesinc
-
Posts
5,777 -
Joined
-
Last visited
Content Type
Profiles
Forums
Articles
Gallery
Downloads
Events
Everything posted by jlpservicesinc
-

"How to watch a YouTube video" collaboration
jlpservicesinc replied to JHCC's topic in Reference Materials
I agree to disagree with the certification process.. I think for the most part it is a waste of time if it is propagating crappy non fitting or outdated information.. A certification is only as good as the guy or gal applying their trade.. Anybody can pass a test.. It becomes do they prefect their craft or simply fall into line with what everybody else is doing.. Certification can be a good way to start but after that it can fall apart.. What everybody else is doing doesn't mean it's right.. So you either work at changing it or you join the club and drink the cool aid.. I personally don't like to wear eye protection.. In nearly 40 years of blacksmithing 5X wearing PPE I've gotten metal in my eye which had to be removed at the hospital.. In that same time frame I have had to go to the hospital 2X while not wearing eye protection and in all the years of working I only wore PPE 5X and each time I got stuff in my eyes.. One could argue they were ill fitting or what have you.. Personally things happen just because.. Unless you are there, you ain't got a clue.. I don't condone nor do I suggest anybody else not wear PPE..And require it for all teaching/lessons.. I always wear hearing protection and now with the " Video series" I have on youtube I wear Eye protection but it's only because I finally found eye protection that works pretty decent.. At least decent enough not to get stuff in my eyes.. In the early videos on hinge making I don't wear any PPE.. Personally I started making the "How to" videos because of the lack of good information posted and was lacking in content.. I couldn't find any really good video's on real blacksmithing other than the vintage ones.. (with that being said there are a few good smiths that take the time to put out good information but also found there was a lack of full content).. One of the largest problems with any of this stuff is: Time is money.. To make a quality video it takes a lot of time and with the PIP it takes 2X the normal amount as it has 2 or more film tracks that have to be edited.. I also film in 3D which shows even greater detail.. These also get YOutubed but you have to have a 3D enabled TV or computer.. If one is invested in all the lighting, mic's, and cameras it is a huge investment.. Technology is updating constantly.. This plays into how much one can invest in equipment unless it becomes a full time job.. Personally I have found that there are thousands of objects to make, but there are only so many forging techniques that need to be taught and once these instructional videos are produced there really isn't a need for more of them as all the skills are there.. It's just a matter of someone watching the videos and then practicing what was taught in the video to get good or even great.. So instruction vs entertainment becomes a very large factor.. Anyhow, Lighting is key but if one is into making professional type videos then it's really not a Youtube gig as its more serious than that.. Most people who are making quality Youtube videos are getting income from such ventures.. I have also found the really good videos are "Free" usually with no advertising.. This is because it's about content not revenue but I can see why it's such a strong draw.. it's passive income.. And now a lot of the free good ones have paetreon and advertising now.. As for my videos: the lighting is terrible.. (there are no lights as it was filmed in the demo trailer in the middle of winter after my regular work so roughtly between 3pm and 5Pm when the sun is setting and 200ft from any electrical (the water is completely frozen in the tub with no heat in 2F weather.).. 2, No story board: I just fired up the forge with both cameras running and taped the whole process.. then edited out all the time spent at the forge heating/reheating the metal.. Every video was done that way but the knife video as I had to figure out how to tape the polishing and handle work this added substantially to editing and filming time.. Personally I like the way the videos came out and is the reason why I posted them.. They are in no way perfect, nor production quality.. But they do give the information in a proficient and timely fashion... Besides that.. As pointed out in many other posts.. I just like to be different or difficult depending on subject.. That being said.. I don't care if the person is wearing PPE, is certified, running shoddy equipment as long as they know what they are doing and their skill set and the video shows that.. Good lighting, a story line and a complete saga is certainly extra helpful.. -
Food Safe Bronze?
jlpservicesinc replied to GandalftheGold's topic in Smelting, Melting, Foundry, and Casting
I personally like the funky look of both the Gremlin and Vega... I also like the pacer if that means anything. But there again I have owned European since my first real car which was a 1970 SAAB 96 V4.. I then moved in the 99 turbo, 900 Turbo and then to the older 2Strokes with a GT850 and a Monte Carlo 850.. I love them old SAABs.. -
Food Safe Bronze?
jlpservicesinc replied to GandalftheGold's topic in Smelting, Melting, Foundry, and Casting
I don't think it's meant as much of an issue as a clarification of what gender I or we are. Lots of people assume I'm a dude because of the knowledge I've gained and a voice to share it. So sometimes there is just a little clarification of terms/labels.. And besides that gentlemanly behaviour is still welcome as is good manners.. -
Food Safe Bronze?
jlpservicesinc replied to GandalftheGold's topic in Smelting, Melting, Foundry, and Casting
I appreciate the correction of gender,,, But I try to follow that skill set is gender neutral.. skills are skills regardless of , race, color, gender, age.. etc, etc.. As such it's a man's world and women are in short supply in the trades so I have no issue with being called "Man".. Or even toots or Honey if used in a friendly non derogatory manner.. -
yes it is.. He is the guy who will be doing the site prep and foundation work for the new shop..
-
Food Safe Bronze?
jlpservicesinc replied to GandalftheGold's topic in Smelting, Melting, Foundry, and Casting
Looking a little better.. Tomorrow if I have a minute I'll post up a short how to.. The waves or ripples will hold it so you can then force down the ripple in the middle.. Anyhow, it will make a lot more sense once you see it.. -
Food Safe Bronze?
jlpservicesinc replied to GandalftheGold's topic in Smelting, Melting, Foundry, and Casting
Never seen them.. I'll have to check them out in my free time.. -
Food Safe Bronze?
jlpservicesinc replied to GandalftheGold's topic in Smelting, Melting, Foundry, and Casting
Sadly, the NEB fall meet went by.. I'd been happy to given you a lesson or 2 on getting it done while at the meet.. The cost of joining NEB and then the cost of going to the meet usually makes up for the difference in cost of going to a class to take a lesson.. If you are using thin gauge material nearly 90% of it can be done cold.. Anything under 1/8" can be worked cold.. 1/8" can be worked cold with experience with annealing in between work sessions.. ideally 1/8" and over will be worked hot.. Largest problem with sinking or raising is not getting a lesson or 2 but then again it's a problem with a lot of this stuff.. The knowledge is here and there are so many with extensive knowledge that there is no reason to reinvent the wheel.. I have a welding video in Que right now which I am working on.. If I have a chance in the next week I'll do a Video how to on Pan making.. It really is a simple and straight forwards project.. Ideally a few lessons on shrinking metal would jump you light years ahead of where you are in like 15minutes.. -
Food Safe Bronze?
jlpservicesinc replied to GandalftheGold's topic in Smelting, Melting, Foundry, and Casting
Miss alignment certainly can happen if not experienced but the only way to get experience is to do it.. I being an old fashioned blacksmith and using time at the anvil and forge effectively would punch the handle. Then punch one hole with the exact placement of the handle as the marked punch point.. Attach the handle with 1 rivet. Position the handle where you want it and then punch thru from the blank side. Be sure to align the punch with the hole in the handle under it.. This way the punch will be guided into the hole below it in a more accurate way.. People who promote drilling may not have enough experience or proper technique in this example to get consistent enough results.. thus suggesting a non blacksmithing way of proceeding... (What do you do if you don't have a drill? Or drill bit!) Now you know!!!!!!!!!!!! Punch the handles hot... punch the pan while it's cold.. handle will be cold also.. -
Food Safe Bronze?
jlpservicesinc replied to GandalftheGold's topic in Smelting, Melting, Foundry, and Casting
+1 -
Food Safe Bronze?
jlpservicesinc replied to GandalftheGold's topic in Smelting, Melting, Foundry, and Casting
Punch the holes.. drilling not needed -
Food Safe Bronze?
jlpservicesinc replied to GandalftheGold's topic in Smelting, Melting, Foundry, and Casting
I was able to visit a site in CT/NY border.. Was pretty neat.. The charging ramp was still in place.. Never been to Saugus though I have driven by it a million times.. Maybe next time i'm in the area.. Very neat.. -
Frosty this list would be a perfect list for an apprentice who is ready to become a journeyman.. Frank, that is a pretty extensive list for a person just starting out... Would this be a 4day or week long course?
-
Food Safe Bronze?
jlpservicesinc replied to GandalftheGold's topic in Smelting, Melting, Foundry, and Casting
that must have been a blast.. To see that is.. Was the sight still recognizably or just a hole in the ground? Around here you can still find Charcoal burn pits if you know what to look for.. Of course now with building everywhere and no more farms, they are getting harder to find.. Last one I found was on the top of a hill and was easily 30ft across.. Looking back at it now, wish I have brought a shovel and dug down just a little to see what was down there.. -
Food Safe Bronze?
jlpservicesinc replied to GandalftheGold's topic in Smelting, Melting, Foundry, and Casting
Poke weed sprouts are yum with butter and garlic.. stinging Nettle tea, Sumac tea.. we have a wonder patch of rhubarb. Strawberry rhubarb pie. Stocks is all that gets eaten.. choke cherries, wild aspergras, leeks, dandiliones.. -
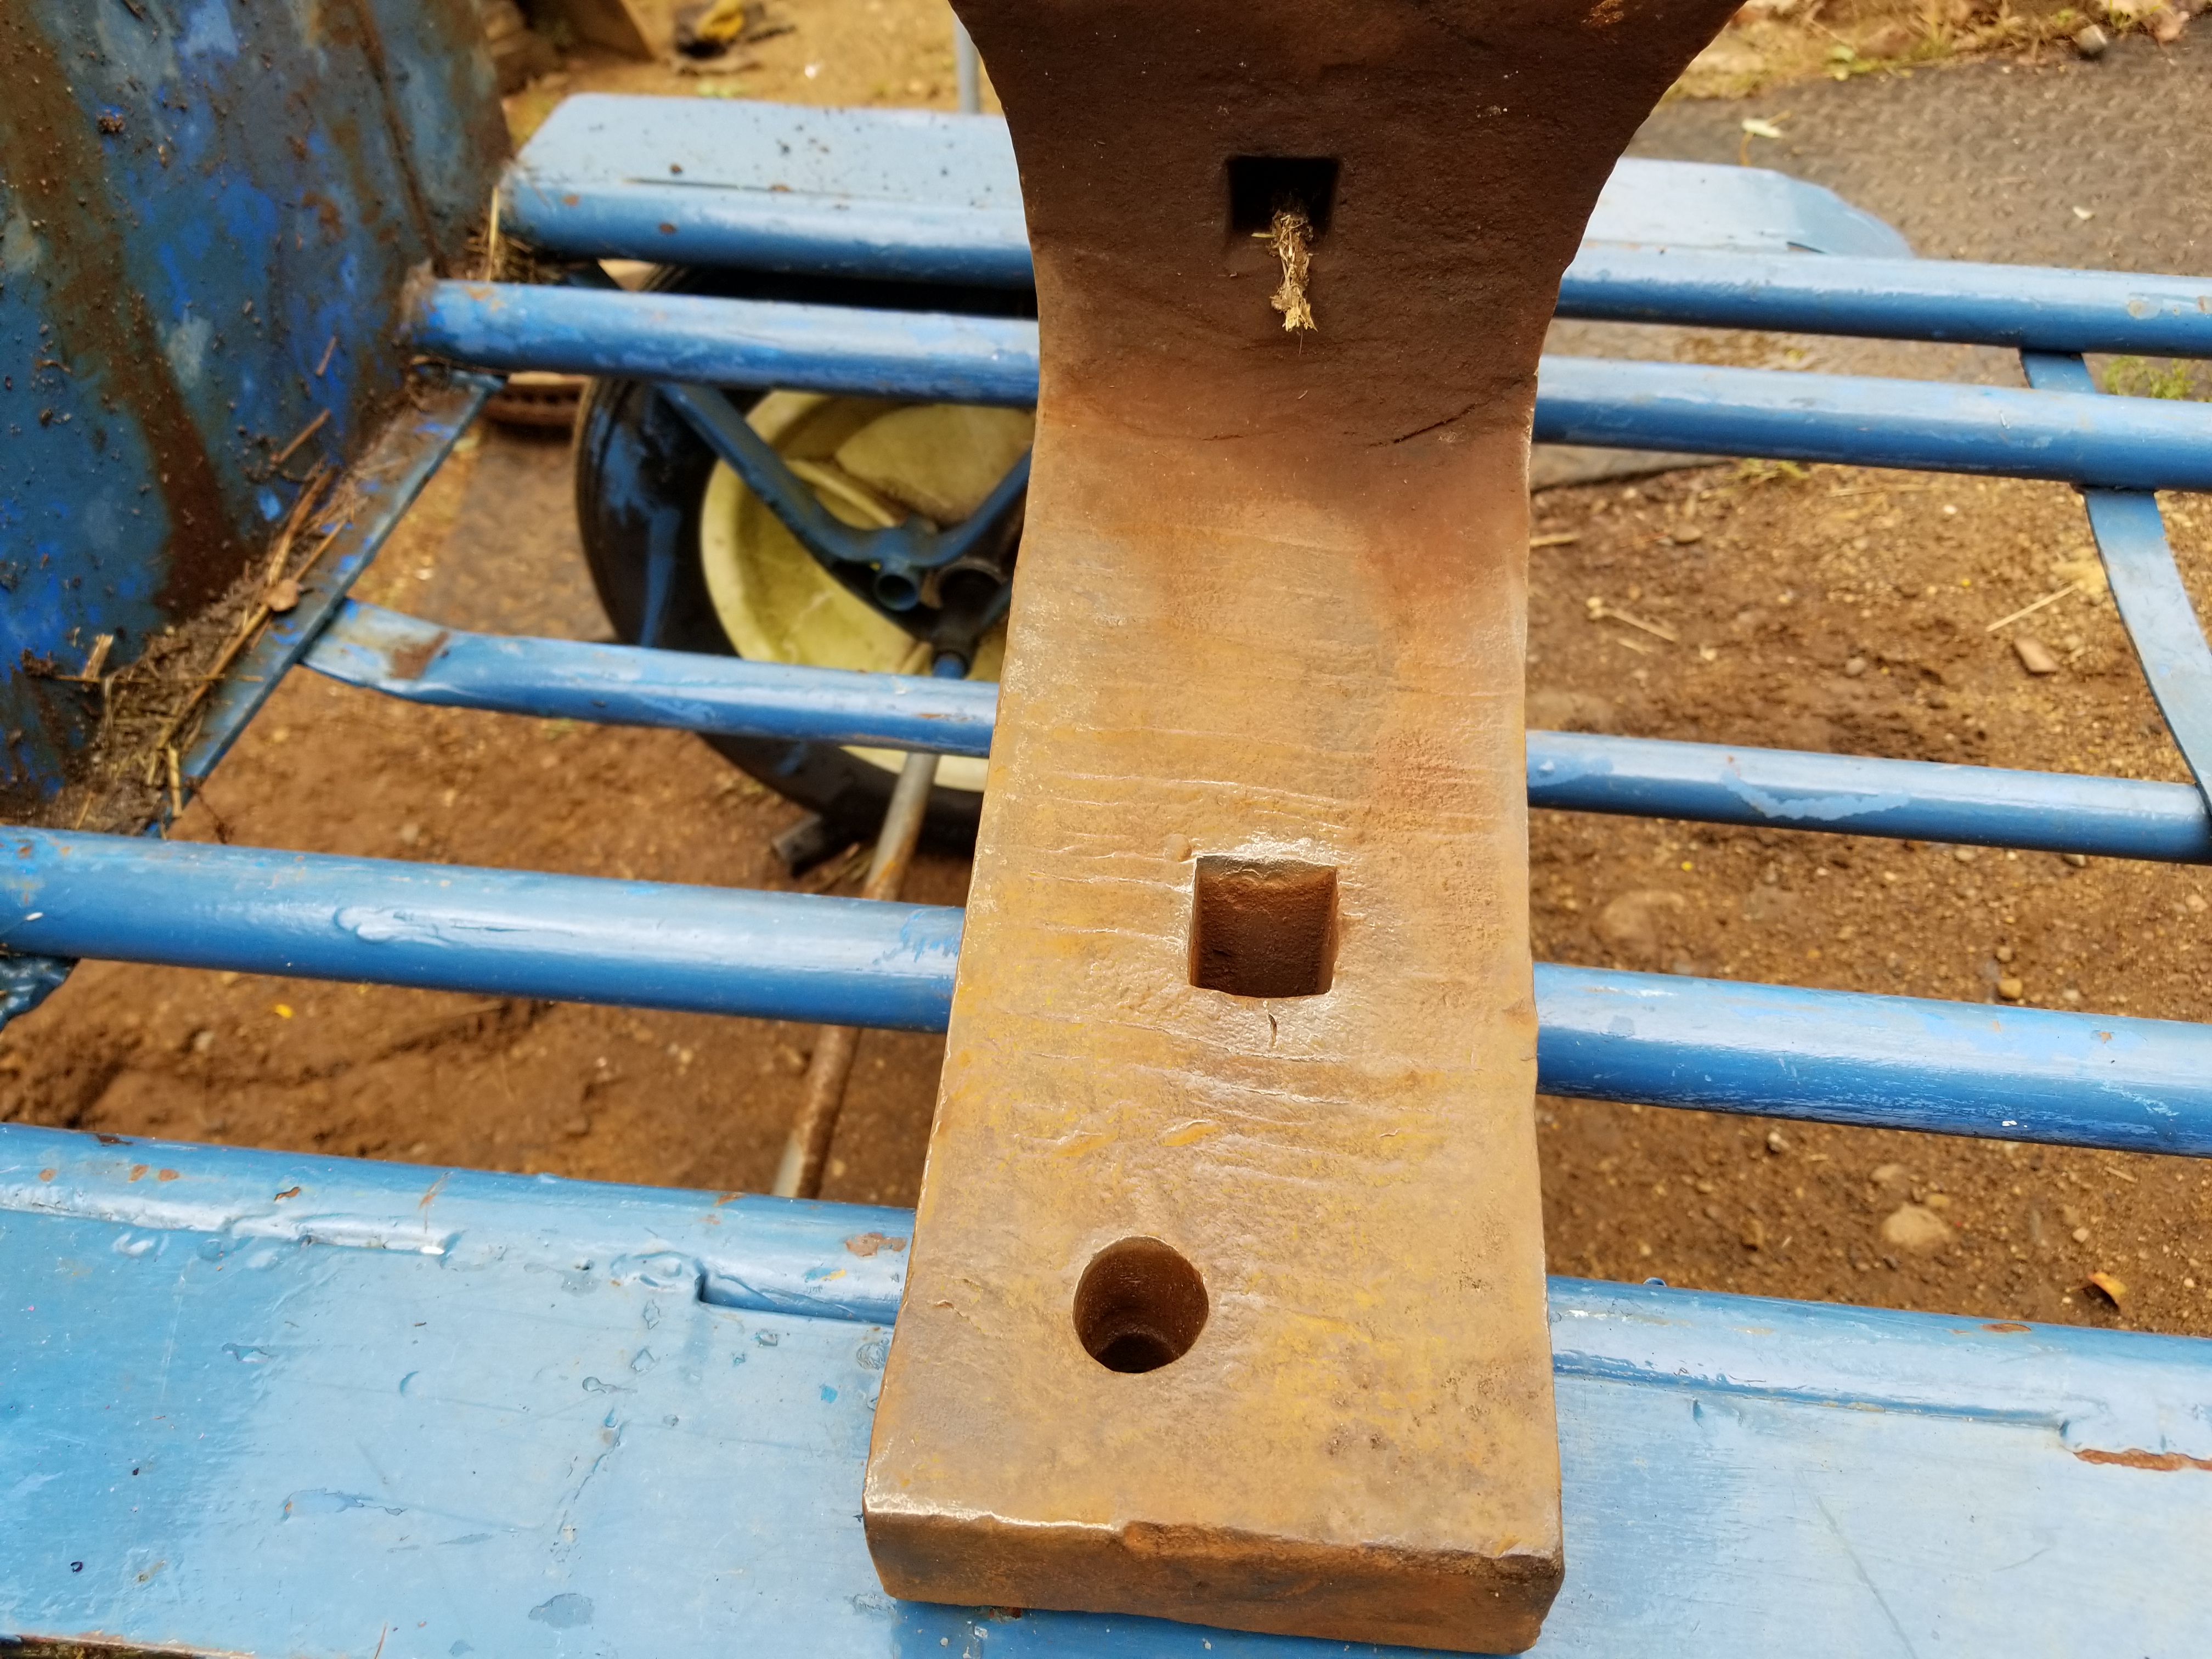
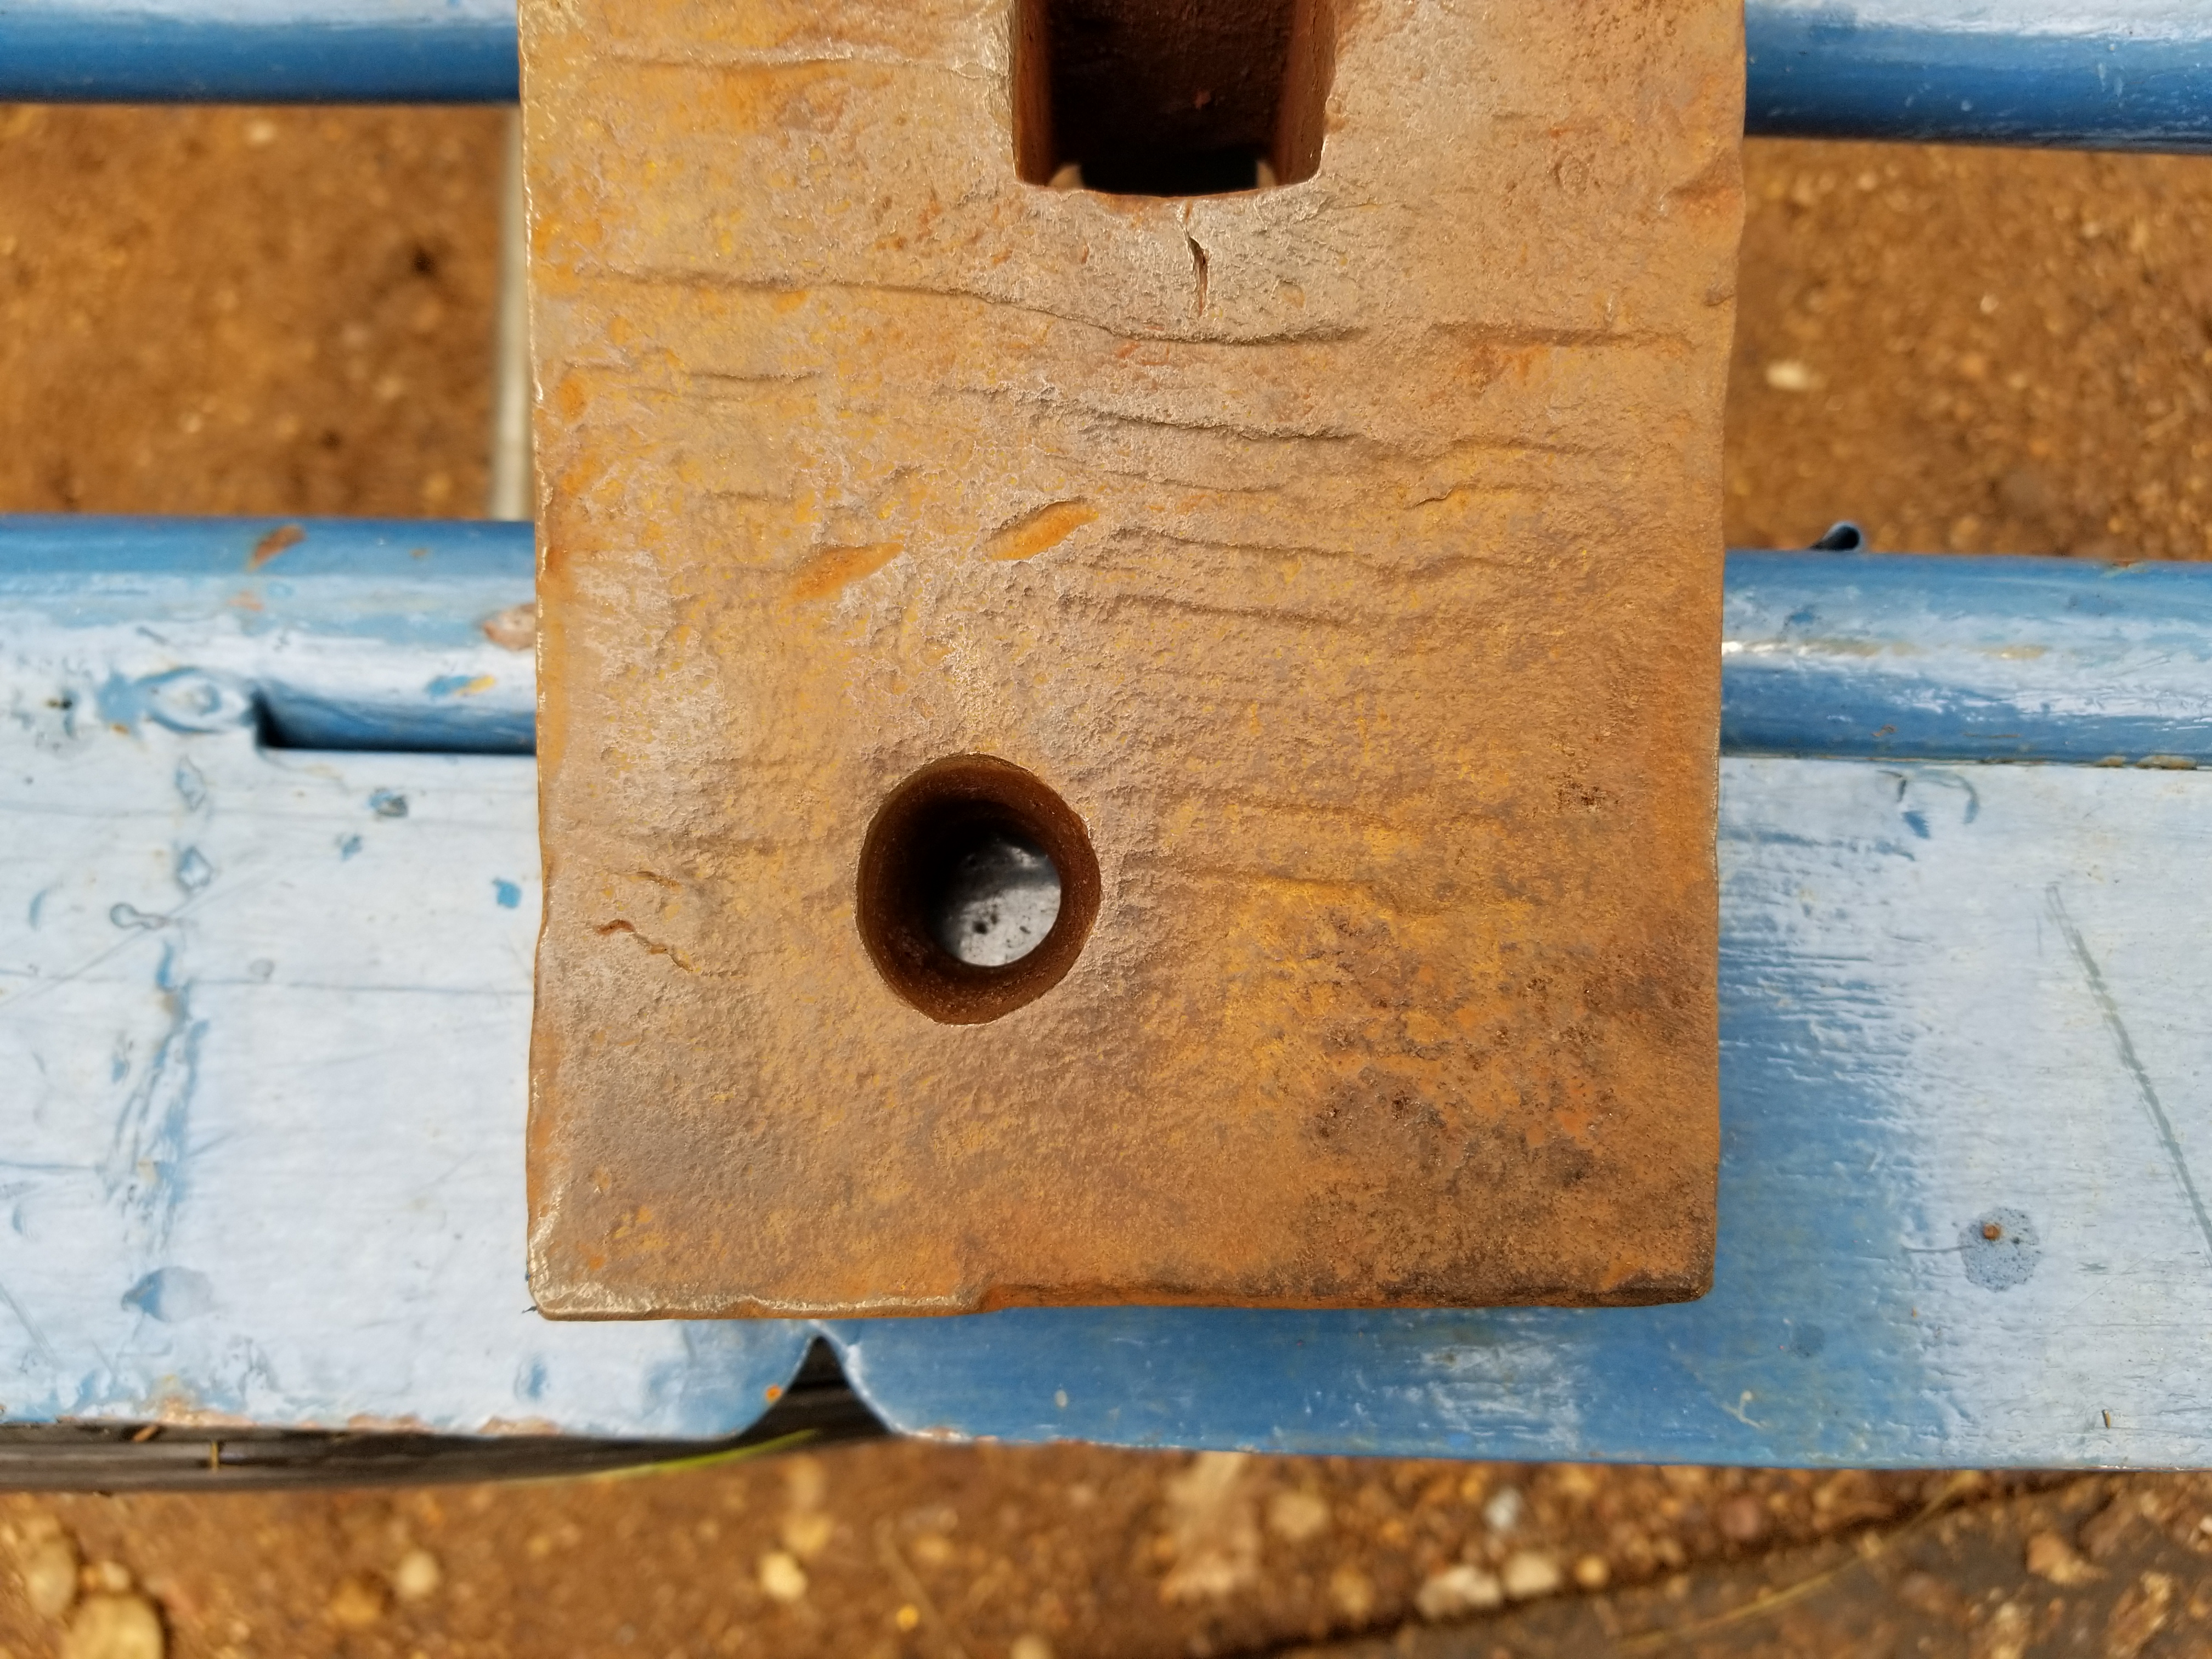
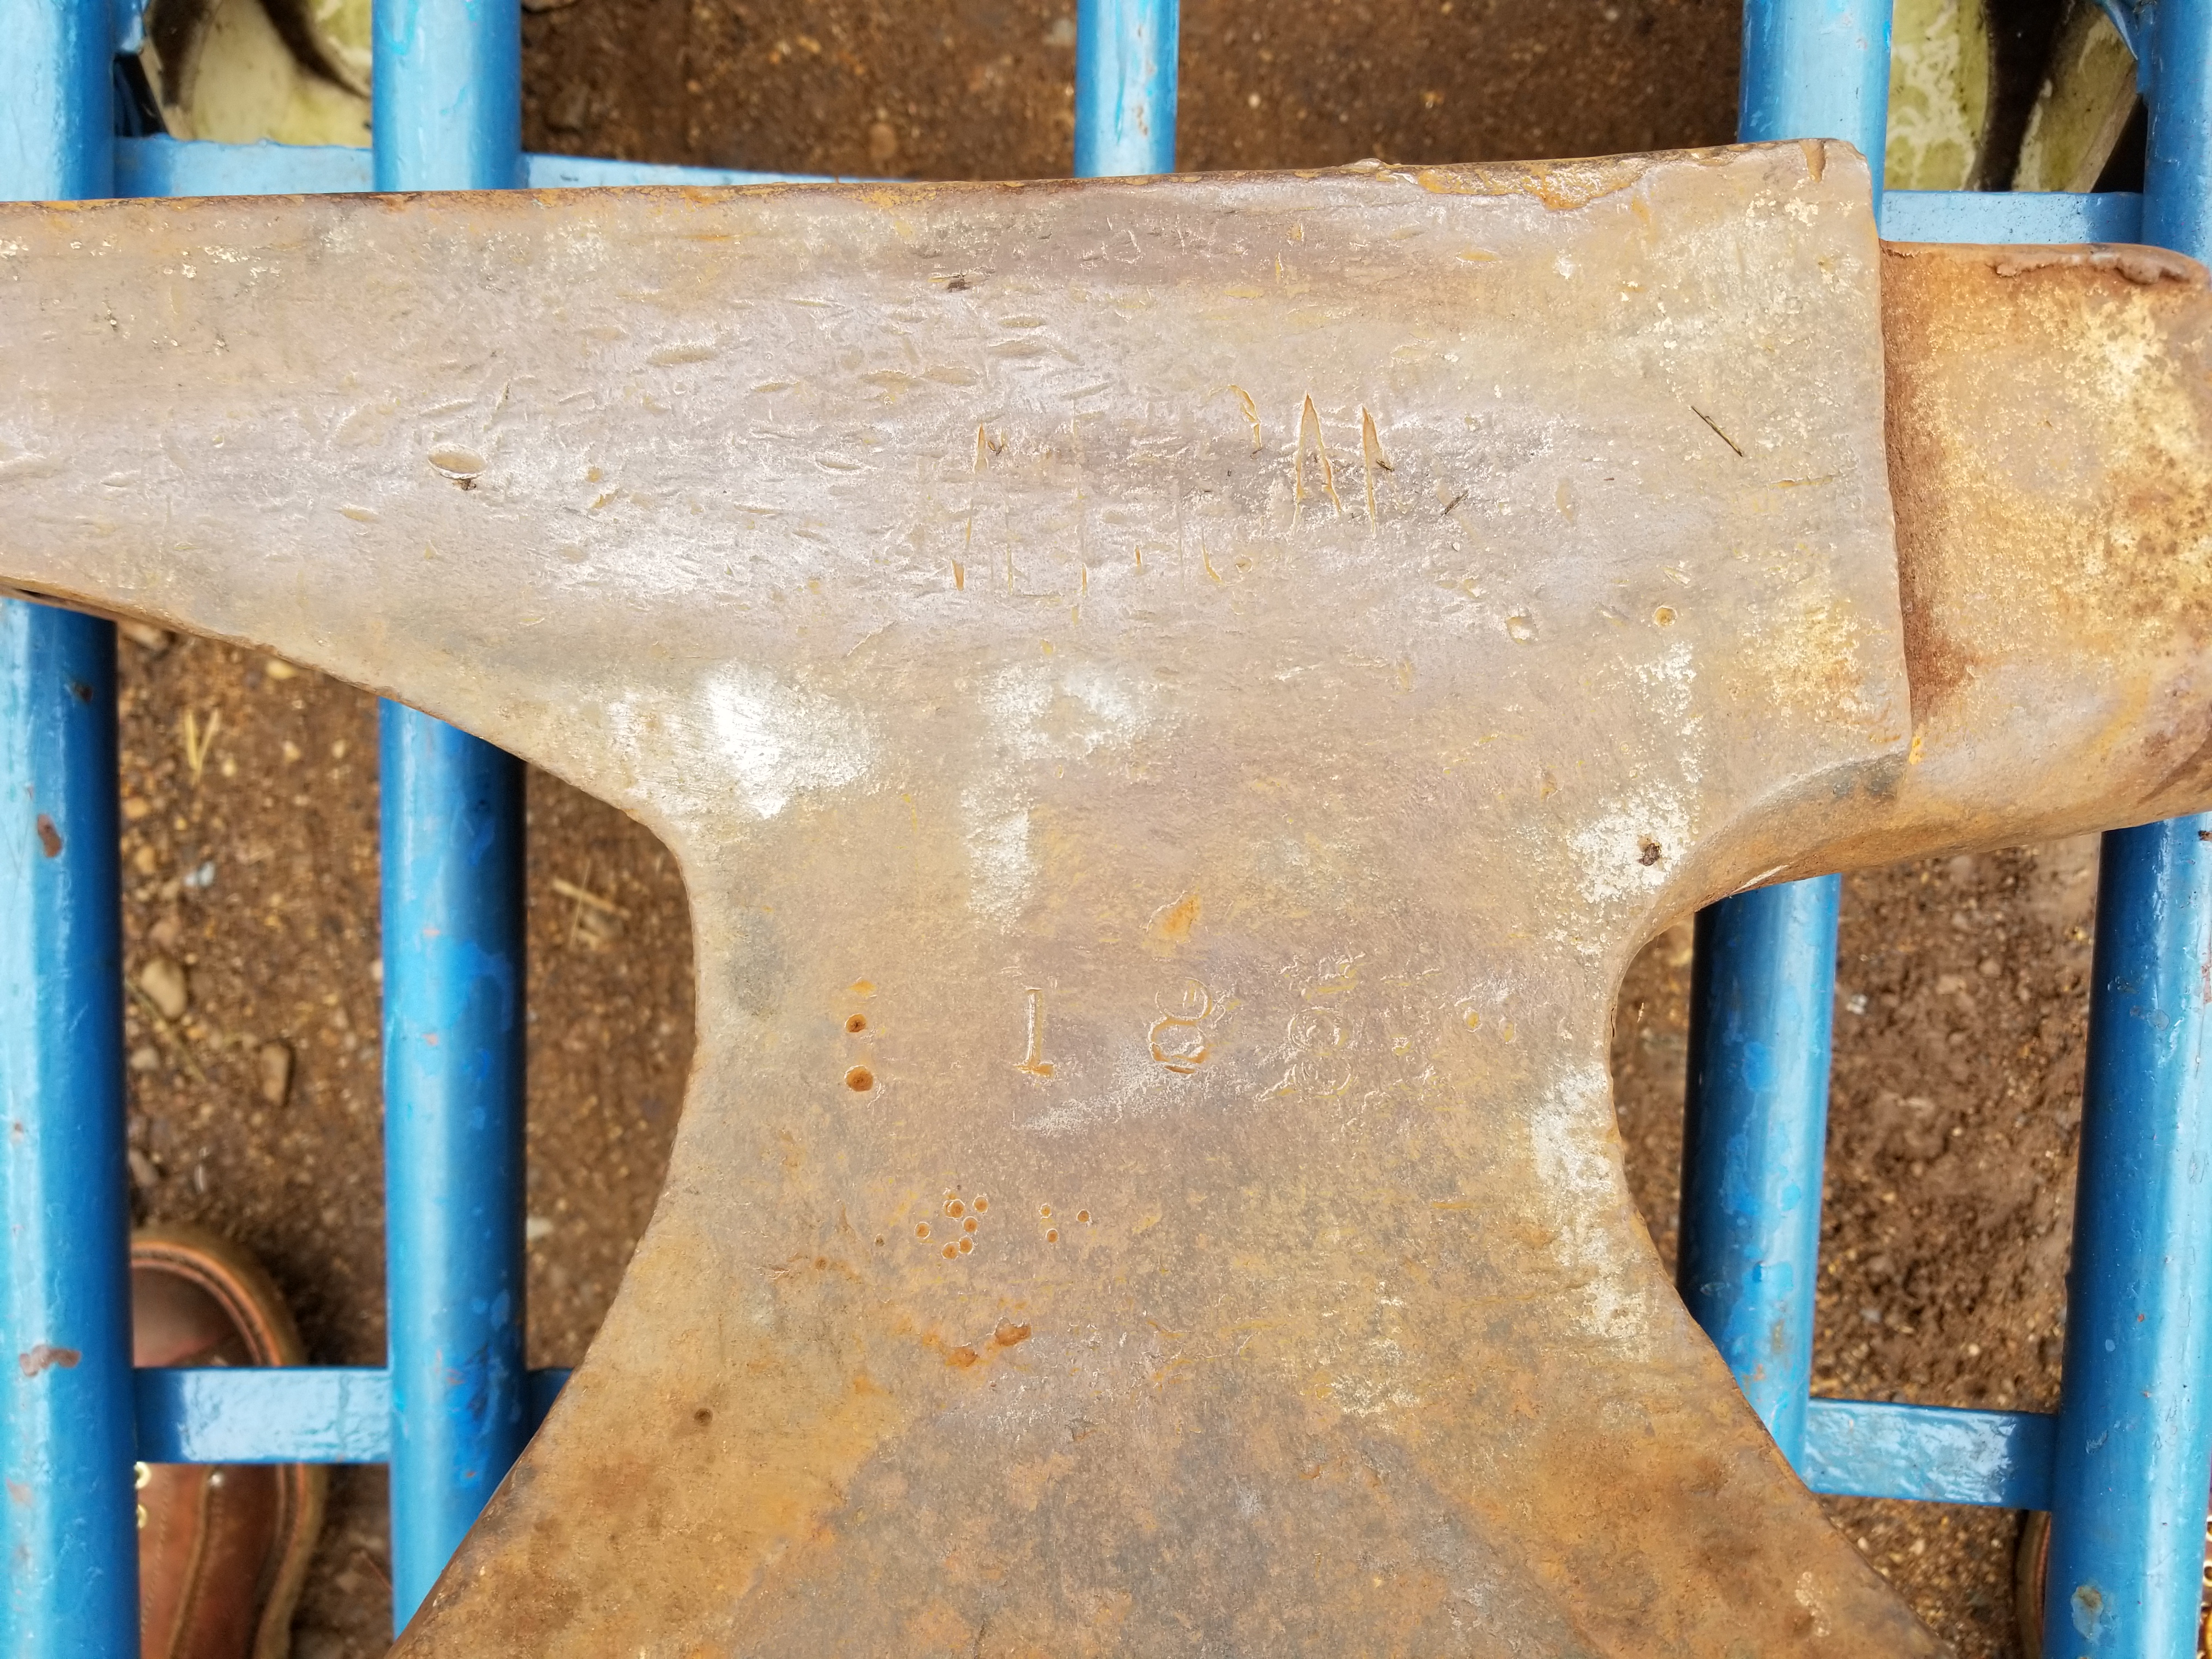
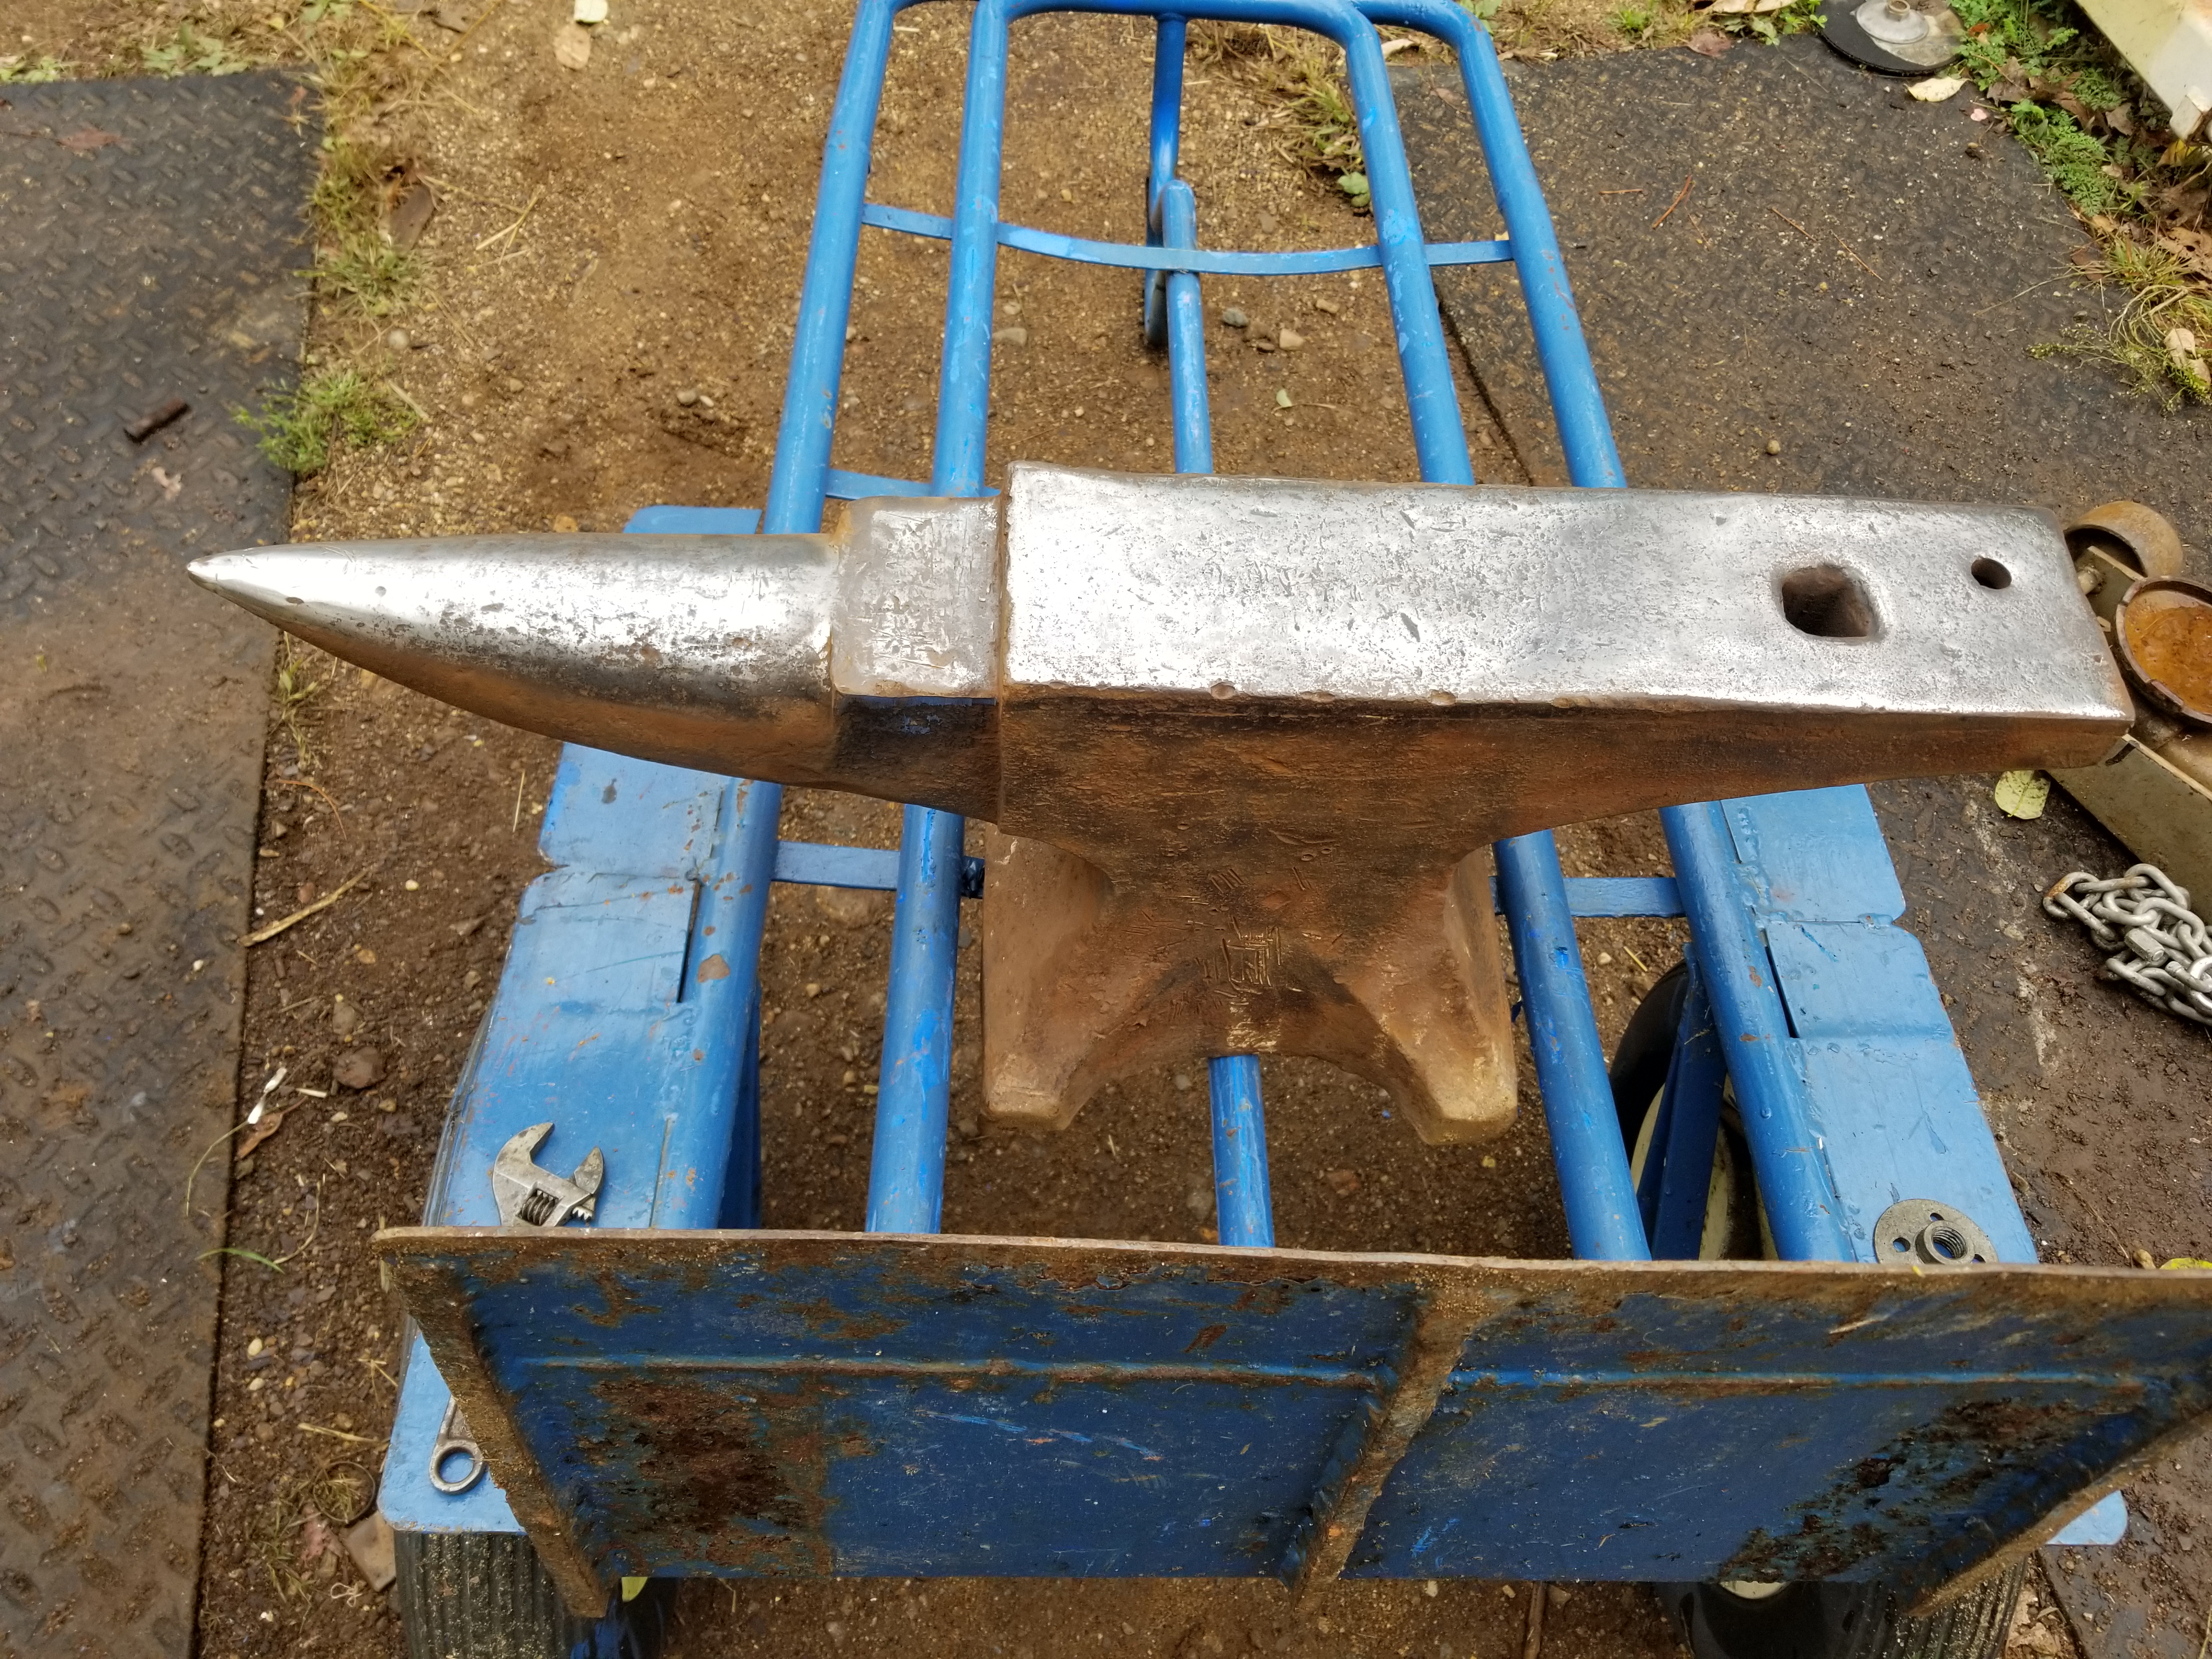
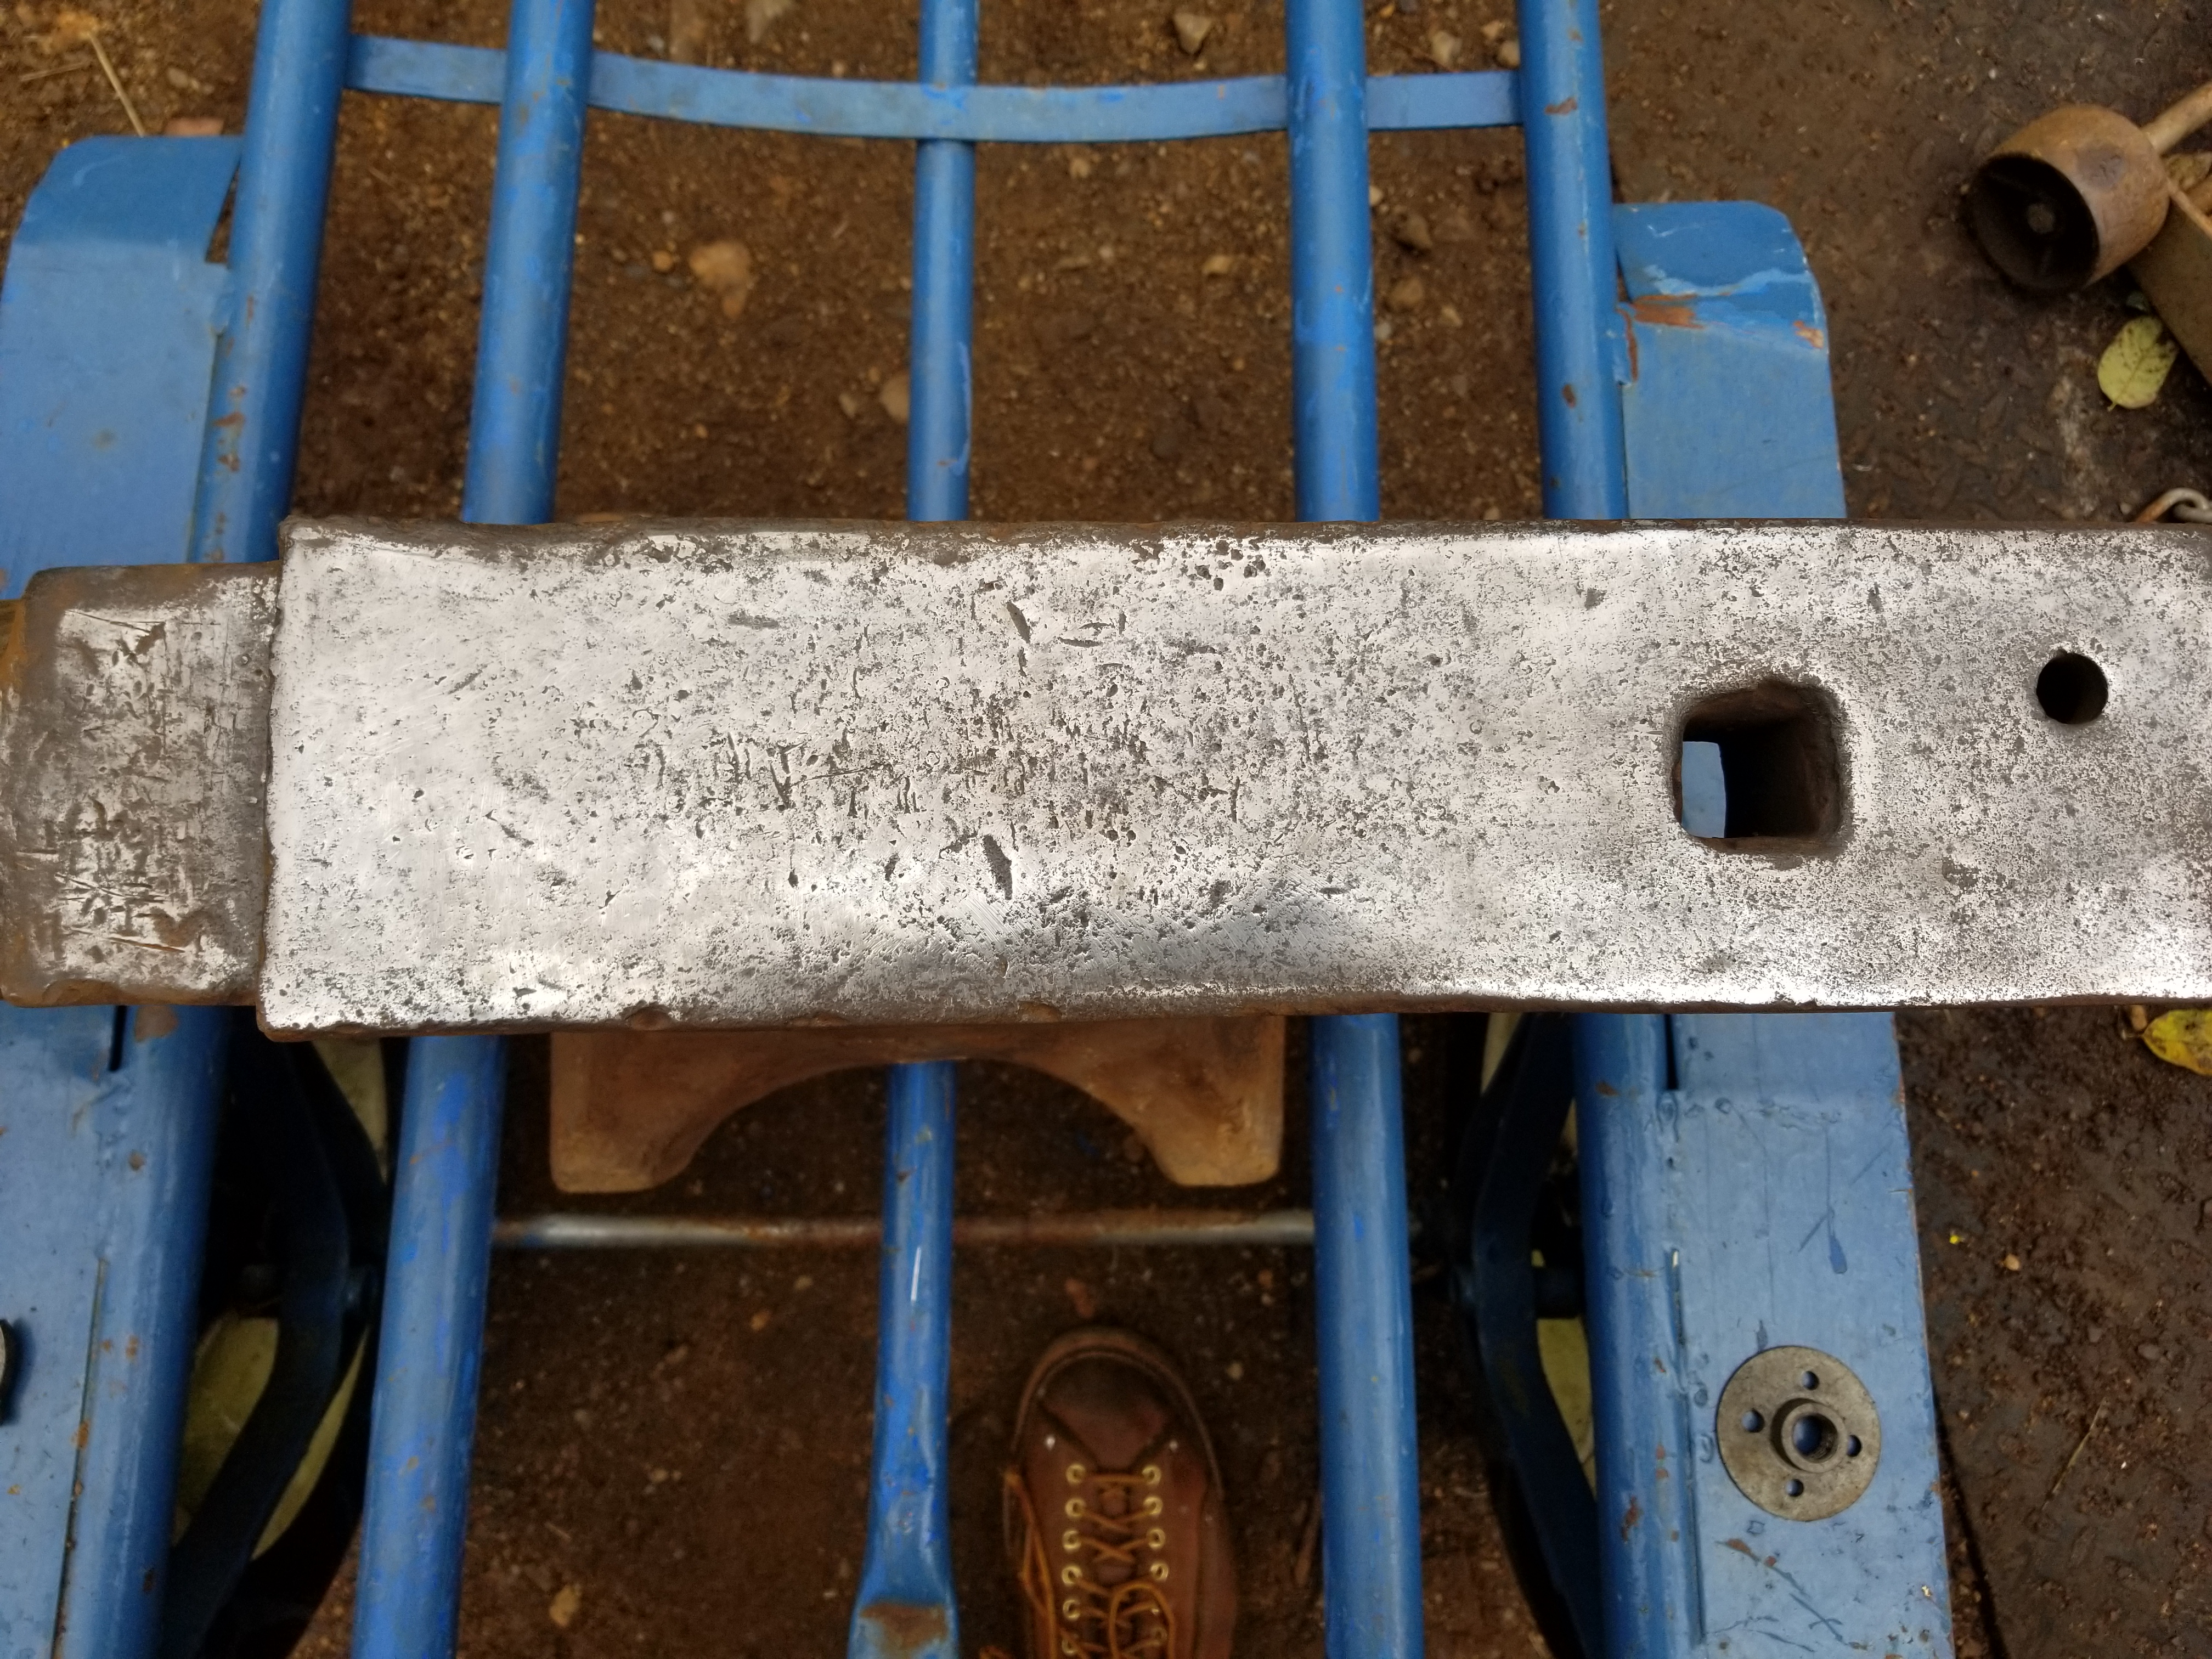
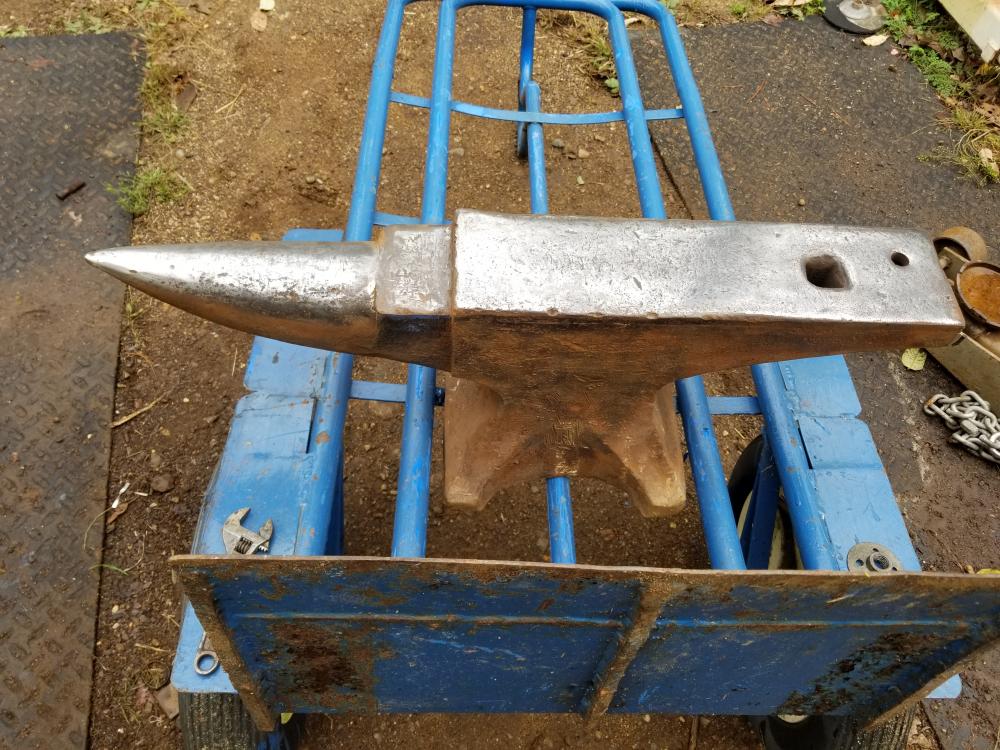
Here is an American A guy dropped off yesterday for some short change.. Good teaching anvil once cleaned up a little more.. 85-90% rebound if you believe in such things.. Love the hammer die marks in the heel..


-
? Kanca VS Peddinghaus?.. 165#
jlpservicesinc replied to Derek Haiges's topic in Anvil Reviews by brand
peddinghaus -
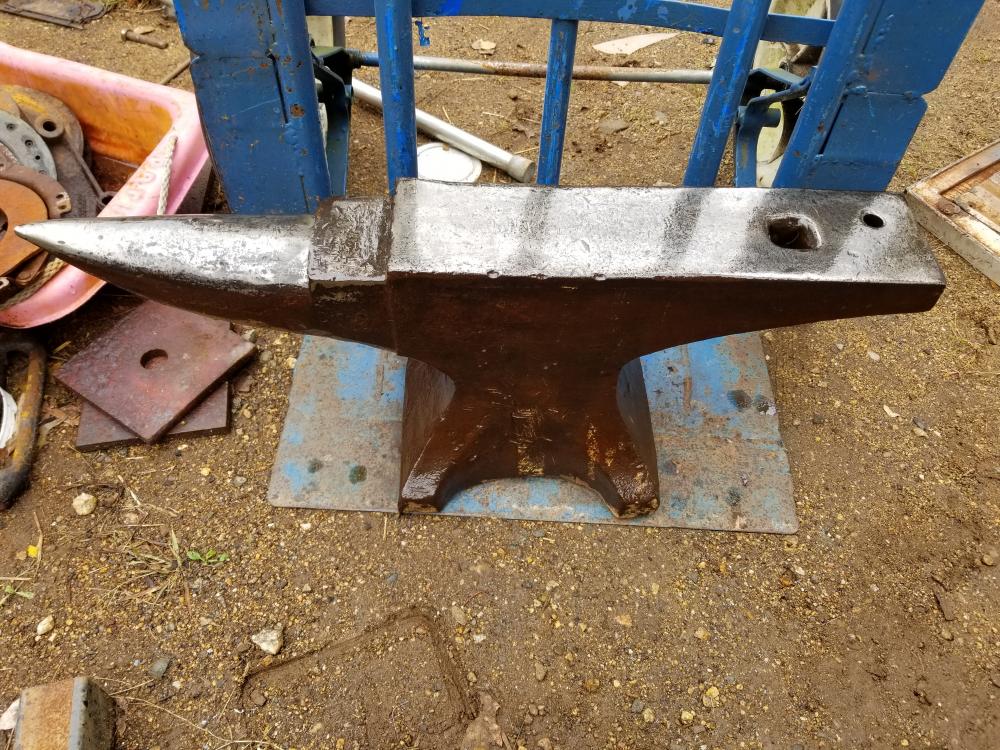
With the bottom like that I'd think early or transitional Hay Budden.. but not sure..
-
Nice anvil.. Great find.. Congrats..
-
Food Safe Bronze?
jlpservicesinc replied to GandalftheGold's topic in Smelting, Melting, Foundry, and Casting
computer challenged I am.. -
Food Safe Bronze?
jlpservicesinc replied to GandalftheGold's topic in Smelting, Melting, Foundry, and Casting
Frosty said exactly what I was referring to.. Thanks.. Frosty said exactly what I was referring to.. In blacksmithing we call, taking long and skinny and making it shorter and fatter as upsetting.. In sheet metal or plate work it's called Shrinking. Shrinking of sheet metal will make the sheet slightly thicker in the areas that have been shrunk vs the surrounding areas.. The ripple is used as a way to bend the metal upwards and this allows for the parts or if you would the waves at the bottom. Or bottom of the wave to hold the top of the wave as you pound it down.. The bottom of the wave or ripples will try to hold position before they deflect giving you a chance to force, forge, upset or shrink the longer radius into a shorter/smaller radius.. (thus upsetting it locally) thomaspowers I think you know exactly what I'm referring to as you, yourself have much experience,, Correcting someone whom doesn't have the experiencing to push them in the right direction commendable but to have a reaction as to ripples and upsetting and thicknesses and such is counter productive.. Length in this case is how long the radius is.. Making a pan, pot, caldron, any vessel with that shape as @rosty pointed out there are 2 basic ways each one will offer a slightly different result.. As I pointed out before I'd rather raise the sides as I like a thinner side with a thicker bottom and if I forge the sides down from the radius of the inside of the object it will give me that transition point I am looking for when I do my preform on the pan, pot, etc, etc. and create the ripples to take up before I push the top of the wave back down to upset the localized area, or shrink the radius.. I am a blacksmith.. By choice Nearly 97% of my work is done at the forge and anvil.. The other 3% is clean up or fitting or polish work.. With that in mind everything is forged.. 1minute at the forge and anvil is 20minutes at the grinder or file/vise.. I currently have 3 different video "How to's" on the list.. Pan making is one of them.. They are extremely easy to make with just a few tools and can be fun projects.. Few instructions.. 3/16" thick is what I'd start with.. 1/8" at a minimum.. find the center of the sheet you want to start with,, Center punch it.. With a set of dividers set them for 4.5" for a 10" pan, or 5.5" for a 12" pan.. Now take the dividers and scribe a line all the way around to get a 9" circle or a 10.5" circle.. Now mark a second line about 1.5" from the first.. Or 6" and 7" respectively.. This will give you between a 2-2.5" side wall height depending on how much you thin out from that first circle.. Then cut out at second line or largest diameter.. Some of the forge work can be done cold if using 1/8" and this will speed up the process for your first pan.. hit from the far side and drive the hammer back towards you in a pulling motion.. This will help to pull the metal towards you, stretching it faster.. Try to keep things an even thickness for a given radius.. Anyhow, it's really not hard and it can be a lot of fun.. Personally I don't like using a wooden stump or form for doing heavier pots and pans and the wood burns to easily.. I like a fixture jig for ease and speed and if I am going to be making one at a show or the like I like a positive mold.. -
Food Safe Bronze?
jlpservicesinc replied to GandalftheGold's topic in Smelting, Melting, Foundry, and Casting
Read it again.. YES it is.. The rippling is because the material on the outside is longer than the inside and these ripples are where the material is upset back into itself.. Thus the reason to thin them down before starting as they will gain in thickness as the pan is formed.. These ripples are then forged in.. I can hardly believe I am having to explain it to someone of your caliber.. It's written correctly just not to your liking.. Yes.. to both, but ideally the bottom of the pan should be the thickest part and is the reason to thin the sides.. Whether raised or sinking as it's applied to pan making.. -
Food Safe Bronze?
jlpservicesinc replied to GandalftheGold's topic in Smelting, Melting, Foundry, and Casting
The methods you mentioned will work, But There are finer ways to do it.. The rippling is because the material is in an upset position and if you ask me is the correct way to do it.. With a gas torch and a form for pan making it would take about 15minutes once the disk is shaped and the sides thinned to make a 10 or 12" skillet.. The rippling is because the material on the outside is longer than the inside and these ripples are where the material is upset back into itself.. Thus the reason to thin them down before starting as they will gain in thickness as the pan is formed.. ideally pans should have thicker bottoms and thinner sides when finished.. Or at least higher quality pans will.. -
Food Safe Bronze?
jlpservicesinc replied to GandalftheGold's topic in Smelting, Melting, Foundry, and Casting
FYI, Birch trees also have sap and it is quite deliousous.. If you are going to forge a pan, the best or easiest way is with a form that you can just clamp the blank into after the edges have been forged thinner.. There are a million ways to forge or make anything but uniess you have free form forging experience on larger sheets 12" or 14" it can be a futile experience.. Reason is you are shrinking the folded over edge of the pan.. Anyhow with guidance it's a pretty fast learning curve but doing it on your own can be tough.. The edge of the pan should be thinned to the bottom which should be left thick.. The transition or where you are going to bend it is where the sides are thinned back to..