
brianbrazealblacksmith
-
Posts
1,683 -
Joined
-
Last visited
Content Type
Profiles
Forums
Articles
Gallery
Downloads
Events
Everything posted by brianbrazealblacksmith
-

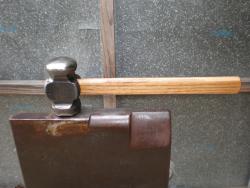
Hardy box and hot cut
brianbrazealblacksmith replied to Gor's topic in Hot Cuts, Anvil devils, metal cutting on the anvil.
Nice job Gor! There is a lot of people making striking anvils and tapered hot cuts all around the world now. I see nothing but positive changes for the better. I'm sure more and more will get up to speed soon. -
Nice job on both tools! No need to heat treat either tool unless you want to cut cold with the hot cut.
-
I've straightened many vices. I never considered doing it cold. It is a simple matter with heat. Just take it apart so it is not too cumbersome. I just straightened a large vice last week for a friend.
-
frustrated forge welder
brianbrazealblacksmith replied to Momatt's topic in Blacksmithing, General Discussion
Try using Iron mountain flux. It was formulated for gas forges so it would not leach borax and not eat up your lining. -
Mild Steel for struck tools
brianbrazealblacksmith replied to Ridgewayforge's topic in Tools, general discussion
I use top and bottom tools almost every day. I offer classes where people make their own hammers and all the tools it takes to make the tools. I also do a few group classes where I furnish all the top and bottom tools for people to do the same. I would not suggest using mild steel for these types of tools for different reasons. First and probably most important is the cost and availability of materials. Medium carbon steels like 4140 and 5160 are available worldwide as drops or scrap in many different sizes, and I've been able to get these steels for free for many years. The maintenance of the tools is another major factor. Mild steel will not hold up as well even when case hardened. If you use your tools, you will find that they need to be maintained. Also, there is no need to go through the extra step of hardening them as these steels are tougher all the way through and I use them as forged. -
I would like to buy, trade, or whatever, that first hammer that you handled, Dave.
-
brianbrazealblacksmith Posted 25 June 2010 - 08:36 AM "I was reveiwing this thread today and thought I should revive it now since quite a few of you out there have seen me using the tapered shanked hot cut hardy, and a few of you have them now. So, what do you think? I'd like to hear from those that have used them. [ I am not selling them, nor do I have any for sell. ] I do tell people that this is my greatest invention because I believe it is. Alot of people on the road expressed concerns about it possibly splitting an anvil, so I started pointing out my top tools as an example of why this will not happen. With top tools, the larger the surface area contact, the more mushrooming you get with use. Flatters require alot of maintenance on the striking end while hot cuts hardly ever need redressing. I know this is not conventional but it is reasonable." Since no one responded for almost three years, so I'm asking again. What do you all have to say about the hardy?
-
Nice forging! How could I contact you if I wanted to buy one?
-
The 90 degree Boogie
brianbrazealblacksmith replied to macbruce's topic in Blacksmithing, General Discussion
Turning your material after each hit is one of the most important things to know and understand about forging. Reason alone can tell you why. The very first thing that I talk about in a class has to do with this very subject. Think about a piece of round stock. What happens when you strike it between a hammer and anvil at a forgeable heat? It will form a pill shape. You would not want to strike it again on the same side and form a thinner and longer pill shape if you are trying to draw it out. If you turn it 90 degrees after each hit it will maintain a smaller surface area contact with both hammer and anvil and come back to a more square shape. If it is struck properly, it will actually bulge the previous sides and therefore keep the surface area contact down to a minimum every time you turn it. It will put energy into the material with each strike instead of wicking heat away with the larger surface area contact with hammer and anvil. -
Basher, I'd love to go to England. We've been invited but just haven't put anything certain together. Definitely come by if you ever come this way. I was recently up in Canada where we did a class, and Contryforge, the one that organized the class was asking who else to get up there for classes and we were specifically talking about you. If you plan to come or end up doing some classin Canada, for example, let us know and I'll try and talk to other smiths to get some more work for you to do while your here. I hear what you're saying about old and new techniques. There is nothing new under the sun. I don't call the rounding hammer my hammer just like I don't call the hammer blows my techniques.
-
That's funny! Be careful with the galvanized fumes when welding.
-
I've got a lot of thoughts on the matter, but I'll stick to the questions you asked. I showed big blue how to forge that rounding hammer on their power hammers. The main difference and the reason for the octagonal face is that the new big blue hammer is forged to finish from a piece of round stock and then ground to relieve the edges. The other big blue cross pein and rounding hammers are forged from square stock like Hofi hammers because Uri Hofi showed them how to forge them. They do not forge the faces to finish, instead, they forge the sides of the faces to accentuate the cheeks. When they do that it hollows the faces out on the squares and round faces, so they anneal them overnight and saw them off flat then grind to finish. The cross pein side is drawn out with the drawing dies past length which makes it bulge out then they saw that side off to length. The handle length is closer to what a horseshoer would want. The short handles like Habermann and Hofi endorse comes from addressing the anvil from the side when using the double bick anvils with no step or forging from the horseshoers side of the anvil. You will hit your handle on the anvil if it is not short enough when forging that way.
-
-
Forging a Crane
brianbrazealblacksmith replied to brianbrazealblacksmith's topic in Metal Sculpture & Carvings
Ironpost, the steps of the wing are on the first page of this thread, post number 13. -
Brazeal Style Hammer - Round Stock Questions
brianbrazealblacksmith replied to Josiah Peters's topic in Hand Hammers
I just got my order of steel in yesterday from Ryerson. I ordered 2" and 1 3/4" round 1045. I had them cut the 2 inch stock 4 1/2 inches long. The cost for that 20 foot piece cut into 4 1/2 inch pieces was $245.35, that makes each piece cost less than $5.00. A 4 1/2 inch piece of 2 inch round weighs 3.996 pounds. The hammer we made from it in a class yesterday weighed 3.612 pounds when it was finished. -
ANVIL STAND that will WORK
brianbrazealblacksmith replied to David Gaddis's topic in Stands for Anvils, Swage Blocks, etc
I'll answer that for David. No, definitely not! You don't want any form of cushion or shock absorber incorporated in your anvil and stand. The energy from a strike is best when it is transferred into your work and not dissipated somewhere else. That is why the legs are at 9 degrees so they back the anvil not farther out for tipping where they would be springy. -
How do I Make a Touchmark?
brianbrazealblacksmith replied to 395743's topic in Tools, general discussion
Cut a piece of 1 inch square tubing 2 3/4 inches long and weld it to a piece of metal that fits in your hardy hole, where the square tubing stands up straight on your anvil. Then get some coil spring that fits inside the square tubing snugly with a little slop so it will move up and down. Now cut a 3/8 inch long disc off the coil spring and chisel your stamp design into the disc. Drop it down the tubing where it rests on the anvil with your chiseled design up. Prepare a 3 inch long piece of the same coil spring to use as your stamp by cutting it to the center with a hot cut hardy on both ends. Leave the point on the end that will be your stamp and clean up any burrs if there are any. Dome the striking end. Heat up the pointed end, brush once, drop it down the tubing, hit it once with a sledge hammer, and then harden and temper the stamp end. Lyle, Urnstbeast, and I came up with this in a class a few years ago and have made several with others over the years. You have one hit to do it in, so make it good, and make your design appropriate. Just look at other stamps and notice the depth and surface area contact. -
Think of it like a big rosebud torch. To heat quickly, you set your flame or hot spot and position your piece you want to heat in that spot. Just like a torch, there is a sound to a properly set flame and a spot in that flame where you can heat quickly, and yes you can burn your metal if you leave it in that spot once you are up to temp, so move your piece. Set your hot spot with your blower where the flame blows through your material. You should hear the flame roar. Preheat and turn, then heat and don't burn.
-
Tips on forging grape leaves
brianbrazealblacksmith replied to TurnedLuck's topic in Metal Sculpture & Carvings
The two-sided taper, far then near, is the most efficient way of isolating an exact volume of material and displacing that volume into a bar, taper, or reverse taper with your hand hammer and anvil that I have ever seen. I'm sure that it was a common method all through history, but I had never seen it done before. It is one of the first techniques that I'll encourage people to try and accomplish in a class. It will lead you on to more things like tongs, hardware, and knives. Being able to isolate and work your material before it fits across you anvil and maintain good structure will speed your work up tremendously. There are a few videos that we put on YouTube that show this technique, and then there is the four-sided taper over the far and near side of the anvil shown in the tong video that helps you displace material. Maintaining and controlling the structure of your material while leaving material isolated on the far end and not having to cut your material and turn it around to work it with tongs will save time and you'll stop having the stress fractures that occur from going too far too fast while you still have more work to do. -
It sure does. I didn't look at the green square at first. The horn on that anvil does not have the classic cone shape of most Peter Wright anvils I've seen. The horns on most PW's is what I like about PW's. I don't care for that bullet shaped horn on that anvil that reminds me of Laurel Machine and Foundry anvils. If I had a spare 5,000 dollars, and if the hard face is still all there, I'd buy it. They don't make anvils like that anymore.
-
If it were a 500 pound Peter Wright that was in mint condition then it would be worth over 5,000 dollars. I does not look like a new Peter Wright to me. It looks like a Laurel Machine and Foundry cast anvil to me. The shape of the horn is what I noticed first and the low step.
-
EWCTool, the flat side of my hammer is ground so it is crowned and I normally only leave about a nickel size flat spot in the center. Royce unruh, if you're talking about the flat side, 1/2 inch sounds fine. There are no flat spots on the rounded face. Thanks everyone that has tried this and reported back. I agree with Thingmaker. You need to try things for yourself. Don't believe anything I say. See things for yourself.
-
Strap hinges - New doors for my smithy
brianbrazealblacksmith replied to Tubbe's topic in Member Projects
Nice work, as always! -
I said what I said, and I wrote what I have written. I have no control over how others interpret that. So back to the reason this conversation was started, since someone asked a question. EWCTool, The squashed ball, instead of the half ball, does hit more like a straight peen, cross peen, or diagonal peen when tilted at different angles. A half ball will always hit like a ball no matter how you tilt it unless you go too far. And a straight peen and cross peen make the impression they will make, and to make larger or smaller impressions you would obviously choose another size. I do have other hammers also, but the reason for this thread was in response to people asking what would be the best choice of hammer for general forging with a hand hammer. A properly ground rounding hammer has more surfaces available to forge a larger variety of things without the need of changing hammers as often. You can also go places you could not go with longer faces like are on straight and cross pens. The curvature of the fuller that occurs at whatever angle you tilt your rounded face gives you a lead in and out of your work if your material is wider than the impression created by your strike. If your material is narrower, the impression acts like a straight, cross, or diagonal peen. This is nothing new. Alec, Lyle, Dave, Kainon, or anyone else out there, could you chime in on this one and describe what I'm trying to convey with your words.
-
Dan P, I was merely responding to your first antagonistic post on the first page of this thread by asking you what specific surface of any given hammer you would choose to do a simple forging operation. You saying that you would use a hammer is not an answer to my question. I assume you probably didn't even watch the video. The point of my question was for you to show me something better. I would like to see something better. I want to make the best choices. The reason for this thread was in response to others questions on what would be the best hammer out of the different styles of hammers to do general forging. Alec and I did a video to show a few of the reasons for choosing a rounding hammer. I am not trying to sell anyone anything. I am only trying to help. EWCTool, from my experience the round face would be the best choice because of the surface area contact with the material is much smaller so more pounds per square inch are being delivered and you are less likely to hit on one side or the other of your material.