
brianbrazealblacksmith
-
Posts
1,683 -
Joined
-
Last visited
Content Type
Profiles
Forums
Articles
Gallery
Downloads
Events
Everything posted by brianbrazealblacksmith
-

Extra blows
brianbrazealblacksmith replied to george m.'s topic in Blacksmithing, General Discussion
Alec you should explain it, you can probably do better than I. -
Extra blows
brianbrazealblacksmith replied to george m.'s topic in Blacksmithing, General Discussion
No offense taken. To accomplish the taper suggested, it would be best to use an appropriate hammer, so you can relax and let the hammer do the work. It is not strength that enables me, Alec, or anyone else to do that taper. It is technique. Like I said on the first page of this thread, I am merely setting my hammer to the side most of the time and it bounces. I would have to bear down to stop it or hold it in the air, neither of witch I would want to do. If I'm just doing a job, I'd be moving faster and I don't lay my hammer to the side as much, but I try and explain forging to people who are interested, so I slow down so they can see. I lay my hammer to the side more. Also, I will bounce my hammer up to start it. I don't want to pick up dead weights. If you ever feel like you are pumping iron and your muscles start burning, you are not relaxed and you should probably be using a bigger hammer. -
Extra blows
brianbrazealblacksmith replied to george m.'s topic in Blacksmithing, General Discussion
George, I simply suggested that anyone do a taper in one heat on a large piece of steel, and report to everyone their experience. -
Nice, Dave! And could you explain that plug thing?
-
Extra blows
brianbrazealblacksmith replied to george m.'s topic in Blacksmithing, General Discussion
No, George. I said what I said. -
Here is the video I promised
brianbrazealblacksmith replied to Trip's topic in Blacksmithing, General Discussion
George M, I came up with the striking anvil a little over three years ago to help others learn to make tools with a striker. I suggest making them at a good striking height, and out of mild steel. I would not want to let just anyone strike on my anvil. My anvil is too high to strike efficiently on when you add the bottom tool, the tool you are making, and the top tool, so I suggest 30 inches or less for the anvil height. The last one we made was 24 inches high. I have seen people miss when striking. I have made hammers and other tools with people from 12 years old to 88 years old and some of them had never forged before. There have been several people make them since. It is becoming a household word. You just gotta get out more.lol -
teaching others to Hammer
brianbrazealblacksmith replied to Borntoolate's topic in Blacksmithing, General Discussion
george m, I do refer to my hammer and anvil as dies. Just like with a power hammer, you choose what top and bottom dies you want to put in. When I use a striker, I also choose the dies that I want to work with. I can change dies very quickly with my hammer and anvil, and I try and clearly communicate the dies or surfaces I am employing. Thank you, Thingmaker, for helping me to explain. -
Extra blows
brianbrazealblacksmith replied to george m.'s topic in Blacksmithing, General Discussion
For all those non-tappers, draw a point on a 1 1/4 inch jack hammer bit in one heat, and then get back with us. Or better yet, do a longer taper on 3/4 inch stock where you change the side of the hammer you strike with from time to time. Borntoolate, Alec was hammering like that before he came to see me. Alec had more hammer experience than anyone I have ever worked with, and he got it from sharpening jack hammer bits with a 4 pound hammer before he came here in one heat. He was also the first and only student that forged the taper on a hammer drift in 5 heats with a 5 pound hammer. The starting material was 1 1/4 inch round 4140, and he almost 5 foot tall and weighed 88 pounds. Relaxing and letting the hammer do the work will enable anyone to hammer without hurting themself. Watch that young man throw a hand hammer or a sledge. He was striking with a 20 pound sledge at a class he helped me teach in Montana. -
Pug}{man, just share. Timothy, that's funny, you should of heard my brother laugh.
-
teaching others to Hammer
brianbrazealblacksmith replied to Borntoolate's topic in Blacksmithing, General Discussion
george m, I have done the same things that you talk about in the past, but now when I guide someone from the start who wants to learn to forge, I get real specific. Cutting to the center, turning your material after every hit, will leave you with a nice point on the end. That will enable you to forge more evenly as opposed to cutting from one or two sides or randomly. It gives a centered cut. Half hammer faced blows with the flat side of you hammer while holding your material at an angle on the anvil will not create shoulders. Your flat die, or flat side of your hammer, hangs over your material. I did not refer to half hammer faced blows held over the edges of your anvil where your hammer is half off your anvil, that will create shoulders. David, I don't know how to do that yet on my new computers. I've been wanting to do a video on making punches and cutting, but I've been busy. Come by and I'll do it if you film it. My brother is hear now, too, and I'm sure you guys would love to meet each other. -
Finished the hardy yesterday, mailing priority today....
-
teaching others to Hammer
brianbrazealblacksmith replied to Borntoolate's topic in Blacksmithing, General Discussion
The sooner people start making punches in a class helps with their hammer technique more than anything I've heard or seen. I'll show how to make a punch with 5/8 to 3/4 inch coil spring then they do it for how ever many tools they choose. Making punches entails cutting to the center with a hot cut hardy and half hammer faced blows with the flat die over your stock on the anvil held at appropriate angles. Two different hammer blows with a tough piece of metal, they are forced into getting their hammers up and hitting better. If they are still pecking after 3, I don't know what to do, tell them to go home. -
teaching others to Hammer
brianbrazealblacksmith replied to Borntoolate's topic in Blacksmithing, General Discussion
-
Here is the video I promised
brianbrazealblacksmith replied to Trip's topic in Blacksmithing, General Discussion
Thank you, HWHII. It has been very rewarding watching all these young smiths sharing their knowledge of blacksmithing. It made me cry seeing them perform at the ABANA Conference in South Dakota this year. -
Here is the video I promised
brianbrazealblacksmith replied to Trip's topic in Blacksmithing, General Discussion
Glad to see you passing on the information Dave. Nice video guys! -
Forge Welding w/Power Hammer?
brianbrazealblacksmith replied to SoCal Dave's topic in Problem Solving
Forgemaster, has the answer. Hitting the metal into itself, gathering it up, is what makes for a successful forge weld. The little giant was just hitting it squarely and not making it skew or form a parallelogram. Forge welding is just like other forgings, the more you hit it into itself or squarely, the more it produces energy or heat and the longer it stays forgeable and maintains its structure. -
Square drift corners
brianbrazealblacksmith replied to Clodbuster's topic in Slitters, Punches, Drifts, etc
Ditto. Thanks, MOblacksmith0530! -
Pug}{maN, if you give me your address in a personal message, I will send you one of my hardies so you don't have to make that one. Make or buy the other type and post the results on this thread. I don't expect anyone to believe me. You have to see things for yourself.
-
Square drift corners
brianbrazealblacksmith replied to Clodbuster's topic in Slitters, Punches, Drifts, etc
Drifts are for opening up slots. Drifts are not for stretching holes to size. Metal is very resistant to stretching. You can stress metal if you try and stretch it. When drifting holes it is best to make the appropriate size slot the use the appropriate sized drift to open it. It does not matter weather you have sharp or rounded corners, you just need the appropriate slot and drift. When you have that, all you need is mild steel for your drift for opening, shaping, and sizing holes. The only exception is drifts for making hammers and top tool since they act like anvils inside the hole so you can forge the cheeks of the hammer or top tool with fullers or hammer. -
The steeper the angle the faster it will cut, but too steep it will ripple. I usually grind them steeper than they should be for myself then use them then it usually ripples and then I grind it again and it holds up perfectly. When I make them for someone else I grind them less steep because they cut quicker than most people are used to so they don't hit their hardy with their hammer as easily. I have never measured the angle, but you can look at pictures that have been taken of my hardies and measure them yourself. If you are just cutting round stock, a straight cut is fine, but if you are cutting square or flat stock a curved one is definitely better because of the surface area contact. I would suggest making it curved because you'll probably be cutting all kinds of stock and it will cut round stock more efficiently also. Everyone assumes that it will slide off the curve, but that is just an assumption. I don't know who came up with the straight hardy, but I'm pretty sure it was not a blacksmith. If you are cutting hot material, you do not need to harden it. If you are cutting cold material, you need to harden and temper it. If you cut large stock, you would just lose your temper, so there is no need to harden. Learning to make, use, and maintain tool is to your advantage, so don't try to "plow" with your hardy. Hot cuts are thin tools, so move your material after every hit and your tool will cool off quickly just like it will heat up quickly if you do not move it.
-
Striking anvil under way
brianbrazealblacksmith replied to FieryFurnace's topic in Anvils, Swage Blocks, and Mandrels
Great job, Dave and Chase! It's good to see you continuing with the tool making. That striking anvil will be one of your best investments you've ever made especially when sharing this information with others, and you'll learn more when you share it. Getting on both sides of that anvil (directing or striking) will teach both of you more, and working with others will also. I've made hammers with 12 year olds to 88 year olds and ages between, male and female, and it taught me a lot. -
Extra blows
brianbrazealblacksmith replied to george m.'s topic in Blacksmithing, General Discussion
Good observation clincher breaker. I've been asked the same question many times over the years. I tell them that I am usually just laying my hammer to the side and it naturally bounces. You would have to be stiff and bear down to prevent it or hold your hammer in the air. It can also serve to help pick your hammer up. -
Big-D, I agree with you using square stock for people starting out to learn to turn their material 90 degrees, but round stock is a better choice once you've learned to turn your material and get it under your hammer because of the surface area contact with your anvil and hammer. The same reason holds true with why the rounding side of the hammer is better than the flat side to move the material faster and keep energy in the piece so you can forge longer. The flats bear on the anvil and hammer more and wick heat away quicker. The only thing better would be forging square stock on the diagonal because of surface area contact. Surface area contact is one of the most important things to understand about forging.
-
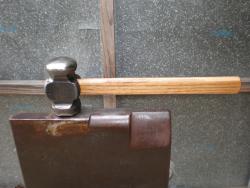
Thanks, everyone. Everything Mac, that is a 6 pound hammer and an 86 pound anvil in that video.
-
That is not a stupid question. There are a lot of different ways to quiet an anvil. I have found that steel on steel is the simplest. Secure your anvil to the stand then secure it all to the earth as best you can. I use anchors on my concrete slab, but you can see by the camera bouncing that the whole slab moves. It would be better to pour a better foundation for your anvil just like is recommended for power hammers.