arkie
-
Posts
2,679 -
Joined
-
Last visited
Content Type
Profiles
Forums
Articles
Gallery
Downloads
Events
Everything posted by arkie
-
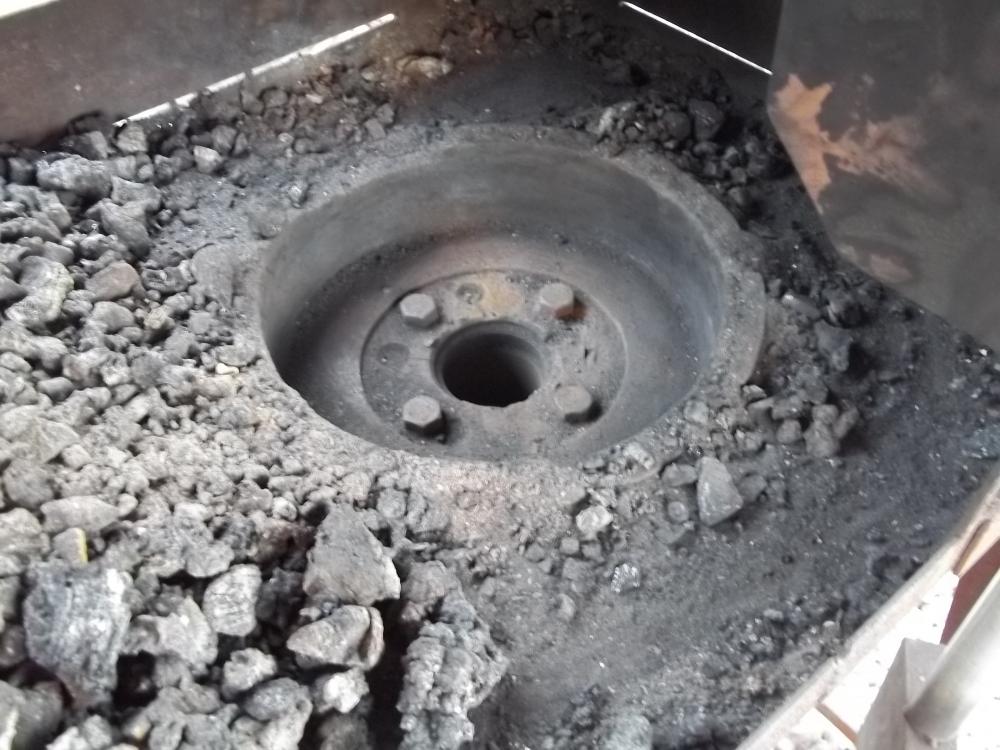
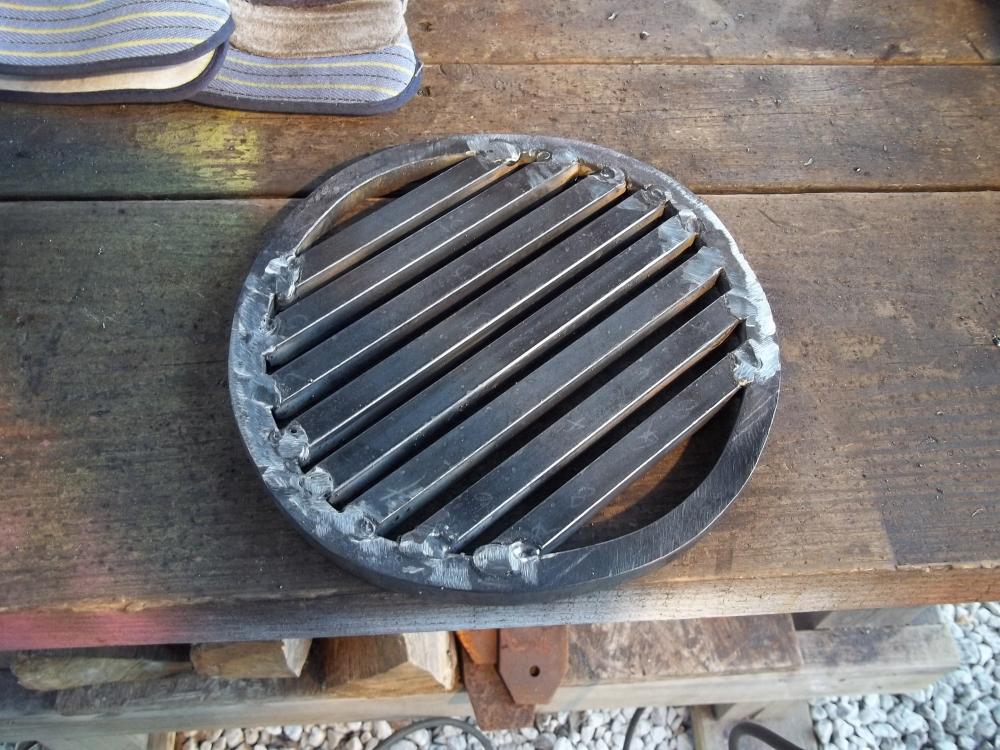
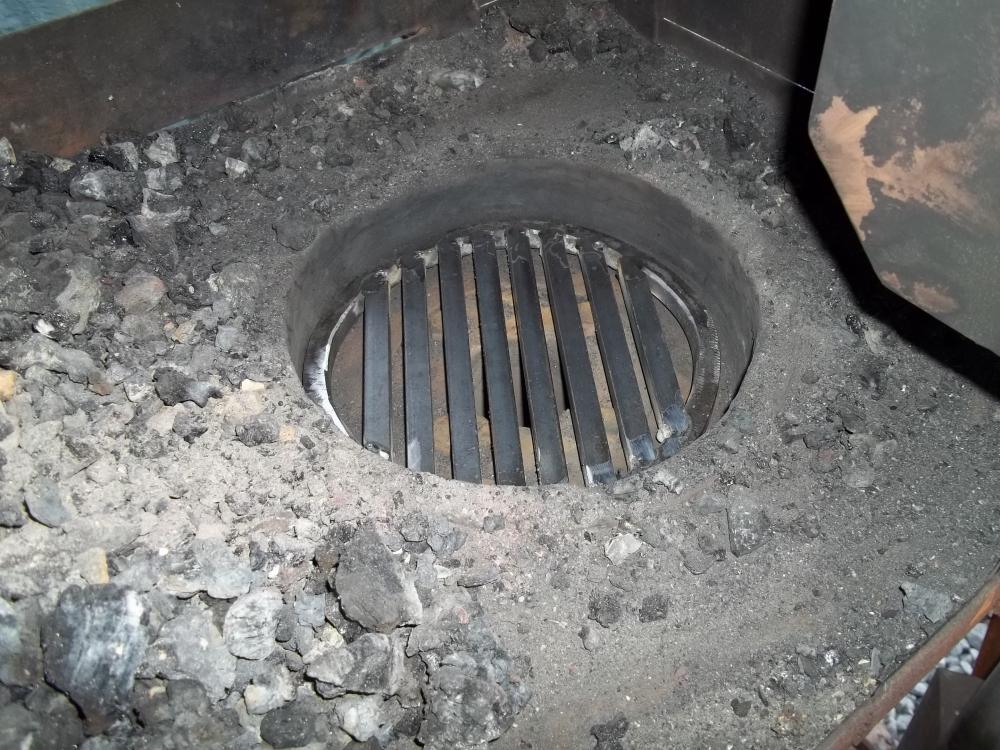
Justin, nice looking work. If your grating burns out, several have suggested other types; plates with holes, grates, screens, etc.. The cast iron drain grates I tried out burned out pretty quickly. Here's one type I'm using now. Made the ring from 1/2" mild steel square bar, diameter same as drum ID. Straight bars are 1/2" square bars, welded with 1/4" gap. I just drop it in the drum. It's heavy enough to not have to secure with bolts or welding. Has been working fine for quite a while now. Easy to make and replace if it becomes unusable, which I don't foresee anytime soon. If an inside bar burns up, just cut it out and weld in a replacement. Better than cast iron which is not easily welded.
-

Do i have to be artistic to be a blacksmith?
arkie replied to Seth O's topic in Blacksmithing, General Discussion
Seth, you'll do fine. "Don't worry...be happy!!!" You have somewhat of a headstart. Several members of our blacksmithing organization are very good woodworkers and/or woodcarvers. So is their blacksmithing. -
Thanks for the compliment. I kinda liked the unfinished one also, but it's her's now and she likes bright colors. If you ever have a chance to get some wrought iron, try it out. Pleasant to forge with.
-
Well, THIS one has LOT'S of colors!!!! Just not of the natural camo type.
-
Leaf spring splitting froe
arkie commented on DUNSTAN's gallery image in Other sharp or pointy things
 Very nice job on the froe. I've been wanting to make one from a leaf spring as well...glad it worked out OK for you. Did you heat treat it or just go with the natural hardness of the spring?
 -
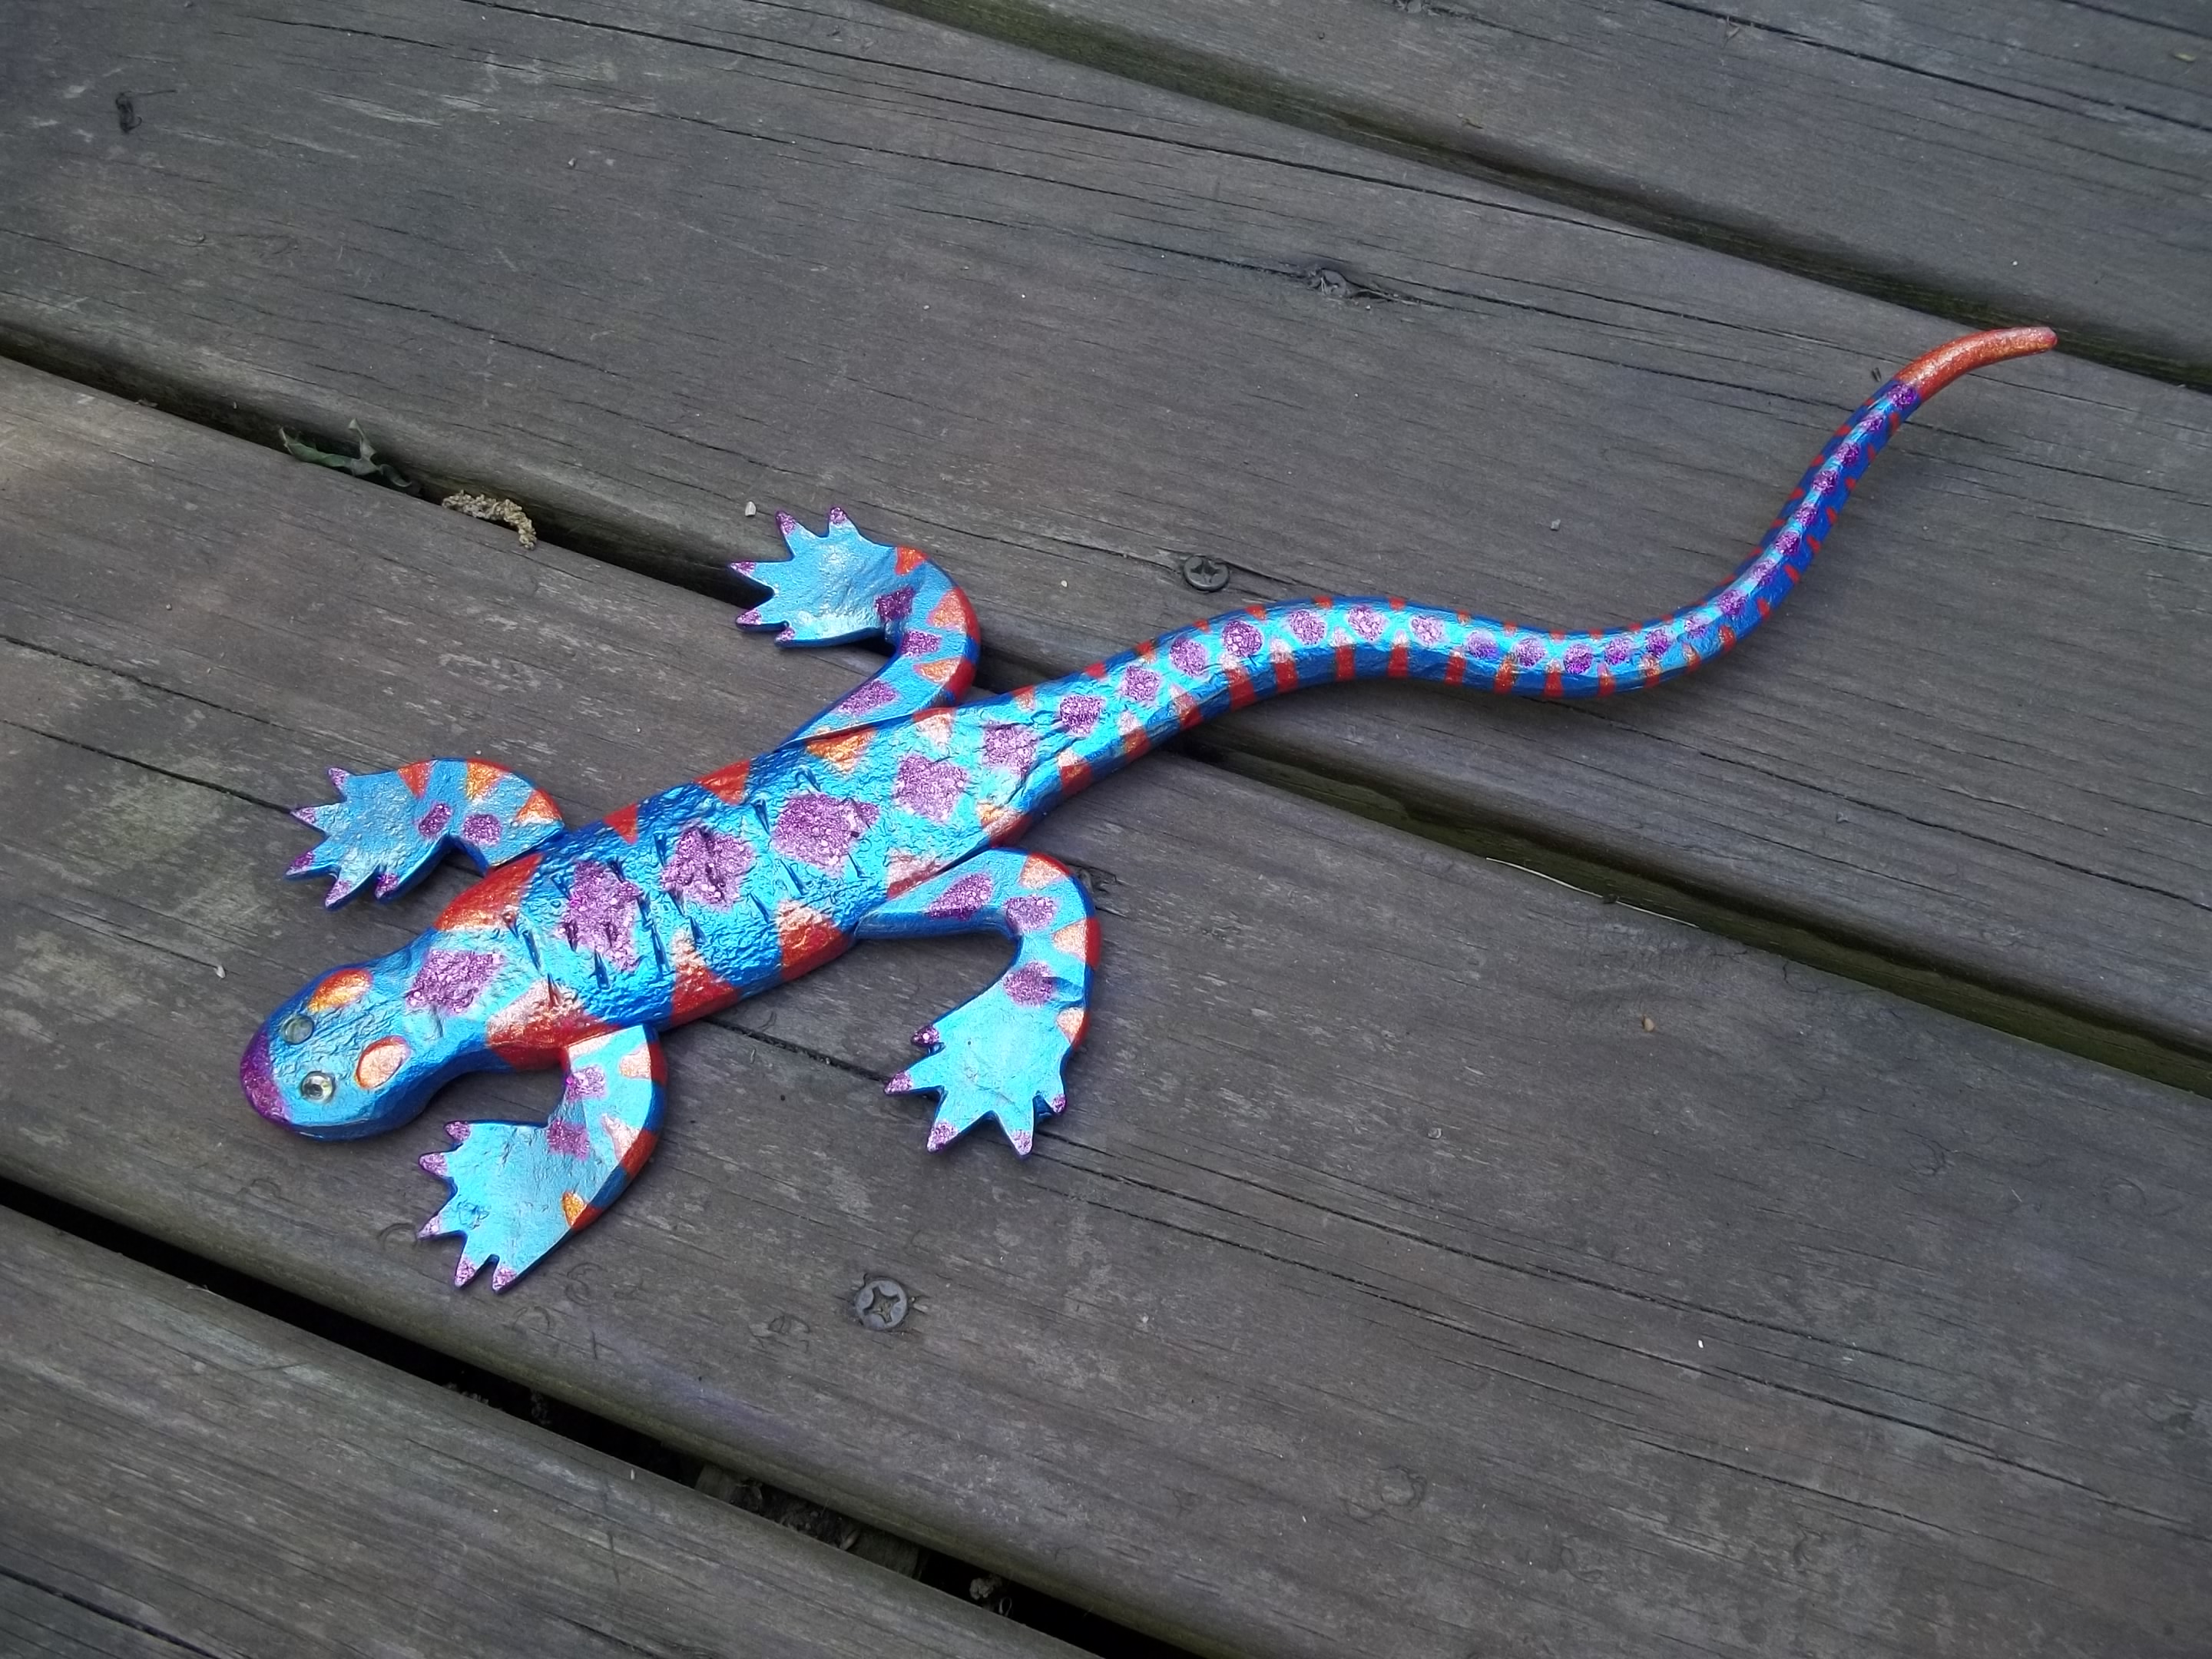
Update on the lizard. The lady, an artist, took some artistic liberty and went wild with paint. Made a psychodelic lizard out of it. Even had glitter on it's toenails and rhinestones for eyes...really off the wall on that one!!!!

-
Birds ruined my forging session
arkie replied to intrex's topic in Blacksmithing, General Discussion
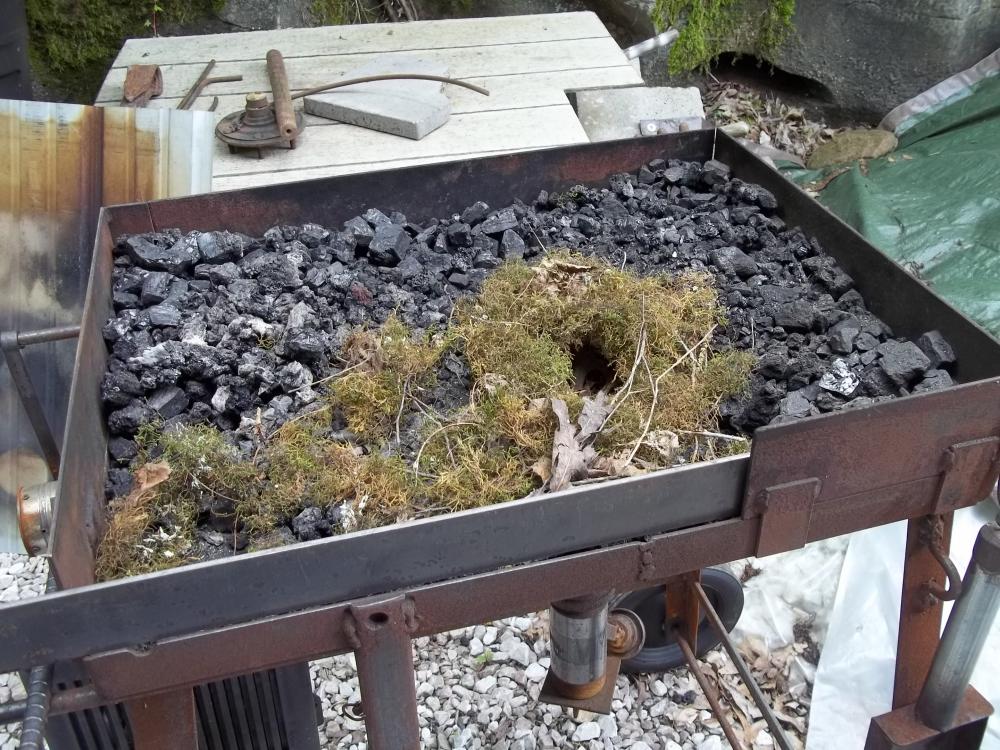
Nest in forge like this??? Last year, about the first part of May, I only had a piece of sheet metal covering my outside forge. A mama wren built a nest over approx. a 2 day period when I was not forging. I removed the nest and put up a barricade so she couldn't get in an opening. About three weeks later, I uncovered the forge to find ANOTHER nest...this one right inside the firepot! After that, I went out every day and checked for a new nest. No new ones. I later noticed she was building a nest in an old teapot we had hanging on our porch. She raised three young ones that year from the teapot.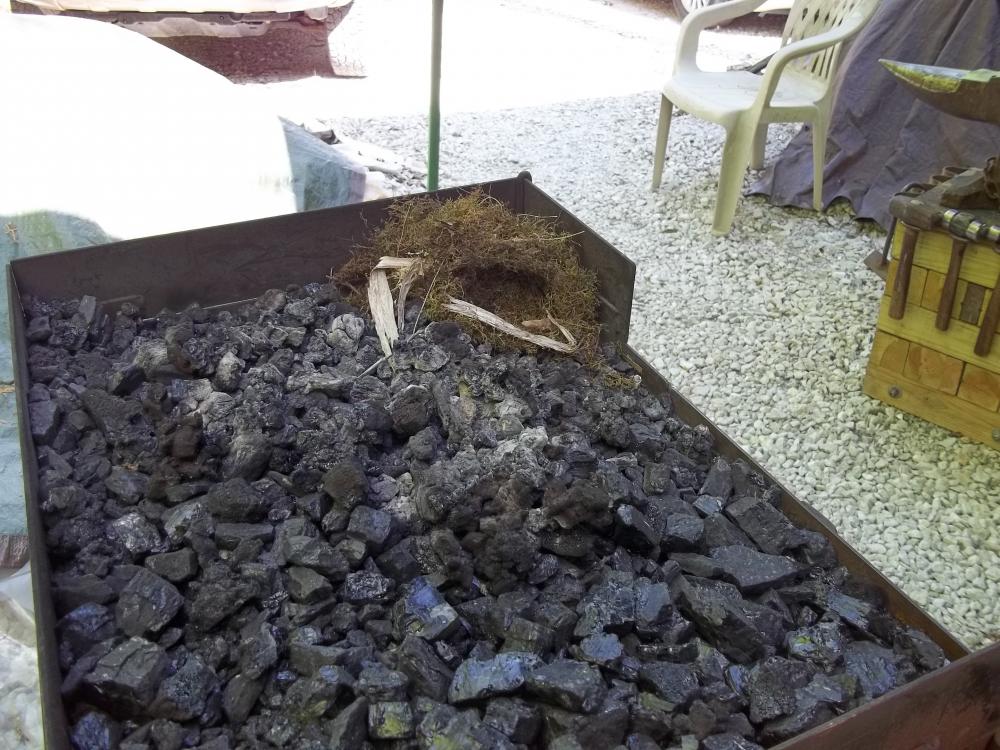
-
Hardie cutter
arkie replied to Stephen Jones's topic in Hot Cuts, Anvil devils, metal cutting on the anvil.
Stephen, Try a local auto or truck repair shop. They might have some broken or bent axles, coil springs or something of the sort you could use. Farm equipment or heavy equipment repair places might have shafts, springs, bars, pins, etc. you could use as well. -
You'll end up with arms like Popeye! Seriously, if you haven't been doing much upper body and arm exercise before getting into smithing, go slowly, don't try to hammer hard at first and don't use hammers that are too heavy. Beginners usually start out with 1 to 2 1/2 lb. and then 3 lb. as they progress. Heavier hammers for when you are in shape or have a striker to help you. Probably most of the blacksmiths you have watched have been at it for a while, years most likely, and are conditioned for proper hammering. If you spend a day smithing, yes, you probably will feel your arms at least have had a workout...maybe your back too! Full body exercise is best, but you probably already know that. Take it easy at first.
-
round or flat hammer face to hit punches?
arkie replied to Ethan the blacksmith's topic in Hand Hammers
Technicus Joe recently addressed the hammering technique of using the flat versus rounded face of a hammer. Do a search of his videos for details. According to Joe, hitting with the flat face sometimes results in either off-center hits or hits not perpendicular to the tool. Using the rounded face reduces off-center or mis-strikes. One doesn't have to use his/her forging hammer to strike, but can use other dressed hammers dedicated to striking tools. -
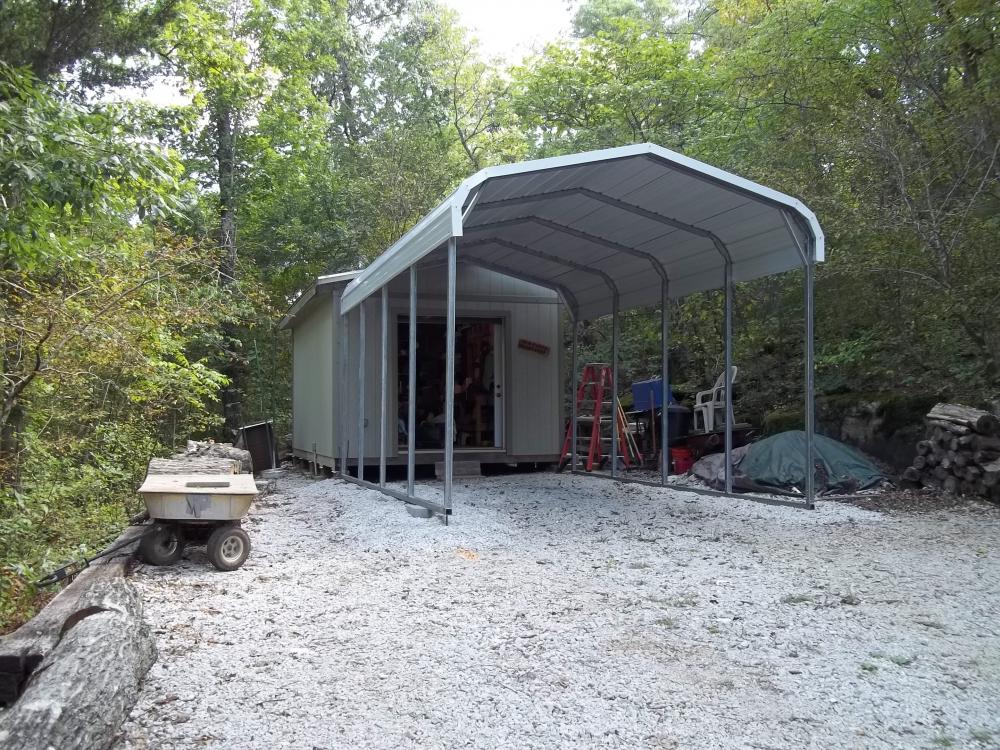
Of course, for a simple cover like mine, you don't necessarily have to use all metal or retail purchase. You can use dimensional lumber, 4x4's or 4x6's for the posts and 2x6's or 2x8's for the plates and rafters/roof joists. Any kind of sheet metal would suffice for the roof and sides if desired or it could be decked and shingled (or rolled roofing)....all kinds of scenarios for simple construction. If you have access to cedar trees, they make great posts and even rafters.
-
Maybe consider just a "carport" type covering. All my smithing is done under one of those metal carports you see along the road over here for "Only $595"....sure.... It works great, air circulation is nice, keeps the sun off your neck, but.........(is a bit uncomfortable in the dead of winter!!!!). Metal posts, rails, and metal roof (fireproof). Your's would have to be smaller; possibly custom built.
-
Quick and Dirty tongs are very good quality, and....Made in USA
-
See if you can find a source over there for large screw/bolts stock with Acme Threads. That might work for you.
-
A quarter turn would put the sides at 90 deg. to each other. Find Dempsey twist tongs.....
-
Steel Grade for "Grade 8 Bolt" ???
arkie replied to SReynolds's topic in Blacksmithing, General Discussion
I think we got it figured out!!! -
In looking at some of the Mousehole anvil pictures in Postman's book, Mousehole Forge, you have a very nice specimen there!!
-
Steel Grade for "Grade 8 Bolt" ???
arkie replied to SReynolds's topic in Blacksmithing, General Discussion
That would be 0.0002 -
Eyesenish, I recently received a copy of Anvils of America written by Richard Postman. Included with the book was another book named Mousehole Forge. Since A of A was a gift, I don't know if it was included as a free book by the giver or was purchased. It is a full-sized paper bound book, of 108 pages, that goes into the most fantastic detail about the history of the Mousehole Forge in England and the anvils. Wonderful reading. You might try to locate a copy.
-
Thanks, all. The scales were a quicky. I really need to use a small chisel or gouge for nicer scales. It's about half abstract anyway.
-
Frosty, thanks. It was a quick forging job. Next time, I want to spend more time and take more care with one. BTW, it's not 38'. My OP said 3 feet. "It was about 1 3/4" wide, 3/8" thick and 3 feet long." Wish I had more. He's gonna look to see if there is more.
-
Thanks. Feet attached on bottom by 1/4" to 1/2" small tack welds, ground flat.
-
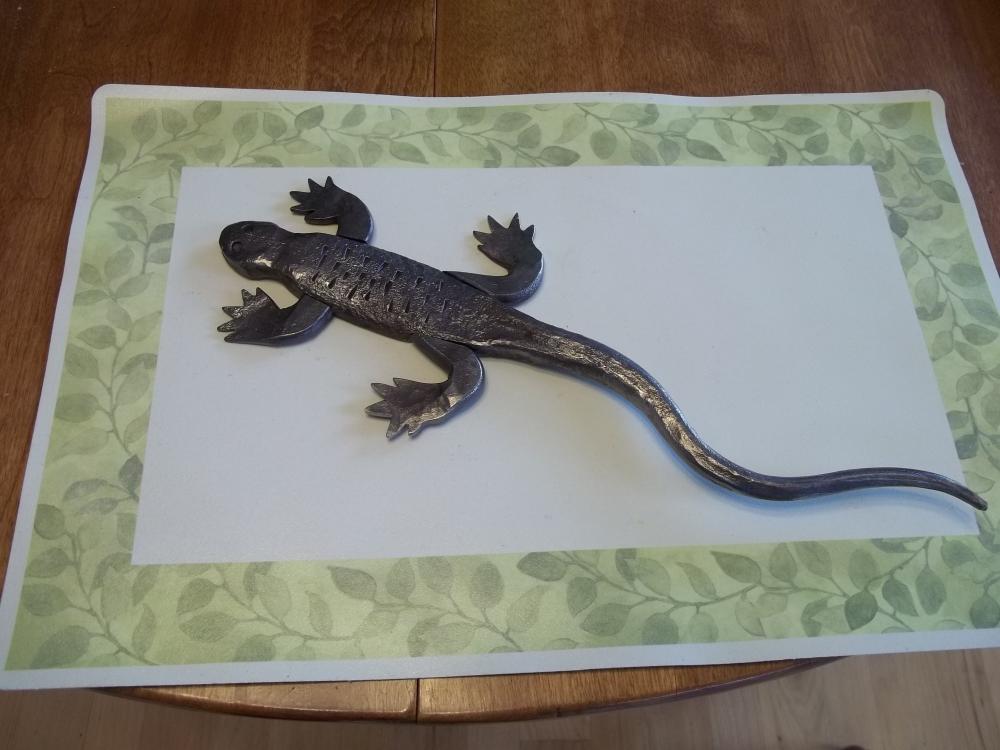
A friend brought over a piece of iron/steel he thought I might like to have. I asked him where it came from and he related that it was an old wagon wheel tire. When I asked him how old he thought it was, he replied that it was his grandfather's. It was about 1 3/4" wide, 3/8" thick and 3 feet long. Bells went off....possibly wrought iron?? I had never forged with wrought iron before, so I thought it would be great to give it a go. I did a spark test and a bend test on a part of it, and it was indeed wrought iron; fibrous texture and all. In appreciation for giving it to me, I made a lizard out of a piece of the WI for his wife...she loves yard art. Being an artist, I left the painting and coloring up to her. I am anxious to see how it turns out. (That's a placemat under it.) The wrought iron was a pleasure and slightly different to forge with. It seemed to be somewhat softer and easier to work. (The legs, BTW, were made from 1/2" mild steel rod, flattened)
-
And....as a last resort, if one doesn't need the extra steel in the RR spike head, one can always cut it off and then have a nice, square end.
-
Should be ready to go tommorow.
arkie replied to redd1981's topic in Blacksmithing, General Discussion
redd, For a hot-cut hardy tool, a used mason's chisel works great. Grind a nice edge, cooling as you go, and curve it if you wish for smoother cutting. You can grind down the handle to fit your hardy hole, and if the chisel has an octagonal handle, like some do, it may fit your hardie hole snugly. If the handle is too small, you can (1) weld a piece of angle iron to it, (2) weld up some beads on two adjacent sides and grind to fit, or (3) use shims.