

arkie
-
Posts
2,679 -
Joined
-
Last visited
Content Type
Profiles
Forums
Articles
Gallery
Downloads
Events
Everything posted by arkie
-
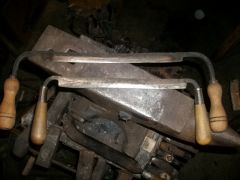 I have two very old ones where the tangs pass completely through the handles. The tang ends are threaded and secured with a small domed washer and nut. They appear to be original. Those won't come off for sure. I thought about doing that, but since I don't have any threading dies, etc. I'll use another method...heat, epoxy. Problem with epoxy is that if you ever need to remove the blade you pretty much have to destroy the handles...not good.
 -
I'll try the heat trick, thanks Charles. :-)
-
Hmmm.....my file handles are always coming loose, no matter what I do. I would think that with a friction fit and pulling, the handles would come loose. I've been toying with the idea of forging some draw knive blades with a curvature approximating my favorite handle shape to help shape them.
-
od, how are you attaching your handles? Threading, epoxy, etc.?
-
Scotty, thanks for the explanation. Gotta give that a try!
-
Scotty, how do you get the "drill bit" twist like in the top photo? Those are really nice looking openers.
-
Vaughn, folks here have given you some very good advice on your welding technique. There is no substitute for seeing the real thing. If you have a welding shop nearby, drop in with some donuts close to quitting time, take your hood and some rods with you and ask one of the welders if they will run a good bead for you so you can see it real time. You are not trying to steal business or get a freebie, but just want to see a good puddle as it's run. Second, go over to weldingtipsandtricks.com. Jody has several excellent videos on running stick beads. Some really good tips also. I like to run some of his videos from time to time to remember what a good puddle looks like!!!!
-
You gotta be faster than the dog when it comes to licking the handle!! RIGHT ON!!! Bacon and forging for breakfast. My kind of thinking. Heating over the fire will let that yummy bacon grease have maximum penetration into the handle.
-
Frosty, I like your bacon grease idea. Hammer for a while and then when you have the handle heated up a little, just start licking your palms!!!!!
-
I just find an old dowel rod, clothes closet rod, stick I carve out, etc. Drill a hole for the tang, put in a little epoxy, shove the handle in...good to go!
-
Hey, Frosty, When we used to go camping/hunting in Texas when I was a kid, my Dad used to pile up a big heap of cow chips (DRY ONES) and build a hot fire. They really DO get hot!. We'd cook steaks or weiners over the fire. If we added mesquite wood to the fire it was even better flavor!!!!! That's my story and I'm sticking to it!......... :)
-
Beautiful work. With the showers of sparks coming off any steel being ground, I wonder how long the wooden parts will last? I have set a few shirts and pants on fire!! You might adhere some thin sheet metal to the wooden table parts at least.
-
Smith...you are supposed to dry them first!!! (jus' messin' wit ya...)
-
I'm all over my anvil like a "chicken on a June bug"!!! There is no right or left, right or wrong...just wherever works the best!
-

Motorcycle Chain Hold Down
arkie replied to 41flathead's topic in Anvils, Swage Blocks, and Mandrels
Coincidence....I just finished putting on my new chain hold down today. I found a 10 ft. length of heavy chain used on heavy logging equipment and used about 4 ft. of it. I then found a piece of steel in my scrap (resource) pile about 3/4" thick x 4" wide x 6" long. I guess it weighs about 5#. It had been broken at a hole, so I cleaned up the break, shaped a hook from 1/4" square rod, welded it into the half-hole. I screwed a hook on the back side of the anvil block so it wouldn't slip off as easily as a nail. The weight and hook will hang on any link and I made it so as to lie as close to the block as possible, no shin bumps. -
Very, very nice hammer. Congratulations on a job well done.
-
Blacksmithing as Therapy for Veterans.
arkie replied to Kendall P's topic in Blacksmithing, General Discussion
Well said........ :) -
Progress On My New 12'x16' Shop / Pole Barn
arkie replied to tulsavw's topic in Building, Designing a Shop
I've been there, Charles. Why do you think I have a brake drum for a firepot instead of a $$$ cast iron beauty.... ;) I love scrounging for stuff both fiscally and for the pleasure of it. Never know what you can come up with! -
Frosty, your book would be a good reading companion to "The Peter Principle". I've known a LOT of those folks over the years!
-
Progress On My New 12'x16' Shop / Pole Barn
arkie replied to tulsavw's topic in Building, Designing a Shop
Charles, My projects seem to cost me BOTH more money and more time!!!!!! I'll figger it out someday. -
I would respectfully disagree with that, and probably lots of folks using them might also. My first forge, and still using it BTW, is a brake drum forge. Firepot cost = $0. Commercial firepot = a bit less than $300. Pretty expensive for the first outlay. Mine has been no trouble at all. Sheet steel table 1/4" thick, cut a hole, dropped in brake drum, hooked up air supply and good to go!!!! Probably when my brake drum gives it up, I may buy a $$ cast iron firepot, but then again I may just get another drum...who knows?
-
I second the idea of putting a companion heated bar in the vermiculite with the blade. I had the same problem when just sticking the blade alone into the vermiculite, but the heated bar with the blade solved the problem. Without the heated bar, the blade was cool enough to handle after only 4-5 hours. As I recall, I used a bar about 1/2" thick by 8" long by 4" wide heated to red.
-
Robbie-G, First, welcome to iforgeiron. Great forum! You can/will learn a LOT here. I pretty much second kubiack's comments. I built my forge as a portable one similar to DSW's but with a brake drum firepot. Been working OK for a couple of years, but in retrospect I now wish I had been putting $10 or $20 away each month in a "firepot kitty" to upgrade to one of the Centaur or Roger Lorance cast iron biggies. In that time, I could have now upgraded. If you have the resources (welder, torch or plasma cutter, source for thick steel) and wish to make a DIY firepot like DSW's, then his is a great model to go by. One caveat on making a brake drum forge: not all drums are the same size. I cut out a circle in my steel plate to drop the brake drum into, but quickly realized that if and when the drum either broke or burned through, I might not be able to find an exact same size replacement. One could easily cut a new plate to fit the new drum and tack it in place over the original hole, but that's another project to mess with.
-
DSW, I rake most of the coal and coke out of my firepot after each forge session and to keep from burning up and wasting the coal if a strong wind is blowing (outdoor forge), I sometimes sprinkle the burning stuff with a water can. I never have noticed if my table (1/4" sheet steel) has any warping or not (?). I might clean it off someday and check it out. Wouldn't make any difference anyway...it's always covered with coal and out of sight!! ;)
-
As has been said many times..."You just can't fix stupid!!!!!!!!!!"