arkie
-
Posts
2,679 -
Joined
-
Last visited
Content Type
Profiles
Forums
Articles
Gallery
Downloads
Events
Everything posted by arkie
-
Pretty good for your first tongs. Onward and upward!!! As Frosty said, hang on to your first project, tongs in this case. We had a new member in our group who didn't have any tongs, so I gave him an older tong I had in my bucket...got home and realized it was my first tongs I had put in the bucket for some reason...oh, well, at least the fella now has some tongs he can use to get started. "Pay It Forward", as they say these days.
-
AR, BTW, don't get discouraged on your first set of tongs. You will probably make several before you are satisfied with one. It's all in refining your skills, one by one.
-
AR, you can use plain old A36, mild steel, rod or square bar for general tongs. You can quench them if they get too hot in the fire (I never leave mine in a fire) and will suffer no ill effects. Some who use higher carbon steel might see unwanted results if you quench them in your slack tub. Size of the parent stock depends on the size of jaws, boss and neck you want. Some use anywhere from 1/2" square bar (or even round bar) up to 3/4", some use bar such as 1/4" x 3/4" or 3/8" x 3/4" (or 1"). Check the many youtubes for dimensions they use for the type of tong you want. Also here, on IFI, there are myriads of tong making ideas. For a 3/8" rivet, I leave about 3/8" sticking out on each side, some smiths might use differing amounts. I seldom use 1/4" rivets except for small tongs.
-
You can screw down some 2x6's, 2x8's, 2x10's, 2x12's or whatever you have handy on top of the stump to provide a "non-end grain" base. Mine just happened to go through the 2-bys' into the 4x4's, but that approach would still be effective with a stump.
-
Wow, the time difference caught me...I would have loved to have had that book. Great catch, Glenn.
-
If your anvil is still too noisy for you, you can always still wrap chain around it or use a big magnet.
-
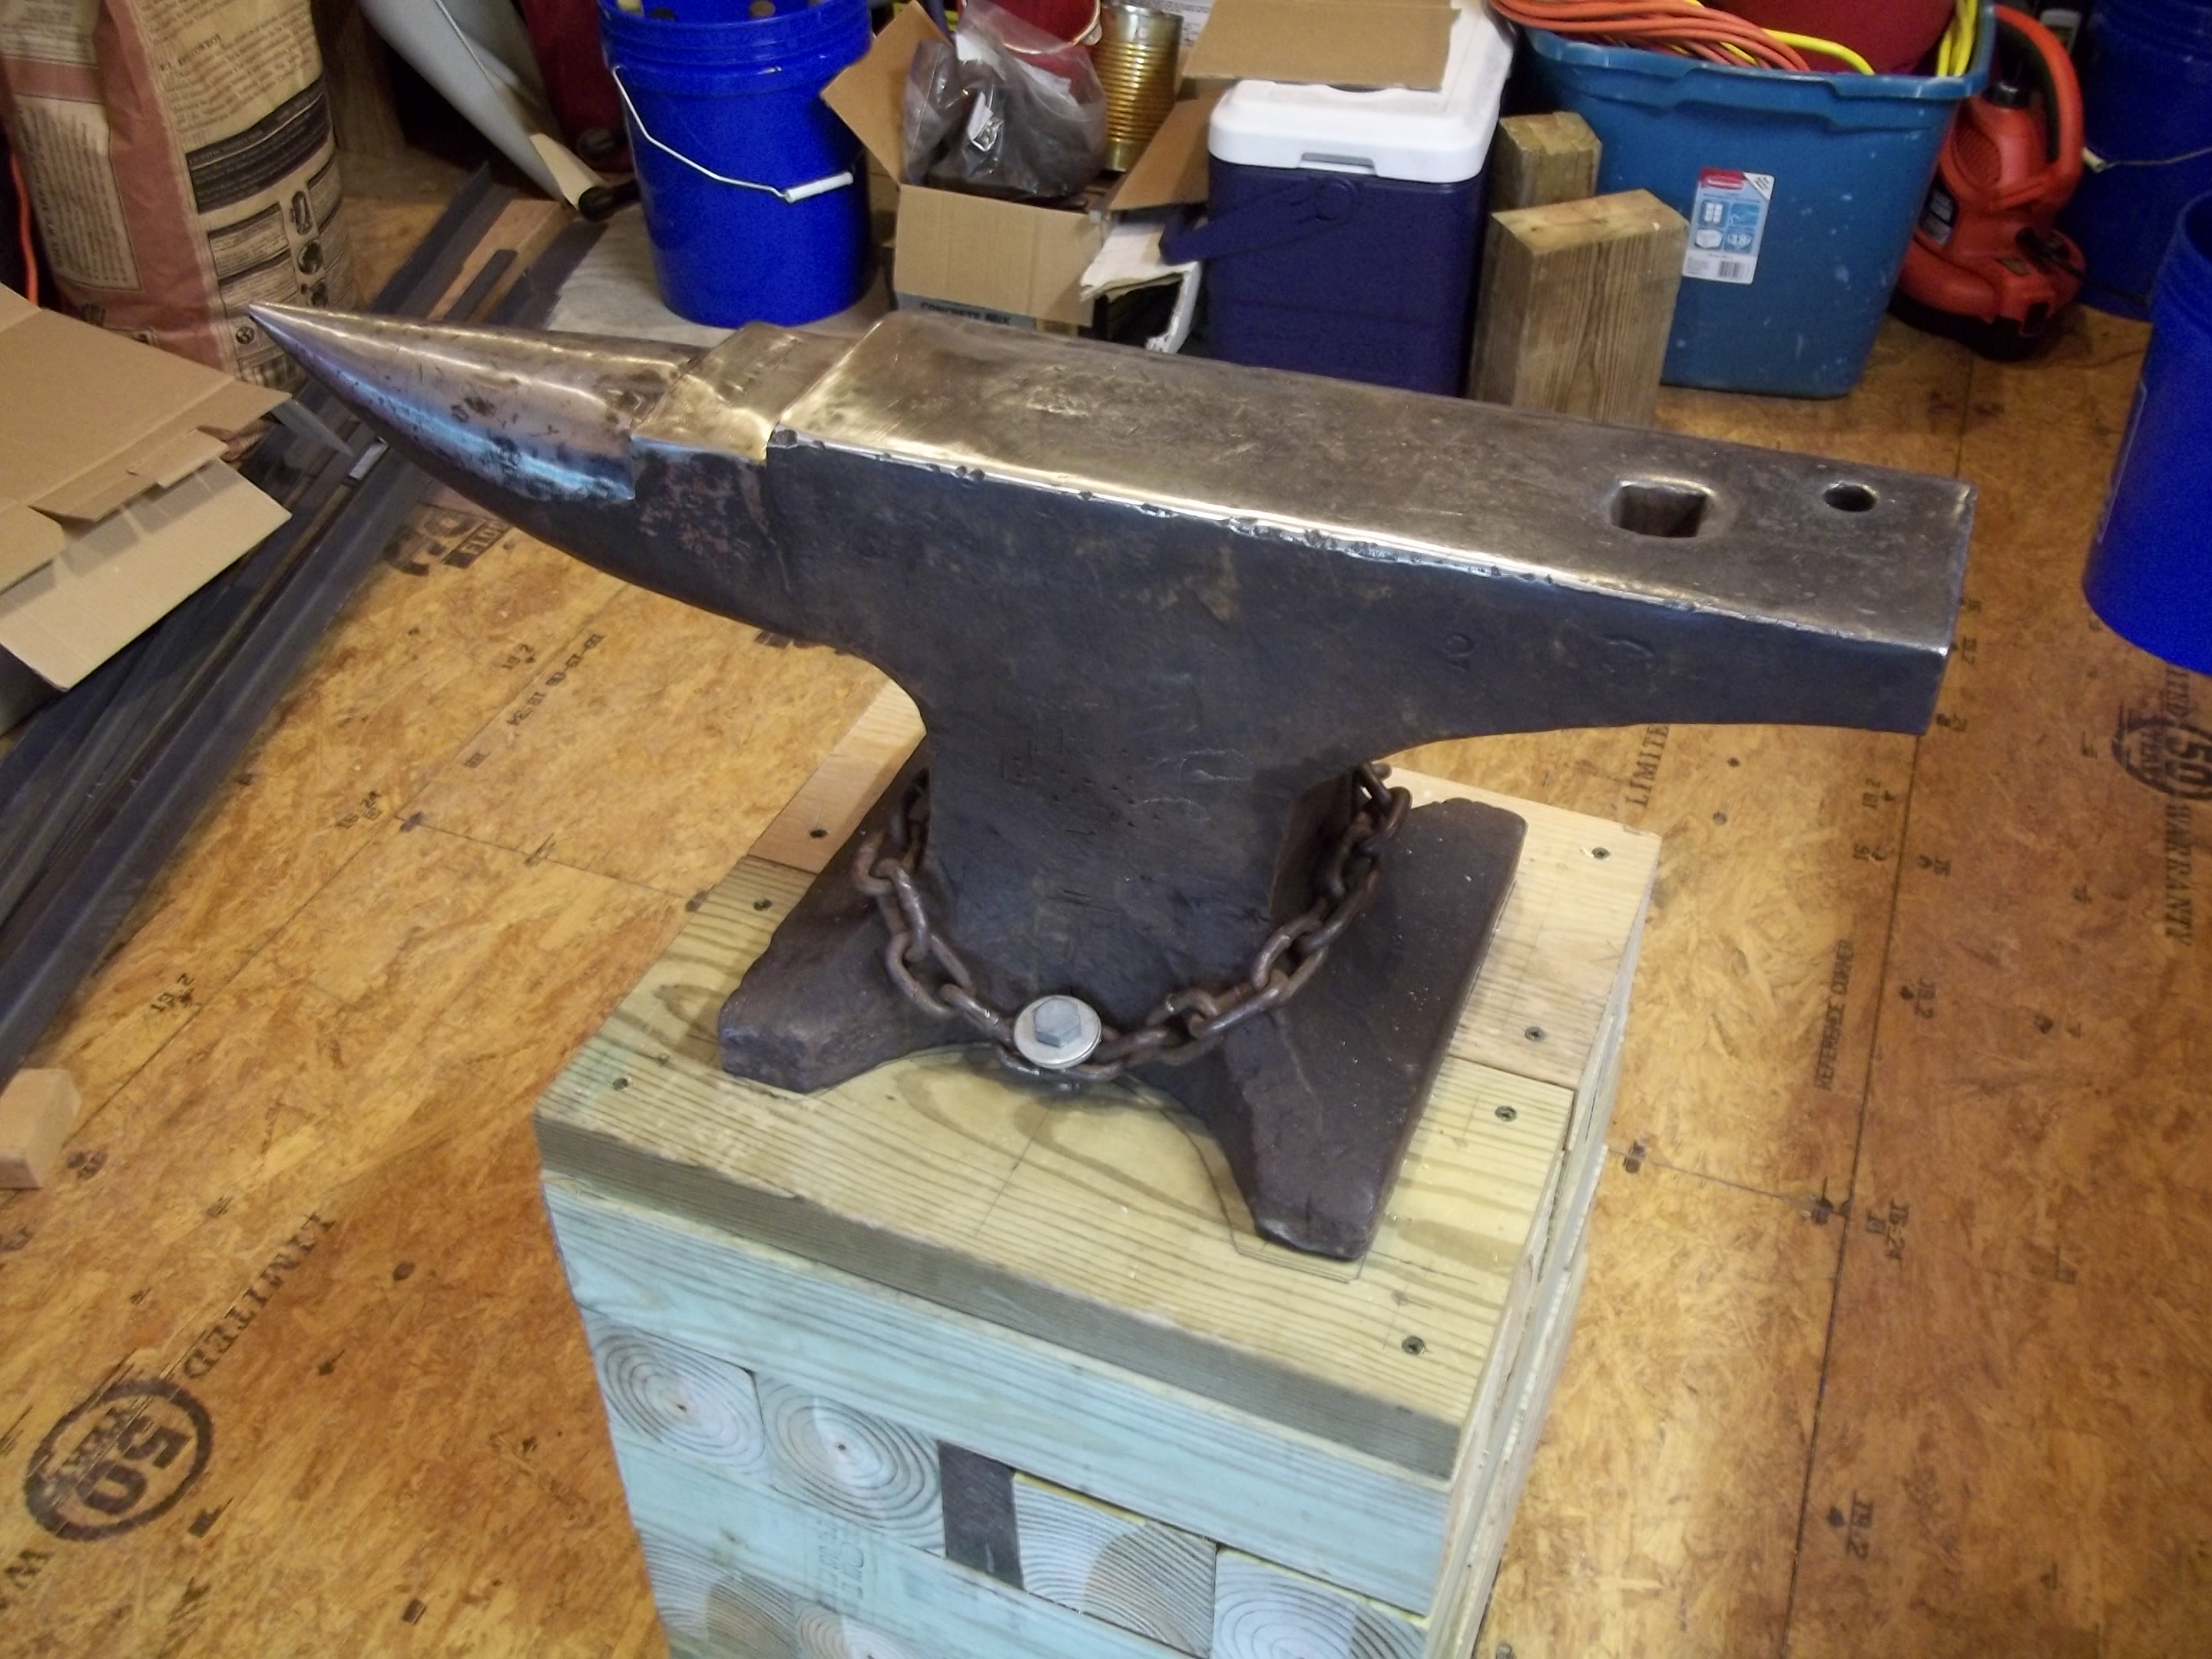
ausfire, Congratulations on finally getting your anvil! I mounted my 170# HB on a wooden base with a chain tightened down with lag bolts, no padding or other deadening required. I didn't have a stump at the time, so I have just stayed with the block base. No ring except at the heel area and I don't forge there that often. I don't think you'll have a ringing problem with the HB like some others. Have fun with it; HB's are great anvils.

-
I don't know if I can keep up with these new "species" of critters..... Kinda like Darwin Gone Wild.
-
Hey, ausfire, your lizard is kool! I like the gecko look Never apologize for any work you do. Often times problems are beyond one's control, such as the finiky nature of wrought iron. I just ordered a bunch of rod, so maybe I can give it a go once more.
-
Nice job, ausfire! Glad you posted your picture. I have a few rasps and will give it a try with one of them. I like the rasp for making the scales...beats using a chisel and doing a boogered-up job. Draw that head and nose out a bit and shorten the toes quite a bit, and you've got a perfect alligator!!
-
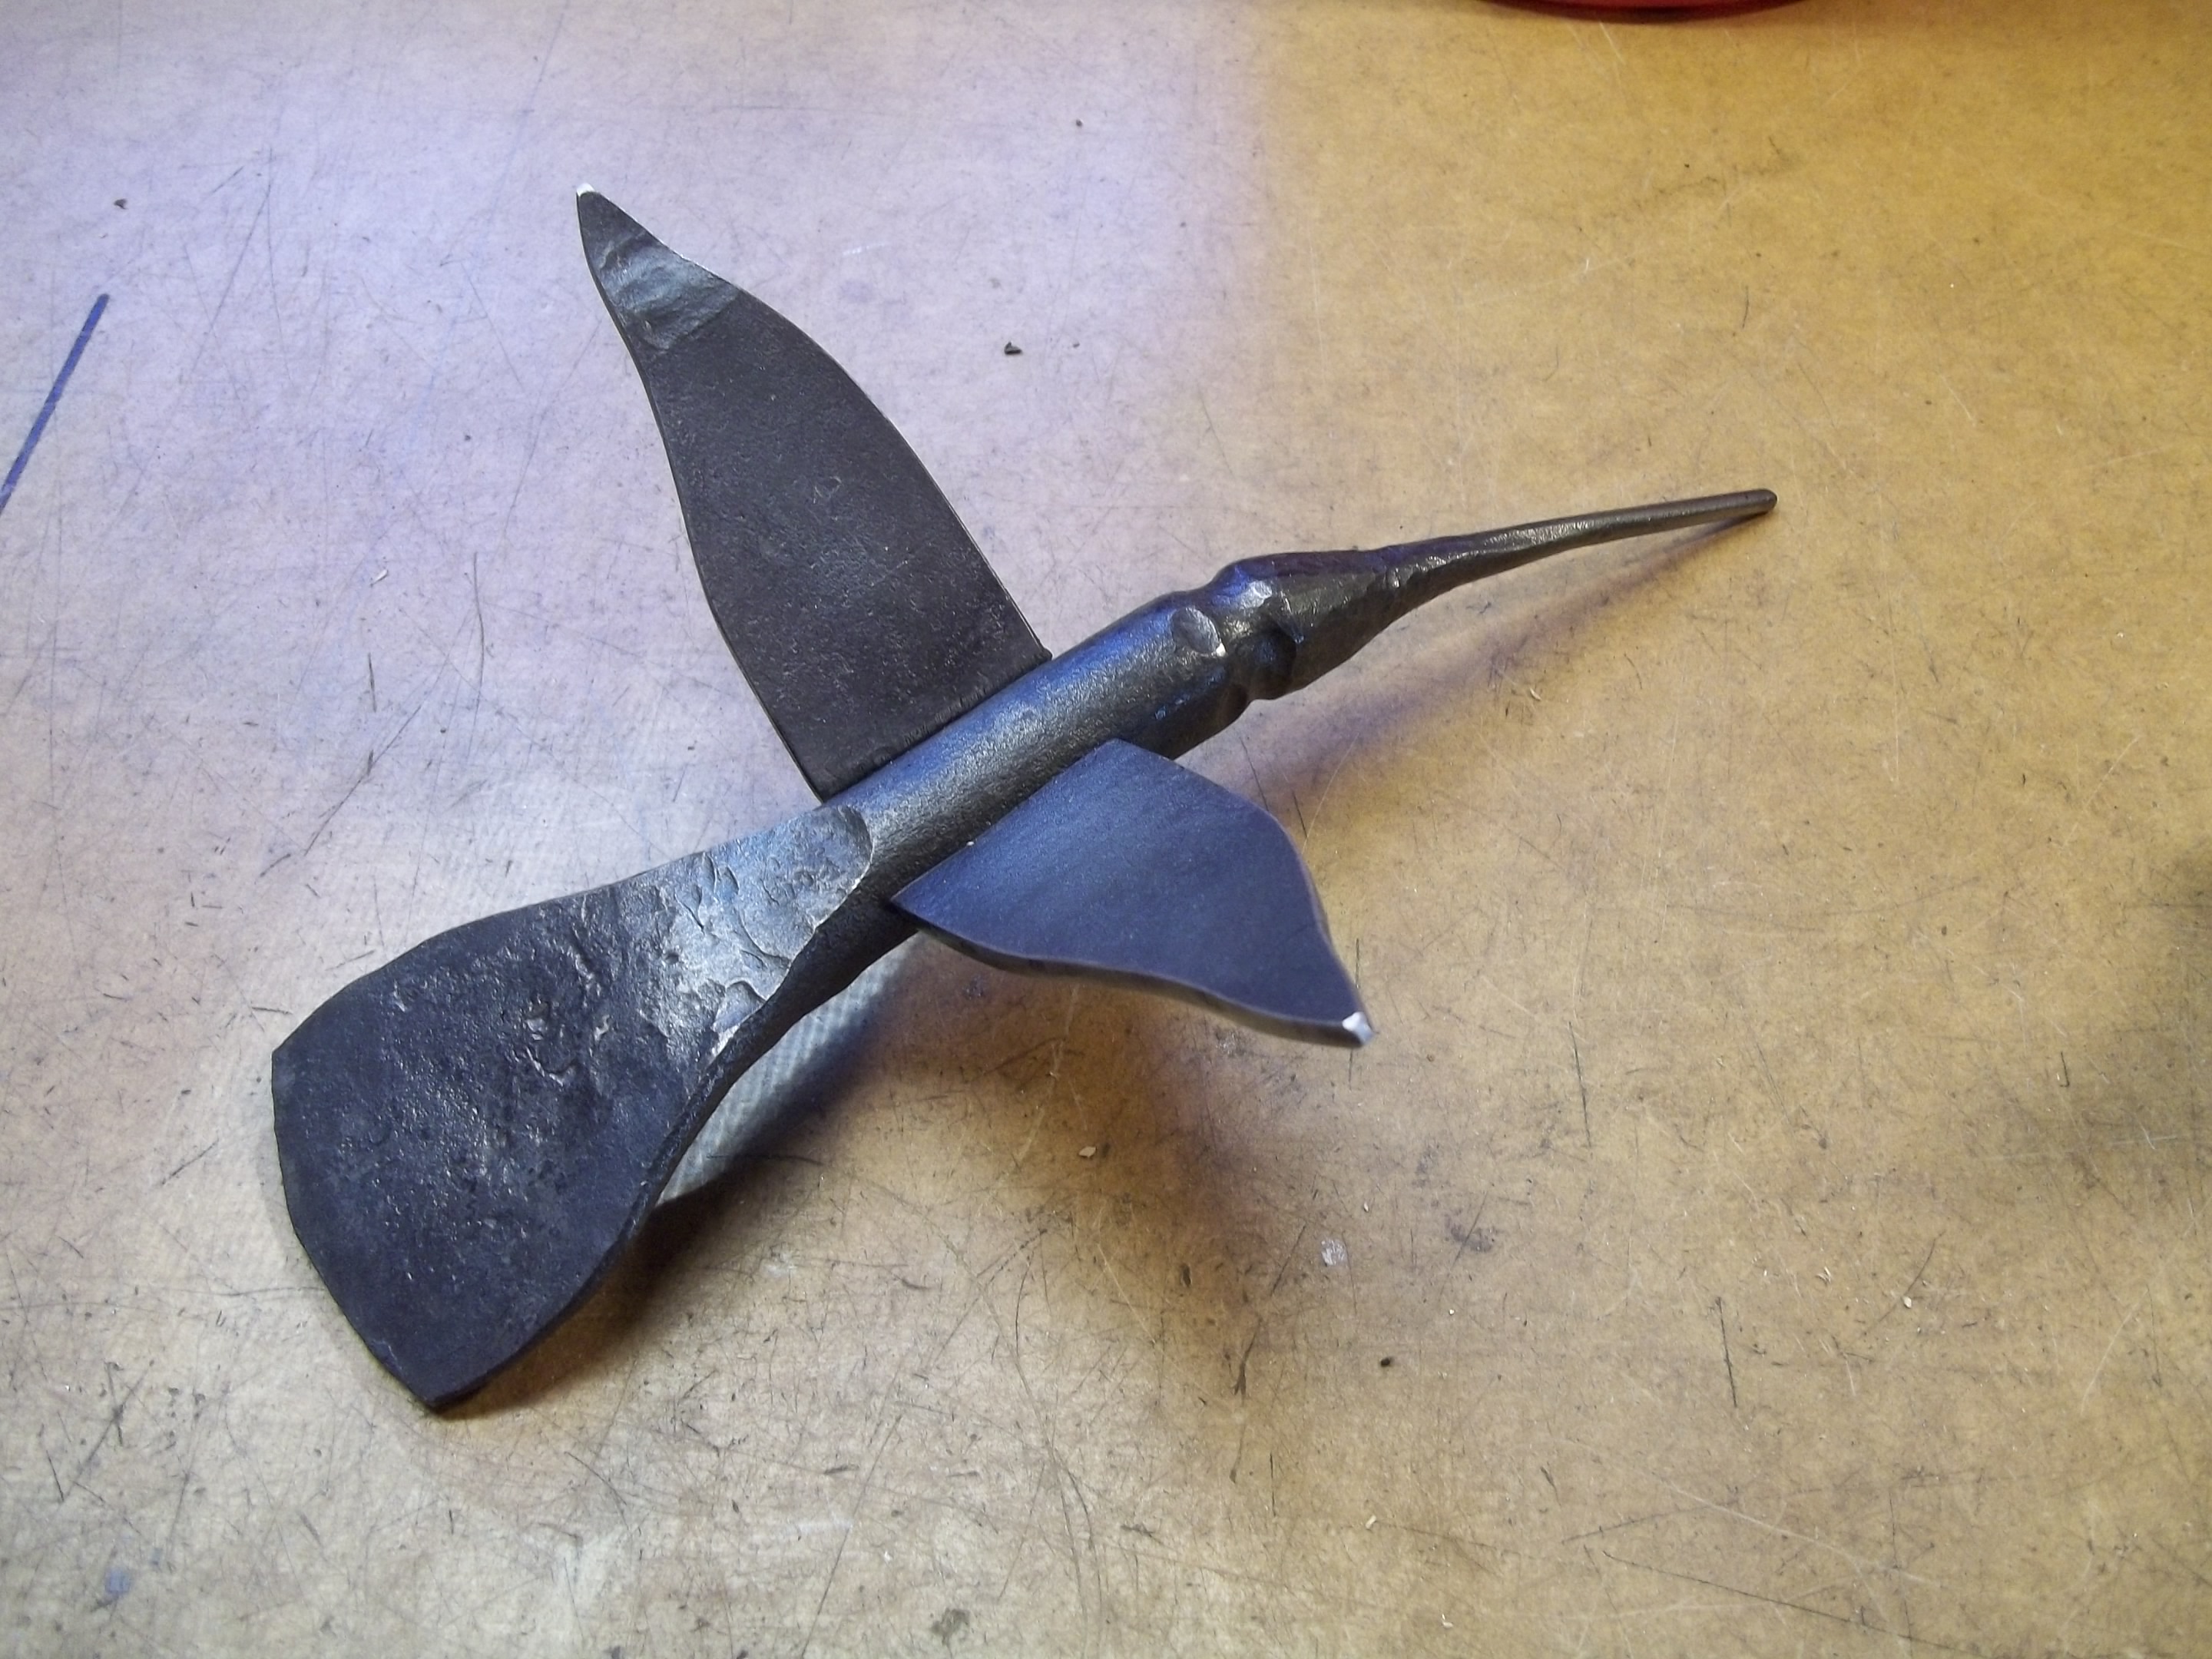
Frosty, I have made several yard art flowers, some upwards of a foot in diameter. I just finished a hummer for my wife. Your idea struck a cord...I have the hummer on a 30" rod and can stick it in the ground in front of the big flower, beak in the flower and it would almost be to scale! You are indeed a genius; thanks for the idea.
-
That is some BEAUTIFUL work!!
-
ausfire, The blank WI tire was about 1 3/4" wide, 3/8" thick in the middle and rounded off on the sides from wear on the wheel, making for a tapered edge. I partially flattened/rounded the sharp edges for the sides. It cupped a little on the belly, but gentle hammering took out most of that. Using flat bar, one would have to taper the edges, sorta like forming a knife edge, but not as extreme...leave about 1/16" to 1/8" reveal around the edges. You might try starting with 1 1/4"" or 1 1/2" wide stock and the edge taper would probably draw the final width to what you want. As opposed to tapering the edges, as with a knife blade it wants to bend in an arc, but if you work both edges simultaneously, it probably would stay straight. A little curved body would still be natural. I guess I got lucky on the shape. Just take your time.
-
A basket twist would certainly be unique! I haven't tried a basket twist yet...on my bucket list...mostly just "skeered" to try one.
-
I believe that IFI is the greatest source of blacksmithing information anywhere. If you can't find it here, then it just may not exist.... Charles hit the nail on the head...LOTS of reading to be done here!
-
Frosty, I probably have posted pics before....but...I've slept since then. Most likely a "senior moment". My wife has started painting them, being an artist and I am certainly NOT one.
-
AR. Welcome to IFI. You'll find a great group of blacksmiths here and a wealth of info. (I'm the BOA member you met over on weldingweb.)
-
Thanks, Charles. They're fun to make. No detail, that's the best part!!
-
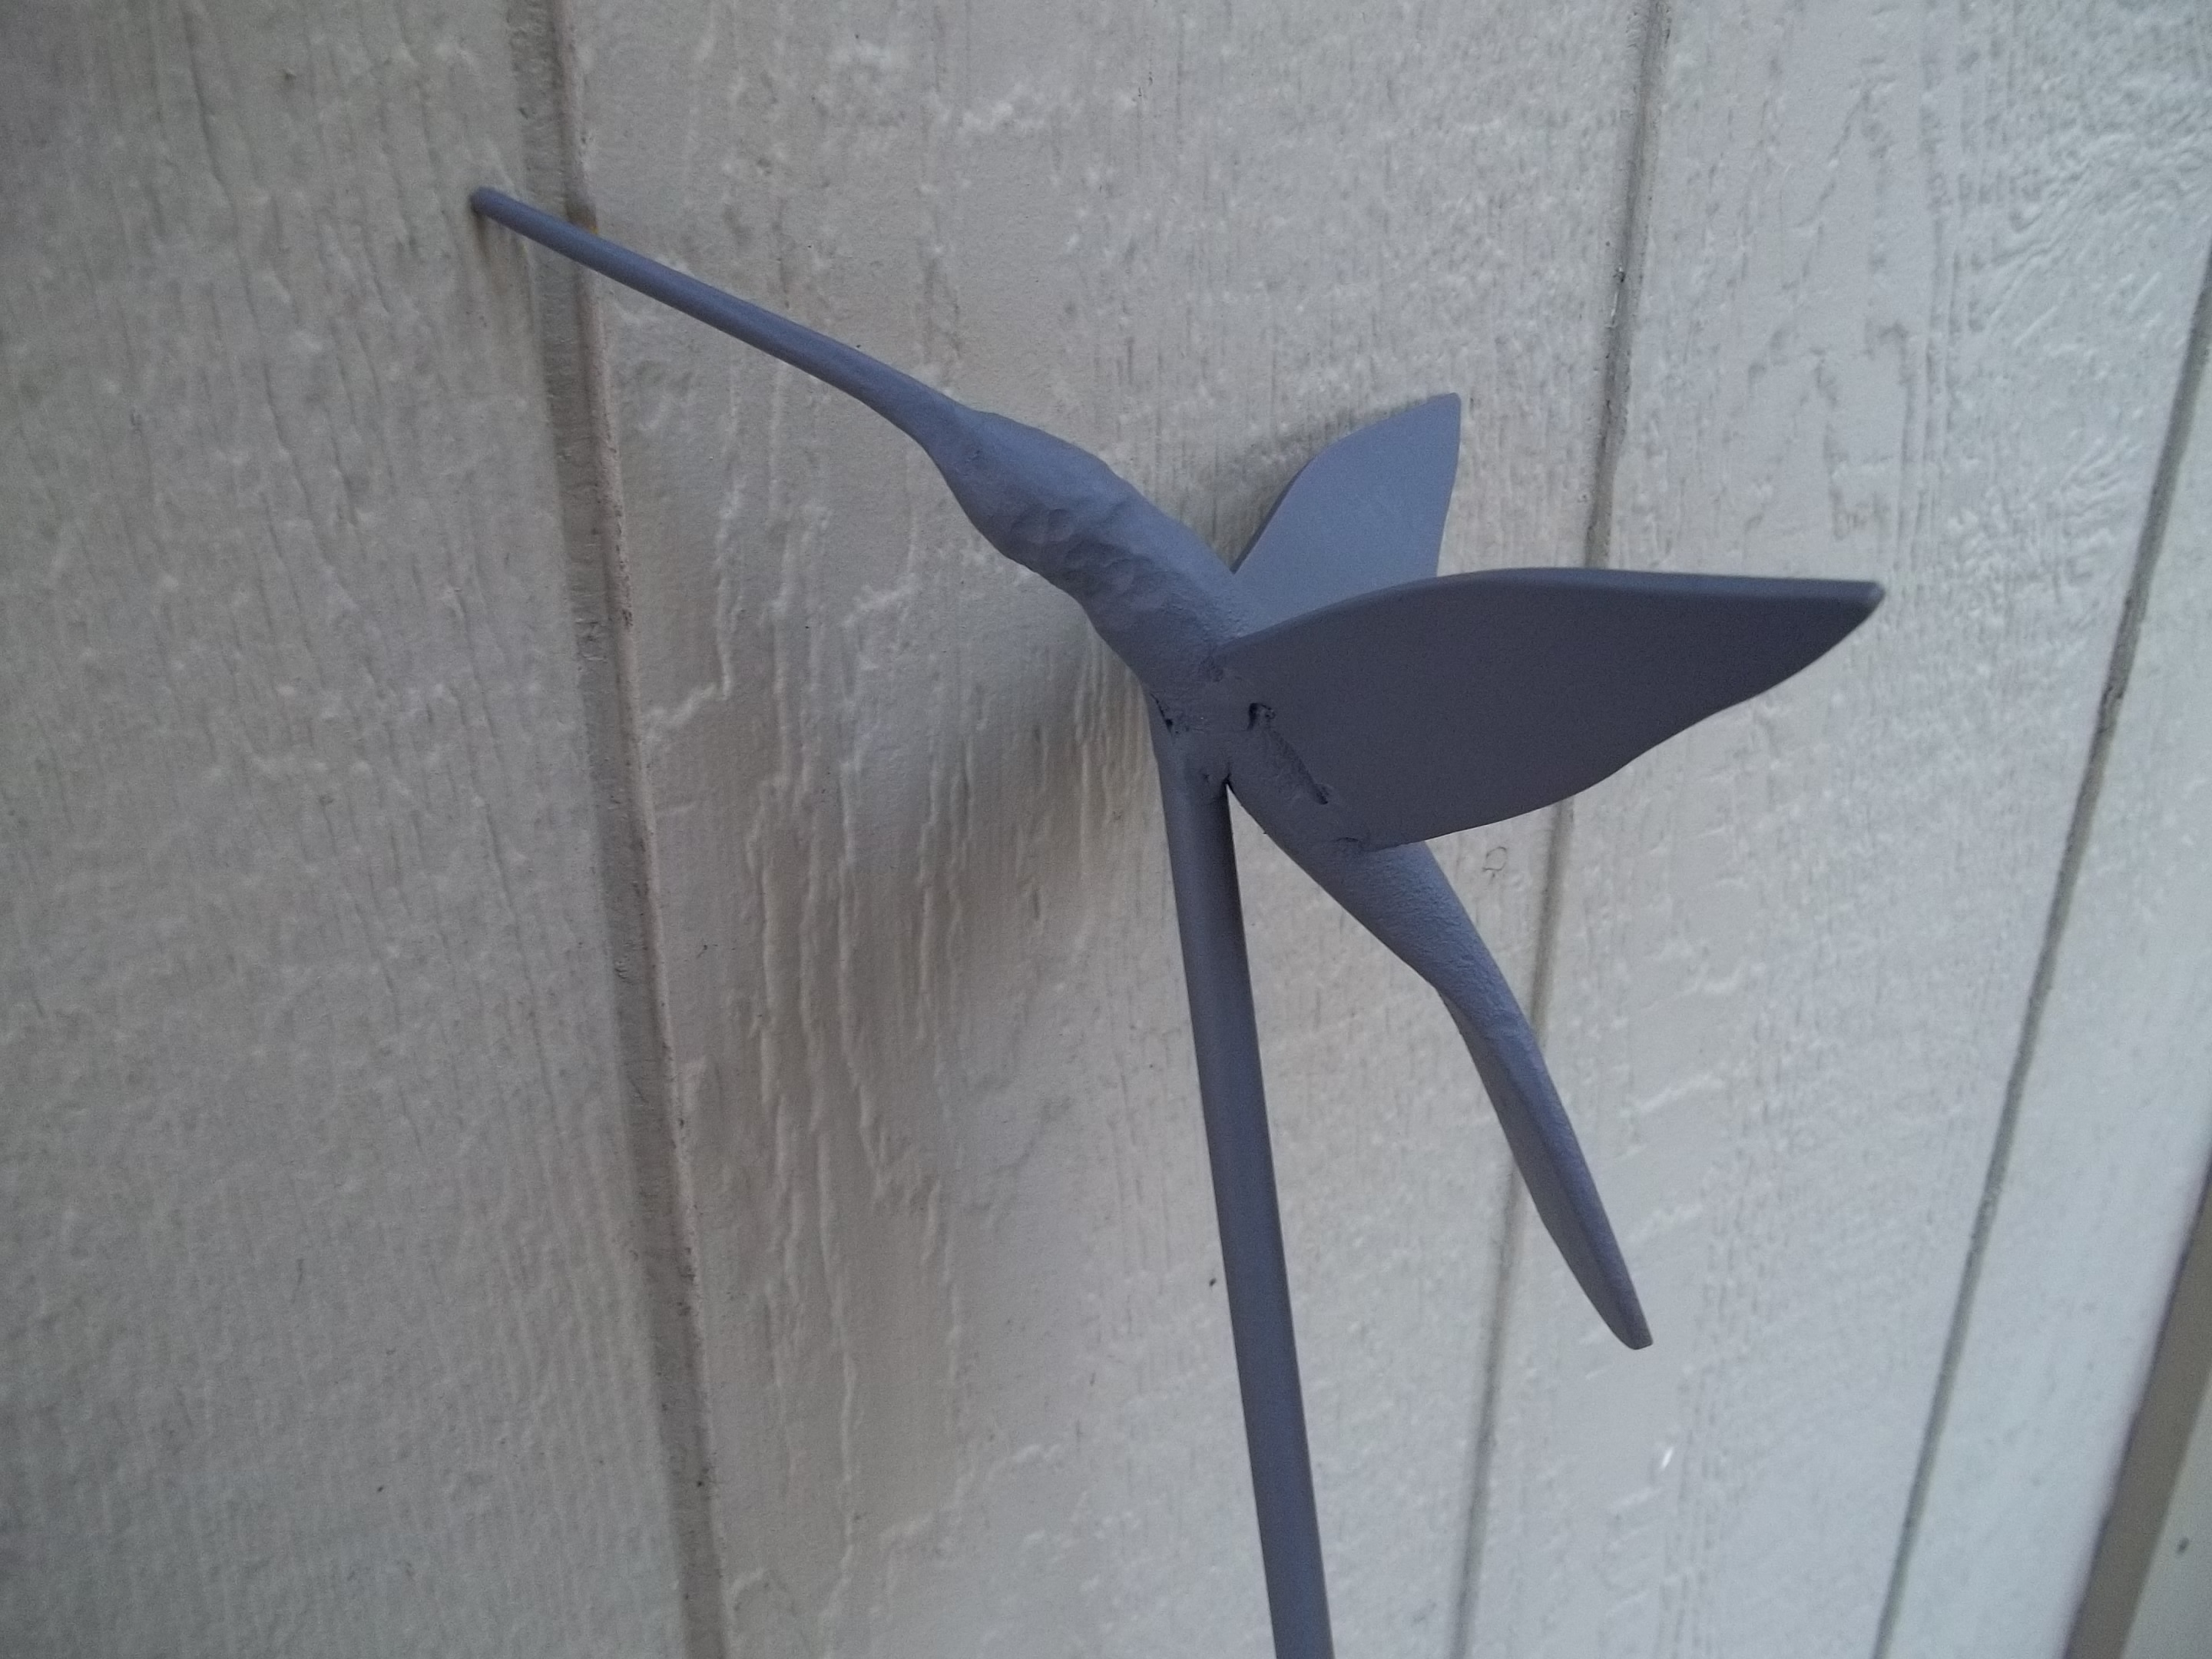
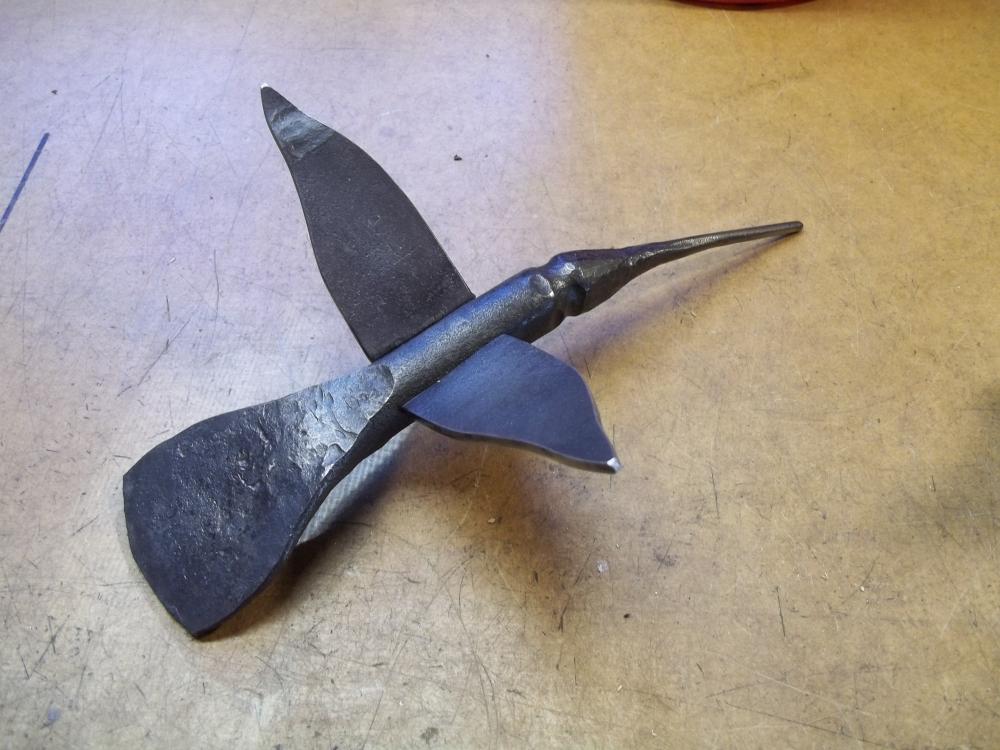
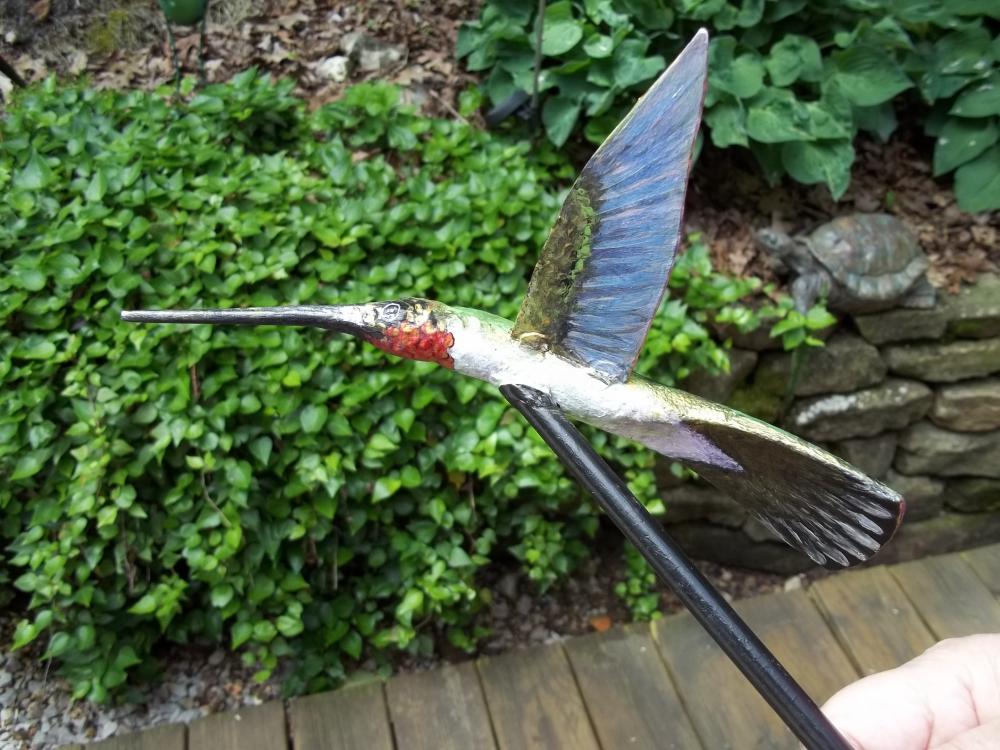
Recently, I've been making some hummingbirds for friends. Made 4 so far. Each one is a bit different. I usually use scrap 3/4" long bolts or any 3/4" mild steel rod. The wings are made from scrap 1/8" sheet for strength and tack welded to the body on the underside. I wish I had taken photos of all of them in the raw state, but only have one or two. After forging, I buff them down with a wire bench grinder wheel, spray them with grey primer then my wife paints them with outdoor acrylic and seals with artist's outdoor clear coat. Usually, I weld a 3 foot length of 3/8" round rod to the belly at a 45 deg. angle so they can stick them out in their gardens. On the last ones, I have been leaving the lengthwise fuller pattern on the tail to give a little relief when painted for a nicer feather effect. I don't try to put in any detail or try to be super accurate on dimensions...they are yard art, after all.

-
ausfire, one characteristic I found out about forging wrought iron (and this was my first) is that you need to forge it hot...hotter than you would mild steel. I let the tail go to red while tapering and it split badly. Cut off the split part and only forged at yellow to orange...no more splits. Thicker pieces might still undergo some splitting if forged too cool. Somewhere I read that wrought iron needs to be forged somewhere between just below welding heat and orange, but I can't place it. It might help you if you do some searching on the forging of wrought iron, maybe you can run across some more experienced information than the limited amount I have. Here is one link on a blade forum I located: http://www.bladeforums.com/forums/showthread.php/892197-Forging-Wrought-Iron
-

Hardie cutter
arkie replied to Stephen Jones's topic in Hot Cuts, Anvil devils, metal cutting on the anvil.
A quick and dirty hot cut can be made from a discarded mason's chisel. Just slowly grind the cutting edge to the shape you desire and fit the handle to your hardy hole. A chisel I used was a perfect fit in my 1" hardy hole. You might have to shim or build up welds on the handle for larger holes, or grind it down for smaller ones. This will hold you until you can forge one. -
A common way welders often make their own fire-retardant clothing is with an application of a solution of borax and boric acid. There are many formulas on the internet. You probably have to treat the clothing after each washing, but the ingredients are inexpensive and readily available. Here is an example of one treatment: http://www.ehow.com/how_5001660_make-fabrics-flame-retardant.html Needless to say, commercial fire-retardant cloth is the most durable way to go, but is very expensive and hard to find sometimes.
-
Beautiful iron work! The wood work is very nice as well...they compliment one another.
-
Anyone here ever used petroleum coke in a coal forge? A friend who works on the towboats/barges on the Ohio River brought me a 2 gallon plastic bag of petroleum coke, presumably off one of the barges, to try out. I checked the specs on petcoke and it can be higher than bituminous coal in BTU values, higher in sulphur, maybe lower in ash, and some other info. Just wondering if anyone had used it much and what the results were.
-
My "new" 125lb Mouse Hole Forge anvil!
arkie replied to Anthony San Miguel's topic in Anvils, Swage Blocks, and Mandrels
Anthony, nice score on the Mousehole anvil. Looks to be in really good shape. If you are interested in the history of Mousehole anvils, I came across a book by Richard Postman (author of Anvils in America) titled Mousehole Forge which has a very detailed, lengthy history of the Mousehole forge in England. It goes from the inception of the Mousehole forge and anvils to the last ones made in this century. Great reading, and I don't have a Mousehole. Should be required reading for every Mousehole anvil owner.