arkie
-
Posts
2,679 -
Joined
-
Last visited
Content Type
Profiles
Forums
Articles
Gallery
Downloads
Events
Everything posted by arkie
-
ausfire, your HB is beautiful. You will enjoy it very much. If your serial number is as you indicated, mfg. date was 1919. Dust the markings with a dusting of flour for better definition.
-
I wonder why you had to buy online? I got my black pipe fittings at my local hardware store for just a few dollars.
-
I would have made the handle straight out to the side for more comfortable dumping, but the scrap stock I used was bent, I was too lazy to straighten it out, so I just tied a piece of wire to it, strung it up through a loop on the forge and I just pull it up to dump, kick it down to close. That was a long sentence........
-
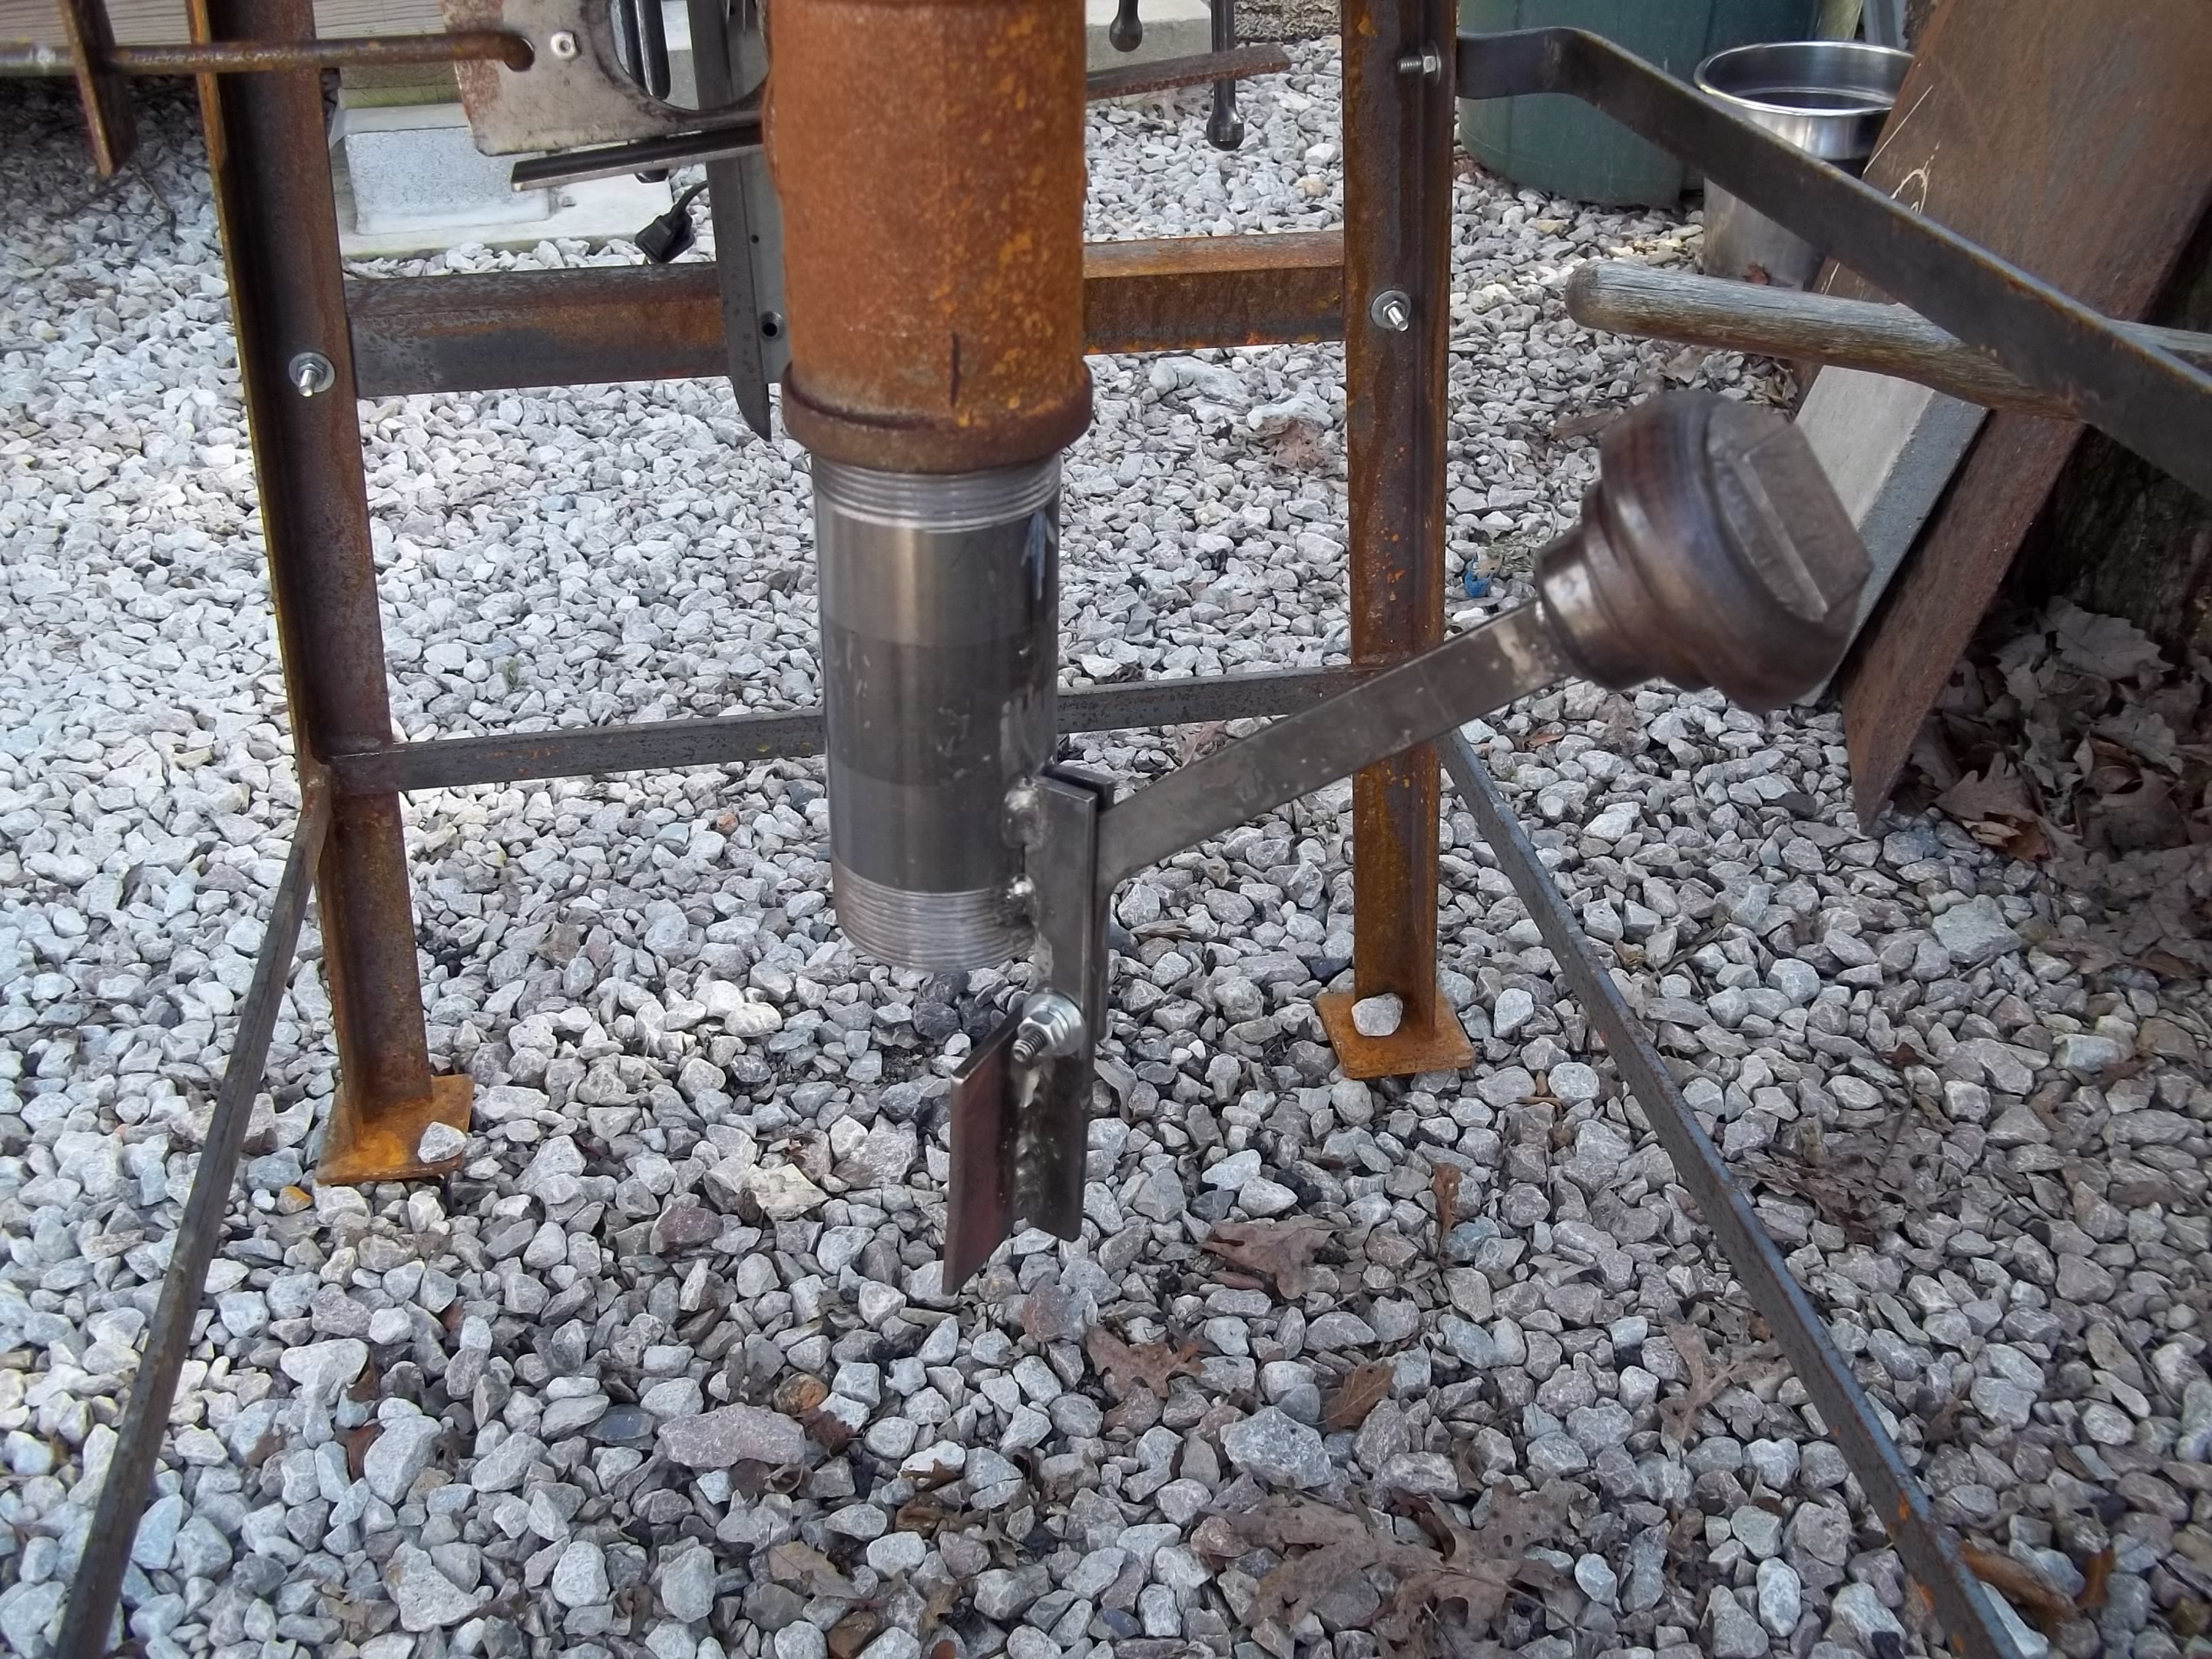
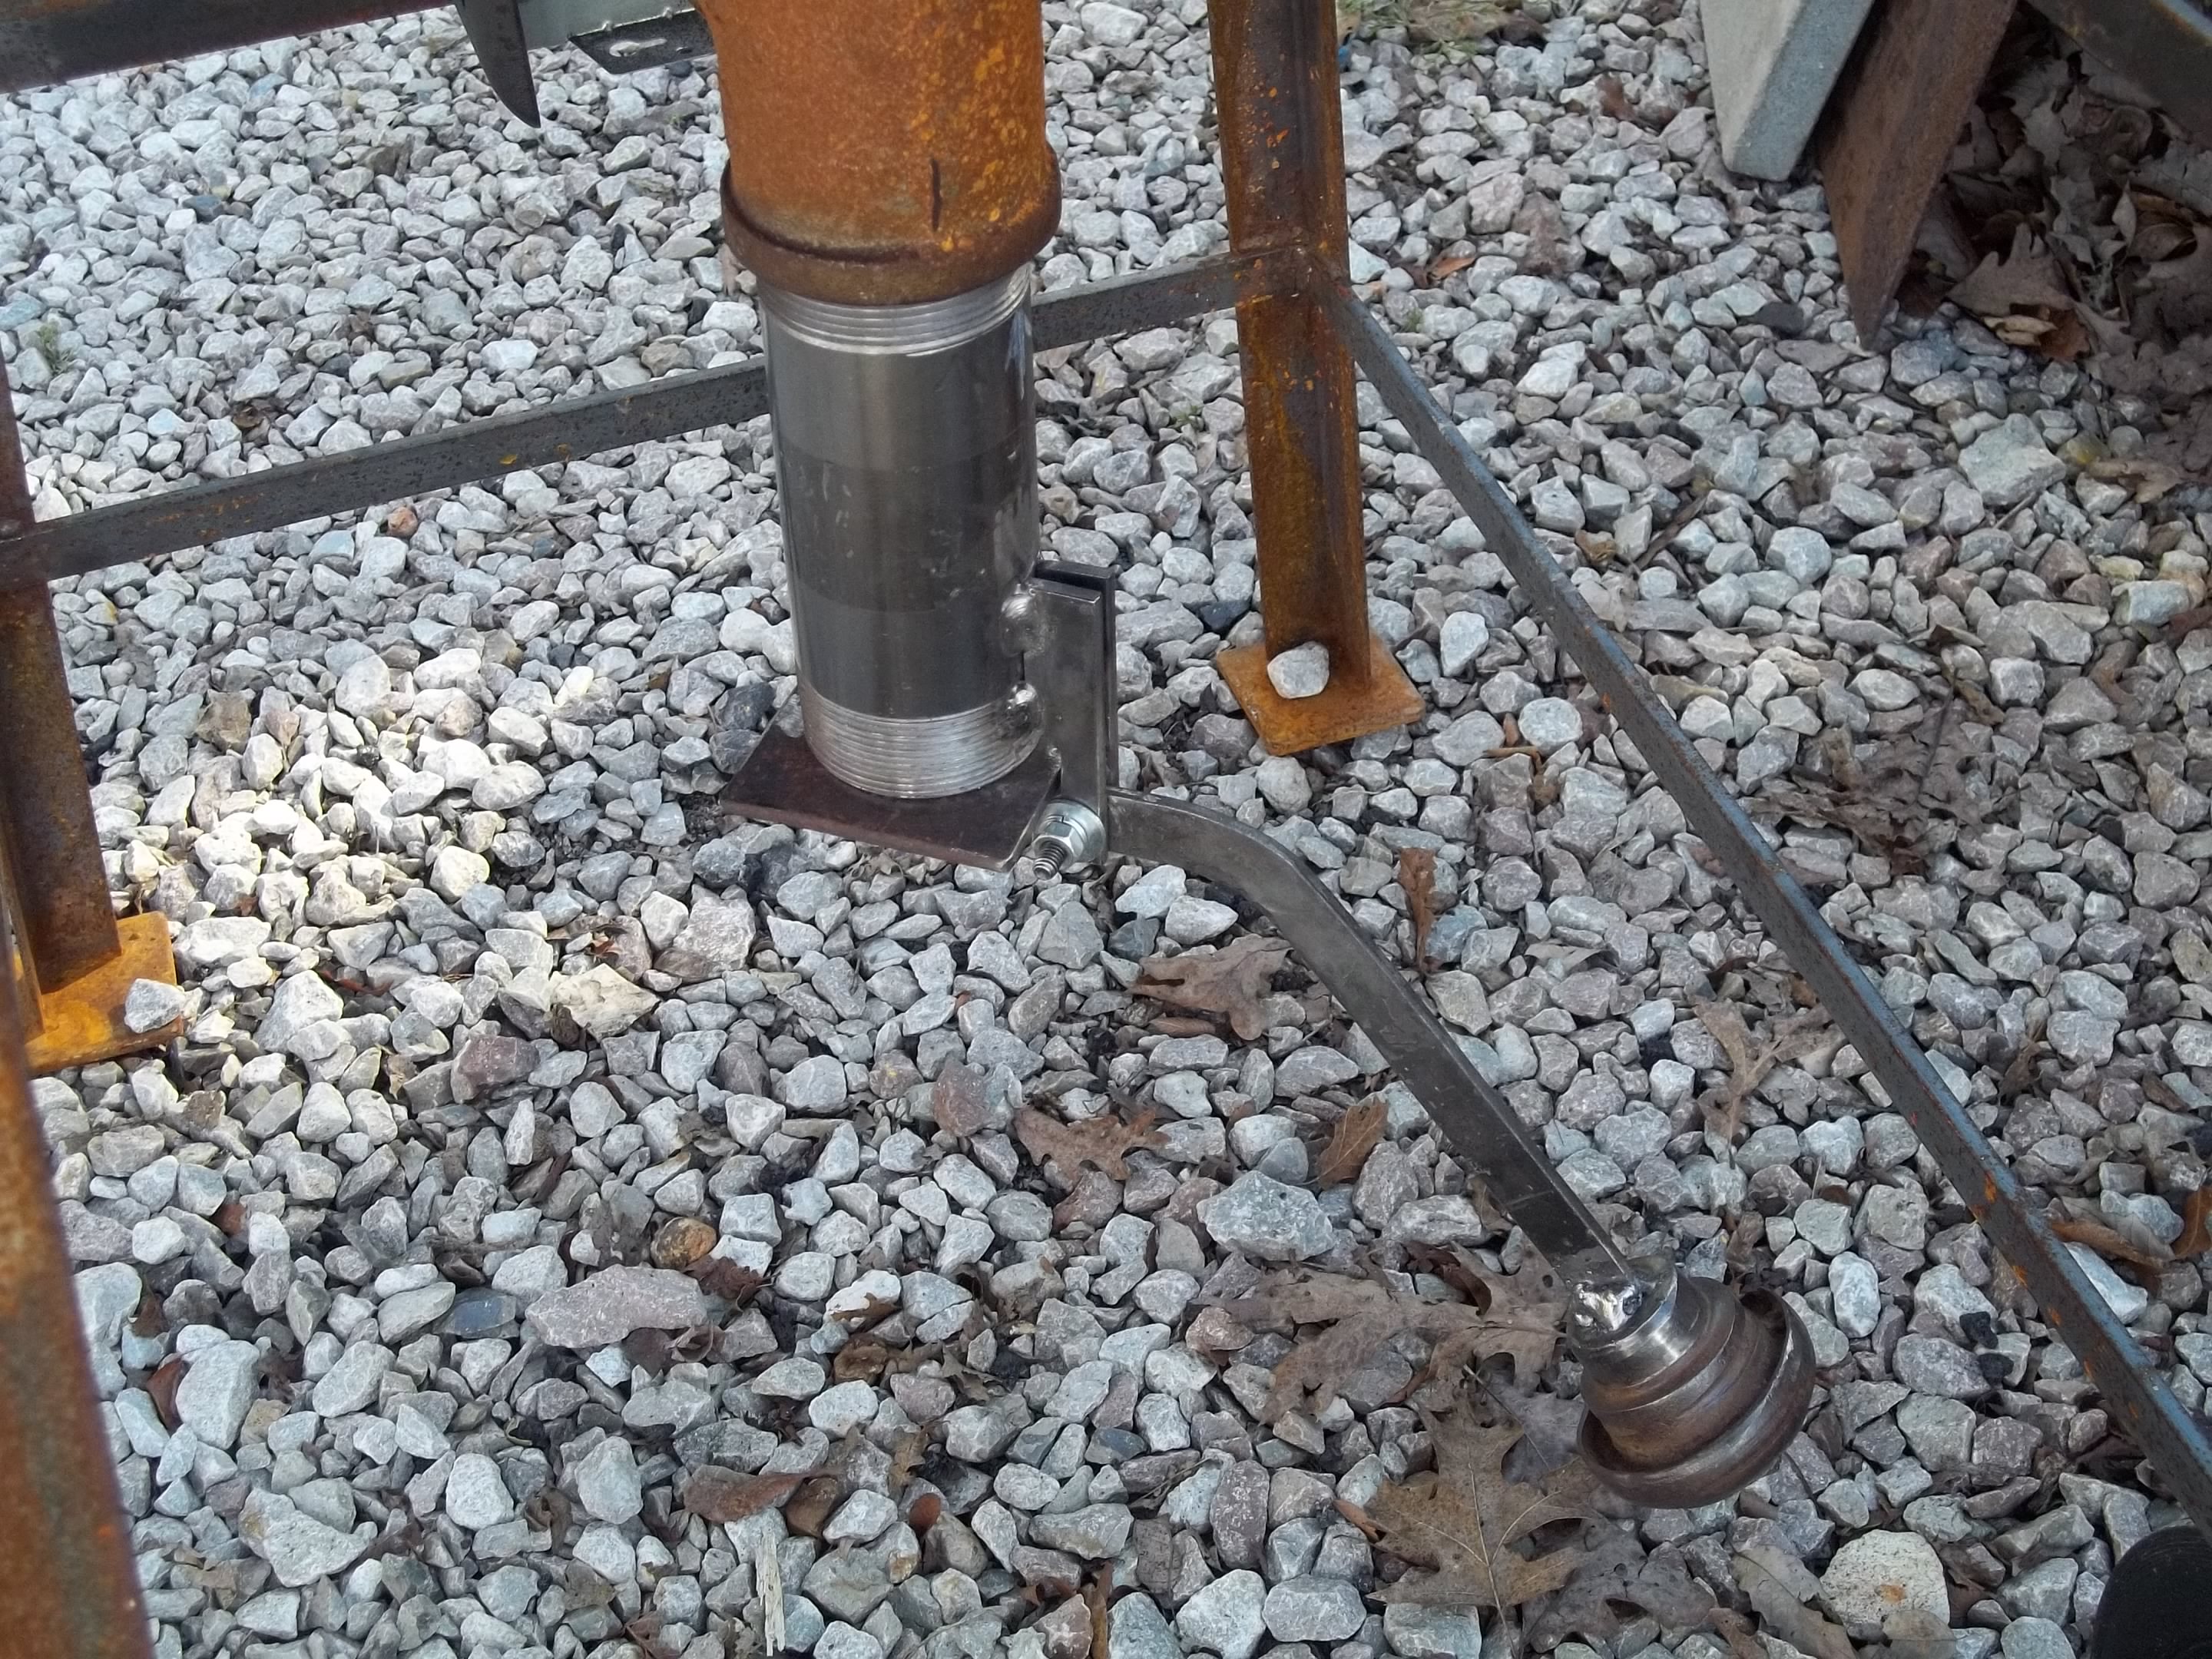
Andrew, Frosty's suggestion of an exhaust cap type of ash dump is well worth considering. Easy to dump, don't have to be messing with a cap. There are probably hundreds of examples of flap-type ash dumps you can look at by browsing around. If you can do any welding, you can make one from scrap. Here's an example on my forge.


-
It's amazing...the inspectors over there found a tiny amount of something in bolt threads!!! Over here the TSA screening agents at airports had a 95% FAILURE rate screening for prohibited items like weapons, etc. in test runs.....go figure.
-
AR, use a magnet to determine if you have reached critical temperature. If the magnet won't stick, quench.
-
Nice goose! Almost life size. :-) The eyes look almost lifelike, the feathers are kool. (BTW, they are Canada Geese, not Canadian Geese)...I know, picky, picky, picky. But after hunting them for years, I was corrected by some biologists.
-
AR, for oils you can use peanut oil, old cooking oil (restaurants might give you some), which are safer and cleaner. some use motor oil but it can be a mess, etc. The non-oil quenches are many, water, brine, air. As suggested, try them all. Search this site for quench liquids.
-
Alan, that's a good solution with the neck strap...gotta try that one out. Summertime and a sweaty neck make a neck strap a pain in the ...........neck.
-
There is a lot of fine-tuning to building a forge......jus' sayin'
-

My Israel Trip To Learn From Uri Hofi
arkie replied to firebug's topic in Blacksmithing, General Discussion
That's an old thread (2009). If someone posts photos on a third party site like Photoscape, etc. then deletes them or access changes, the photos are no longer available. As posted by someone here a while back, maybe Glenn, it's best to upload your photos directly to the IFI site for retention (if that's your desire). -
Nice looking forge. I would just leave the blocks in place if you won't need them for anything else...that will help your hood draw better. If you do remove them, you can stick some sheet metal on the sides and back. You might eventually need to put some rails around the table to help keep your coal in place.
-
lifting big anvil on the stump alone
arkie replied to matei campan's topic in Anvils, Swage Blocks, and Mandrels
When I bought my 170# HB, I had a plan to unload it alone and place it on my anvil block (no stump at the time). From my pickup tailgate, I slid it down my truck ramps onto a 2 wheel dolly. Wheeled the anvil into the shop. Chained and lifted it with a 2000# rated come-along attached to a double 2x8 ceiling joist. Lowered it onto the anvil block, secured the anvil and wheeled the anvil/block to it's final resting place. No lifting involved. -
Need some Value help.
arkie replied to Culver Creek Hunt Club's topic in Anvils, Swage Blocks, and Mandrels
See if you can get pics somehow. An anvil in "excellent" condition in one person's eyes may be something completely different in yours. Might save you a 6+ hour round trip. -
Another rail road iron anvil
arkie replied to Charles R. Stevens's topic in Anvils, Swage Blocks, and Mandrels
Looks kool!! Not yer everyday run-of-the-mill RR anvil. Your right brain was running full bore, Charles. -
Very good point!! I too, was in the martial arts, and the same techniques applied to obtain maximum power....the target was not often just skin deep. I never thought about applying it to forging. Thanks for the analogy.
-
AR, you have a PM.
-
I'll try to make this short... One of the Boy Scouts in our troop wanted to work on his cooking badge on a camp out in the woods. He didn't have a cast iron dutch oven, so he asked the gnarly old scoutmaster if he could borrow his. Reluctantly, the old scoutmaster agreed..."just don't mess it up" he told the kid. Well, the kid was scared to damage the 30 yr. old, perfectly seasoned cast iron dutch oven, so he lined it with aluminum foil. He was going to make a cheese souflee'......you see where this is going?????? The kid got the bed of coals going great, put in the ingredients, layered some more coals on top and let 'er cook. The cheese souflee' turned out pretty good...at least on the top half. The bottom half was completely burned to a crisp and when he dumped out what was on bottom, the aluminum foil stayed behind!!! The fire was so hot it literally melted aluminum INTO THE PORES of the now non-existent seasoning that was in the cast iron. Scrape it out; nope. Brush it out; nope. The old scoutmaster was about ready to kill the kid. They took the dutch oven and kid to the scoutmaster's home and worked about 4-5 hours trying to get the aluminum out; to no avail. The old scoutmaster had to grind a new bottom surface on his prized cast iron dutch oven and start another 30 years of seasoning...I don't think he lived that long. The kid? He never got his cooking badge. Go figure.
-
I only wish I could run straight beads like that!! Mine wander all over the place. That guy has good steady hands.
-
Sometimes, I'll make a "starter" groove, or cut, with a cold chisel just to keep the hot cut on track when I go to that.
-
Yeah, the skink was more of an afterthought than being something pre-planned. I'm almost embarrased to post something like it when I see some of the fantastic work shown here on the forum. My intent in posting was to give some blacksmith/welders an idea to recycle some of their scrap practice pieces into usable steel stock instead of junking them.
-
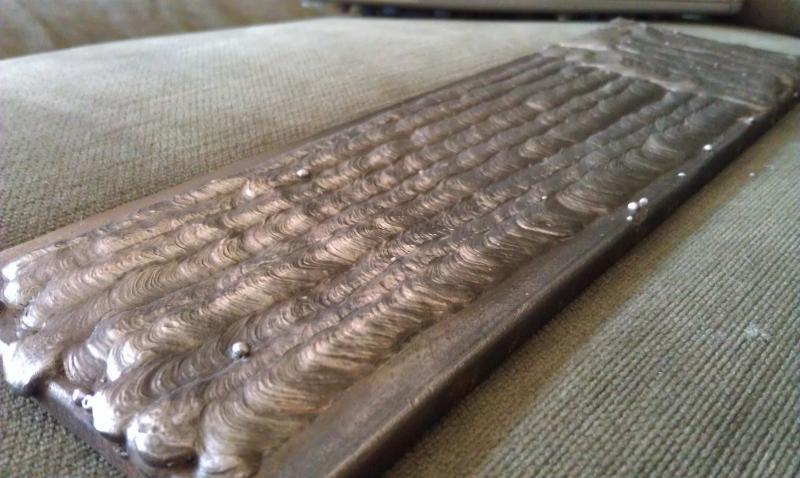
Eric had a good description. These are stringers (not mine, photo borrowed from weldingweb site). My recycled stock was made with the stringers filling angle iron to the edges, not on a flat plate. I guess one could fold and forge weld a plate like this.
-
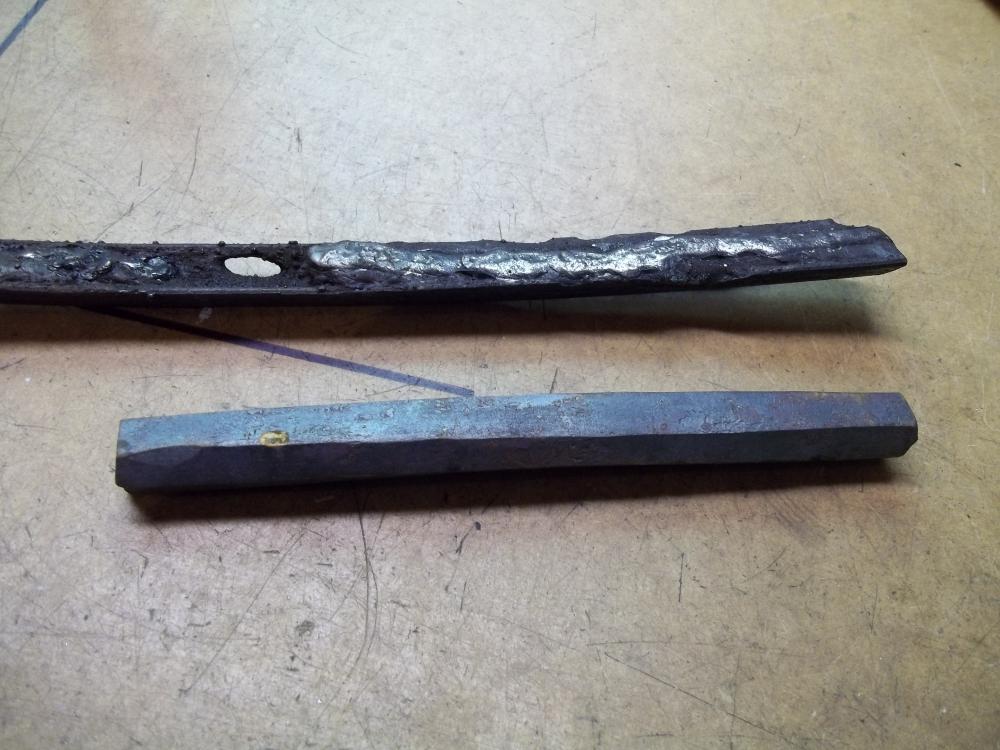
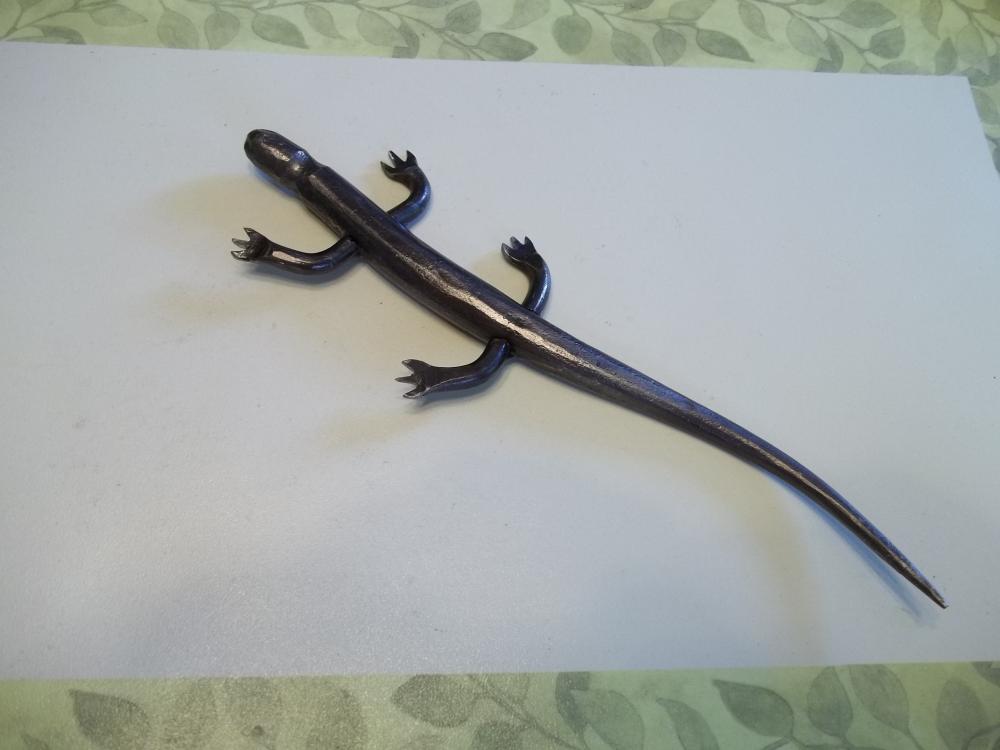
Seems that ausfire and I have gotten off on a blacksmithreptile kick lately. His latest "crockofile" was really neat. Well, I found a piece of 1" angle iron which I had filled with welding stringers just keeping my welding skills(?) in shape. I figured it would be better to try to put a piece of the solid steel to good use instead of the scrap pile. I cut off a piece of the cleanest and fullest stringer filled part. I then forged it down to about 1/2" - 3/4" square. I have NO idea what the resulting steel type is when you build up a lot of welding stringers, but for yard art...who cares? I was sitting on the deck and skinks (a type of lizard) were running all over the place and I could visualize a skink out of the forged weldment stringers. Anyway, here is the result, three-toed skink. No scales, they're too tiny to forge. Recycling/repurposing at it's greatest!! As a side note, a lot of folks do a lot of welding practice building up sizeable pieces with/from stringers. Why throw it in the scrap bin? Make something useful with it. Reshape, draw out, bend, fold,...etc. to utilize it. I doubt it would be useful for serious bladesmiths since the metallurgy is unknown. I suspect the core of most common welding rods is mostly mild steel of some sort, excepting specialty types (stainless, hardfacing, nickel, etc.) but beyond that...???
-
That is KOOL!!! ausfire, you are getting to be a pro at these blacksmithreptilians. I like the way the legs are bent. Gets him/her up off the ground.
-
Nice trammels, aus. I like the way you used the holes in the horseshoe and enlarged them. The leaf on the end is kool. I made a trammel once for some folks who had a two month long horse camp, but it was just bar stock. The horseshoe one you made would have been perfect for them. If they need another, I know where to look for a go-by!