
SJS
-
Posts
458 -
Joined
-
Last visited
Content Type
Profiles
Forums
Articles
Gallery
Downloads
Events
Everything posted by SJS
-
Jim that is nice, the mottled black patterning is a pleasant effect. Frosty yes I have a genetic sensitivity to it, and several other things. I make the analogy that the floating allergies are like when everything is good the police (your immune system) doesn't shoot anyone, when there has been a crime spree & rioting and marshal law has been declared the police (again your immune system..) shoots anyone who looks strange that's out on the streets. When your immune system is lit up to DEFCON 4, you are going to react to EVERYTHING, then when things settle down you might not notice any reaction or symptoms for a minor infraction... If I follow my diet STRICTLY I don't react to ragweed, but if I make a couple poor choices then I react to ragweed. I live in a different world than average American's, and the industrial food industry will kill us all;-) A partial list of my allergies: WHEAT/Gluten, red dye, caffeine, ragweed, dust mites, dogs and horses... Then I am sensitive to metabolites of: corn, peanuts, dairy, all deadly nightshade family veggies, so tomatoes, potatoes, peppers, eggplant, tomatillos. COULD be a lot worse... I am very thankful to GOD that I discovered all this stuff or I would be dead...
-
Looks like 1/4" x 1" twist with the reins arc welded on. Serviceable, but wire brushing hot would slick them up and improve their looks. To be honest they are better than several pairs that I made when I started making tongs, and as good or better than some that I have made recently ;-) Jr Strasil (his login was irnsrgn) had a trick where you do a lap weld with the arc, or a mig, or whatever, fill in the filet on both sides, then you get it hot and forge it flat. Often times if you do it right it is hard to tell it is not a proper forge weld;-) Good job, Thank you for your service.
-
I have practically toxic levels of zinc in my body that has affected my health for a number of years, if I so much as pop a zinc and Echinacea and C lozenge in my mouth I get flu like symptoms... I wouldn't do that even up wind of the forge, totally not worth it. If you get the "flu" and it doesn't go away you will know you made a bad mistake...
-
Feb. 7th 2015 hammer in at my place, Kalamazoo, MI
SJS replied to divermike's topic in Events, Hammer ins, Where to meet
Fund raiser for 8th grade trip to DC is that day, got to stay home and watch the little ones... maybe next year;-) -
Feb. 7th 2015 hammer in at my place, Kalamazoo, MI
SJS replied to divermike's topic in Events, Hammer ins, Where to meet
That would make me a little over 3 hours away... Very tempting, and far enough out to pencil in on the calendar;-) -
Club Meet Date, Location, Time ?
SJS replied to McGrath John's topic in Alaska Blacksmith Association
Gun hooks to hang your long arms on the wall;-) lots of ways to get an angle on the gun market... Duck or moose head hooks, bears dog's head hooks... lots of cool options. -
Multiple radi on a set hammer give you the option of smoothing and cleaning up your transitions in thickness, adjusting shoulders, and upsetting shoulders. I have a VERY small set hammer that is 1/2" square by 1 1/2" long that I chuck up in a set of tongs and use to define features on human and dragon heads... Lot of cool uses;-)
-
Those have some character, and a lot of potential. Try using the horn and a rounded cross pein or straight pein to get a nice smooth transition. And your right punching a hole and slitting to it works nicely for a this kind of process, isn't absolutely necessary, but smooths the bottom of the crotch. You just have to clean up the transition to legs so their smooth too;-) I could see a Beer Dragon made out of that, punch eyes and some nostrils, could look very Cool:-) Could make it look like the dragon on the prow of a Viking long ship... Lots of potential like I said;-)
-
Everyone like Pics - Post your Coolest!
SJS replied to Borntoolate's topic in Blacksmithing, General Discussion
That pan is pretty cool, I like that;-) -
Try intentionally posting them sideways, 90 to the right??? Inquiring minds want to know??? ;-)
-
Everyone like Pics - Post your Coolest!
SJS replied to Borntoolate's topic in Blacksmithing, General Discussion
The stamped decoration on the tall candle stick, was that done on the treadle hammer, or on your fly press??? Looks more like a fly press kind of operation... -
Valuing the process is important to keep the shop clean. Some people are good at the "cleaning frenzy", but have an awful time with the day to day picking up that prevents the need for the traumatic cleaning frenzy. If you clean up before a project, and clean up after a project... ie put away anything in the way, and setting out the tools you think you will need, and then putting them all where they go when you are done, things just stay cleaner. The other trick is to find a place for everything when it shows up in the shop the first time, that hopefully prevents every horizontal work surface from accumulating several layers of stuff in the way of getting anything done. The other wonderful discipline is to brush off the benches and tools, and sweep the floor at the end or beginning of the day. Get it clean, keep working, keep it clean, repeat;-) Ordnung, now if I could just do it;-) Easier said than done, but self discipline has wonderful rewards...
-
just because it was a commodity product, probably from England, doesn't mean it wasn't produced in a small shop with less than modern techniques... Donald Streeter in "Professional Smithing" shows forge welding a collar and then using a spring swage, or set of bottom and top tools to do pieces like this. Lots of stuff was forge welded together, especially back at that time and in wrought iron. Modern smiths OFTEN go out of our way to avoid having to do a forge weld, at this time forge welds were everywhere...
-
I have always said that the guy who came up with planned obsolesance should have been taken out behind the building and horse whipped, not given a raise and a corner office. Although lack of that kind of thing is part of what put Hay Budden out of business, they made a great anvil, they continued to expand their production capacity, they saturated their market, and then the market dropped off as people opened welding shops, and mechanics garages instead of blacksmith's shops.
-
If you just like making tools, to add to your kit, and increase your options... Make the set hammer, they can be very useful, lots of smiths never use one, other guys use them all the time. I like them
-
The handle has a traditional shape to the bow, but the cusps are too plain to be period. Most of the colonial pattern handles had matching cusps, or rarely an elaborately decorated cusp at the top and a pointy cusp at the bottom. Many people pick the handle up and put the point on the top, even though the bow to the handle should indicate that the handle should go the other way. The holes were punch and then drifted square to take a 3/8" carriage bolt, that was how they were mounted to my old 2x6 shop doors back at the farm in Attica. With the handle through bolted it is sturdy enough, unless it is mounted on a slider instead of a hinged door. If I make more I suppose I could punch the cusps for 3 1/2 20 carriage bolts. The texture of the rasp gives it a very interesting visual appeal, and I like making things out of rasps, other than snakes;-) and I have lots of them...
-
Full beard mostly grey and short, I refer to my present hair style as the tennis ball look, all of it is trimmed to 1/4" beard, stash and top of the head, try to trim around the edges to neaten thing up. I ask my wife to give the old goat a show clip;-) I like the look and it is virtually maintenance free on a daily basis, seems to all grow out to an inch long in just a few weeks so I have to run the clippers over it a lot. Used to have long wavy red hair the girls were all jealous of, and went really nice with early period costumes... My wife misses the long hair, and would like for me to grow it back out, maybe later when I am not so busy... Lots of people say I "look" like a blacksmith, form follows function... and having some "big guns" doesn't hurt;-) I did have one lady panic when I walked out of the truck, she saw my forearms and though I had been injured, and that they were "swollen" I was pumped up but it was just Popeye forearms.
-
We are planning on antique gold pinstriping on the pully and maybe a few other places to jazz it up;-)
-
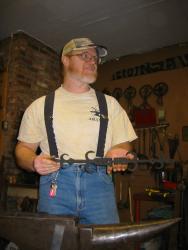
This is a door handle forged out of a farrier's rasp
-
My brother in law wanted me to turn these band saw wheels into a steam punk looking table with horse rasp legs... This is how we did it so it was tall enough to be a good side table height.
-
Induction heater and a Massey 10 cwt clear span hammer;-)
-
Time management skills, and prioritization... and I haven't overcome it yet... I can only free up time every so often, and I can't get things done as quickly in reality as in my mind. Lillico, Clifton Ralph, and my power hammer taught me to think in isolate and distribute, and changes in cross section. I have 30 years of doing high end hobbist/low end professional smithing;-) SO once I am up and running in "the flow" things go pretty good, its getting up to speed, and sometimes remembering what comes next (I used to be able to forge a realistic wizard head that was really cool, cant remember how I did it...) I have been wanting to make some hammers for a few years, but it never makes it high enough on the priority list to get done... There are lots of tools I want to make to improve my capacity and efficiency, but I often make complicated projects that don't have a great return on investment... Like my lovely horse head hooks that take around 2 hours each... and I have one more holiday craft fair and my stock is low... and lets not forget obsessing over some minor detail in the process that causes it to take 150%-200% of the time it should... Do the important thing 1st - making the tools to help you be a better smith is important Work at constantly improving, but don't obsess. Make things that sell, not just things that make you happy, or shows off your skills. Balance helps - make some tools, make some product, build your skill set. practice, practice, practice - NOTHING teaches hammer control like carefully watching what your hammer is doing to the steel, and responding. Patience, patience, patience - make an S-hook, make 3 just like it, make 20... make a leaf key fob, make 100... learn tapers, learn how to spread a boss, learn finails... make nails. Learn half faced blows, and shouldering in. learn to butcher and chisel and punch. Self discipline, if you want to achieve a certain goal, plan on HOW are you going to get there... Aim for nothing and you will hit it everytime. Harden your dreams with practicality, and Temper your practicality with your dreams... Your asking the right questions if you want to learn from someone else's mistakes without having to make them yourself!!!
-
Always learning, always hoping to improve. Alan's comment about if you can't get the wedge in you didn't dress the end of the stick good enough was a gem. Alan's father took the time to pass on something of great value to his son, most of us have to learn these things the hard way, and / or Google / Iforgeiron...These kinds of things are much easier if you grew up doing them. The poplar wedges are kinda wimpy, especially if you didn't dress the end of the handle enough. Funny if you fit the handle really well to the eye, and saw the slit wide enough and deep enough, the soft wood wedge will do a good job. You want it to be somewhat obtuse so that it fills the top of the hourglass. But that also means the head can't be crimping the slot closed. If your hurrying and mistakenly believe that the handle fits the eye just fine, it just needs a little persuasion;-) right, you can try a cheat is to start the wedge in the slot, then start the handle in the eye. But it is good to remember fewer regrets and few repairs if you do it right the first time;-) Another gem is you want the head locked between the shoulder and the wedged end. Alan is right you want the part of the handle in the middle to not be compressed by the eye, let the wedge fill up the top half of the hourglass. I have rehafted a bunch of hammers over the years, some I got right, and they were tight and right. A BUNCH I messed up and they loosened up and didn't stay where they were put. I have reforged a number of hammers to improve the eye, often to make it take a larger handle;-) cause I hit too hard and drive too deep sometimes... Some lessons;-)
-
Bolts for power hammer foundation
SJS replied to CKillgore's topic in Power Hammers, Treadle Hammers, Olivers
The Massey and Alldays T bolts are a very elegant solution, and I remember Forgemaster Phil saying if you do the tubes make sure the tubes are long enough for the broken T bolt to fall in and not interfere with installing the new one, that way you don't have to fish out the broken piece, if you do shear a bolt for some reason. If you are only gonna do this once, might as well do it up nice;-) -
Question for the experienced, anvil build
SJS replied to Woodweavil's topic in Anvils, Swage Blocks, and Mandrels
Nicromang rod will grind down to a smooth finish, then you can take an air hammer and pein it till it is a harder than hens teeth. Trying to get full penetration welding on a top plate isn't something that is easy or even necessary. Its making the job harder, just build it up with the high manganese rod and work harden it. You have a lovely start on a decent anvil, don't ruin it fixating on the idea you need a top plate. Top plates were for when they forged the body out of wrought iron. Whatever that steel is it will work fine for an anvil, do a little hardfacing and grind it up, and then work harden it... AR400... meaning abrasion resistant armour plate, I have heard absolutely nothing good about trying to weld that stuff... Use that as your cut plate saddle. If you have access to the full shop of the school you can make all kinds of hardy tools and furniture for the anvil. don't bother with a shelf, there again it was a function of the wrought iron bodied anvils. They can be useful but so can having your horn flat to the face of the anvil... AND I do really think what you have done so far looks great