Buzzkill
-
Posts
2,049 -
Joined
-
Last visited
Content Type
Profiles
Forums
Articles
Gallery
Downloads
Events
Everything posted by Buzzkill
-
Cutting existing castable refractory to modify a forge?
Buzzkill replied to Hefty's topic in Ribbon Burners
That shows inlets on two sides. Is that just to show that you can use it in either orientation, or is there actually a function for both of the potential inlets as shown? -
Ok, I found it. It was on The Knife Network site and the thread is called Glue Wars. There is also a Glue Wars 2 on Blade Forums.
-
There was a thread on one of the knife making forums I read a while ago that addressed the epoxy issue. If I can find it I'll either post the link or the words to use to find it. Anyway, the author used quite a few different adhesives for testing and used both synthetic and natural materials for handles. Ultimately some performed better with certain materials than others so there was not a clear winner. However, a couple things became very clear: 1) Proper preparation of the mating surfaces made a big difference in the performance of the adhesive, and 2) Using the correct amounts of the components for 2 part epoxies (and mixing them thoroughly) had a big impact on their performance. There were some like West System (who makes G-Flex) and Acraglas that seemed like solid performers in nearly all tests, but there are different versions of epoxies within those name brands as well. Gorilla Glue had a surprisingly good showing in some tests as well. I couldn't find the thread on a quick search, but if I find it later I will put the information here.
-
Naturally Aspirated Ribbon Burner. Photo heavy.
Buzzkill replied to Frosty's topic in Ribbon Burners
It drills ok with high speed on the bits, light pressure, and a wooden board to back it up. You want support under it to avoid punch out. Slightly undersized holes are ok as that helps hold the tubes in place, but I think trying to punch holes without any drilling would most likely make a mess of the boards. I'm not sure about filing teeth on a straw. It might work, but if not done well it could result in more of a tearing than cutting action. As far as the burn back into the plenum goes, I'm not entirely sure. There were several things going on. As I mentioned, the box I cast cracked, and that may have created an additional pathway for plenum ignition. Also with less than an inch between the plenum and welding heat, it's possible that the board itself allowed enough heat through to be an issue. I think I still have the block I removed. If I remember in the next few days I'll try to take a look at it and see if there is any obvious heat discoloration on the SS inserts. Overall I do think the concept works ok, but with the extreme temperature swings we produce in small forges the challenge is finding materials that can handle the extremes without cracking. Now you've got me wondering if I could make the "box" out of fiber board as well and use high temp mortar to glue it all together and glue it to the plenum. I'm fairly sure it would handle the swings in temperature without cracking, but the board doesn't really bind to adhesives well since it can delaminate somewhat. -
Naturally Aspirated Ribbon Burner. Photo heavy.
Buzzkill replied to Frosty's topic in Ribbon Burners
I did something quite similar to what you're describing. It's documented here: https://www.iforgeiron.com/topic/68753-another-narb-experiment-pic-heavy/ It worked fairly well - at first anyway. Ultimately the refractory box cast from sifted kastolite 30 cracked badly, so I moved on to another idea I had. Towards the end of the time I was using it I kept getting burn back into the plenum pretty much right at welding temperatures. If I stayed in normal forging range it would work indefinitely without issues. -
That sounds a little better for knife making, but still less versatility than most 2x72 builds I've seen. In my mind at least, getting even, flat bevels free-hand using that setup would be a significant challenge.
-
Based on the picture you provided, you only have access to a small portion of the grinding belt. That portion is curved. If that is all you have to work with then any knife ground on that machine will have a hollow grind (assuming you are grinding with the blade perpendicular to the belt travel. In my opinion that's not a good option for knife grinding unless there are other orientations that will allow you to do flat platen grinding at a minimum. The ability to use different diameter wheels is also helpful for getting the shapes you want on some profiles. Pretty much all of those things can be done with some combination of angle grinders, files, or other stock removal options, but only in rare cases will any of them match the belt grinder for quickly removing material consistently and within tolerances acceptable for blade making.
-
What did you do in the shop today?
Buzzkill replied to Mark Ling's topic in Blacksmithing, General Discussion
That may be an indication that it is a hardenable steel. If it is and was hardened prior to your forging then you removed that by forging and returned it to an unhardened state. You can test for that easily enough by quenching a small piece to see if it will break rather than bend. -
I've had the "harmonic howl" on the last several naturally aspirated ribbon burners I've built. I definitely get it on the burners that are side mounted. I think I also got it on the one I had that was floor mounted. For me it's temperature and pressure dependent to some degree. Back pressure seems to also play a part. One burner I used was sensitive enough that the noise would change when I walked in front of the forge. When I first fire up the forge I get a constant howl for a few minutes from the burners that displayed this "feature." By the time the interior is glowing the howl goes away for me. Another thing I noticed is that the ribbon burners I've built with a lot of small diameter holes were more prone to the phenomenon than those that used a lower number of larger diameter holes. The current one has 180 1/8" holes and it howls loudly enough to be quite annoying at certain pressures when the forge is cold.
-
What's your latest blade look like? Post em and let us see.
Buzzkill replied to HondoWalker's topic in Knife Making
She does almost all of the shopping, but I think that falls into the "gathering" category more than "hunting." As far as I know she has never taken any of my knives with her, but at home the phrase "That's not a knife ...... that's a knife" has been uttered a few times. The first one she wanted was a dagger, and since a dagger is pretty much the "assault knife" of the cutlery world I wasn't too sure what to think. She does keep that one on the stand next to the bed. Hmmm. Maybe I should invest in some chainmail. On the other hand she's had it for a few years now and I'm still waking up in the mornings. She wouldn't be lulling me into a false sense of security now would she? -
What's your latest blade look like? Post em and let us see.
Buzzkill replied to HondoWalker's topic in Knife Making
Thanks again. The guard is slotted. I file these guards until I can barely get them to start to fit and then I hammer them into place. There are no pins, but I do use a low temperature solder(a little over 400 degrees F melting point) to secure them in place. I heat from the tang side of the guard to reduce the chance of ruining the temper. Between that and the epoxy on the scales, the guard isn't going anywhere without some unreasonable abuse. -
What's your latest blade look like? Post em and let us see.
Buzzkill replied to HondoWalker's topic in Knife Making
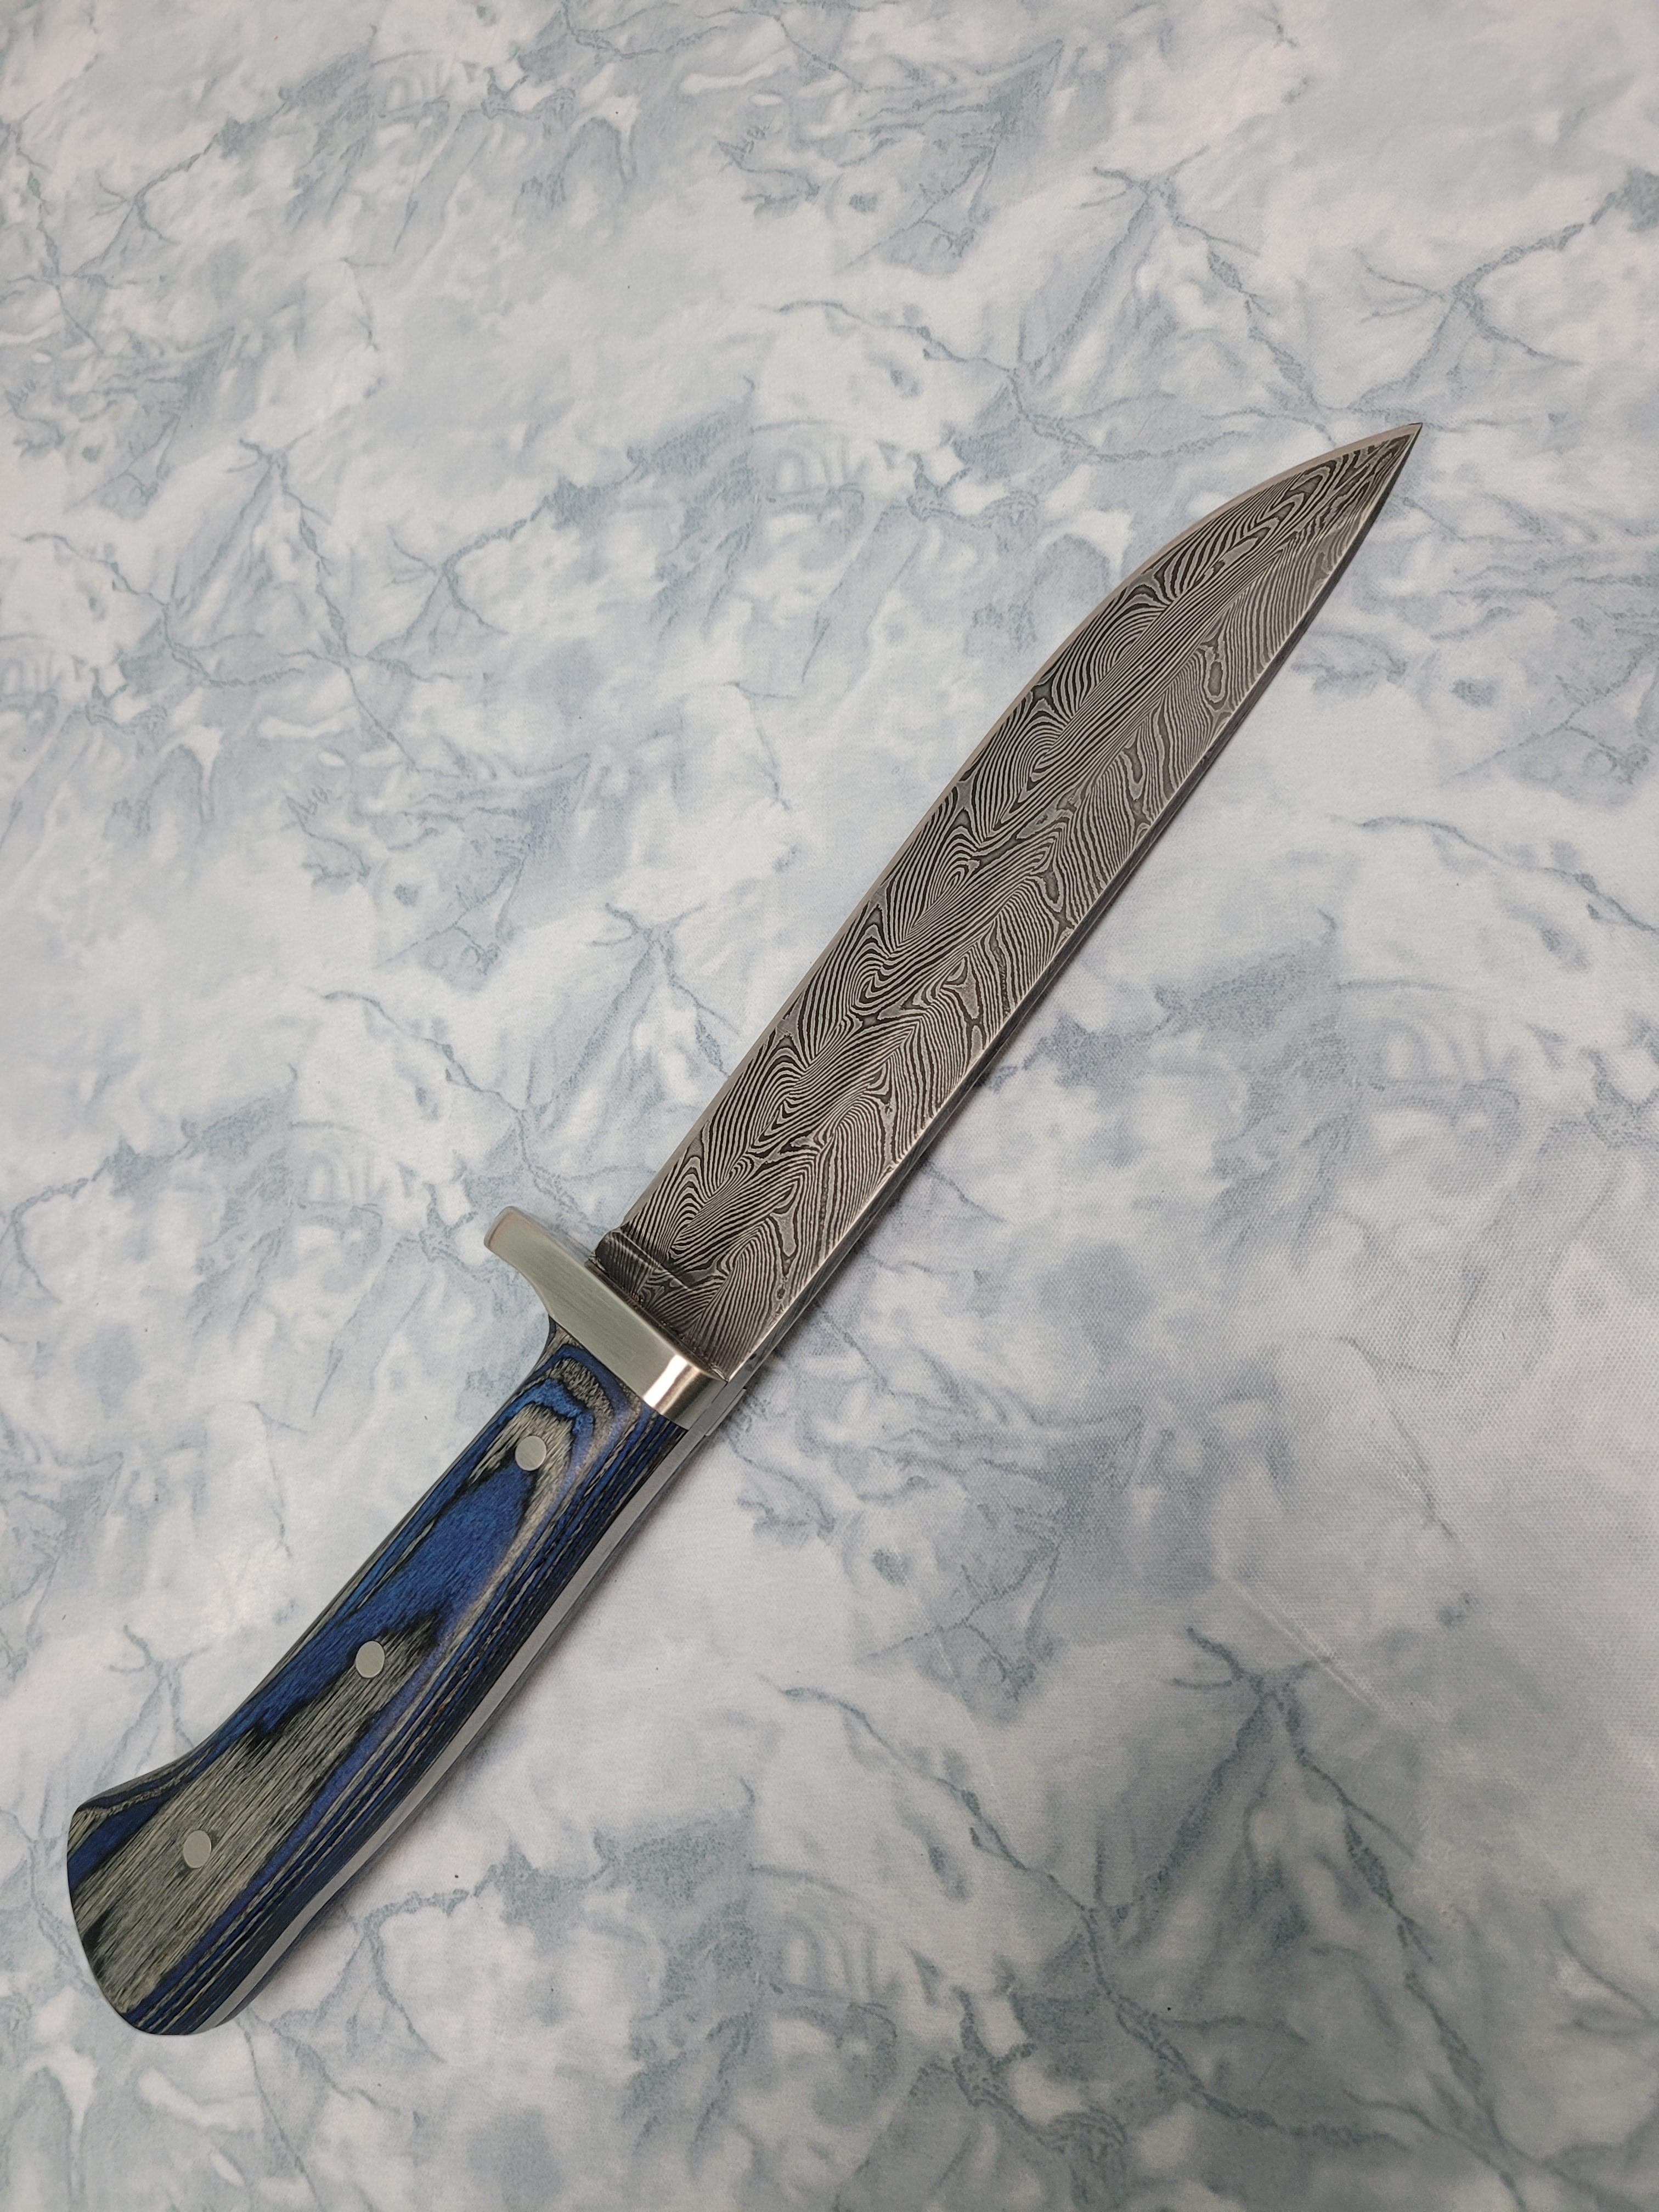
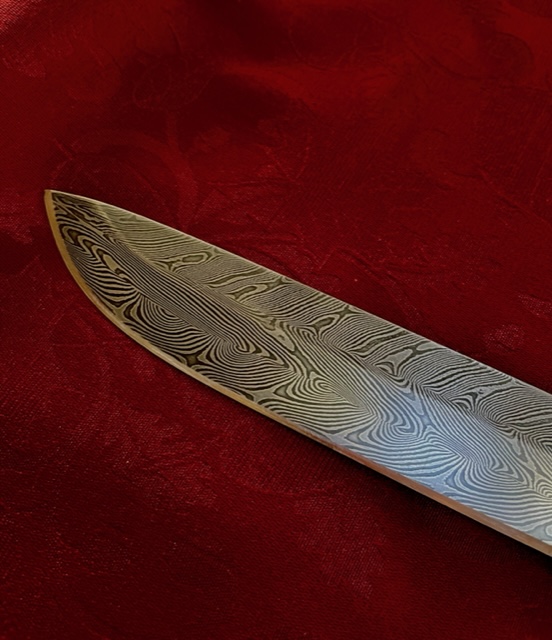
Thanks guys. My wife does absolutely no hunting. She does buy a fair amount of my scales though, and she is my consultant usually when choosing which scales to put on a blade. She just really likes the pattern - and the scales she chose. The twists weren't quite as uniform as I would have liked between the 3 bars, but overall I'm pretty happy with the outcome. There is an awful lot of "wasted" steel (for me anyway) to get that pattern. Since I don't use flux, every mating surface has to be as close to perfectly flat and clean as I can get it with my equipment each time I forge weld. The transition from the guard to the blade part of the spine is actually a smooth transition. It must be a lighting issue or something. I see the same thing you see in the picture, but in reality there is no abrupt change at the guard. I built a grinding jig that I've used on my last couple simple knives. For me it decreases the time spent standing in front of the grinder quite a bit. I'd rather be heating and beating and I've done quite a few blades with freehand grinding, so for me it's the option that allows me to maximize the time doing the parts I like and minimize the time on the more tedious work. Here's a pic from a different angle. You can see that the spine has no abrupt change.
-
What's your latest blade look like? Post em and let us see.
Buzzkill replied to HondoWalker's topic in Knife Making
I finished this one up a few days ago. I thought I'd be able to sell it, but my wife decided it's hers.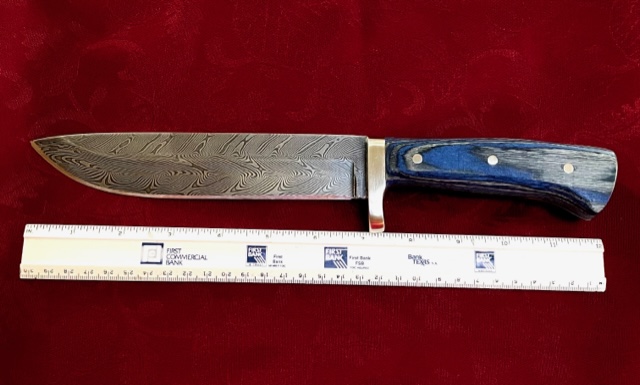
-
Gassifying Drip Oil Fed Rocket Heaters with a Heat Exchanger?
Buzzkill replied to 671jungle's topic in Everything Else
I'm not sure how thick the fuel can be and still function with that setup. We were in temps as low as -50 degrees F when using those, so the fuels we used had to flow at extremely cold temperatures. IIRC the burner had a top plate with the fuel line screwed into the center of it and a thicker bottom plate where the drips would hit. The plates were separated just a little so that when the fuel evaporated it burned around the circumference of the plates. Most of the intake air came from above the burner, so that helped pull the flame down into the stove. The front door of the stove had a sliding gate to help fine tune the intake air. Having only used this stove and never built or experimented with any designs I'm afraid I'd only be offering educated guesses regarding your questions. The closest thing I built and used was a forge/burner combination that was fueled by used motor oil. However, I used compressed air and a siphon nozzle to atomize the oil rather than using a gravity/evaporation system. I also started the forge using kerosene or diesel fuel until hot and then switched to used oil. It was fairly difficult to keep it lit with just used oil when it was cold. The wick system may allow for thicker fuels to be ignited more easily before everything gets heated significantly. -
Gassifying Drip Oil Fed Rocket Heaters with a Heat Exchanger?
Buzzkill replied to 671jungle's topic in Everything Else
The only stove I've used of that nature is the M1950 Yukon Stove when I was in the Army. It dripped white gas, kerosene, or diesel into the middle of a relatively thick plate that (after heating up) would cause the fuel to vaporize when it hit. Two design features of note: (1) Most of the air was drawn in where the fuel line entered the burner assembly, and (2) There was pretty much maximum distance between the burner and the exhaust port. I believe that it was designed to draw air in past the fuel line to keep it cool enough so that the fuel would not vaporize in the fuel line before the drip hit the plate. The second feature of note was to get the most heat into the tent. A couple side notes here... I was in a canvas tent that caught on fire from one of these stoves burning too hot. They also tended to produce a fair amount of soot which would gradually choke off the exhaust and/or spark arrestor cap. Our solution was generally frowned upon, but we'd throw a 5.56 blank cartridge in the stove. When it detonated that would clear out the exhaust pipe and spark arrestor fairly well. You have a heat exchange system, unlike the M1950, but I still think you want to keep the hot gases inside the stove as long as reasonably possible to get better efficiency on transferring the heat. Any way that forces the exhaust to take a more circuitous path without decreasing the overall throughput of the exhaust should help there. -
Quenching after induction tempering
Buzzkill replied to Sivakumar's topic in Heat Treating, general discussion
I'm with Steve on this. Do what they want and charge them accordingly. Our rule of thumb is give the customer what they want unless they ask for something unsafe or illegal. If it's safe and legal just figure out how much to charge them so they can get what they want. It's sometimes surprising how much people will pay to have it done the way they want it done, whether it makes sense or not. -
Check the easy things first. If you haven't done so already, try other belts to verify that they do the same thing. It's not likely the belt is the problem, but you want to cross that off the list before moving on. After that the tensioning mechanism would top the list of the most likely suspects in my opinion. Especially when there isn't enough tension belts can wander significantly with light to moderate pressure on the sanding surface. If that system appears to be defect free and has the right amount of tension then I'd probably see if there's any play in any of the bearings. I'm pretty sure if the frame was the issue the belt would not track right ever rather than suddenly change in use.
-
Vitrification at the bottom of a forge
Buzzkill replied to Thr's topic in Insulation and Refractories
The best way to try to remove it is at forging temperature. As I said it will turn semi-liquid and sticky again. At that point you can scrape most of the "bad" stuff out with some scrap stock bent to whatever shape helps the most. You won't get all of it of course, but you can get most of it. If you try to chisel/chip it out cold you'll most likely end up breaking the floor and you'll have to re-cast it anyway. As I said, if it were me I'd keep using it for now. I'd probably try to scrape some of that stuff out and/or cover it with a sacrificial piece of kiln shelf or castable refractory until it gets to the point where the whole thing needs refurbished. Forging temperatures are brutal on a lot of materials and the thermal shock of heating or cooling rapidly tends to degrade or crack a lot of things we use in forges. The interior will not stay pristine for long no matter how well you do on your construction. Don't let perfect be the enemy of good enough here. As a side note, one of the reasons I stopped using flux when forge welding is the mess it can make on the floor of a propane forge. I'm almost exclusively forge welding stacks of uniform sized high carbon flat stock though, so it's not as much of a challenge to get good welds as it would be with mild steel or irregular shapes. I'm also fastidious with my prep work for the welds. -
Vitrification at the bottom of a forge
Buzzkill replied to Thr's topic in Insulation and Refractories
I'm guessing you used some flux in the forge. If so, what you're seeing is the result. At high temperatures flux is quite caustic and can dissolve a lot of materials. Even Kastolite 30 is somewhat susceptible to this. Once it cools down, the partially dissolved material tends to end up as a dark/black glassy substance. Forge lining and floors are consumable items. They will have to be replaced periodically. If it were me I'd keep using it for now. I haven't tried to patch over the top of spots like that, but when reheated to forging temperatures the glassy black stuff will become sticky again and could potentially dissolve material cast over the top of it. It's not that bad now, but I'd wait and recast the entire floor if it were me. In the future you might want to cast or cut a removable floor piece to use when forge welding and then remove it for normal forging. When it gets bad then you just have to replace that piece instead of a major overhaul of the forge. -
You really do like the deep end of the pool, don't you? Forging stainless tends to be more difficult than mild or simple high carbon alloys, and the forging range can be quite a bit different. To properly heat treat all the stainless alloys I've seen that are suitable for blades requires more than just a heat in the forge and a dunk in oil. Many of them require quite high temps for quenching - around 1900 degrees F or more, but many of them also need to be held at lower temperatures for a while and then be brought up to quenching temperature to get the most out of the steel. This pretty much requires a system where the temperature can be accurately controlled and held. Usually that amounts to an electric heat treating oven. Unless you are willing and able to build or buy such a device I'd recommend sending anything like that out for professional heat treating.
-
This depends on what you have at your disposal in the way of tools. If you have and/or can use an electric welder one of the easiest things is to weld a long rod on to the stack. If you do not have access to a welder then hopefully you have tongs. One option is to leave a couple longer pieces of flat stock in the middle of the stack so those stick out a couple extra inches and are available to grab with tongs. If you have tongs large enough to grab the entire stack you can keep all the pieces the same size. Wire or stainless hose clamps can be used to hold the stack together until the welds are set if you do not have access to a welder to tack the stack together.
-
I have to agree with Purple Bullet here. It seems like you're trying to fly before learning to walk. In one respect I admire your "can do" attitude, but it appears you're missing some basic knowledge and experience that will increase your likelihood of success. Don't get me wrong. Quite a few of us on here are some combination of introverted, stubborn, and independent which makes us less likely to seek help in person. Some of us also know from experience that a little time with someone who is proficient in the activity we're trying as a beginner saves a ton of time and reduces the failure rate by an amazing amount. However, if you really want to travel this road alone and with the advice of strangers on the internet, please do get the kaowool installed correctly, rigidized, and coated with something to keep microscopic fibers from ending up in your lungs. Beyond that, if you must try to do this solo then take a step back and let's work on forge welding some billets with just a few layers of flat stock so you can get a feel for the process. Getting a good forge weld on cable can be significantly more difficult to accomplish than forge welding layers of flat stock of uniform size. Based on the pictures you posted I didn't see any successful forge welding in any of them. I saw smashed oxidized steel. If you do all your prep work correctly and hit the right temperature then the cable should start welding while you're twisting it tightly - before you start hammering on it. Again, I can appreciate your ambition, but backing up a bit will give you a much better chance at success in the long run.
-
IFB and castable base for ribbon burner forge
Buzzkill replied to rls1160's topic in Insulation and Refractories
Unless you're planning on having more than one shell you can use for your forge you may want to rethink the floor mounted ribbon burner. I ran a naturally aspirated floor mounted ribbon burner for a couple years. There are some pros and cons to it. It automatically gives you good swirl with a D shape overhead. It is simpler to create/fabricate the shell. However, as you can see from your picture, you lose about a third of your floor space with that arrangement. You may also find that scale and/or small pieces of refractory that break loose from the shell end up on your burner head and possibly in the plenum of the burner. If your burner were to be installed in the angled section on one side and pointed at the angled section opposite that should give you good swirl and maximize your floor space. If you don't mind losing the floor spaces and the occasional cleanup of the burner you'll probably really like that setup though. On my most recent build I went back to a side mounted ribbon burner and overall I like it a bit better. Your mileage may vary. -
What did you do in the shop today?
Buzzkill replied to Mark Ling's topic in Blacksmithing, General Discussion
I'm not sure why, but Sir Mix-A-Lot came to mind when I saw that picture. -
Yes, but do you know the airspeed velocity of an unladen swallow?