Buzzkill
-
Posts
2,049 -
Joined
-
Last visited
Content Type
Profiles
Forums
Articles
Gallery
Downloads
Events
Everything posted by Buzzkill
-
Hmm. That may not be good advice for some people. What if you would insult your boss, purchase a bunch of stuff you couldn't afford, and/or possibly ingest a bunch of stuff that's not good for you on your last day? It might be a bad idea to live every day that way.
-
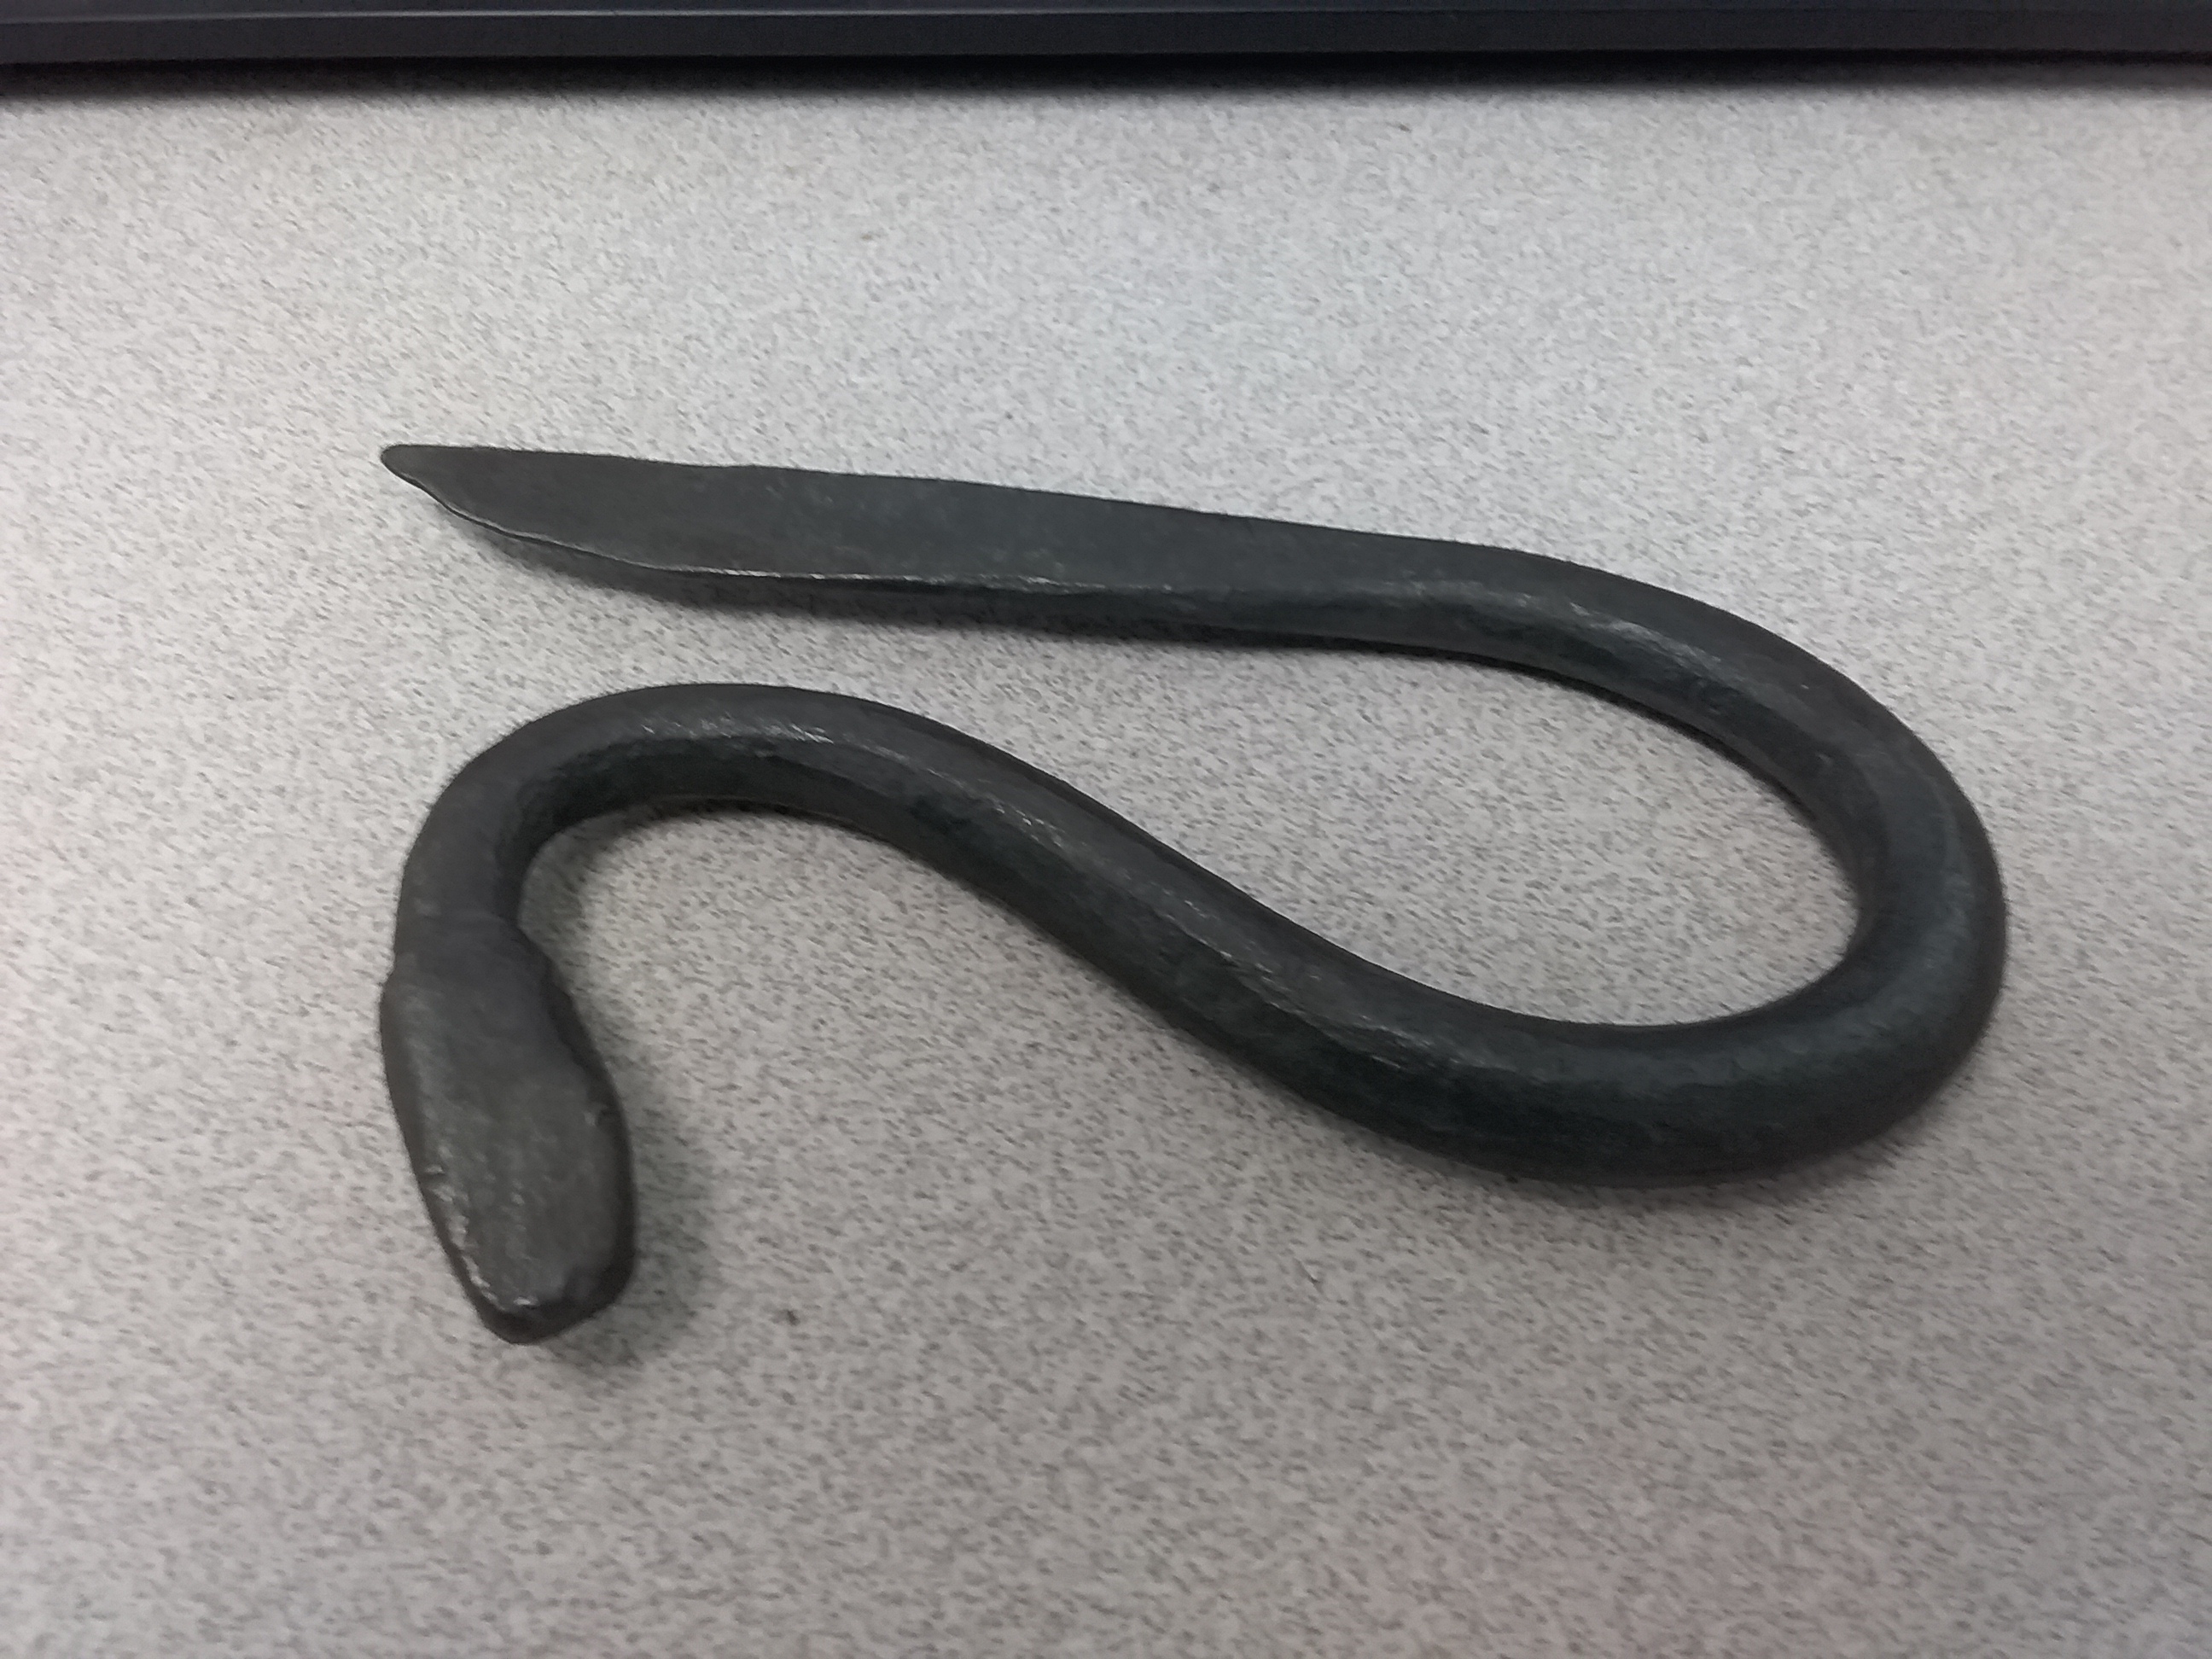
I was going for snake-like. Guess I need to make an eye punch and add some details.
-
In between heats for a pattern welded billet I made this from some coil spring. I left it as forged.

-
I used a wood drive wheel for a while on the 2x72 grinder I built. This may not be ideal, but I used a couple pieces of (oak I think) 2x4 glued with the grain 90 degrees from each other. I marked and drilled a center hole just a hair undersized so I had to tap it into place on the shaft. The shaft was keyed, and wood is softer than steel so I tapped a key into place to hold it securely. Then I clamped the motor to a workbench and used a piece of RR track as a work rest for lathe tools to get the wheel perfectly round. I used the wheel for more than a year with no problems and now use it on the power hammer I built. You should crown either the drive wheel or the tracking wheel if I recall correctly, but not both. If I were to do it again I would drill pilot holes and add 2 or 3 wood screws to help hold the pieces together for some additional peace of mind. What's the rpm of your motor? The first version of my belt grinder used a 1 hp motor with 1750 rpm. I used 2 step pulleys opposite of each other to change the belt speed. That's not as good as a variable speed 3 phase motor with a VFD, but it worked ok for me in all but the fastest setup. I could stall the motor fairly easily in that arrangement.
-
What's your latest blade look like? Post em and let us see.
Buzzkill replied to HondoWalker's topic in Knife Making
Edit: Deleted link to Monty Python's Lumberjack song. It may not be quite as family friendly as Glenn would prefer. -
What's your latest blade look like? Post em and let us see.
Buzzkill replied to HondoWalker's topic in Knife Making
Well, you could drop your collection of pressed wild flowers for one thing - especially if you skip and jump. -
What's your latest blade look like? Post em and let us see.
Buzzkill replied to HondoWalker's topic in Knife Making
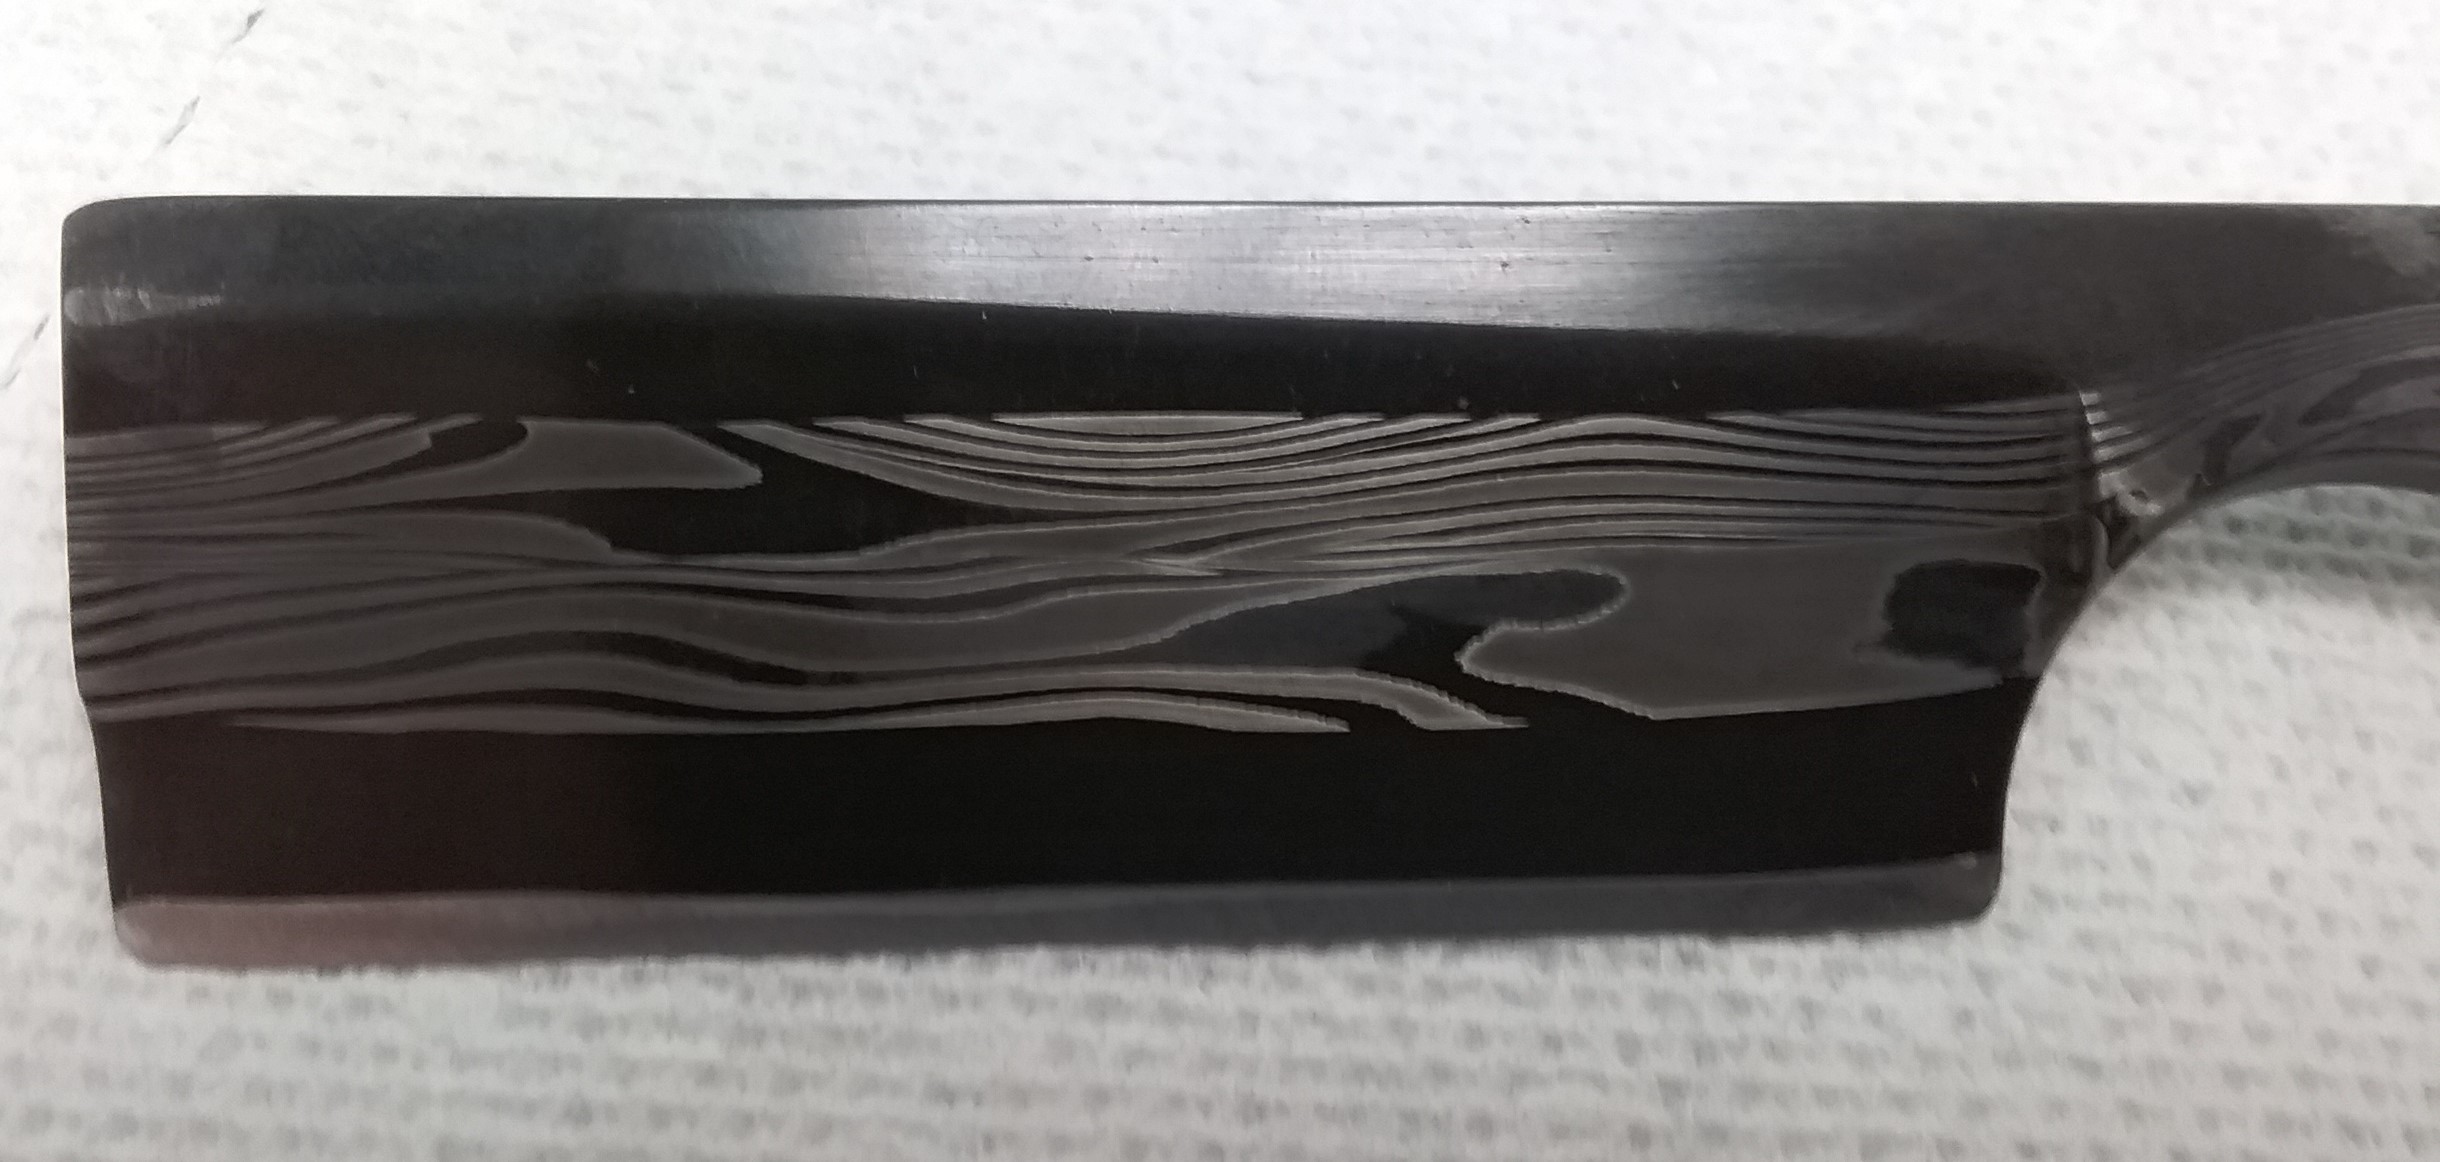
Thanks so much. I find myself drawn to those with around 30 to 40 layers for a lot of patterns. Some of the high count stuff looks really good, but you can't see the details clearly unless you're really close to the piece. My eyesight isn't what it used to be so bolder is better for me usually. -
What's your latest blade look like? Post em and let us see.
Buzzkill replied to HondoWalker's topic in Knife Making
I haven't shown it to the barber yet. I'll take it with me the next time I get a haircut though. -
What's your latest blade look like? Post em and let us see.
Buzzkill replied to HondoWalker's topic in Knife Making
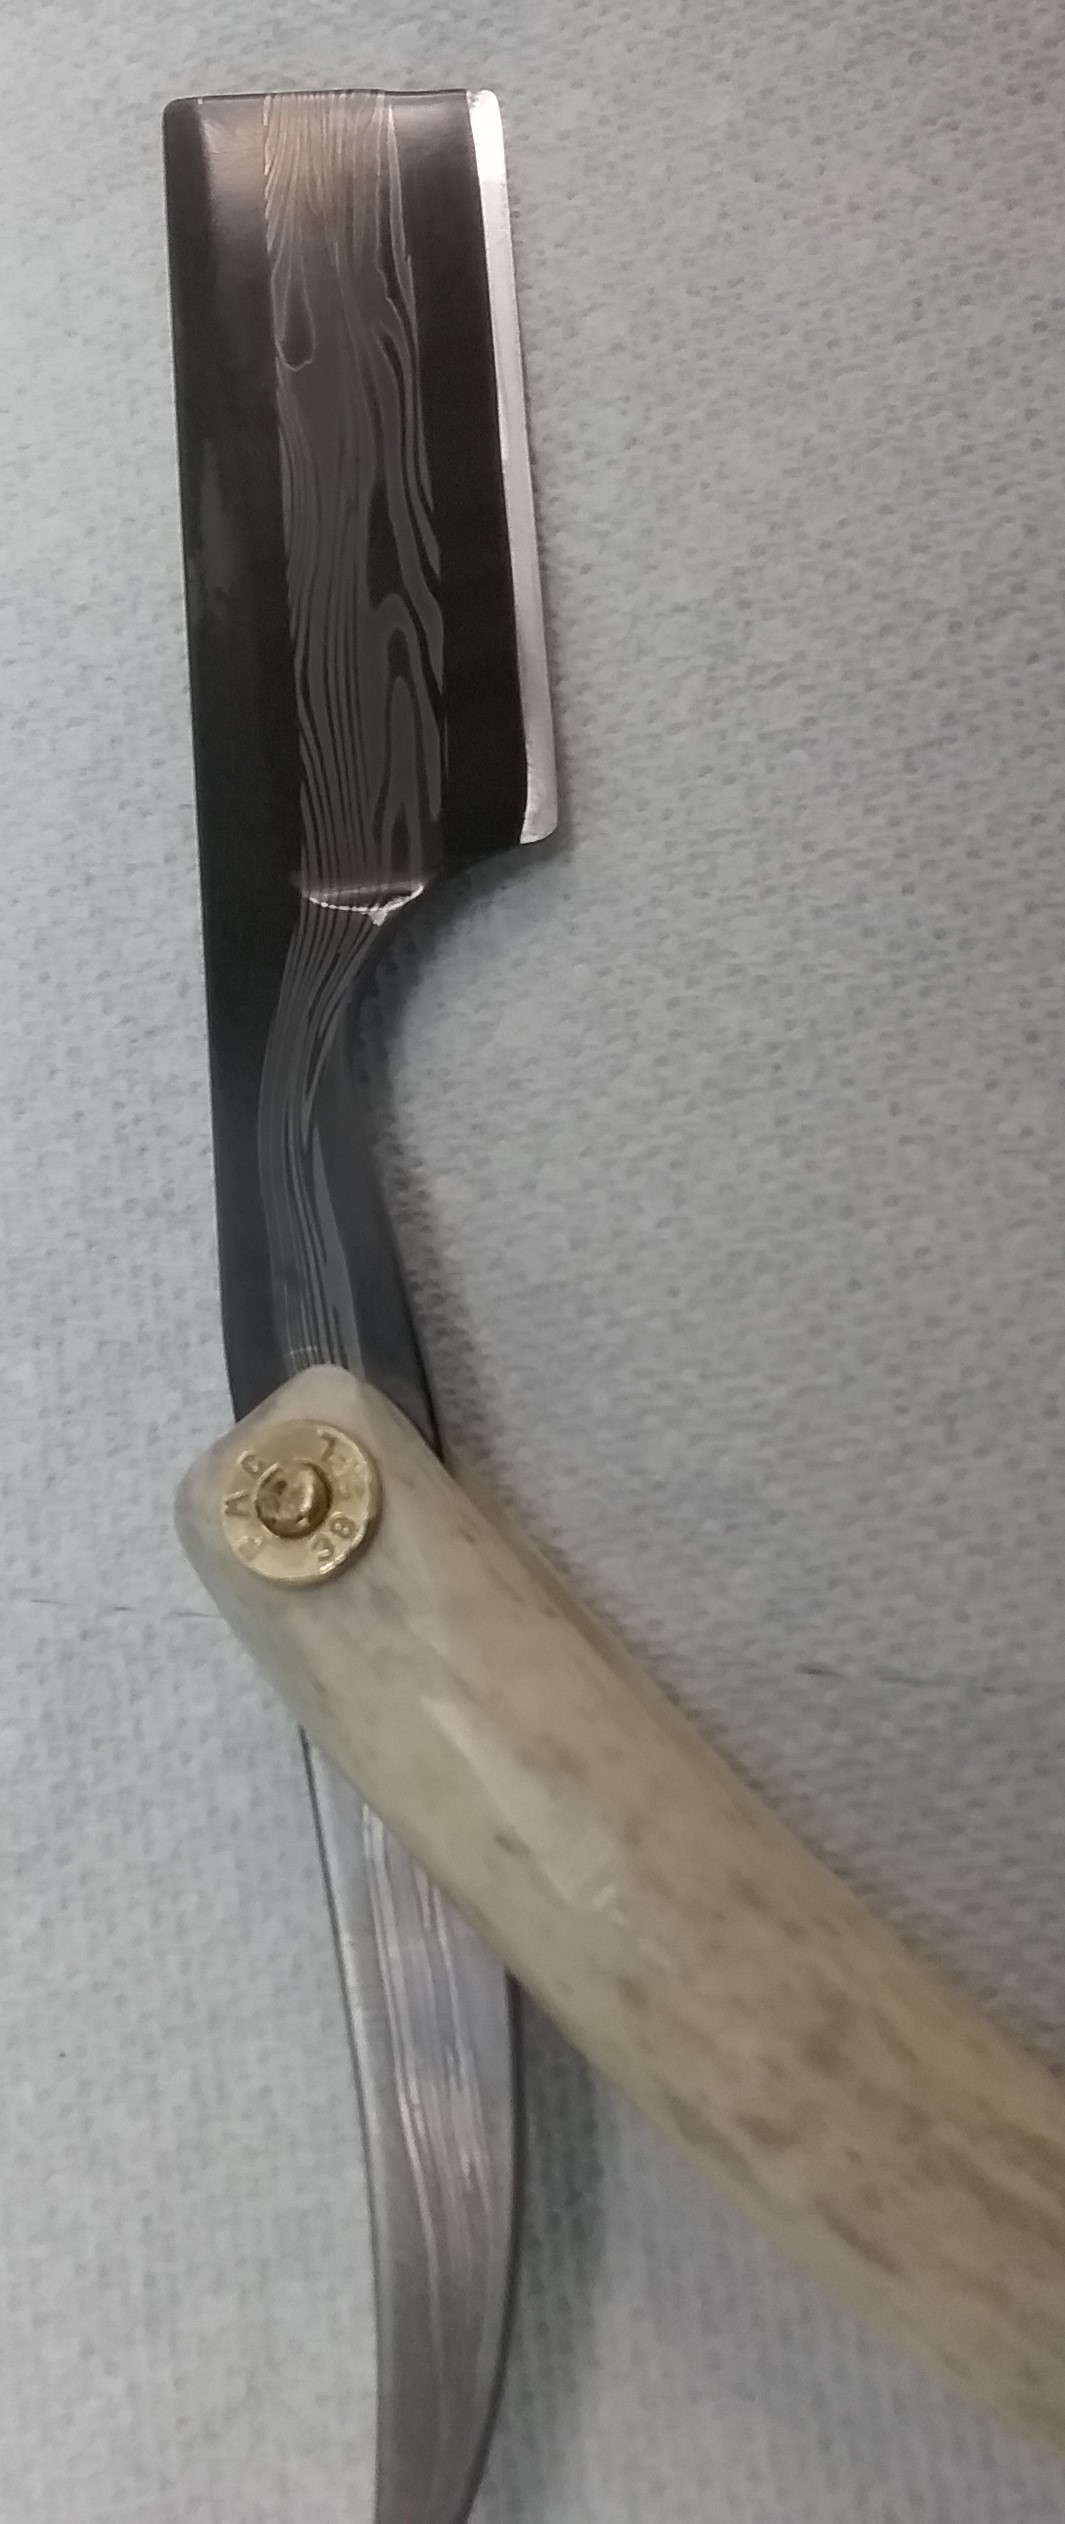
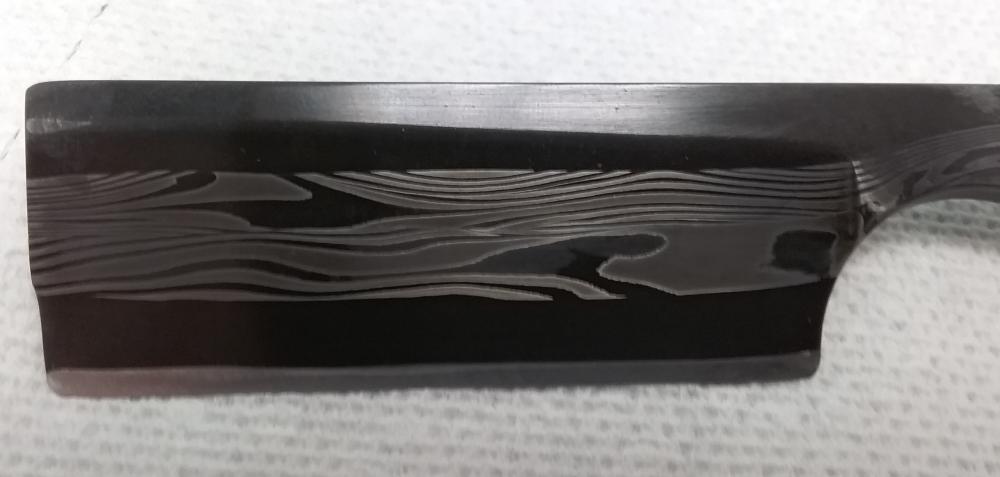
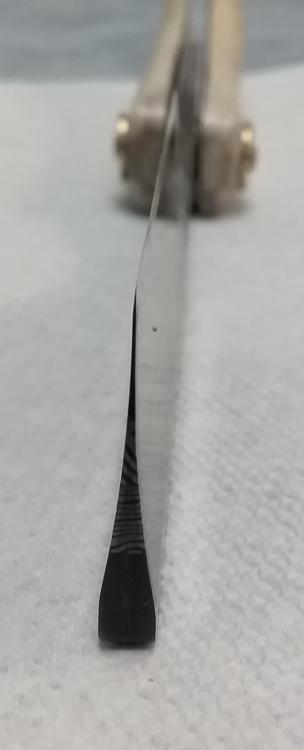
Brief back story... Last time I got my hair cut the barber was wearing a custom knife on his belt, so naturally the conversation went that direction. I had one of my knives in the truck and showed him. He asked if I made straight razors. I hadn't to that point, but decided to give it a shot. Here's the results: This is by far the thinnest edge I've ever ground before sharpening - just over 1/100th of an inch thick. I've never used a straight razor before, so I don't know if the dimensions will be comfortable and practical, but I do like the way the pattern came out anyway. The blade is 80CrV2 and 15N20 and the handle is a piece of whitetail deer antler tine. I etched the blade for a few minutes in Ferric chloride then sanded lightly and etched overnight in coffee for more contrast.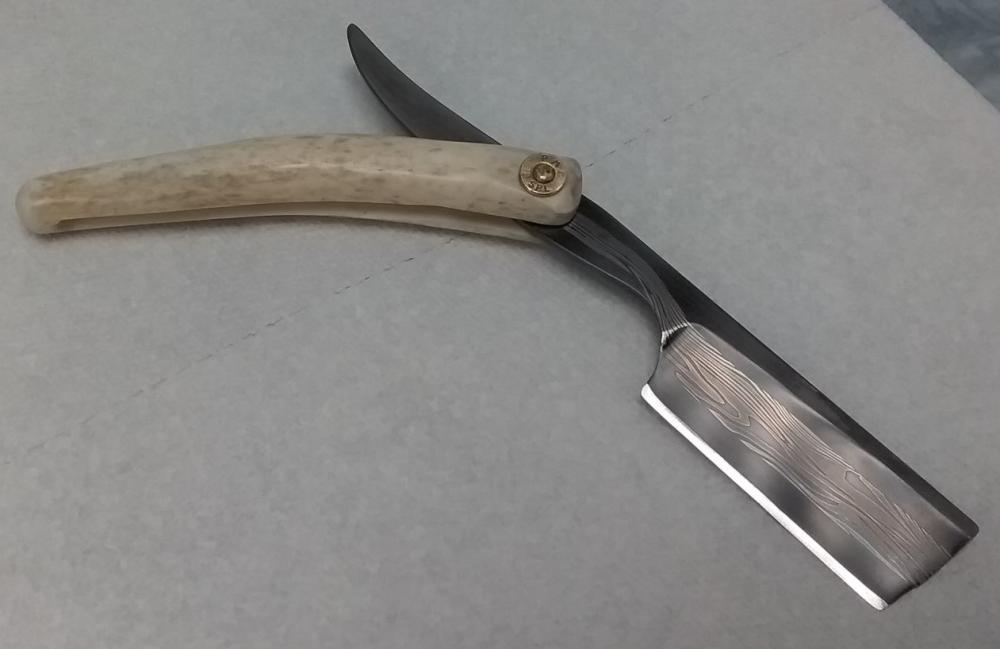

-
What did you do in the shop today?
Buzzkill replied to Mark Ling's topic in Blacksmithing, General Discussion
I don't think that would work well with the inside curve of a scythe in mind. I believe you need a small raised and rounded anvil surface in order to focus the force where needed without deforming the edge. Having said that I have never personally attempted to sharpen a scythe, and I formed my opinion from videos I've watched and from grinding inside curves on blades that I've made. -
If we're talking about grinding bevels I don't see how anyone could reliably get good grinds with the cutting edge down - freehand anyway. As Steve pointed out you need to be able to look at what will become the cutting edge as you grind to ensure that it's even and ends up at the thickness you desire. Trying to accomplish that with the cutting edge down would be a constant "stop and check" frustrating endeavor since you'd essentially be grinding blind with regard to the edge thickness and even-ness. If you were doing a full flat grind it also would be just as likely to catch the edge and throw the blade out of your grasp with cutting edge down or up anyway. A variable speed grinder is a big help too. My most recent project is a straight razor. Attempting to get an even grind on a final edge about as thick as card stock with the cutting edge either down or up would be close to impossible at full speed. It would also easily overheat the edge and destroy the temper. However, with a fresh belt and low speed you can make small adjustments to the grind with little to no danger of the blade being ripped out of your hand or overheating the blade.
-
Leaving the teeth of the file intact is also a risky move. Every place there is a defined tooth with a sharp transition in the steel is another potential failure point. Another trick to use for determining quenching temperature is to put some table salt on the blade while it's heating in the forge. When you see the salt melt it should be at a good quenching temperature. As was already stated, based on the grain size you quenched at a much higher temperature than is ideal, and one way or another you had a small crack in the blade either from the forging process or from heat treating. It was definitely there before you tested the knife.
-
What did you do in the shop today?
Buzzkill replied to Mark Ling's topic in Blacksmithing, General Discussion
As has been mentioned elsewhere, the true cost of scrap steel isn't always easy to define. For instance, if you get some free steel, but it takes you a lot of fuel and 4 hours of your time to forge it to the shape you want, that may have cost you more than purchasing new steel that is already close to the shape and size you want. I think nearly all of us have at least one time worked on a piece of "free" steel for several hours before concluding that it may not have been the best choice. There is definitely something satisfying about taking a piece of steel that would just be junked or recycled and turning it into something that can be used for generations, but sometimes it's not worth the effort. BillyBones' suggestion of using a tire iron is a good example of trying to find something much closer to shape and size you need for your project. Coil spring is also probably a better choice than the leaf spring. I have hammered out a couple things from leaf springs which are about 5/8" thick and 3" wide. Those experiences convinced me to choose starting stock more wisely in the future. -
What did you do in the shop today?
Buzzkill replied to Mark Ling's topic in Blacksmithing, General Discussion
If you have an extra ball peen hammer you can forge that into a handled hot cut fairly easily. I wouldn't want to cut those with an angle grinder either. -
What did you do in the shop today?
Buzzkill replied to Mark Ling's topic in Blacksmithing, General Discussion
I have a number of leaf springs that I don't even try to work with a hand hammer anymore. However, if you have the means to split them in half lengthwise, the halves are much easier to manage. Otherwise it's hard to use them without a press or power hammer. -
What did you do in the shop today?
Buzzkill replied to Mark Ling's topic in Blacksmithing, General Discussion
Looks good. I like the simple but effective way you've given yourself for easily changing the radii of your bends. -
What did you do in the shop today?
Buzzkill replied to Mark Ling's topic in Blacksmithing, General Discussion
You may be making this more complicated than necessary. One end of the chipping hammer will come to a point and the other will be similar to a chisel on the end, correct? If so there is no need to upset anything. You don't need it to be that thick especially if you think it's already too heavy. If I was dedicated to making the hammer head from a leaf spring like that, I'd cut about a 4 inch length then split that in half lengthwise (either hot cut or bandsaw). After setting one of the halves aside for a future project, I'd taper one end roughly to a point and flatten the other to a chisel thickness on the remaining half. After punching and drifting the center point for the preferred handle size it would just require clean up grinding, heat treating, and putting the handle on. I don't know what you have in your resource pile, but I have several different thicknesses of leaf springs ranging from about 1/4" thick to about 1 inch thick, so you may not have the same options. -
+1 to everything George wrote. If you don't like spending time in front of the grinder (like me) you may want to consider building or buying a good jig for grinding bevels. I finally built one a few months ago after a few years of free-handing everything. For a simple blade bevel I'd say it cut my time in half or better. Recurves, really long blades, or complex shapes won't work well with a simple grinder/jig combination of course, but for a lot of blades it can make a world of difference.
-
What did you do in the shop today?
Buzzkill replied to Mark Ling's topic in Blacksmithing, General Discussion
How thick is the leaf spring and how wide is it? Also, how thick do you want the hammer head to be? Do you have a power hammer or press? If the spring is around 3 inches wide you can gain a bit of thickness by decreasing the width. You can also upset the piece lengthwise to gain some additional thickness. However, if you are trying to increase the the thickness by more than double it will be a lot of work. You might be better off forge welding a piece on for the hammer head. I tried to do something similar to make a one piece tomahawk with a hammer head opposite the blade. I gave up before I got the thickness I wanted. I'll attach a drawing of the steps I used to make the hatchet. You may be able to make a hammer head instead of the hatchet head.springhawk.pdf -
In my latest ribbon burner there are 180 1/8" holes in the burner head, and the sound of the mig tip inducing air at the T fitting is louder than the flames at the burner. However, when first lit the burner gives off a "harmonic howl" similar to the sound made when blowing across the top of a glass bottle. It goes away by the time the forge is up to temperature though. So, I traded the roar for a howl, but at least the howl only lasts about 10 minutes or so.
-
I personally wouldn't use HCl. It might be ok, but one of the problems that occurs in stainless steel is stress corrosion cracking. The presence of chlorides can make this worse. For small blades and a single passivation cycle it might not matter at all. I usually see it with tertiary or quaternary amine chlorides being transported in stainless tanks followed by a substandard washing and drying afterwards. You can dilute most common acids easily using water, so saying one is stronger than another doesn't really mean anything unless you know the concentrations. Just remember to add the acid to the water, not the other way around to reduce the risk of getting splashed. If you're curious if it will work for you then just test a small piece to see how it reacts. Remember, if you want stainless steel to retain its corrosion resistance never use abrasives, wire wheels, buffing wheels, etc. that were previously used for non-stainless steel.
-
The passivation process helps protects the piece from rust. It removes iron from the surface of the piece and allows the chromium oxide layer to form. Although it is not a guarantee that rust cannot form, it significantly reduces the chance of rusting. It is stain-less, not stain-free after all.
-
What did you do in the shop today?
Buzzkill replied to Mark Ling's topic in Blacksmithing, General Discussion
Looks like a Norse minion blacksmith to me. -
He showed it running briefly around 1:09:40 in the video link given in his first post.
-
What did you do in the shop today?
Buzzkill replied to Mark Ling's topic in Blacksmithing, General Discussion
As far as I know thermal cycling on simple steels before quenching is always a good idea and will help shrink the grain size if done at successively lower temps each time. And yes, that is pretty coarse grain structure. As Jobtiel1 said, your steel temperature was too high when you quenched as well. Table salt melts really close to the correct temperature for quenching a lot of simple steels, so you can sprinkle some of that on your stock and watch for it to melt to know when to quench.