September 11, 20169 yr I finally gave up on propane forges and went to using coal. I built my first coal forge out of a cast iron pot and brake rotor. I have advanced my operation by creating this new forging table. I also built a power hammer. (I am going to figure out how to change out the hammer though, the current one seems to stretch very well, but not flatten and widen. Could be my lack of skills using it too.) My fabrication skills far exceed my blacksmithing skills though. But, I have fun. Here are some fun pics. Keep in mind, I am an extreme nube.
September 28, 20169 yr Nice looking stuff but does not your back hurt when the anvil is so low. If you make it possible to change the dies or whatever they are called in the power hammer you can get it to make different tricks.
September 30, 20169 yr Im jealous you've got a power hammer made ,I've been trying to get mine built for a while but family obligations ,and work keep me from it . Could you post more detailed Picts of it , I'm very interested in your design . Have fun making stuff!
October 23, 20169 yr Author On 9/28/2016 at 0:32 PM, gote said: Nice looking stuff but does not your back hurt when the anvil is so low. If you make it possible to change the dies or whatever they are called in the power hammer you can get it to make different tricks. Thanks for your comment. I am thinking on ways to incorporate changeable hammers and dies. That will be in Mod1. On 9/30/2016 at 6:34 PM, Lionel h said: Im jealous you've got a power hammer made ,I've been trying to get mine built for a while but family obligations ,and work keep me from it . Could you post more detailed Picts of it , I'm very interested in your design . Have fun making stuff! Well, I have a lot to learn. The original design had some flaws in it. I have some bad wear points that I am addressing and testing. Overall, it does work really good. I have drawn a railroad spike out to about 18". Working on a Kukri now. I will post some pics when I am done. Thanks for your comments.
October 23, 20169 yr Red heat looks good in a photo but needs to back into the fire. Try forging mild steel at high orange and yellow. Raise the height of the anvil face. Your back and your work will thank you.
October 23, 20169 yr It has been noted somewhere on this site or somewhere else, that when the old blacksmith texts, (or articles), refer to cherry red temperature they do not mean the color of today's commercial cherries. The commonly consumed cherries of the 1800's and then first few decades of the 1900's the cherries were a lot more yellowish. Cherry red, then, would be e more yellow-red color. It may make for a difference when forging by "eyeball", SLAG.
October 25, 20169 yr I mention it here on a regular basis. It's one of the "how things change with time" examples. Even words can mean different things a couple of centuries later---like "awful and artificial" High praise at one time!
October 25, 20169 yr Author On 10/23/2016 at 1:37 PM, arftist said: I would rewire the hammer as mod #1 House wire has no place on a powerhammer. I'm always willing to learn, but I don't quite understand your comment. The "House Wire" was removed from an industrial electric impact hammer. The wire is 12 ga which will fully support 30amp at 90deg, according to the NEC. Under load on my motor I am drawing 8 to 12 amps. I am not an electrician though. Comments welcome. On 10/23/2016 at 2:10 PM, Glenn said: Red heat looks good in a photo but needs to back into the fire. Try forging mild steel at high orange and yellow. Raise the height of the anvil face. Your back and your work will thank you. Great comment, Thanks for your advise. With my newly built forge I am using anthracite coal and having much better time controlling my heat. I did find out this past weekend, after forge welding a motorcycle chain together and making a nice block of metal that when I went to flatten it and draw it out I was getting cracks. Is that the heat issue? ...and mabee I will try the anvil at a higher level and see how that works for me. Thanks
October 26, 20169 yr On 2016-10-23 at 10:37 AM, arftist said: I would rewire the hammer as mod #1 House wire has no place on a powerhammer. Humm... What's the problem? Maybe hot bits would dislodge from the hot metal and melt the wire insulation (plastic covering). I think some form of metal covering would work really well for the power supply. What would you suggest? BX cable? EMT conduit? BTW, MFK, your fab looks great. I too think more pictures would be in order (for us who may wish to steal your ideas!) Best, David
October 26, 20169 yr Author On 10/25/2016 at 8:09 PM, DavidTodtman said: Humm... What's the problem? Maybe hot bits would dislodge from the hot metal and melt the wire insulation (plastic covering). I think some form of metal covering would work really well for the power supply. What would you suggest? BX cable? EMT conduit? BTW, MFK, your fab looks great. I too think more pictures would be in order (for us who may wish to steal your ideas!) Well, truth be told, the only thing I had to buy was the motor. In my business we decommission a lot of heavy steel and I am a fabricator by trade. So, This project was built for two reasons. 1. I need a good forging hammer 2. see if I could build it with scrap. ...and I did. There are many, many improvements I would make. So maybe we could look at if from that aspect. But I sure with a small investment of my own I could create something really to talk about. You know what I mean, buy some off the shelf stuff instead of fabbing it up myself from scratch. But thanks for you comments and critiques. They are most welcome.
October 26, 20169 yr The narrow top die is why it is good at stretching or drawing out. Try turning your work 90 degrees along the length of the die and see the difference.
October 29, 20169 yr I just built a hammer im getting alot of bounce i got it mounted to 4x4 and 3/4 plywood im wondering if you are getting bounce im thinking about putting anchor bolts into the floor how is your hammer mounted.
October 30, 20169 yr Author Some, but not to much. I mounted it to a 2" slab of steel, anchored to cement floor.
October 30, 20169 yr I tightened alot of things up tonight and it took alot of the bounce out a few more alterations it should be tamed lol im goin to anchor it to the floor as well.
October 31, 20169 yr On 10/25/2016 at 7:03 PM, mfkerr said: . The wire is 12 ga which will fully support 30amp at 90deg, according to the NEC. Not exactly. The 90 degree column is used for derating purposed only. Field installed #12 wire is not allowed to have overcurrent protection over 20 amps with a couple of exceptions regarding motor and compressor loads. It is not rated to carry 30 amps, no way, no how. Motors and compressors have high startup current for miliseconds.
November 1, 20169 yr No problem. For a nube your work looks really nice, I am a nube too and I would be embarrassed to put my work next to yours. What did you use to polish the end of that spike? How long did that piece take you to make?
November 1, 20169 yr It looks to me as if your forge would be much improved by adding a few firebricks to get a deeper fire! I started with one very similar myself! It makes a BIG difference when you get your metal a little hotter!
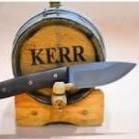
November 1, 20169 yr Author I have been polishing much longer than forging. But I would say the spike took about 1.5 hrs or so. This pic below is a modified version of a Kukri made from U-bolts from an 18 wheeler's axle. The tempering is excellent, though I didn't try to cut a nail with it. But I forgot to drill my holes befor the tempering and I melted the drill bit on the fourth hole. This was just a practice session so I didn't take a lot of time with the scales (Handles). They are from 3/4 oak plywood. a.jpg Next Project. Old square axle. I will put nice handles on this one. b.jpg
November 2, 20169 yr pics didn't show up. Did you polish the spike with a wheel and compound? I want to try polishing one of my crosses but they have square cuts and I wonder if the cloth wheel will grab them
November 5, 20169 yr Author On 11/2/2016 at 9:37 AM, bigb said: pics didn't show up. Did you polish the spike with a wheel and compound? I want to try polishing one of my crosses but they have square cuts and I wonder if the cloth wheel will grab them OK, think the pics will show up now. I have some progress on the square axle stock. The knife pictured next to the scales I plan to attached. Anyway, about the polishing. The first part of polishing is the "Grinding" or shaping of the rough hand beaten, sloppy hammer work, to remove dents and form the shape you couldn't get straight out of the forge. This is with a hand mini side grinder with grinding wheel. 2. Next is mini side grinder with 60 or 80 grit discs. 3. then 100 or 150 disc on the side grinder 4. some times I will use my belt sander with various belts, but my belt sander is a real piece of SHAT. (China, small, no power) 5. I have quick replace sanding disc which I use in my drill, grits from 80 to 2000 (They work great) 6. Polishing wheel on bench grinder, first white compound then red. Sometimes the polishing takes longer to do than shaping the blade from "Raw" materials. To achieve the mirror finish on the small but of the spike probably took 1/2 hour. To get the same finish on a blade, ugh..., 3 or 4 hours maybe longer depending on hardness of blade. Talking about a "Flawless" mirror finish. Here is a custom handle I made. (Not the blade, it is an Ebay bought blank, I'm not that good yet...) It was a crazy idea. I think it is a beautiful show piece, but I know it is not durable. The "Jake 2016" my custom hand made laminated wood and sheath. Again, I didn't forge the blade. Ebay did it for me. But the handle is solid on this one. The last one is just a little ol ugly RR spike and a rough @ss sheath I tried to "age" but that didn't work out to well. (Oak plywood handle)
November 5, 20169 yr Author On 10/31/2016 at 11:09 PM, bigb said: No problem. For a nube your work looks really nice, I am a nube too and I would be embarrassed to put my work next to yours. What did you use to polish the end of that spike? How long did that piece take you to make? You are very kind with your words. I have been a "metal" craftsman for my entire adult life. I seam to have a passion for "Bladesmithing". I've never had instructions or training. Back before U-tube it was all trial and error and a few tips from my pops. Now with the internet I can read and watch instructional videos and get good feed back in forums like this one. I have made "File" blades as far back as 14 years old, but my real interest has developed into forging over the past several years. I do have the confidence to think I could atleast get through the first cut on "Forged in Fire", Ha, Ha,...maybe.
November 11, 20169 yr mfkerr, The electrical system location on your power hammer would fall under the heading of "subject to severe physical damage" in the National Electric Code. I would recommend that all electrical attached to your power hammer be done in intermediate metal conduit (IMC) or rigid metal conduit (RMC). 99% of the time electricians refer to "rigid" they're actually talking about IMC. IMC is threaded like gas pipe. Junction boxes for IMC are made of malleable iron. It's expensive but it won't result in an electrical hazard when something hot and heavy inevitably strikes it. There's a big-time difference between what's passable for a UL listing, and what the NEC requires. Piddly little wires run through sheet metal openings are common on UL listed devices, but that would never fly for an electrician who's responsible for building electrical systems that aren't tested in a laboratory. The NEC was created so insurance companies would have uniform standards to deny fire damage claims. Insurance adjusters have successfully denied claims by identifying unrelated code violations. Something as simple as an unlisted light fixture can mean the difference between rebuilding your life, and living in rubble.
Join the conversation
You can post now and register later. If you have an account, sign in now to post with your account.