mfkerr
Members
-
Joined
-
Last visited
Everything posted by mfkerr
-
I have a dual burner Fucina. It works well enough. I can forge weld. I can make small pieces of 1095 / 15N20 pattern welded steel billets. (Could make them larger if I had a power hammer). Over all. Nice forge. I block both sides with fire brick to help heat up the larger stuff. It is a nice forge and value for the money I spent. Once heated...the stainless doesn't look anything like stainless... It doesn't stay shiny. I think I would prefer forge with thicker steel walls.
-
I'll buy it and be the guinea pig. It's a small investment to find out if this "Off The Shelf" product is worth it. Dual burner on order. The bad part. Don't expect any customer service. The forge ships out of Cyprus, yea, Cyprus the country in the Med. Downfall, shipping is one month. Not very good for the impulse buyer!!
-
Yes I did. I is a nice machine. I haven't been back on here since I got cooled down for some time by the moderator. I promised an "Un-Biased" review, but have been skeptical about posting. I have made many knives since the acquisition of the machine and am satisfied with it. Regards... Mark
-
Very thoughtful, thank you for your comments. My intentions were not to come off abrasive. It did seem as though I stirred the pot. As a craftsman myself, I understand and respect those who have more knowledge and experience than I. It just seemed like a bashing. I will be more thoughtful and try not to read to deep into comments. I will research the brands you mentioned before I make a decision. Thanks. Well aren't you a sweetheart.
-
I would be delighted if you could direct me to a half price machine with the same capabilities. Maybe I could avoid a purchasing mistake. I will be much appreciated.
-
Actually Professor, my question was a "Yes or No" question. I don't recall asking for advice, rather than looking for product information. But instead of anybody that actually had knowledge of the machine, the posting just got blasted with negative comments.
-
Welcome to the international "Hate Train". Thanks for all of the negative comments!! Can there be anything positive here about this completely sub-standard machine which just happens to be affordably priced. Well, tell ya what. I'm going to be the self appointed "Guinea Pig" and buy the machine. I will give a very detailed unbiased report on it once I have it. The "Funny Named" company I will admit was somewhat of a Kill Joy!! ***beautysupplyworld***, What the heck...
-
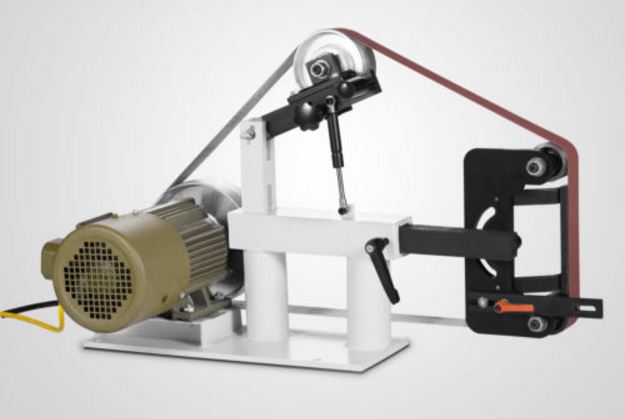
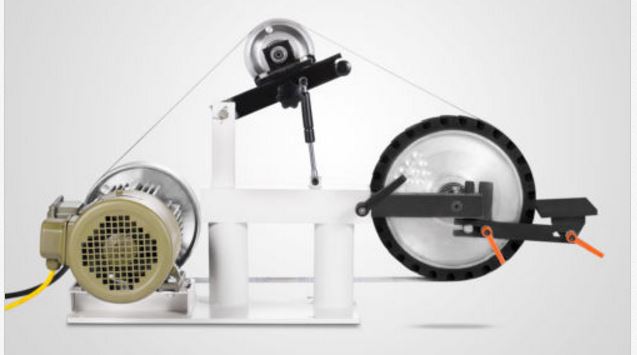
I am looking at this belt grinder on ebay and am wondering if anybody here has bought one or knows about them? link removed PH 427 X 12" Wheel & Flat Platen Tool Rest 2 Hp 110 Volt Belt Grinder 2" X 82" Grinder Variable Speed Package Content 1 × 1.5kw Electric Machinery With All Copper Wire 1 × 2.2kw Vector Transducer From RILIPU 1 × Toothed Rubber Wheel And Independent Movable Rod 1 × Flat Grinding Rack With Independent Movable Rod 1 × Concare Grinding Rack With Independent Movable Rod 2 × Concare Grinding Wheel
-
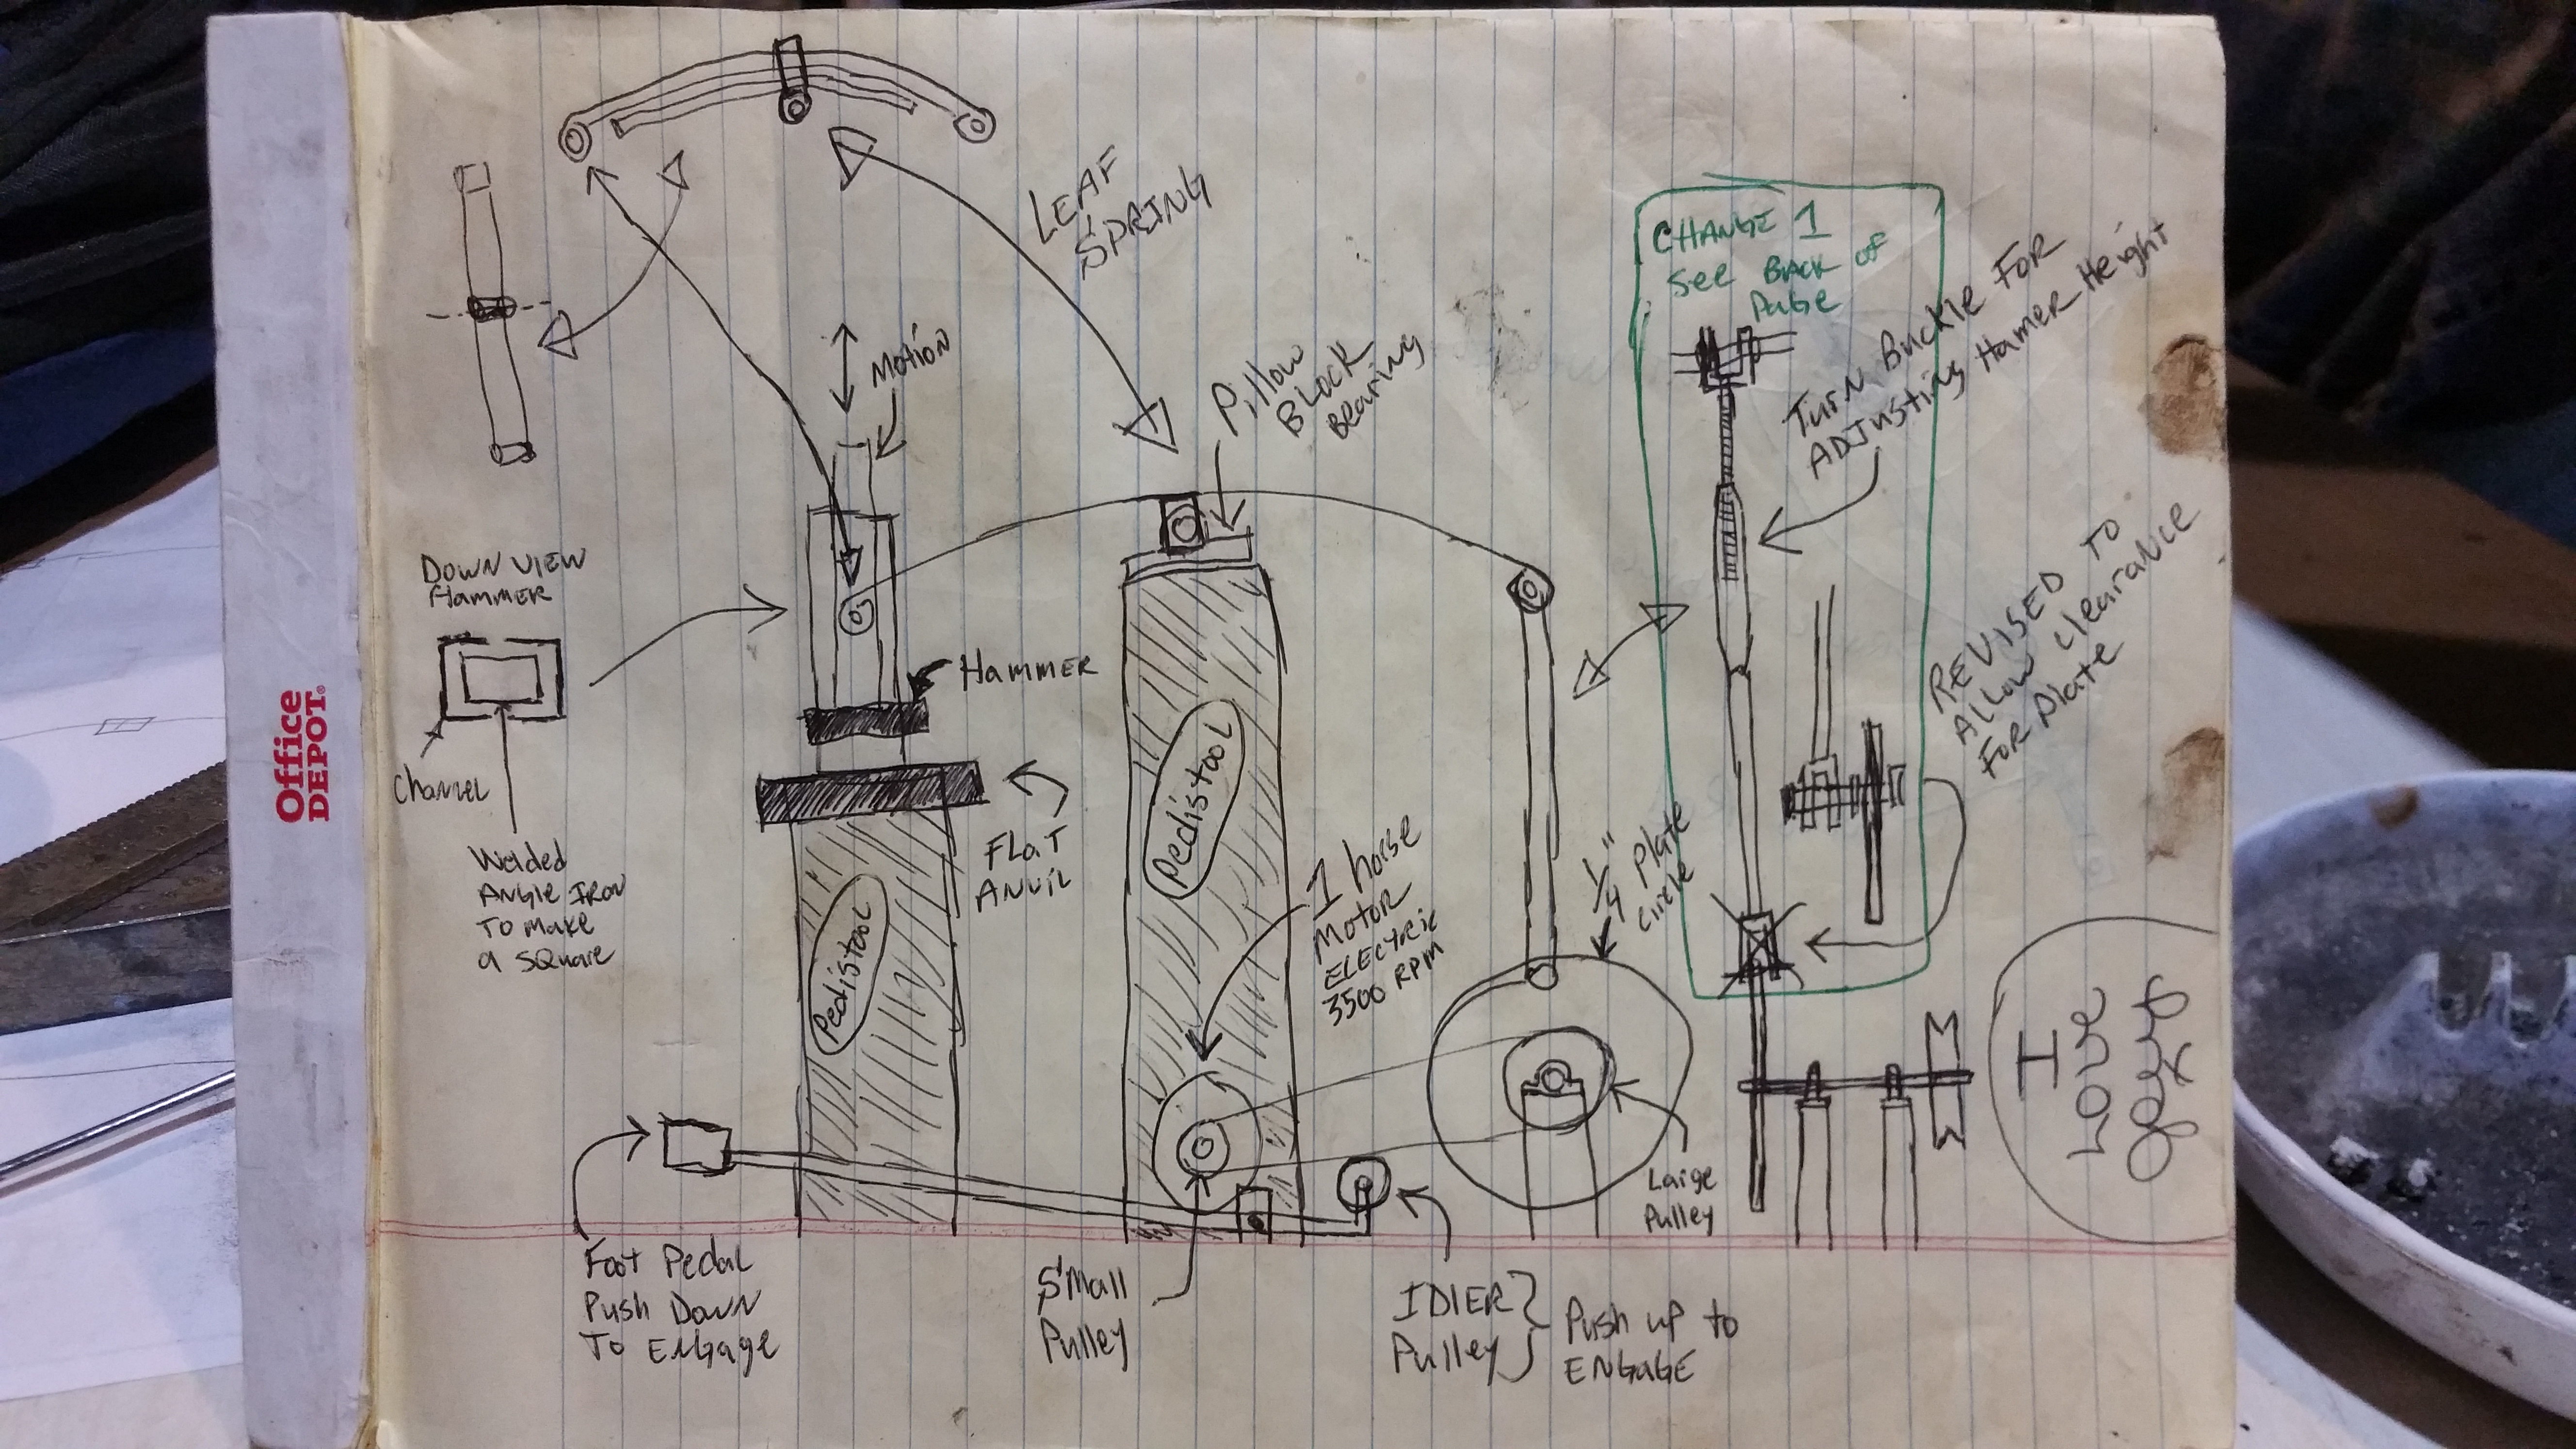
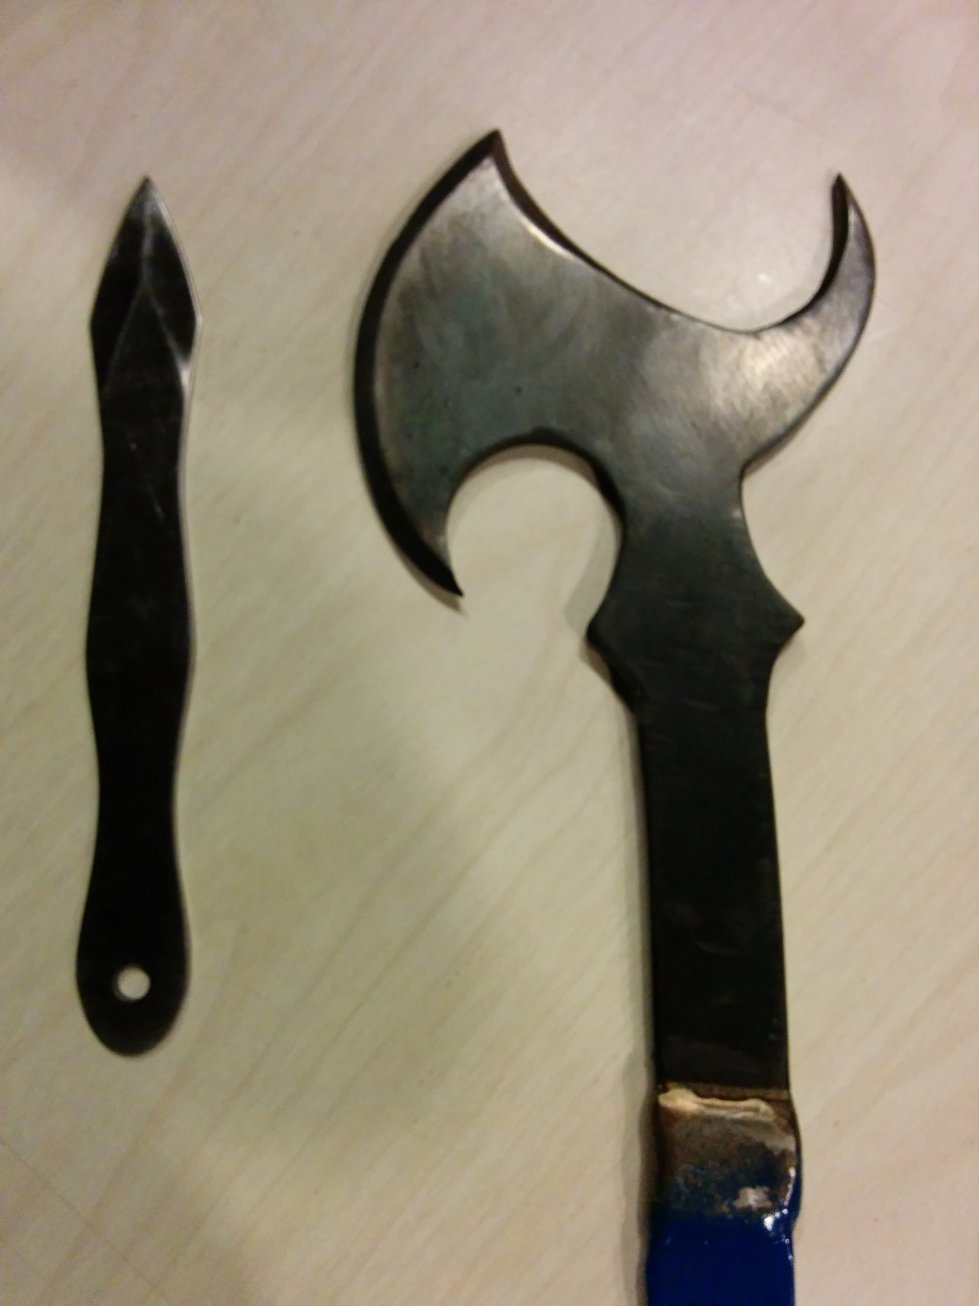
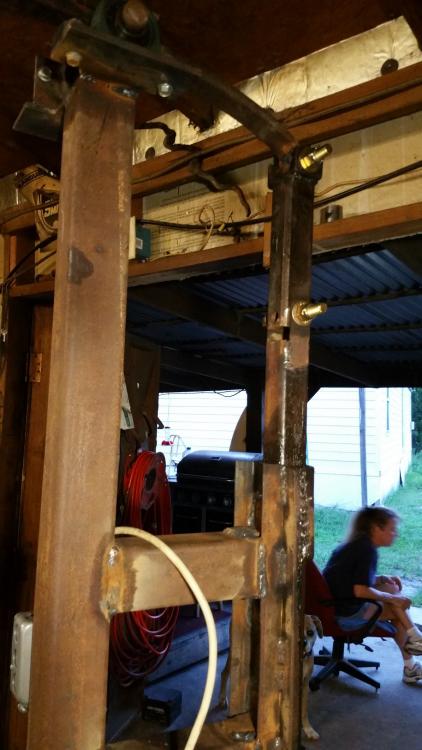
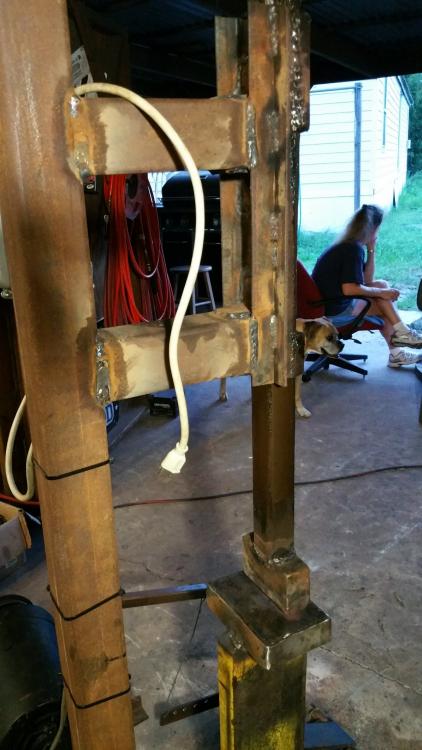
Here is my original design. Probably drew months before building. I used it as a guide mainly to keep me focused on the end goal. As you can see it in reality, it is conceptually similar.

-
An honest and modest fellow. I commend you. That is such a great quote. I love it!!!
-
Do you have a basic design you could post. I made a hammer and I have a lot of lessons learned I could pass on to you if your design is anyway similar to mine. Here is the link to some pics, hammer pics are about half way down in this long post. Feel free to give me some pointers as well. http://www.iforgeiron.com/topic/47990-kerrs-forge/
-
You are very kind with your words. I have been a "metal" craftsman for my entire adult life. I seam to have a passion for "Bladesmithing". I've never had instructions or training. Back before U-tube it was all trial and error and a few tips from my pops. Now with the internet I can read and watch instructional videos and get good feed back in forums like this one. I have made "File" blades as far back as 14 years old, but my real interest has developed into forging over the past several years. I do have the confidence to think I could atleast get through the first cut on "Forged in Fire", Ha, Ha,...maybe.
-
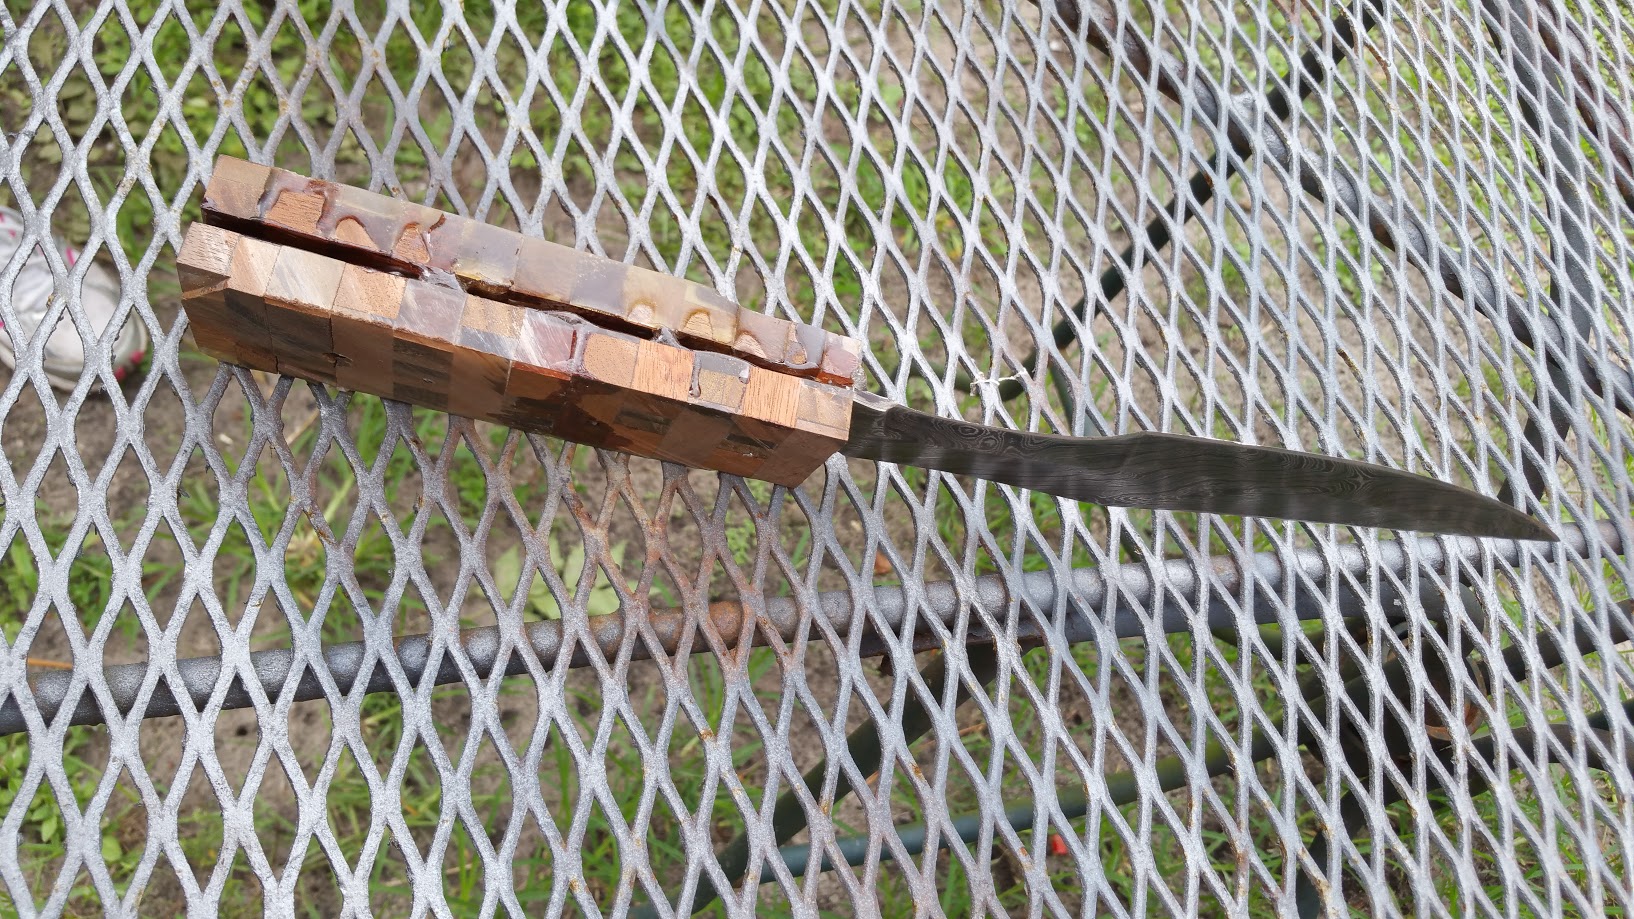
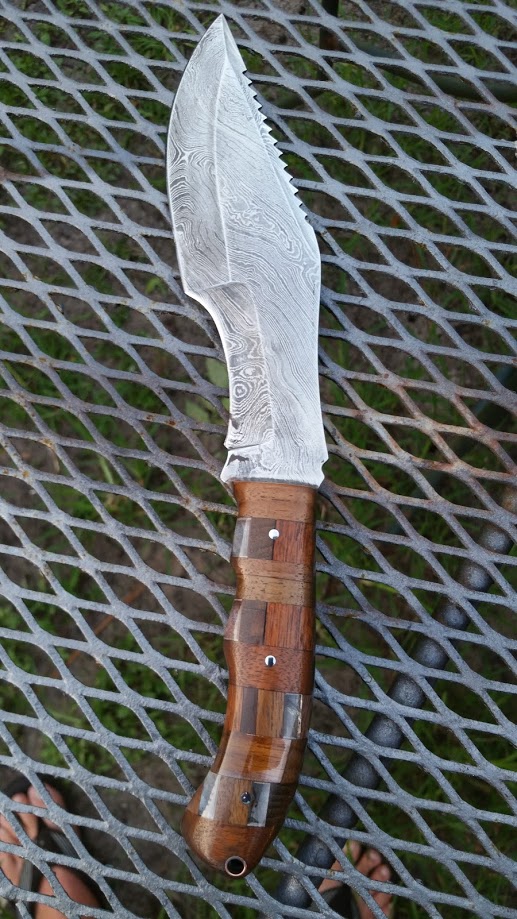
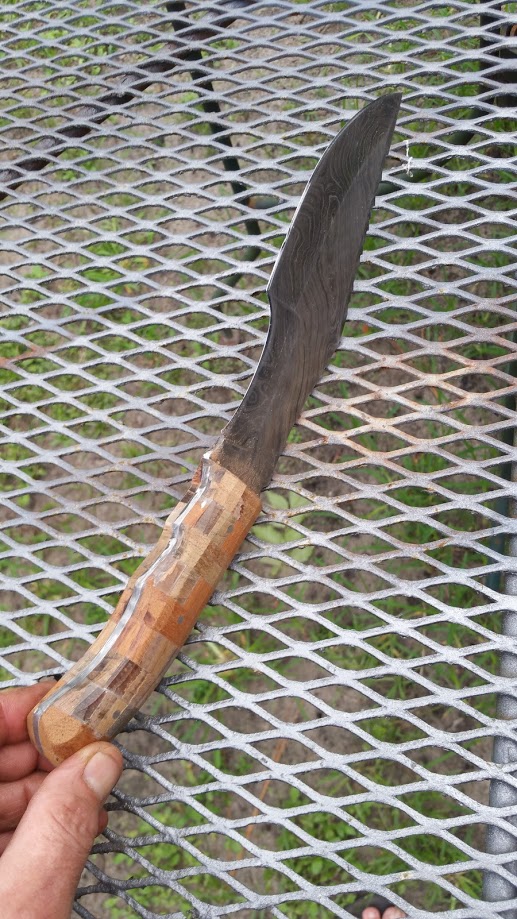
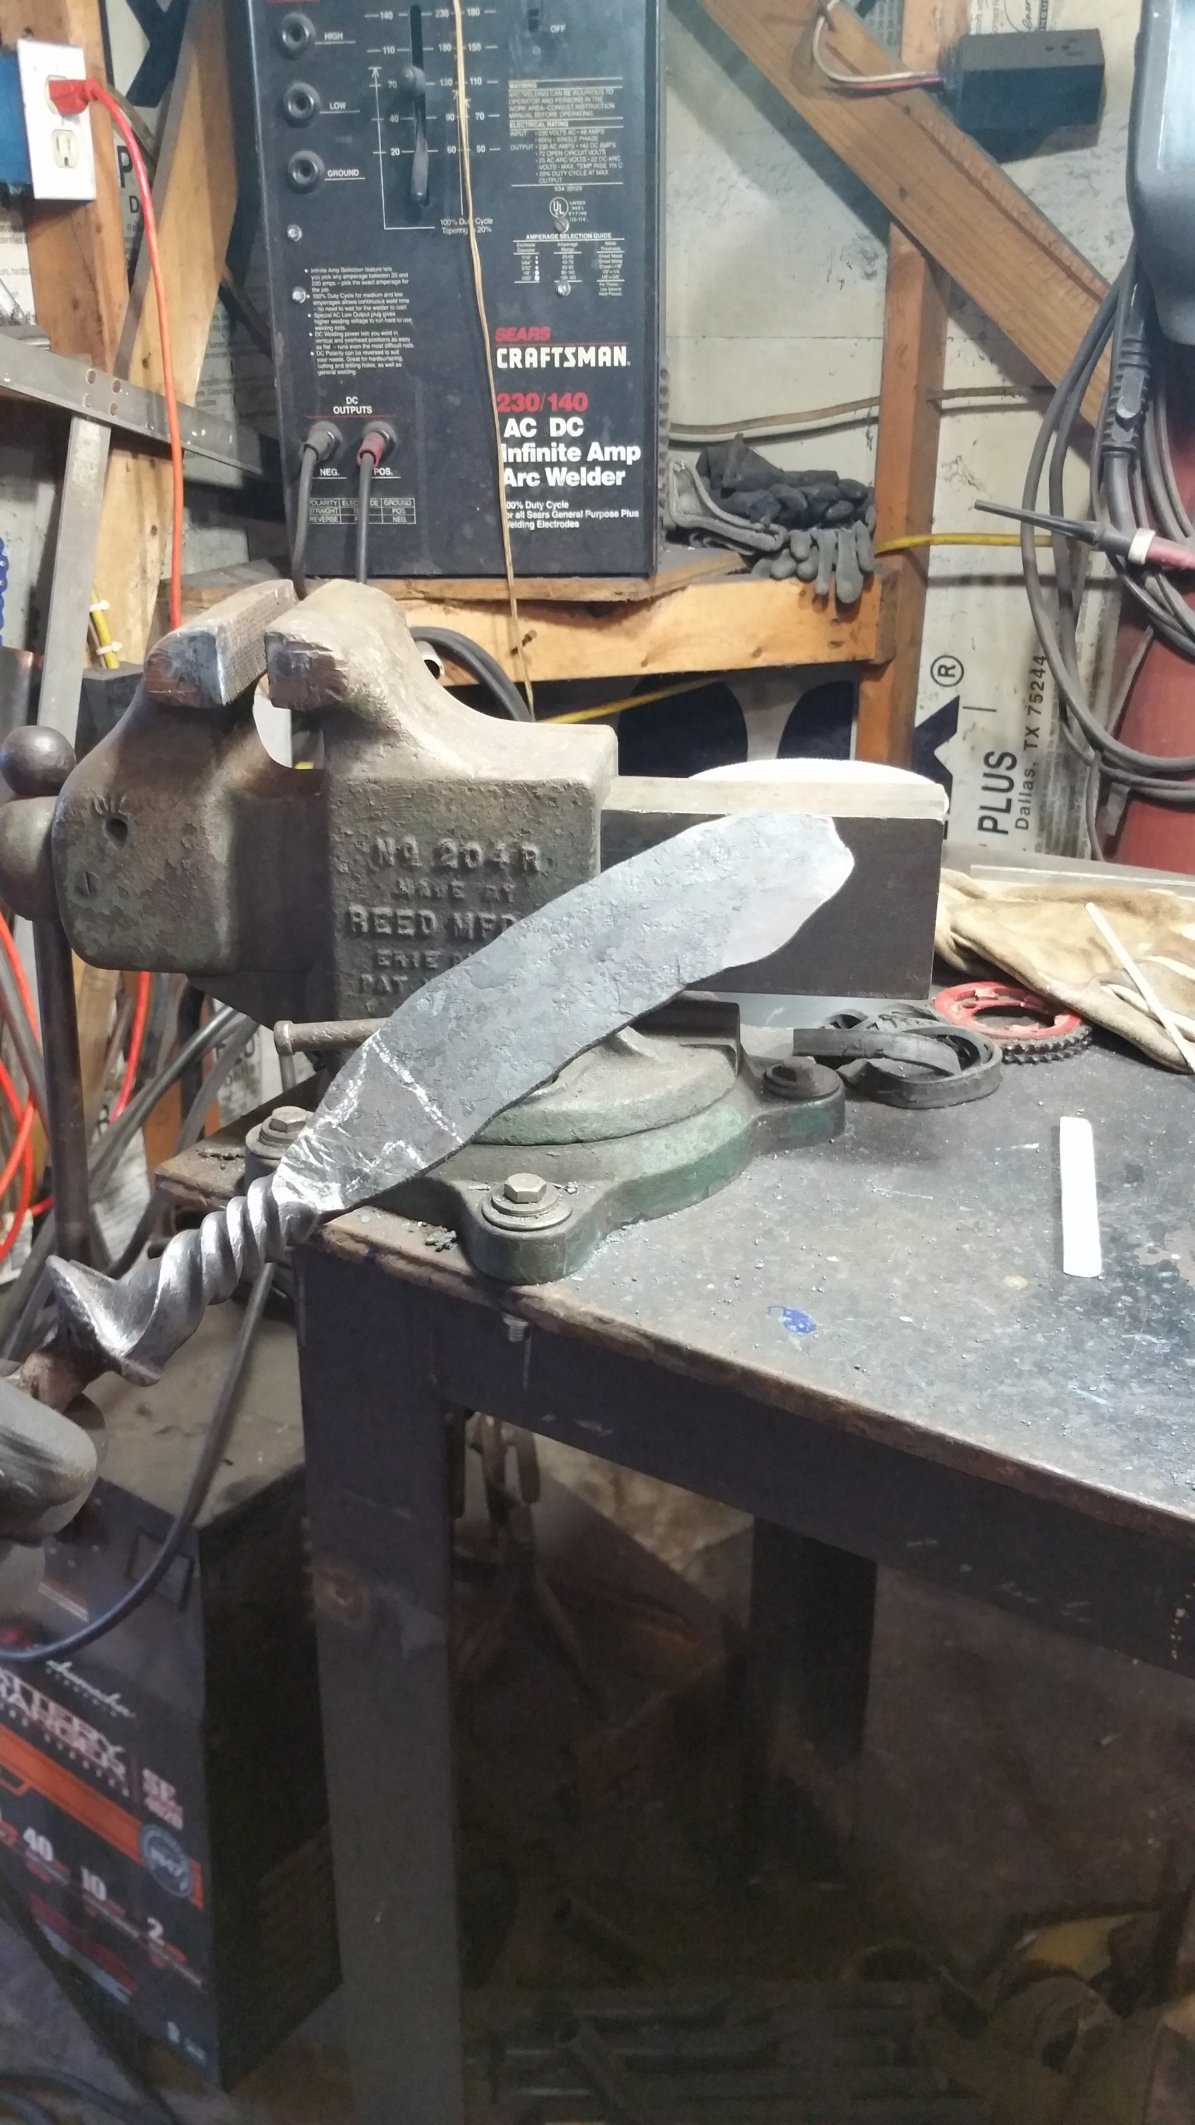
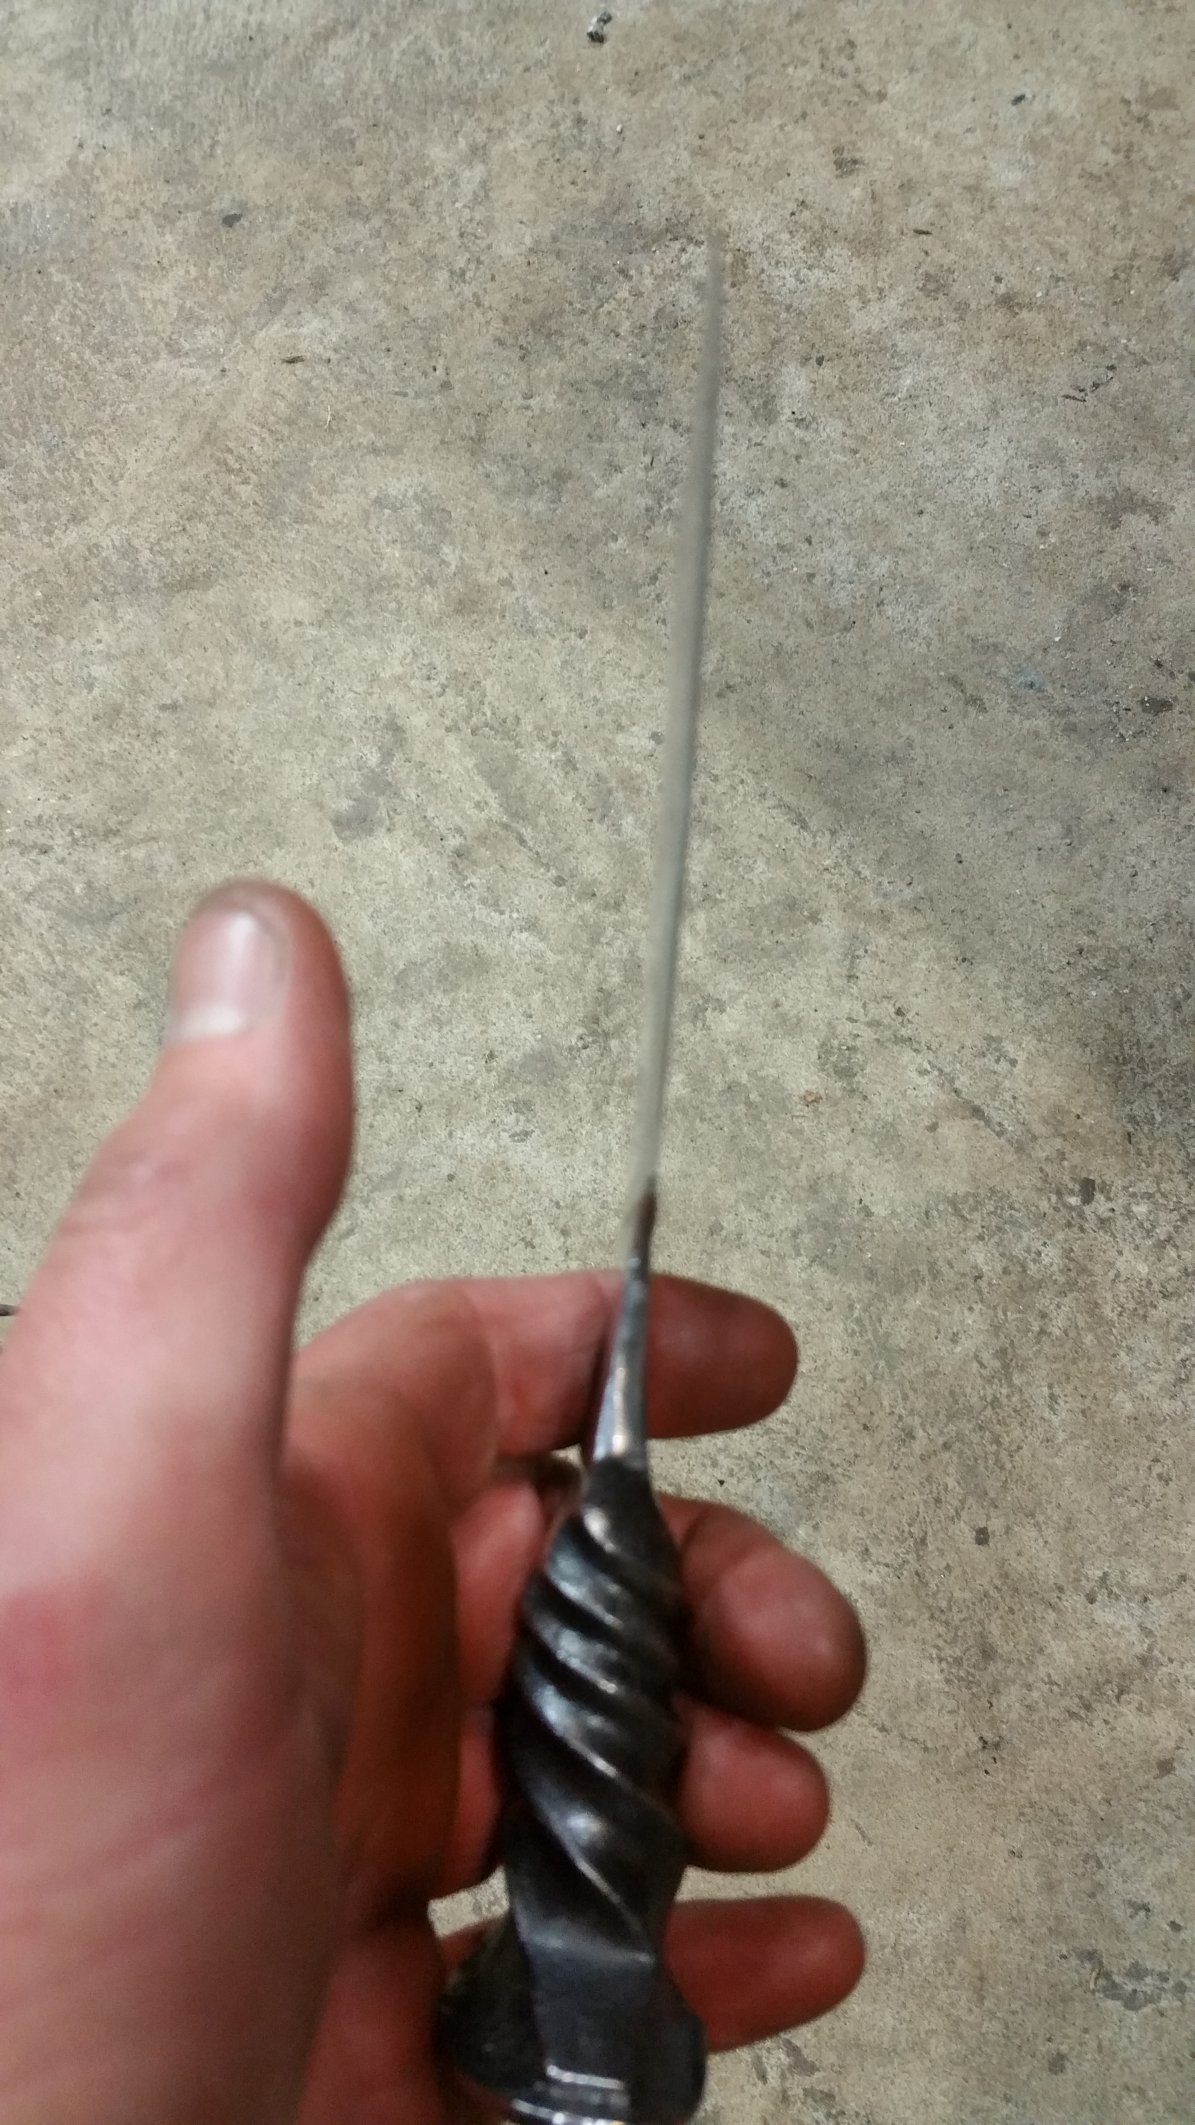
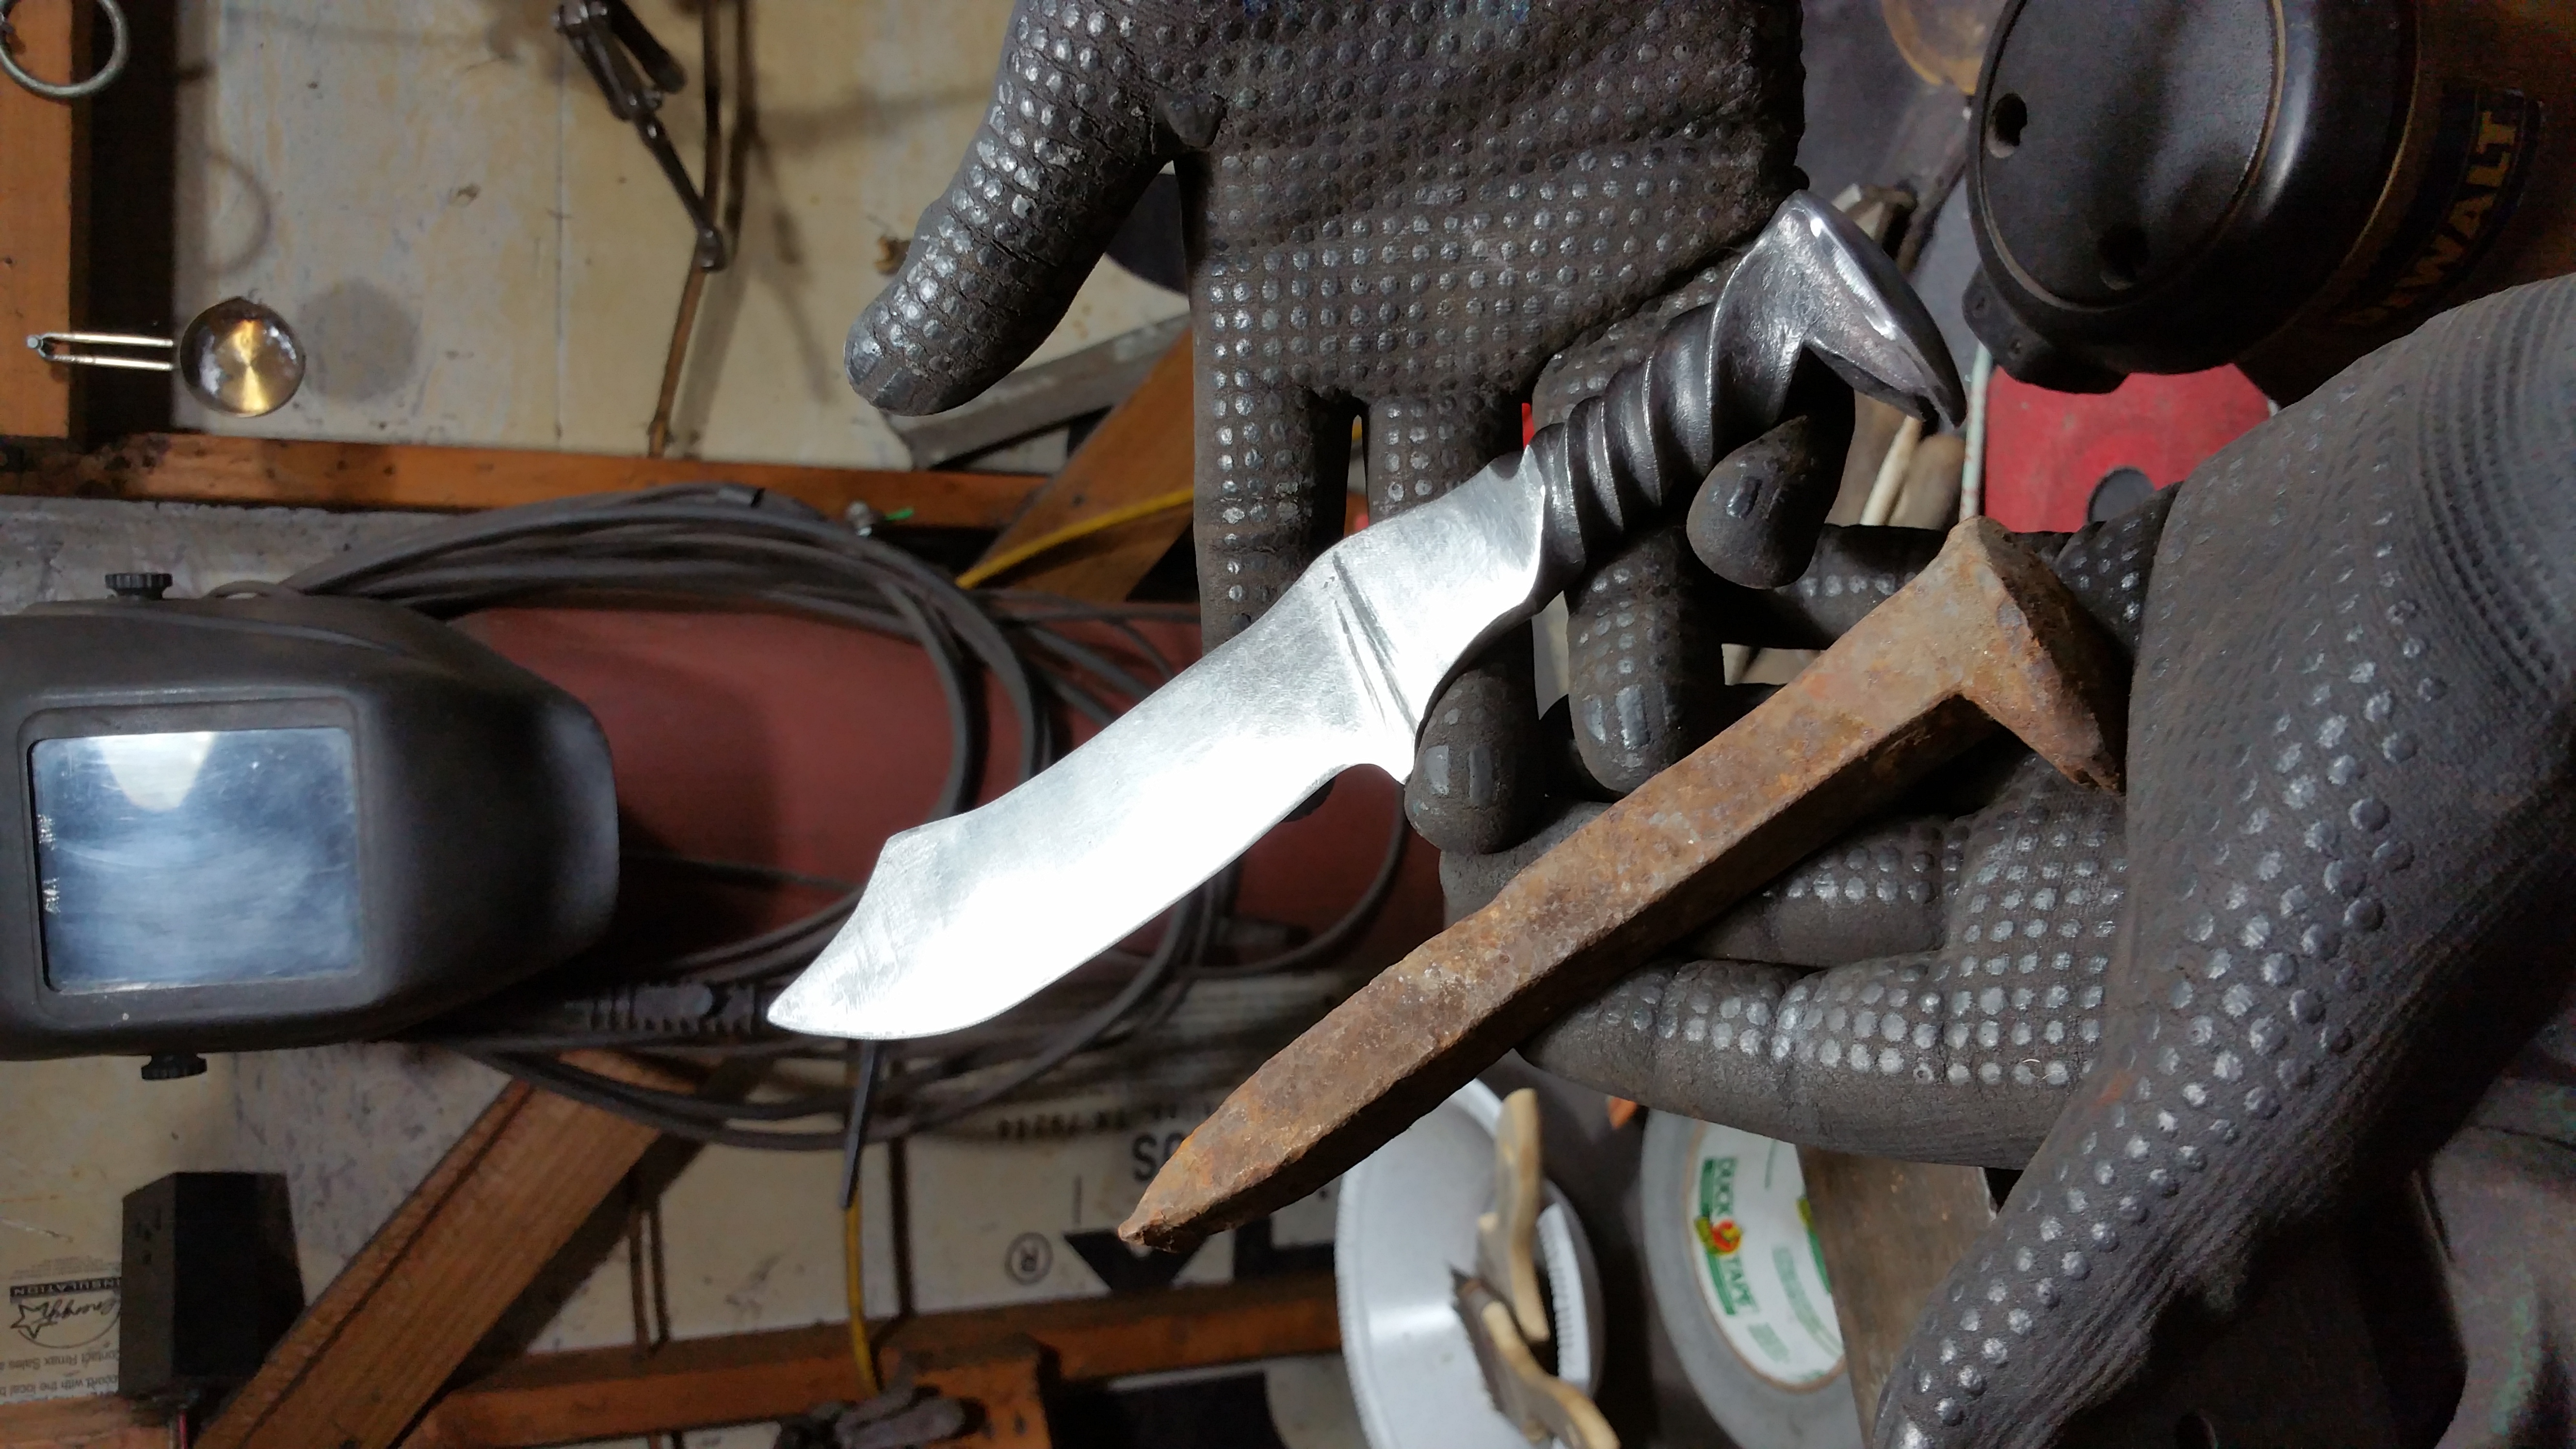
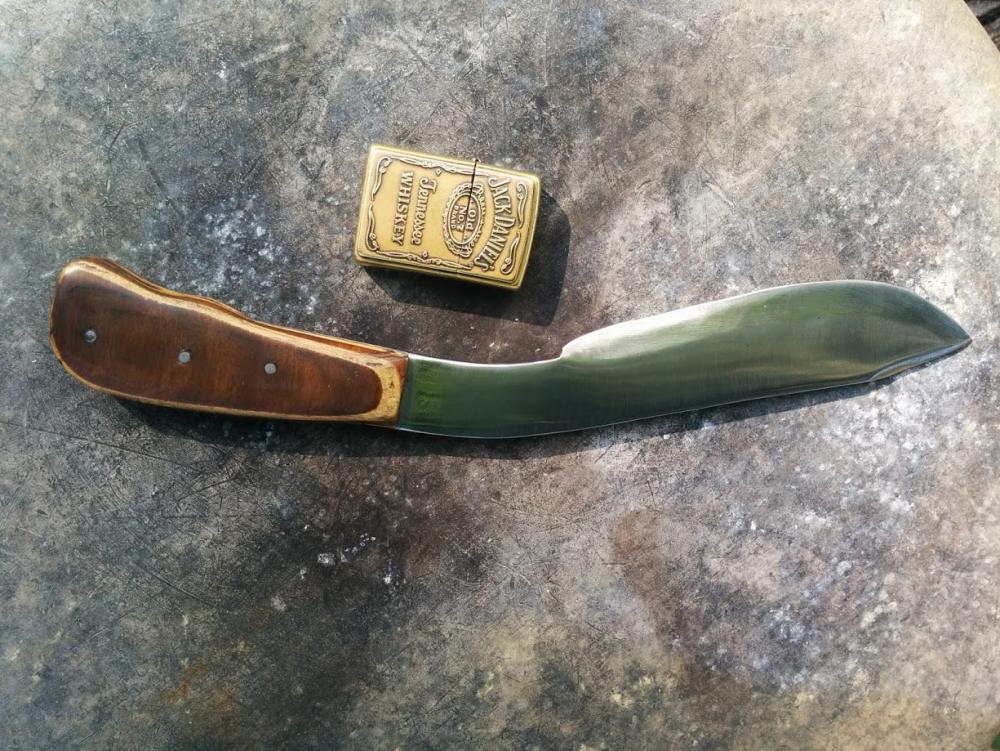
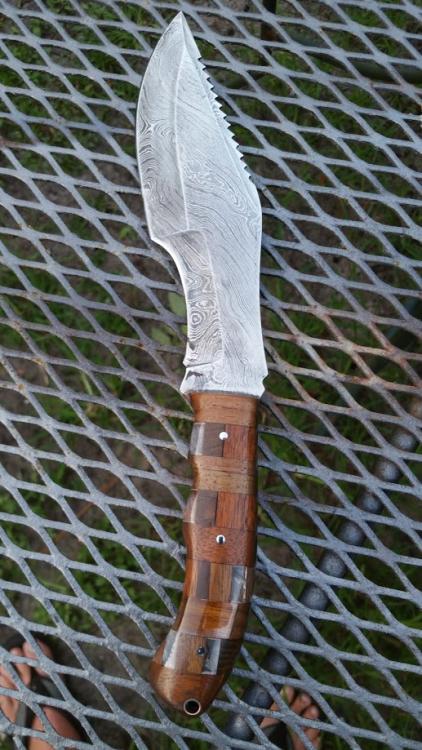
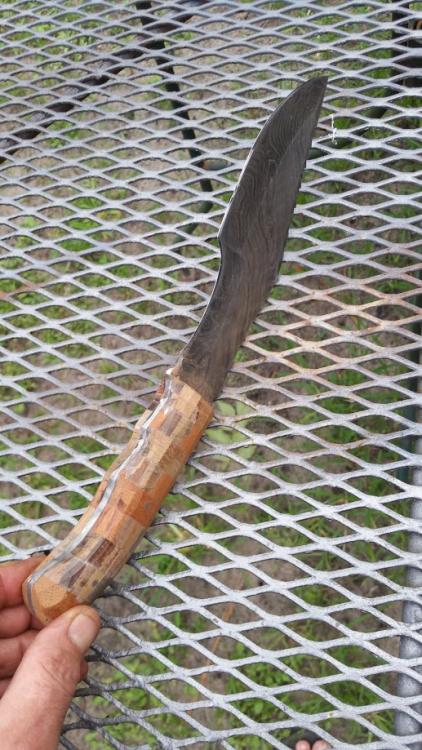
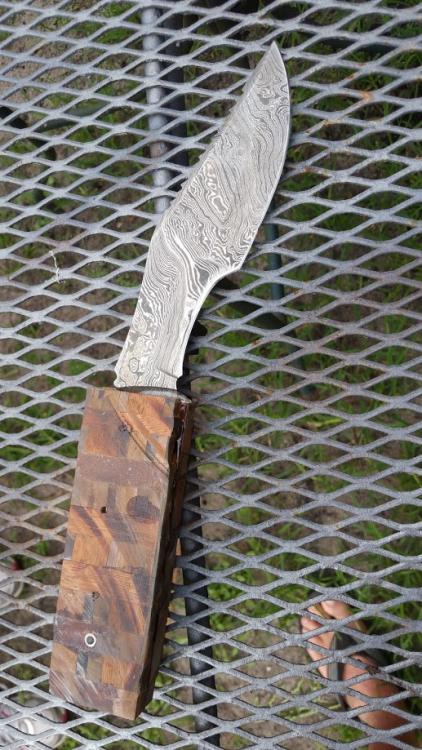
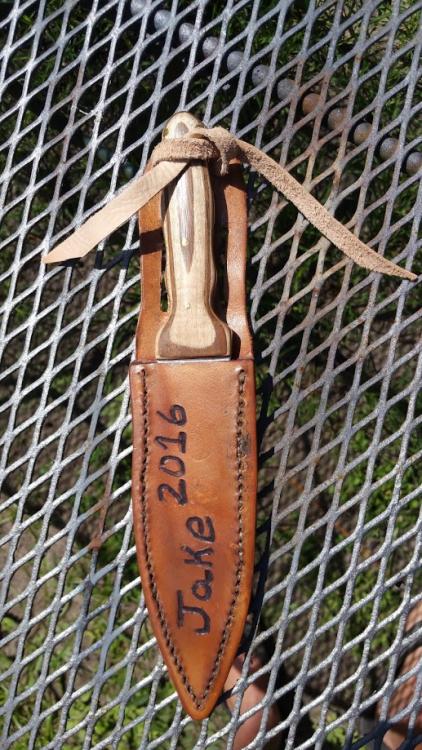
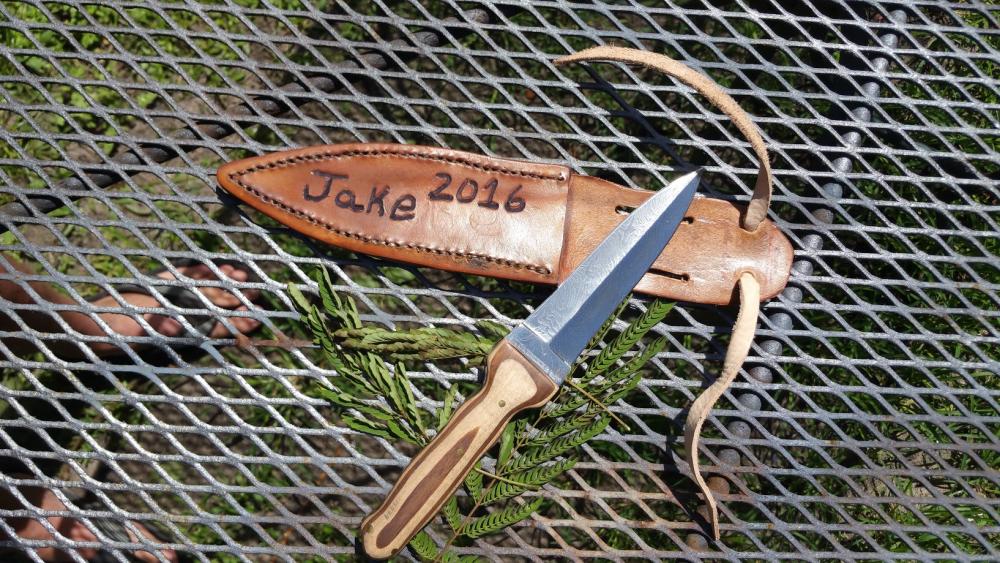
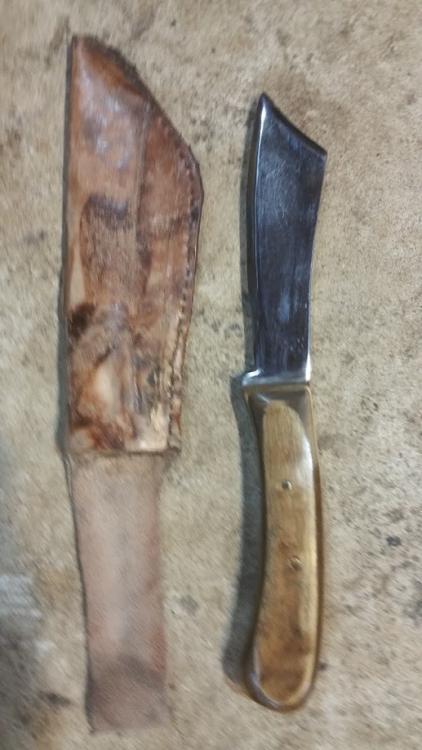
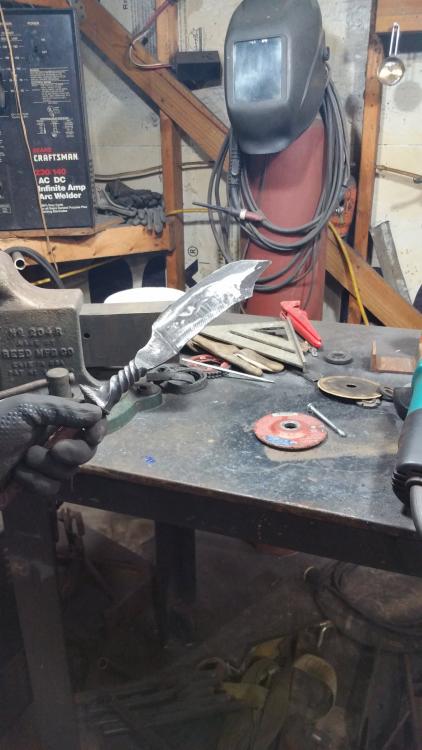
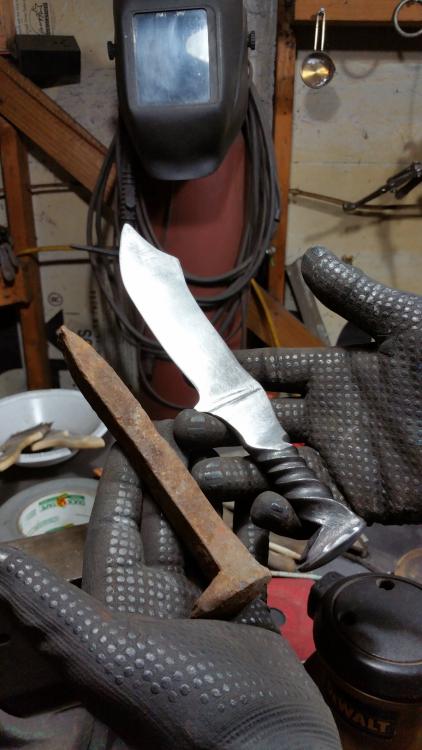
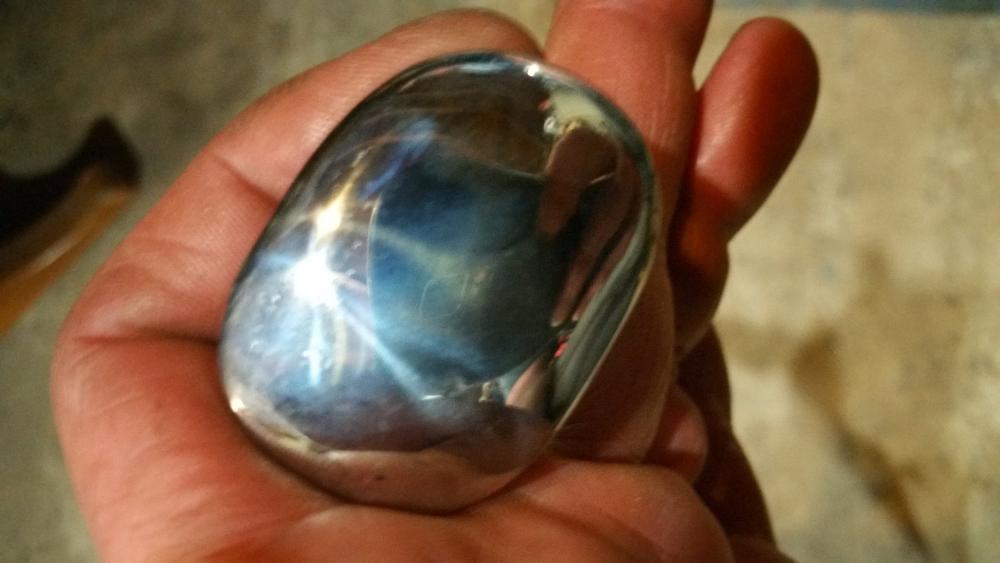
OK, think the pics will show up now. I have some progress on the square axle stock. The knife pictured next to the scales I plan to attached. Anyway, about the polishing. The first part of polishing is the "Grinding" or shaping of the rough hand beaten, sloppy hammer work, to remove dents and form the shape you couldn't get straight out of the forge. This is with a hand mini side grinder with grinding wheel. 2. Next is mini side grinder with 60 or 80 grit discs. 3. then 100 or 150 disc on the side grinder 4. some times I will use my belt sander with various belts, but my belt sander is a real piece of SHAT. (China, small, no power) 5. I have quick replace sanding disc which I use in my drill, grits from 80 to 2000 (They work great) 6. Polishing wheel on bench grinder, first white compound then red. Sometimes the polishing takes longer to do than shaping the blade from "Raw" materials. To achieve the mirror finish on the small but of the spike probably took 1/2 hour. To get the same finish on a blade, ugh..., 3 or 4 hours maybe longer depending on hardness of blade. Talking about a "Flawless" mirror finish. Here is a custom handle I made. (Not the blade, it is an Ebay bought blank, I'm not that good yet...) It was a crazy idea. I think it is a beautiful show piece, but I know it is not durable. The "Jake 2016" my custom hand made laminated wood and sheath. Again, I didn't forge the blade. Ebay did it for me. But the handle is solid on this one. The last one is just a little ol ugly RR spike and a rough @ss sheath I tried to "age" but that didn't work out to well. (Oak plywood handle)


-
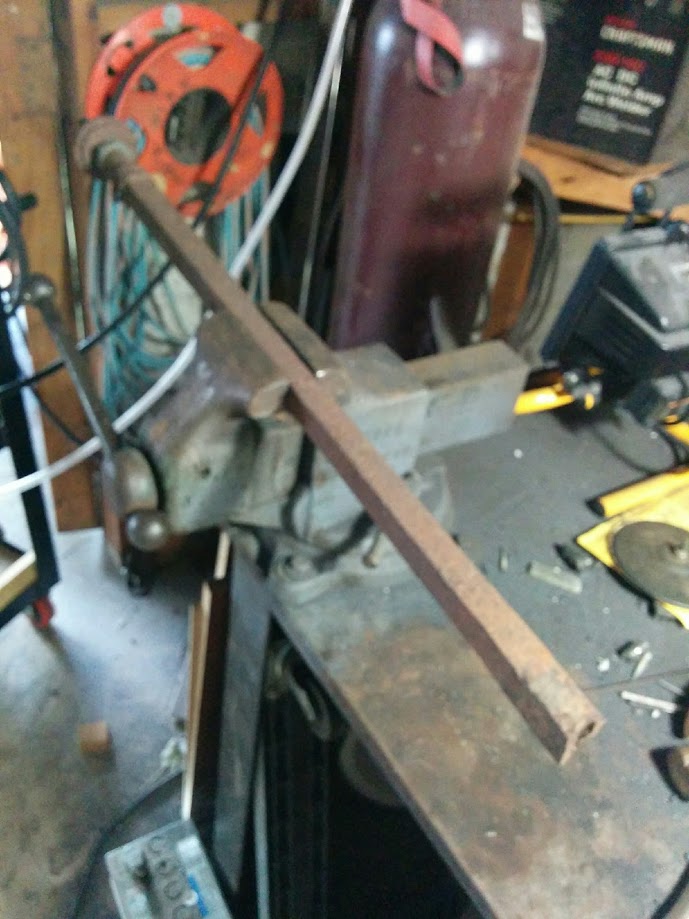
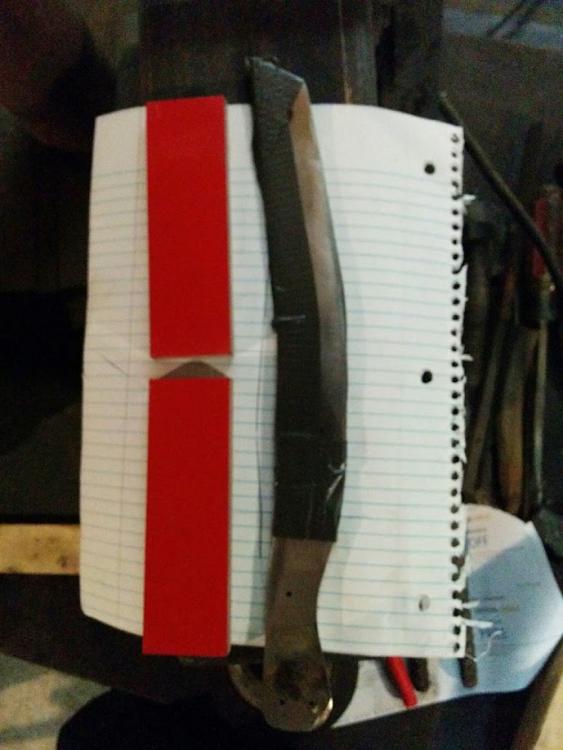
I have been polishing much longer than forging. But I would say the spike took about 1.5 hrs or so. This pic below is a modified version of a Kukri made from U-bolts from an 18 wheeler's axle. The tempering is excellent, though I didn't try to cut a nail with it. But I forgot to drill my holes befor the tempering and I melted the drill bit on the fourth hole. This was just a practice session so I didn't take a lot of time with the scales (Handles). They are from 3/4 oak plywood. a.jpg Next Project. Old square axle. I will put nice handles on this one. b.jpg
-
Thanks Bigb for the clarification.
-
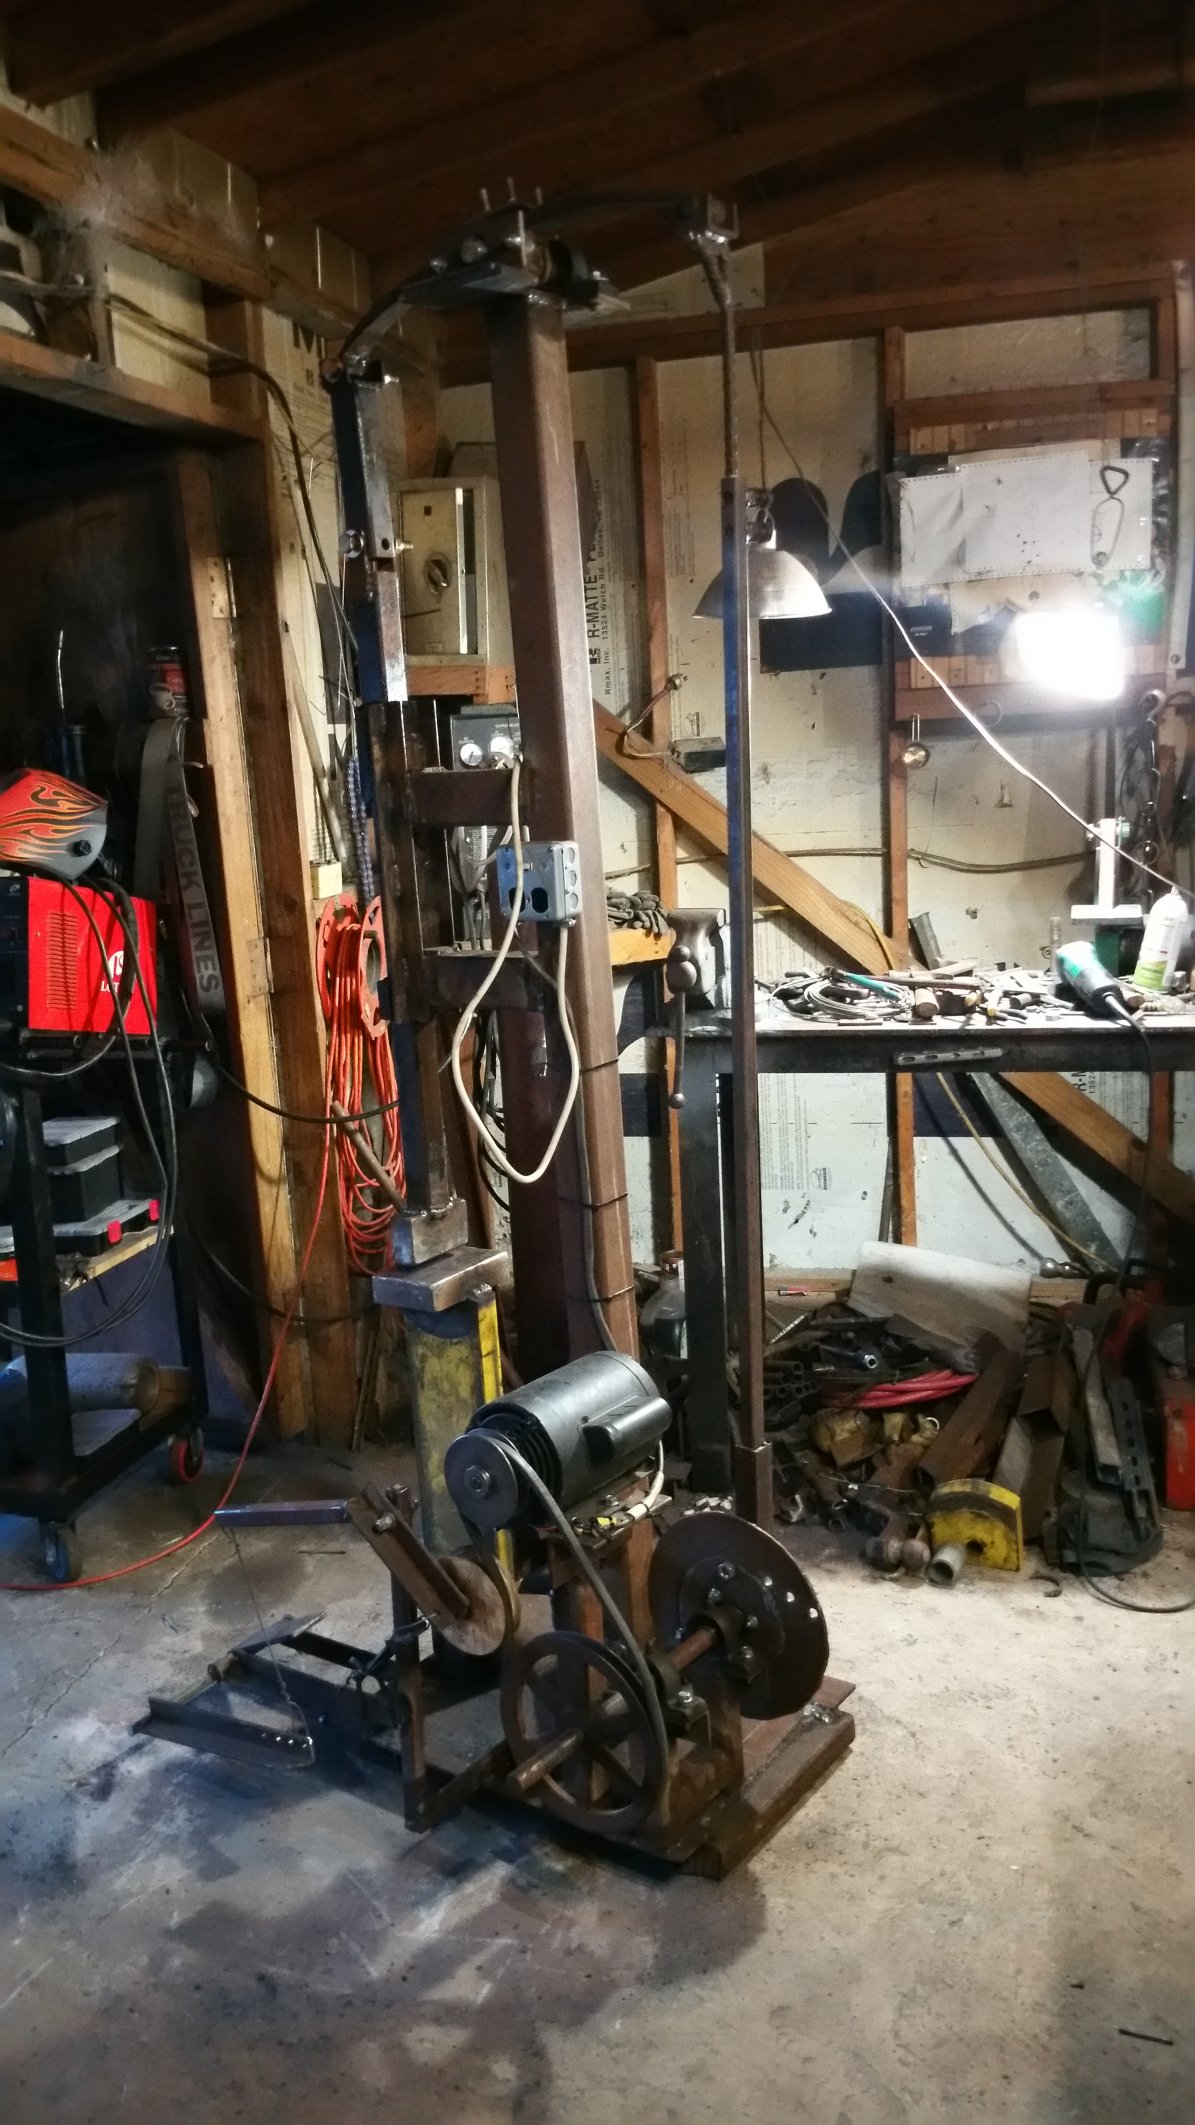
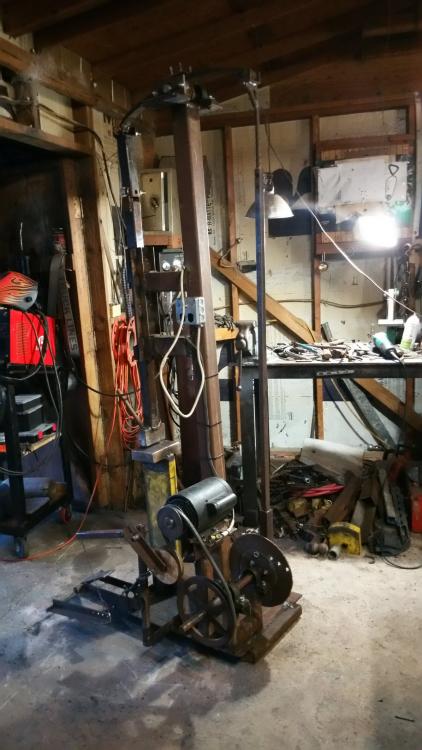
Some, but not to much. I mounted it to a 2" slab of steel, anchored to cement floor.
-
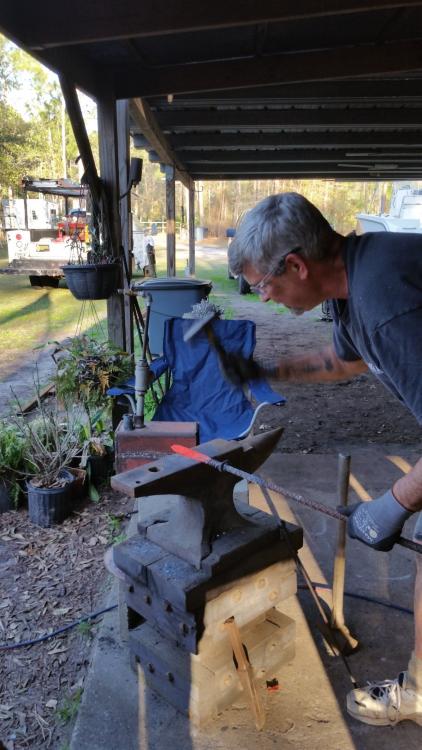
Well, truth be told, the only thing I had to buy was the motor. In my business we decommission a lot of heavy steel and I am a fabricator by trade. So, This project was built for two reasons. 1. I need a good forging hammer 2. see if I could build it with scrap. ...and I did. There are many, many improvements I would make. So maybe we could look at if from that aspect. But I sure with a small investment of my own I could create something really to talk about. You know what I mean, buy some off the shelf stuff instead of fabbing it up myself from scratch. But thanks for you comments and critiques. They are most welcome.
-
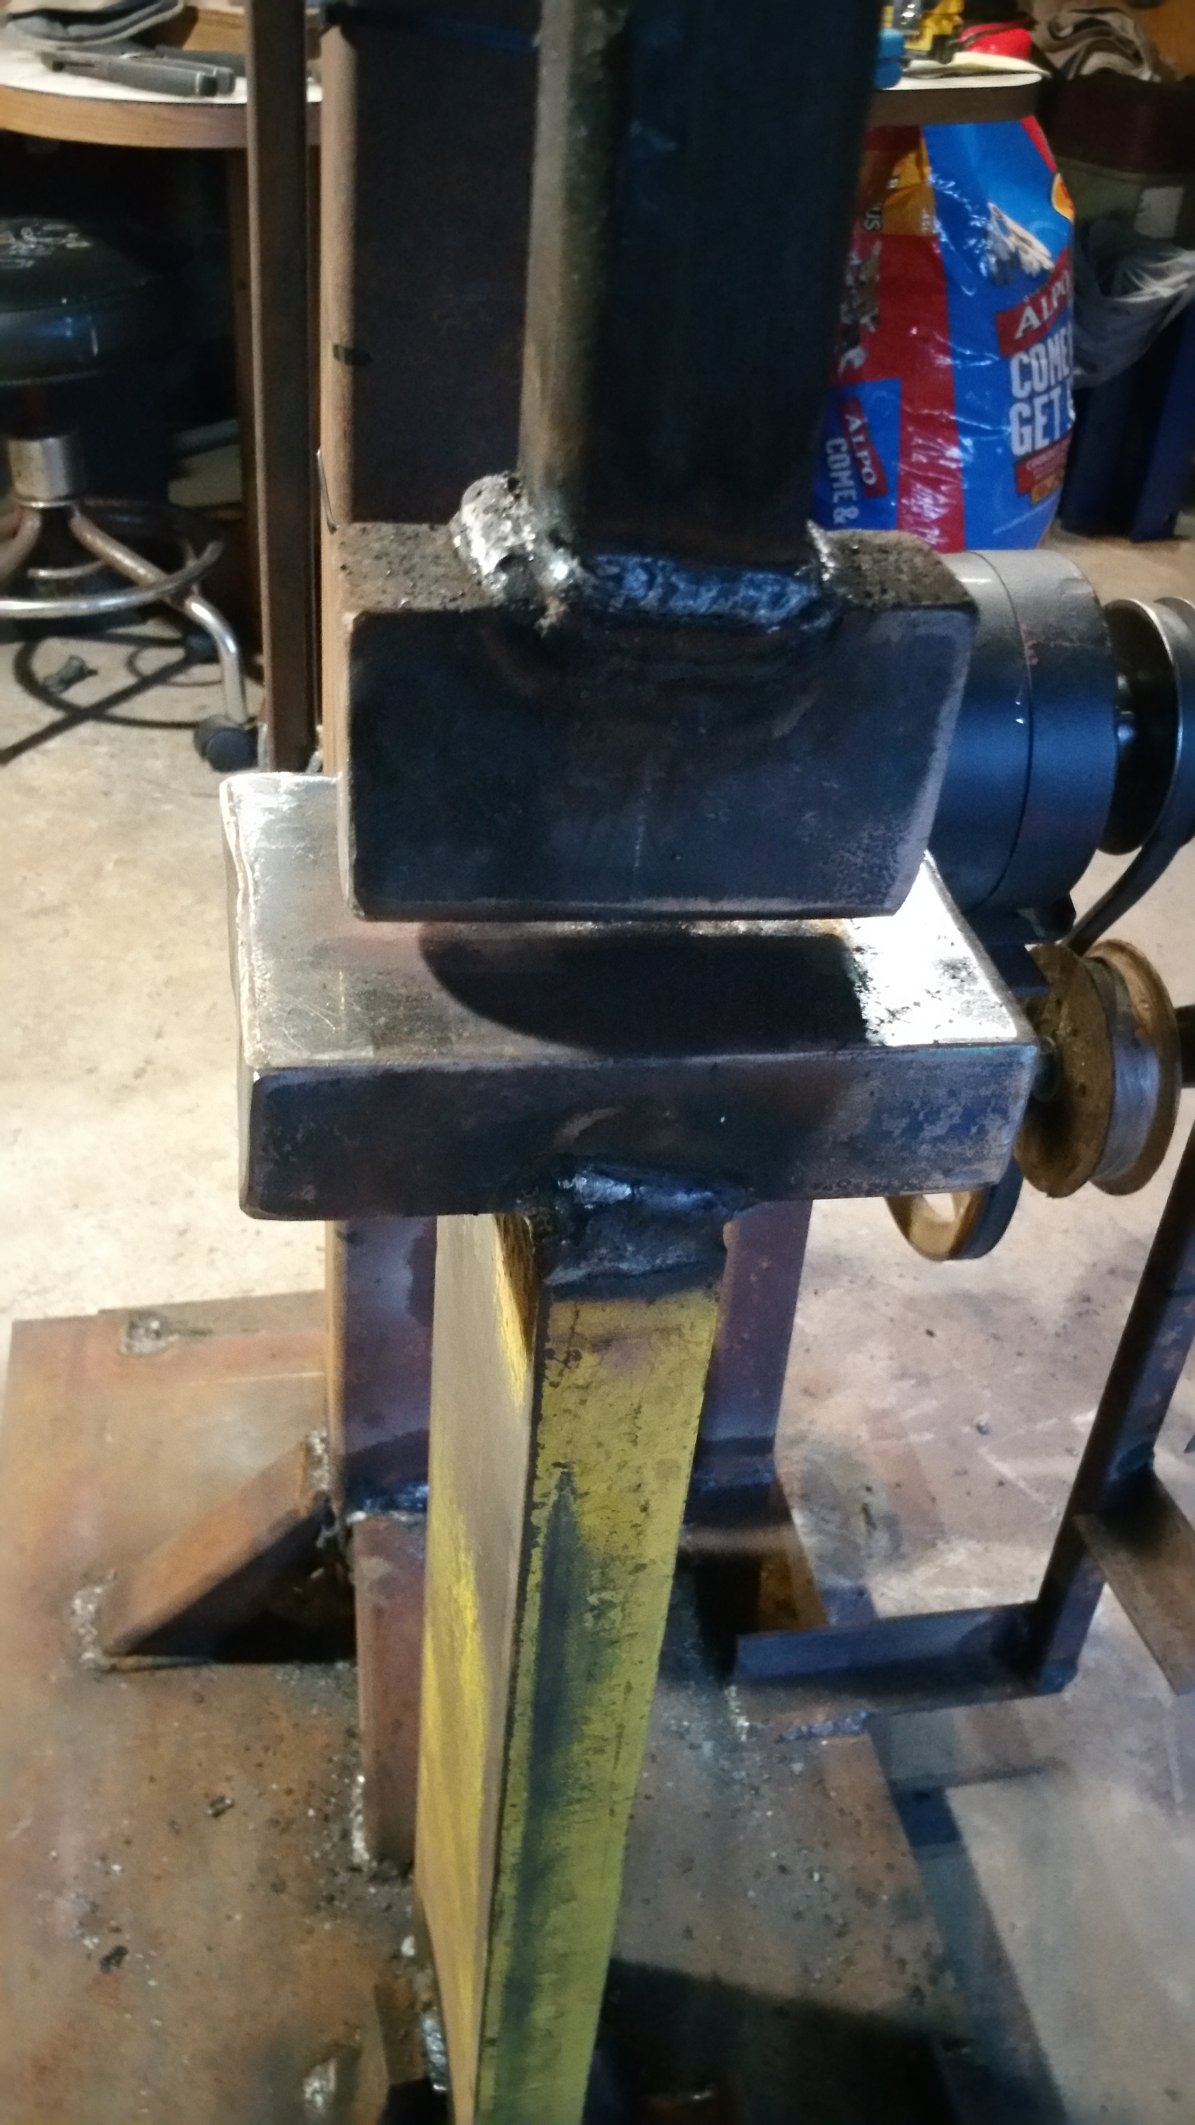
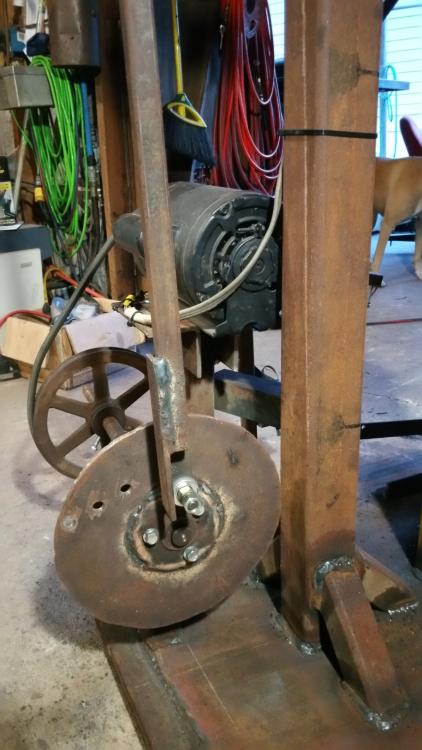
I'm always willing to learn, but I don't quite understand your comment. The "House Wire" was removed from an industrial electric impact hammer. The wire is 12 ga which will fully support 30amp at 90deg, according to the NEC. Under load on my motor I am drawing 8 to 12 amps. I am not an electrician though. Comments welcome. Great comment, Thanks for your advise. With my newly built forge I am using anthracite coal and having much better time controlling my heat. I did find out this past weekend, after forge welding a motorcycle chain together and making a nice block of metal that when I went to flatten it and draw it out I was getting cracks. Is that the heat issue? ...and mabee I will try the anvil at a higher level and see how that works for me. Thanks
-
A Volcan Teddy Bear....LOL....LOL....LOL
-
Thanks for your comment. I am thinking on ways to incorporate changeable hammers and dies. That will be in Mod1. Well, I have a lot to learn. The original design had some flaws in it. I have some bad wear points that I am addressing and testing. Overall, it does work really good. I have drawn a railroad spike out to about 18". Working on a Kukri now. I will post some pics when I am done. Thanks for your comments.
-
Pretty Cool. I'm going to take that idea and see what I can do with some old hammers laying around.
-
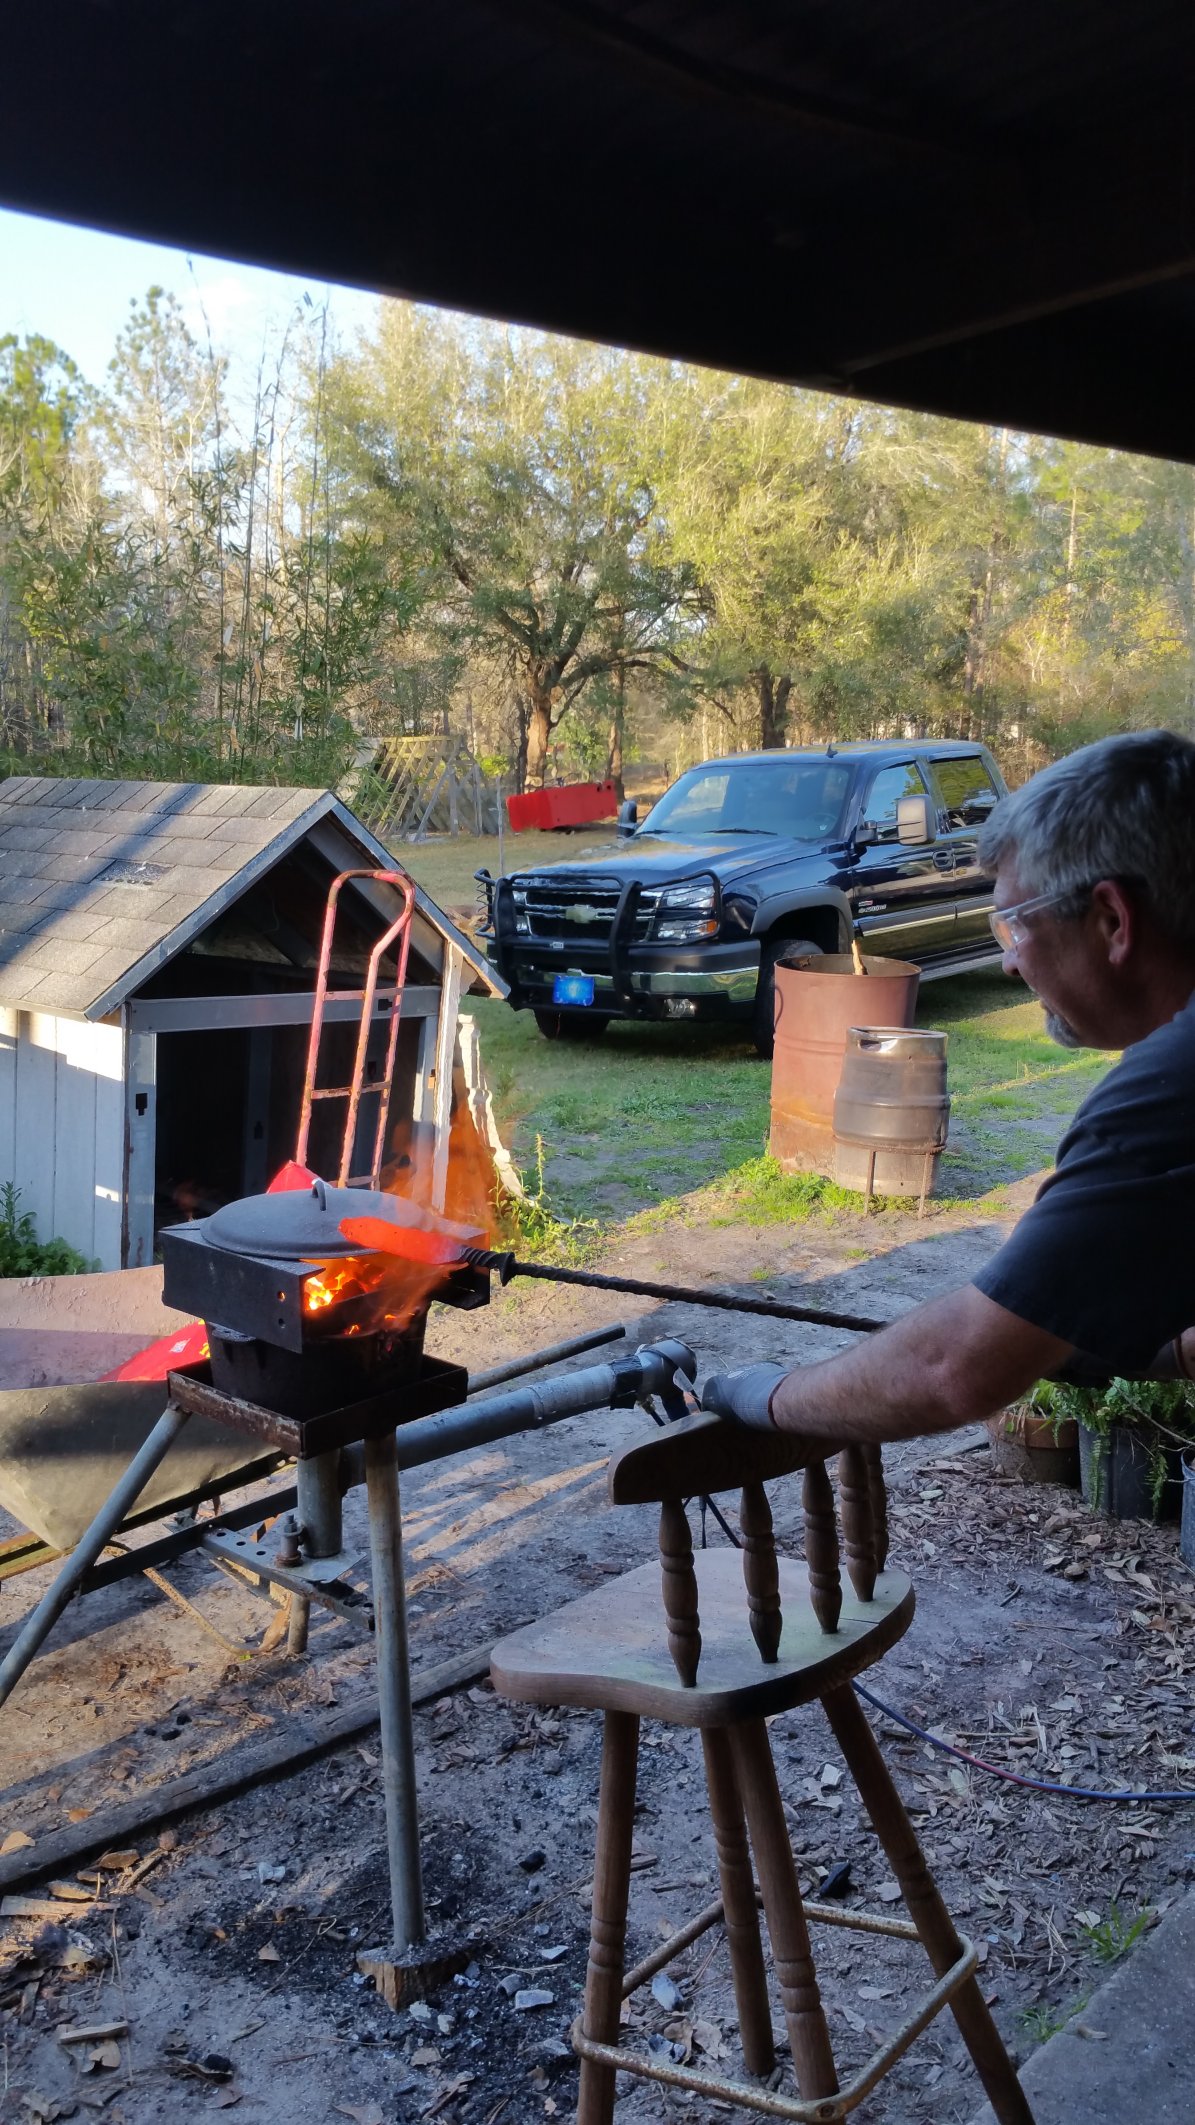
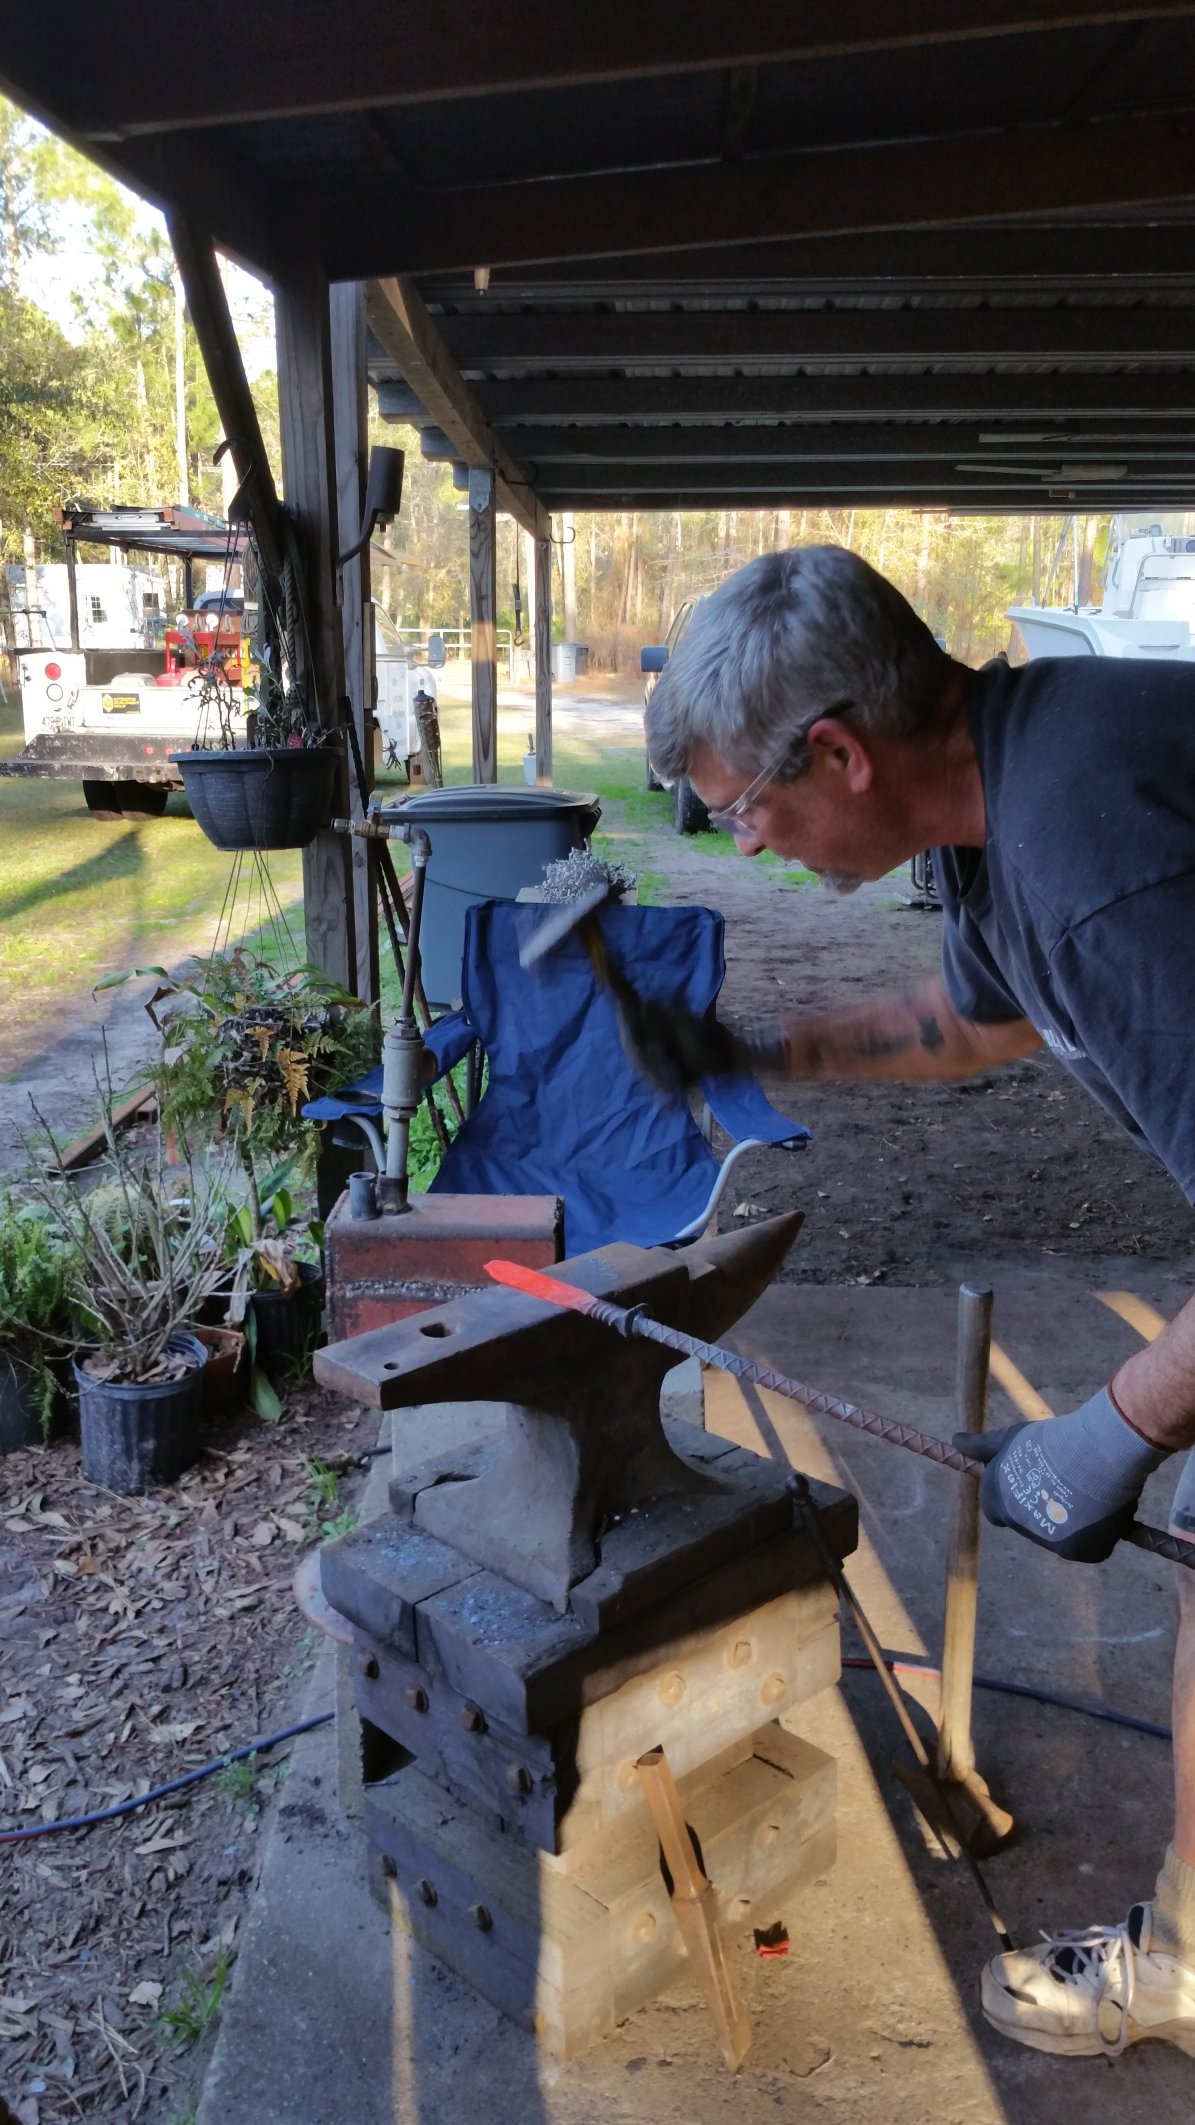
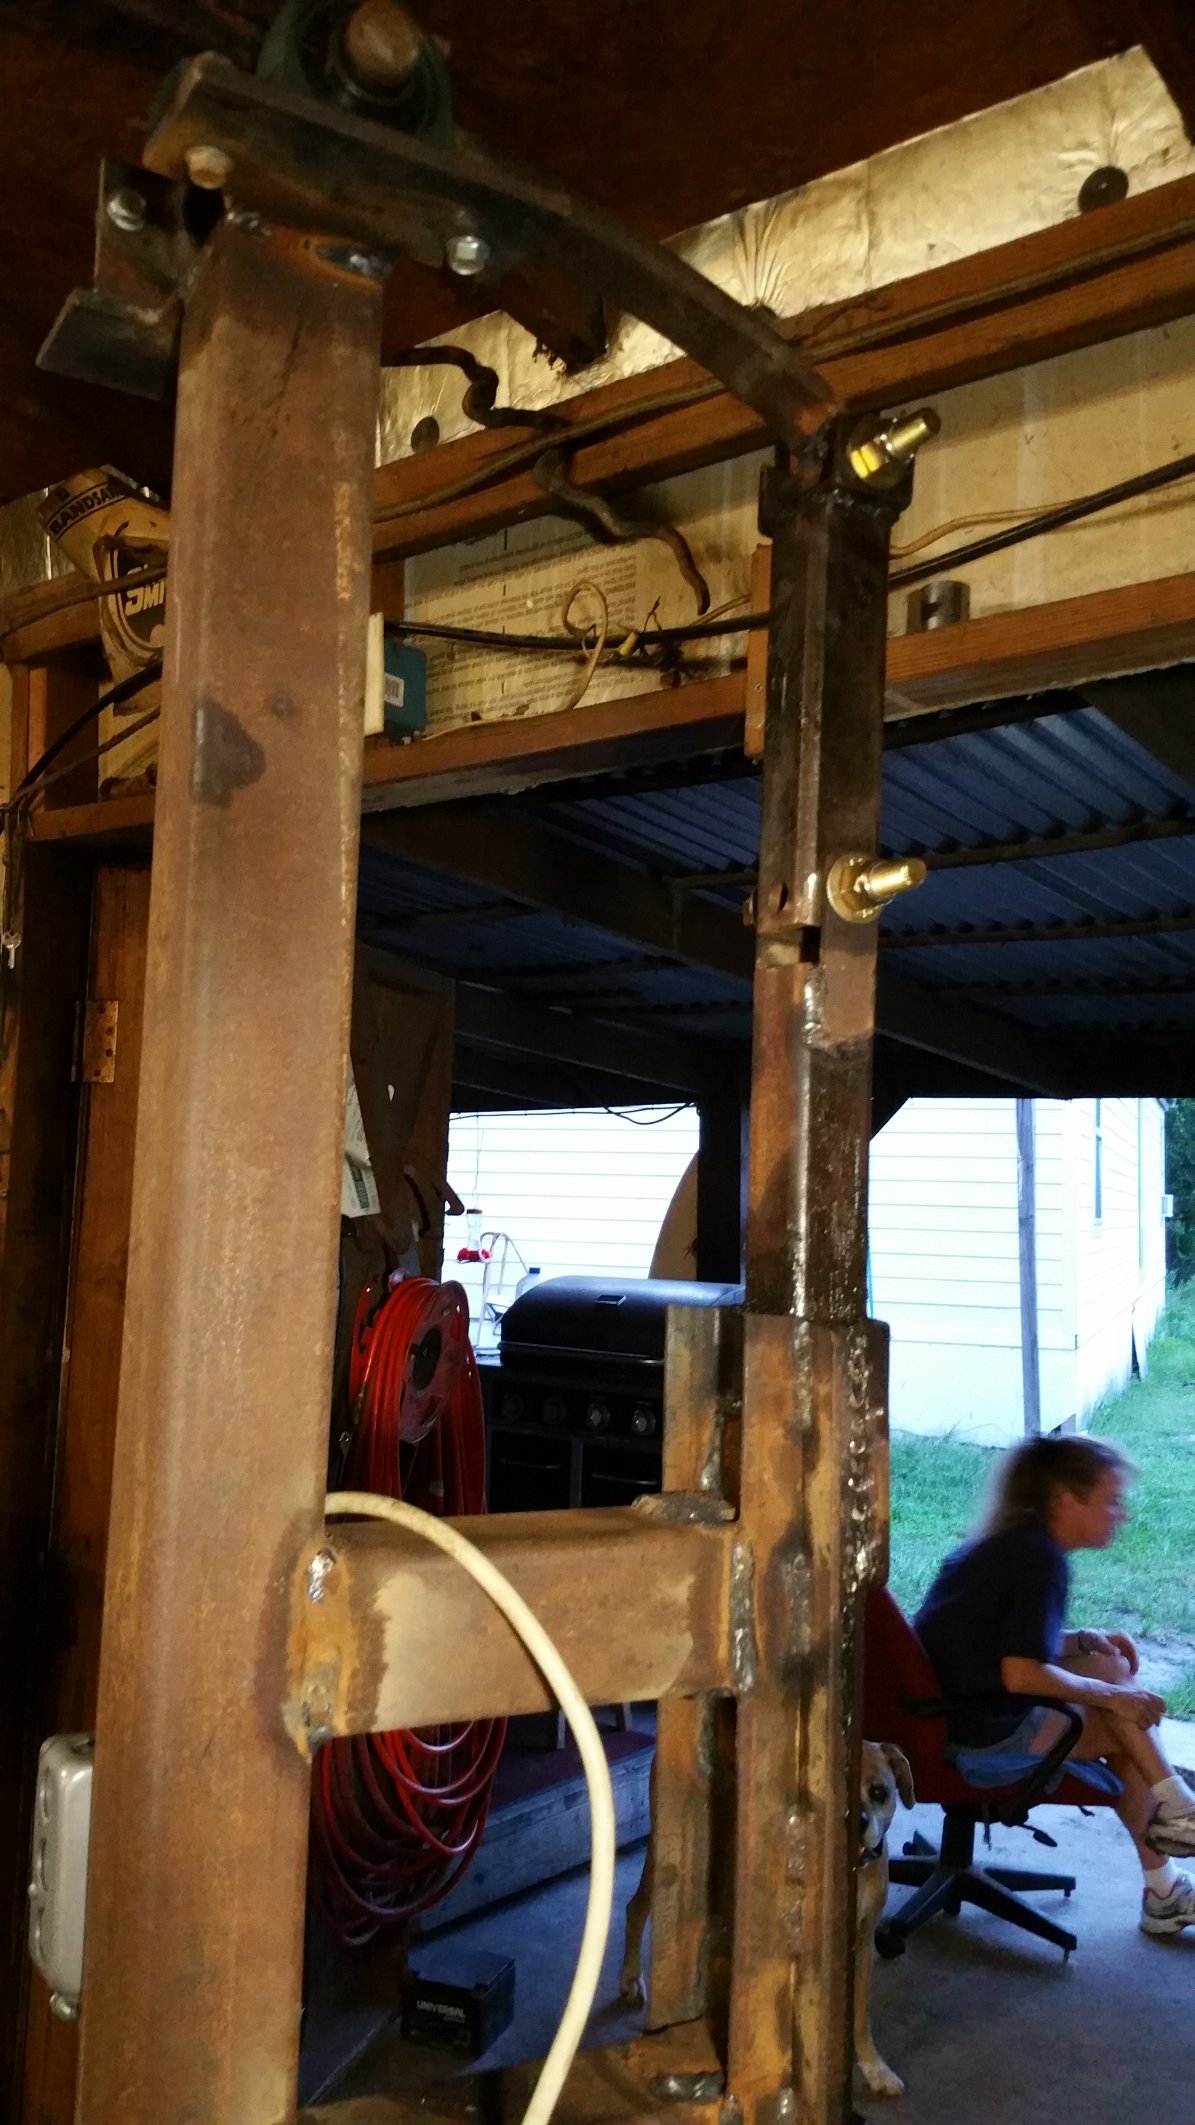
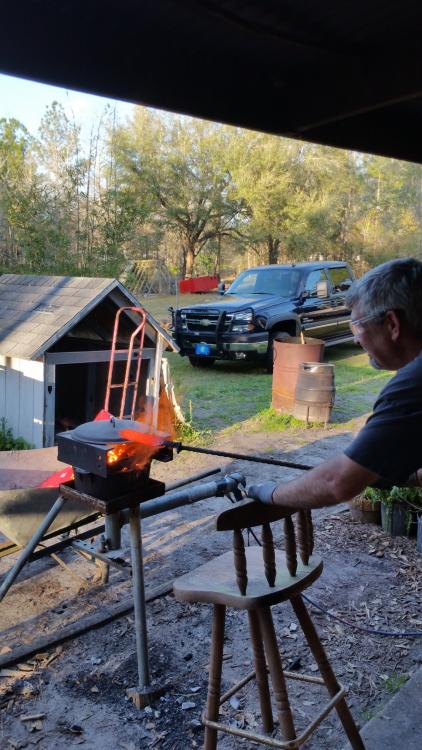
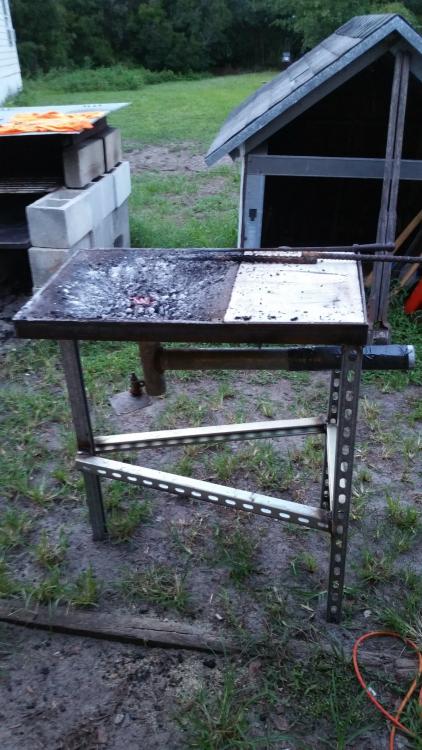
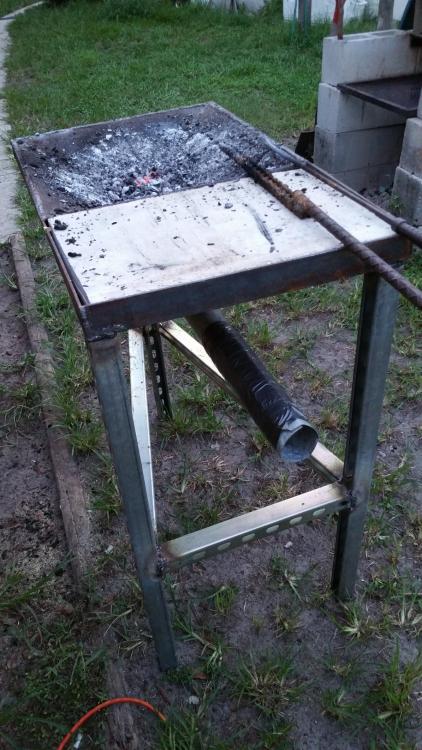
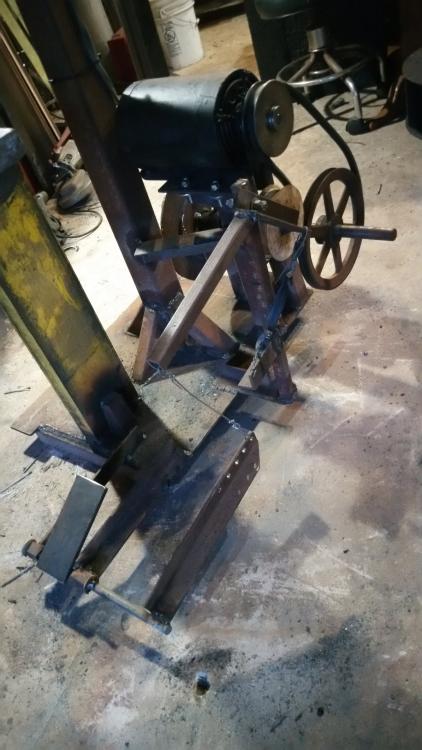
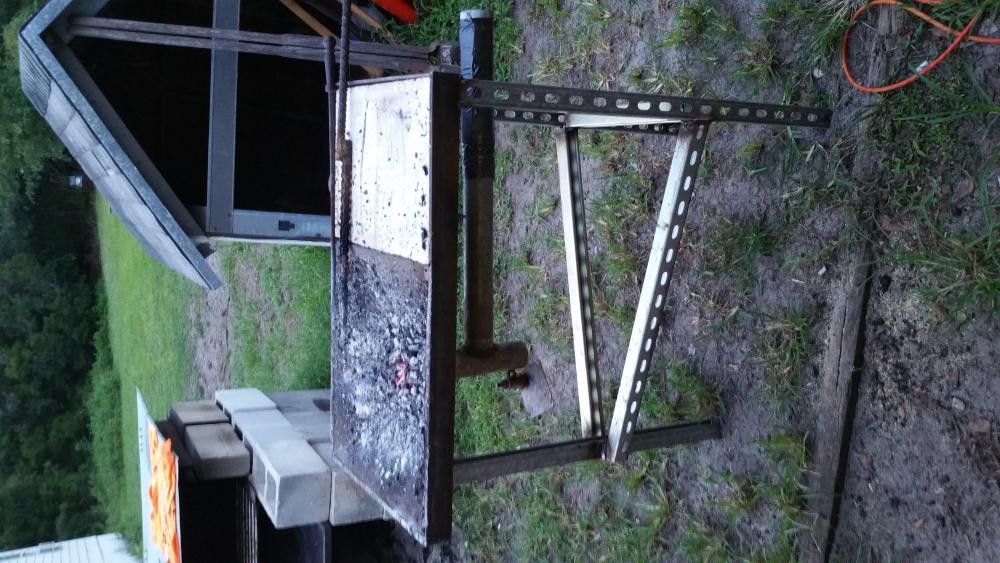
I finally gave up on propane forges and went to using coal. I built my first coal forge out of a cast iron pot and brake rotor. I have advanced my operation by creating this new forging table. I also built a power hammer. (I am going to figure out how to change out the hammer though, the current one seems to stretch very well, but not flatten and widen. Could be my lack of skills using it too.) My fabrication skills far exceed my blacksmithing skills though. But, I have fun. Here are some fun pics. Keep in mind, I am an extreme nube.


-
Your forge looks pretty technical nice ideas. Here is my new homemade forge, simple structure, using a "Blow Dryer" for air.

-
Hi everyone, I'm new to this forum and forging. I'm glad to have found this great informative site. I am building a forge by plan from this site: BP0192 Gas Forge | Blueprints 100-200 When I tested my burner, (I just read on another thread that I need to get a better regulator: I'm using a turkey fryer reg) it lights off what seems to be acceptable but when I turn the gas up, the flame blows itself out. Can somebody give me some insight on this problem and solution. I am getting a new regulator today anyway, but don't know if it will correct my problem. Thanks in advance for your help. Mark
-
Thank all of you for the great advice. I am an experience welder of all sorts and am familiar with metal working. I will continue to complete my forge and see what happens. BTW, has anybody made the forge in these blueprints in the 200-300 section. If you look at the plans, does the shape have to be round or will an octagonal shape work for the oven. Thanks... Mark