Alan Evans
Members
-
Joined
-
Last visited
Everything posted by Alan Evans
-
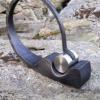
If you do not have the time to make tools but still want to make a bottle opener for your demo...always a good laugh if you open a bottle of beer at the end...The best bottle opener I have used (anthropometrically and ergonomically) is the style that I make and strangely it is the simplest to forge! The picture shows one of Jan Dudesek's hand grab openers, you should be able to see the fingers and the thumb. My stainless ones are a development of that principle with their cooler, abstracted sculptural form with the facets and all, but without the good humour of Jan's figurative take :) You should be able to spread and bend the grab in a couple of heats in mild steel with a hand hammer. I take four heats to make mine in stainless steel. One to octagonise one to spread one to bend and one to draw out and bend the handle. Starting point for those is Ø10mm (Ø3/8"). Jan's is from Ø12mm (Ø1/2") and you would need a straight chisel to chase in the fingers and a curved one to cut off the thumb and chase in the thumb nail... Alan
-
Hot saw dust embedded in rubber tyres could be a problem I think. Though I did use my father's wood band saw to cut up some 2" square aluminium once and it survived. I used an anti pin wax as I recall. I have an old Elliot horizontal metal bandsaw which does hinge up and convert to vertical with a table. I am surprised there is that much difference in cost or availability between a wood or a metal version definitely think your time would be better spent looking for the thing you want rather than modifying something not designed for the job. The Milwaukee porta saw sounds good. Will have to look out for one of those. Alan
-
Thank you for the link. It looks like a good way to spend a happy hour or two! Alan
-
-
Stainless steel electro polished is the best maintenance free. It looks like chome plating almost...it is chrome oxide. Getting anything to key onto a stainless steel surface is problematic, the clue is in the name. The only black surface treatment I could find was Peoton and that was small items they could treat in an enclosed atmosphere as part of a production run. Rod ends for racing cars was their speciality I seem to remember. Do tell about the patina solution system you have found. Is it self do-able? It sounds to good to be true. Shot blast, zinc spray, etch prime, under coat and top coat(s) or hot dip galvanised, etch prime, under coat and top coat(s) will get you up to 25 years maintenance free in an "inland polluted atmosphere", less on the coast. I have been quoted those specs by my finishers in the past. I find that making architectural forged work out of stainless steel should be priced at about four times that of mild steel, although the finishing by electro polishing is cheaper than paint or powder coat on top of zinc on mild steel. I have done a couple of jobs and am currently working on the third where I have been able to persuade the client to accept an as-forged stainless surface. These are handrails forged to and octagon section and have the loose oxide stainless wire brushed and Scotch-Brited away with a pneumatic drum sander and then a periodic coat of renaissance wax. The client knows that the surface may get the occasional rust colour from the contamination of the steel hammer pallets and forming tools. The patina that builds up from the wax and use is to my eye the best. Alan
-
Thank you Beth. For some reason I cannot go back and edit the initial post, I managed to lose a sentence or two off the second paragraph which listed the advantages of beeswax... An advantage of beeswax is that it is a sustainable product, provided that the bees survive and hopefully now they have stopped spraying neo-nicotinoids over here they will come back. Another advantage is that it has a really nice smell when you melt it on. To put its protective abilities in perspective, it has a pretty good track record. A lot of Mediaeval church ironwork, door furniture and etc. has survived because of it. They use it at the Tower of London on the suits of armour, they warm them up in a big oven... In use it is very efficient, I had a large frying pan (skillet?) which caught all the drips as I rubbed the block over the hot metal, every now and then I would heat up the pan and pour the wax into a block mould and start again. Alan
-
Wax finishes for forged metal. You can use bees wax uncut if you warm the metal either in the fire or with a propane torch and rub the block on. You can get it on almost clear for armour bright steel if you keep the temperature low; you can get a black wax finish if you get the metal hot enough to make the beeswax smoke. The disadvantage of beeswax is that it has a low melting point and remains sticky even at room temperature and then attracts dust. It can also contain organic compounds that break down and form acidic corrosion If you want the best performing wax finish it would be Renaissance Wax. Unfortunately it is fossil fuel derived but as it is extremely thinly applied does have economies of quantity! You can buy it ready made from a company called Picreator (very very expensive) or make it up yourself (very very cheap). The one I make is a blend of Microcrystalline and polythene “A” wax melted together and poured into White Spirit, about 10 or 15 times as much White Spirit as wax off the top of my head. I make it so thin that you can put it on with a paint brush and then buff when dry. It is much harder and has a higher melting point than beeswax (85ºC versus 60ºC) so you don’t get the stickiness or dust sticking to it. It still has a bit of creep to repair abraded areas, though not as much creep as beeswax. I use it on everything from copper, brass, stainless steel to leather, furniture and wooden and tiled floors. It works great on the aluminium shower curtain pole as a lubricant...positively glides along! Having said all that any wax will do as an interior metal finish. Furniture polish or car wax for instance. We have a very elegant mirror made by my friend Peter Parkinson who used shoe polish. That one was black but you can use green or blue to give some really subtle patinas on forged metal. I used red shoe polish on a forged copper sculpture recently. It was Peter who gave me the Renaissance recipe and told me about the museum supplies place where I bought my initial wax supplies. The recipe for our Renaissance wax is four parts Microcrystalline to one part Polythene “A” wax. The “A” wax has a higher melting point (+/-100ºC) so that should be melted first and then the microcrystalline (MP86ºC) added to it bit by bit. I melt it in an old pressure cooker on top of a Rayburn hot plate. When all melted and mixed it is poured into white spirit (taking precautions against fire risk, I do this outdoors) stirring vigorously until mixed to a smooth paste. I decant it into screw top glass jars. I use between 10 to 15 litres of white spirit per 1kg batch of combined wax. 2 or 3 gallons per 2lbs. I bought my lifetimes supply of wax (25kg of microcrystalline) @ £3.56 per kilo plus carriage and tax back in 1995 from Poth Hille. They have moved but are still in business with a good website and product information. I bought their Microcrystalline wax type 3749 in slab form and the “A” wax as powder. They had a fairly high minimum order so I asked how much wax I could have for the minimum invoice! Alan
-
I have started another thread which is called "Bees Wax and Renaissance wax" by the time I wrote it all out it was a bit long winded and too specific for this thread. It includes the formula/recipe and source for the waxes Alan
-
Were the 3811 views and 82 posts not enough for you in Idle talk, Who is your favorite Blacksmith from the movies? Gluttons for punishment some people! :)
-
I will dig it out and post it, I am about to make up another batch shortly. Alan
-
I use Renaissance wax for everything. But I make it up rather than buy the extortionate ready made stuff. It is a blend of Microsrystalline and Polythene "A" wax , (4:1 I think) and white spirit. It is 90% white spirit. I tend to make it up very runny so that it can be applied quickly by brush. I make up a batch every few years and store it in jam jars. Goes an awful long way. Alan
-
We have a graphite and wax called zeebrite for producing the live surface irony look on the old cast iron kitchen ranges. Rekkit and Coleman make it. You can make your own with renaissance wax and a bit of flake graphite. The simplest everyday finish is shoe polish, any colour you chose will work fine for interior metalwork. You can build it up in layers and leave the area over your wobbly welds unbuffed to disguise them a little :) Alan
-
You used to see the little chain hanging off the bottom of cars a lot years ago. We always had one on ours to try and help with my car sickness when I was a kid. Haven't seen one recently... I am interested that your belt grinders are on rubber tired wheels. Mine just has a rubber tyre on the pressure/working wheel the drive wheel is plain aluminium which is crowned to centre the belt. The fact that you are able to type means you resolved your problem :) but in case anybody else needs to polish chain on a buffing wheel the trick is to wrap it around a piece of wood and make sure the ends do not dangle. I once went round a chain maker's shop in the Jewellery Quarter in Birmingham and they tumble polished all their chains of course. Alan
-
You might check out Margaret Hills' diet and advice. She wrote a couple of books the first was "Curing Arthritis - The Drug-FreeWay" ISBN 0-85969-449-6 which has meant my mother has been able to keep her arthritis and gout pill free for over 15 years. I must admit I would probably not put up with having to give up foods that I enjoyed, but maybe some of the advice will suit someone...
-
Regarding blast media there was a discussion on here a few months back that I was involved in:- http://www.iforgeiron.com/topic/27883-quick-way-to-dry-out-sand/?hl=blasting#entry285744 and there are probably others... I would also ask your suppliers' technical department what they recommend for your application...they should either know themselves or be able to ask their suppliers'. The loss of hammer marks is always a probability if you use an eggshell or gloss finish. The best way to restore the detail and bring out the forged texture is with a burnished graphite top layer. It has likely been discussed on here before I think. Flake graphite, mixed in with eggshell paint, sprayed on, and just as it is going off, rub the surface to burnish the graphite. My favourite is with Levi denim. It highlights the ridges and remains black in the pits which makes it look very "irony". If you use a shoe brush it burnishes in the pits and you do not get the dramatic contrast. You can even make a piece of wood or concrete look like iron with this system. It will even bring back the forged surface which is obscured by the homogenising/flattening effect of zinc spray or galvanising. You can use it with any colour, black is normal, but red makes the piece look like it is still hot and blue looks very classy but the blue tends to fade in sunlight. I always specify a wash etch primer rather than a high-build which keeps the paint layer as thin as possible commensurate with effectiveness. When used on top of a zinc finish as far as corrosion protection goes the paint is purely cosmetic anyway. Like any graphite finish it is not the best for handrails or door furniture! Alan
-
It is a well explored technology! Think of surgical forceps and I bet Mr Mole and Mr Vice Grip used them as the basis for their tools! When I was starting out and had ill fitting tongs that meant the tong reins were too wide at their tips to get a ring on I found that a "C" clip could be slid on from the jaw end effectively. As the "C" clip can be used from both ends I tended to make most of them to that form. I have some very nicely made box jointed slide grip pliers which also use the principle, I will try and post a photo. I always reckoned that the workpiece hand was equally if not more important than the hammer hand in achieving a form. No matter how precisely you drop the hammer if the workpiece is not in the correct position you will never get there. Alan
-
I take the ball weights off the flypress when I want to do a series of quick repeat light blows when I used my bowl tools, or using it for bending and straightening. With them on the balls have the same disadvantage as a heavy hammer forging light stock, you don't get the rebound and have to put more energy into lifting it up between blows. I presume that the ball weights on your press were used as the handle for maximum power, the shaft is fairly smooth so depending on the oomph required that was also used. Any hand rub marks?
-
Where they sell off ex military surplus stuff. My basic pairs of top and bottom tools, the swages and fullers for the hand anvil, all have the broad arrow and date on them, a lot from around the second world war. The big old second hand tool dealers like Crystal Palace Machinery and those listed in Exchange and Mart...I have just done a search and Crystal Palace no longer seem to exist but there will be machine tool dealers near you that will always have a pile of odds and sods that they do not bother to list but are too good to scrap. Look up your local ones and give them a call. They still have big auctions of Ex MOD stuff and these guys buy it up for peanuts and sell it on to the likes of us. For example this is the first one I found having done a google search for "used machine tools Kent" and then looked at the miscellaneous listing on this dealers site http://www.gandmtools.co.uk/cat_leaf.php?id=9170 there will be others even closer to you I am sure. Those actually look like a Vaughans' set possibly from a secondary school metalwork shop. I used to make the chestnut roasters I showed in your bowl tool thread number one and the marriage guidance council entrance gate I also showed in that thread. I have not specialised in bowls at all, but over forty years of making stuff you acquire a collection! But as you can see from the video once you have one set of tools it only takes a few seconds to make a bowl and I just made a few variations as required for specific shapes for specific projects I will dig out some example images if I get the time. Once you have the basic set you can make a tool set and the workpiece in less time than it will take you to make the first bowl using a stump and hand hammer..As the video showed I made four or five bowls, most in stainless steel, and one of which was a hemisphere in eight minutes, less than two minutes each....you would not get one (even mild steel bowl) done in eight minutes with a ball pein on a wood block! Alan
-
In that case I think you are right, it would operate independently guided and return sprung tooling, that is what I was trying to confirm. It does not lift the tooling itself...Be intriguing to find out what. There does not seem to be any mushrooming or other sign of pressure or wear on the boss...doubly intriguing...obviously needed a sharp crack of a blow rather than a squeeze with those weights whatever it was. I have a toggle press which had tooling for embossing, I am not sure whether it was for letter heading on paper or aluminium. That is a possibility for a short stroke tool... Some of the tooling which came with one of my fly presses was for punching out instrument panel holes some of them were self contained, self guided, others the male had a short locating pin in the centre which located in a pre drilled guide hole in the panel. They all required less than an inch of stroke. Alan
-
What is on the end of the thread? Your photos show a plain boss in side view. Is there a threaded hole or any apparent method of attaching it to a tool or slide block?
-
Yes ministry of defence. Ex forces. I use the 312 for dissimilar and unkown metals. Not for mild to mild or stainless to stainless. But for say mild to stainless. I don't know what alloy your rails might be so I suggested 312 as something that would stick to it whatever it was! I was recommended 312 and then when I read up about it, it seemed to be a wonder glue so I have used it ever since. It has repaired the hammer pallets and even the cast tup of the hammer. I use it to weld mild steel handles onto Progen tools. It seems to flow onto anything and stick tight!
-
Look around ex ministry places for stakes. The ones I have made have been from mild steel and stood up fine. I suppose it depends what they are for as to their longevity, one off or production. The ones I have purchased were either drop forged or cast. I am sure others will have advice re the rail welding but as far as I know there are different types of material used for rails. If in doubt about the material I always use 312 with either stick or TIG. It is designed for dissimilar metal welding and I use it for every thing, mild stainless tool steel and etc. Alan
-
-
Polished tools are a huge time saver. My old metalwork teacher at school had it right.."the best way of taking marks out of metal is not to put them in". True on so many levels. Ah well if you did not see the videos first time around , go and have a look at the old thread and read the explanations as well. Glad you have seen them now so I didn't waste my time! The tools you have made will work just as mine do when you pick up a fly or hydraulic press, so nothing wasted. If you are using them by hand use a heavy mushroom shaped hammer rather than a ball pein, the principle of not having to straighten out the dimples is the same as my top tool. "Move a lot a little rather than a little a lot"....the temptation of using a small hammer face is to see a dramatic effect, but it is misleading, you have to then undo it. Alan
-
I understood from your earlier post that the cylinder ends were convex rather than concave like these. My bad. What you have done looks fine, very versatile. You will be not be limited to using them on the stump and will be able to just use your tools directly on the bench on the floor or under a press when you get one, full marks. Did you see the videos and photos I made for you and posted to your earlier thread? unfortunately it was while the IFI site was not updating properly and you may have missed them. I would hate to think the time was wasted! I won't copy the images and text you can have a look on the old thread, these are the video links. Alan