NoGoodWithUsernames
-
Posts
159 -
Joined
-
Last visited
Content Type
Profiles
Forums
Articles
Gallery
Downloads
Events
Everything posted by NoGoodWithUsernames
-
My anvil is 200lb (it's what was available locally for a not-too-unreasonable price) and honestly I would not mind having a smaller one for a lot of stuff I do. If you're not doing anything with large stock but mainly working from smaller stock you shouldn't have any issues. If you do need to work larger stock stay away from the heel and horn if you are striking heavy blows. My main complaint is the bigger anvil is just a heat sink at first and it quickly pulls heat from smaller stock until it warms up. Working anything small it takes ages for my anvil to heat up enough that it's not immediately pulling the heat from my work. I usually start off slapping a piece of 3/4" plate in the forge and laying it on top of the anvil for a few minutes to help jump start it. Roll with what you've got! Looks like a great score.
-
 Glad to hear it. Love it when it's a simple fix!
 -
What Thomas said, have a way to verify any of it? Or just the VFD no longer powers up? Only time I've seen a VFD not work like that is if it is over powered aka a 240v drive hooked to a 480v outlet or such. That definitely will let you know something is wrong though and you'd notice. "POP" and the magic smoke comes out of it.
-
I work with mostly AC Tech brand VFDs at work, and don't recognize that brand you have. But if the outlet does not have power to it that points the finger elsewhere than the drive. Try flipping the breaker off and inspecting the outlet wiring, then flipping it back on and trying again. Also double check your wiring to the VFD. 3 phase stuff is usually pretty easy but make sure the cable you have isn't shorted inside the sheathing and all connections are tight. Did you have the motor hooked up to the VFD when it tripped?
-
I've seen lots of mentions of this type of finish but what is the benefit vs straight oil finish? I've used BLO as well as canola for some food use projects and they seem to both give a pleasing blackened surface with decent protection. Is the paste wax just easier to apply? Less messy? I also picked up some bees wax recently but seems difficult to apply as it's rather hard when cold.
-
It followed me home
NoGoodWithUsernames replied to Glenn's topic in Blacksmithing, General Discussion
TW, does the Cannedy Otto blower turn free? I've one just like it that the only problem with it is one of the gears inside seems to be some sort of fibrous material that has swelled up and cracked over time. All the other gears are just a little gummed up but cleaned up well and I'm not sure what to do about the oddball gear... Would like to get it working again though. -
As Frosty stated, if you want to just start heating some metal without investing a lot of time and/or money, another option to look into is the JABOD (just a box of dirt) It is very inexpensive and can usually be made with stuff laying around. lump charcoal is relatively easy to obtain, I know our Walmart has even occasionally carried it. Tractor Supply and I'm sure other similar places will also carry it. I used a small JABOD for a while waiting to buy supplies to build the propane forge.
-
A key welded on the outside of the screw box should suffice, mine does not have a keyway in the vise but has that same shape and it keeps the screw box from turning, might turn a smidge either way as I tighten or loosen before the key hits the vise but not much.
-
Power Hammer that I did.
NoGoodWithUsernames replied to MerlincMan's topic in Power Hammers, Treadle Hammers, Olivers
I like the use of a clutch, any issues with burning/smell? Definitely makes for easily replaceable wear parts. Have a dimensional list or cut sheet? Could probably sell plans for it as it looks pretty well thought out and designed from across the interwebs. Angled dies seems to be the only "complaint" so far. If you don't mind sharing, what was your approximate cost of materials? -
Barry Jordan's Working Miniatures
NoGoodWithUsernames replied to JHCC's topic in MIlls, Milling machines, etc
Wow! Quite fantastic, thanks for sharing that. Excessively large and excessively miniature things have alway been neat to see being at extreme opposite ends of the "normal". Nothing special about seeing a Bridgeport, but an 8" tall working Bridgeport? Now that's cool. -
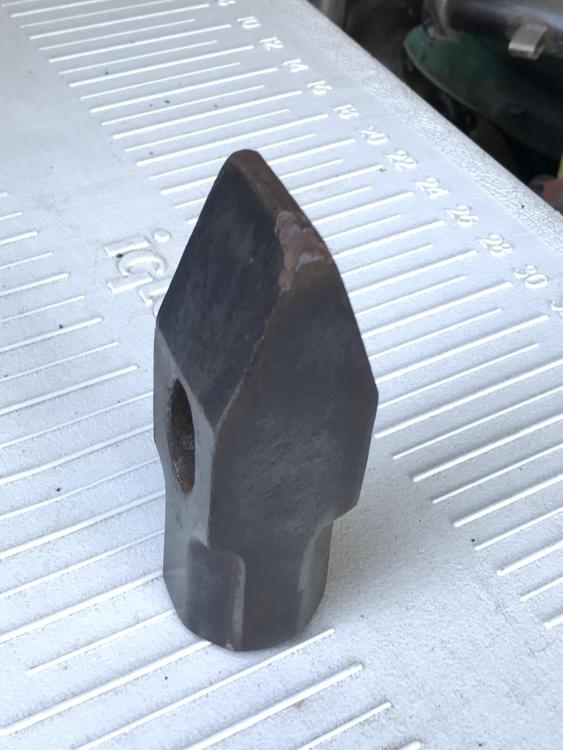
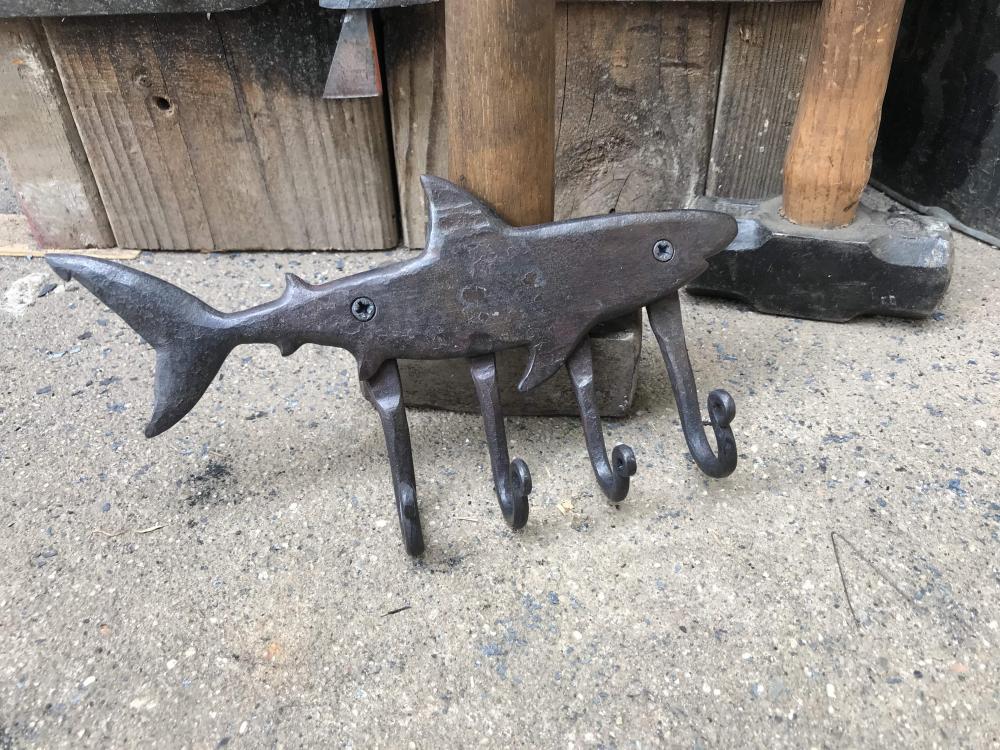
Here is a photo, the pein is currently around the size of a standard pencil. Sounds like best option is indeed grinding the pein to a larger radius. Face will get dressed as well. All the struck tools in the batch badly need the struck ends cleaned up, they are beyond "mushroomed" and actually can see where chips have come off. Reminds me of the video in welding class of the guy with half a cut-off disc in his face... Glad yours didn't end with anything permanent other than a scar and a story.
-
I have browsed through the last few pages of posts looking for info on hammer repair and came across the Hofi Repair thread but since he had someone else repair the chip I don't know that it helps me much. Anyway, I acquired a fairly decent, though unmarked, cross-peen hammer recently with some other tools. However there is a chip out of the corner of the peen side, probably 1/4" x 3/8" or so. It sounds like it's not "bad" to weld in new material and then re-finish the face and peen, but what method is best? I have access to MIG and TIG to fill the chip, I only have SS filler rod for the TIG but could probably get something else from the machine shop down the street.
-
Looking for stainless steel
NoGoodWithUsernames replied to Houjous's topic in Blacksmithing, General Discussion
Would some 316L TIG filler rod from your local welding shop suffice? Comes in various thicknesses and they may just hand you a piece once you start chatting. I've some 3/32" here but would shipping would cost more than the filler rod. Also wouldn't stabbing citrus fruit technically work to continually passivate from the citric acid content in the fruit? -
Waiting for the client
NoGoodWithUsernames replied to yves's topic in Blacksmithing, General Discussion
Wow that is very nice, exactly the type of work I am hoping to do some day! Well designed and executed. -
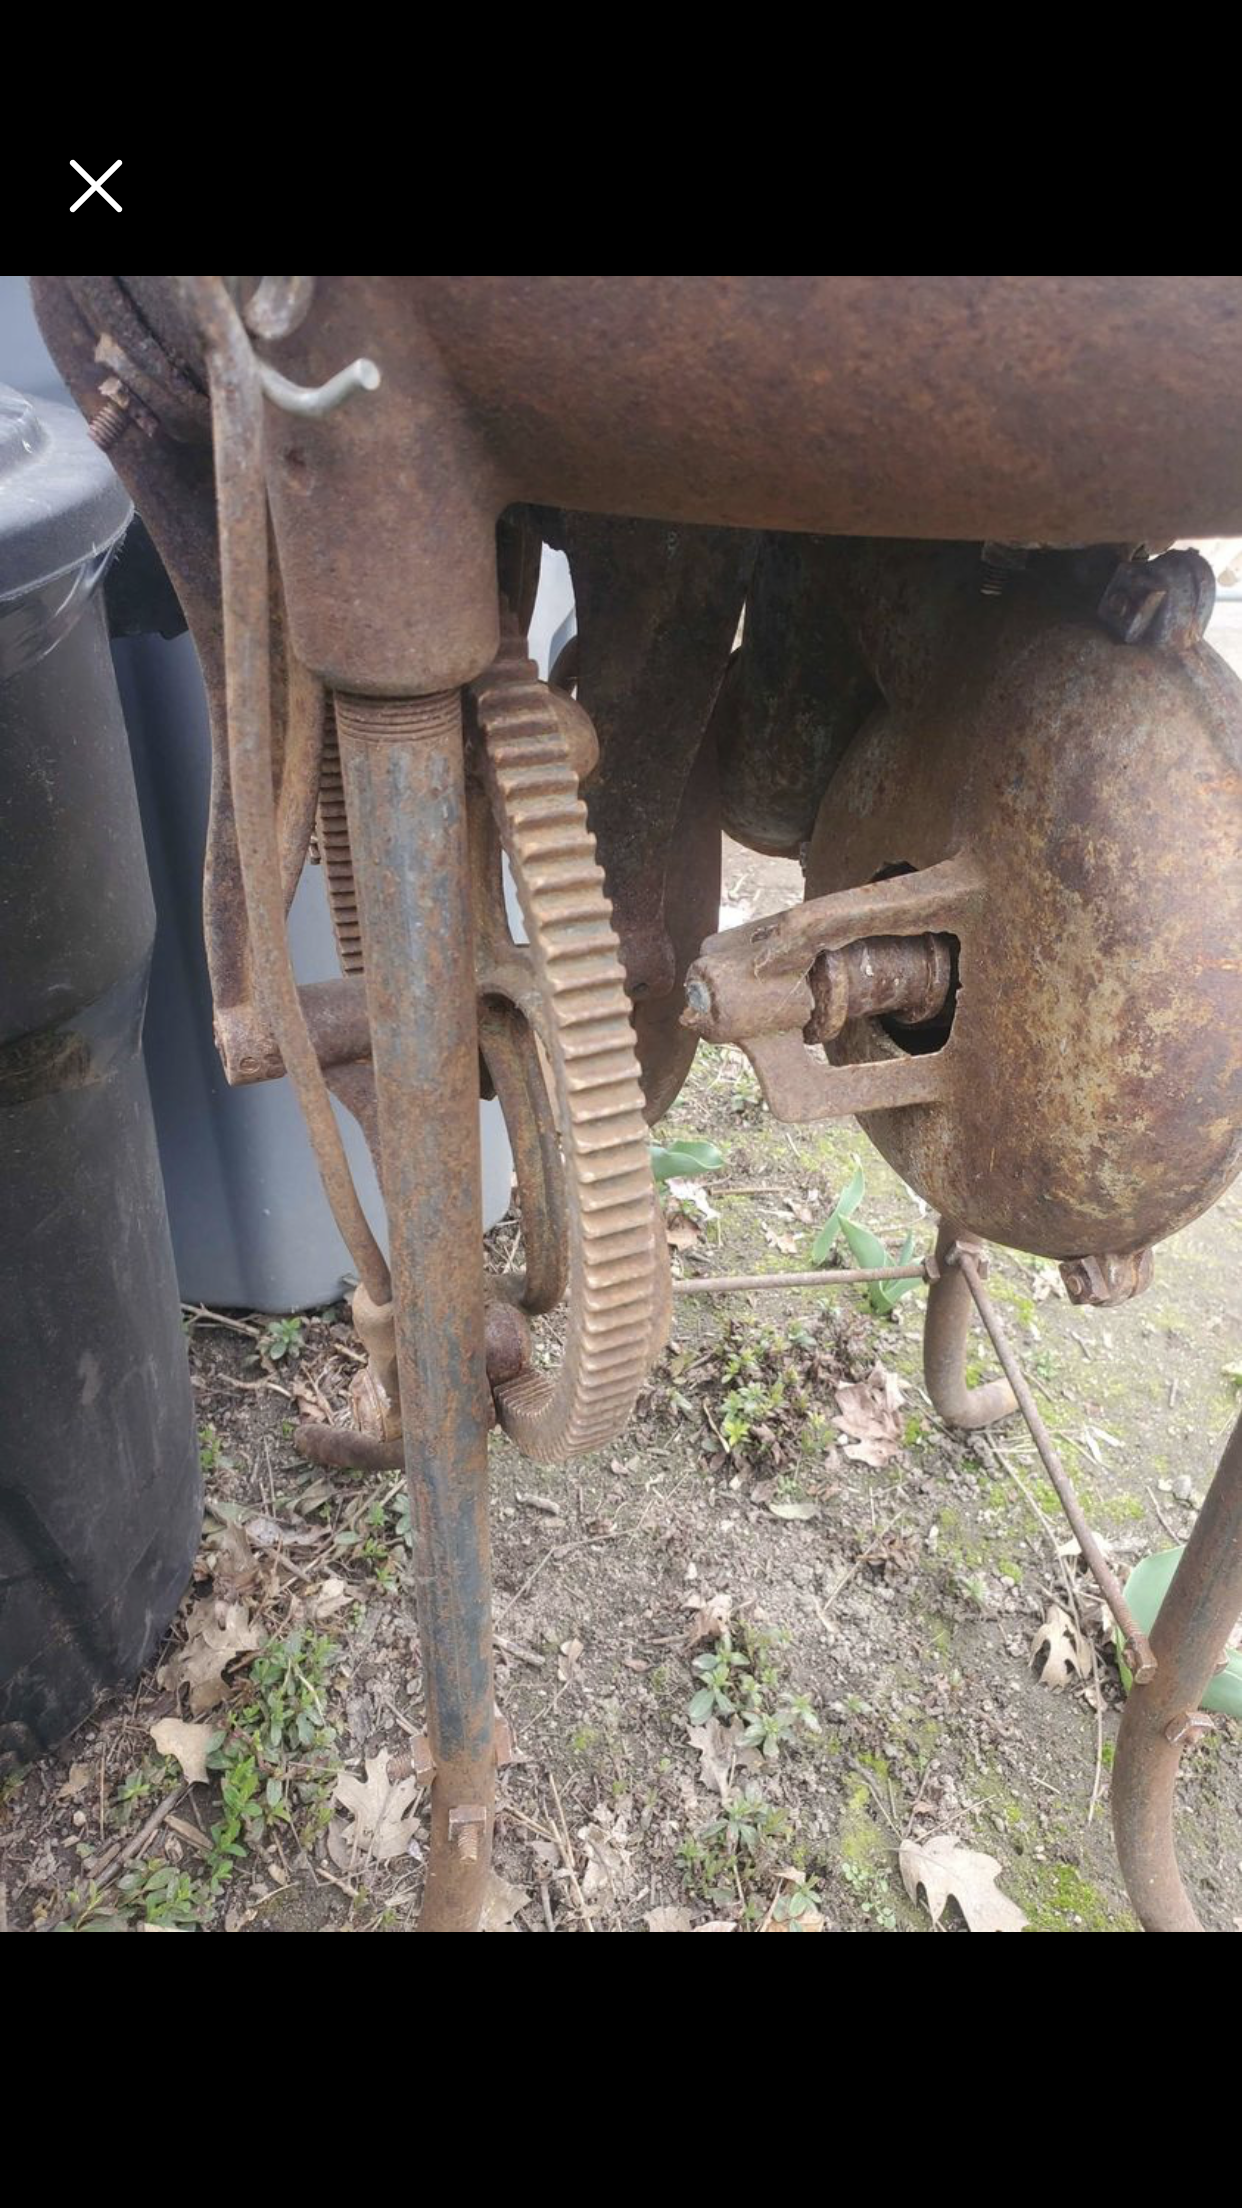
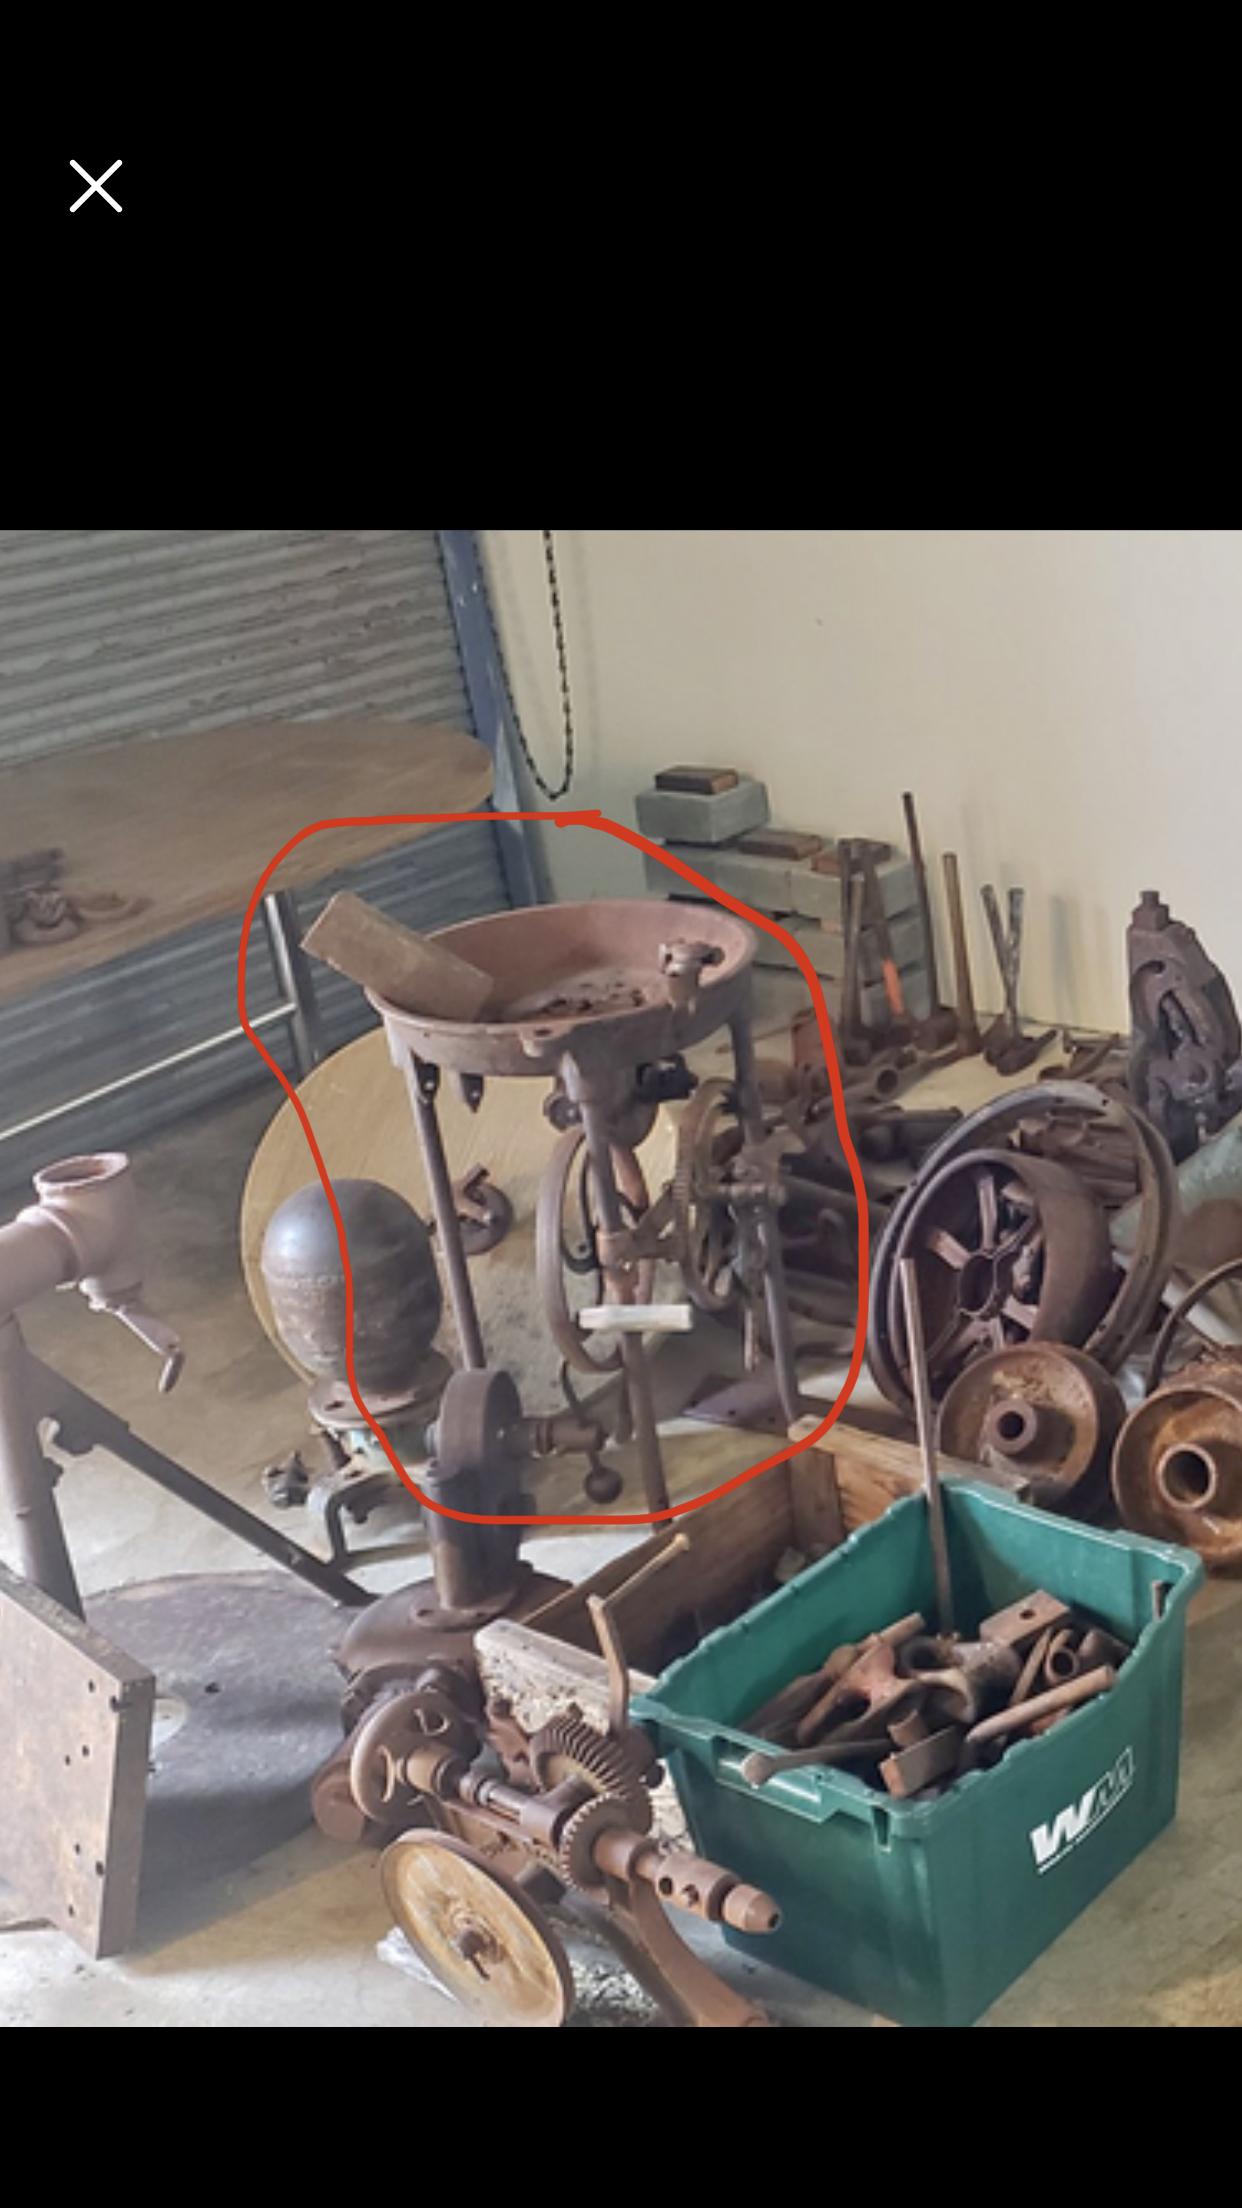
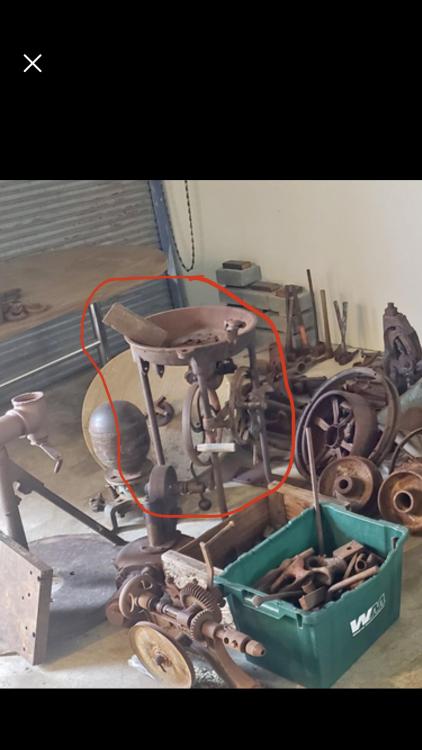
I found another forge that looks to be identical to the one I picked up but a little more complete, here are a few photos. Irondragon: That threw me off looking at the ad as well, but the handle that looks attached is actually from the blower on the floor. This is a belt driven, lever powered forge/blower. After I get it cleaned up and re-assembled I will get some decent photos and post them up, then get it clay'd and put it to work.


-
You're darn right. Of course I didn't think to take any better photos until I have the thing all torn apart to clean it up so you get the one from the ad. I am kinda kicking myself for not picking up the pillar drill in the foreground just because it's cool.
-
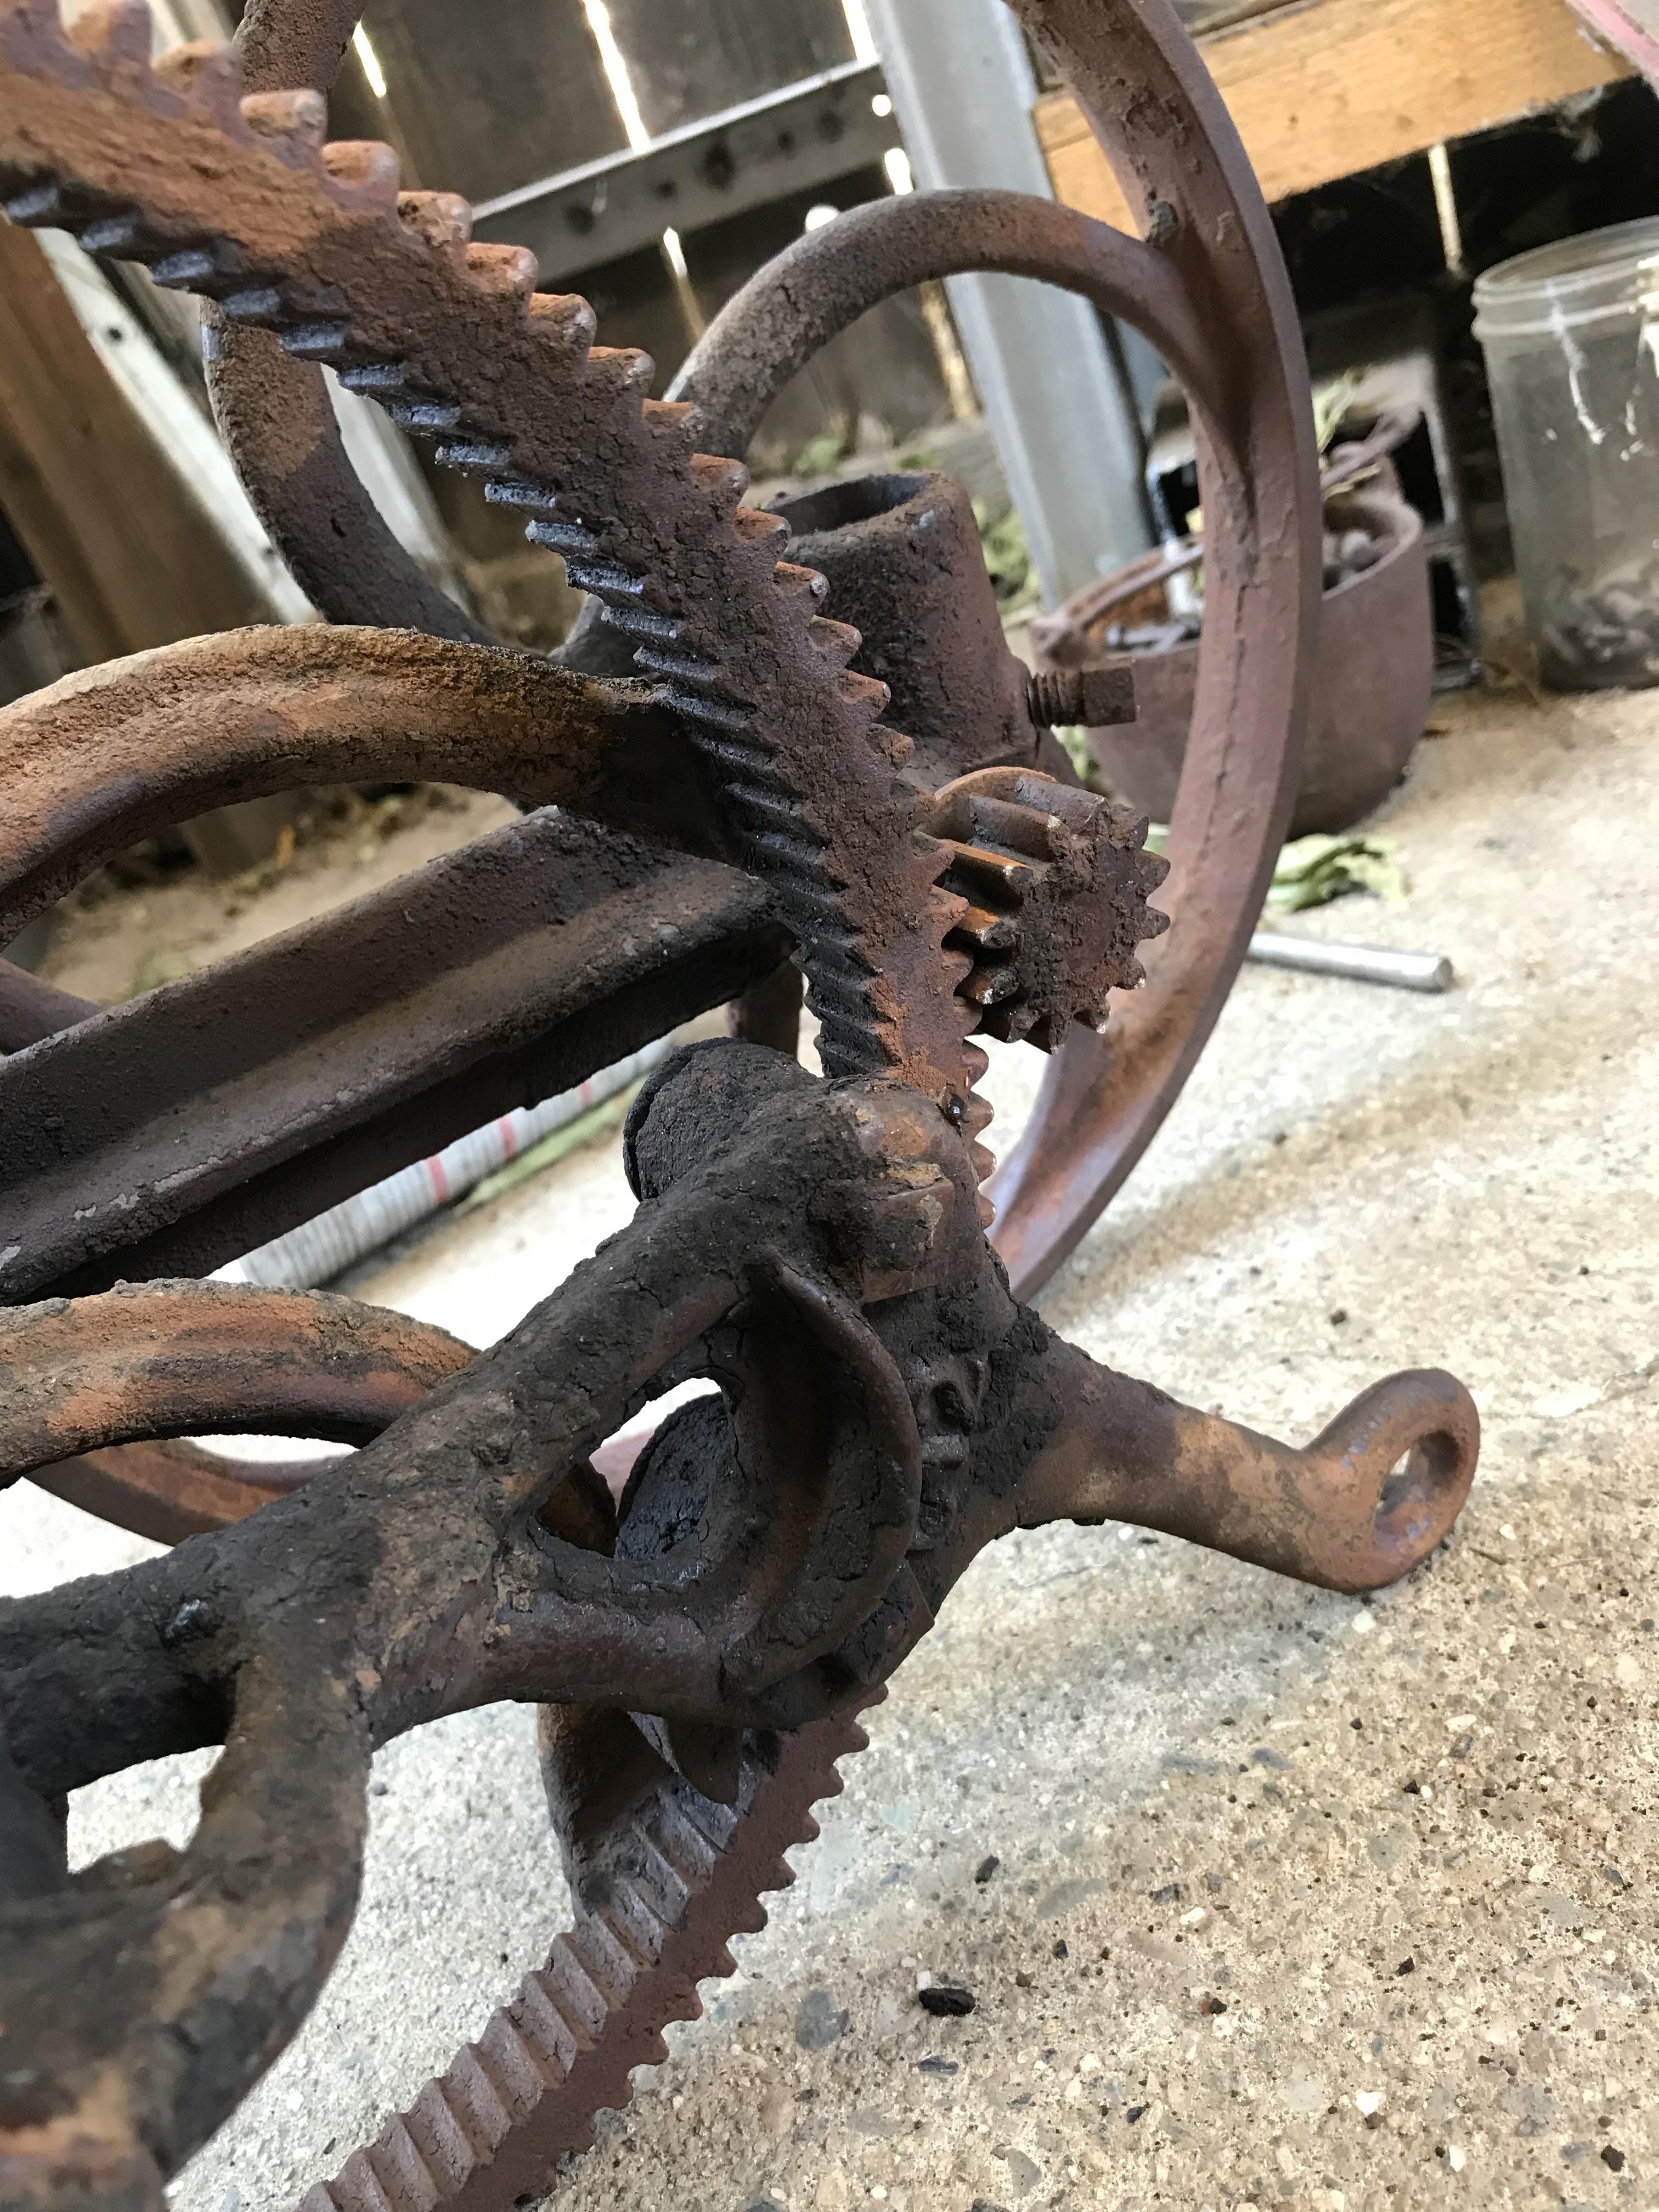
Hello folks, been a while since I've been on here. However last week I picked up some neat stuff from just up the road for *I think* a pretty good price. Got a Royal Blower with stand just needs one new gear, thinking of 3D printing it to replace a gear that swelled up and cracked. Almost looks like it was made of pressed paper, very strange. Also a good handful of struck tool heads and a few hammer heads. The point of this thread however is the rivet forge. I have been trying to look through the old price books and such to find any that match and so far not much luck. There is no MFG info on any of the pieces however almost every piece has a "C**" (C12, C15 etc.) item number cast on it and the forge pot has "150" cast underneath. The blower is rather unique in that the ash dump comes out at approximately 45° rather than straight down like most seem to. Looks identical from what I can tell to the blower on the right on page 128 here. http://www.bamsite.org/books/canedy.pdf However the drive mechanism seems entirely different from that shown. There is no clutch, instead the drive gear is moved via a couple of ratcheting teeth on the lever arm. Can just be seen in the attached photo. The forge body however has the two cast bosses that hold the 1/4 round gear that drives the clutch, so maybe this is either a very early version not in the catalog or is a mashup of two different forges? Maybe a different MFG all together?

-
I found another vise with the same logo, in Australia of all places... He has the Wilkinson logo shown as well and they don't look the same.
-
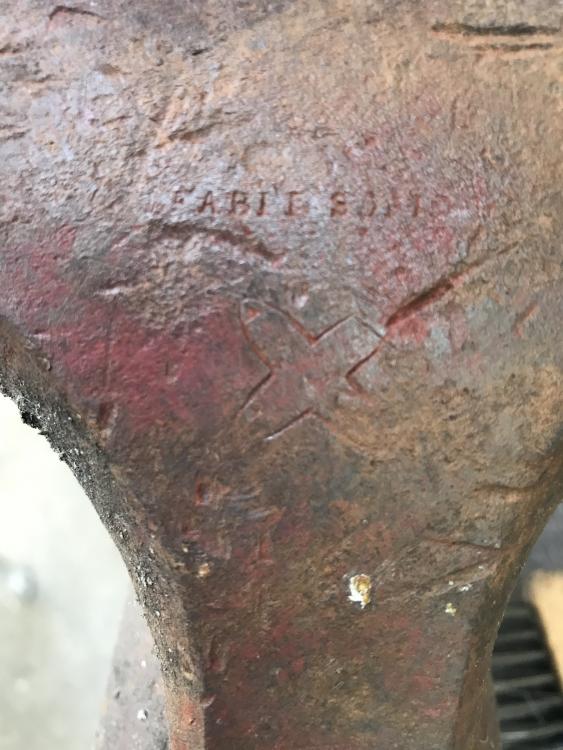
Best I can make out is "ABID SOLID" though I think there is at least one more letter before that.
-
Hmmm, they don't seem quite the same. Very similar but slightly different shape, I wonder if it was possibly a logo change over the years. If I ever find out anything different I'll be sure to share with everyone.
-
This is the logo on my post vise, bought locally in northern CA. Anyone recognize it?
-
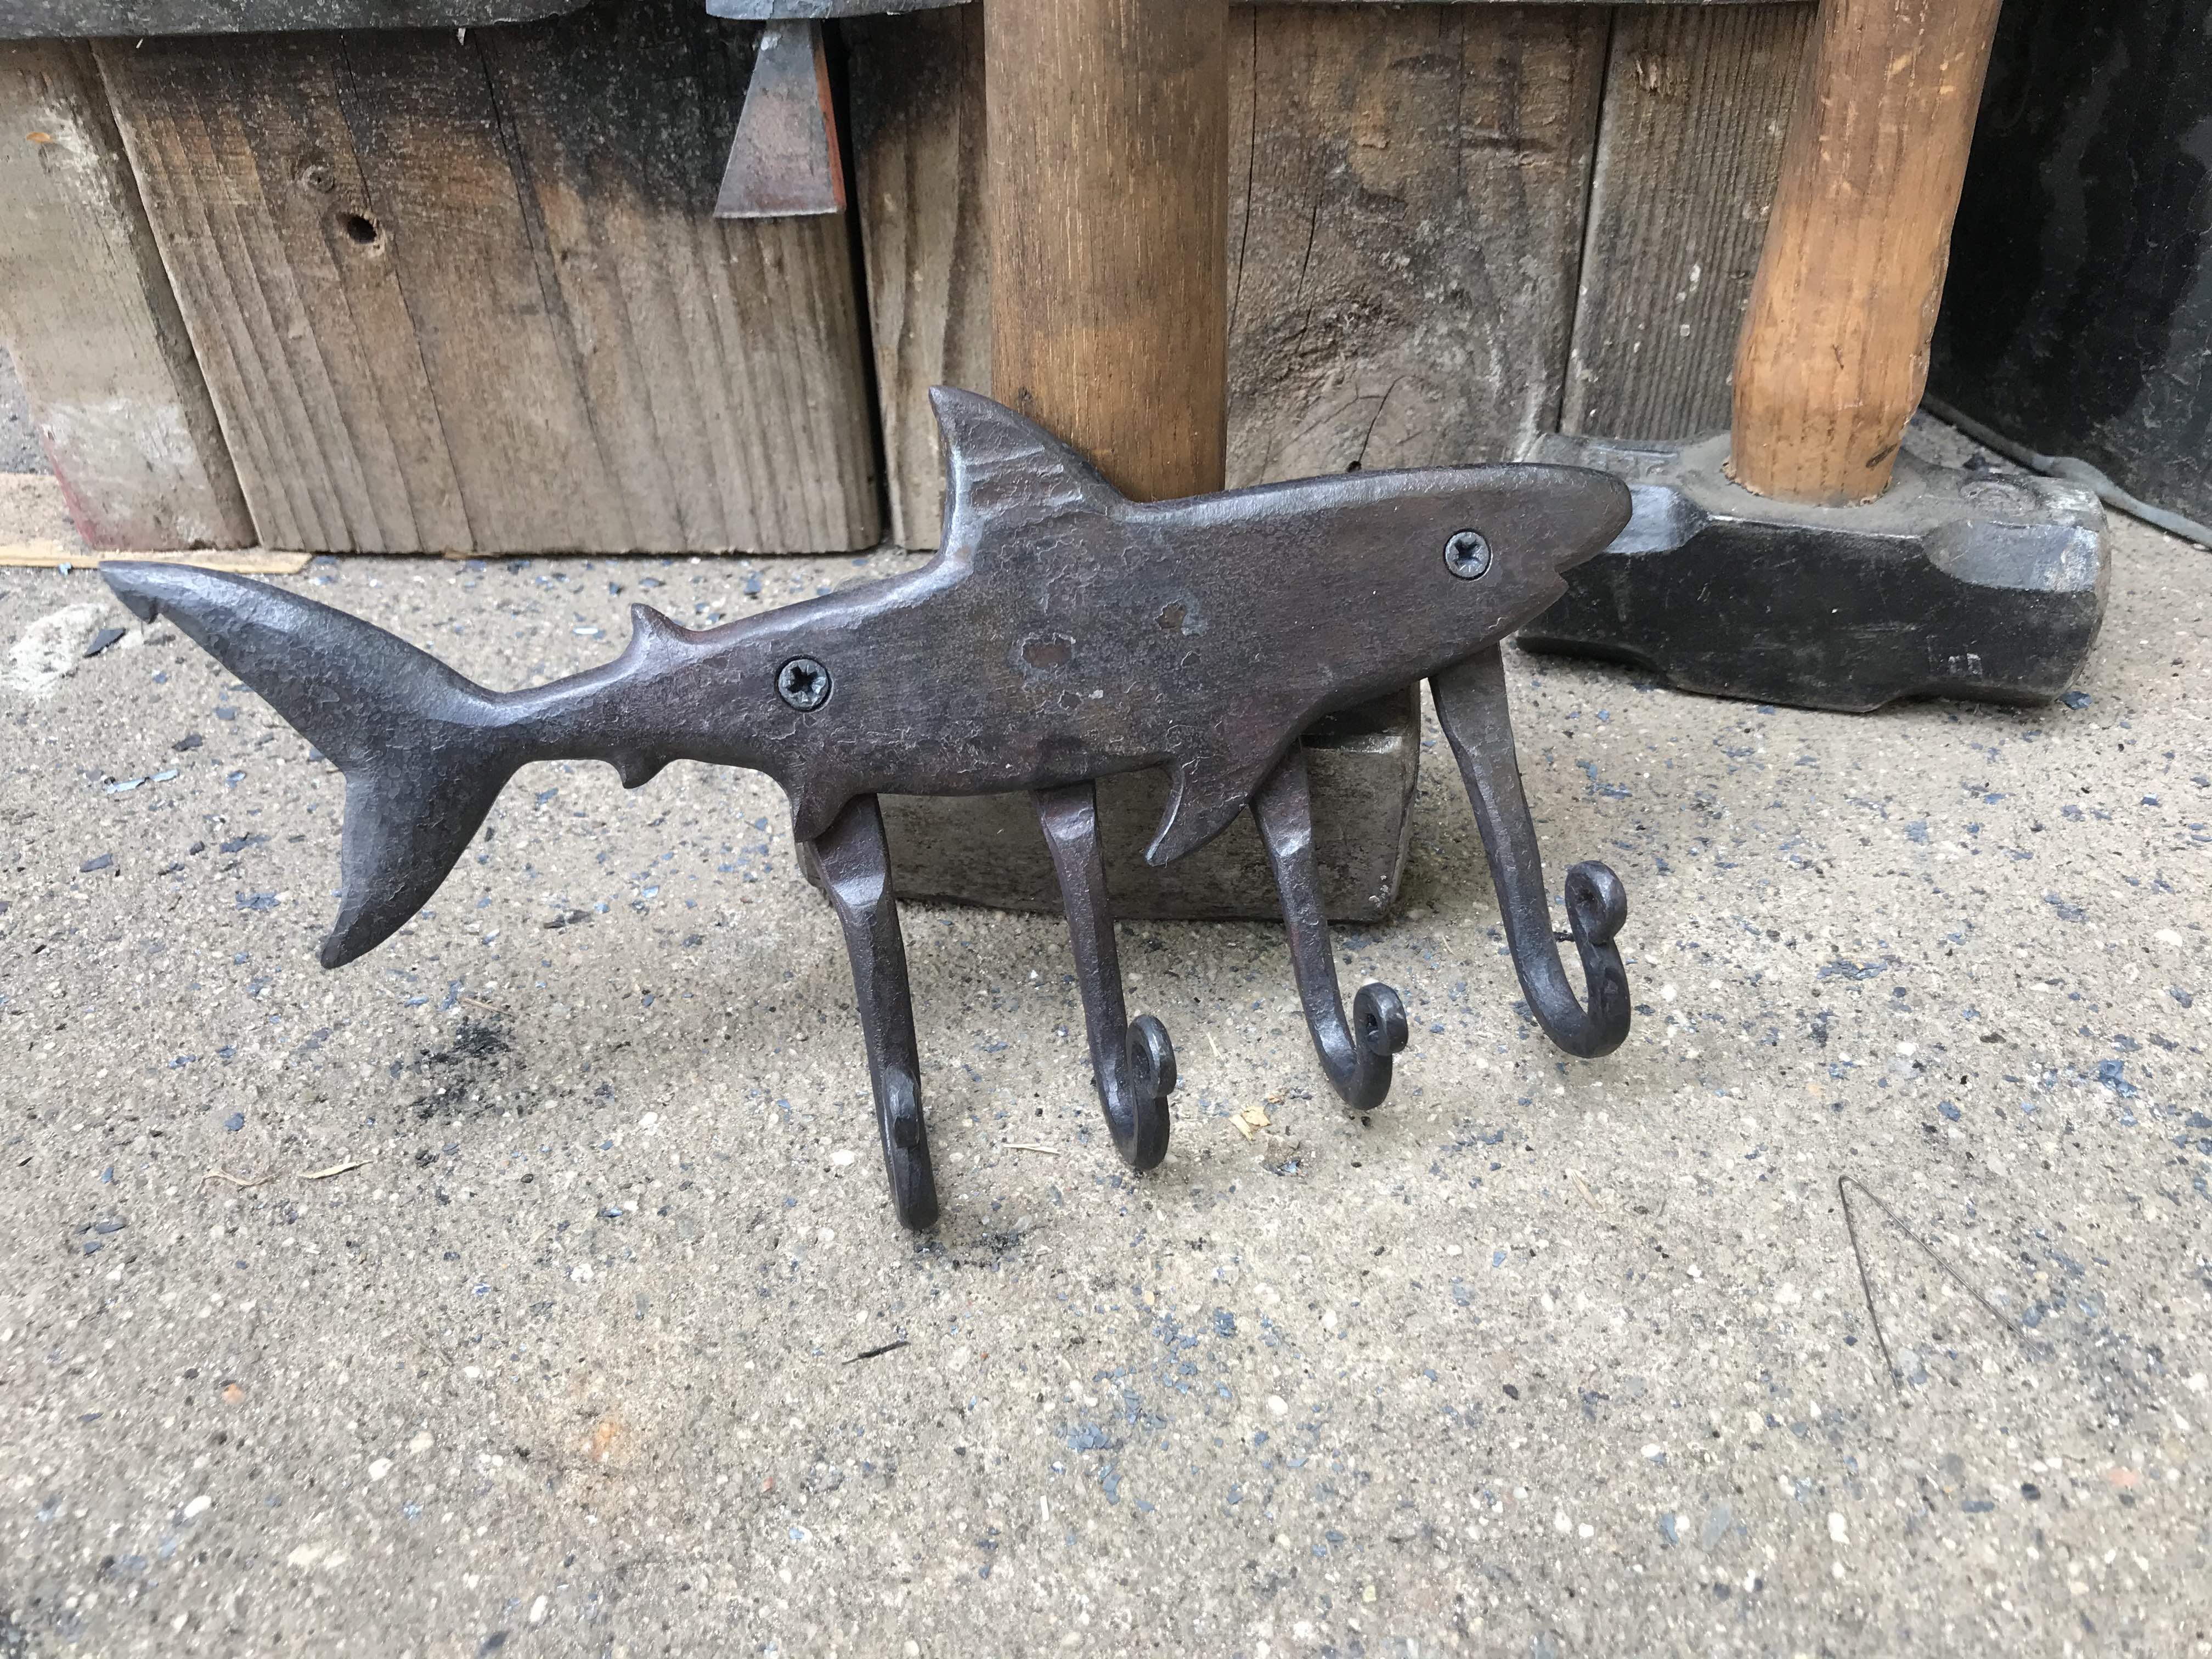
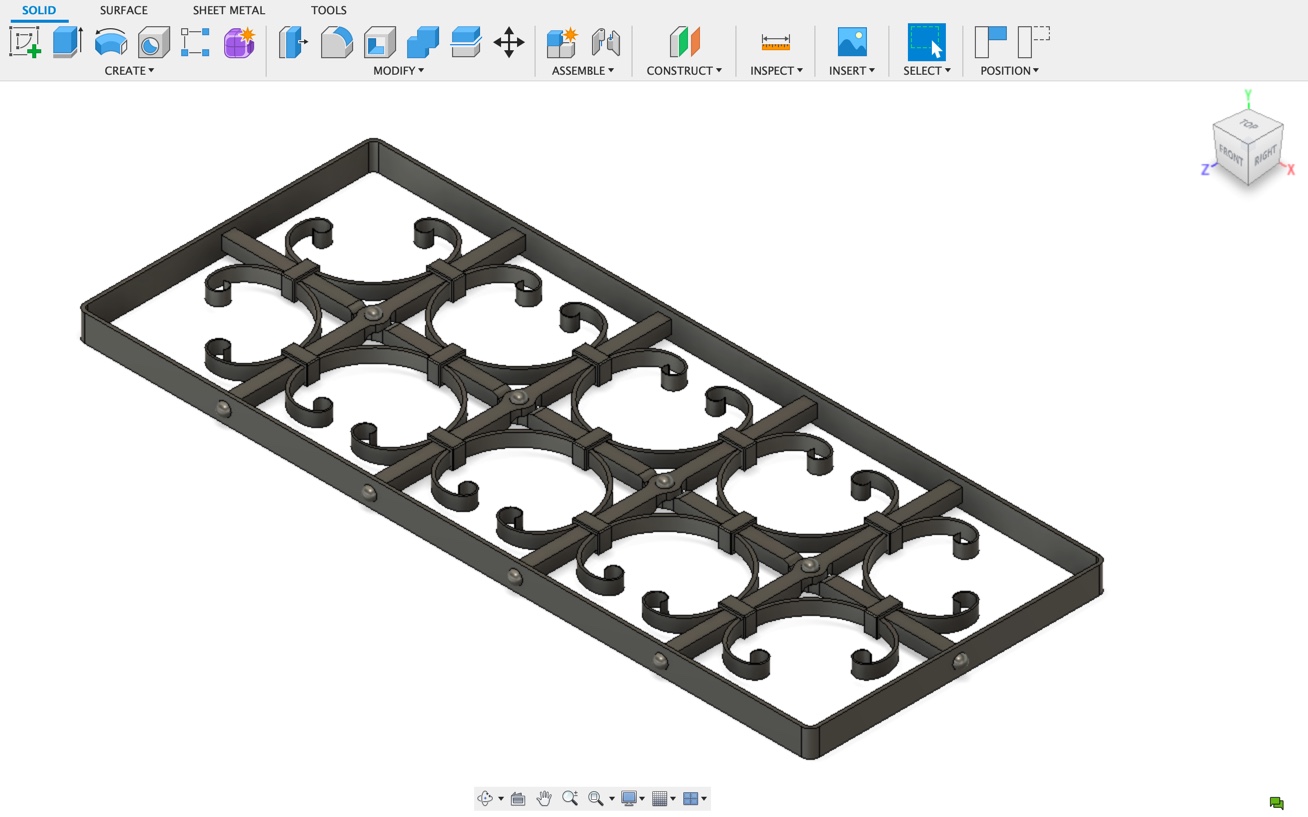
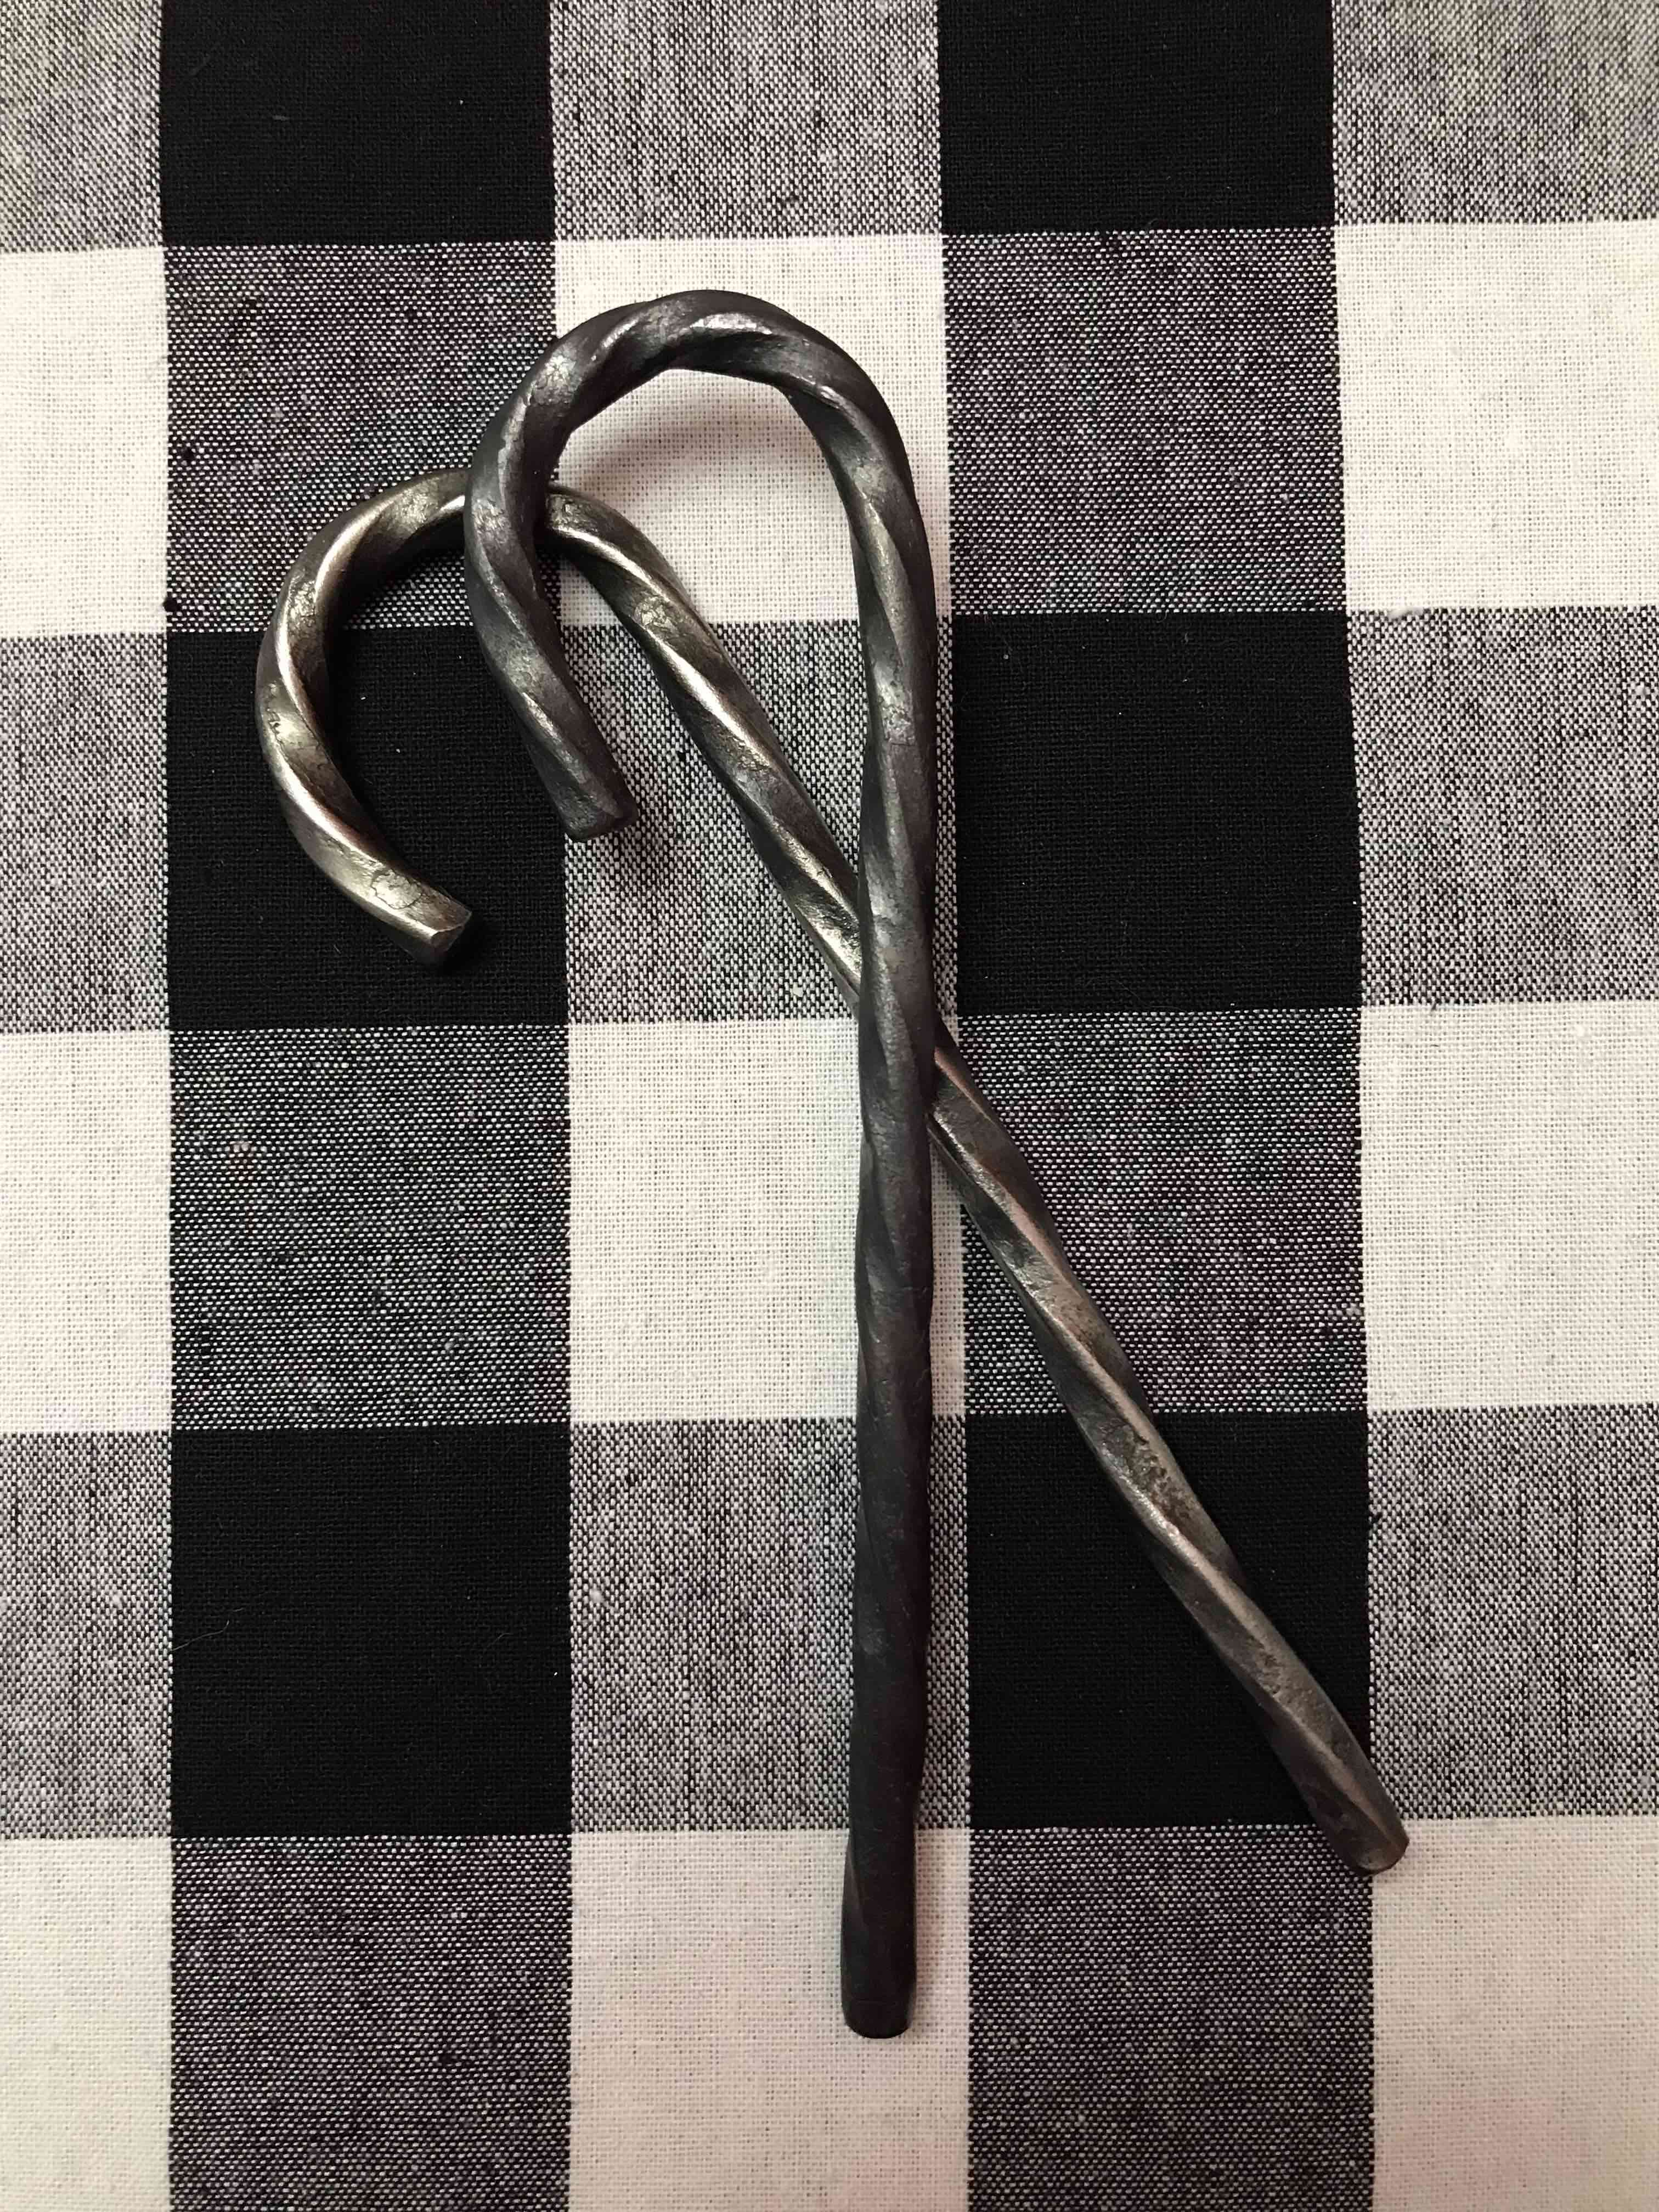
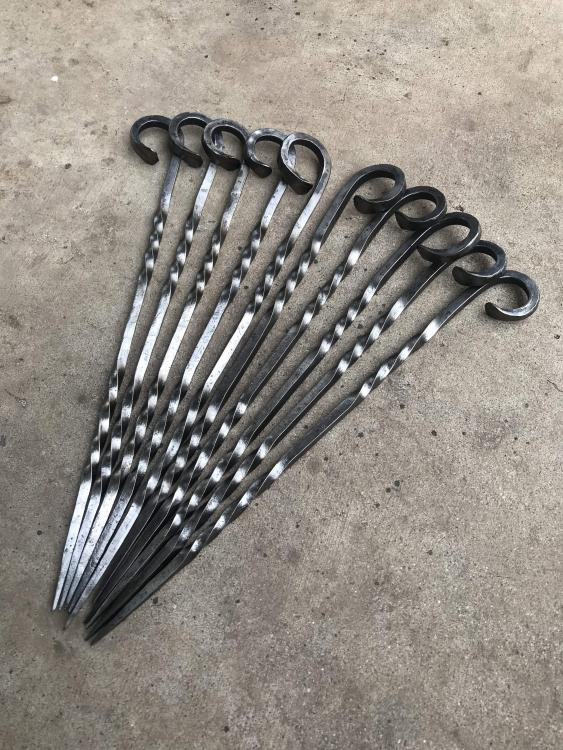
Hello fine IFI readers, I realized it had been quite a while since I'd been on and just wanted to stop by and say things have been going well. The forge you all helped me get going has been holding up extremely well and has helped produce quite a few little projects. I've experimented with some different finishes and quite like the glossy black finish applying canola oil to hot metal gives and it is also food safe. I successfully completed a small forge weld on a fire poker as well which I was pleased by. Everyone likes photos so here is a little sampling of what I've done since the new forge has been running. Also a CAD model of a project I am hoping to work on in the near future. It will be a small bench for the bedroom, the model shown being a shelf on the bottom and I am planning on doing a "tufted" cushion as the top of the bench. (We will see how far I get with that or if it ends up with a basic square cushion.) I will say I have found some limitations with the propane forge and would like to get a small coal forge at some point in the future to be able to do some larger ornamental pieces and oddly shaped things more easily. I do have an opportunity to trade time/labor for one from the guy I bought my post vice from, but that will be down the road sometime and I have enjoyed having a proper forge compared to my JABOD that was about 12"x18" outside dimensions, powered by a hand pump for air mattresses.


-
304 stainless square tube
NoGoodWithUsernames replied to Flight RN's topic in Blacksmithing, General Discussion
From working in the food production industry I will say that 304 is indeed food grade and is widely used in food and beverage unless superior corrosion resistance is required for things like tomato paste with high acid content which is when 316L would generally be used. My very first project was a set of BBQ tools for my father in law and I used a drop of 304SS sheet from work as the spatula and riveted it to a forged mild steel handle. Turned out quite well. -
Good Morning everyone, some better news to report today. Since the latest KOL application had cured for 24 hours I moved the forge outside and installed the burners to start the drying process. I would light it up for a few seconds, then shut it off and let it sit for a few minutes while I was working on other stuff. Wash rinse repeat. Kept a fairly consistent wisp of steam coming out of the forge and the KOL was noticeably changing. Light taps with a small wrench where it was dry would produce more of a ring vs the thunk the still wet KOL made. I even put one of the pieces of crumbled floor in the forge to dry it and it became much more difficult to break than an un-dried piece. When turning back over to right side up, none of the new casting fell out so between liquefaction and heat "curing" this time went much smoother. I also realized when turning it back over only half the floor is gone, it broke at about a 35° angle so from the front edge it looked like it all fell (and there was enough material I thought it was the whole floor!) but the back of the floor is mostly intact, so that made me feel a bit better about it as well. In regards to buttering, everything was well wetted before applying the rigidizer. First layer air dried for nearly two weeks before it was completely dry (didn't have the burner running well enough to dry it with that.) I used two complete bottles on this forge and the insulation is crusty but still has a bit of give, does that still indicate that more of the rigidizer should be used? Insulation was also wetted again before applying KOL. I appreciate all the constructive feedback, as always feel free to ask for better information or call me out if needed. I think perhaps the largest issue starting out was not using the correct procedure for applying and curing the KOL coupled with a bit of impatience and feeling rushed.
-
I will give that method a go, inswool is all rigidized, though again this is my first time at any of this so who's to say how well it was done. Learning a lot of lessons to help the next one go much better. I just found Wayne's method where he cuts the tank in half and hinges one side. Seems like a good method to help speed things up as you can cast both sides simultaneously. Oh well you live and learn and try to learn from others but sometimes I gotta get my hands dirty and see how things work out.