NoGoodWithUsernames
-
Posts
159 -
Joined
-
Last visited
Content Type
Profiles
Forums
Articles
Gallery
Downloads
Events
Everything posted by NoGoodWithUsernames
-
Also thank you all for the encouragement and advise. I'm still hopeful that the end result will be worth all this effort. Since a few have asked on details here is exactly the steps I've been using. 1: forge shell lined with rigidized inswool is on it's side 2: pour 5lb bag of KOL into plastic tub 3: weigh out 13.75 oz into cup on postal scale 4: weight out additional 1.2 oz in separate cup for use if needed 5: start mixing slowly adding water until I can form a ball and toss it up and down, usually ending up using all water measure out. 6: get on ground with tub and sprayer full of water, spritz whole area I will be covering generously with water. (First time may not have been generous enough, been going to town with the water spritzing the inswool on the following two batches.) 7: apply KOL I am doing all this in the garage since it's been too cold outside, getting into freezing temps sometimes at night. After the first batch I laid some damp towels inside it and covered with a trash bag, last night I did not.
-
New day and a fresh outlook. Still frustrated, but ready to deal with this rather than being inclined to toss it in the bin. (No, I could not have thrown it out, too much time and effort put into it, but I can daydream!) Mikey, are you saying to cure AND fire each section of refractory before turning and going to the next? I only let it cure for a day and didn't fire it. Perhaps that was part of the issue, the KOL had hardened it seemed but when the floor fell it pretty much crumbled. It came off in big chunks but it was very easy to break apart. Swede, I like that idea, however I don't know anyone local who throws pottery. The local community college I believe has classes (not sure about this year with distance learning however) Will have to see how this one goes and might try that with the next forge. A question on the texture/consistency of the KOL. When I mix it I have been starting with the 2.75oz O2 per 1lb KOL and working up to just shy of 3oz. I am able to form a ball and toss it up and down and it will hold together. However shortly after I start trying to apply it to the forge walls it starts acting more like granola and I sometimes can't even get it to stick to itself very well. I did pat it and got some liquifaction most places with this batch and that seemed to somewhat help but transitions around the front lip and rear lip were a royal PITA and still have some small gaps on the front that will need filling. Should I keep adding a little more water when mixing or is this just the way this stuff is?
-
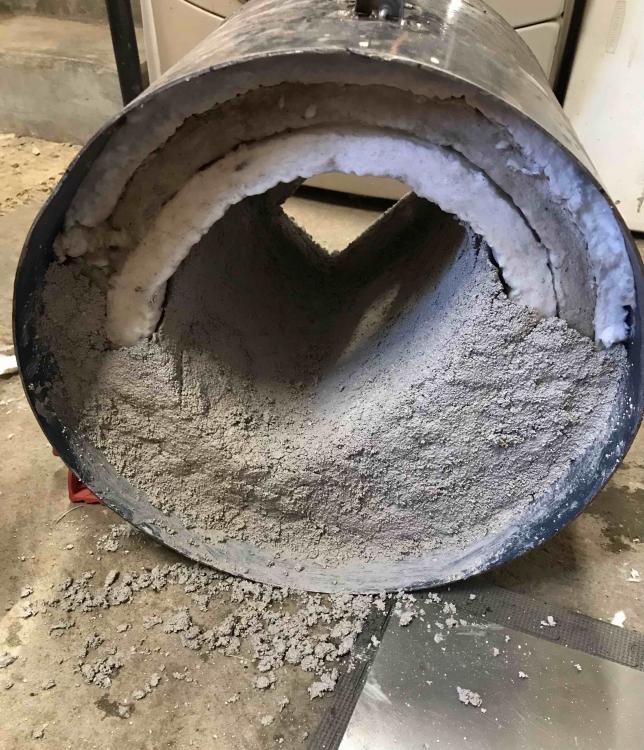
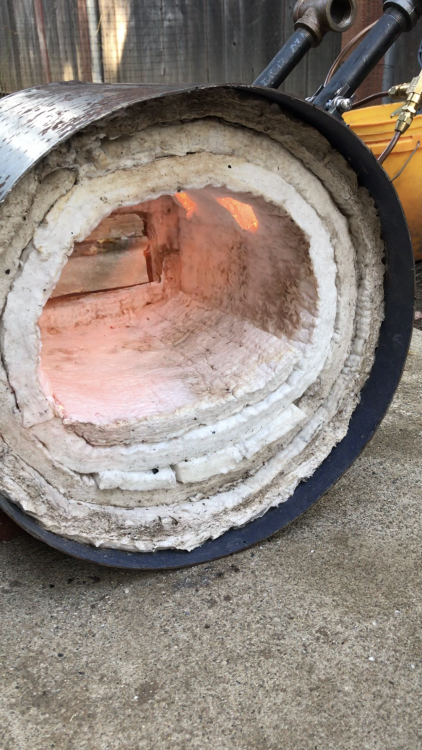
I’ve about had it with this stuff. Thought it was all going well when the entire floor fell down in chunks after I had the forge upside down for a few minutes of putting this stuff onto the ceiling. I can’t even get this stuff to stick to itself hardly. Still the only surface it sticks to is my hand. I had to toss the rest of the mix I had prepped because there were no more horizontal surfaces to put it on. At this point I think I would have been better off just buying a premade forge. Less headache and less money. Now to order more kast o lite since I lost a whole bag of it in the floor.
-
This is where I am currently at. (see photo) Not very happy with how it is going. I am having a bear getting the dang stuff to stick to anything but my hands... (You can see on the left and right edges it's trying to pull away from the ceramic wool, and in the foreground a small pile of fallen refractory on the floor.) Hopefully once this portion cures it will stay in place enough to rotate and do the other side. Assuming that it is okay to let this cure a few hours/overnight and apply another batch later on? You can see the rectangular rear opening, at some point I will be making a bolt on front cover that will give the whole chamber a lip around the edge but I think I will need more Kast O Lite before I can do that... Trying to get it up and running to do some forging this weekend with a buddy. Though if needed to he can probably pack his forge and drag it with him.
-
First bag of Kast O Lite 30 is mixed and applied. Started with the 2.75 oz water per pound and ended up adding a bit up to about 2.9 oz per pound after some mixing. I must not have wetted the ceramic wool enough before applying because it isn't wanting to stick too well. 5 LBS covered the floor and up one side about two inches, and a little bit around the openings. Just waiting for the first batch to setup a bit so I can turn the forge and keep going.
-
Here are a few stills from the video. Must not have been a compatible file format.
-
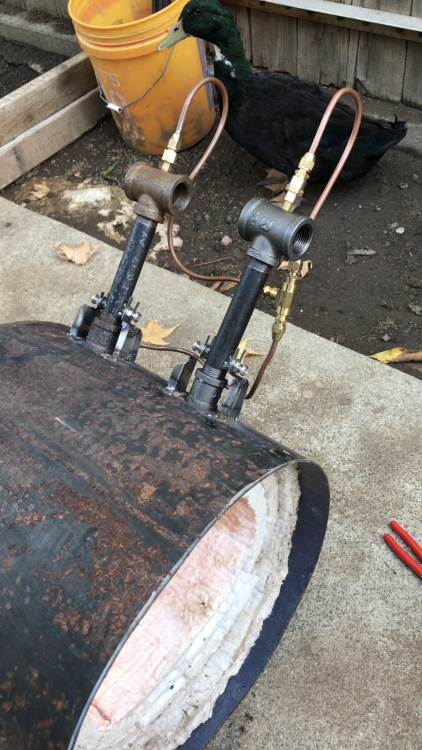
Tapered burner ports it is, here is where we are so far. Ceramic wool is all in, rigidized and dried. Attached the two burners and lit it up because I couldn't help myself and we have a fire! I want to make a face to the forge somehow giving the whole thing about a 1" lip to help contain the flame, and then from there use fire bricks on the front and back shelves to block the openings further if needed. IMG_7793.MOV
-
Alright, I think the layout is complete. Pre refractory is 10" dia (with a raised flat floor so 8" height) x 12" OAL (NO TAPER TO THE CHAMBER) factor in refractory and it's 9"x7"x11" which gives me 584 cubic inches. Which means I'll be building another 3/4" burner (or should I build a single 1" burner instead?)
-
Of course, I even put my dunce cap on! Oh interesting, makes perfect sense though to use the refractory as a sort of Venturi. This sounds really interesting, and to make sure I’m on the same page as you, you’re saying taper the entire length of the forge so the back is narrower than the front opening correct?
-
I apologize, I don't know why I can't get that terminology out of my head. *castable refractory* *castable refractory* *castable refractory* I don't think I've actually considered burner protrusion much, but I was planning on flush or slightly recessed. Though I do intend to have the burner bolt on so I can adjust that if needed.
-
Mikey, great question. I'll be shooting for 4 layers on the walls I think, for an 8" diameter with a flattened floor like so in this sketch. Per your recommendation above burner at 2:00 slanted slightly in look good? Though once refractory cement is in I guess that would drop it down to about 7" diameter. Still be plausible with a 9" end diameter and flat floor?

-
Hey all, just wanted to check back in and let y'all know this is still moving along. It got put on hold again for a little while, but I have some extra ceramic wool on the way now. I'm hoping to have it wrapped up in a few weeks to start working on Christmas presents for the season.
-

Local Business Sign: Steele House Coffee
NoGoodWithUsernames replied to NoGoodWithUsernames's topic in Member Projects
And here I thought I was being witty! -
Local Business Sign: Steele House Coffee
NoGoodWithUsernames replied to NoGoodWithUsernames's topic in Member Projects
Thank you for the kind words sir. Yes indeed, the owners of the coffee shop are the Steele family. Though not technically customers as I didn’t charge for it, I just wanted a project to work on. -
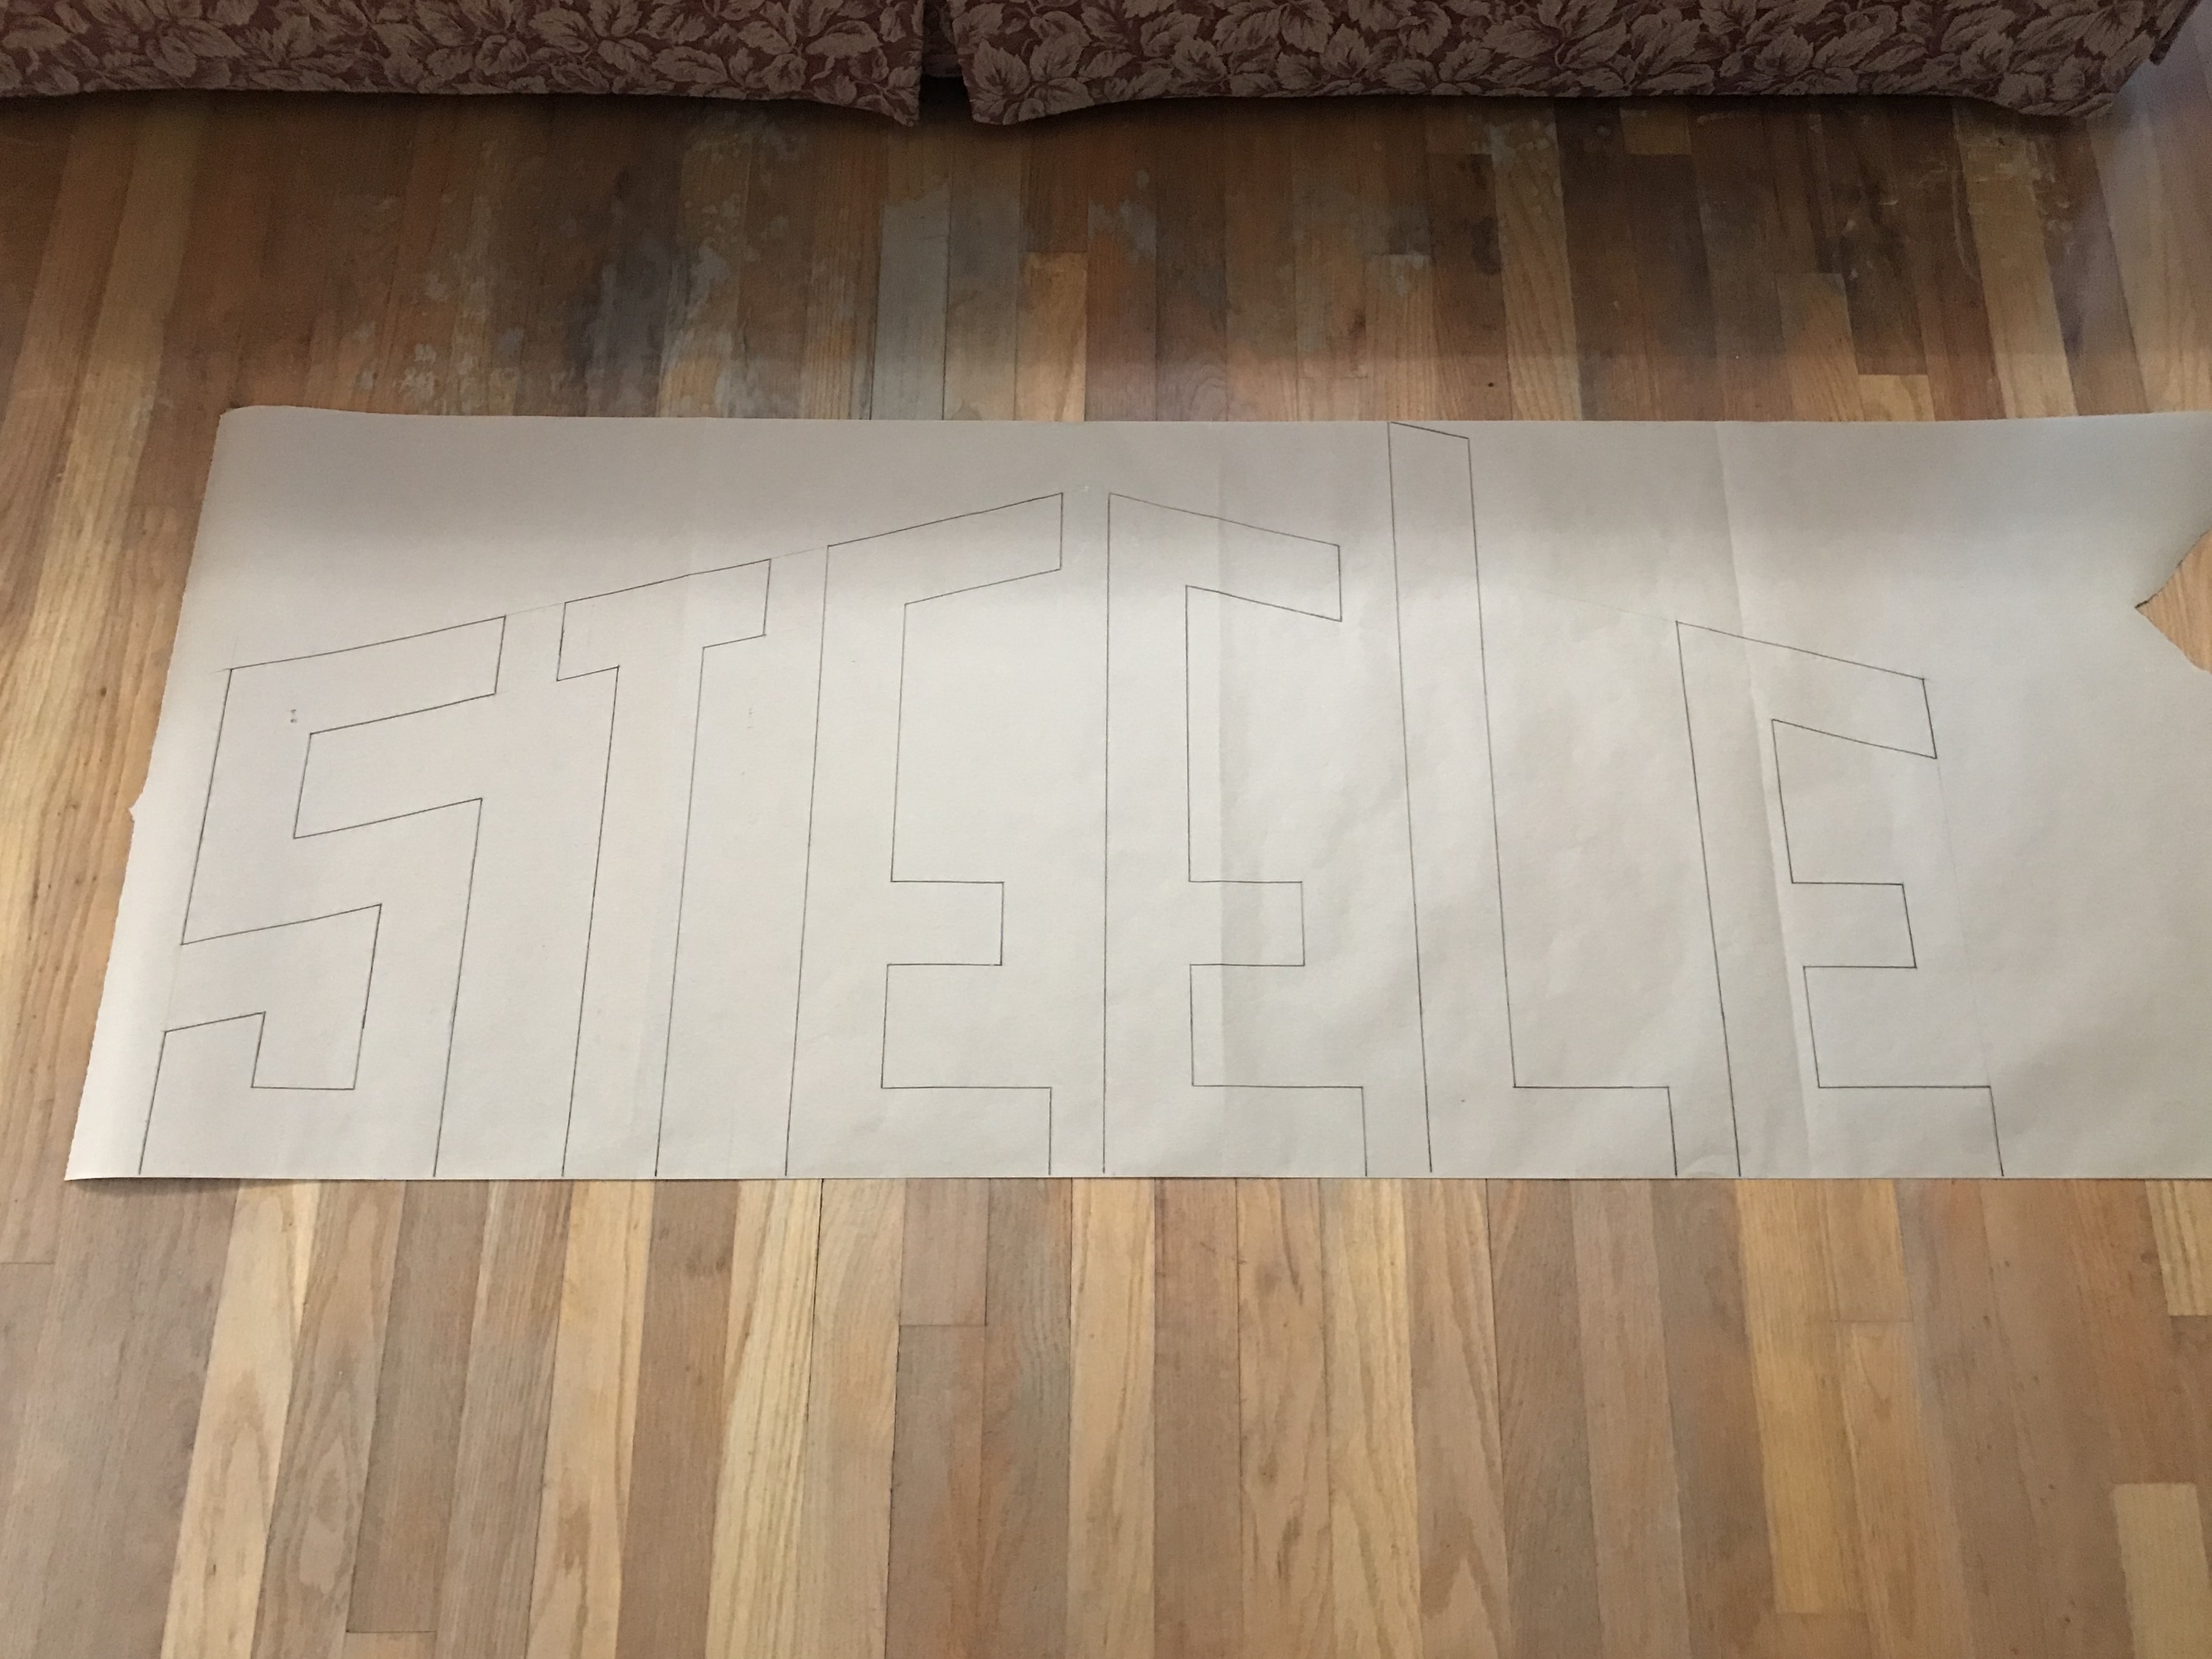
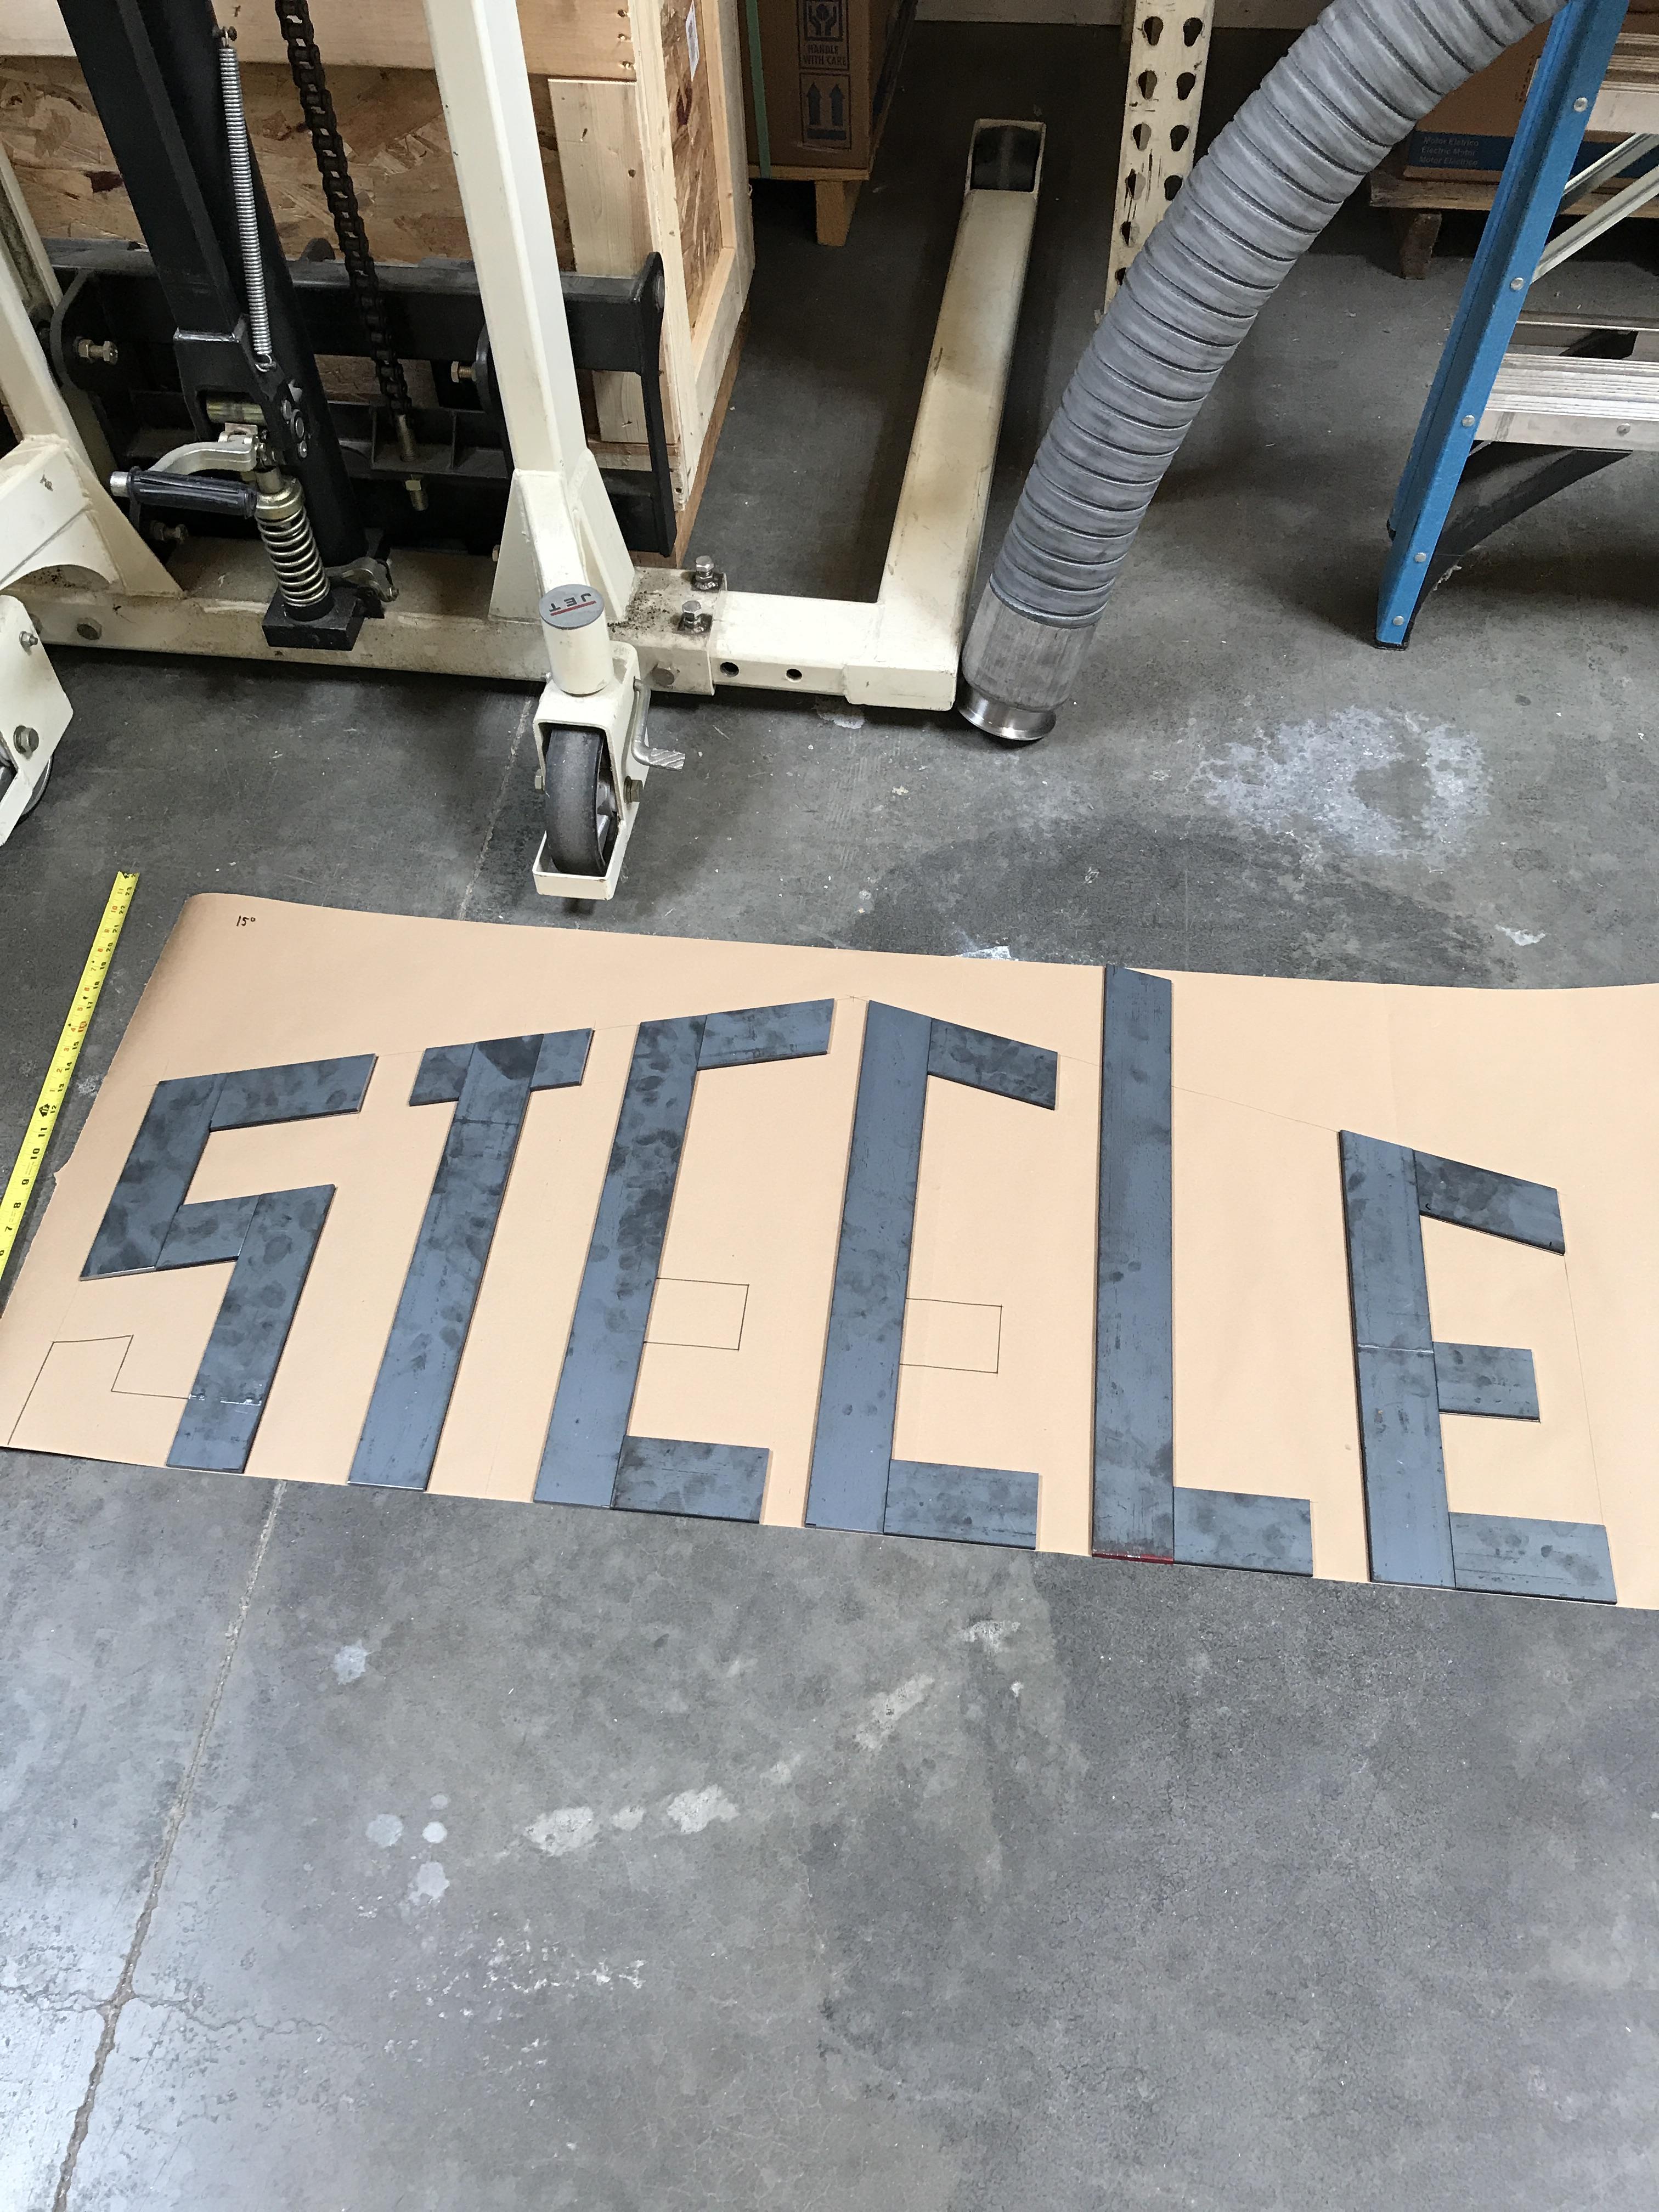
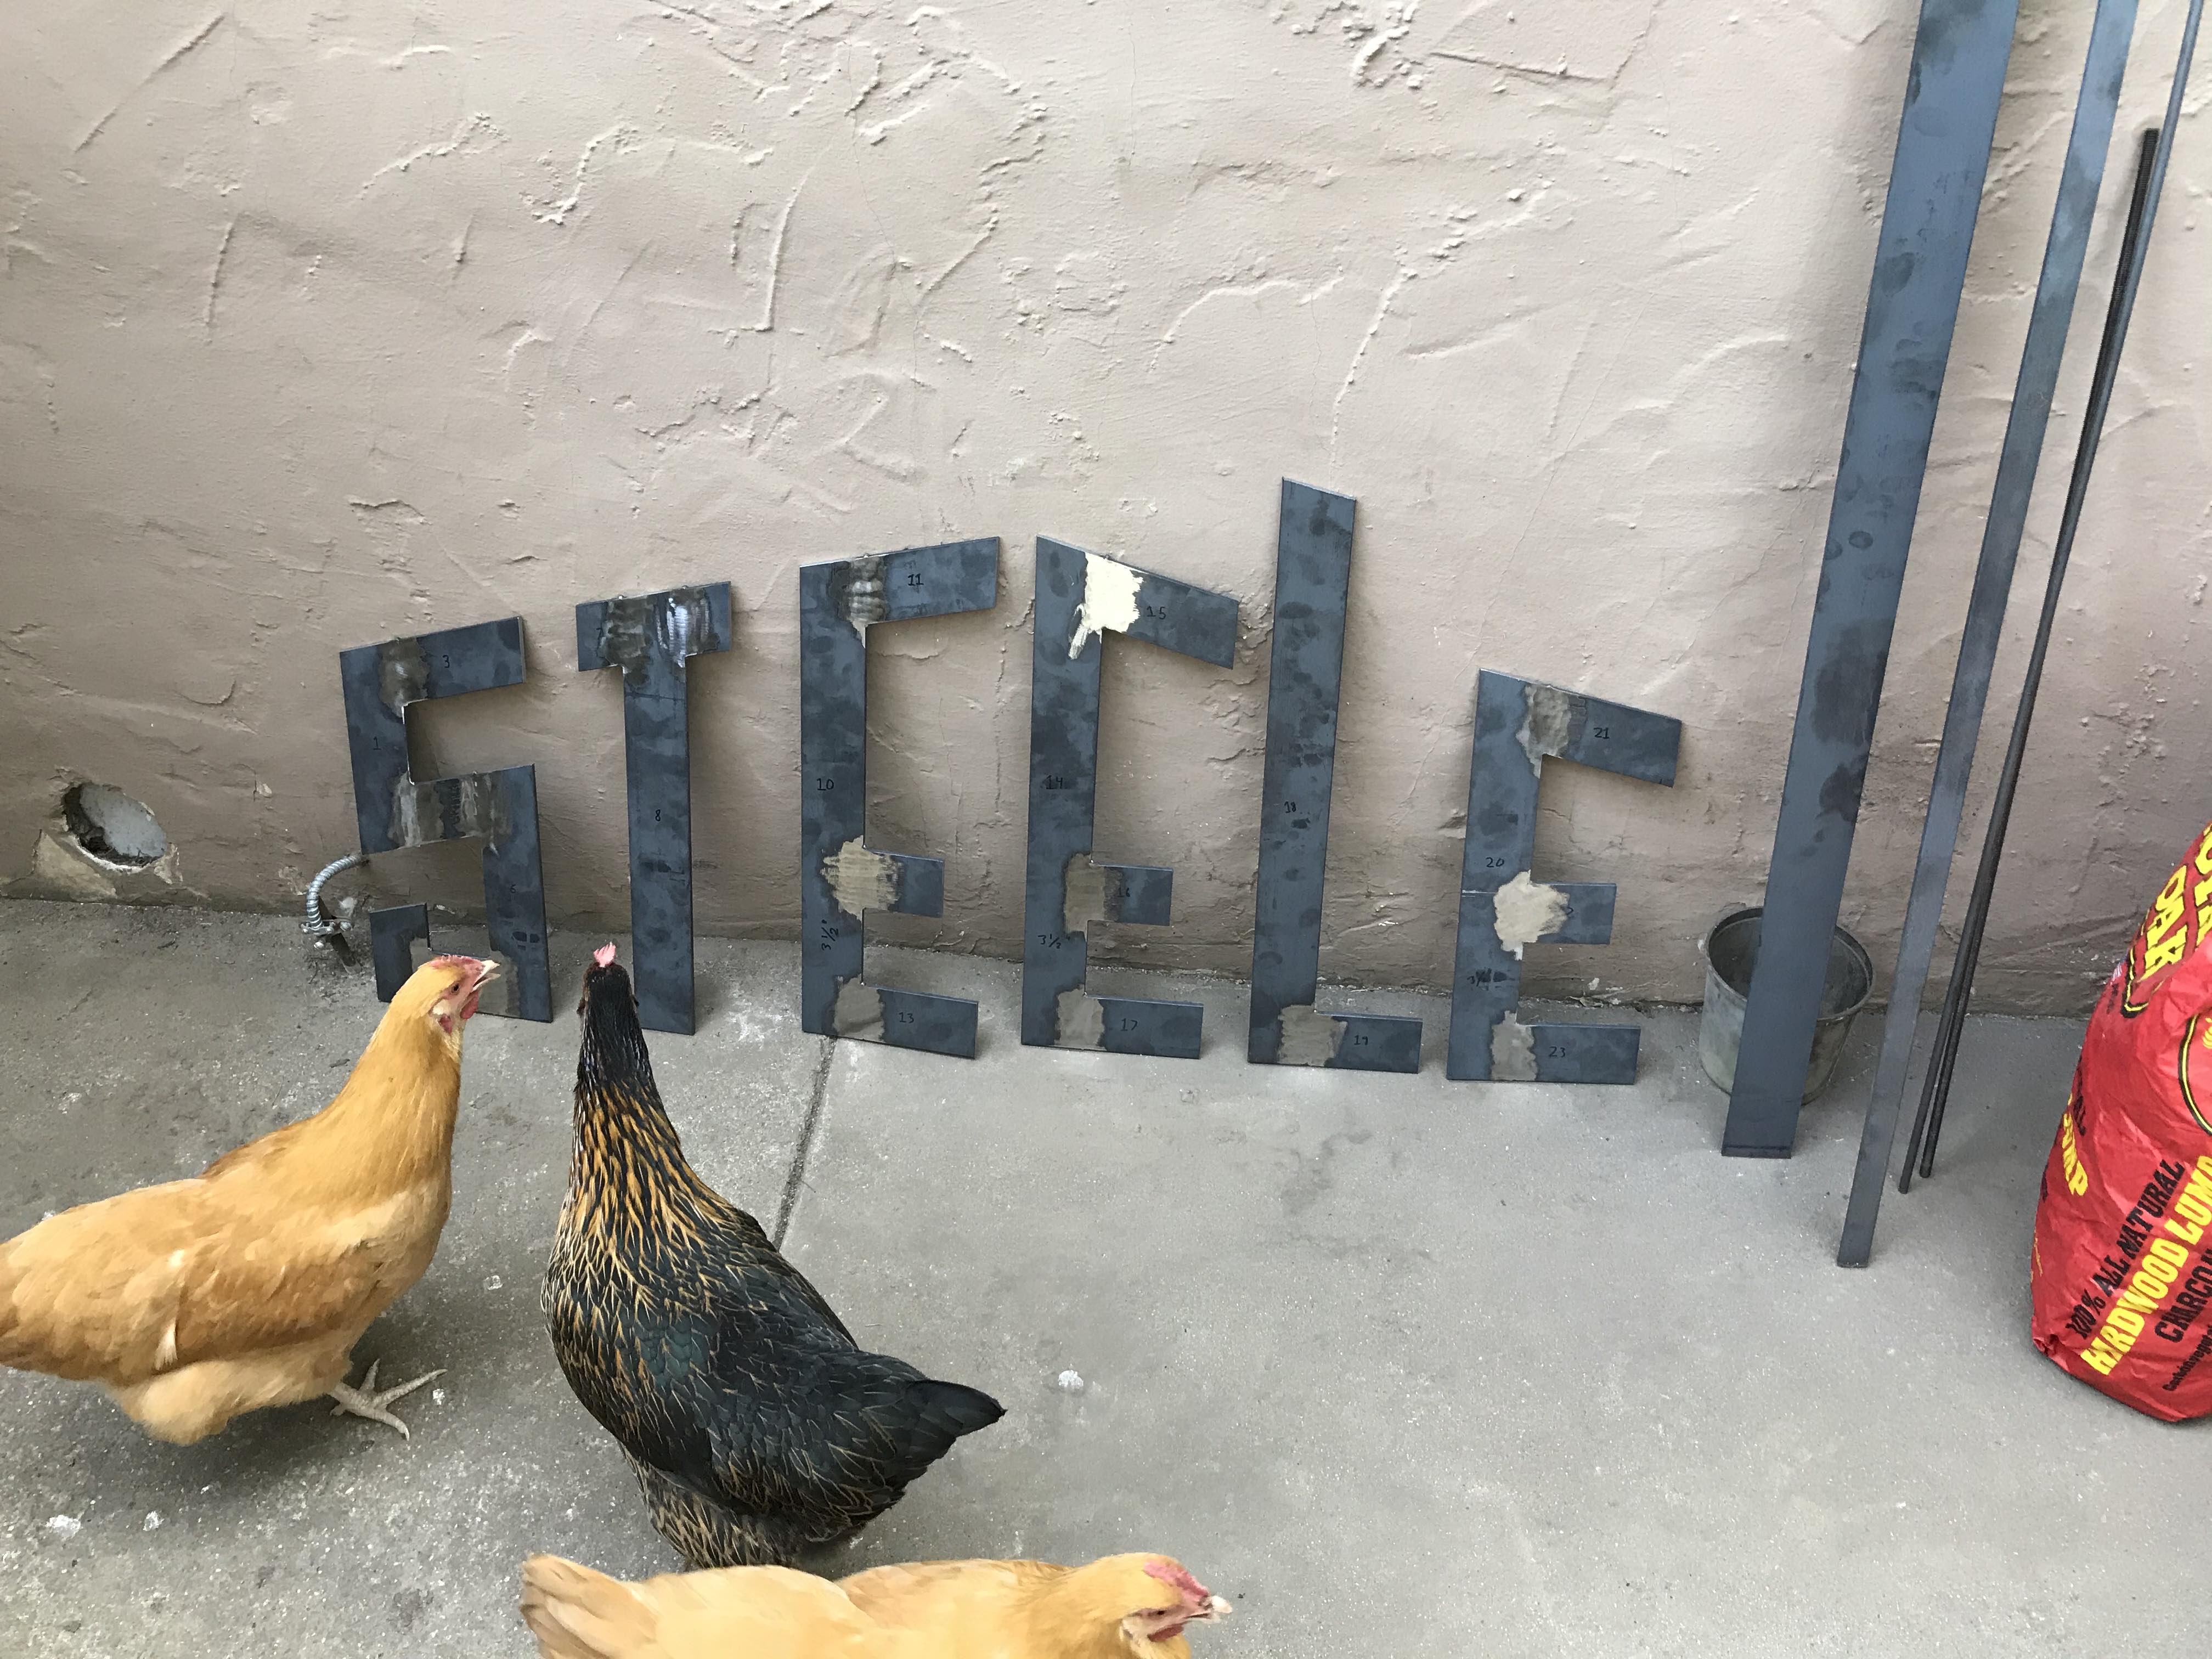
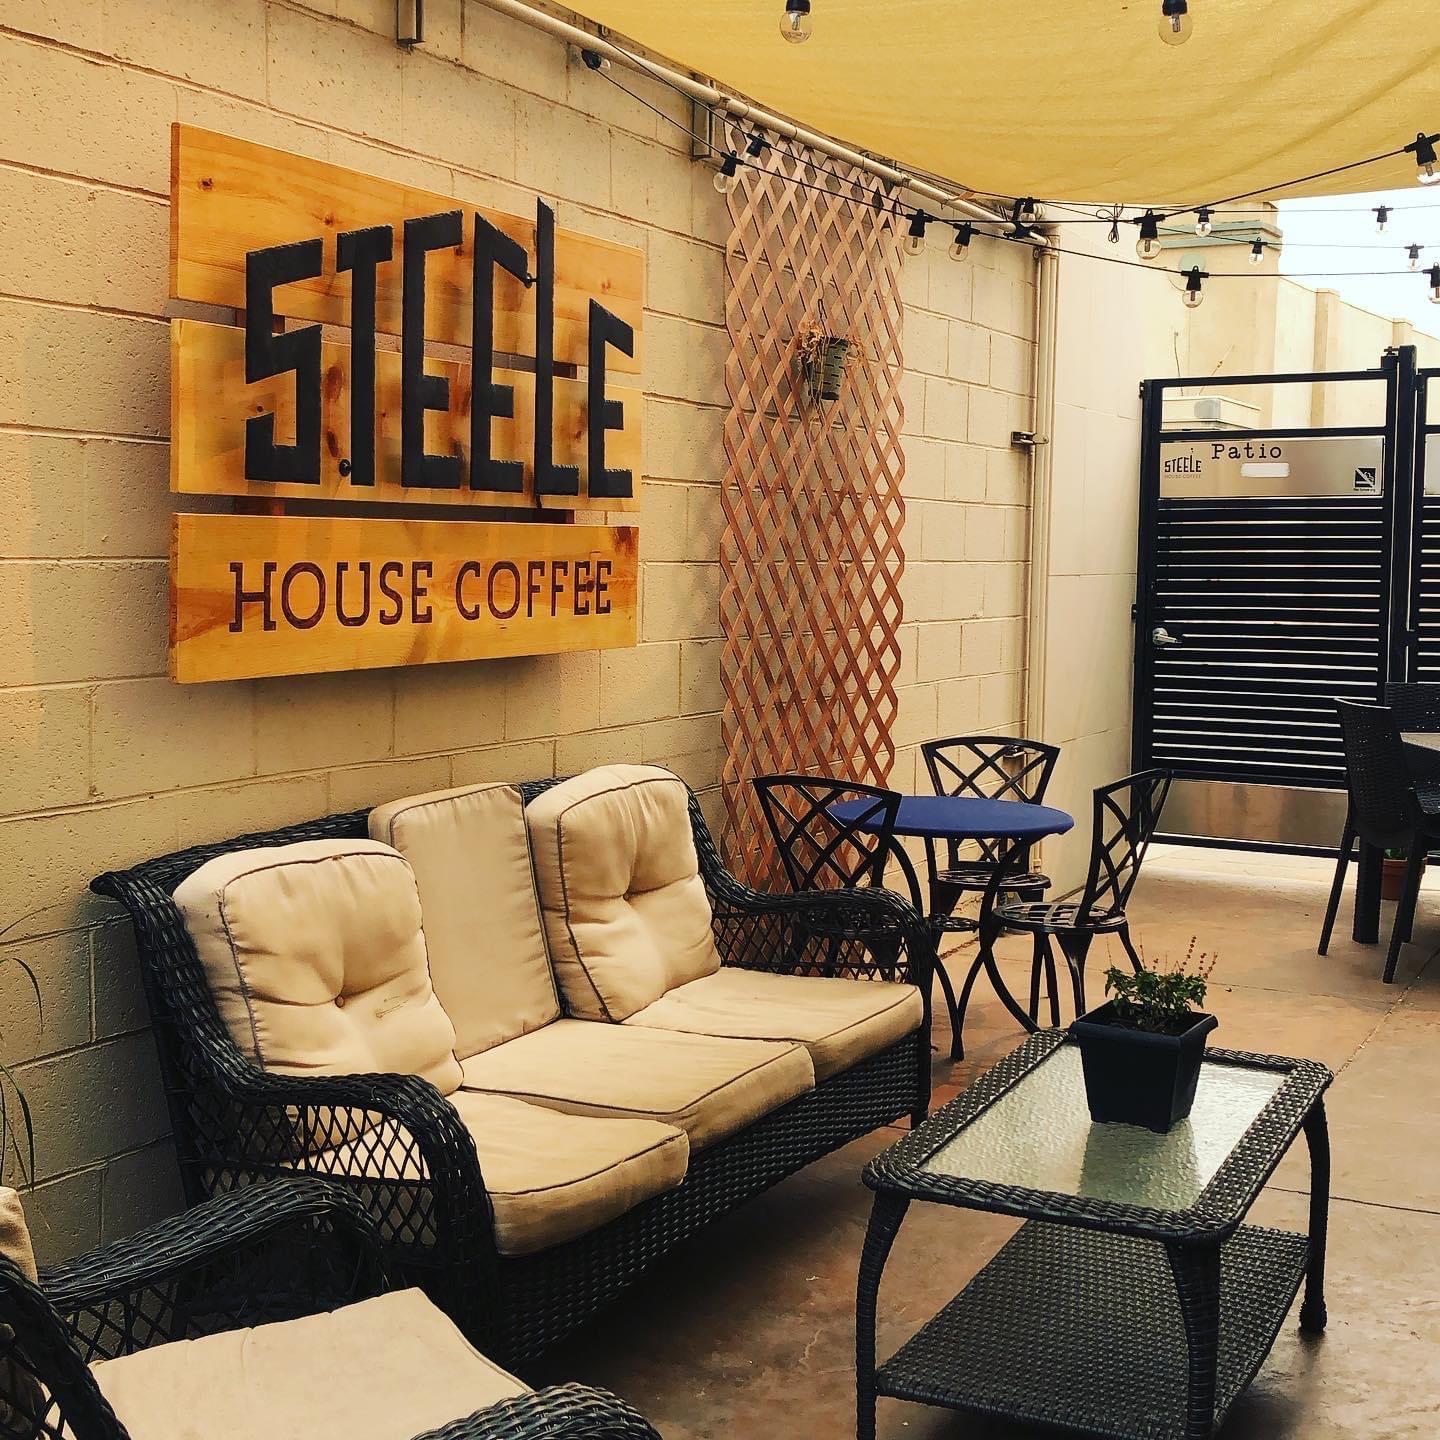
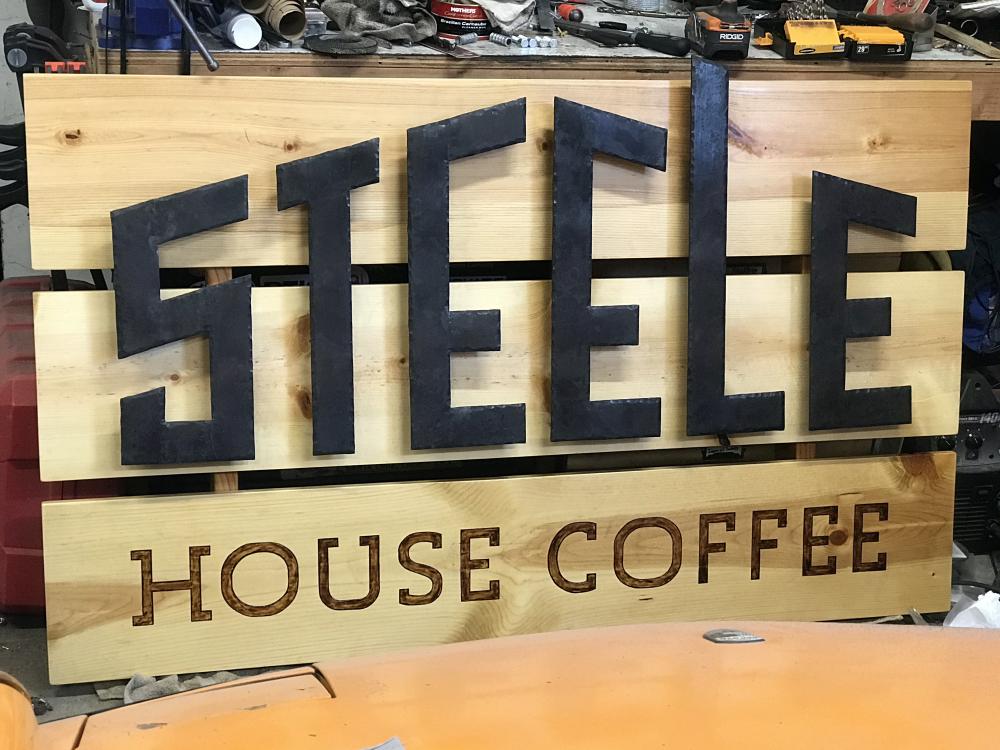
Happy Labor Day fellow smiths. I'm here to show a project I just completed and delivered to its new owners today. Started with getting a copy of their logo and transcribing it to its new scale. The scale I chose gave me 2.5" with font so started cutting pieces to assemble the main part of the logo. 2.5"x0.25" flat mild steel. Getting letters welded up and cleaning the welds. Technically they are forge welded, as in, they are welded (MIG) and then I forged them. Completed sign, might be hard to see but edges are all textured then used carnauba wax while still hot to help protect and darken the letters. Custom standoffs welded to the backside to set the letters off the backplates for depth. Finally, the sign in its final position.


-
Mikey, I think I was inadvertently leaning towards a "D" Forge, or at least "D-ish"... I will read up on those, I found Andy's "D" Forge thread and will read through that. Are there any others that would make for some good reading? After just a few minutes of reading up I'm kinda thinking a hybrid D/oval forge, make it oval with a flat floor. This would in theory smooth the transition to the floor a little bit better as well as reduce some volume by lowering the ceiling of the forge.
-
Got it, I think our difference comes from me using the 11" as measured with the wool loose in there, which should probably be tightened up a bit to get closer to planned dimensions. I will for sure do a third layer of wool, maybe even on the ends to reduce that volume further. Thanks again for the advise to a rookie, it is appreciated.
-
Buzzkill, I apologize for not quite understanding. Would you mind typing out your calculations? I gave the over all dimensions of the cylinder I'm using, so if with 2 layers of wool and one 1/2" layer of castable I should be in the ballpark of a 10"Diameter x 9"or10" OAL cylinder I think, which is what I based my calculations on in my previous comment. It's totally possible that I'm off on that so if you don't mind sharing why your calculation is so much different than mine? I am all for frugality, I can't imagine I'll be doing anything larger than the 8"x3" door in the back of it (will be the same size on the front), so given there should be a little bit of a lip to retain the fire I am okay getting as close to that as possible/need be. I already need to order more wool so doing a 3rd layer would not be a big deal.
-
Buzzkill, thank you for that clarification. I thought the Kast O Lite was a form of refractory cement. I am indeed using KOL-30 ordered from Glenn. Paul, once I add insulation to the ends and castable refractory to the inside it should end up at 10" diameter x 9" OAL give or take a little bit. So that's about 440"3, add in the floor and I get about 293"3. (figuring the floor to take up approximately 1/3rd of total cylinders volume) Does that sound like a more acceptable volume for a 3/4" burner?
-
Mikey, Thank you for the feedback! I'd rather here "you did this part wrong" and be able to correct it than to waste time and materials! I'll get some more wool on order to double up the ends, I did not calculate it into my order the first time so what you see in the picture is what I have except a few scraps. Yes refractory cement, NOT regular cement. Just called it cement because I was too lazy to type out refractory every time. My bad. Burner position sounds good easy enough to move still since I haven't drilled anything. Good to know about the floor and Perlite. Thanks again, and if anyone else has input or constructive criticism or even wants to poke fun at it feel free!
-
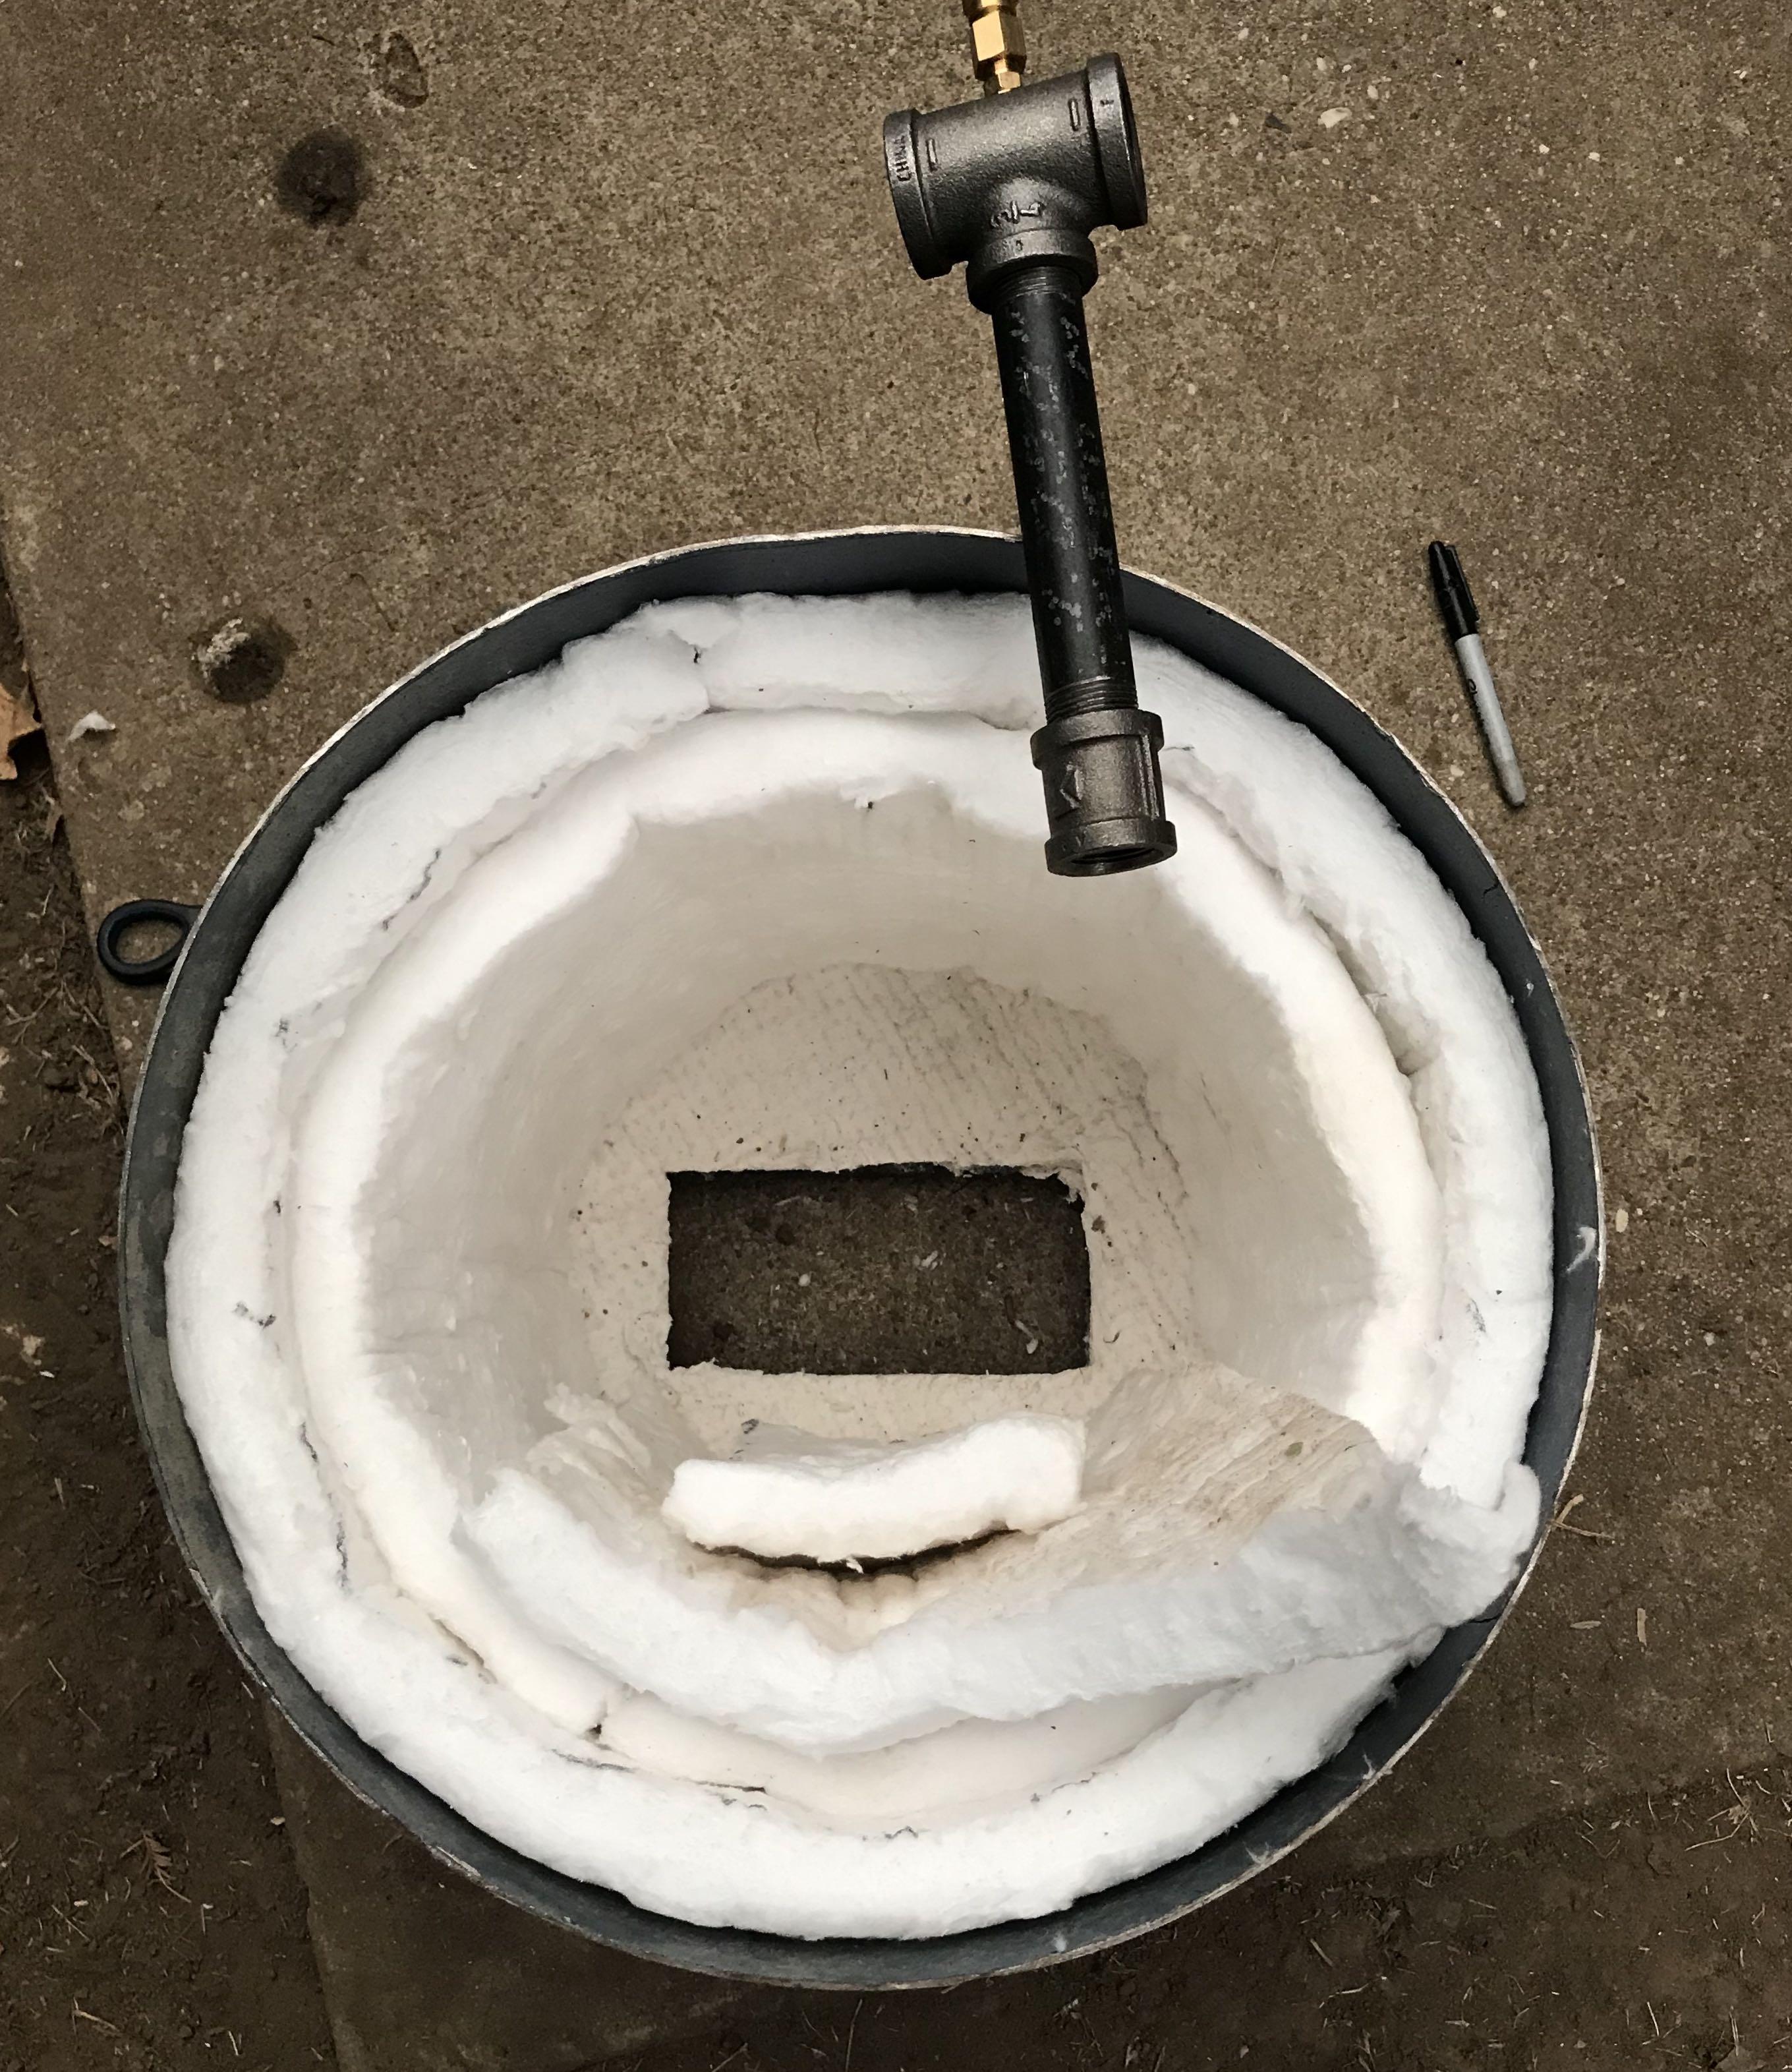
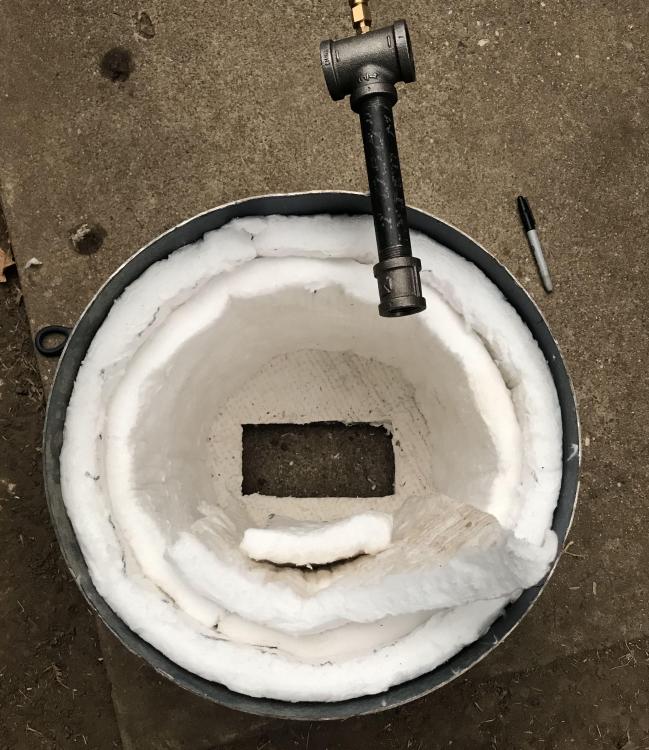
I'm building my gas forge with what I could find and that ended up being part of an old water heater, slightly larger diameter than a propane tank forge, and I want to have some more experienced opinions regarding my layout before I cut holes and rigidize and cement everything in. The tank is 16.5" ID x about 14" long (not including shallow dome on one end) I have the end dome with 1 layer of wool, then two layers around the outside leaving me about 11" ID (not counting 1/2" of cement all the way around of course leaving me with 10") I think layering a few extra pieces on the bottom would be beneficial to both reduce volume and get closer to a flat floor without having to pile up the cement on the bottom of the forge as much. Is this a good plan? If not what are better options? Also I think having the burner offset aids in "swirl" and helps forge efficiency? Should it end up about flush with the inside of the forge or be recessed into the cement/wool lining a little bit? Here is a photo to help visualize what I have/am planning.
-
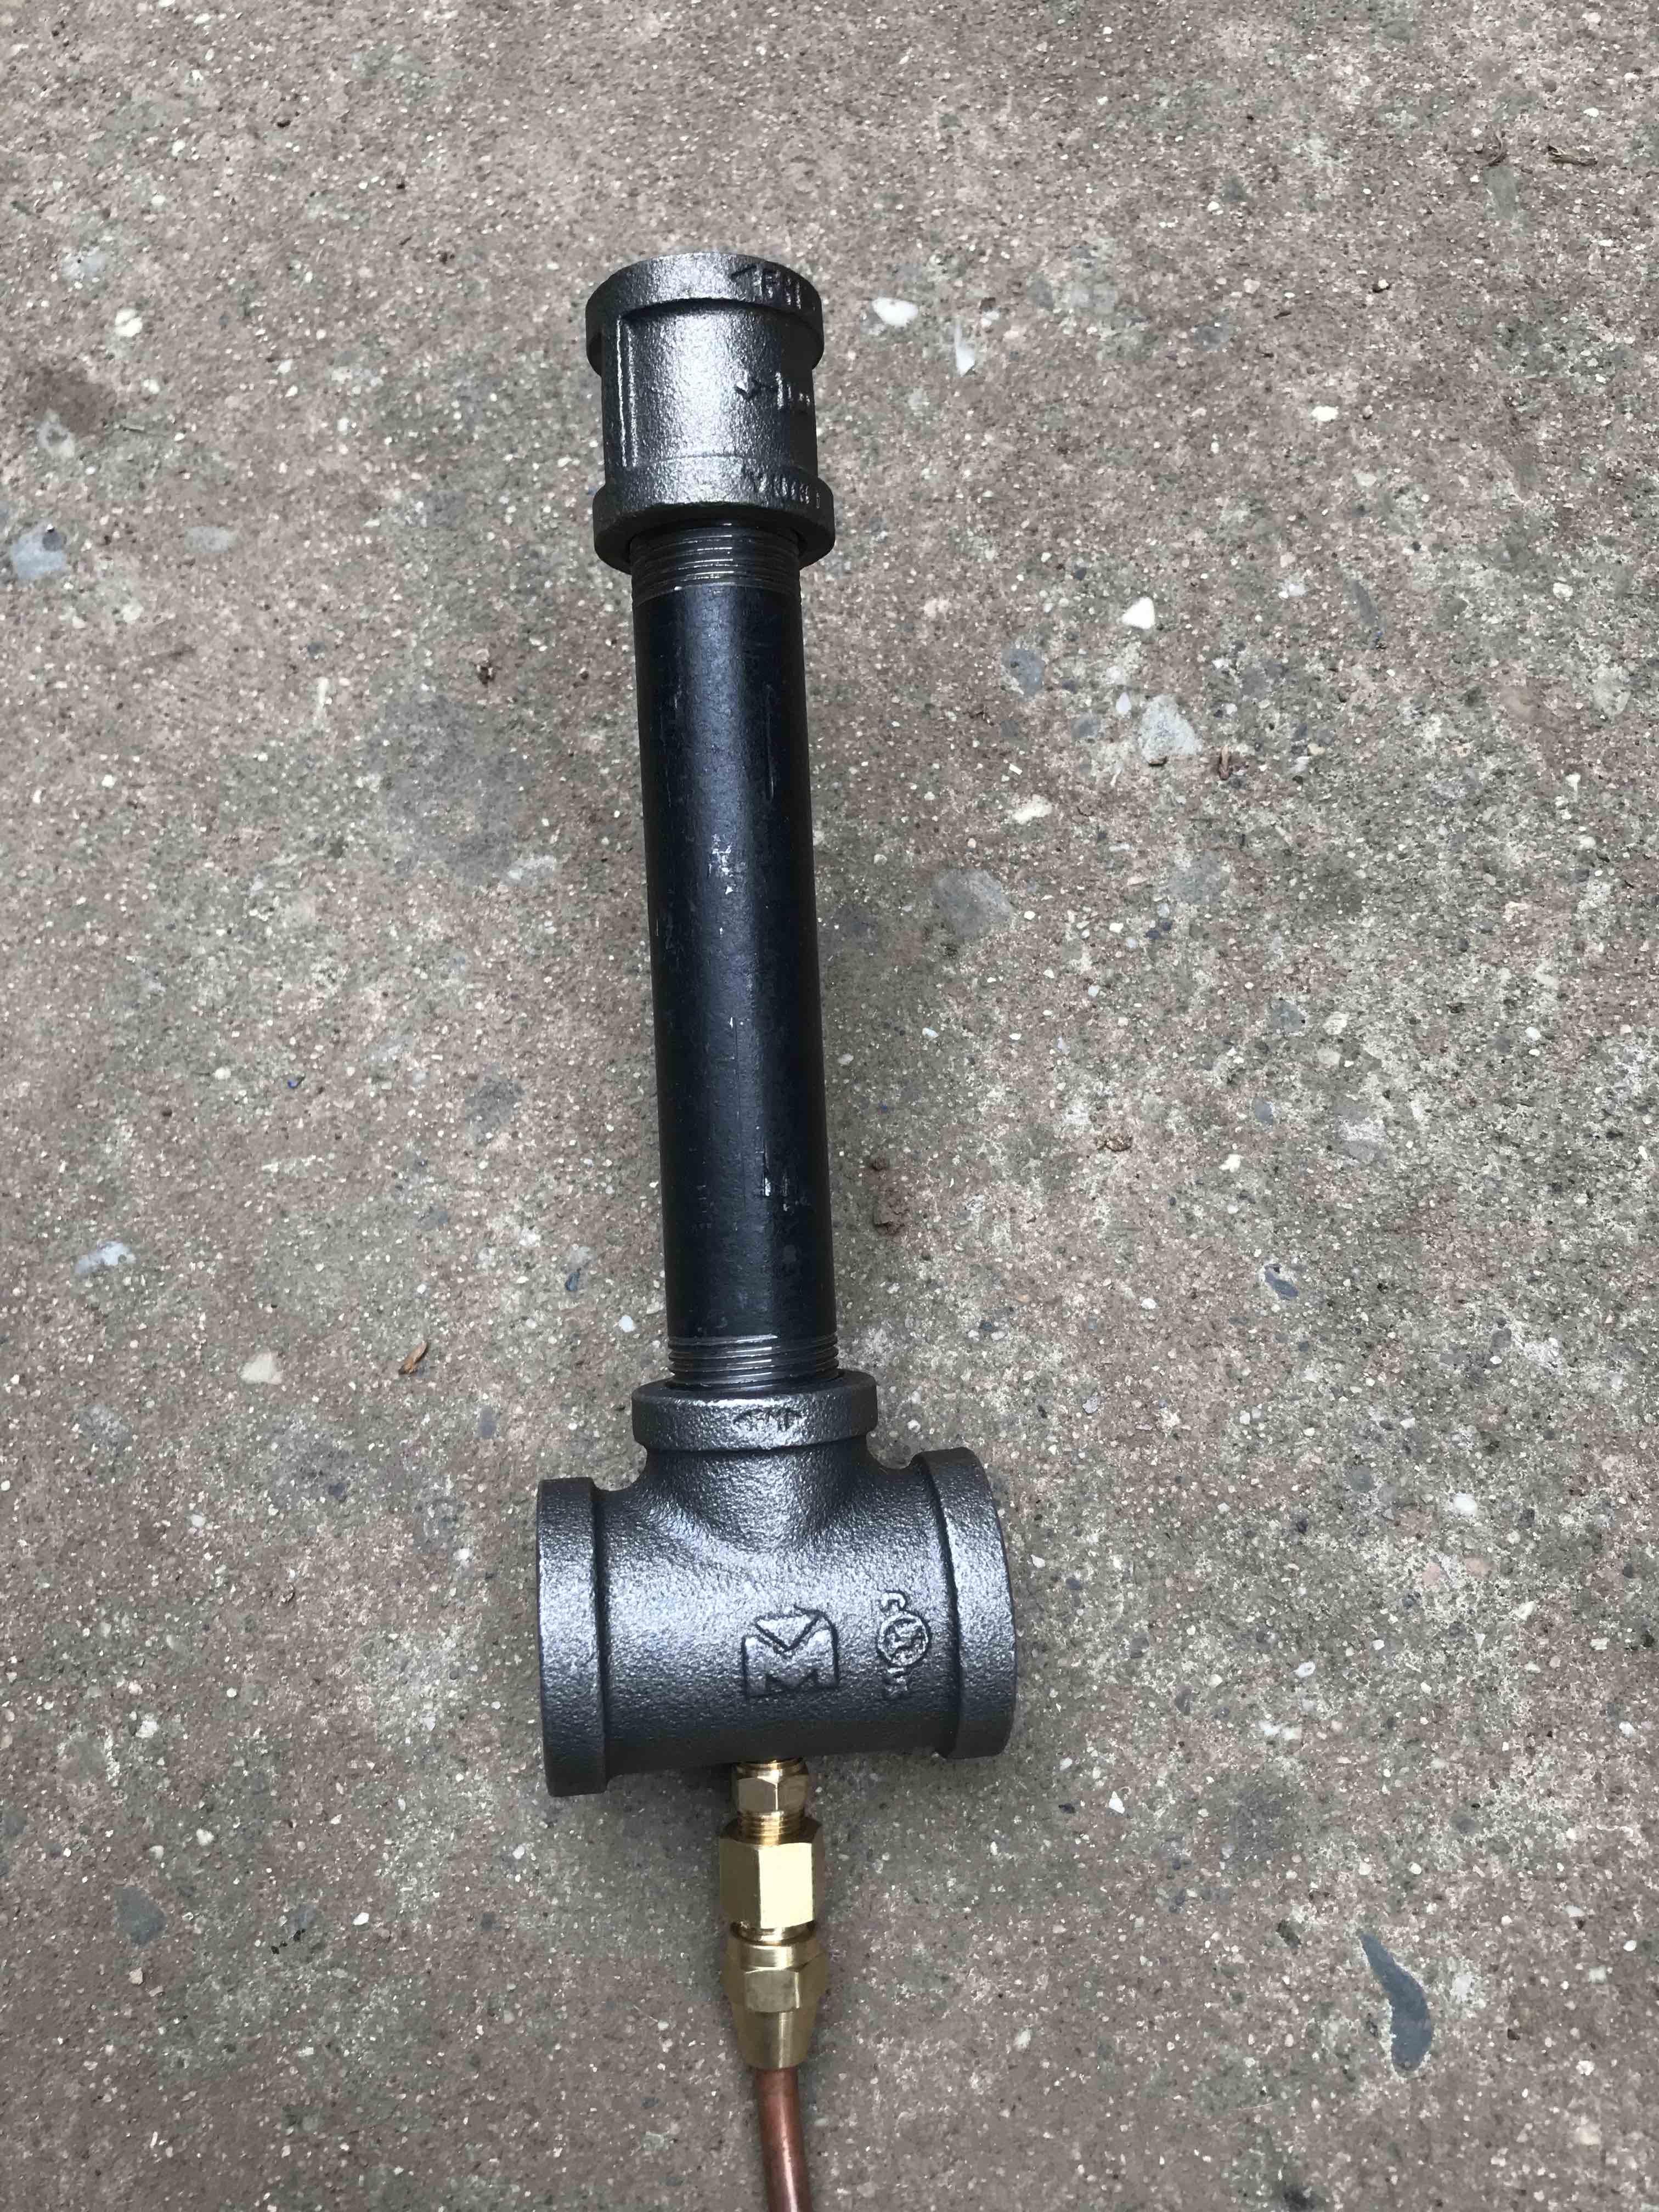
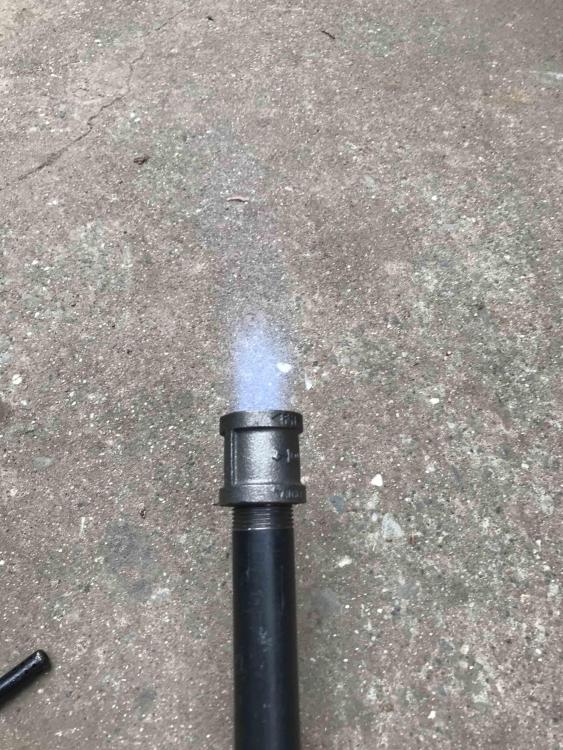
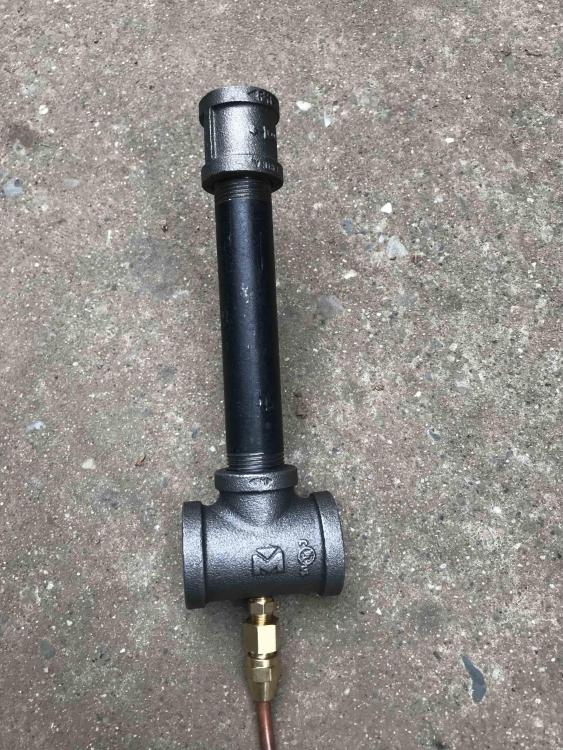
Thank you all for the help! I think a big portion of it was not having a "nozzle". I went ahead and put that on last night and tried it out again and was able to get it running much easier, did some rough tuning and get a nice blue flame with some orange wisps at the end. Much more please with that. Also some photos because everyone likes show and tell.
-
Don't have any right now but can take photos when I get off work. It's built exactly the same as Frosty's. 1"x3/4" Red Tee, 6" nip, 1/4" nip into the middle of the tee with a .035 mig tip threaded into the 1/4" nip. Nothing on the "nozzle end" of the 6"x3/4" nip, maybe it needs a coupler/thread protector or something?
-
Managed to put up with the heatwave here in Northern CA long enough to get my T-burner put together and try tuning it... Having very limited success right now and could use some advise... As built, and not in a forge (too hot to get more than one layer of ceramic wool installed and rigidizer is still drying...) it will not stay lit. Shortened the MIG tip incrementally until there was only about 1/4" left and still no luck. I ended up trying to cover some of the air inlet with my hand and that got it running, not great but enough that I know it must be running too lean normally. I superglued about 1/3 of another tip onto the end of a new one and it will now stay lit and work at about 1psi on the regulator/gauge. (edit for clarification, will go out if pressure goes much above 1 PSI. Much like with the shorter tip but those wouldn't even stay lit at low pressure.) From what I've been reading I think that it's longer than what most people end up using but I can't figure out why mine is so different. I built it exactly according to the directions at the beginning of this thread, nothing is grossly misaligned, so I am semi stumped. And combined with the heat it was a rather frustrating weekend to say the least. I hate not being at least somewhat productive.
-
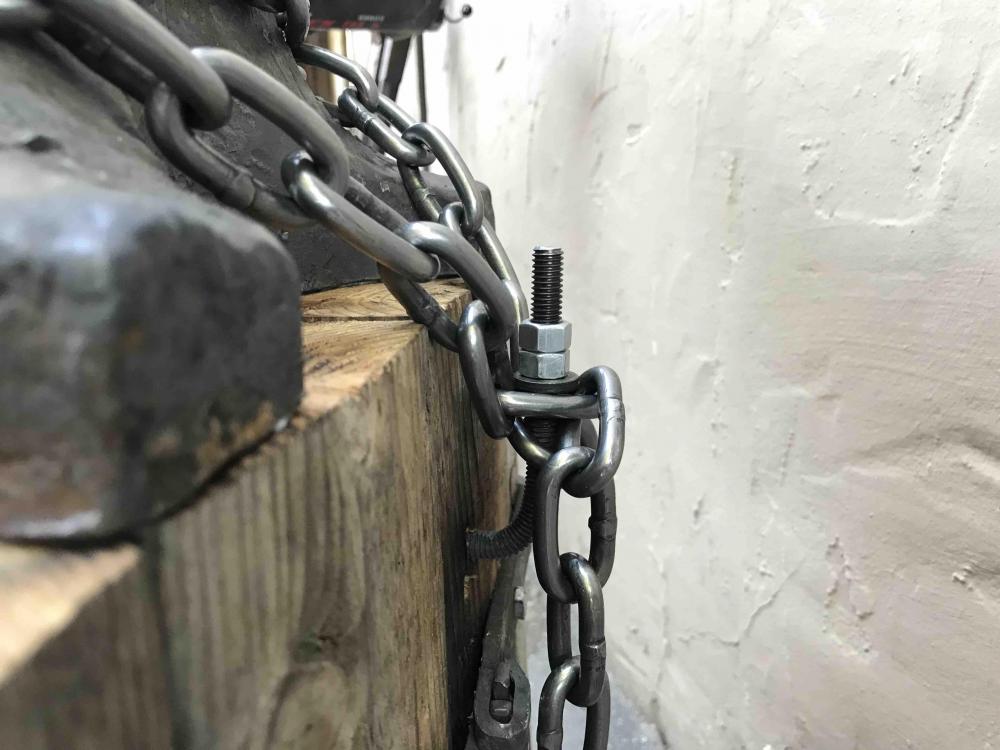
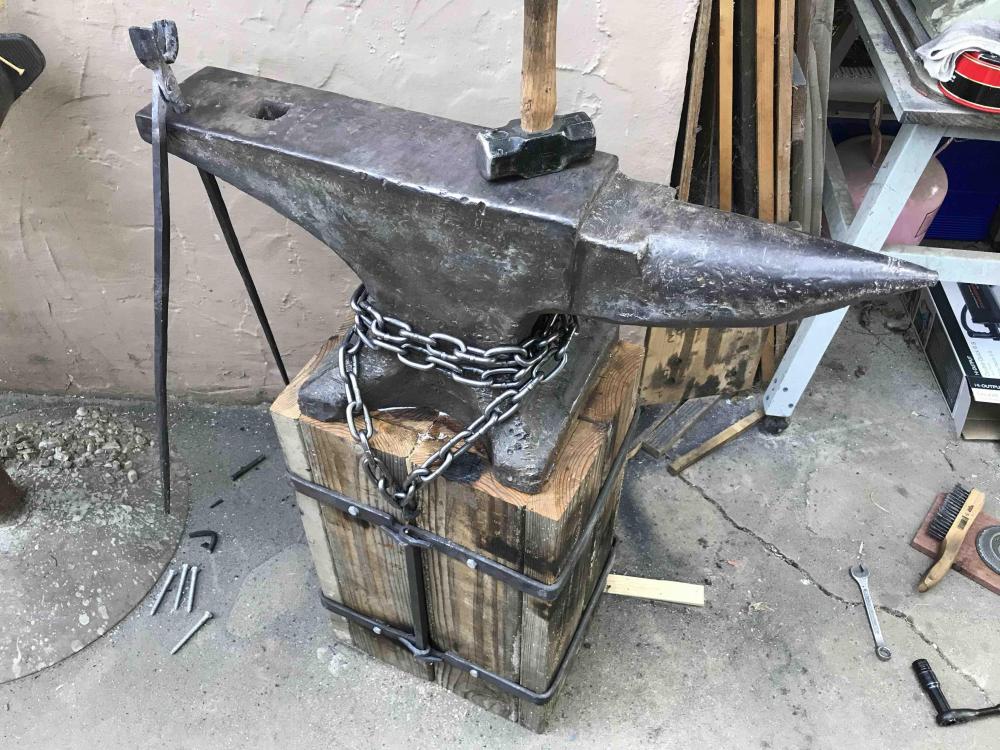
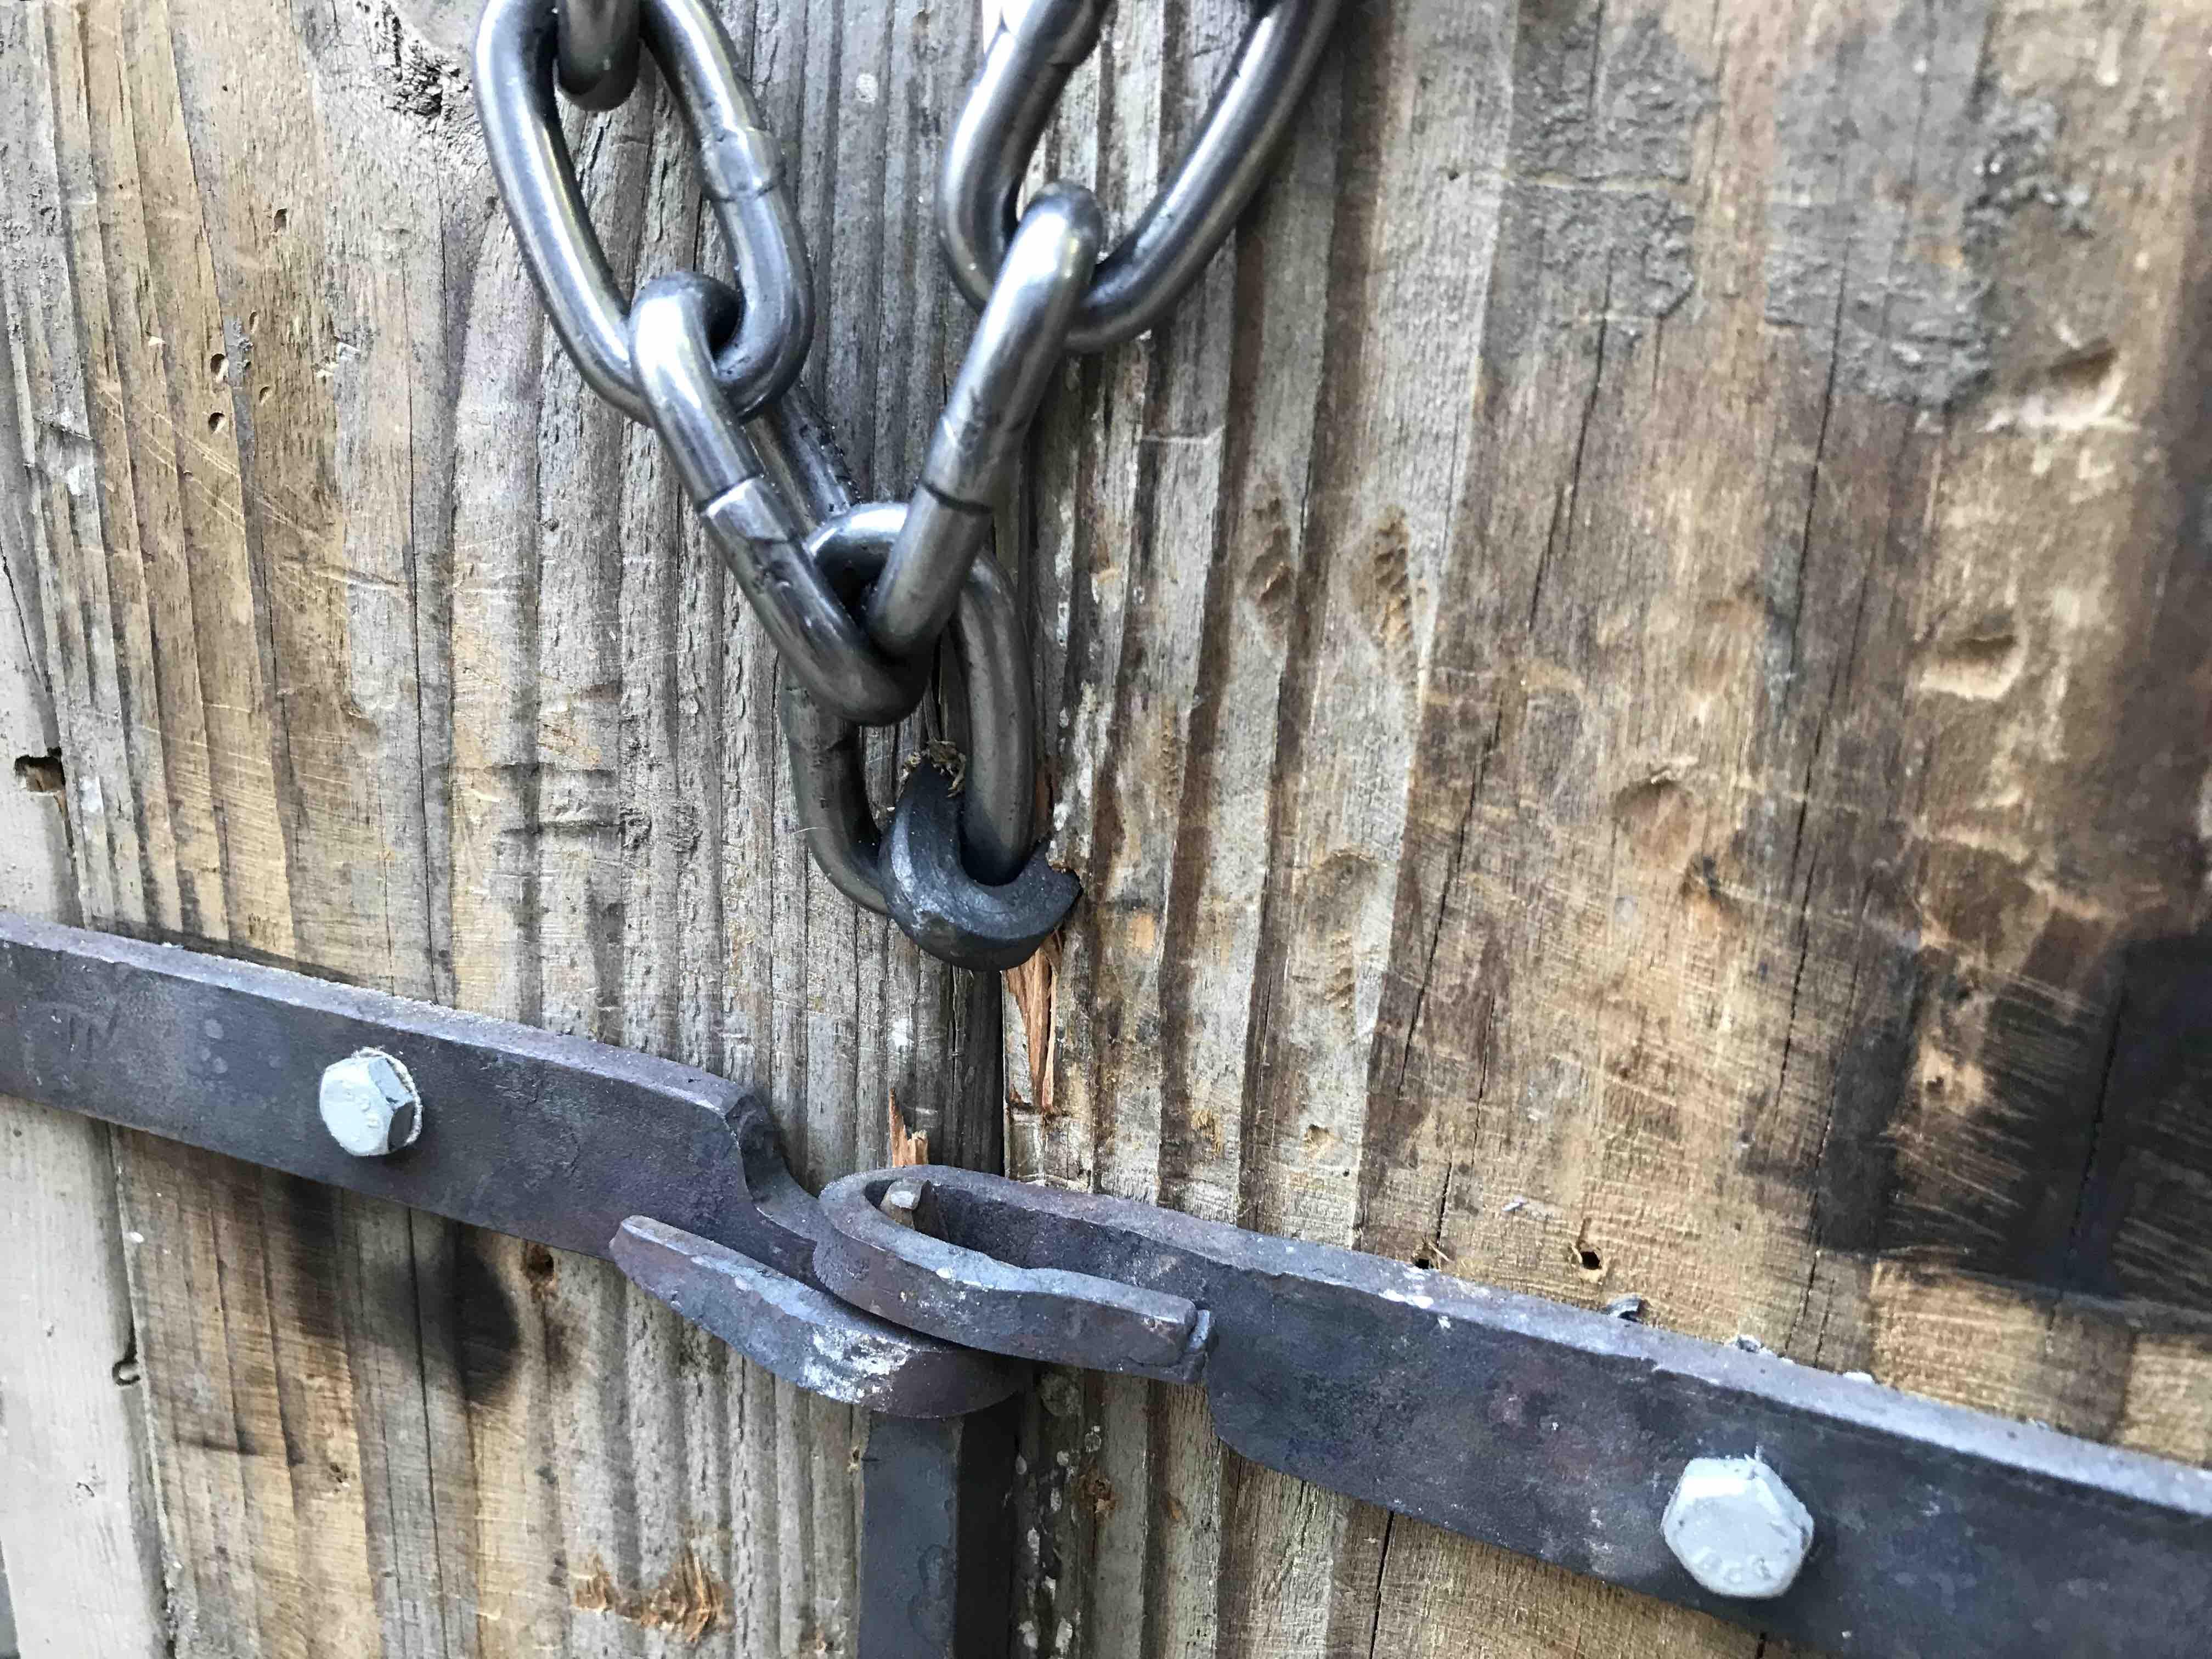
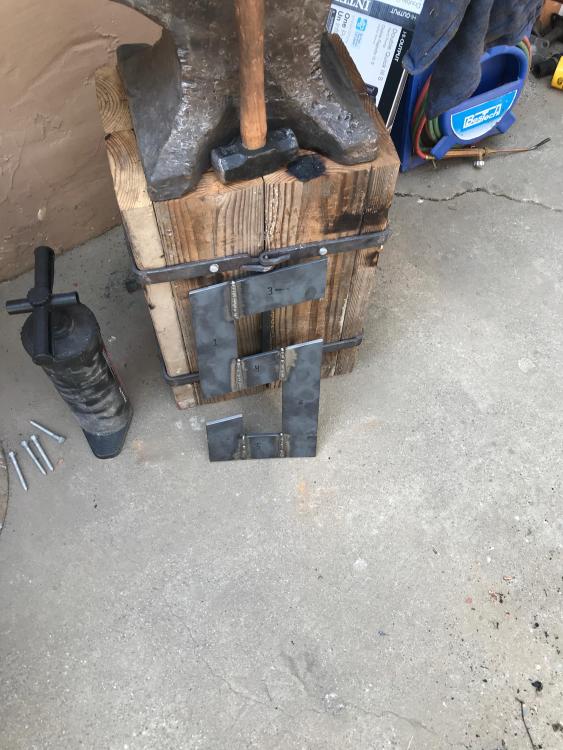
My anvil came with a heavy duty 1/4" angle iron stand, but it was a bit too low for me and I just didn't really like it much anyways. So I decided to make a better looking stand and raised the anvil up a touch. 2"x6"s are all glued and screwed together, then strapped and wedged. Forged a staple and a hooked threaded rod to tie down the anvil, and laid down some clear silicone prior to bolting it down. Much better sound, I'm sure the neighbors will appreciate it.