
Frazer
-
Posts
1,403 -
Joined
-
Last visited
Content Type
Profiles
Forums
Articles
Gallery
Downloads
Events
Everything posted by Frazer
-
If you find that you don't have enough material, you can probably upset the bar or cut some length of the bar ~3/4" of the way though and bend it back on itself. Then forge weld it into itself to get some extra material to work with. Neither is ideal, but I suppose either could work. Try it as Glenn/TP suggest first.
-
 Maybe? I imagine those are galvanized so remove the zinc in a vinegar bath first. I feel like people will often open the cable up (while hot), flux, then close it back up. I also think a bottom swage sized correctly for the cable will keep it from fraying out while welding. Might work better than a hose clamp. Either way it's worth a shot.
 -
Organization of slitters, punches, drifts, etc
Frazer replied to Dewnmoutain's topic in Slitters, Punches, Drifts, etc
Billy, That's just about how I do it. I have a basket screwed on either side on the anvil stand and I keep my common hardy tools on one side and some punches chisels and drifts on the other side. Then another pile over on a table with all the stuff I don't use as often, but still need sometimes. Unfortunately, since they are wire baskets, the top tools I use most often (and are therefore are on top of the pile) have a tendency to slip out one of the holes on the sides and get kicked into the land of 10mm sockets. Only to be found when looking for something else. That's how I ended up with multiples of each. It's not such a bad thing though. Most of the time what I need is in arms reach and the rather open sides allow me to look into the pile and pull out what I'm looking for quicker than trying to dig down through them. -
That is quite the fire they have going. Very cool and interesting to watch. Thanks for sharing.
-
What did you do in the shop today?
Frazer replied to Mark Ling's topic in Blacksmithing, General Discussion
WI is expensive because it is no longer produced (in large quantities) and the people selling it online are generally doing so at a premium. It can be found relatively easily though depending on the region. Yes, that is caused by slag inclusions in the steel itself. Its very easily identified by a score and snap test where you can clearly see the almost stringy nature of it rather than the grainy texture of steel. It's very fun to work with. Soft under the hammer and easy to forge weld together (those slag inclusions can act like flux when welding). However, it will shear apart if worked too cold which takes some getting used to. -
What did you do in the shop today?
Frazer replied to Mark Ling's topic in Blacksmithing, General Discussion
I would think it's just an extra unnecessary step in making them. One can easily make a strap that wraps around the feet/waist and bolt/screw that down. Or if you're using a wooden stand, a large nail or staple that can be driven down into the wood holding the feet in place. I don't think it would affect the structural integrity, unless you drilled a really big hole that is. There are just much easier ways to hold it down that don't require any modification of the anvil and are just as effective. However, I do think some anvils do indeed have holes cast for mounting them. I don't think it's very common though. -
Top tools with loose wooden handles
Frazer replied to LeMarechal's topic in Tools, general discussion
Hm, I have never heard of such a thing (granted that isn't saying much), but I have seen people who use a steel handle that is just some round bar wrapped around the head of tool rather than using a wooden handle going through an eye. Here is a picture I found as an example. I suppose the thought process is the same. More give in the handle means less force transferred up to the arm. I've never done it myself as I generally just use a wooden handle with a tight fit. But I think this approach might be easier than trying to put a handle on loose purposefully.
-
The two that I normally get are these two styles (one of which is the unit V mentioned by pnut): Those are just stock photos I found online since I don't have any pictures of them that I took myself. I find them them to be very handy and have tongs made specifically to hold them. Great for larger drifts or top tools. I have even made a knife or two out of them, a fast oil quench works quite well. As far as them being tough under the hammer I would compare it to a coil spring. However, these are much thicker material than the springs I usually get so that is a factor in how much force is required. The track on the other hand, that is some seriously tough stuff. I generally reference this BP for RR steel composition. https://www.iforgeiron.com/index2.html/blueprints/original-series/bp0011-common-railroad-steels-r166/ Quoting from that BP,
-
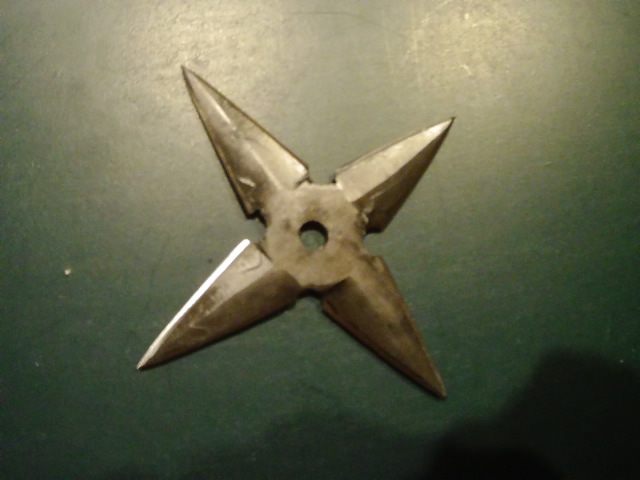
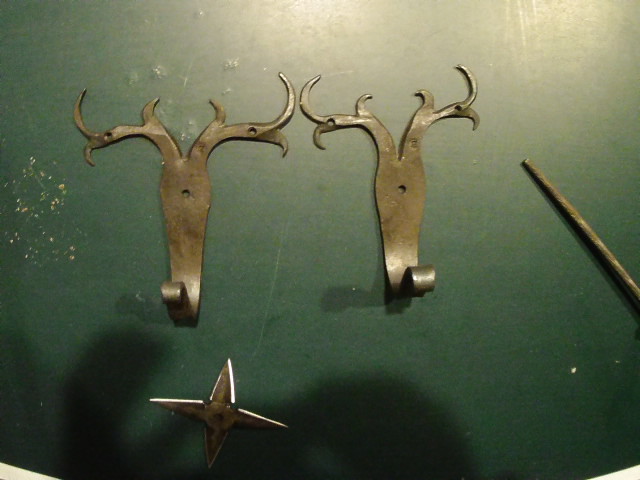
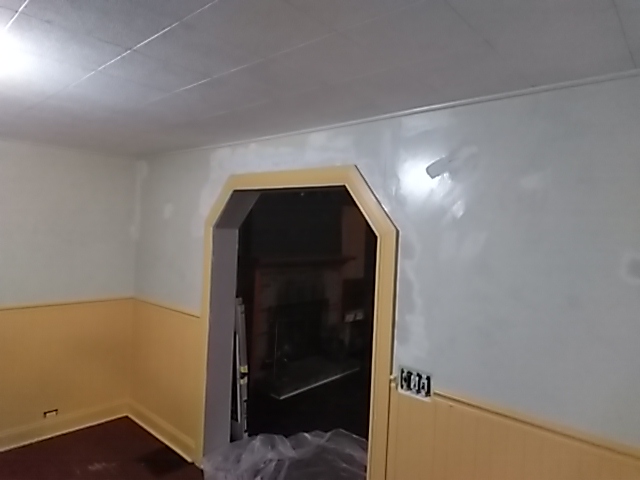
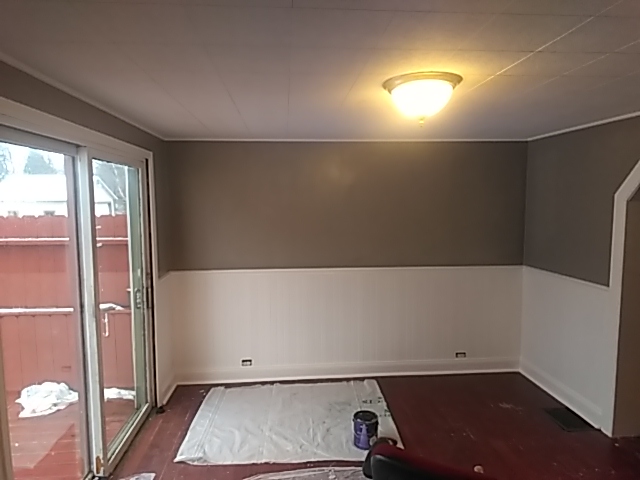
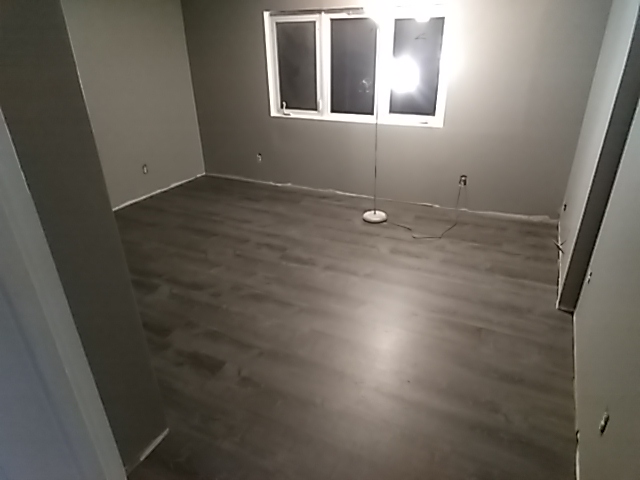
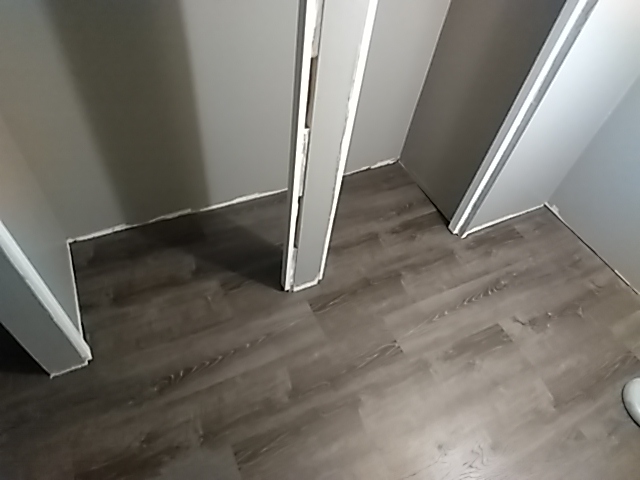
Work at the house has cut into time at the forge quite substantially, but I did make a few excuses to get in there on account of making Christmas presents and needing a coat rack. For Christmas I made a several hooks (5 total) that got mailed out to CA, AZ and around NY. As a joke to a friend from college I made her a throwing star. I didn't have any hardenable material 3" wide so it's a san mai with spring steel forming the edge and mild steel on on the faces. You can kind of see the layers after the etch, but I didn't really expect much contrast. I mostly etched it so the edges would be more pronounced after sharpening. It actually turned out pretty cool. And it was very sharp when I mailed it... probably too sharp to send to a stranger, but I trust her. I forgot to take a good picture of the coat rack, if I remember Ill take one later today while I'm there. On a non-blacksmithing note, I'm making my way through the inside of the house one room at a time removing the awful paint colors the previous owner chose in every room.. Who in their right mind paints all the trim and wainscoting in the kitchen/dining room a high gloss orangeish-yellow with green walls?? Strange.. Anyway, I didn't get a good before picture, but here's a before/after. I am also very impressed with the laminate flooring that's out there, I am removing all of the carpets from the rooms and putting in laminate since I have learned that I am very rough on carpets.. best not to even have them. I bought the tapping block, but they sell another tapping block to get in up against the wall that is just bent piece of metal, I have metal and the means to bend it to I just made that. That tongue and groove laminate sure does lock together well and it was pretty easy to do. I don't have any before pictures. To be perfectly honest you don't want to see them. The room was a disaster. She cleaned up okay though. These were taken before all the trim was replaced. I picked up the new forge that is now sitting in the garage where I'm slowly working on removing the loft. Once that's done I can get the chimney installed (not by me).

-
Goods, agreed. Chimaera, clean your workbench? I mean you can if you want, just make sure it's never clean enough to find that thing you lost a few months back. Workbenches have been engineered for collecting stray, discarded and useful items indiscriminately and to lose things in plain sight. At least that's my experience
-
However, if you find a US quarter from 1964 or earlier (very unlikely in the UK..) you may want to hold on to that one. They are ~90% silver. I found one once. I noticed it was different as I was bouncing off a table playing a.. game. in college and I noticed it sounded quite different than a normal quarter. That one went in my pocket.
-
Always better to ask in my opinion, no worries. Unfortunately, we aren't born knowing everything.
-
What did you use for your quenchant?
-
With damascus I have not had any issues with the epoxy not bonding well after etching. Just clean the steel well with acetone or some other streak free cleaner before you glue it up. If anything I would think the rougher surface caused by etching would make the bond stronger rather than weaker, but I'm not going to say that with any certainty.
-
To your point, a lot of things can be used as an anvil, including a tree stump or a rock in a pinch. To TP's point, there is really no reason to buy a cast iron anvil in a world where there are more suitable materials everywhere. If someone has a CI anvil, there is no reason they can't use it. It's not going to be ideal, but it will do and it's better than trying to forge something on, say, a pile of dirt or the hood of your car. The main problem is when people look up prices for a new anvil, not knowing that any reasonably heavy chunk of steel can be used, and see an anvil at 1/10th of the price, but still a decent sum of money for many when they are first stating out. Only to find that they had an improvised anvil right under their nose the whole time.
-
Ha, that's funny. I have the same one. Good progress on the knife. What are you thinking for the handle?
-
Need some ideas, recommandations and empirical values
Frazer replied to LeMarechal's topic in Chimneys, Hoods, and Stacks
The installation instructions for my particular stovepipe includes the following figure. Seems like it's the standard.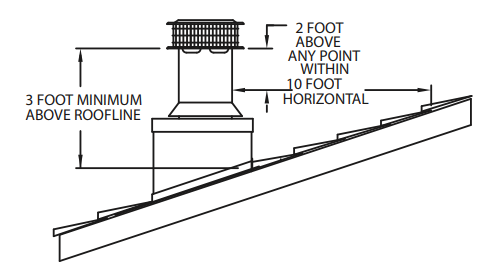
-
No amount of homework can substitute onsite experience. Mistakes and "stupid" (I prefer the word fundamental) questions are expected when starting anything. I ask what would be considered fundamental questions to some just about every day! Unfortunately, or perhaps fortunately, we aren't born knowing everything. Just saying Speaking for myself, I know very little about blacksmithing. I've only been at it 2 years now and much of that was spent just experimenting, reading, applying what I saw, starting over, (watching youtube videos ) plus a few classes that are offered near me. One of those classes was the first time I ever hit hot steel with a hammer. I'll just say that I'm glad I had someone with experience there watching to correct what I was doing in real time. I know things are different now than they were 2 years ago (for obvious reasons). I'm just perhaps stating the obvious. I agree with TP, you have to start somewhere, why not soon?
-
You won't know how much or little those dings affect your work until you have used the anvil for a long time. I think 2000 hours is the number often thrown around often and I'm sure Glenn will correct me if I'm misremembering that figure. The removal of the surface of the anvil by abrasion from scale is a slow process. You can speed up that process by grinding it down flat again, but at the end of that road is the death of an anvil that might otherwise outlived your kids. Which is why it's never recommended.
-
Since you did stock removal rather than forging, this doesn't apply as much, but the best blades are generally forged thick then ground thin. Mostly to limit decarburization that is inherent to the forging process, but that can come as a result of overheating while hardening I suppose. Only to a much lesser extent. 220 is plenty, in my opinion. If you took all the time to go to a mirrored finish it would be ruined by the quench I don't make may knives but when I do I finish the profile, start my plunge grinds and drill the holes after annealing. Then finish all my grinding and hand sanding after the blade has been hardened and tempered. If my first knife looked half as nice as that one I would have been very pleased. Looking forward to seeing it complete.
-
Hey Tim, you'll probably want to increase the thickness of the edge by removing some of the width prior to heat treatment. I usually leave the edge around 2mm sometimes down to 1mm thick going into heat treatment. However, 1mm is pretty thin in my opinion. Now that's probably more width than you're looking to give up on your overall profile, so that's more for future reference. After removing some material, when heating your steel up for heat treatment, you'll want to heat very slowly, keeping in mind that the thin areas will heat up much faster than the thick spine. You want to avoid overheating the edge which will both increase the grain size and cause unnecessary decarburization, thus lowering the quality of your edge. Once everything is heated up evenly, you'll be good to go. I have quenched a knife that was brought back from being sharp and it can be done. No matter what it's not going to be ideal, but it can be done. P.s. I like the knife, what are you thinking for handle scales?
-
If you have a piece of rusty metal laying around, grind a clean spot and test it. I think you will probably notice a difference, but maybe you'll be able to find a way to match the two surfaces before trying it on the real thing.
-
(For reference)
-
Darn it! Who spilled the beans????
-
Is that compounding or simple interest? *grin* To answer a jokingly put question somewhat seriously, I would say compounding.