LeMarechal
Members
-
Joined
-
Last visited
-
That is much too easy
-
That looks like an easy way for normal shops... Thank you for that!!! The bolt an nut version sounds good too, but a little more complicate if you wish small diameter rivets. Maybe an advantage for applications where you have to disonnect parts from time to time. Or for repair issues I guess.. Anyway, it's still a good idea!!!
-
Good idea, thanks Thomas! Here in Germany it´s not easy to get such photos because we have no such stores that's why I never got this idea... Here what I found to the fast: [Commercial link removed]
-
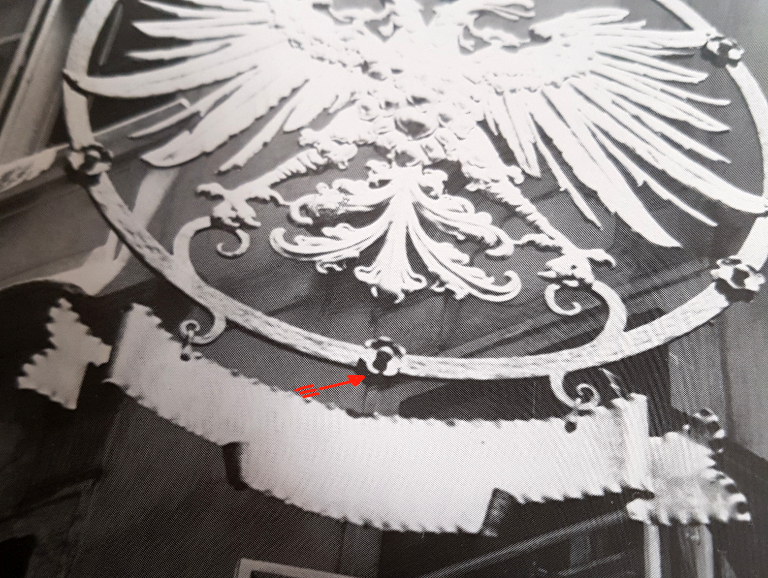
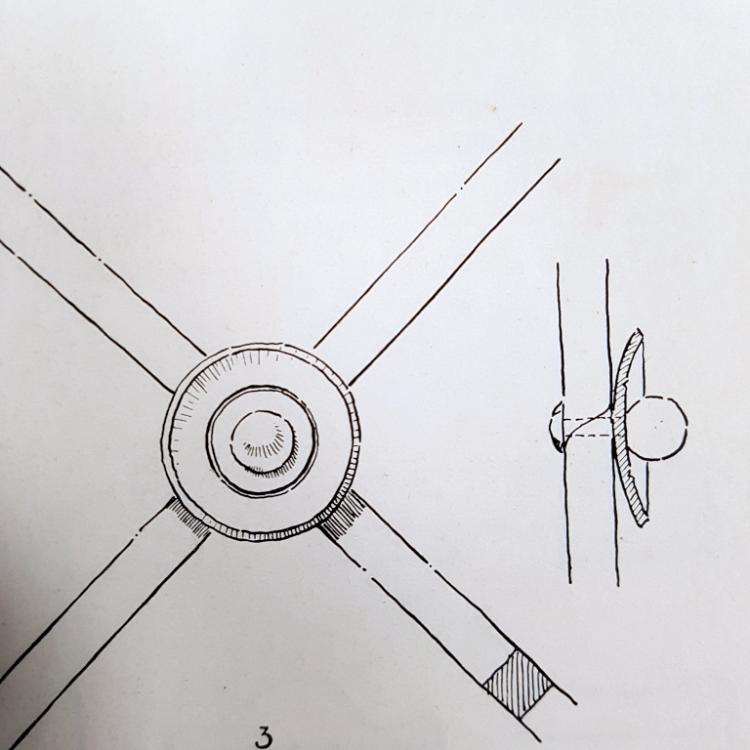
First of all I like to point out that I´m not sure if the term ballhead rivet is the right in english??? Please correct me if this is wrong. In one of the amazing Otto Schmirler Books I found this picture for an example of ballhead-rivets: As this kind of work can be seen from both sides, I´m wondering if there is a way to rivet these rosettes togehter, ending up with two ballhead rivets, one of each side? I can´t imagine that but I wouldn't be surprised if the old masters could Does anyone more about it? Greetings Sascha
-
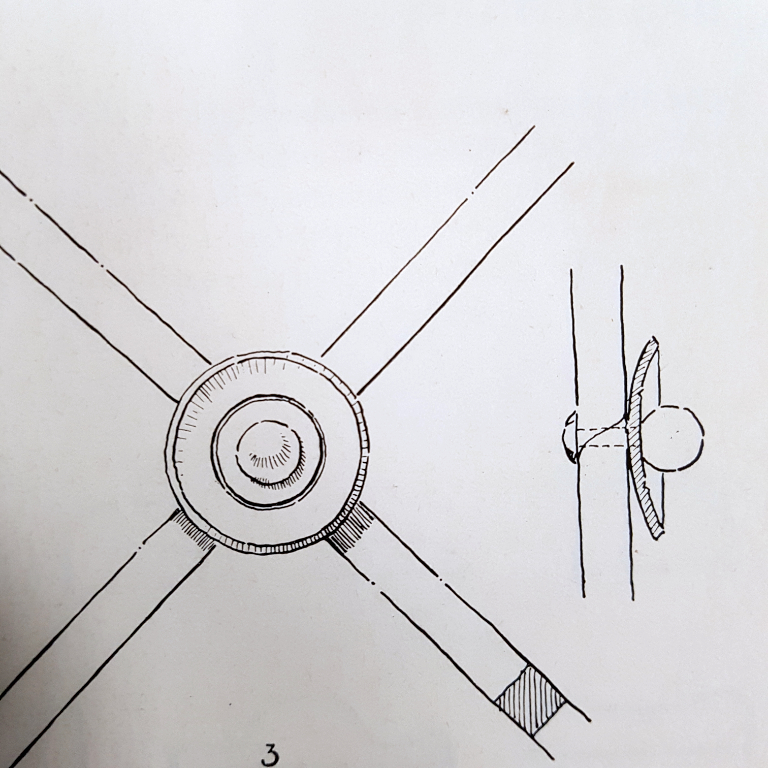
Hi to all out there, I'm currently dealing with how to make ballhead rivets. Until now I forged a little ballend at the end of some round stock, then cut off 1" or so away from the ball to get enough mass to form the tennon part of the rivet under the powerhammer using my tennon-spring -wage. Now I´m searching for ideas for making a springswage to make the ballend and the the shaft in one step. Find no examples how such a tool may look, nor how to prepare, preforge the stock for such tools.... Any tips? Greetings Sascha
-
I know what you mean and I wondered if that long stickout would be disturbing at working. On the other hand if you place the bolt too close to the end/edge of wooden things, you may end with splitting the wooden end ( bad writing style, I would be a terrible writer ) There is a rule of thumb that recommend to stay away from wooden ends 1" or so... But you're right I will see if it works
-
Hi Daswulf, I think so too... will look around where I can find someone near to me who wants to do this job. If I found someone I'll post some up to date pictures
-
Inspired by HojPoj I made it this way...
-
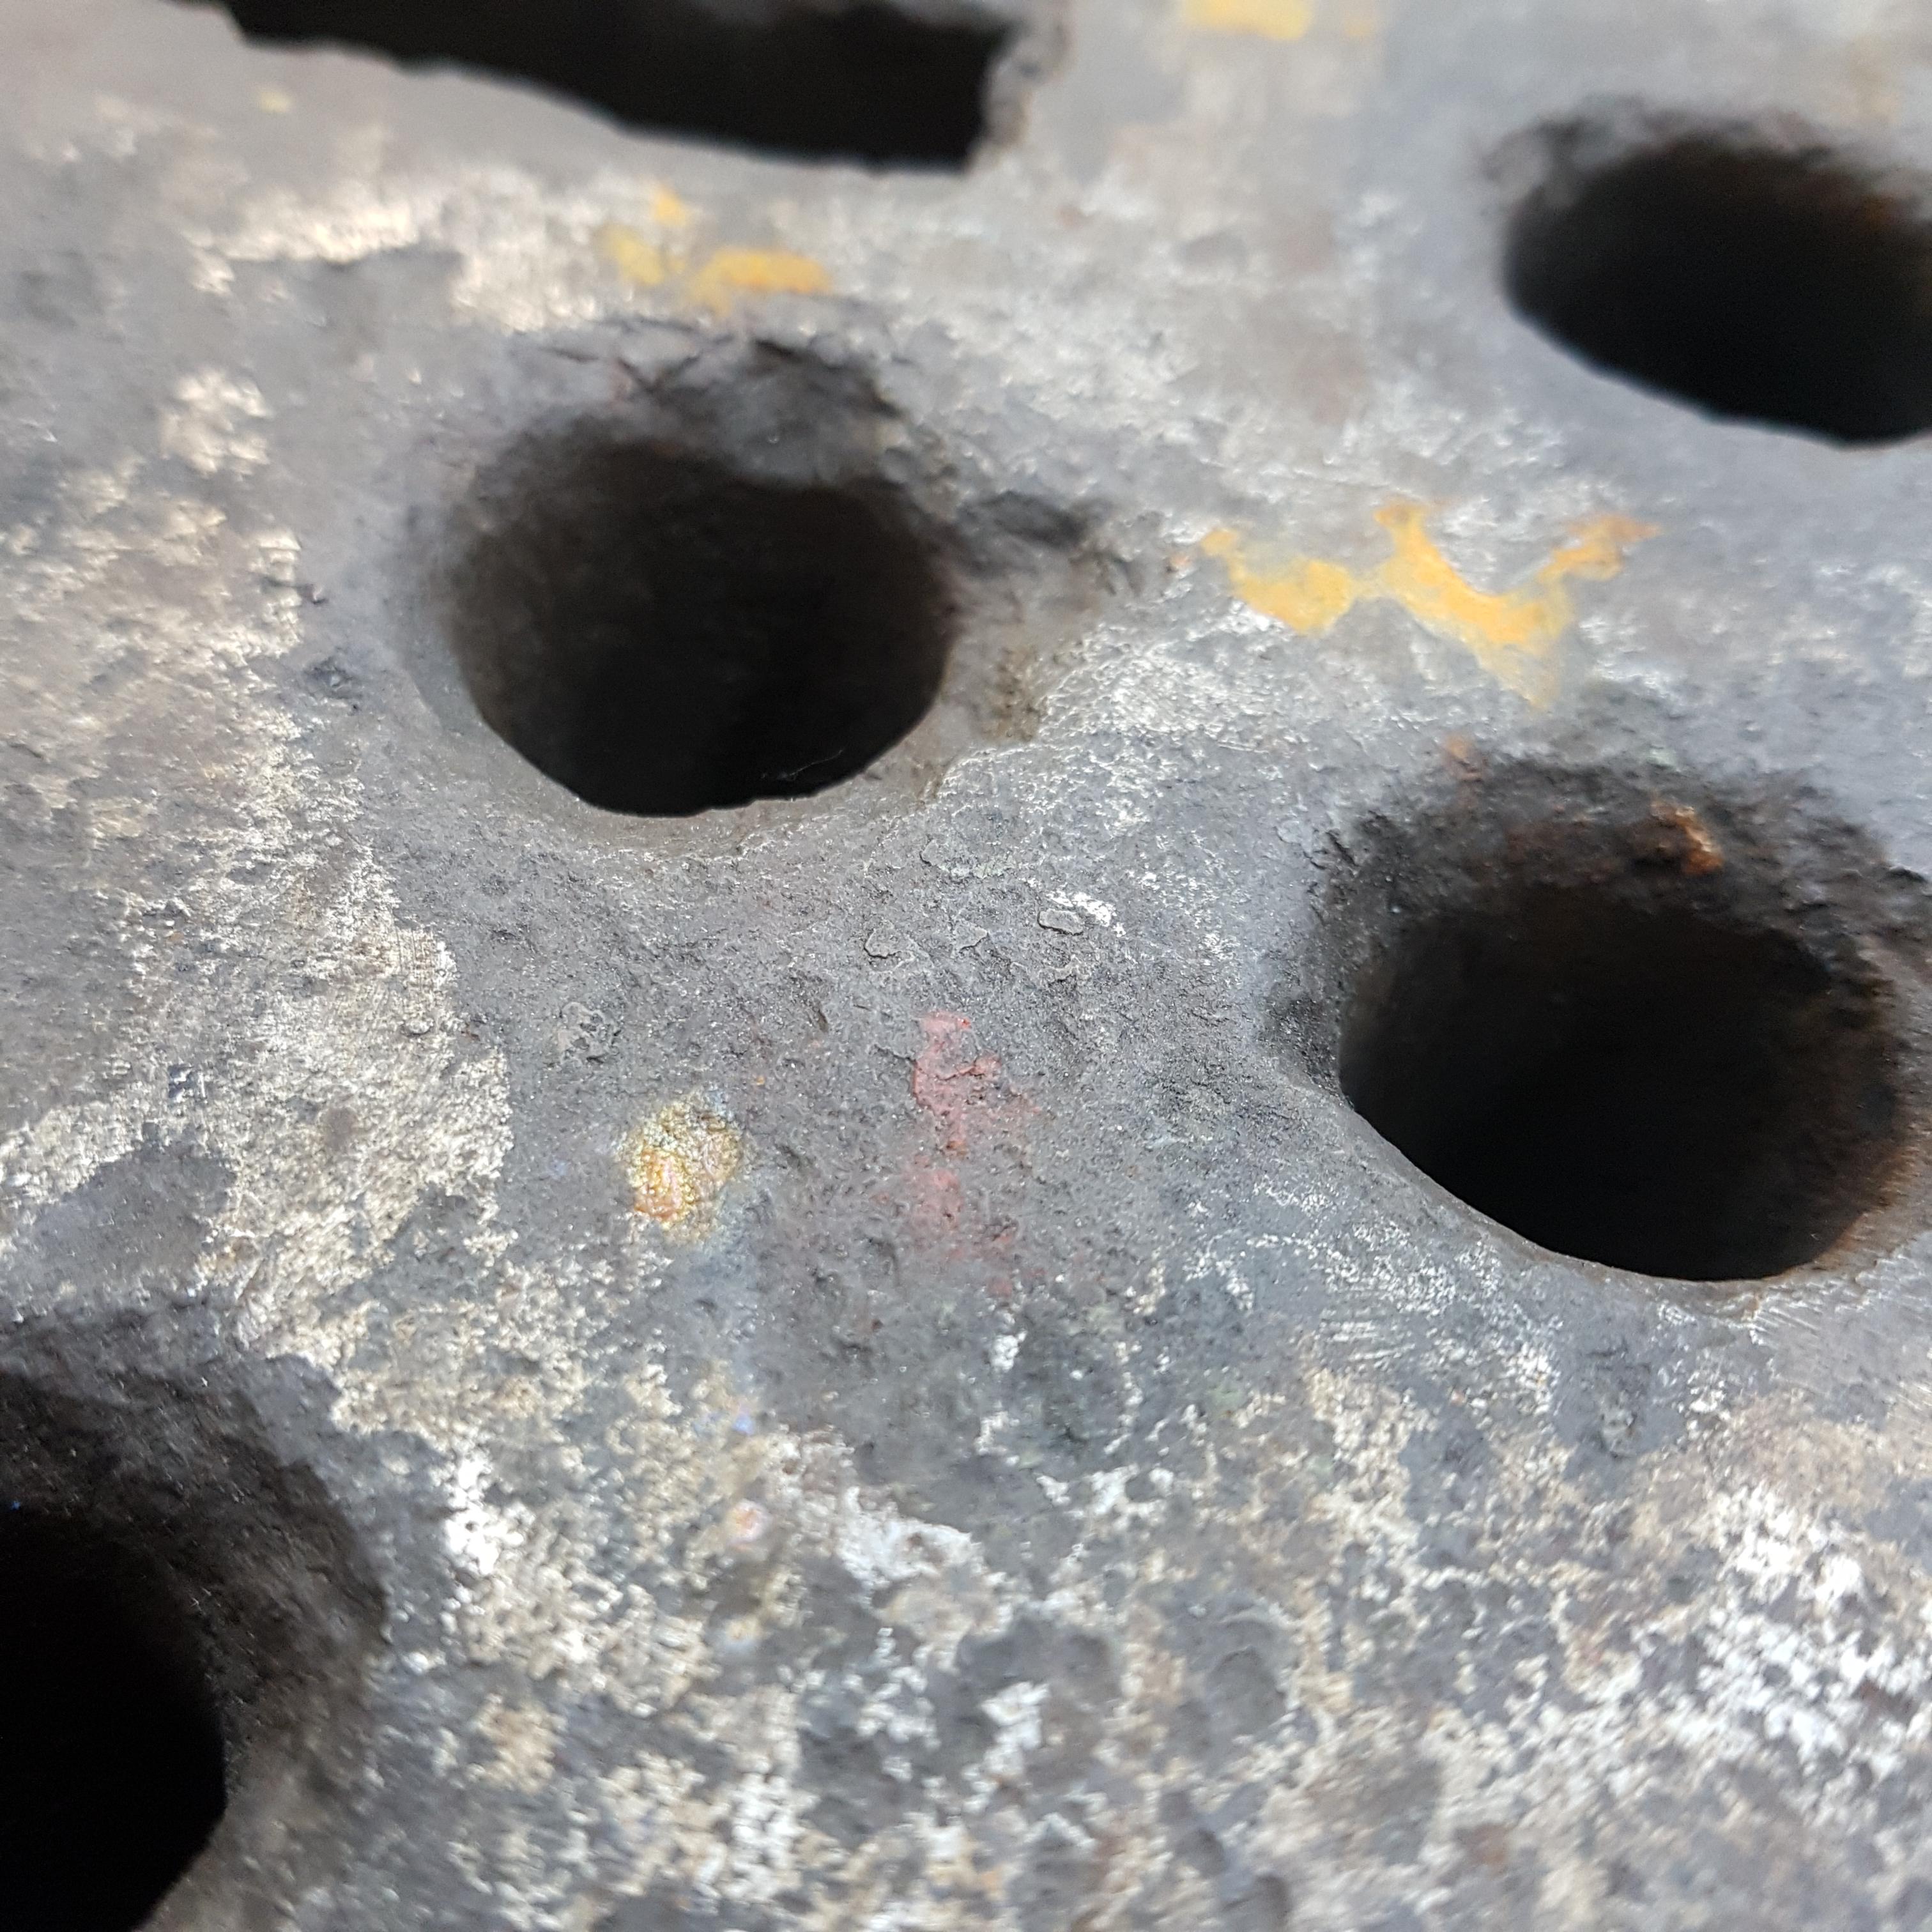
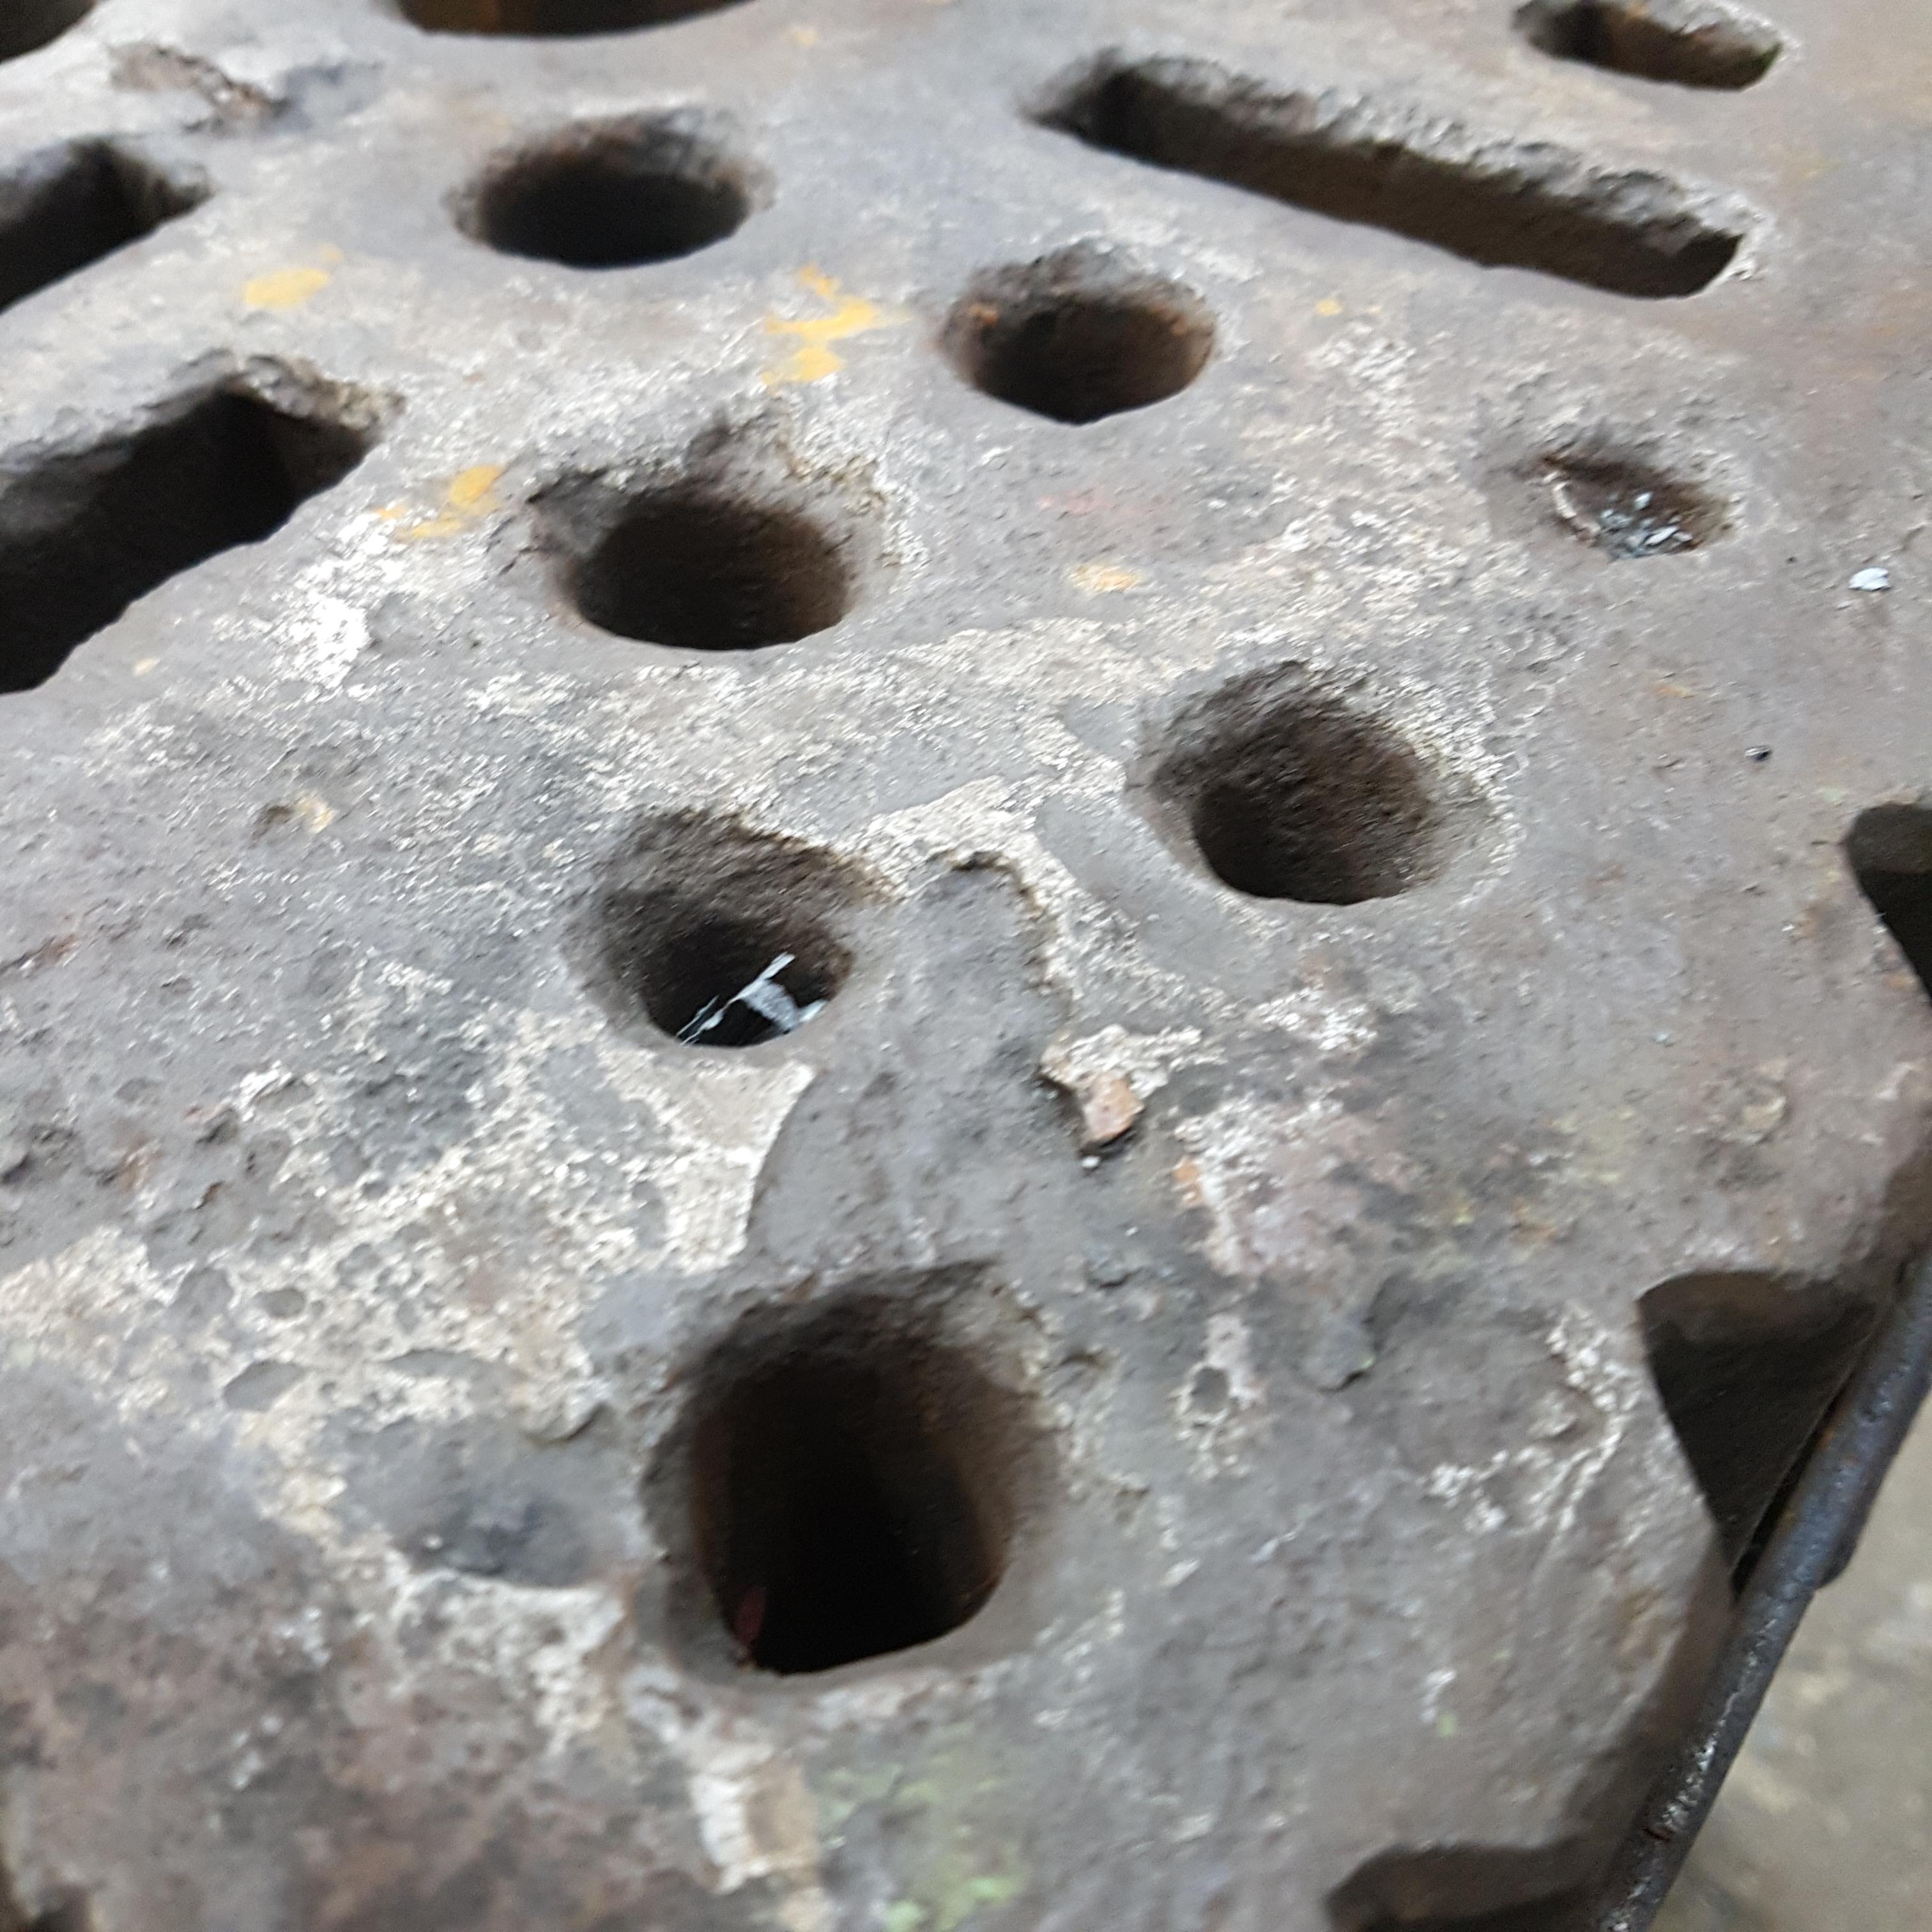
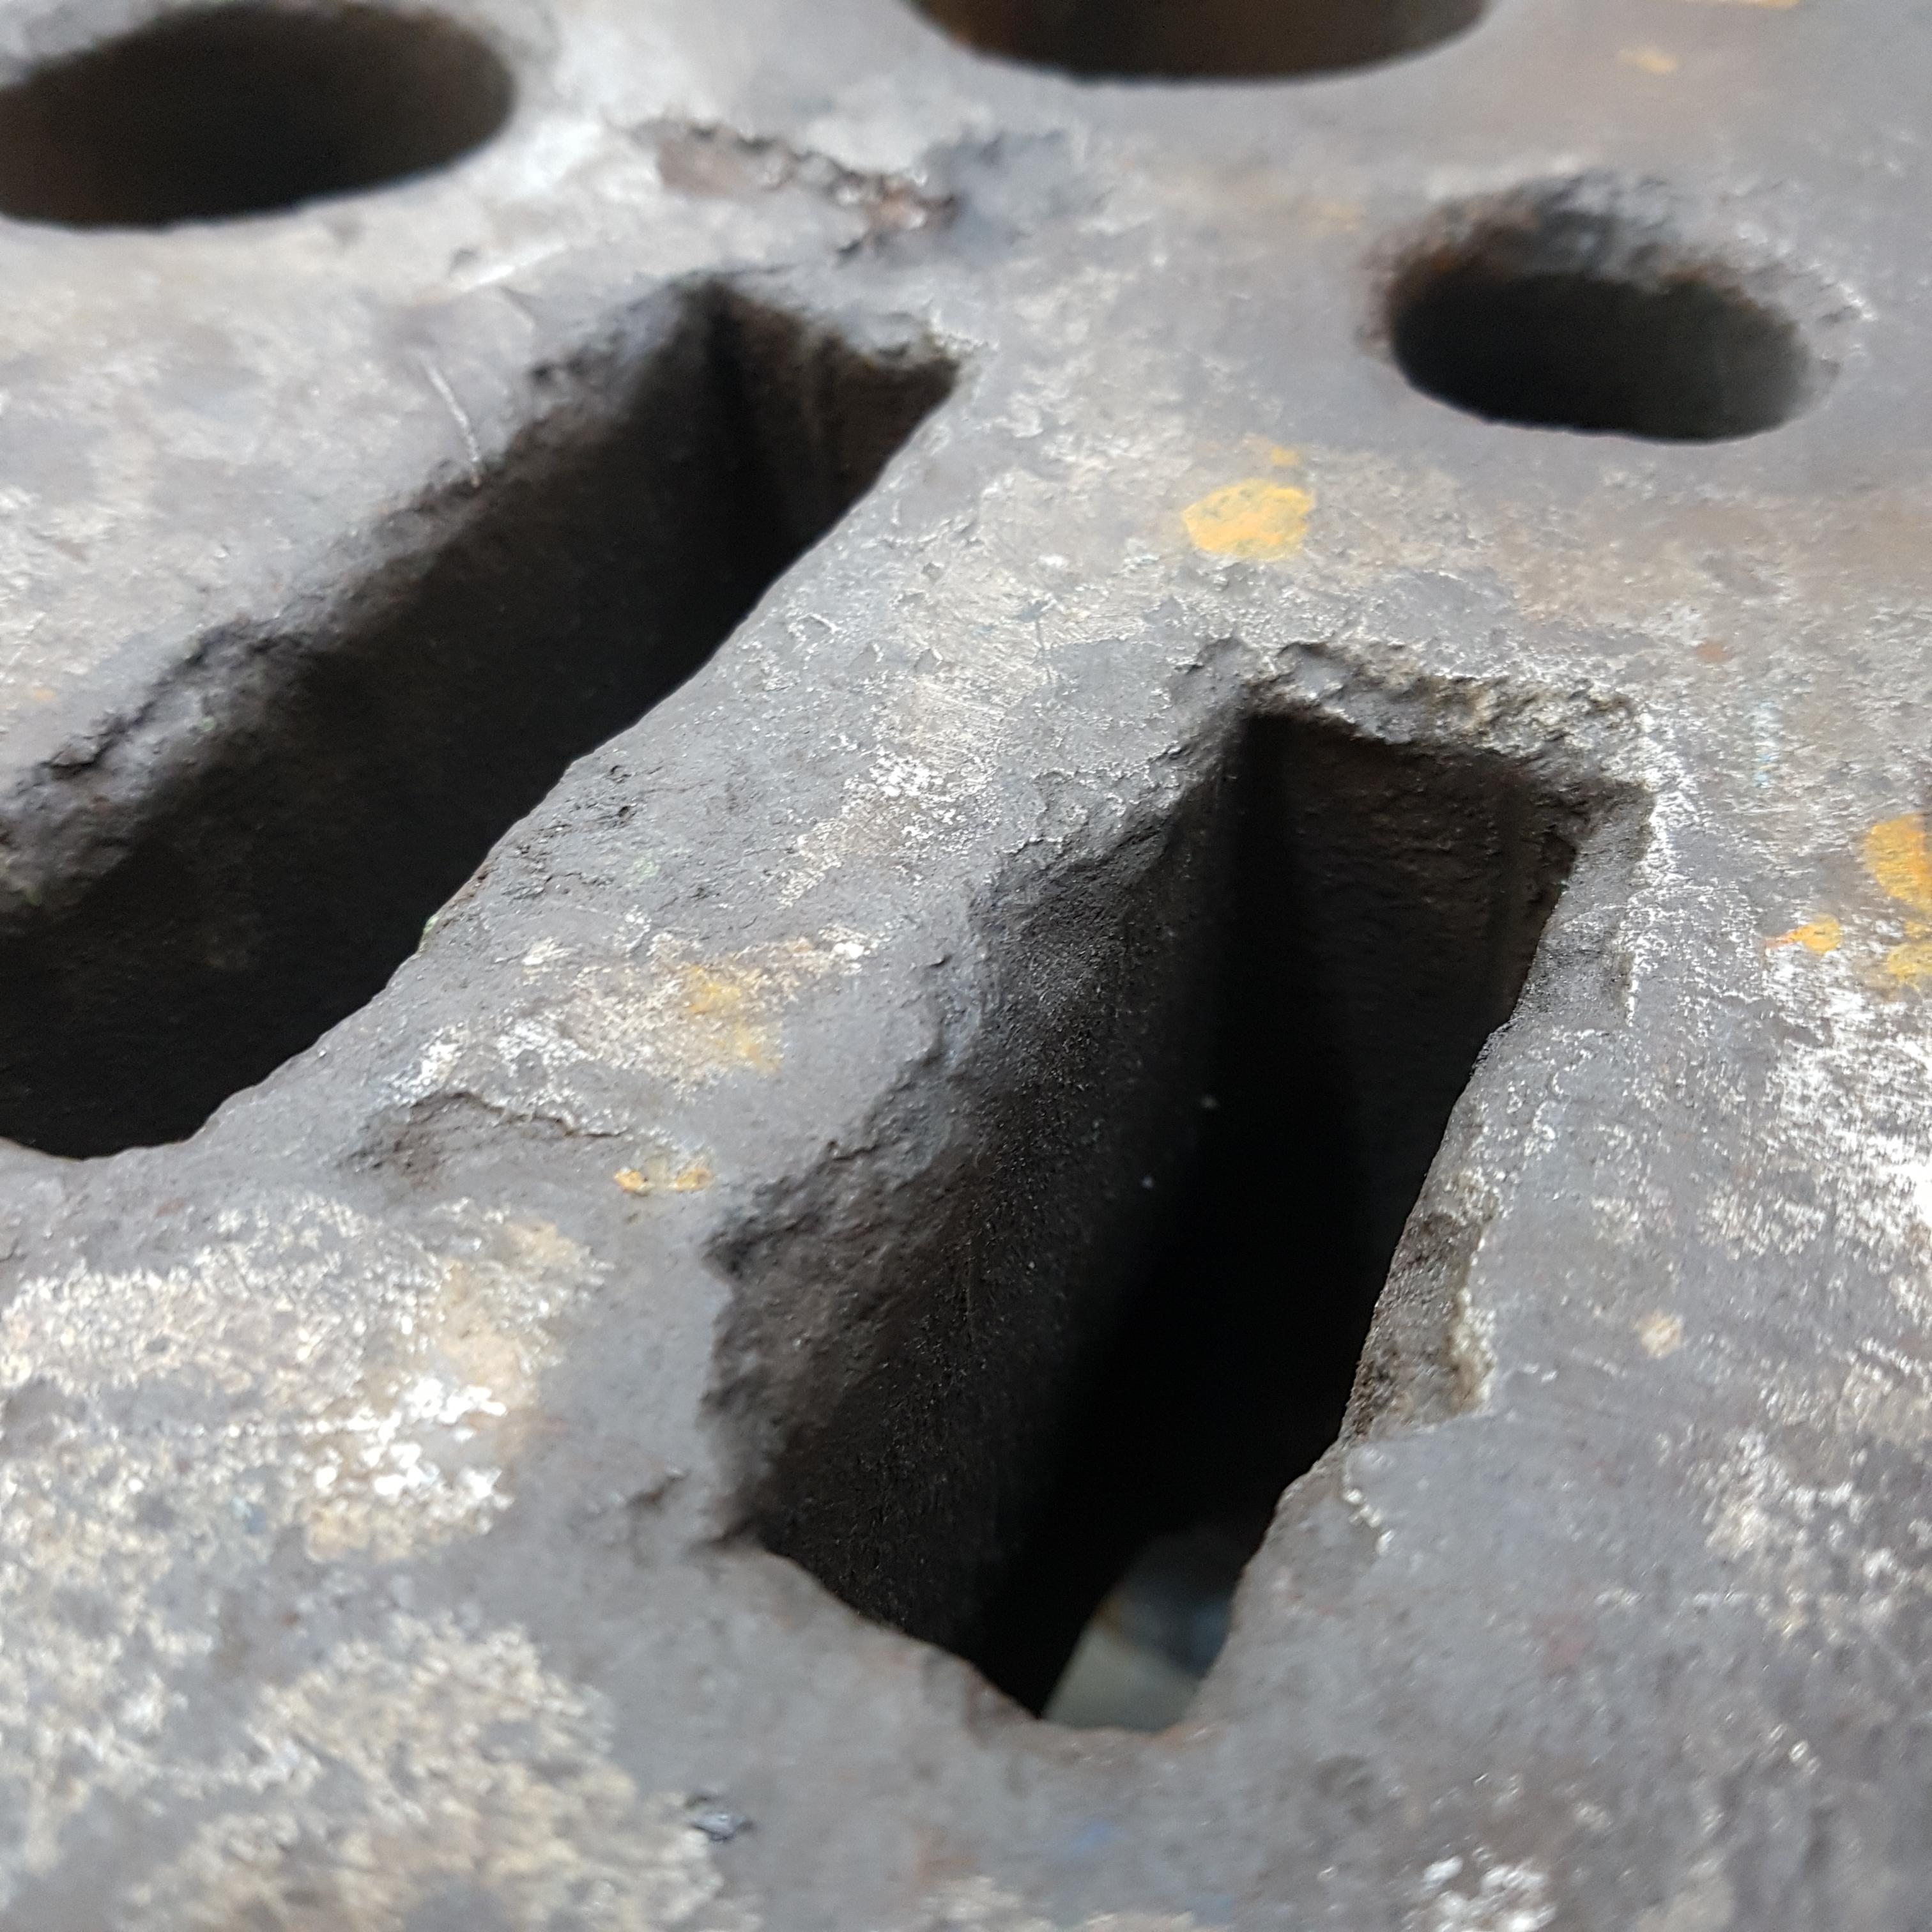
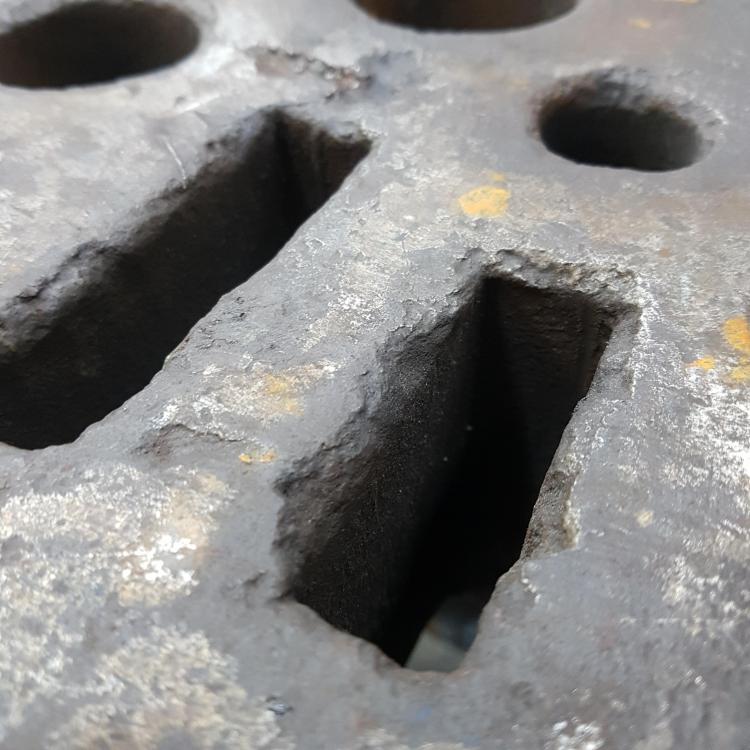
So it took me some time but finally here are the pictures as promised... hope you can see the chipped edges... The swageblock thickness is about 10cm a little bit less than 4 inches. If the milling idea comes up once more I would mill of 3/8" or so...


-
All the important things about unsing the forge to minimize the scale have already been said. But if it is too late to lock the stable door after the horse has bolted(hope that I´m using this aphorism in the right manner :) ), I like to give you an idea how to "rescue" these pieces... Chemical scale removement may help you: white vinigar works fine. I´m using normal 10%white vinigar from a normal food store near to my location. Stored in a plastic barrel. Leaving the pieces in there overnight is just enouh, even for heavy scale. In most cases you can wipe of the rest of the scale simply by hand/toothbrush under running water. Maybe you won´t like the bright silver shiny surfaces you will get with this method? Another drawback maybe that you have hurry up a little bit to make your pieces dry after cleaning under water, because rust will come up in minutes, even if you have dried everthing carefully, there is no much time befor it will get a thin rusty coating. So if you want to try it out it is recomandated to dry things good after cleaning with water and make your coating (paste wax ect...) immediately afterwards. If you indeed don´t like this silvery look, go back to the forge and heat the pieces up to a dark red heat for rescaling to your liking. If you take the pieces out of the forge start wirebrushing until it is cool and you should end up with a nice, more blacksmithing like colour.... Greetings Sascha
-
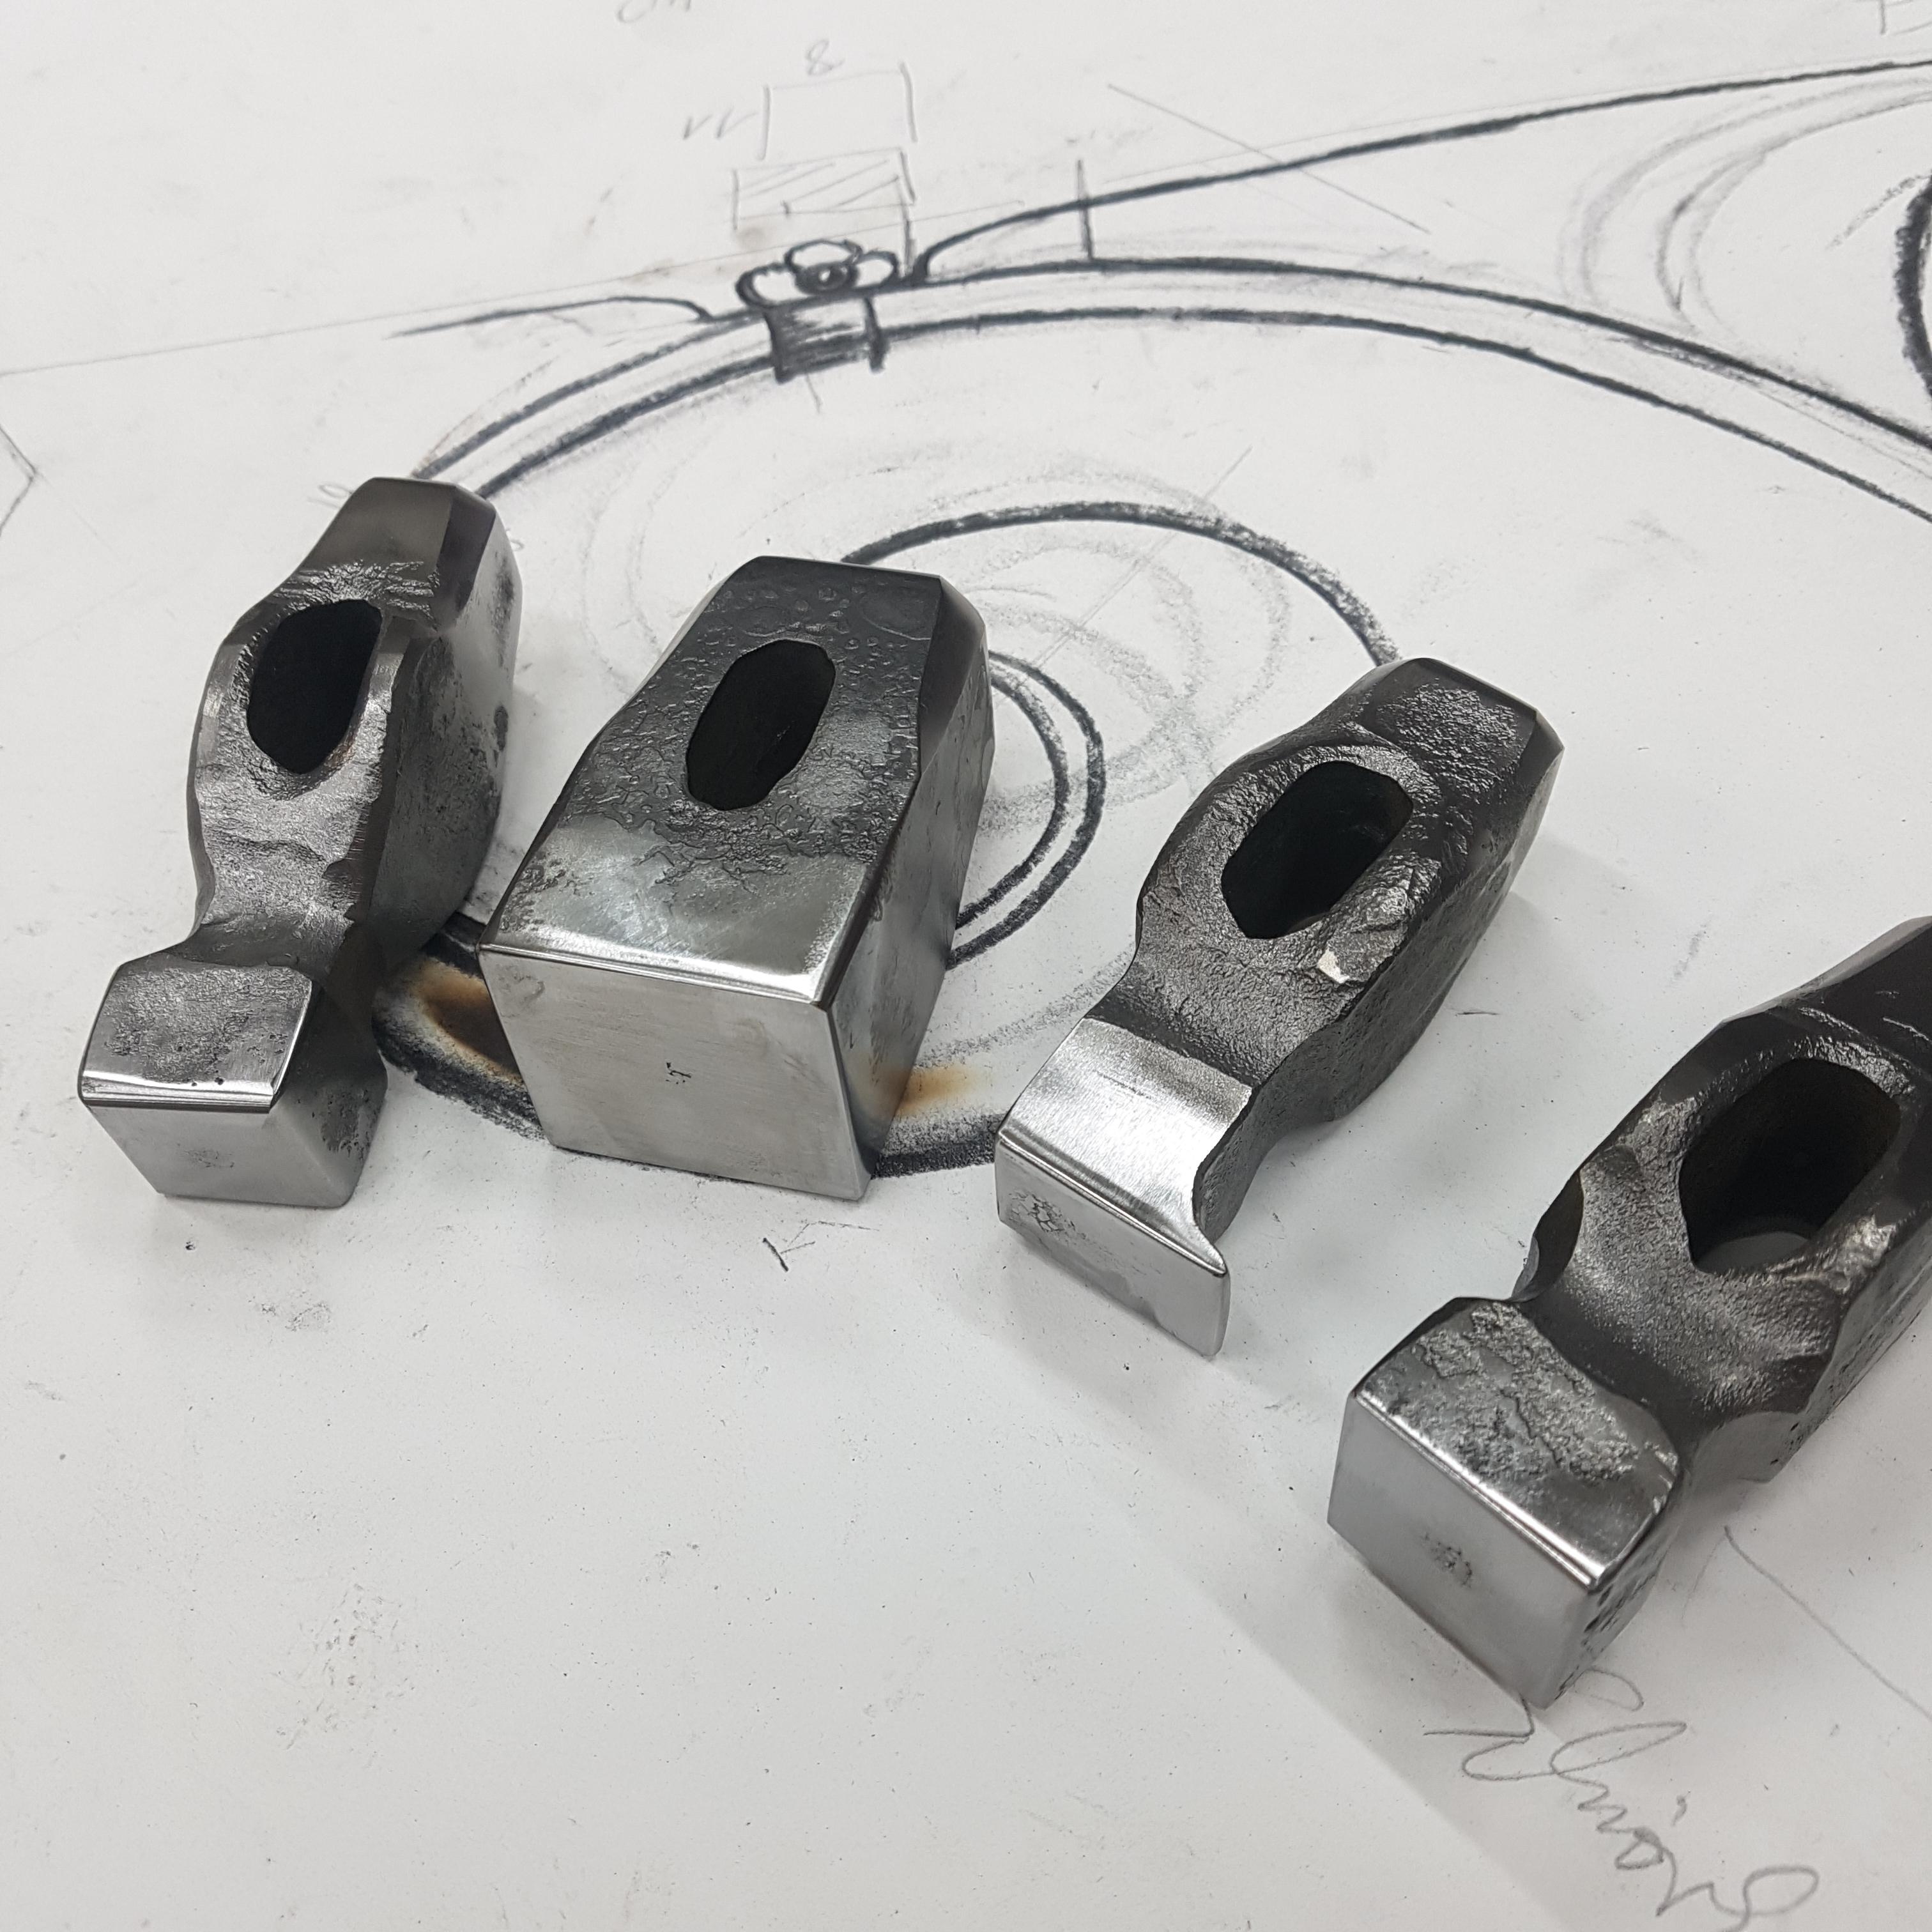
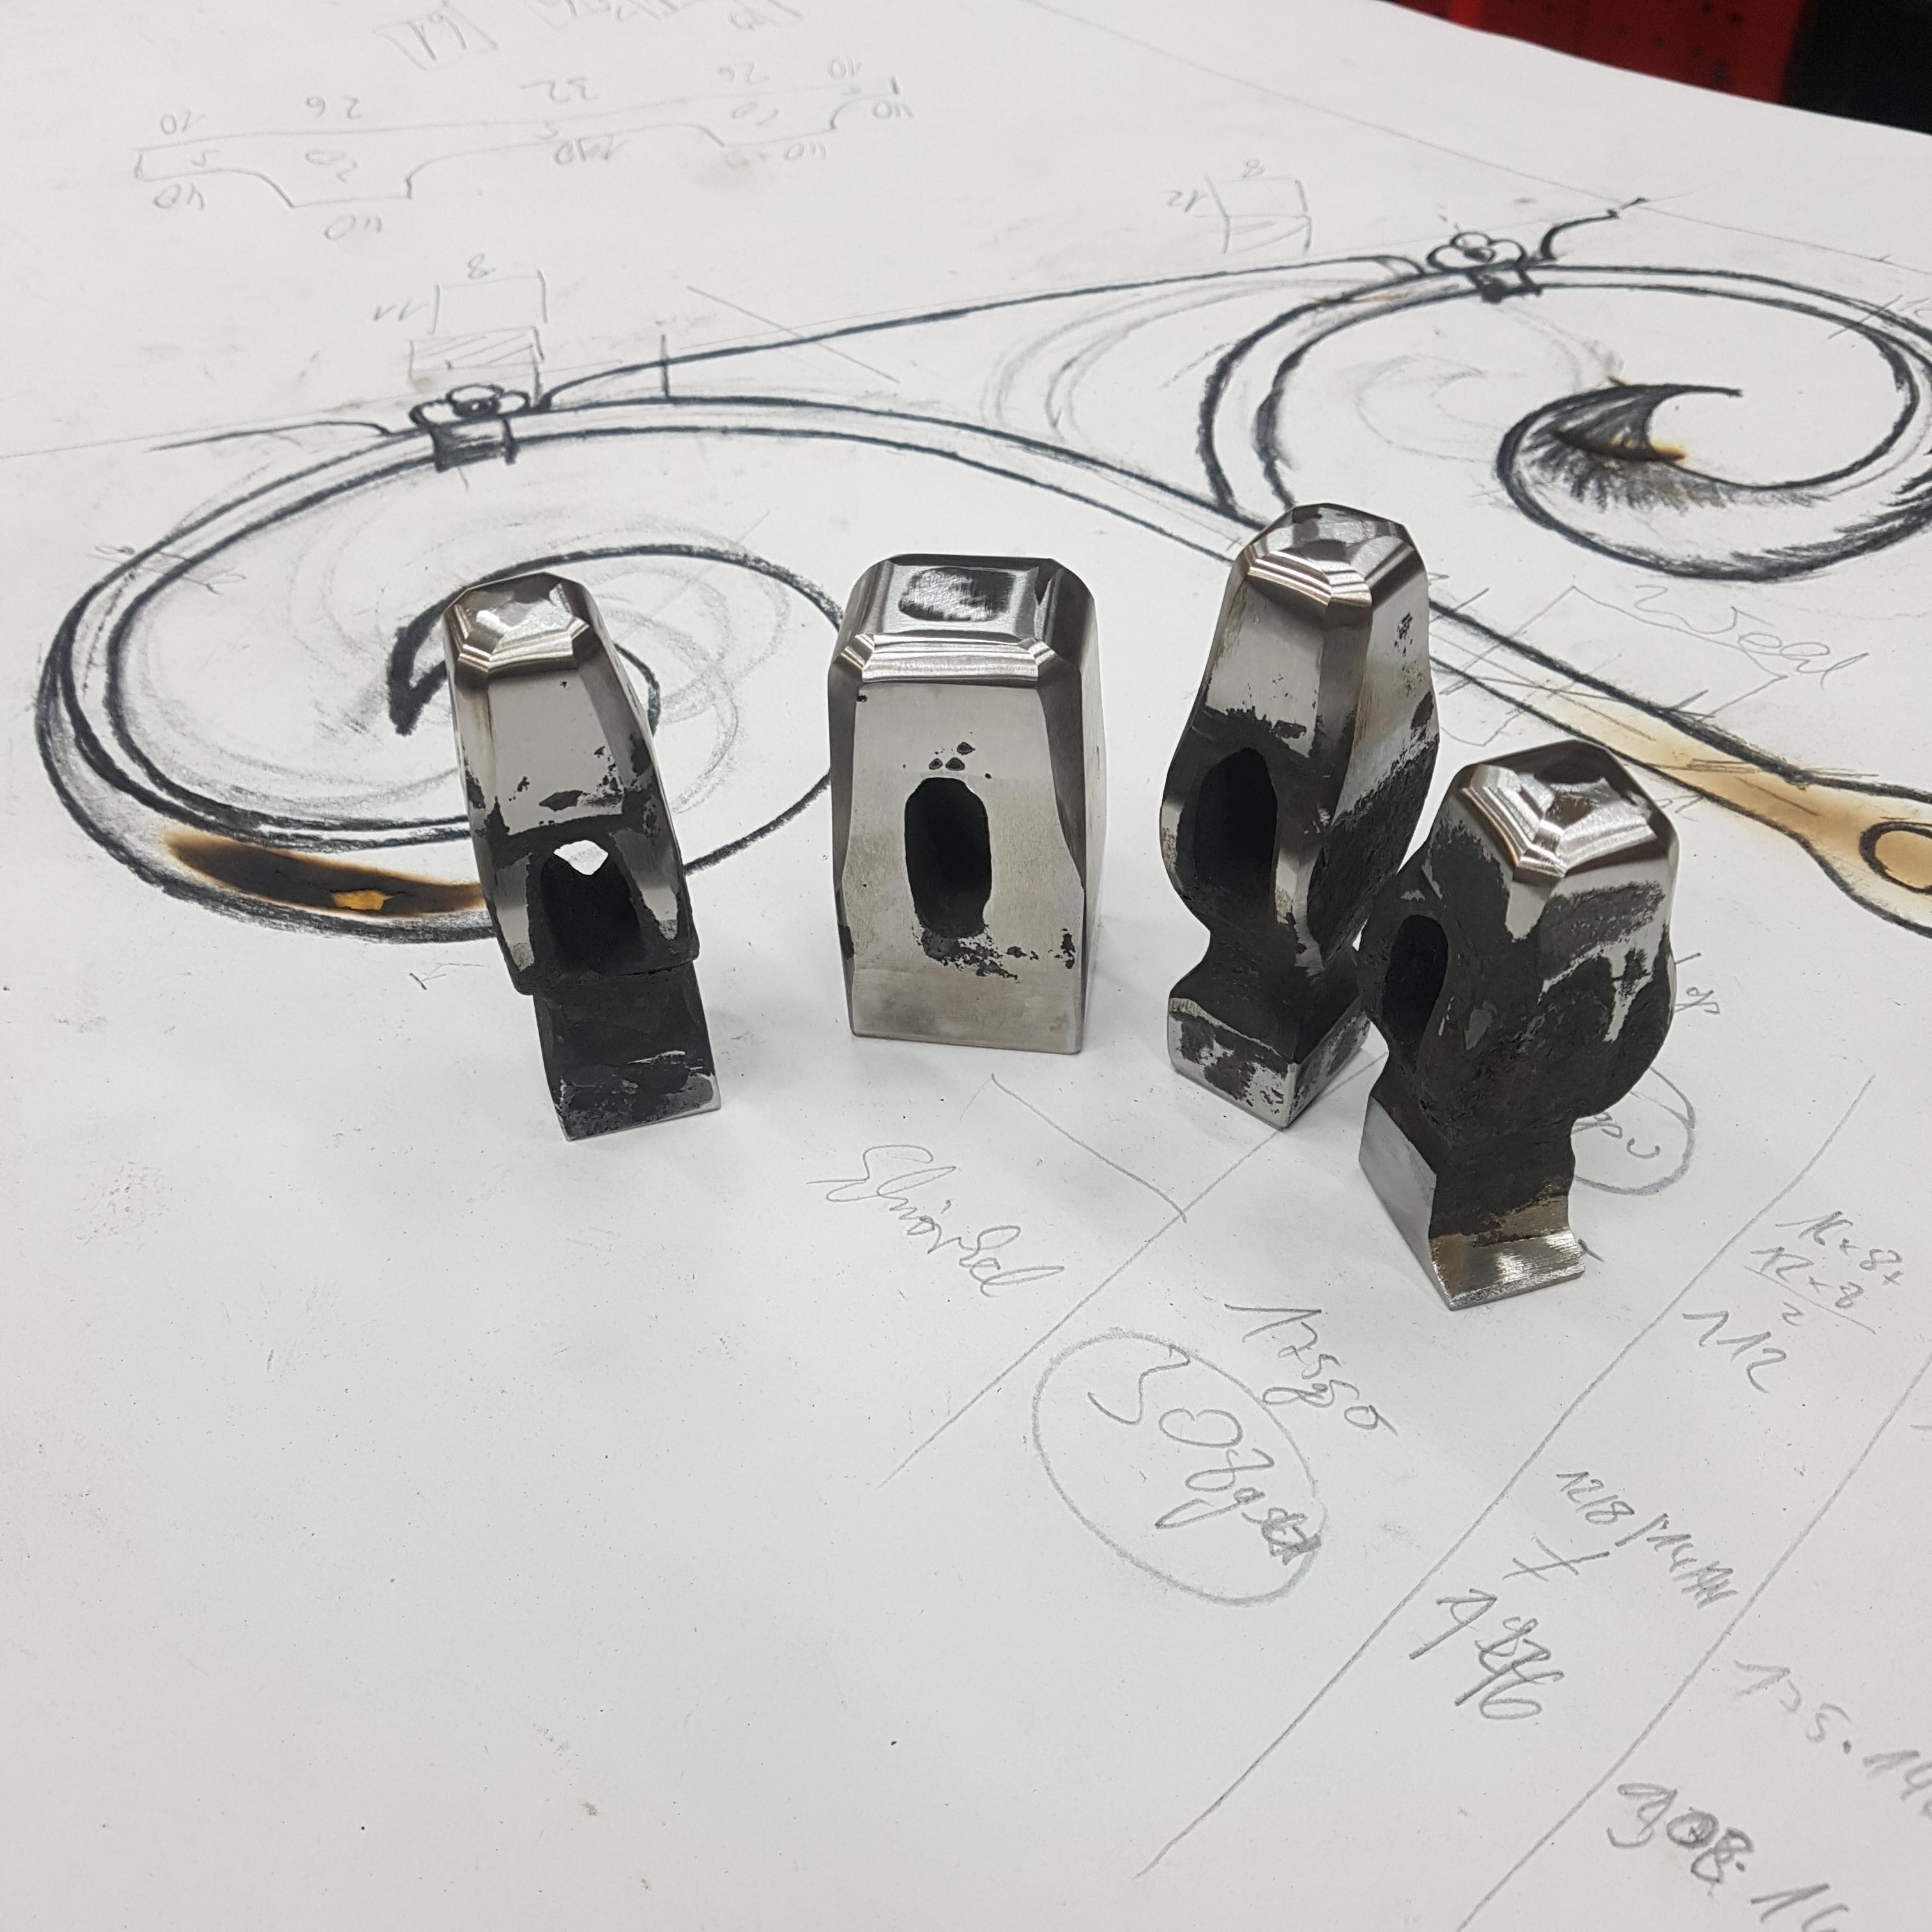
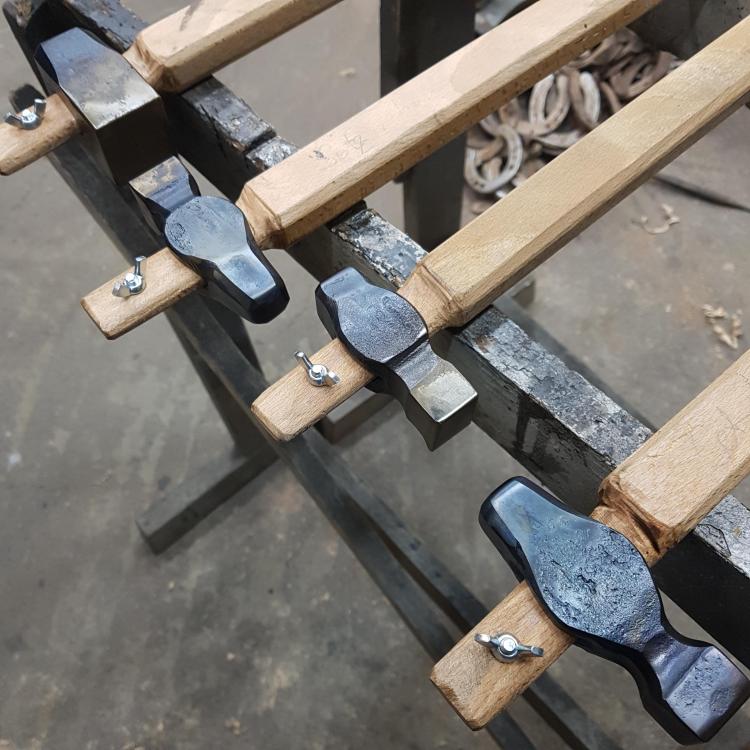
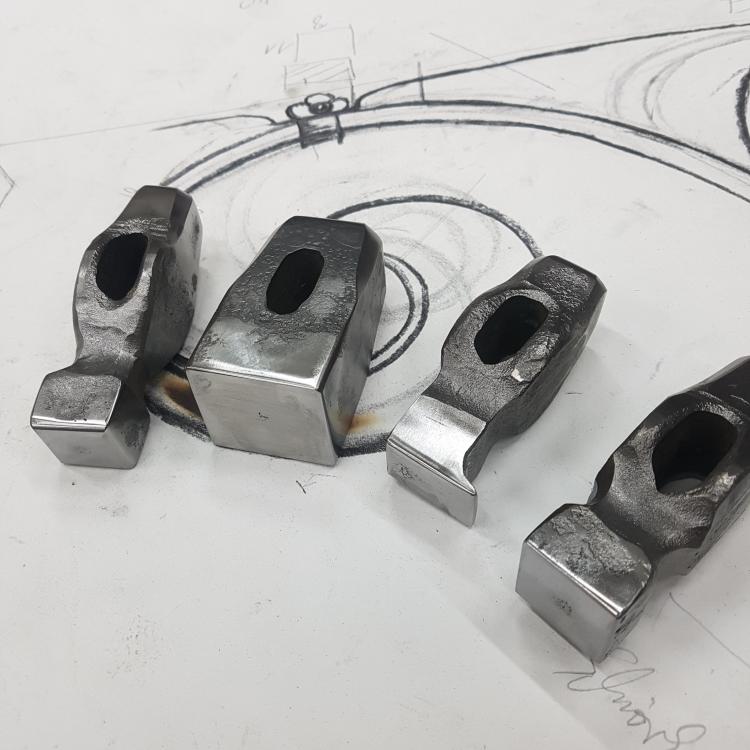
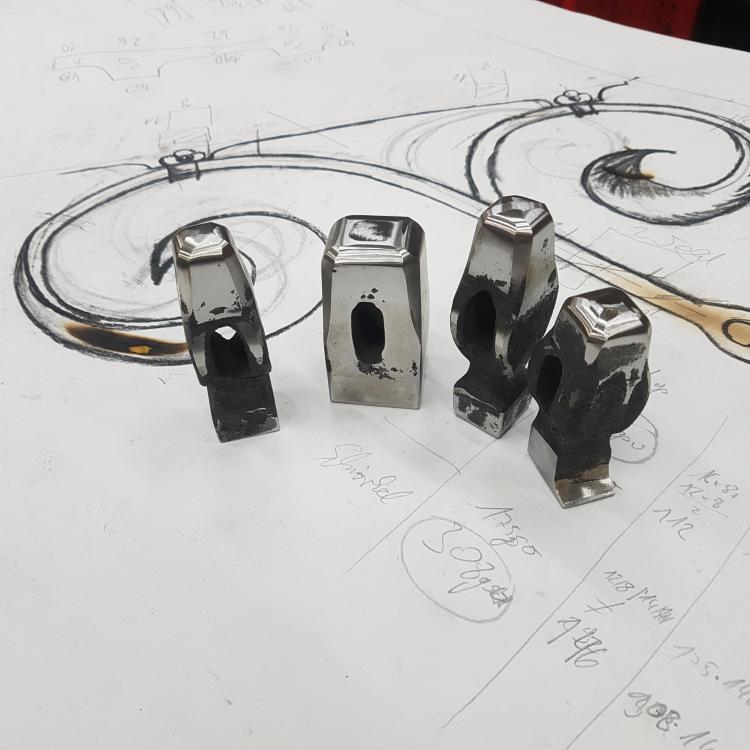
Made some different kinds of sethammers today. The big cubic one is for use under my treadlehammer the smaller are more for use at anvil/postvise ect. From left to right (above photography) you can see: straight sethammer with heavily rounded edges 1" square, sharp edges 1 5/8" square, sharp edges 1" straight, sharp edges 1" heeled sethammer... Now have to search some fine wood handles. Here in Germany the traditional handels for top tool are made from oak or hazelnut branches... don't know where I can find. If you walk into the next forest and cut off some branches you can get in big troubles if anyone noticed...
-
Cool to have that sorted out these are those little detailed questions wich can become very soul-destroying for me if I do not can get an answer... Now I can sleep much better
-
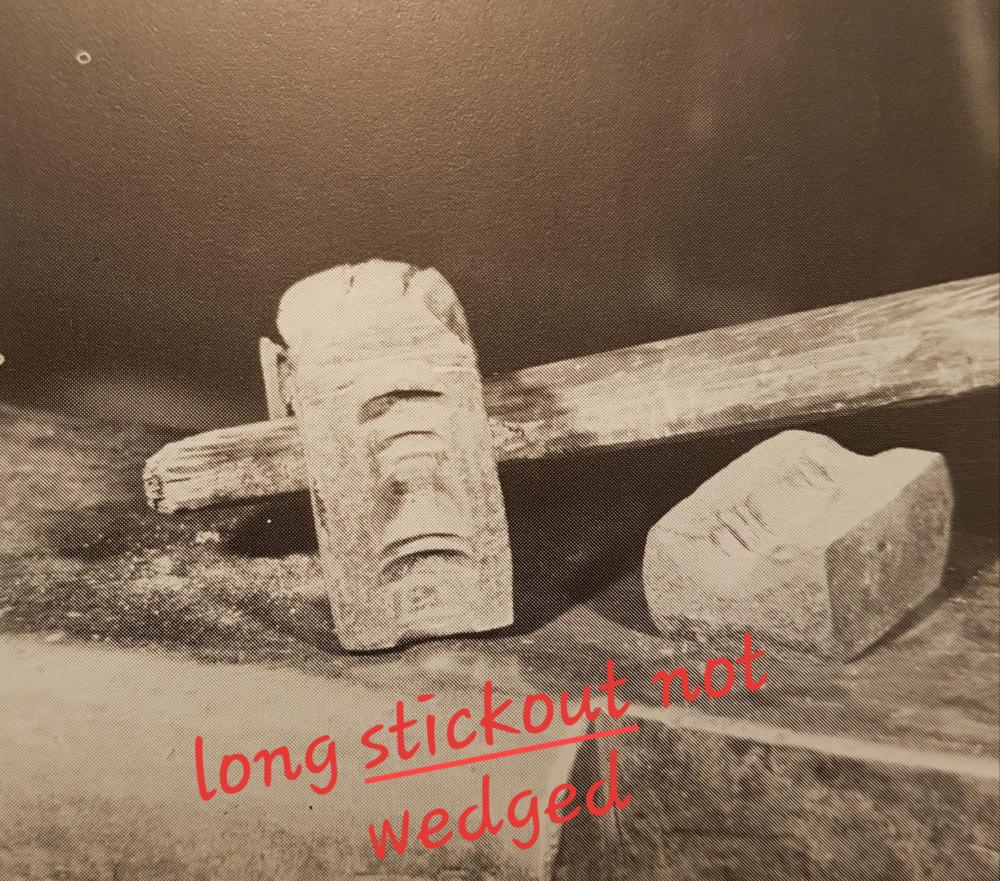
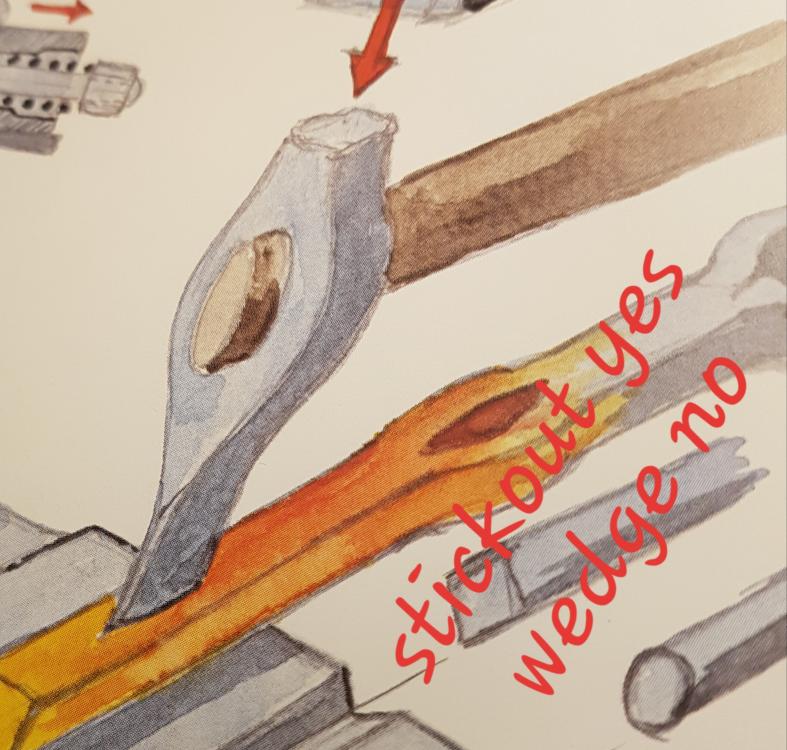
Think I found the answer Here I copied such a statement for example: Die Hämmer erhalten gewachsene Hartholz Stiele die aber nicht verkeilt werden damit bei schiefen Schlägen auf den Hammer keine Prellungen entstehen durch die die Hand verletzt werden könnte Here I tried to translate with help of Google translator: The hammers have grown hardwood handles that are not wedged, so that if the hammer is hit at an angle, there are no bruises that could injure the hand... I'm sure everyone will catch the main idea After reading this I think I missinterpreted the whole thing. It doesn't mean loose in the manner of something wobbly or so. The point is, the handle itself should fit but then it is not wedged in place as usually done with handhammers. Furthermore I found in the book of -Otto Schmirler : the smithy's craft and tools - some drawings and photographs where obvious stick out is noticeable, but no wedges. So, I've learnd today to understand "loose" simply as not wedged
-
Hi Frazer, That's my preferred method too if I make tools by myself. Wrapping around the tool not to tight and you end up with a little "loose" But now I found some old tools wich I would like to use in future. And they all have hammer eyes. The special point of these eyes is, they are parallel and not hourglass shaped as necessary for handhammers. I came across this topic, because in all German blacksmithing books this loose fit is always recommended to avoid bruising the wrists. However, they don't explain further how to realise this "loose" fit Thomas, can you move these tools easily on the handle? Greetings Sascha
-
Yes that's an other idea. Don't touch the swageblock, and use it for rough work. If it must be perfect then use a custom made bolster plate with nice clean rounded edges... Thanks Thomas