Dasher
-
Posts
70 -
Joined
-
Last visited
Content Type
Profiles
Forums
Articles
Gallery
Downloads
Events
Everything posted by Dasher
-
What works best to free rusted parts
Dasher replied to Roy56's topic in Gunsmithing, Muskets, Flintlocks etc
Update, I've freed 1, still 1 to go, no hurry, it will come eventually I'm sure. -
Metal bandsaw vs chop saw - which to choose ?
Dasher replied to BartW's topic in Saws, bandsaws, hack saws, etc
I'd go for the cold saw every time, but I've only had little use of a metal bandsaw, so others with more bandsaw exp may disagree. I suspect your relatively cheap bandsaw will have to work hard at the risk of maintainence and renewal of guide bearings etc. There isn't a lot of inherent risk in a cold saw, but a sound clamping system is a no brainer, because while it may be low speed, it has torque to burn. -
What works best to free rusted parts
Dasher replied to Roy56's topic in Gunsmithing, Muskets, Flintlocks etc
Thanks big gun, I,m going to hold off putting them in the oven for now while I try a few other things, Irondragon's suggestion sounds logical, so that is next. -
What works best to free rusted parts
Dasher replied to Roy56's topic in Gunsmithing, Muskets, Flintlocks etc
Not rust per se, but related, I,ve just today started to re new my old motorcycle, hasn,t run since the late 80,s, [ family , work, yada yada], apon pullng the carburettors, I discovered that the slides had seized in the throttle bodies, as they were only a 100 or so hrs used since the bodies were last sleeved, I,d like to save them. They are currently soaking in a wd 40 mix, but I was wondering if someone might have had this issue before. As the bodies are made of pot metal, any introduction of heat must be very judicious, any and all advice appreciated. -
I agree with pnut, most likely mild steal, pressed metal or aluminium, come along handles a generally short of length , with all the work being done by the geared mechanical advantage, I've seen them bent, broken and abused and nothing leads me to think they are made of anything of note. As a side note, whether by design or coincidence, comalongs are hard to break or damage when used correctly and to it's rating, but you add a "cheater bar" to the handle for a bit of extra grunt, and you will kill it very quickly.
-
Well picker77 I applied for a job there in the early 80,s, doing maintainence on the towers, I missed out, in hindsight, luckily, I, ve already had 1 knee and 1 hip replaced, and another hip being done soon. I think had I been climbing 1000' towers all these years Í' d be on my 2nd or 3rd set of hips and knees by now.
-
Thanks picker77, yes I think I will need to sort some time of platten arrangement eventually . BTW that communications facility you mention "near Perth" is almost 1/2 way up the state, over 700 miles from Perth.
-
Thanks picker77, I've got it running and tracking well atm, haven't made a lot of dust due to other things needing doing, but I' ll run it as is for a while and keep up the maintenance like you noted, if it lasts 1/2 of 13 years they can put it on my coffin.
-
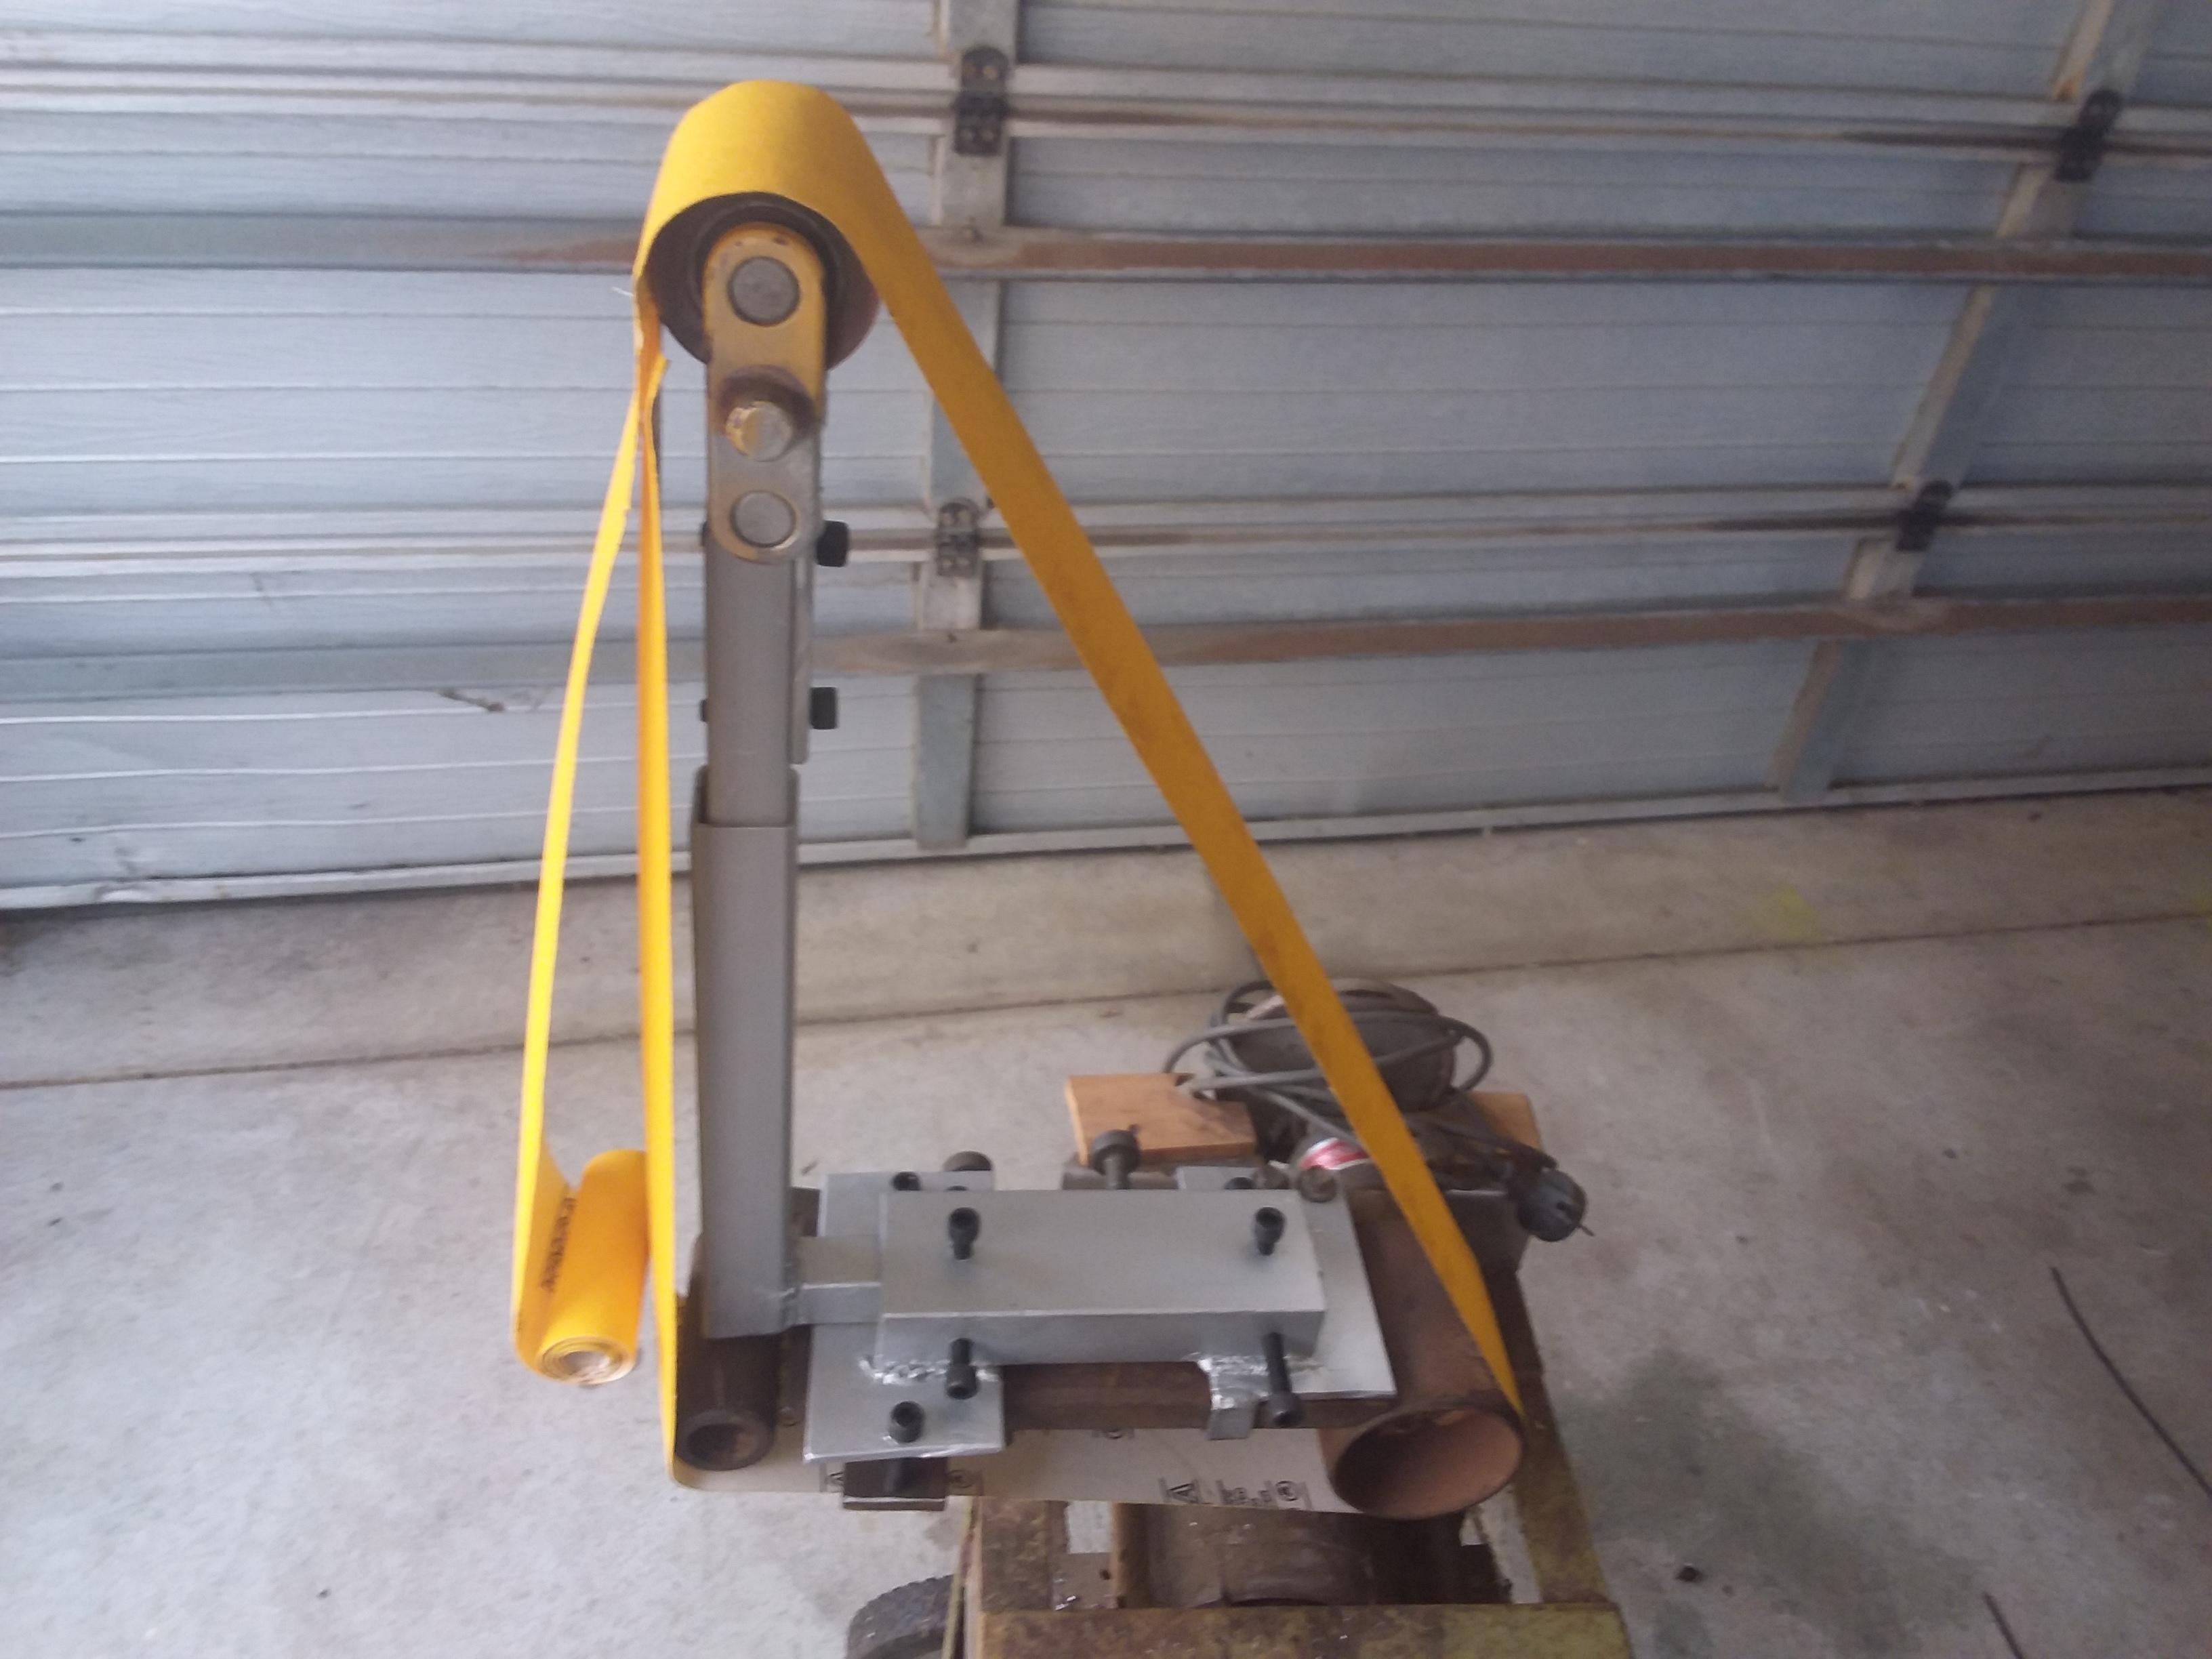
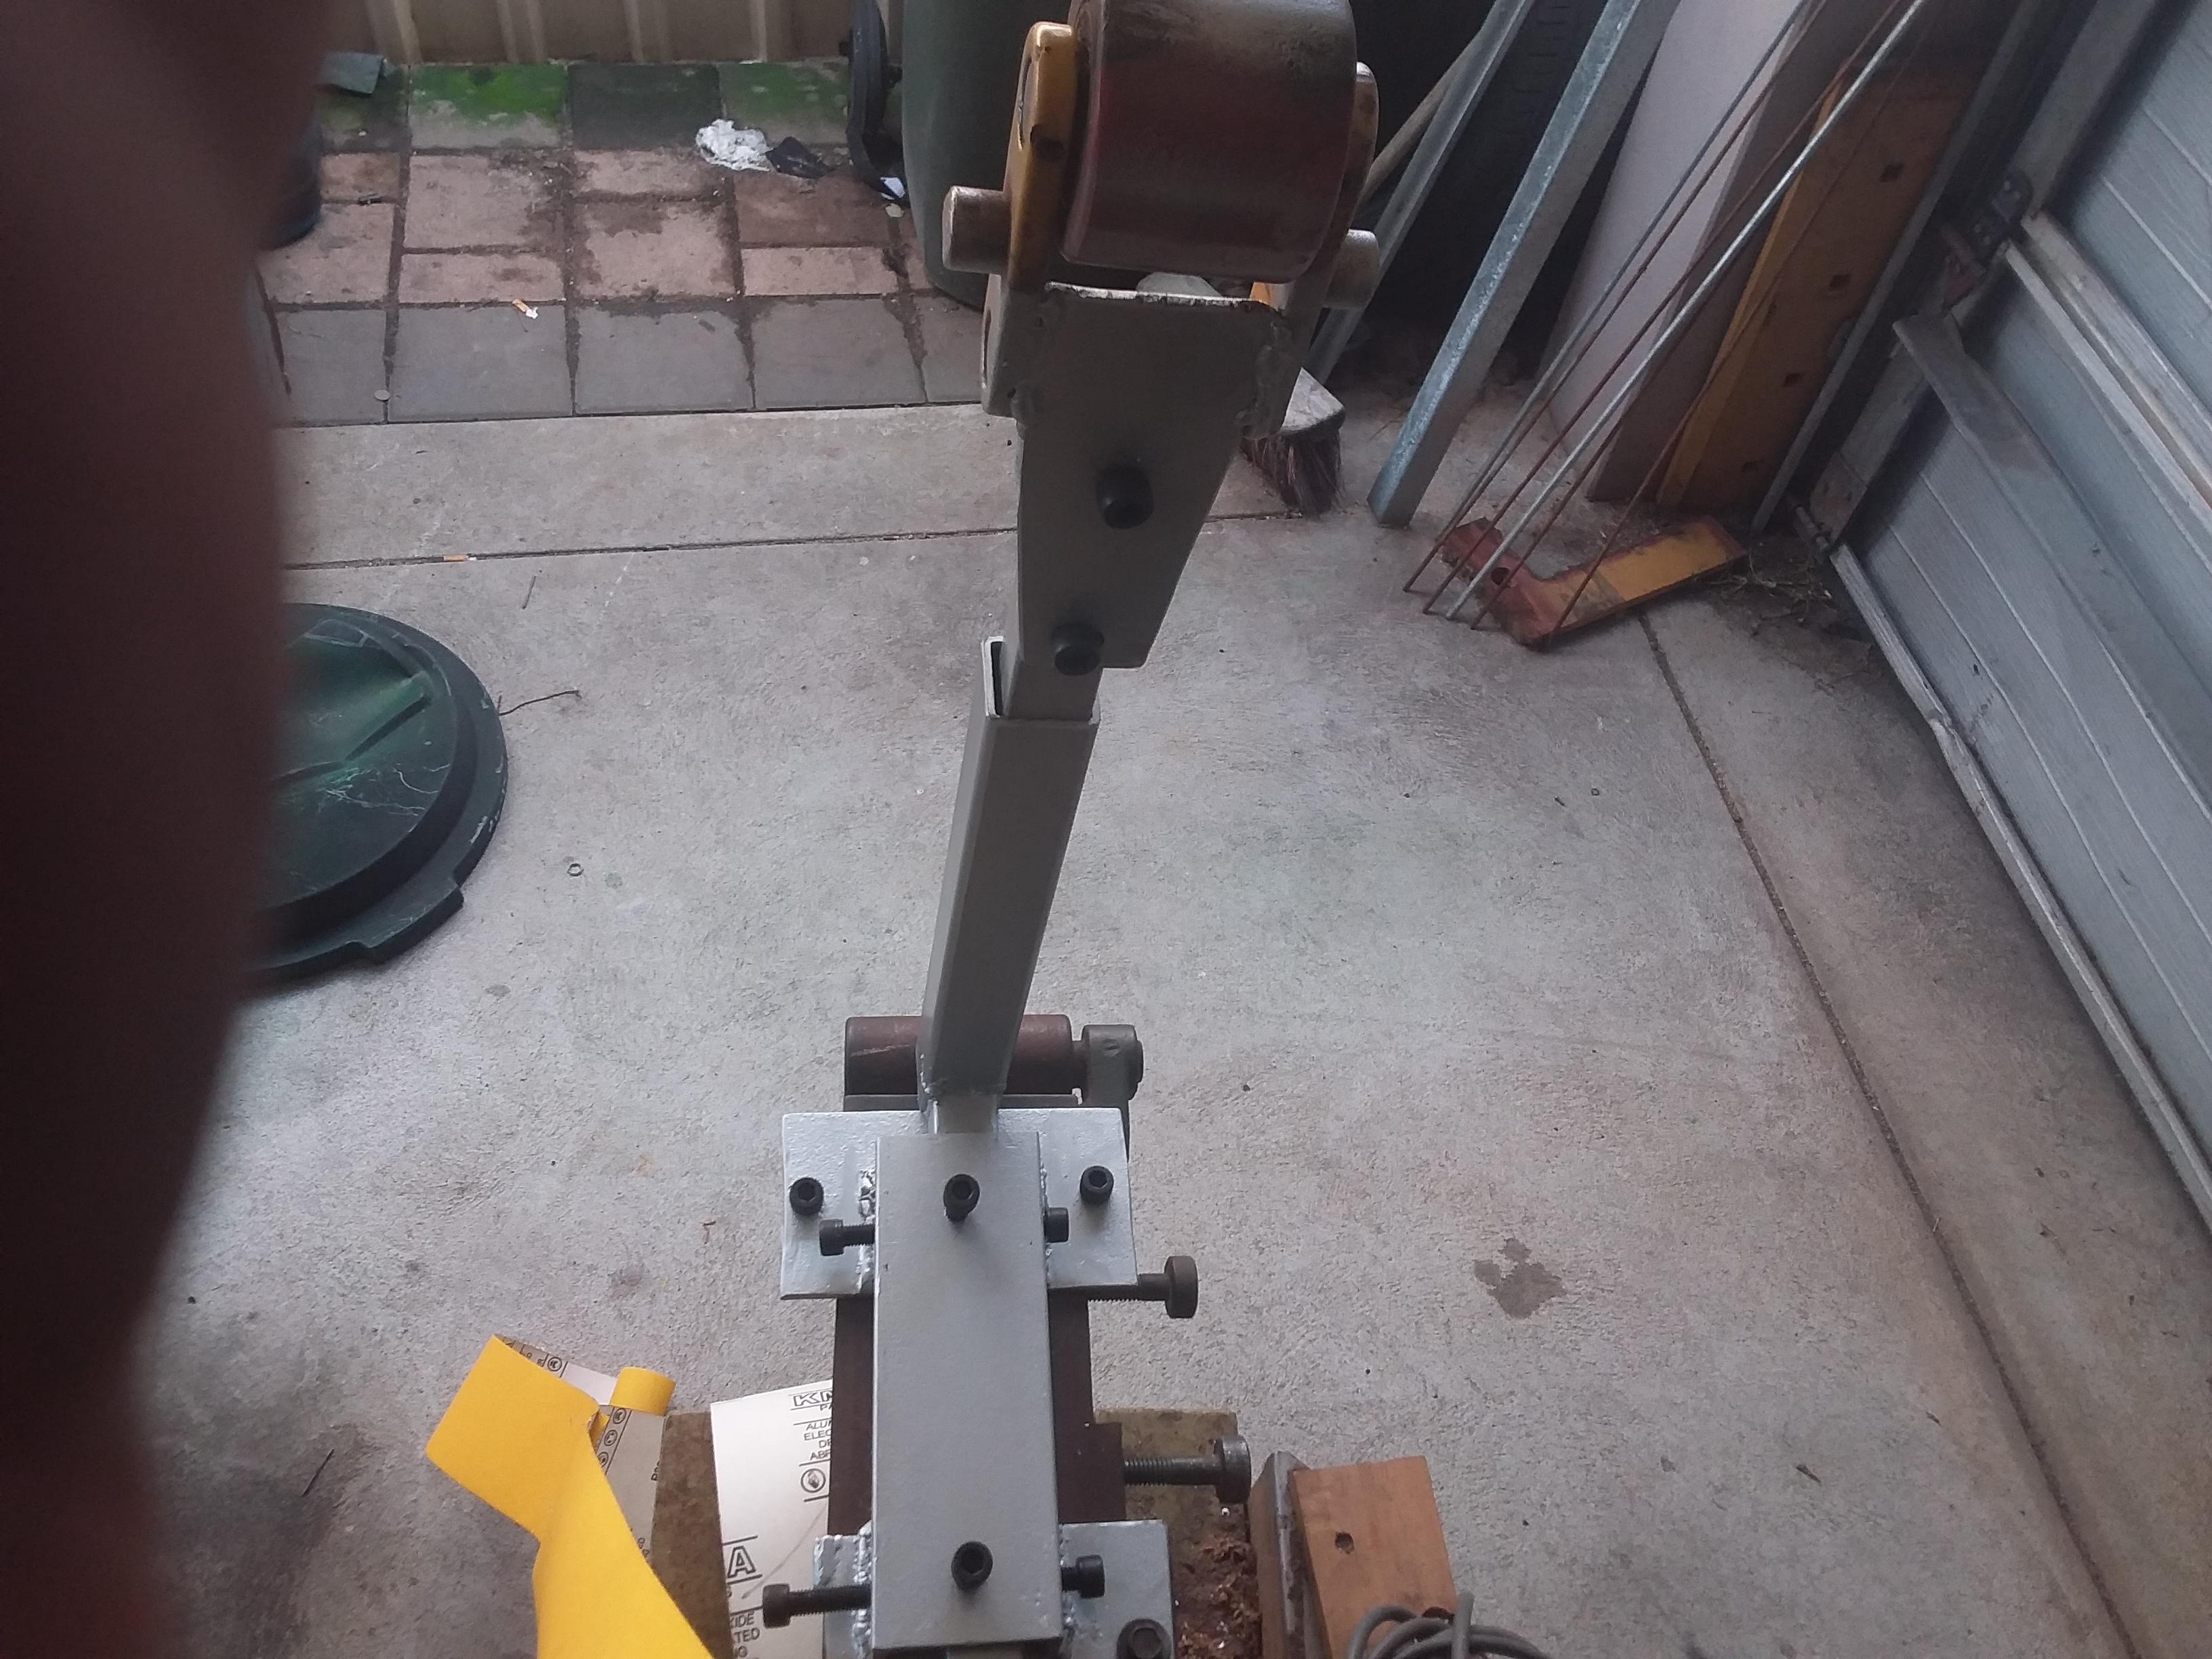
Update, and more questions; The belts finally arrived and I tried them out, everything runs pretty well and true, the only issue being a bit of belt "flutter" [for want of a better word] on the hypotenuse leg of the triangle, where the belt is first "pushed" from the drive pulley, given that ATM I have only tried ultra cheap ebay belts, am I over worrying about it, or do i need to add a 4th tension wheel? The working leg of the belt runs very smoothly and the vertical support is spring loaded, and I have tensioned it to what I guess and feel is about right, I'm hesitant to tighten any more without some advice from people who have been through a similar trial. Thanks for taking the time to read, and all advice appreciated.
-
Are there any structural engineers on here?
Dasher replied to BIGGUNDOCTOR's topic in Everything Else
Interesting idea BGD, sort of a mud brick/ adobe method, the structural ability would be quite high given the large base area, but a couple of problems you might face are; while the filling is dry the bags will settle and "nest" together very well and become very stable, but full sealing of the joints, especially vertically will take a bit of thought. The other thing that comes to mind is are the bags uv resistant? Or can they be made uv and weather resistant? If not , depending on the material the sacks are made of, they will deteriorate pretty quickly and your dry mix will probably leak out, so you may need to add a binding agent and water to the mix, then that becomes a procedure issue, to either fill and cure the blocks in a uniform shape prior to installing, or filling and installing immediately and letting the bags nest and conform to each other as they cure. From there, the next issue would be how long to let the structure settle before shot creting, and you will need expert geo advice for that and if you have extreme weather/ temp changes, it could be a party stopper. This is by no means authoritative advice, just my thoughts from many years in construction, I hope you manage to sort it out as the idea itself is pretty sound, but you do need to get it right. -
Thanks Pnut, I'm just trying to make do with stuff I have laying around, the existing sander works ok, but being horizontal and waist height, it is hard to do detail work or sharpening without being in a bad posture, and these old bones complain when I do, so I figured the vertical belt section will take care of that, and it's only 5 minutes and 4 bolts and it can be set up as before as a bench sander, if it works ok, I'll keep an eye out for an enclosed motor.
-
I am currently in the process of upgrading my old 4" x 48" bench sander to take 72" x 2" belts, and while waiting for some cheap sanding belts for setting up with to arrive, I thought I would throw it out for anyone to comment , good or bad , whether my system is likely to be ok or not, in the pics attached, I have stapled some 4"" sandpaper I had to make a 72" belt to get the geometry close to what I need. My main questions are ; The vertical post is spring loaded internally, allowing a bit of give vertically, will this be ok? The existing sander has a tension/ tracker head pulley, do I also need an adjustable top pulley? The top pulley is adjustable now, by about 7 degs either side of centre along the line of belt, and 2 or 3 degs either side of centre horizontally at the head, as these are not idiot proof safety wise, I'm hoping they will be set and forget, once I have a belt running true, and any tracking adjustments for change of belt etc, can be handled via the existing tracking controller of the head pulley which doesn,t need hands or clothing near the moving belt. Next, with the reduced contact on the drive pulley, am I likely to get belt slip, or should I rubber line the pulley now?, Lastly, as the motor is not enclosed/ sealed, would a light metal enclosure with a strong magnet attached reduce the entry of airborne filings, my Idea is to keep the enclosure far enough away for the magnet to have no effect on the motor field. Almost forgot, does the top pulley need to be radiused, or should flat be ok? Thanks for reading all this, and comments, yay or nay appreciated.


-
Man, I had an EK when I was younger, all of them having the same tail lights is what put me into guessing mode.
-
Looks great Ausfire, even better in the FC/ FE?
-
Need help reversing a motor (if possible)
Dasher replied to JHCC's topic in Machinery General Discussions
As others have said, many AC single ph motors are not reversible, have you considered turning the motor around and driving the saw via a lay shaft? It will probably cost a few bucks for the added pulleys / bearings etc, but it is an option. -
JLP Blacksmith Teaching Center.
Dasher replied to jlpservicesinc's topic in Building, Designing a Shop
that is sweet work JLP -
To cut sheet metal, you just need to make a hacking knife out of whatever you have around, an old heavy,[ as in thick] knife, power hacksaw blade, even an old large flat screw driver, you just mount the sheet securely, and penetrate and cut the sheet along your line by striking the back of the knife with a lightish hammer, just like sawing but instead of going in and out, you just drive the knife along your marked line, you will be surprised how accurate you can get with care.
-
What did you do in the shop today?
Dasher replied to Mark Ling's topic in Blacksmithing, General Discussion
I expect you get the same Middle Age Mutant Whingeing Tourists we get in the north of W.A Austfire Daswulf, you cold also tune your bell by raising or lowering your clapper, much like a guitar or trombone slide, with a bell of that length, there is a tone for everyone, somewhere. -
for the screw and nut, see if you can get a scaffold screw jack, maybe a different name where you are, but you can get them in 20, 25 mm, [3/4, 1''] sizes , and others, they come with a substantial nut, complete with wings that can be cut down and housed snugly in your mount post, you are on your way to a near indestructable vice then.[ unless you let my youngest son use it]
-
If you are working hot steel, certainly, as long as the can and concrete don't get extremely hot, no probs at all, of course if there is a chance of the concrete getting very hot, be mindful that concrete will spit at you when overheated.
-
I'm in Australia, so my go to brand for that type of welder is not available to you, but as others have said, Miller, Lincoln, Hobart and others have been making them for years and are reputable brands, the reason I suggested the old heavy type, is because they are just that, old and heavy, thus no one wants them anymore, but they were built with quality internals, whereas the latter day cheapies often have aluminium components instead of brass and copper, as you intend to have the welder in your shop permanent, a little bit of weight is no big deal, and if need be, just add a couple of wheels if not already fitted.
-
Sorry Chris, confused you, I'm talking about output amp, not supply amps, that welder will run pretty well on a 10 amp supply, but duty cycle is reduced a bit, It runs much better on 15 amp, and the 120 amp I mentioned was just an indicator,Most of my home welding is done with 3.2 mm rods in the 90- 110 amp range.
-
My take, for the work you are intending to do, and most likely want to do, buy an old heavy single phase stick welder, the reputable brands are horses, and rarely die, nowadays everyone is buying lightweight inverter welders and throwing out the old ones for pennies. I have what was a top end [ 20 odd years ago], nearly 2000 bucks worth at the time, 240 volt inverter with stick and tig capability and I love it, but it was bought for easy portability as it only weighs a couple of pounds so I could take it anywhere there was a power supply and do what was needed, It will run 120 amps all day, IF the power supply can stand up. You can buy similar, but lower end units nowadays for a couple of hundred bucks new, but you don't need that unless you intend to do a lot of welding of various types. Also ,I agree with Frosty, learning stick is a lot easier to be able to read and interpret what you are doing as you learn, learning mig without someone helping you set up the machine will have you frustrated quickly, although once you get your settings right on a good machine, welding is pretty simple.
-
I'm a relative newbie, so my advice has no real merit re experience, but the guy who advised me on my forge build was adamant that cracks, fissures etc on insulation joints were real heat sinks/ escape routes, advising me to stagger and overlap joints in a step keyed method, to counter escaping heat. My 1st thought on seeing your forge was the parallel joint at the floor making an easy escape route for heat to leave the furnace and be soaked up by the shell. I hope I've not poked my nose in and misled you, but that is what I think.
-
Why Doesn't the U.S. Use the Metric System? Or does it? (sometimes)
Dasher replied to caotropheus's topic in Everything Else
BIGUNDOCTOR, most of what you say is how I feel, but I doubt the US can afford the conversion, unless someone like Cuba or Somalia lends them the finance.