Lou L
-
Posts
1,180 -
Joined
-
Last visited
Content Type
Profiles
Forums
Articles
Gallery
Downloads
Events
Everything posted by Lou L
-

What did you do in the shop today?
Lou L replied to Mark Ling's topic in Blacksmithing, General Discussion
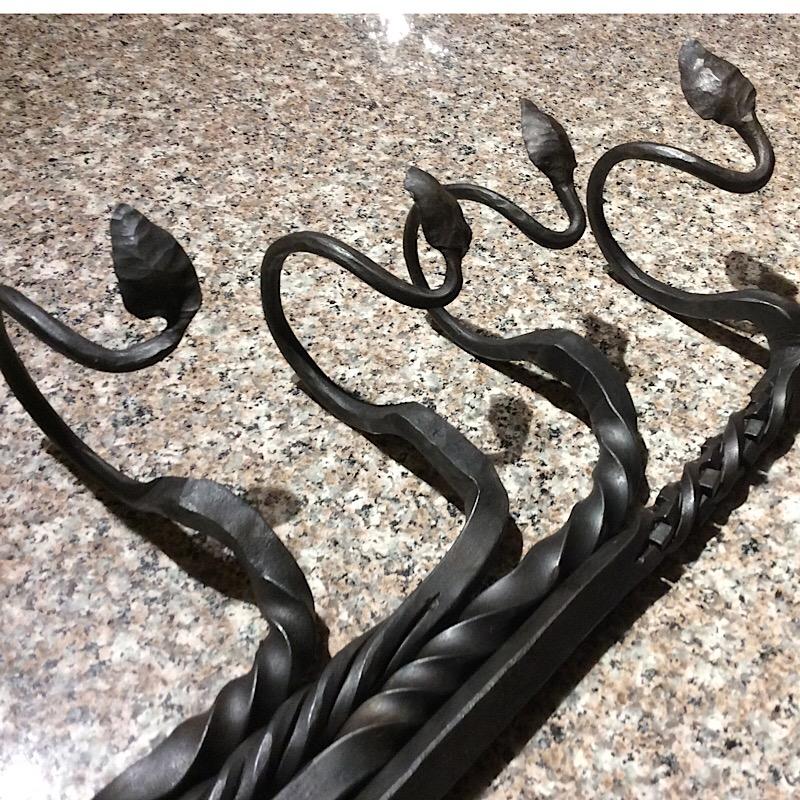
I completely forgot to take,pictures until the night before I Gave them away. I intended to set the whole thing up in the lawn and take some pics. Total fail. I intend to make Moore for people in the neighborhood and I’ll get action shots then. Thanks, by the way, they are the first thing she I’ve made that I felt were worthy. They are far from perfect but, in my defense, I intentionally left hammer marks to make them look more “hand made”. Looking back at the pictures I think,there are areas I should have cleaned up more. Next time! -
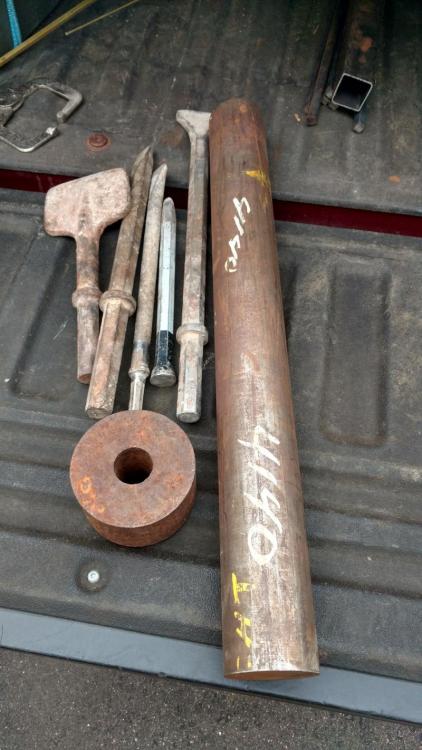
Beautiful press Gergel, I'm envious. I did manage a bit of a deal today. No idea what I'm going to do with it but I found a huge chunk of 4140 (3.25" by about 3 feet) at my favorite steel supplier today. They normally only carry structural steel. I have the manager some bottle openers before and he usually hold me up. He sold it to me at their regular price for A36. Also got some bronze for knife pins and another project, some dimensional bar stock, a portable Hardy hole, and a load of large Jack hammer bits. I'd appreciate some ideas on what to do with this 4140. Remember I have no press or power hammer.
-
I had a conversation with my chair this afternoon about the difficulty of getting a clean finish on a knife. It was all the chair’s fault that I had to do most of it by hand and was out of my depth. My chair told me that I just had to get up and start. We politely agreed to disagree.
-
That’s a good point. I didn’t have any insights on a possible fix. Here is what I’d try: I’d get it real hot and use my swage block half round to try to straighten it. Then I’d read the spec sheets on target temps for hardening H13 and go by color in my rinky dink coal forge and air cool it (maybe use the shop fan for insurance). After that I’d take a file to it and expect it to skate the file. If it doesn’t I send the guy a nasty gram. If it does I put the striking end in the fire just before it gets red (1000 degrees is the temper target...I’m not sure what that looks like on H13) and take it out.
-
I’m going out on a limb here, but I think it is very difficult to anneal one section of H13. It has to cool super slowly in ash or vermiculite without losing heat to fast due to part of it sticking out. Maybe he heated just the working end to critical and let that air cool and the rest was already annealed. Hmm, maybe he tempered the end and just doesn’t know the difference between annealing and tempering? Or, most likely, it’s not H13. For a second there I thought it looked like the top half of a pre-formed concrete anchor but even those would Ben tougher than what you’ve experienced.
-
My guess is that someone ground out those sides to create a “safe edge” so they could file away knowing they wouldn’t affect adjoining parts of the work piece. It’s a pretty common practice that had no idea about until recently. Must have been a really weird spot to file.
-
To be honest, the more I think about that design punch the more I don’t like it. I guess it would be okay for a countersink but that thick section in the middle basically eliminate the option of punching and drifting a little bit. Plus it’s a waste of expensive material...if it’s H13.
-
I’ve always heard that H13 is highly desired for hot work under a power hammer....I just can’t conceive of an explanation other than that smith is not reputable. I’m not sure but I assume it is considered bad form to use the name of the person on this forum but, is it a well known individual or someone you just found online? The fact he won’t stand behind the product tells me he knows. I’d try to get the money back anyway and then get one from someone you can trust. There is a YouTube tong maker who does his work in Taiwan and me has his H13 punches machined to his specs and then handles them. His prices are close to what it would cost for the steel around here. Shipping hurts a little, but that’s how you convince yourself to get multiple tools to make it worth it!
-
I’m no expert but I don’t think it is H13. That stuff is air hardening and stays incredibly hard even at dull red heat. As far as I know, one would have to anneal H13 in order to get it remotely ductile enough to bend it the way your punch did. I would ask for a refund or for a new punch and I’m not one to send things back when I’m not happy with them.
-
What did you do in the shop today?
Lou L replied to Mark Ling's topic in Blacksmithing, General Discussion
I have actually been pretty busy in the shop lately but haven’t posted anything. I made some wine glass holders for the yard along with a bottle holder (didn’t get a picture of the bottle holder). The night before I was to give them to the teachers on the last day of school I thought to take a last minute picture of them. Not ideal pics but they represent a serious improvement on the trial attempt I made when @JHCC visited and we each tried one.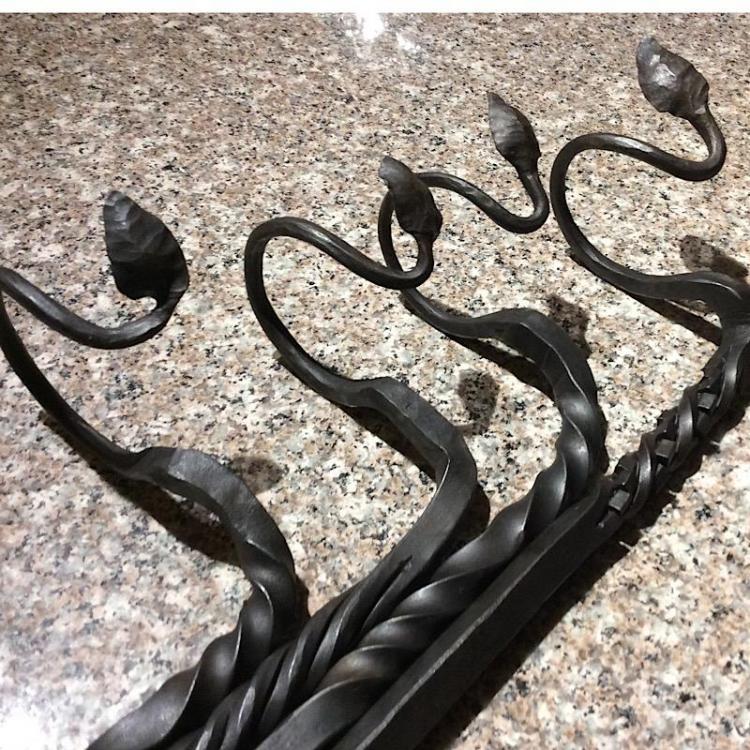
-
I have resorted to using the Dremel with drum sanders and hand sanding. Didn’t really know about cratex wheels but I believe I have some now that I’ve searched for it. Just this afternoon I tried using sweeping passes with the sanding drums and the dremel and went from 80 to 120 to 200 grit and got great results. Just have to wet sand after that. This knife design is time intensive...my friend will pay! I’m most excited in the process I’ve stumbled into in which I progress in stages with each piece after I learn what not to do with the one before it. Still making new mistakes but learning a lot. Good times. Thanks for the cratex wheel idea...I’ll give it a go.
-
Oh, sorry all. I swear that was an iPad typo. Sometimes it just decided what word it thinks in trying to type. Gotta love that typo. That's pure curmudgeon bait right there!
-
What did you do in the shop today?
Lou L replied to Mark Ling's topic in Blacksmithing, General Discussion
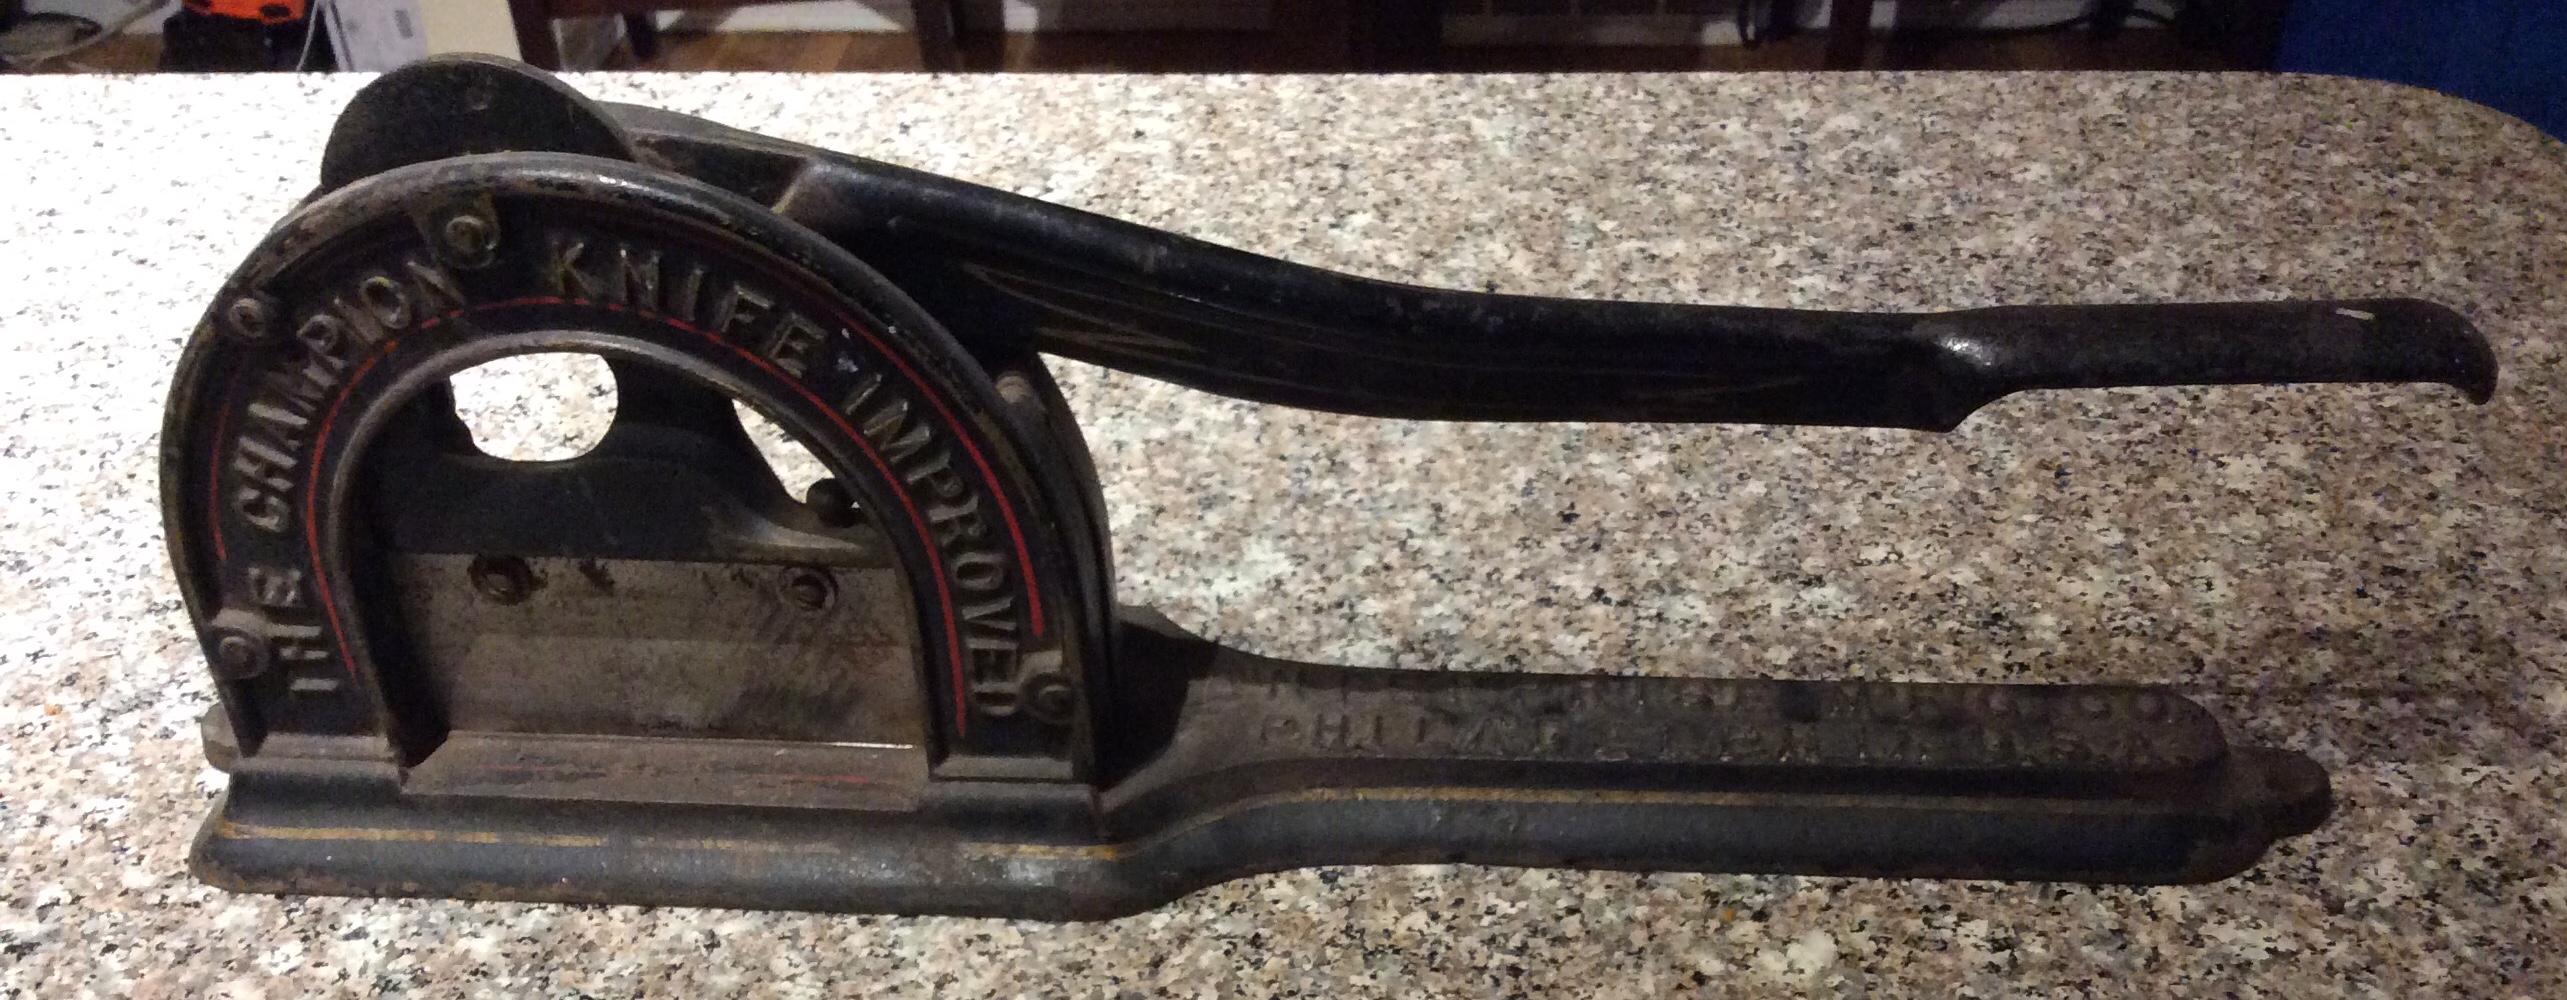
Yeah, I pretty much adore the thing. I can just picture it on the counter of a general store in the 19th century. Plus, I do occasionally cut plug pipe tobacco with it. It needs that. -
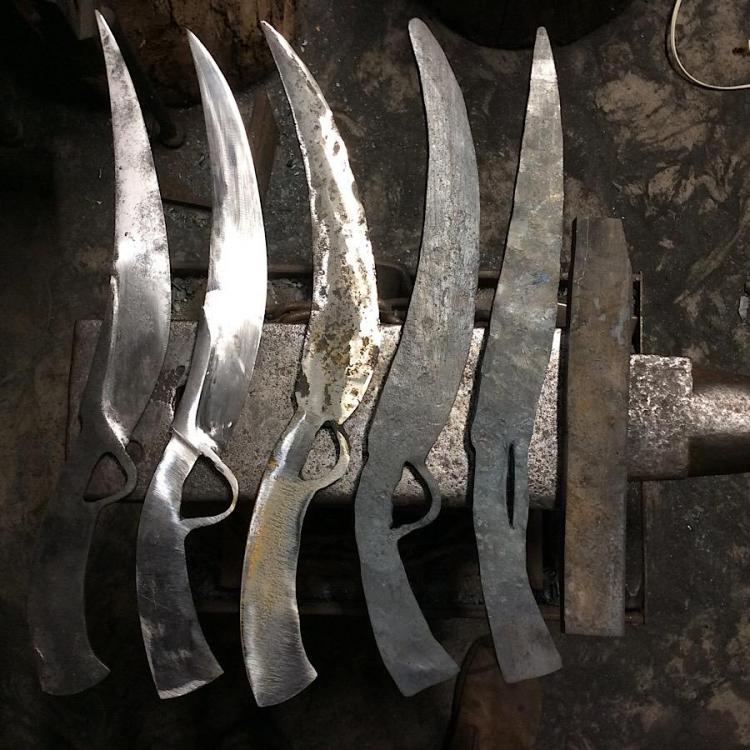
I didn’t have any reason to think it would actually warp due to being horizontal. I really was trying to wade through all the mysticism you run in to when you get information from a variety of places. This forum isn’t where the hard-nosed pragmatists with loads of real experience hang out...so I test for wives’ tales here if I have questions. By the way, the horizontal quench went fine. I had some warping but that was due mostly to my not respecting the value of thermal cycling! After pecking away at this knife project for months in little spurts of time I’ve f8nally had the time to invest this past week and have made major strides. My friend asked for five knives. This represents the process I’ve followed in all of the steps. I move forward with the first one and, as I learn mistakes to avoid, I move a little more one the next one. I just recently learned the value of grinding to a pretty fine grit prior to heat treat (or just doing most grinding after heat treat). Because I left it too rough I have lots of hand sanding to do to clean up the heat treated knife on the far left. The one next to it is nearly hand sanded fine enough so I can heat treat it. From left to right displays my current status from nearly done to starting billet. So many mistakes in this photo! I learned a lot getting to this point. Fortunately, I told my friend I was going to experiment with the forging of each so they would not be identical, rather, they would be siblings. I really regret accepting this design with the varied thickness from the bolster into the ricasso. It’s all hand ground, filed and sanded because no grinder..belt or otherwise...can get into that area.
-
What weird animals have been in your shop
Lou L replied to Glenn's topic in Blacksmithing, General Discussion
You must have a tasty snake buffet in your shop, Glen! Hey, it’s my first time online since that guild meeting. The shirts were appreciated. One guy grabbed the XL and announced it was his motivation to stick with his diet. I have a picture of one of the winners....couldn’t find the other guy after the iron in the hat. -
What did you do in the shop today?
Lou L replied to Mark Ling's topic in Blacksmithing, General Discussion
Wow, it’s been a while since I had the leisure to visit here. Anyway, cool rose Scott. I need to try that some time soon. Figured I’d show a picture of my plug cutter to clear things up and show it off a little. Still has the original pin striping!
-
Preferred Refractories for Chamber vs Ribbon Burner
Lou L replied to Daguy's topic in Insulation and Refractories
I have to agree with the basic premise of this question. I’ve read essentially the entire gas forge section, some threads multiple times and still I have some blank areas in my understanding. I have two pages of notes and quotes of specific posts with links to them. Still, one basic question bothers me. Okay...a few questions... Every IR reflective material like metrikote says in the directions that it should not be applied on top of another castable refractory and yet all the directions I have seen suggest a layer of kastolite 30 and then ITC 100 or similar in a thin layer. Is this layer for the entire inside of the shell or just the floor? Im also curious about how people get a tight fit between the ribbon burner and the wall of the forge. Also, is a kiln shelf a must if you follow the above directions for castable and IR reflective? Okay, I know this is annoying because this has all been said in small bits here and there. But conflicting ideas and cutting edge options have also been mentioned in the same threads. It has been seriously hard to piece together a happy medium between making a solid forge and making a cutting edge forge. I just want to make something that is proven and reliable. I’m still unclear after many hours of reading on how my forge floor should be constructed. This is no,demand and I’m willing to make some mistakes and learn the hard way. I’m even happy working with my coal forge indefinitely, Once I struggle through the process myself I fully,intend to post my experience with an attempt to boil,down the complex issues I struggled with. Sadly, by then, it will likely be out of date as the pros learn newer and better techniques and materials. I think that is the dilemma in its essence. We new guys want to make something as up to date as possible but that is a moving target. It’s like jumping into a moving vehicle. -
I didn’t supply a link, it was the name of a blacksmithing group on Facebook. I wasn’t aware that we couldn’t use people’s names or mention the name of other internet resources. I thought the rule was that we can’t post commercial links. I’ll PM you.
-
Save the dates! Spring and Fall Meets 2018
Lou L replied to Judson Yaggy's topic in New England Blacksmiths Assoc.
The other names listed may be the other officers. The guys at dragon’s breath forge are highly,involved and it may be their names you got. Reality it, the Guild was just recently reconstituted and the names Abana has may be old. Lou -
The next Connecticut meet is scheduled. The time is not concrete yet. Email ctblacksmithsguild@gmail.com to join and get on the email list. Specifics of the schedule will be emailed soon. I’ll update here when I get the email. Saturday - June 16th, 2018 Time TBD Where: Guilford Art Center 411 Church St. Guilford, CT 06437
-
Save the dates! Spring and Fall Meets 2018
Lou L replied to Judson Yaggy's topic in New England Blacksmiths Assoc.
“Whom”....that was autocorrect I swear. I meant “who”. Had to fix it in case JHCC sees it! -
DOH. <palmface> I’m not certain if that was +1 or -1 milligrump. I guess we are boiling water here.
-
Save the dates! Spring and Fall Meets 2018
Lou L replied to Judson Yaggy's topic in New England Blacksmiths Assoc.
The CT Blacksmiths Guild is back alive. The president is Mace Vitale whom teaches classes at the Guilford Arts Center. We have meets every two months. The next one is in the second week of June at the Guilford Arts Center...IIRC. To get connected email ctblacksmithsguild@gmail.com and ask to be added to the email list and to join. I’m in West Hartford and willing to help out if you can travel. Lou -
One tong maker has an interesting concept tong he now sells. It is an adjustable,pair of tongs that he admits is not perfect for anything but is useful for filling gaps in your collection. No matter what you get, using long stock and hand holding it (with gloves) is WAY better than using pliers, channel locks or the wrong tongs. If you plan on doing s-hooks and bottle openers to start then some 1/2” volt or wolf jaw tongs will be perfect. Wolf jaw are more versatile because you can hold flat stock as well. If you plan to make knives then bolt tongs or knife makers’ tongs are needed. If I keep going I’ll be channeling Thomas......”It depends...what type of work do YOU intend to do?” A lot of good gear posted in your neck of the woods. It might be worth a look. Im with JHCC on the side blast forge. It is much easier to get started with one and simpler to run. You should check out Torbjörn Åhman’s recent video on the concept. It would be perfect for your temporary setup. Concerning hammers, I think it is wasted money to buy an expensive one right out the gate. A flea market hammer is waiting for you. Heck, Harbor Freight blacksmithing or engineers hammers aren’t bad at all and are a cheap way to experiment with hammer dressing. (I just pictured a weirdo with his hammer and some Barbie clothes and can’t get the image out of my head..<sigh>). I don’t know your budget or your personal values so I can only give my opinion....but I would go cheap on the hammers and forge, buy at least two decent pairs of tongs, and then save the rest of my budget for the bigger tools. Post vise was an excellent suggestion because there is little substitute for one. Anvils are everywhere...they just don’t look like the ones the coyote buys from ACME. It’s clear you’ve been spending your time overseas quite well because you have been reading. I’m positive your obvious research has warmed the heart of a curmudgeon....at least one full degree. We need a name for that measurement! How much energy it takes to warm a curmudgeons heart up one degree Celsius. Thanks for your service, Lou
-
It looks like it may have been part of one of those multi-tool anvil kits that seem to have been popular in the early 20th century. They would be mounted alongside a vise. Either way, the casting is clear as a longitudinal line right down the middle of it.