MonkeyForge
Members
-
Joined
-
Last visited
Everything posted by MonkeyForge
-
I read this earlier on Monday, through another thread. Did not have the words, then. Frosty, rest easy. Know that you touched a lot of people and helped them on their journey with whatever knowledge you could provide, for sure you helped me and it pains me to have to dump these thoughts in this thread. You will be missed.
-
Just to reiterate, I don't think I am breaking any new ground. I would like to have a homemade high zircon mix that holds up to lots of fire, I am not there yet. MR Hansen himself states he has mixed results in thermal shock resistance (see https://digitalfire.com/picture/1517) And I do think that this is one of the variables in play, looking at my results. For any new forge builders that are not me; get a known refractory concrete, build around that. That being said, and as stated before, I am pretty confident in the application as a refractory coating, as stated in an earlier post in this thread. I have yet to test it out on plain rigidised blanket but we can tackle that in this thread.
-
Thanks Frosty, for confirming straight up bentonite works. Curious as to whether or not you got a powdery coat or if it fired solid. Personally I like solid because I am heavy handed at times and I want my equipment/coating to survive that. In any case this is valuable for this discussion. (I used bentone in my mix, veegum is not easy to find here, then tweaked the ratio to suit) Mike, have you tried any of the spheres or is this all a theory? When it comes to this I am only book smart myself
-
Back in the 2000's, almost feel old Like I said to David, this should be feasible and it was my original intent with paper fiber. Speculation below: I want to try it but keep in mind that these spheres are not created equally, some are mostly silica, some are alumina/zircon +alumina. All of which have different melting points, do we want glass in in our high zircon refractory or just cavities, or both? That being said: - As a monolithic refractory, Still testing and tweaking. - As a refractory coating as listed in initial post: pretty confident. If only we had the magic recipe that did it all
-
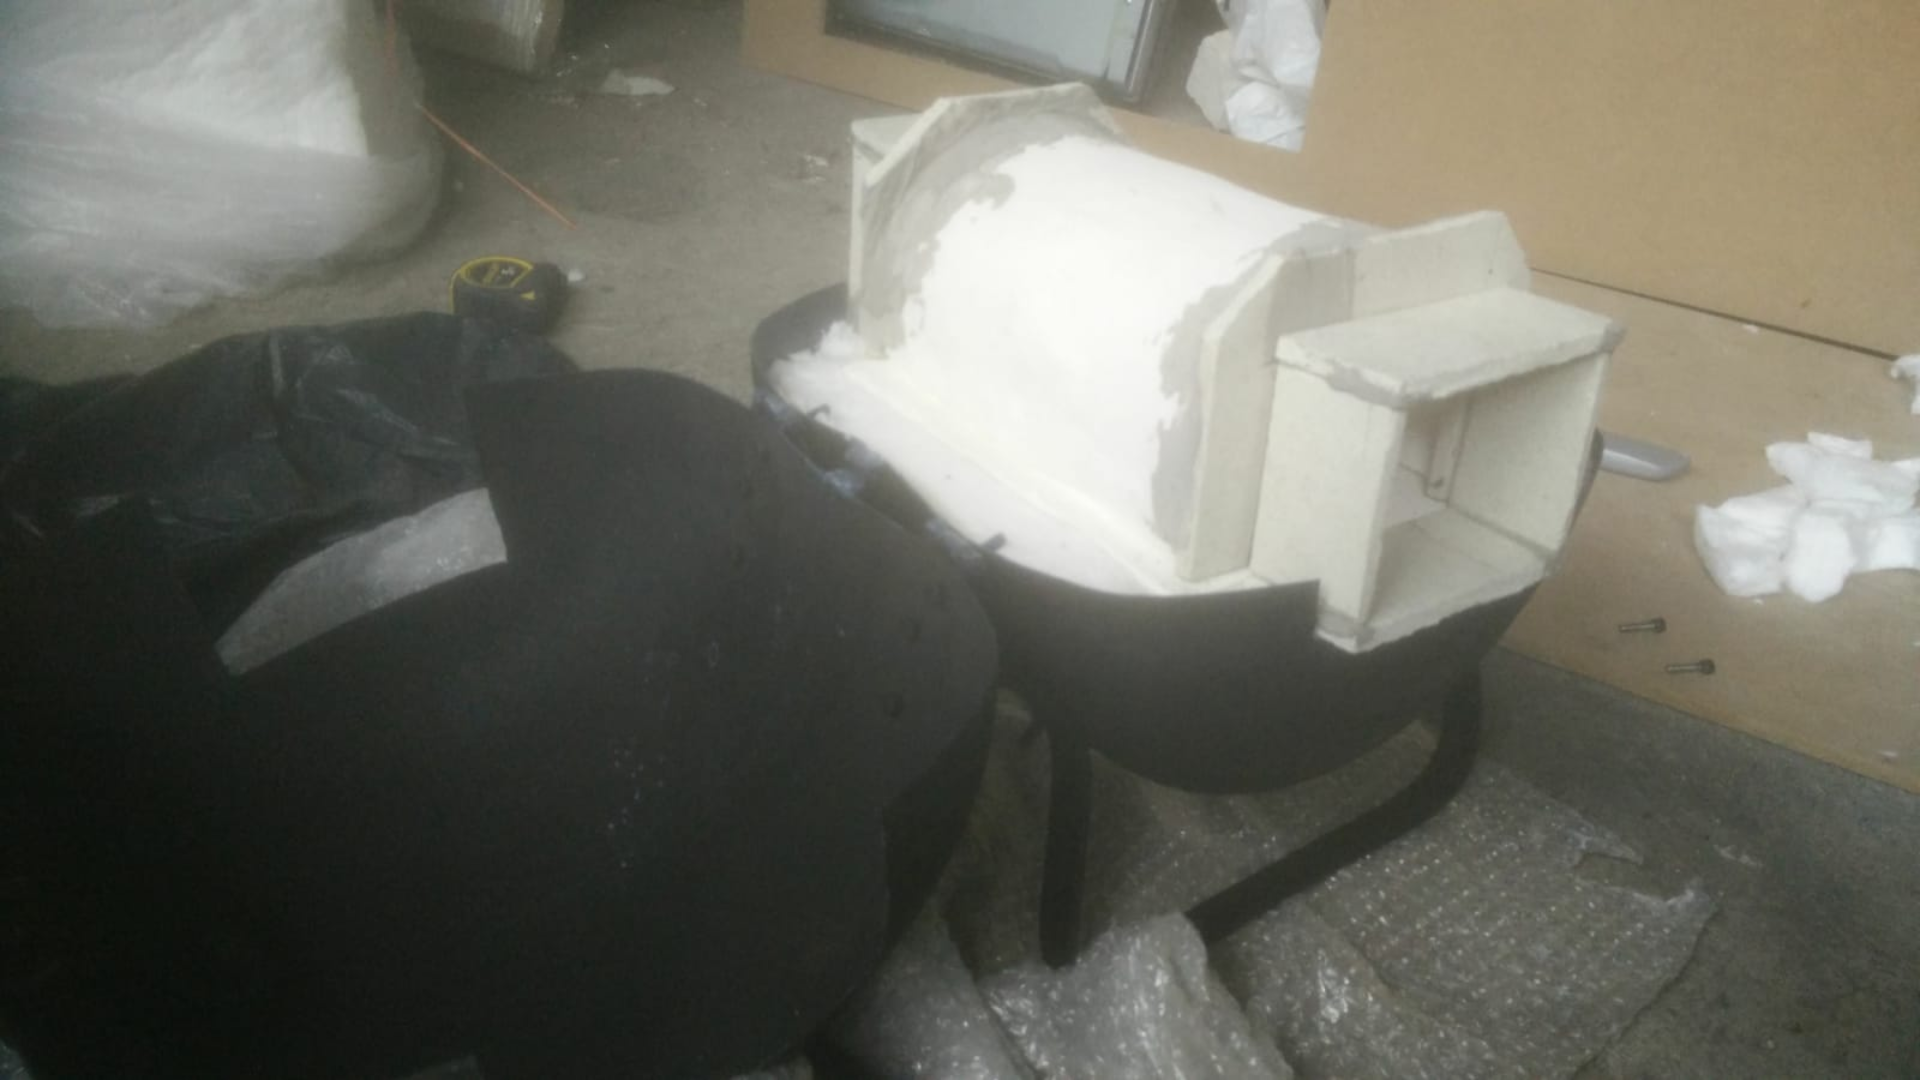
Thanks Mikey. Randy thanks for the tip. I accounted for the shrinkage part, what you describe is more or less what I did. I built the floor and the roof, had the fired in a kiln so all the firing shrinkage was accounted for. I then took an old pressure vessel, cut it in half lengthwise and put a hinge in. Built the forge around the ceramic parts and closed the lid. My mistake here I think, again not confirmed, is cementing the floor and roof together as well as cementing some parts made out of kiln-shelf to the rest. I could at least have left some gaps/seams to account for the parts expanding and contracting during heating cycles. (in a lot of ceramics kilns the bricks are held in a frame rather then cemented together for exactly this reason) Drying shrinkage, firing shrinkage and thermal expansion/contraction are 3 different things that should be accounted for at different stages. The coating recipe does not seem to suffer from excessive shrinking, at least not when applied in thin layers and as long as water content is not too much higher or lower than mentioned.
-
Thanks Frosty, just read back my post. Outside if editing window, of course. For mixing the coating it is better to add dry mixed ingredients to moving water. I got that backwards. For creating the clay body i like to do the reverse, just because it makes managing water content a bit easier (even if more messy/ sticky)
-
This was the original idea with the paper fibre. Gives it dry strength before firing,,( it did so all good there), fibres burn out in the firing process leaving cavities, in theory increasing insulation. So my thoughts would be similar regarding the spheres, provided you can achieve an equal distribution throughout the clay body. For now it is still fun. Maarten
-
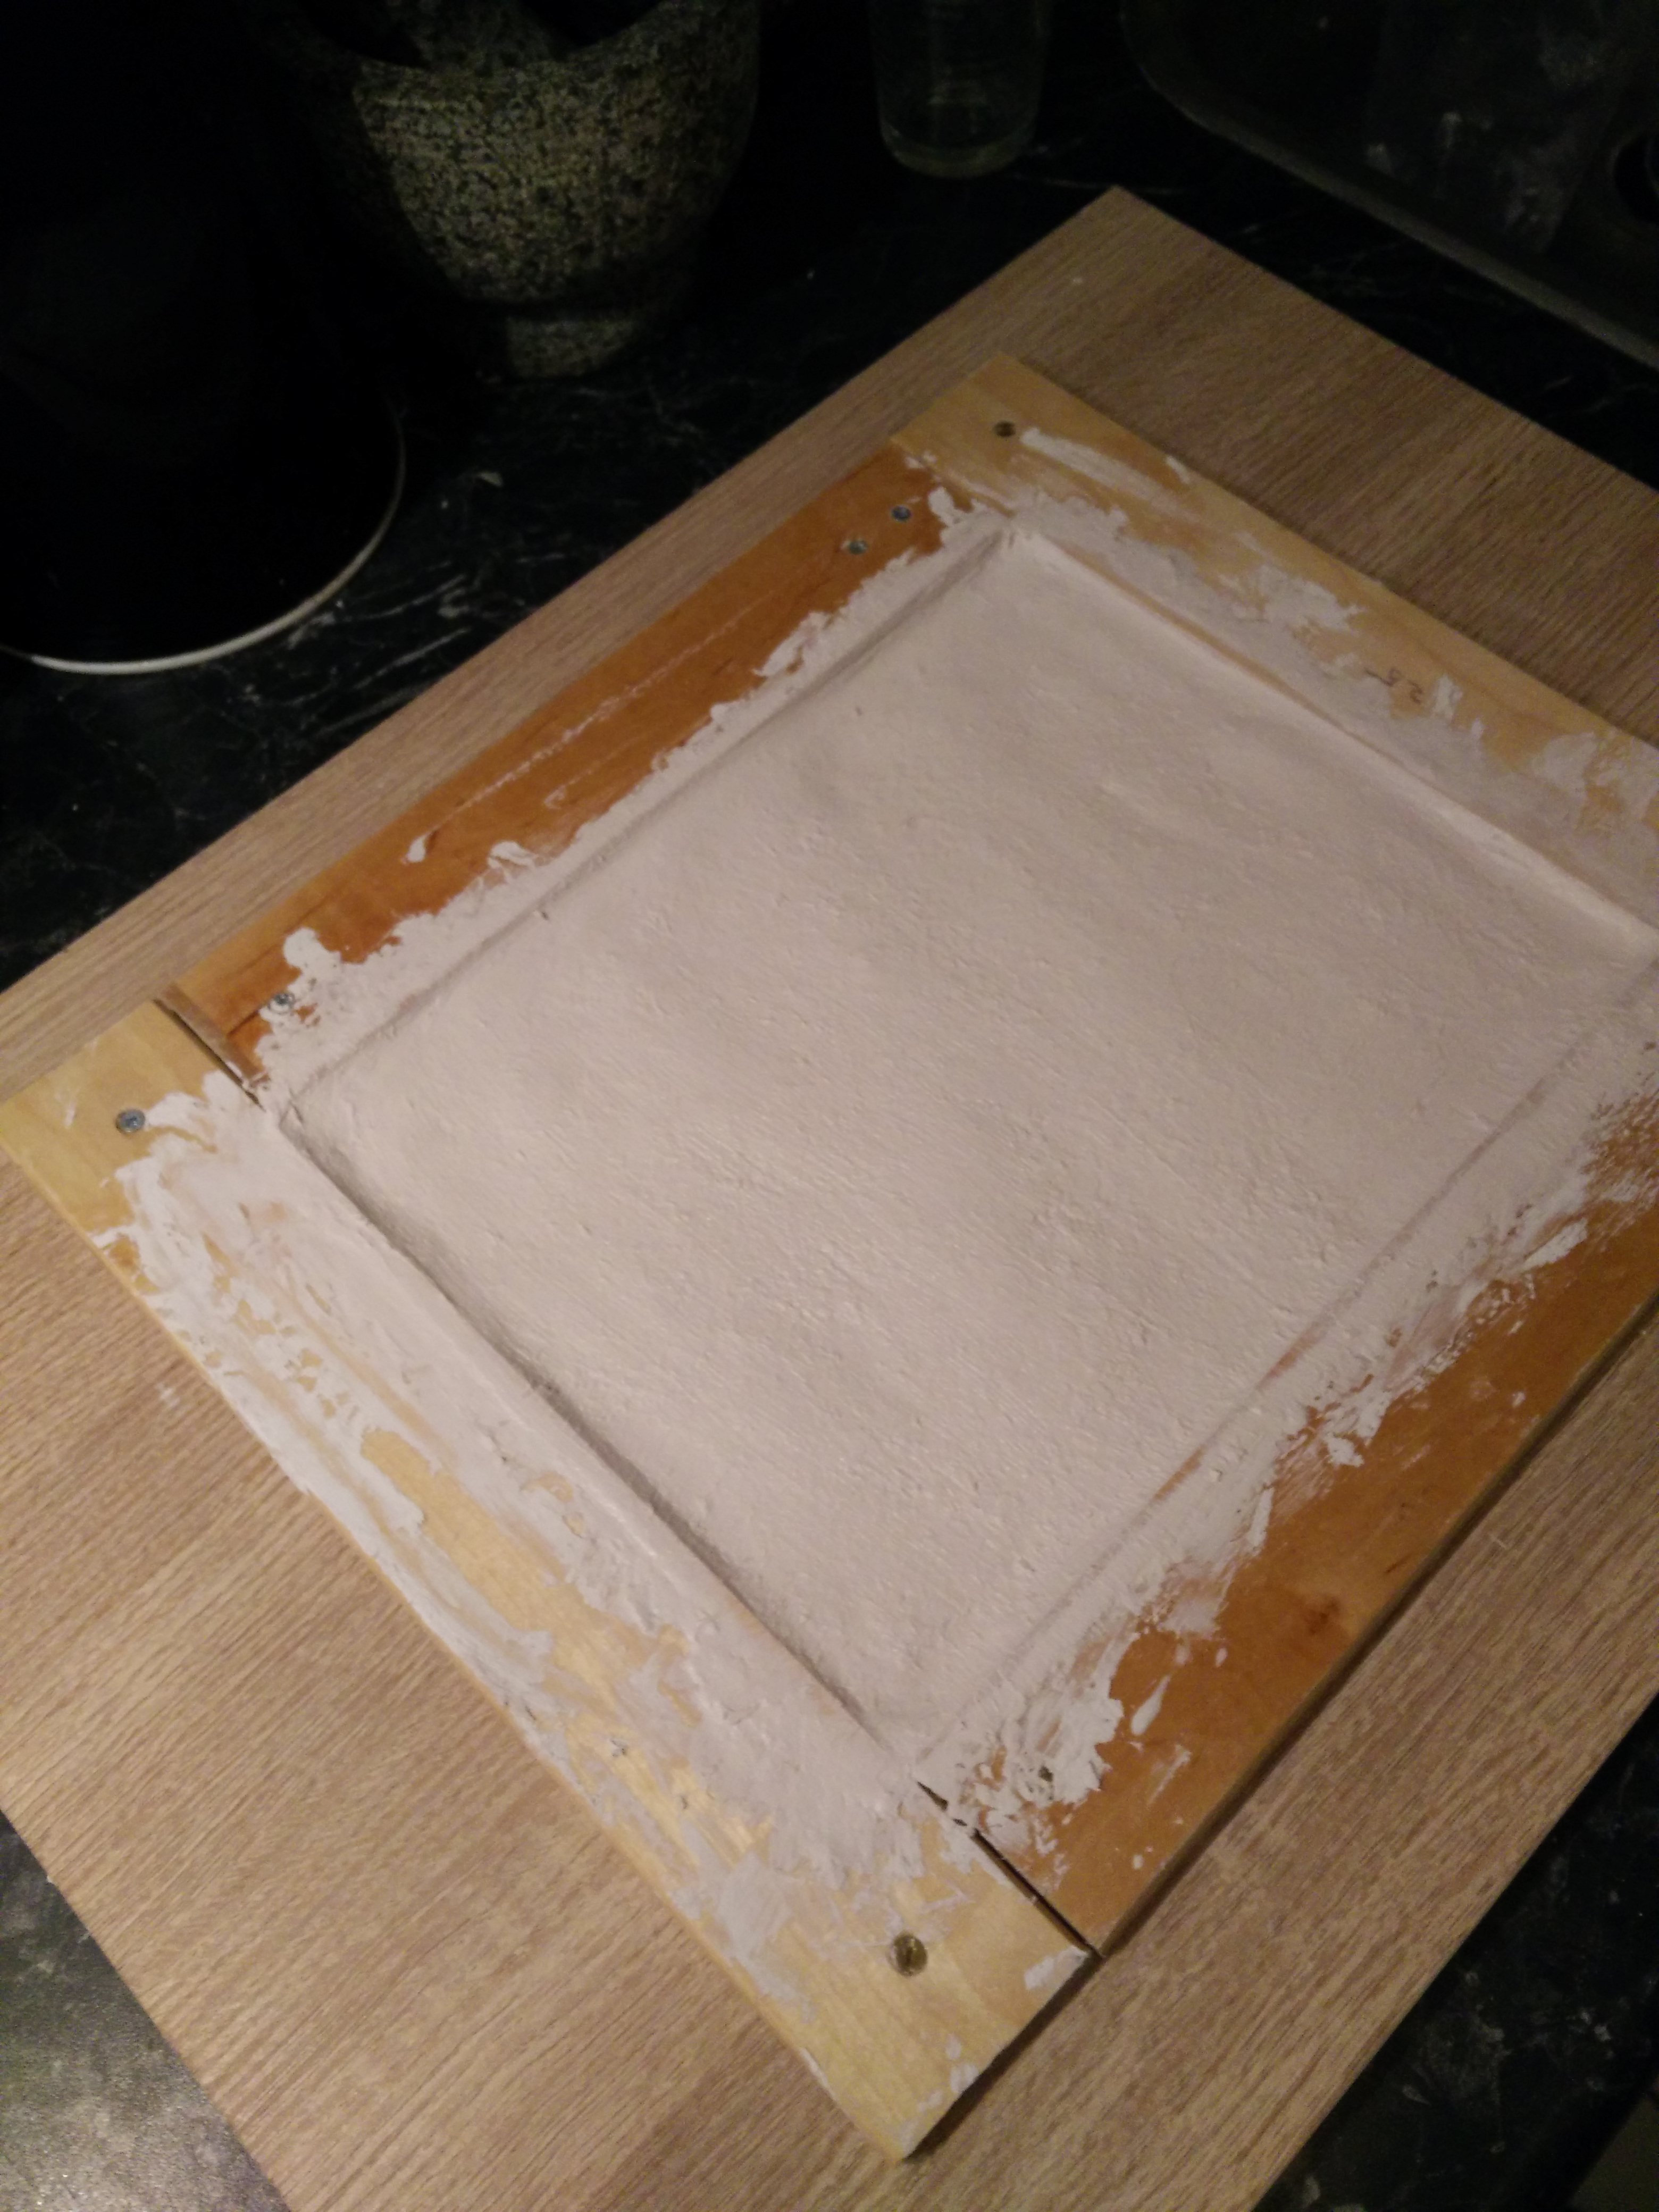
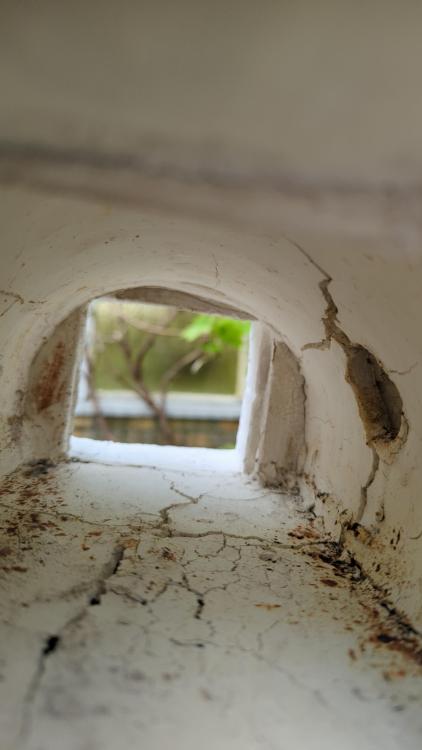
Hi everyone, I have not had a lot of time for hot work and forge experimentation until recently so, bear with me while I get rolling again. since I am occasionally quoted and referred to I thought it was time to share my findings so far. Also full disclosure: Like Mikey I was, at least at the beginning inspired and guided by he Mr Hansen's work on digital fire. Also, do not see this as a scientific truth, I have done some stuff but not nearly took enough measurements to conclude anything. TLDR: - I am still messing around with this - Even if you have a fool proof formula this may not be economical - It "works", forge gets hot but the process of making refractory needs work. - Insights welcome initially I used this mixture to shape the flame facing side of the forge. This may have bitten me in the rear end, more on that later. - Zircon 66.91% (or 82.19% minus water and paper) - Bentone 2.23% (or 2.74% minus water and paper) - Molochite 12.27% (or 15.07% minus water and paper) - Paper fiber 3.72% - Water 14.87% Unless you have a sure fire way of homogeneously distributing the paper fiber and provided the fiber size is consistent, I would forego adding it. Again, more on that later. The parts: Also see This post As a refractory coating this same recipe works well, provided you do not use too much water and give it ample drying time. The recipe for the dry mix would then be - Zircon 82.19% - Bentone 2.74% - Molochite 15.07% For a clay-like consistency (still very sticky): - Water 14.87% For a paintable mix to use as coating: Add water to dry mix until specific gravity of 1.25 I contrast to the following I would not omit the molochite. for use as a coating see this post In any case I had big cracks forming after some time, this can be due to a number of reasons, none of which I have confirmed. The following pictures are before and after the patching, then after firing the patched flame face. I made this thing and after approximately 60 hours of heat this happened: My best guess here is as follows: - Different thermal expansion properties between my home-made parts and the cement holding the parts together caused stress on the whole - Paper fiber not equally distributed caused extra weaknesses (fault lines) - Relatively cold ambient temperatures increased the impact of above factors I made some more "coating" in this case just adding water by the teaspoon until I had a paste and patched the largest cracks, I fired the forge again: After patching and firing after patchnig baked The next pass will be more of a coating pass to get rid if the irregularities, so same mixture, more water. This will even out the flame facing surfaces. So yeah forge still gets hot, I still need to mix some coating to fill in the little cracks, will keep you posted. Hope this is useful to someone, any input i welcome.


-
mixed that up, Bentone MA, not ME.
-
TinkerTim: Is used Bentone, which is refined bentonite, more or less. Chemicaly it is noted as Al203.4SiO2.9H2O in its datasheet. It does massively expand in water and I use molochite to somewhat counteract the shrinkage during firing (and drying). (See my linked comment in previous post for reference) The same recipe with pure bentonite would probably need a higher percentage bentonite than it would with bentone, but I have never tested that. I think UK pottery/ceramics suppies should hold Bentone ME which a brand name but has similar properties. I do recommend that you measure the specific gravity of whatever you cook up during experimenting. Once you have something that works you can use that number to have repeatable results. I just used some kiln shelf cut-offs painted them and baked them in the forge for testing. Frosty: I am currently a whopping 3 meters above sea level, and pretty close to the coast, all is well here, though a bit hot this summer. Built a small forge last year, which I still need to share here, got an Amal burner to play with something new. (got a small collection of burners by now) Not much forging/playing around. New job since April last year, challenging, which I like but yeah busy. Got a couple of knifes done though, plus a poker and some tongs for the wood stove.
-
Hi, yeah still lurking here I used Zirconium silicate. See my last experiment linked in comment below. This was brush-able and fired smooth. I only tried it on kiln shelf and other smooth surface parts though. I suppose substituting the zirconium silicate with something similarly fine grained and inert could work well, if LeeJustice decides to go this way I am curious about the result, in that case keep us posted. Anyway, hope you are all well.
-
Hi, I accidentally saw this conversation short answer: chamotte or grog is fired clay. E.g. there is no more moisture in it and no more/ minimal shrinkage or expansion when heated. To achieve these properties you need to fire your clay. In a kiln or hole in the ground or whatever. This will give you the raw materials at the cost of fuel to generate the necessary heat. You could skip that by getting raw grog, crushed toilet bowls or sinks. Still you will need a binder to form a brick from inert grog and then fire it and still need fuel.. Maybe there is a way to use a hole in the ground or an inexpensive throw away kiln to get you started to make your own? above are just my thoughts, hope you come up with something cheap and let me know. This is a good discussion
-
"gas burners for forges furnaces & kilns" if i recall correctly. Happy hunting.
-
If you already have the stuff on hand you might as well make a test piece. I have achieved a result with bentonite + molochite + zircopax. For a kiln wash you may get away with omitting the molochite. I have had repeatable results (paint-ability, and no cracking on drying) by noting and using a specific gravity of 1.25. This simply means that 100 ml of volume of your wash should weigh 125 grams. (100 ml is a good amount for testing as well) Weigh the dry components and mix dry. (start with 24.25 grams of zircopax to .75 grams of bentonite. if you don't have a scale that fine round up to 24 and 1) Add dry mixture to your 100 ml of water while mixing (stirring is good enough at this stage) Take a drill with mixing attachment or similar to thoroughly mix. check if 100 ml weighs 125 grams Take a paint brush and paint your scrap piece. Let dry for 12 to 24 hours before firing. (make sure it fits your forge.) Note that depending on how long you fire the coating may still be a but powdery to the touch, this should become less after multiple firings. Also it should not flake. Let me state again that my recipe had an extra addition so you will be doing the testing here :). Using scrap kiln shelf and IFB helped me a lot in formulating recipes. If you decide to go this way let us know how it pans out.
-
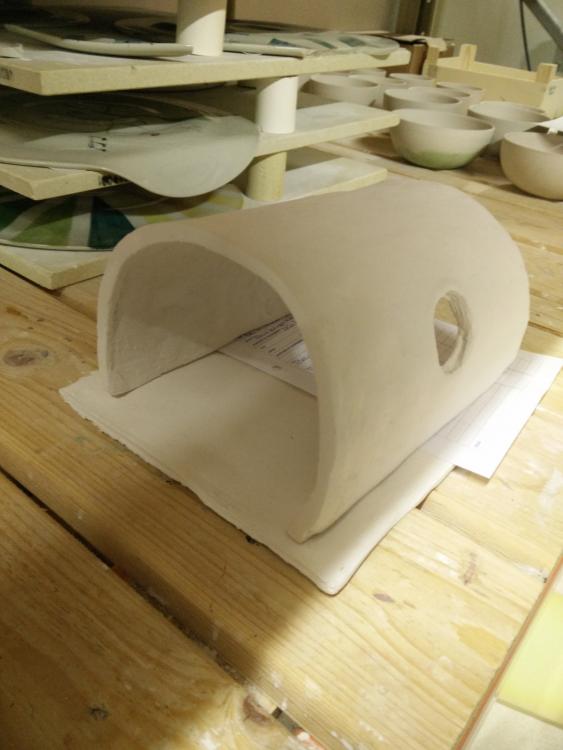
Always happy to share. All percentages are by weight. I mixed the components dry before adding the water. After the water is mixed in the material feels and molds like clay but it is very sticky, so be aware of that. I used a mould to make two tiles, one I left flat to become the floor, the other one I draped over a tube to get the half cylinder. Photo if the mould below. (Can't find a picture of the tube unfortunately) I had everything fired with their porcelain. So in the ballpark of 1300/1350 degrees C. Building the forge from the outside in had its own challenges, mainly because I did not have a shell. Found one that was close enough , found a use for refractory mortar and built an extension out if kiln shelf.


-
Considering I am not a ceramicists by any stretch, I have no informed opinion on using any other type of fiber. I imagine that as long as the filler burns away in the firing process the results will be similar. I decided on paper fibre because it is easy to make and I liked that it improves green strength. (I knew I needed to transport the piece prior to firing). In theory the cavities left after firing would improve insulating propperies but since the piece is only about 1 cm thick I that that is negligible in my case.
-
Yes I used the molochite as well. It stabilises and to an extent counteracts shrinking during drying process. (Digitalfire has a nice definition of grog and its uses) I dug up an earlier post and found the ratios. Will work without paper fibre, too. - Zircon 66.91% (or 82.19% minus water and paper) - Bentone 2.23% (or 2.74% minus water and paper) - Molochite 12.27% (or 15.07% minus water and paper) - Paper fiber 3.72% - Water 14.87% And below is the part I mentioned. I had it fired at my ceramics supplier.
-
I based most of my experimentation with ceramics on Mr Hansen's information. My ratios are close to what you refer to above. Bentone has the same role as veegum in ceramics but it is not the same stuff. I think close enough though. And it will be location dependent which is easily accessible. Some of the parts I made with my mixture in are now in a forge which is awaiting first firing. I hope to update on that soon.
-
Hij Deimos, Looks like you are on your way with the right kind of bricks. If you need some pointers to local sources that have online shops or if you have trouble translating parts/things shoot me a dm. The ceramics supply in Haarlem I got some of my stuff from has a webshop too.
-
When you scale down the burner you scale down most parts. 1/2" inch T would have a 3/4" to 1/2" redducing T fitting, a 1/2" nipple and a 0.023" mig tip. (Anyone correct me if I have my imperial wrong). In these cases it is the ratios that matter. On my phone now so cannot easily find all the threads discussing the 1/2" T burner, there are a couple.
-
That looks like a 1/2 inch Amal injector. There have been a couple of threads on them here on iforgeiron. Apparently with the right orifice size they can be tuned to be pretty hot and when used in a forge do not necessarily need a flare. (if I remember correctly) These are just 2 In no specific order I hope they are useful to you: https://www.iforgeiron.com/topic/59893-helium-tank-forge-with-amal-burner/ https://www.iforgeiron.com/topic/60905-amal-burner/
-
Hoi Thijs, This looks very promising, slip casting was on my list but never got around to trying it. I added the molochite clay to my mixture to counteract the shrinkage and water repelling properties associated with bentone somewhat. This worked for a clay body but I don't know if it would for casting slip. I'd have to try. Also this means less % zirconium silicate. It would be interesting to see your plaster molds in detail. All in all a nice contribution to the homebrew ceramics part of this forum. Keep us posted.
-
Good question. I have been considerering this myself in the past. In theory a castable layer inside a soft brick forge would take 1) the direct flame contact, 2) prolong cool down time after shut off. (If thick enough) Whether or not point 2 will prevent degradation of the brick due to thermal shock is the interesting question. Of course different kinds of bricks have different properties when it comes to resisting thermal shock, I think some people with more recent experience on that will chime in. Long story short: potentially good idea. Maarten.
-
-