Trees
Members
-
Joined
-
Last visited
-
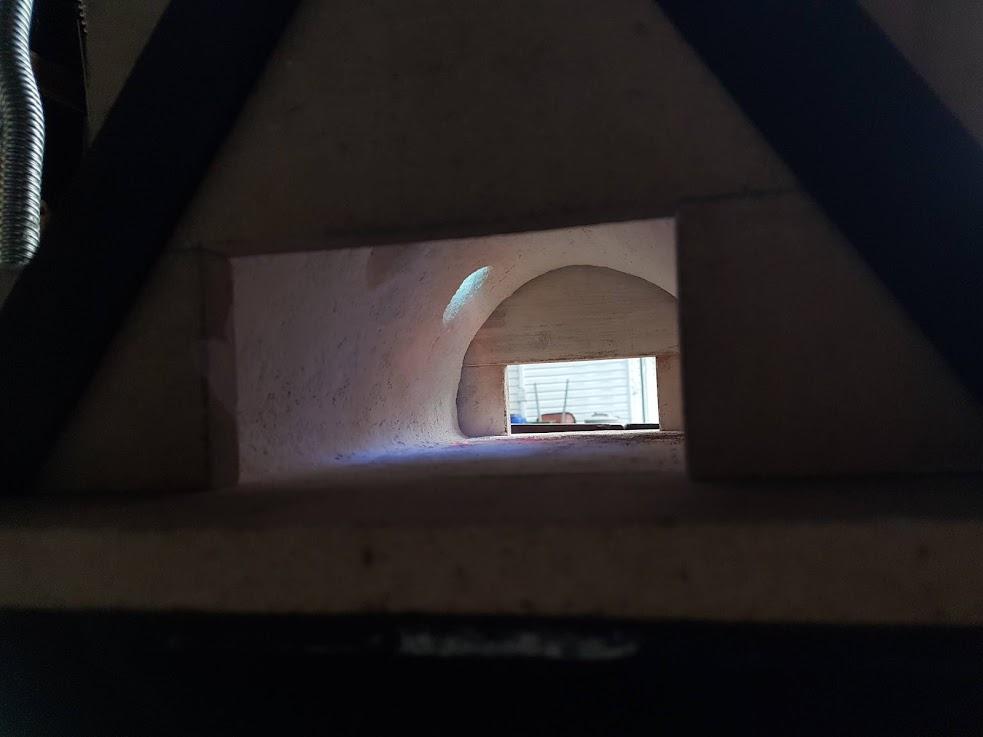
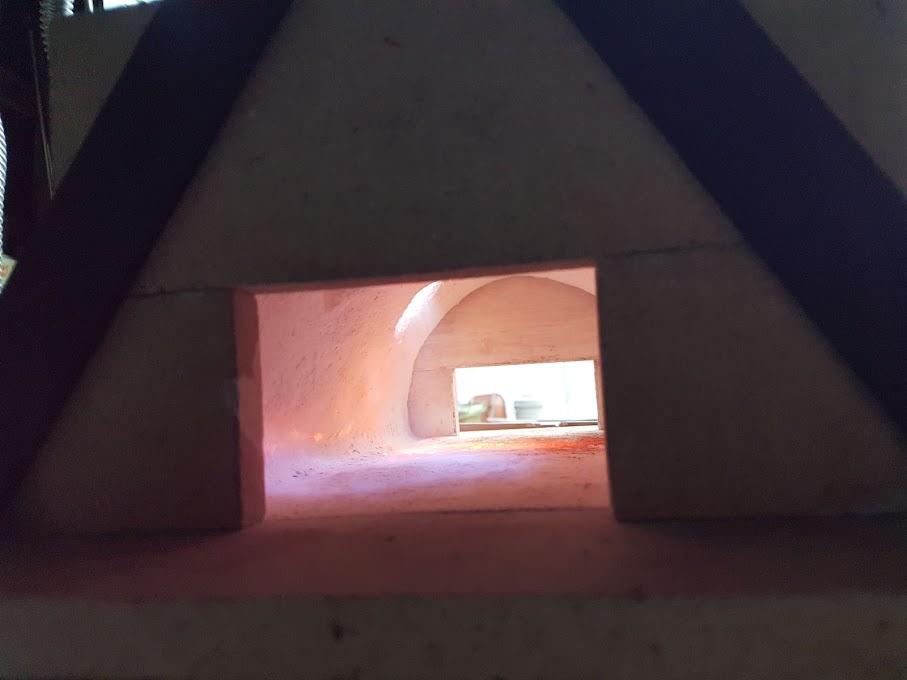
Hi Frosty, I followed your plans in the T-burner thread. In the 4th post there are pictures of the 1/2" burners, using 3/4-1/2" tees, 4.5" long 1/2" nipple, and 0.023 MIG tips. They seem to be drilled nice and straight. I should clarify that once I turn down the regulator very low, both flames stabilize immediately every time for the rest of the session, no matter what pressure I adjust the regulator to afterward. I understand the PSI numbers are meaningless but I am using them for repeating adjustments - there is a point on the gauge (about 4PSI) where if I start above it, one of the burners has a weird flame that will stay weird unless I bring the pressure down below that point, after which it is stable no matter how it gets adjusted. I think it's fine, as the forge seems to work fairly well once I figured out to drop the pressure down below that point just after lighting it. I'll hear the flame change immediately then I know it's good to go. As this is my first forge, I am also happy to be told by those with more experience that it's not fine and I've made a mistake that can hopefully be fixed. My best guess is that behaviour is something to do with the forge atmosphere maybe caused partly by the shape I cast the burner ports - maybe I should have made them widen a bit quicker than 1:12 over the 2.5" to the forge interior? In the last picture in my last post above, do those flames look OK to you?
-
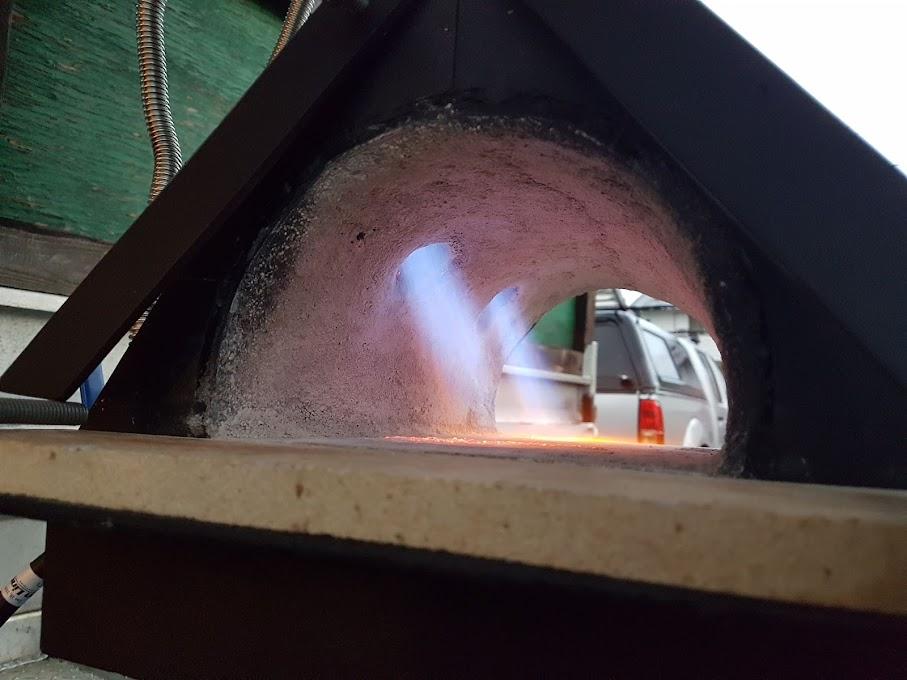
Well I never did figure out the issue with the Plistix, but I did figure out the burner issue I started the thread with... For some reason I can't understand, if I start up the forge with the regulator set at 4 PSI or higher, most often one burner will have the flame starting way out of the burner port and into the forge with a little cold spot on the forge floor where it hits, and the other one the flame will light up the burner port and no cold spot on the floor. But if I then drop the regulator down to about 2-3 PSI, the farther out flame jumps up into the burner port and the port starts glowing like the other one, then both burners behave normally when I turn the regulator back up again. So starting like this at 4 or 5 PSI (there is a flame coming out of the near port, it's just far out and splashing onto the floor: Then turning the regulator down and the other flame jumps up into the burner port and the port starts glowing: Then right away I can turn it back up as high as I want and the flame stays put: Has anyone else had this experience? How do those flames look in the last picture?

-
Good eye - it's a repurposed Windex bottle with just water... I sprayed a fair amount of water on first, but the bricks just suck it up so fast they didn't seem very damp before applying the plistix... Same with KOL inside the forge.
-
I'm assuming it's Plistix 900 - I ordered from Wayne and the bags were just labelled as Plistix. I asked but he hadn't heard of this happening and didn't have any suggestions for why it's behaving weirdly. I had read Glenn's thread, but hadn't noticed the last post: I wonder if me first 'buttering' the surfaces with water may have been the cause of it not sticking?
-
Yep, buttered the surfaces first but no difference. The thrift store blender idea is great - thanks Pnut. The cloud of fine plistix dust coming out whenever something rubs a coated surface in the forge makes me feel like I should be using a respirator whenever I use it... Might make sense to buff off with a scotch brite pad and vacuum as much of the poorly bonded stuff as possible before trying another coat with the blender trick.
-
Latex paint was the thickness I went for on average. I also tried thinner and thicker to see if it would help but the results were always the same. It would clump easily upon contact and dry (almost on contact) to a loose powder that would slough off, no matter how thick or thin the coating or how long I left it to dry... Like this: Each coat was more or less the same, even when firing between coats. I get a constant dusting of fine plistix dust every time I pull out the forge or something rubs against one of the surfaces. Mixed it well each time too. Noticed it felt extremely gritty when mixing, I'm guessing that's normal, but really wondering if I got a bad batch the way it behaves when it dries... Another weird thing. I tried mixing a batch that had dried overnight in the mixing container with fresh water the next day, and it behaved the same as the stuff freshly mixed from the powder.

-
Thanks everybody - great suggestions. I'll report back when I can test them out. Frosty - I did try patching the cracks with Plistix, but I would be most interested to hear feedback on whether anyone else has had issue with the plistix clumping and drying instantly as it's as applied, and mostly drying into a powder that just dusts off as soon as the surface is touched. All coated parts of my forge are constantly shedding fine plistix dust. Changing mixing consistency, buttering, etc. didn't seem to help. Just wondering if that is normal for plistix, or user error, or a bad batch...
-
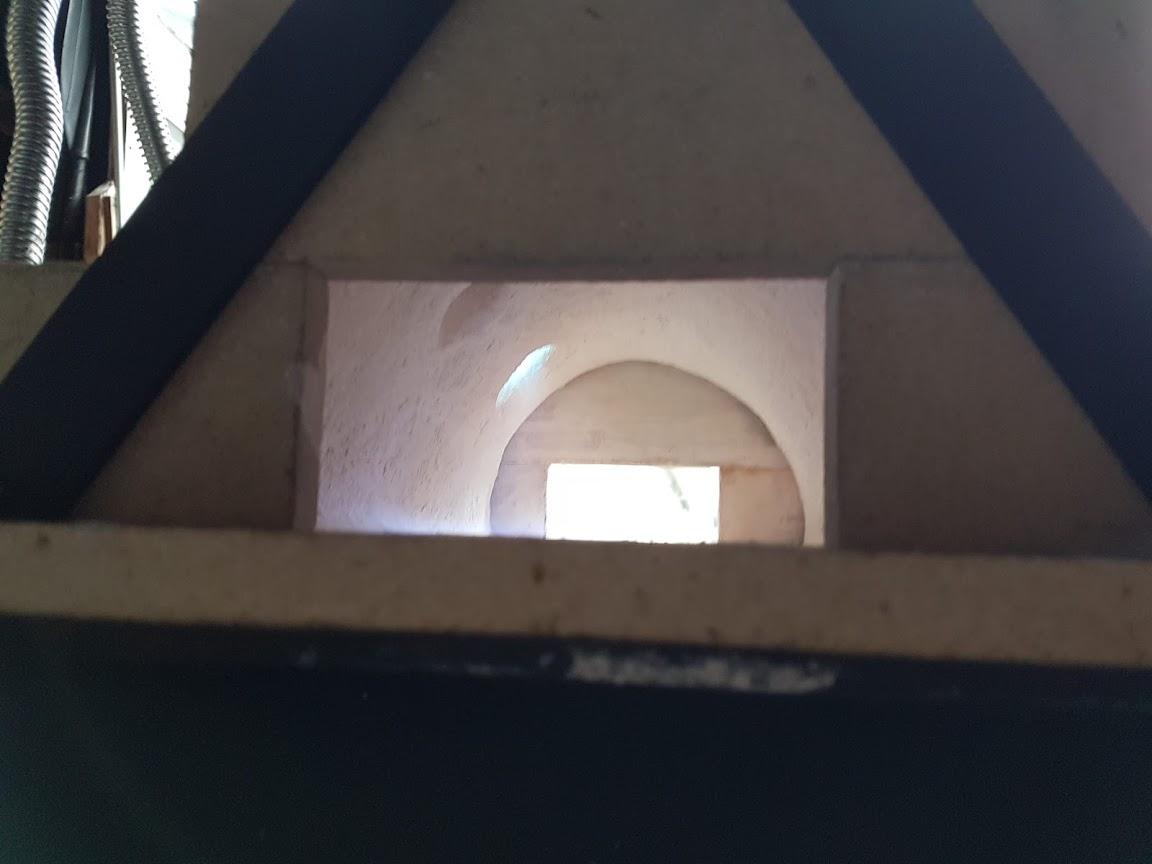
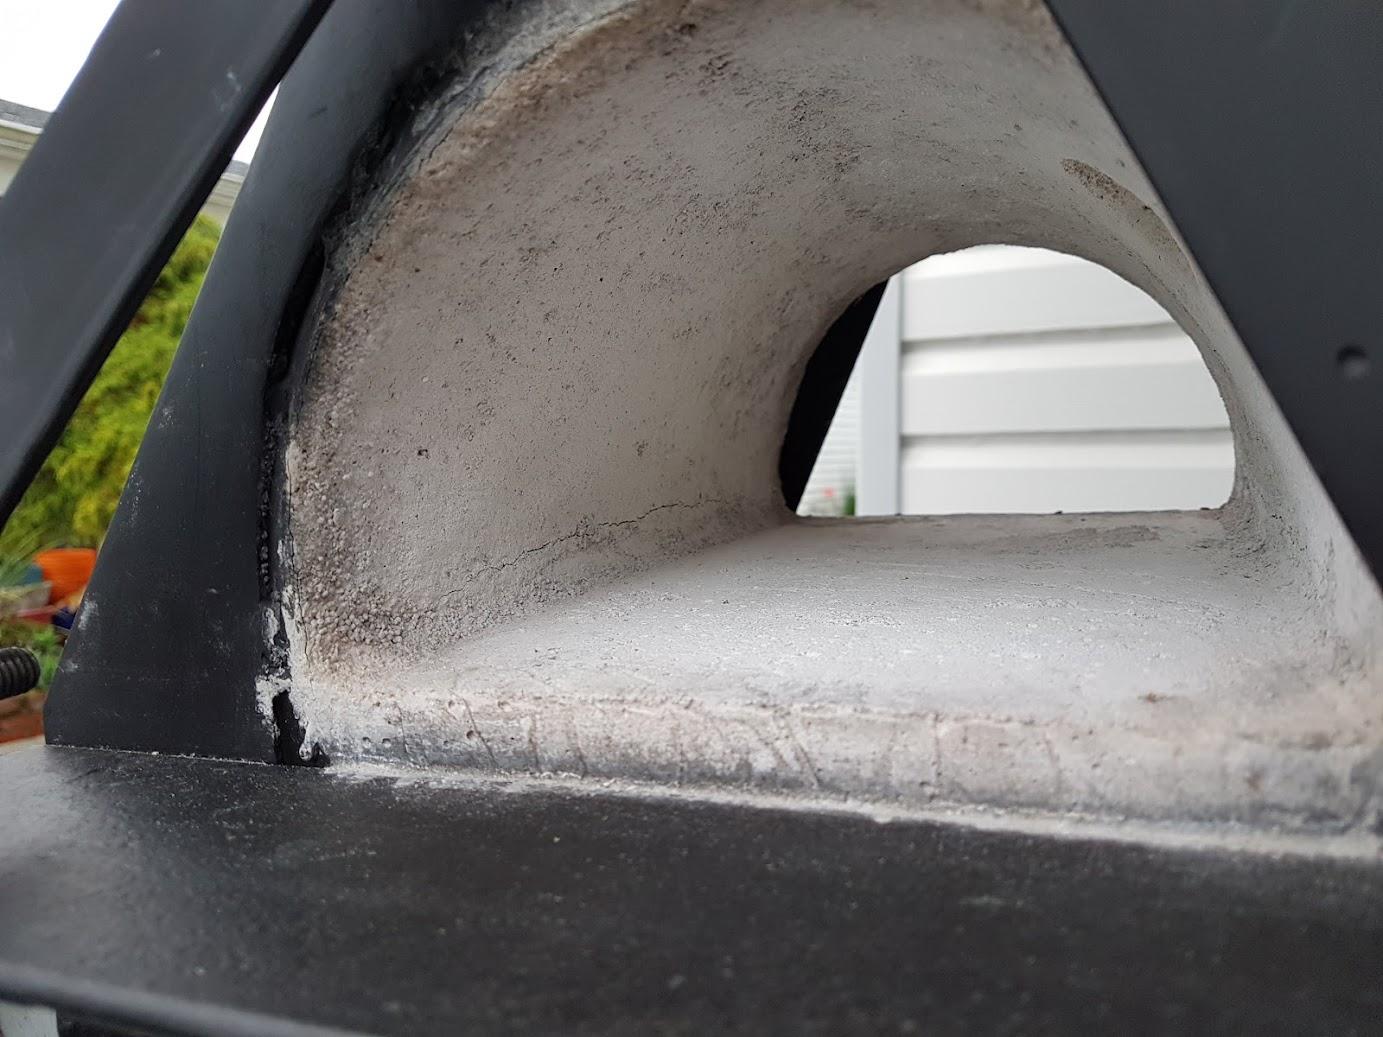
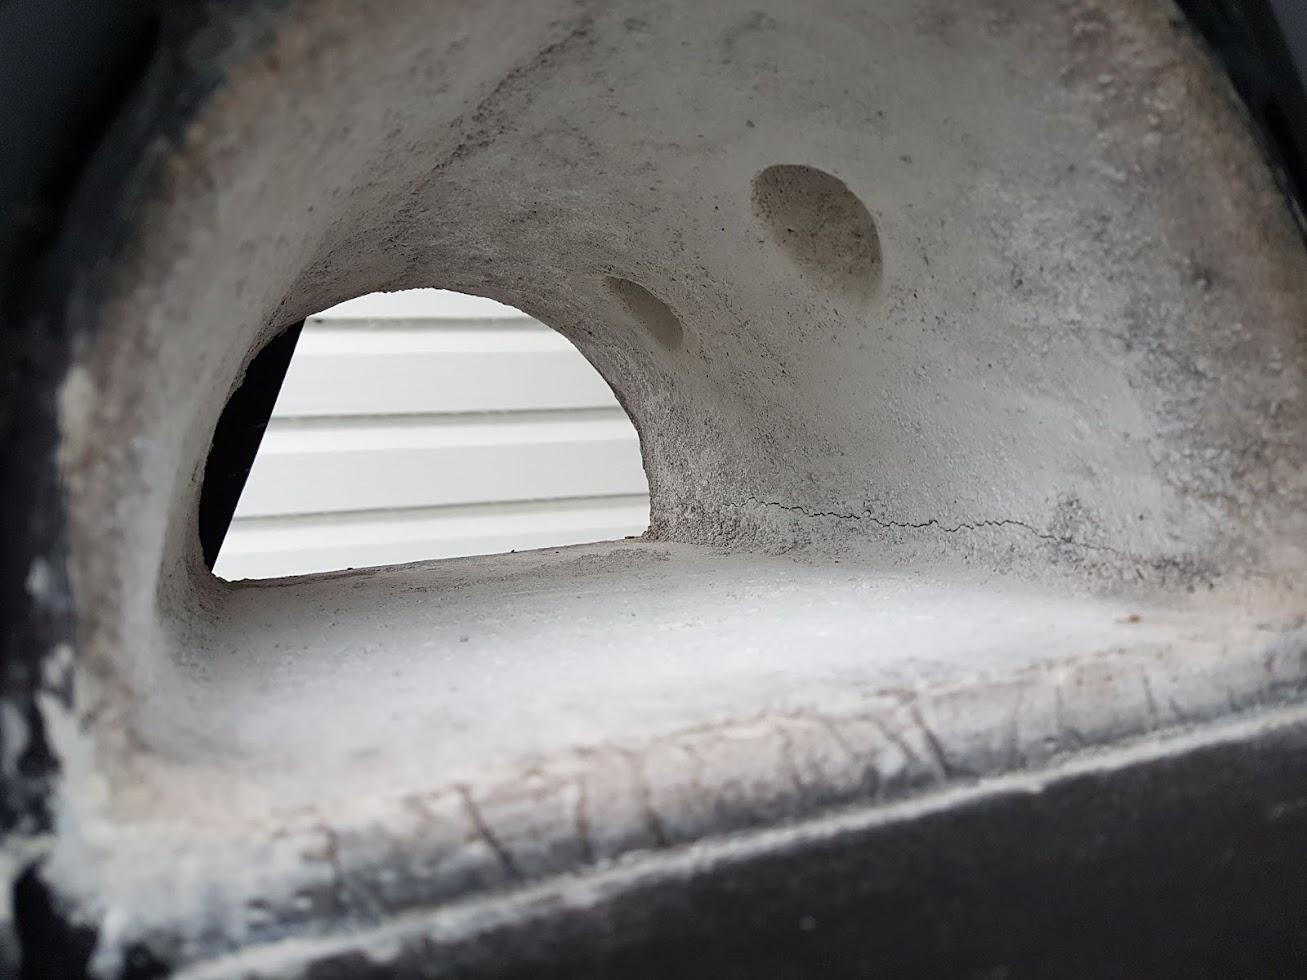
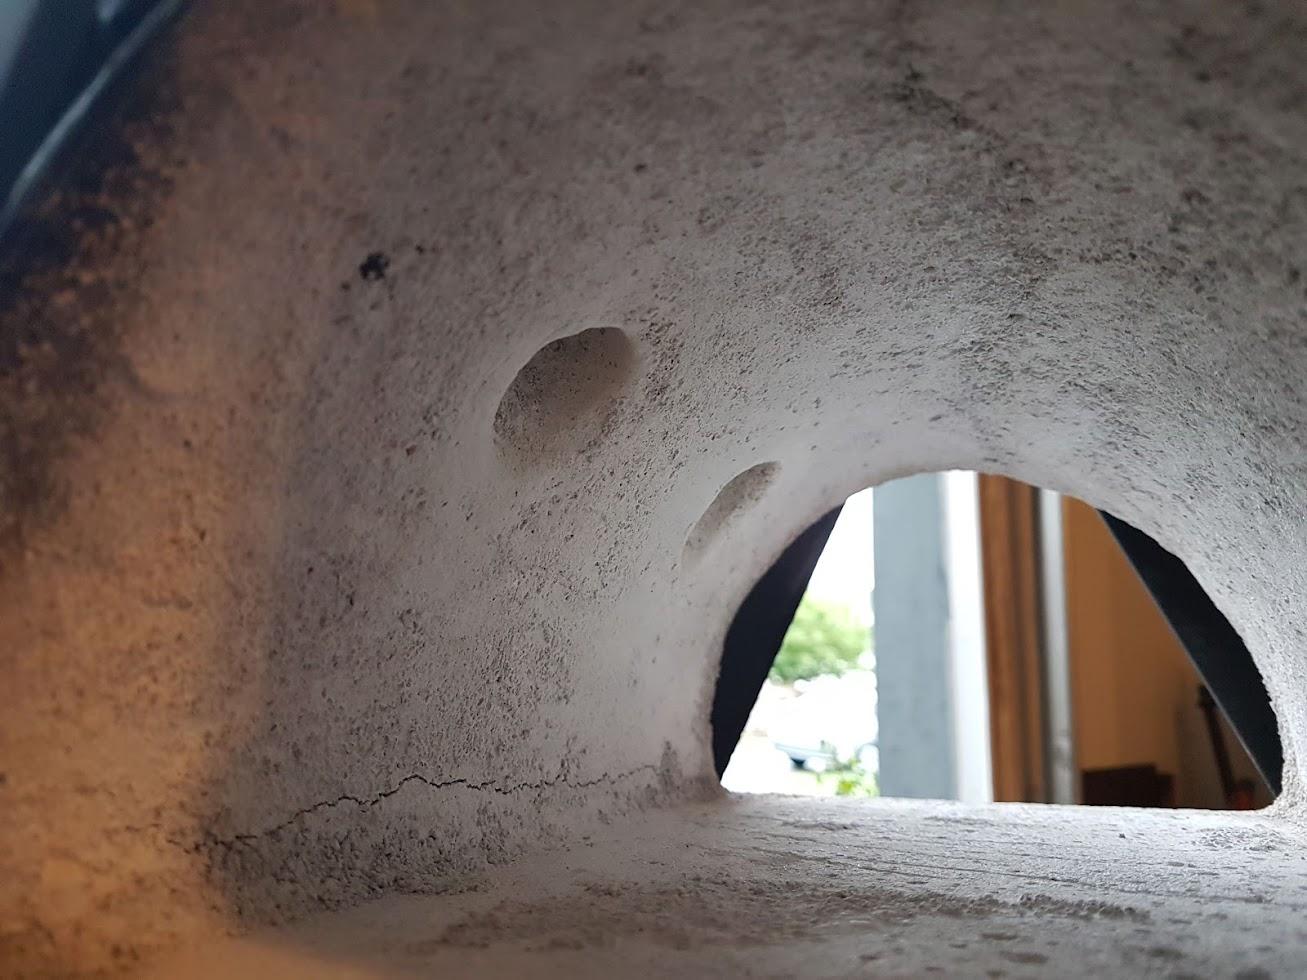
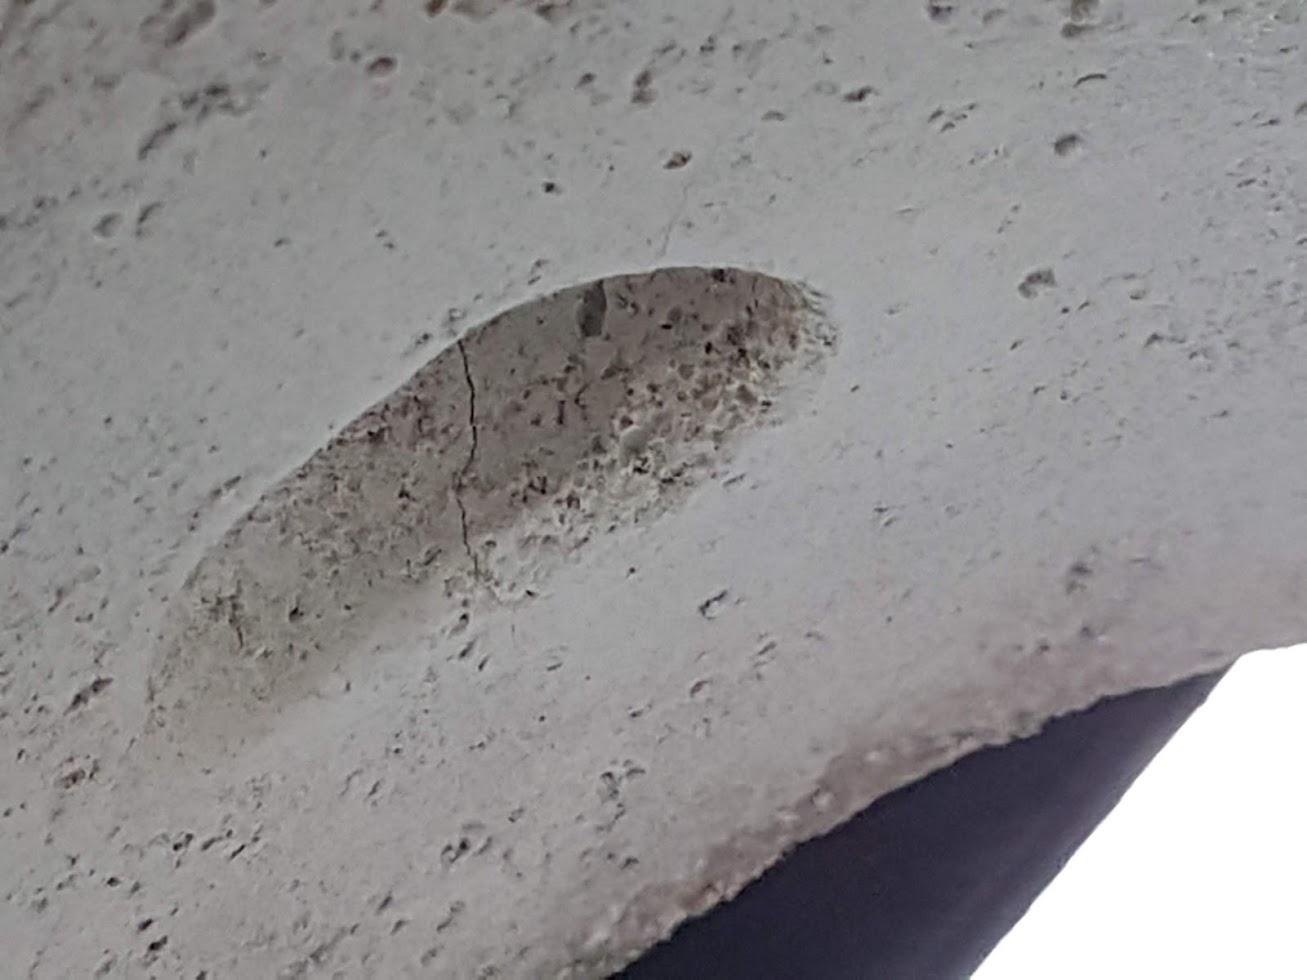
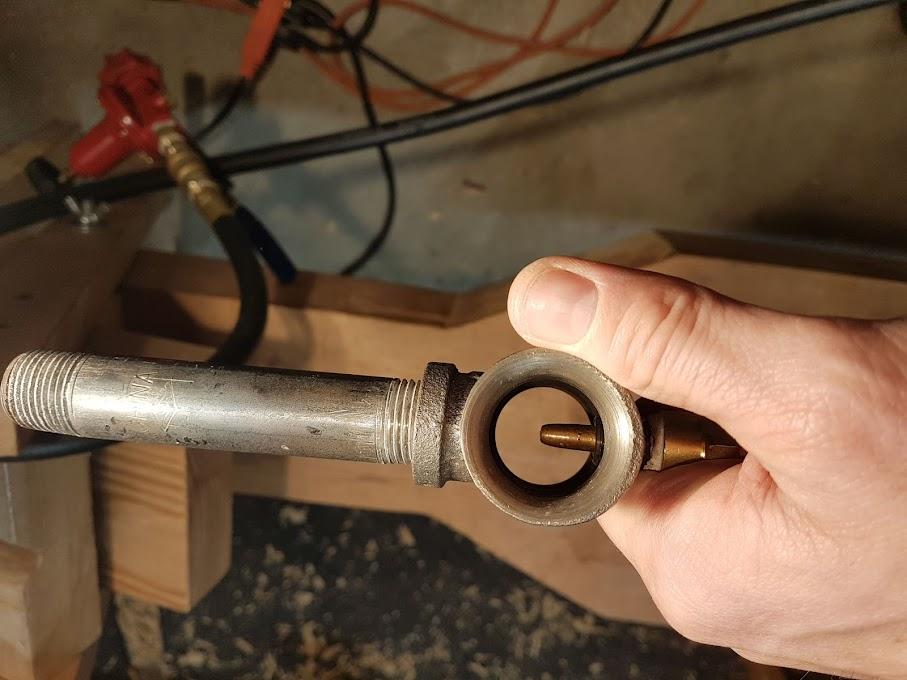
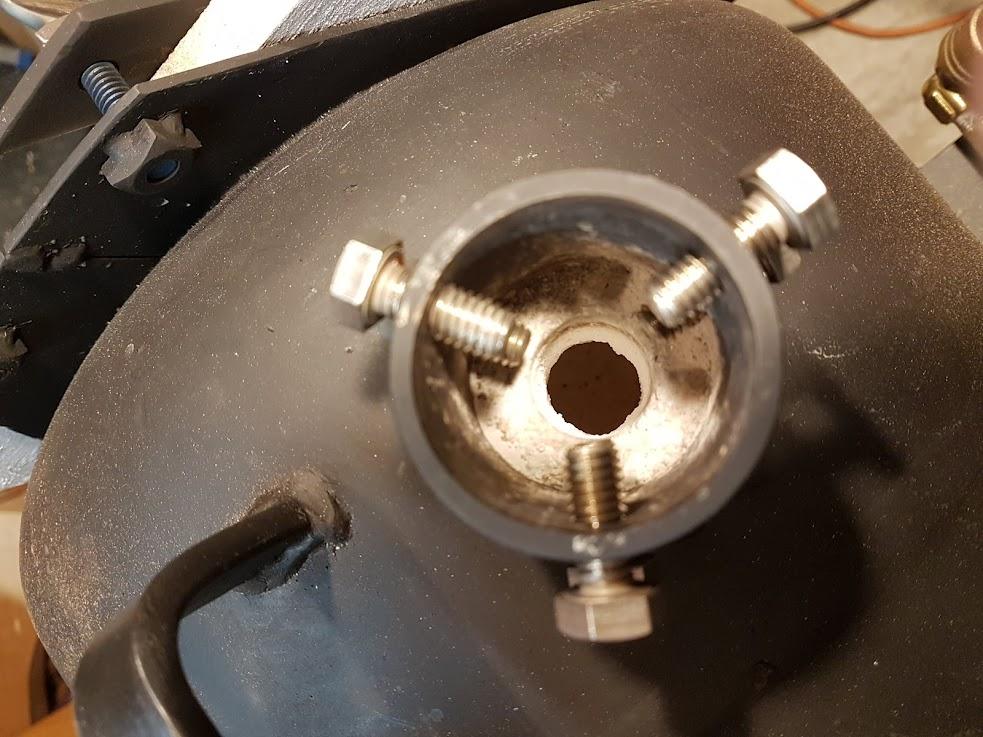
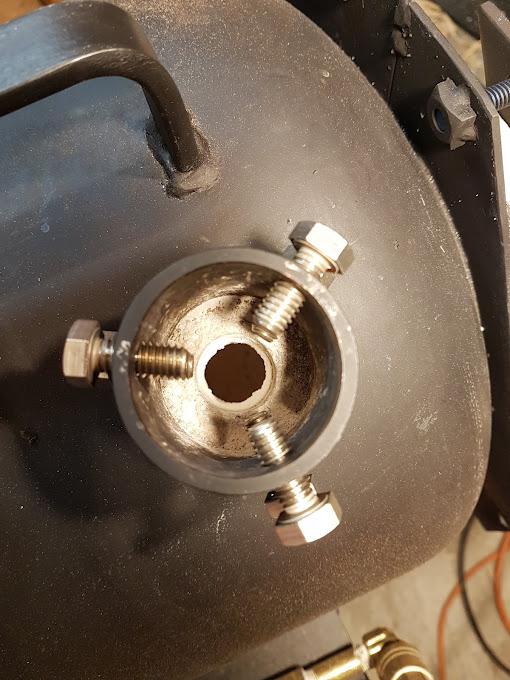
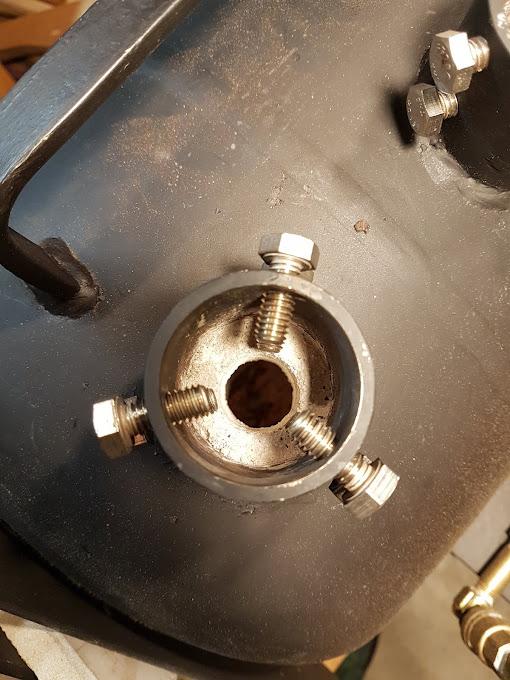
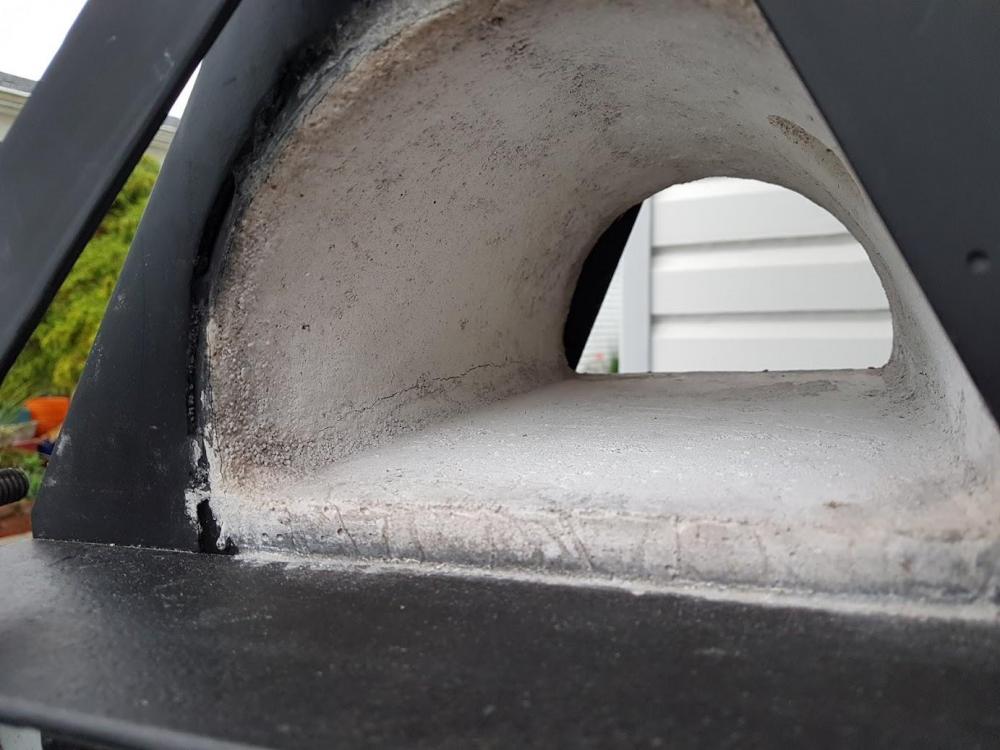
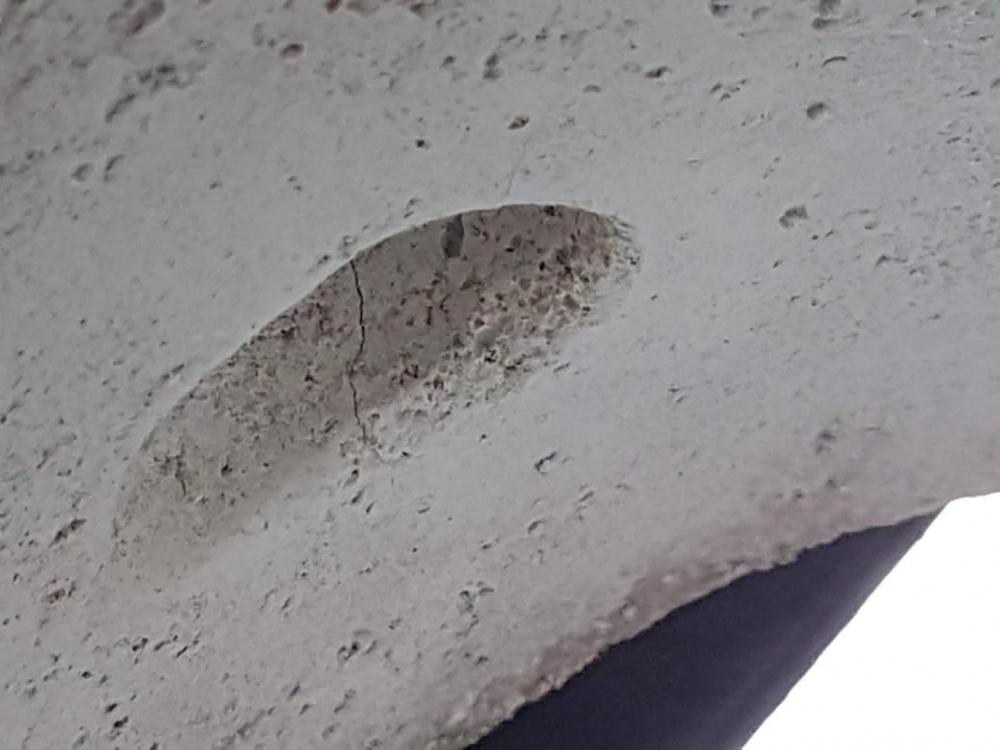
Thanks Frosty - I should have mentioned that the other troubleshooting I did last night was to push the burner in and out and tilt it as it was running and it wasn't changing anything. Both burners were installed about 1/4" into the cast (KOL) nozzles. The forge is 2" kaowool covered with a 1/2" KOL & Plistix on top. The burner ports were cast using a wood form with a 1:12 slope for nozzles. Thomas, here's some photos of the setup (I'm not lighting it in the wood shop). Problem burner is on the right. I didn't think the kink in the supply hose above the burner would affect the burner that way - It looks to me to be a pretty minor constriction in front of a much smaller orifice. But I might be wrong on that one: Removing the burner mixing tube I may have found the culprit! I must have forgotten I put on a third coat of Plistix since the last firing (see the last pic in the first post where both burners seemed to be functioning much better). The port on the funky burner has some pretty big clumps of plistix making the nozzle rough and irregular. I wouldn't have thought it would affect performance that much, as I think even with the bumps the nozzle is still wider in ID than the mixing tube but is that the most likely culprit? I probably won't get a chance to test fire it tonight after scraping the plistix clumps off as it's pretty stormy over here, but will post back when I get the chance. Maybe while I'm at it I'll shamelessly plug my other post on the Plistix application as it was giving me fits and I still haven't figured out what I was doing wrong with it: https://www.iforgeiron.com/topic/68680-clumpy-plistix/?tab=comments#comment-747713 Here's the rough port followed by the cleaner one where the other burner seemed to be functioning OK:
-
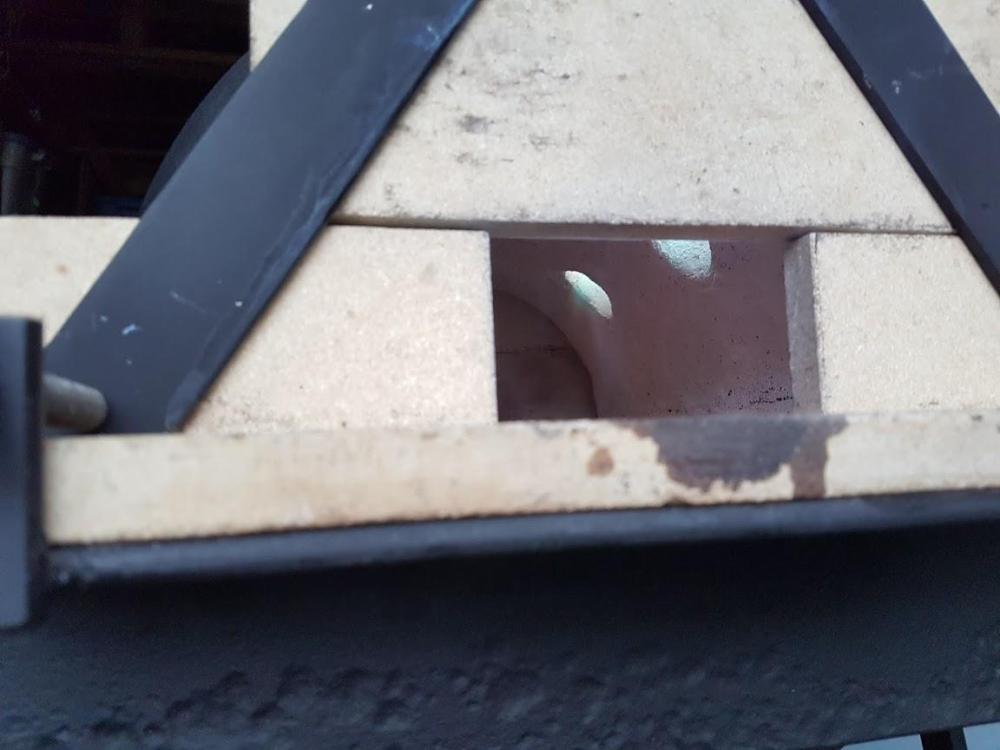
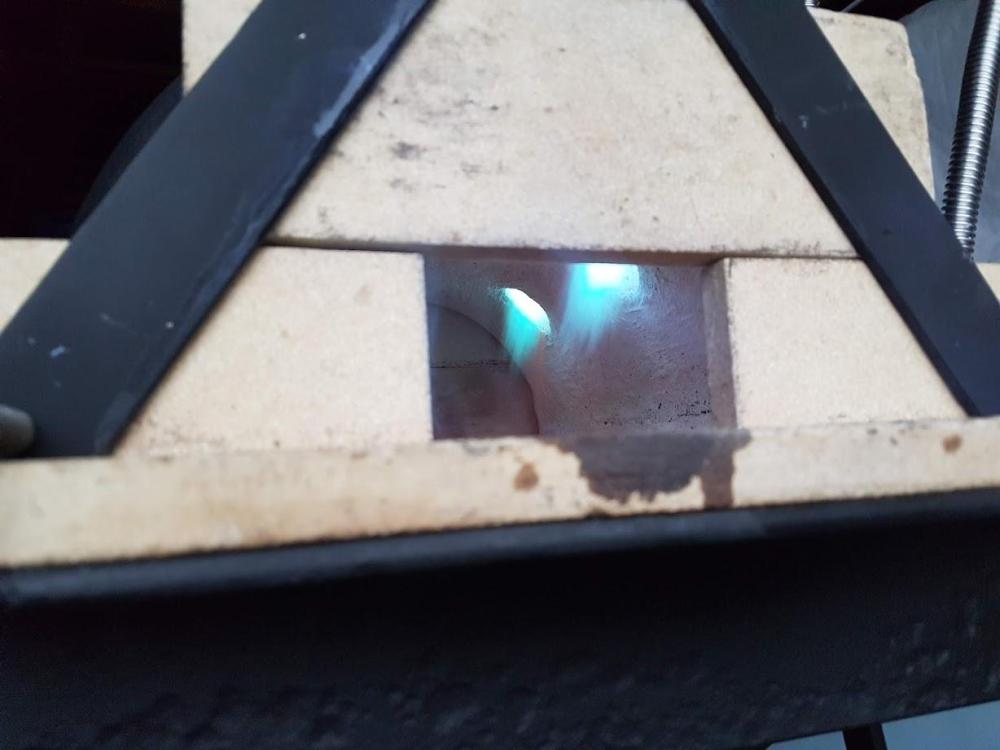
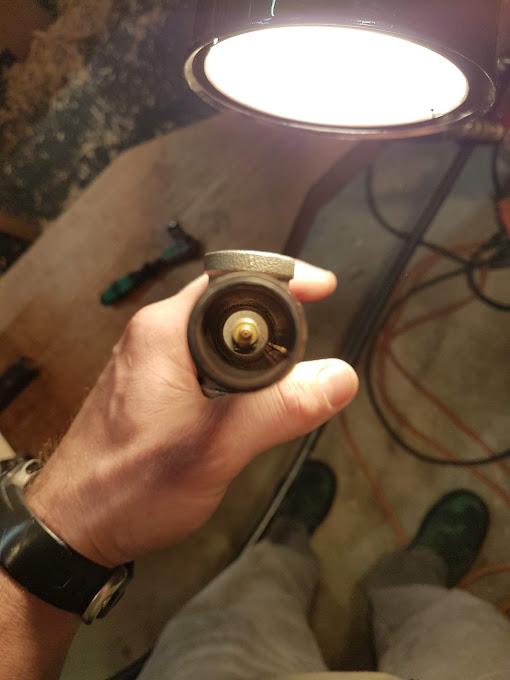
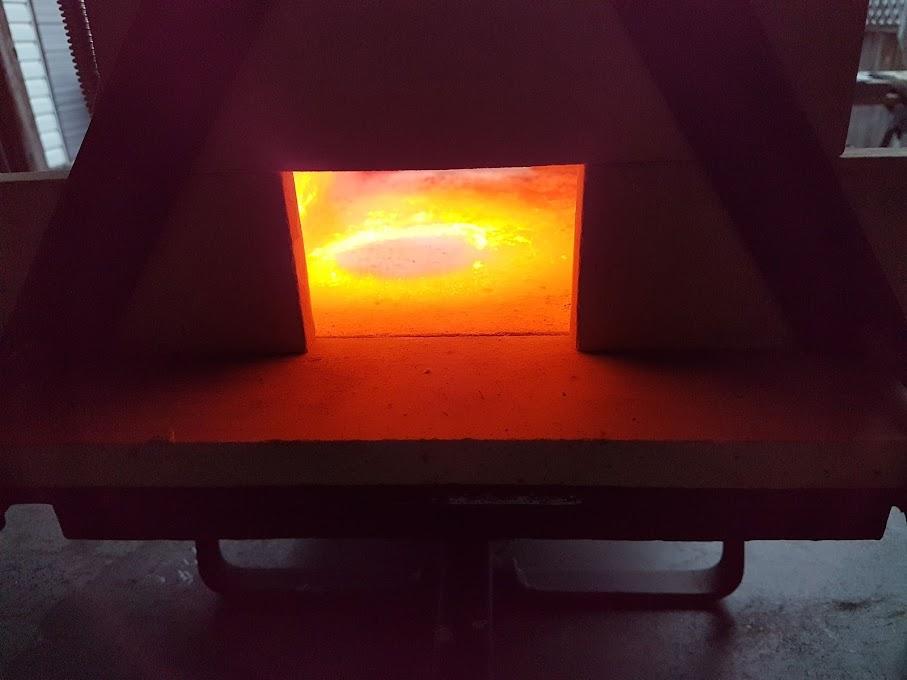
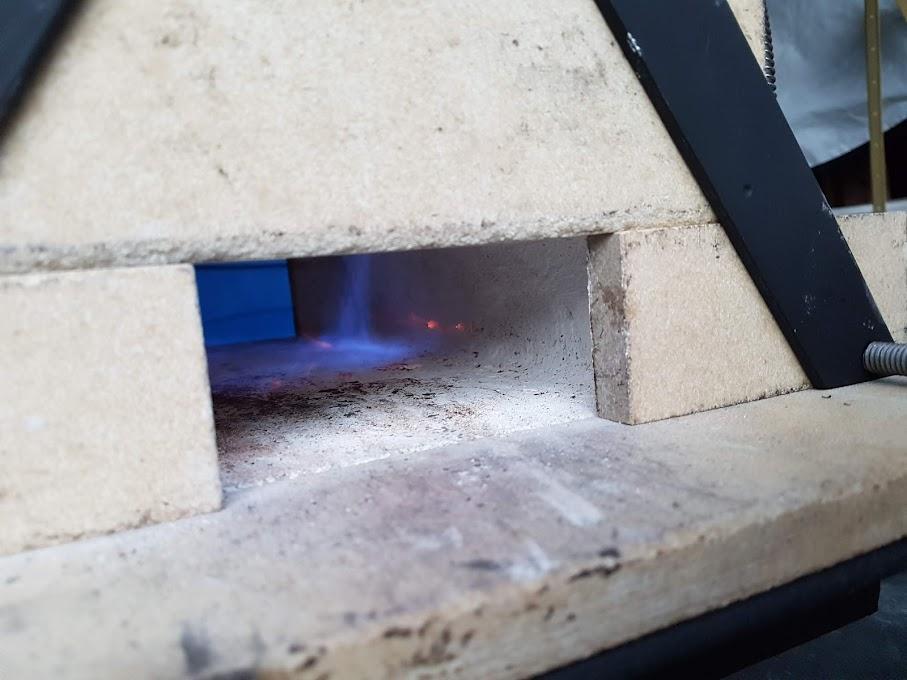
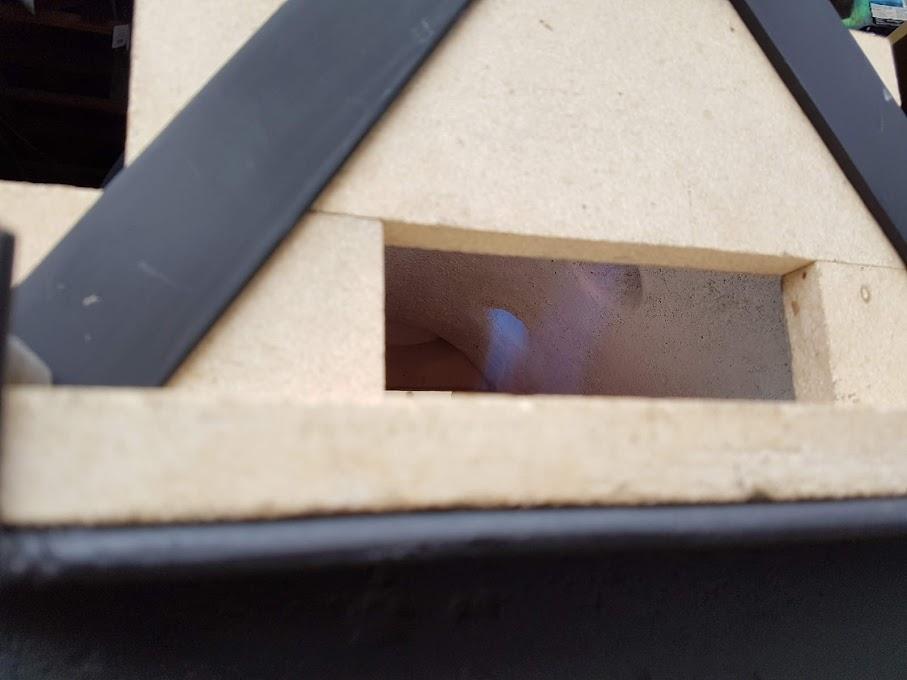
I have a recently built propane tank forge with two 1/2" Frosty T burners. When I fired it up tonight (fifth firing), one of the burners was behaving a little differently than it had before. It was much quieter than the other one and the flame was weird looking, not really staying together. I thought it must be a blockage in the fuel supply, so I detached the propane hose from the top of the burner to see if the orifice had some debris in it, but the MIG tip looked clean (gave it a couple swipes with a torch tip file anyway just in case), and I couldn't notice any obvious fuel restriction on that side of the system. Could it just be that the MIG tip extension in the T needs adjusting for fuel/air mix in the T, maybe it somehow got bumped deeper or shallower relative to the air intakes? Or does it look like it must be a fuel supply constriction somewhere? When the forge got up to heat, metal on that side did seem to visibly scale up a lot more, so I'm guessing that could either be a sign of fuel supply blockage or a MIG tip that's too far back? Any insight or suggestions where to start would be greatly appreciated. Here's what it looked like tonight - the naughty burner is in the foreground and the flame is mostly visible as the blue on the forge bottom and a little broken blue flame trickling down the wall, compared to the other side which is a uniform lighter blue cone (though hard to see in this picture): When I turned off the better functioning burner: Another shot from when it was a bit hotter, the flame in the foreground is almost making a dark blue halo on the floor: The floor here: And here's some pictures from previous firings when it was behaving differently - I haven't (at least knowingly) adjusted the burners between then and now:
-
And now to piggyback on this post - after the first real heat of the Kast-o-lite in the forge body, I've noticed some of the dreaded cracks appeared. I was heating up the forge to finish burning off the stinkies in the cured KOL before applying 2 coats of Plistix to the whole inside. Am I correct that these cracks can be effectively patched with the Plistix, or should I be trying to get a bit more Kast-o-lite in there first for added strength?


-
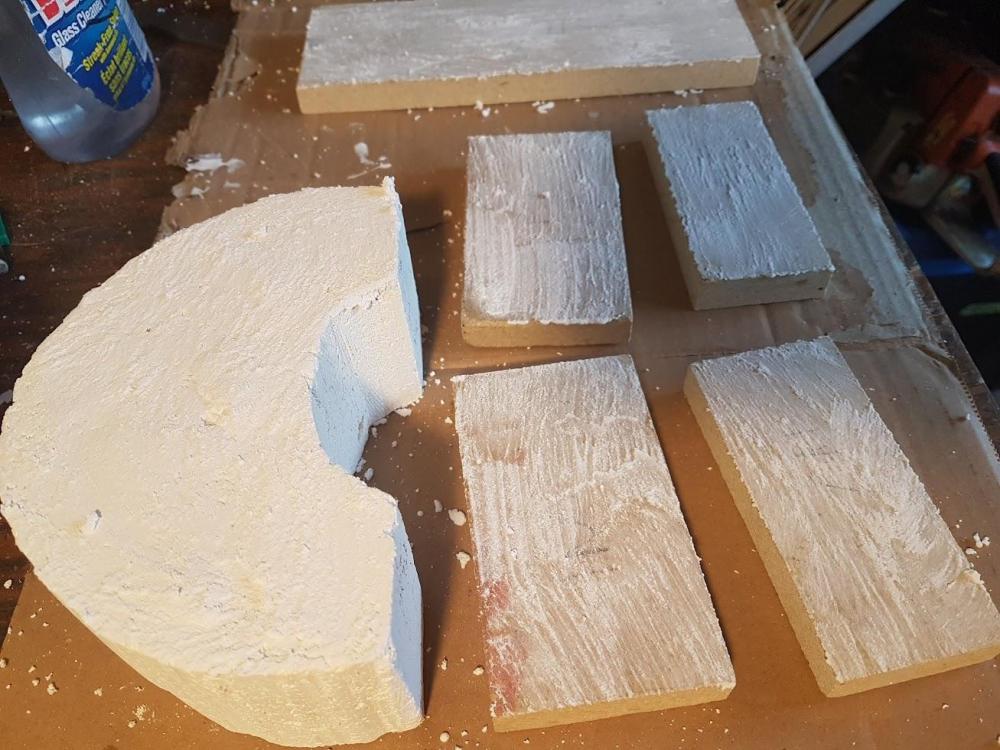
Interested to hear people's experience applying Plistix... I was putting my first coat on the kiln shelf pieces that will be my forge doors and the K26 firebrick piece that will be the removable divider. I stirred the powder well with the water to maybe slightly thinner than latex paint to start and used a paintbrush. On the first brush strokes it would clump massively - like it was instantly drying and clotting together, leaving the areas between the clumps with barely any Plistix on them. Was similar for both the kiln shelf (high alumina I believe) and the firebrick, but a little worse on the brick. I tried 'buttering' a couple pieces of the kiln shelf first - not drenching but spraying quite a bit of water on it, but that maybe seemed to make it worse? Also tried mixing thinner and thicker with no improvement. The picture was taken after spending a bunch of time smudging out the worst of the clumps. Is that just how it goes with the first coat, or is there something wrong with my technique? Also - I've noticed that once the remaining mixed Plistix dries a bit in the container, it seems revivable by mixing in more water. Wondering if I put a lid on the container, if the same leftover mix could be used in a day or two if a bit more water is added again?
-
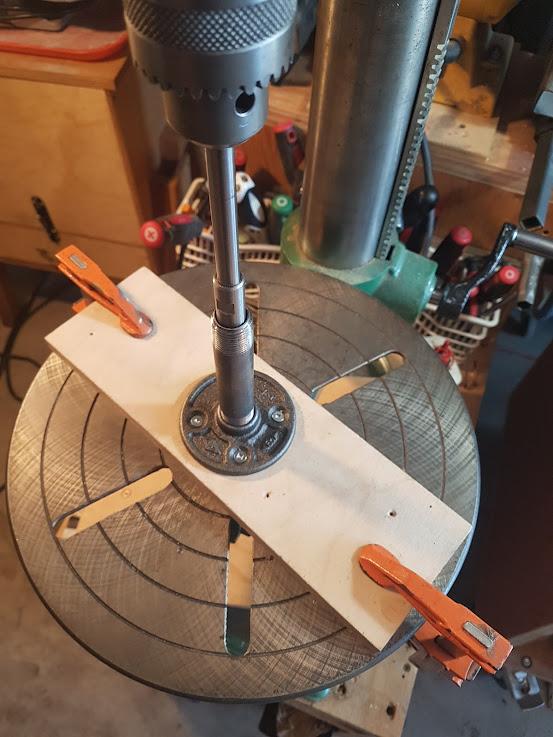
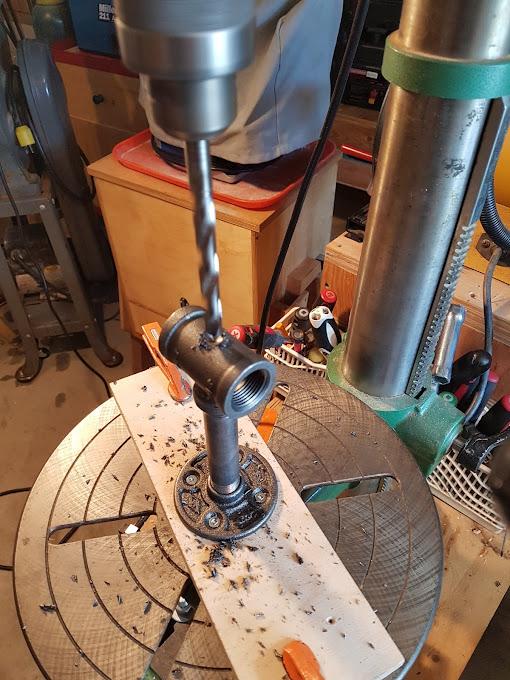
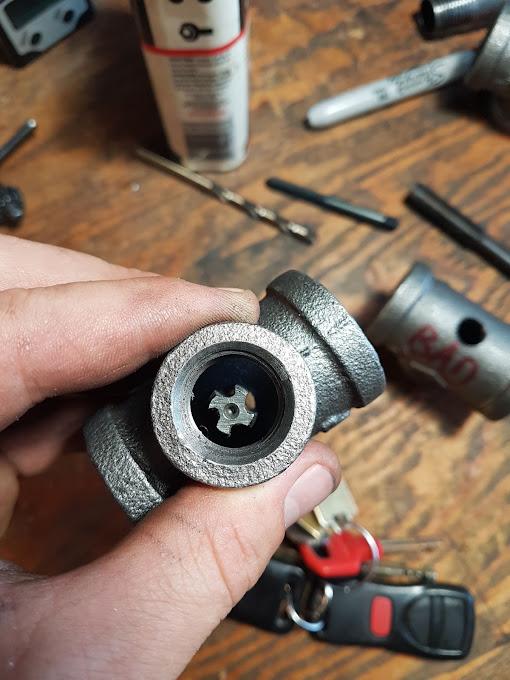
Thanks Neil! I will take you up on that For when I attempt another drill press T down the road, that is good advice on using a shorter nipple - that totally makes sense. And thanks Frosty for the head slapping realization that I could have swung the drill press to the side to clamp the flange directly. I must have forgot my coffee yesterday morning... The DP table and flange/nipple were square and centered every time I checked... I think maybe some flex/give in the plywood along with some deflection of the bit at the start and inconsistencies in the plumbing parts led to poor results. I had been starting the taps through the tees on the DP and removing the tees to finish tapping. In retrospect, it would reduce error to just complete it on the DP so the brass fitting could be chased and tapped for the MIG tip without rotating the tee, as Frosty suggested. Thanks for the tips everyone
-
I'm having a xxxx of a time trying to get the hole for the brass fitting tapped straight... I tried tapping 4 tees, on only one of them the fitting looks straight enough to try to put together, and even on that one, when I put it back on the nipple & flange to chase for tapping for the MIG tip, the centre of the brass fitting is off-centred from the drill bit. I'm off tomorrow to pick up a new batch of tees to try again, and maybe a new flange & nipples (in case those were compounding the error)... My guess is that even though I am being really careful to lightly peck the drill bit to start it (after filing a flat on top of the tee), that it is still deflecting some amount that I can't see and drilling off-centre. Both flange and nipple still seem to be very close to centre after removing the tee, certainly not off enough to get these results... Just wanted to throw this out there before trying again in case anyone has any extra tips, or sees anything obvious with my setup.

-
Thanks Frosty for clarifying - those hoses were actually cheaper than any regular hose I was able to find and I didn't want to go with copper because the forge will get moved and likely bumped a lot. I do like that they are steel and not rubber/plastic next to the burner too. Thanks Neil - I flaked out and forgot about the meeting tomorrow! See you there
-
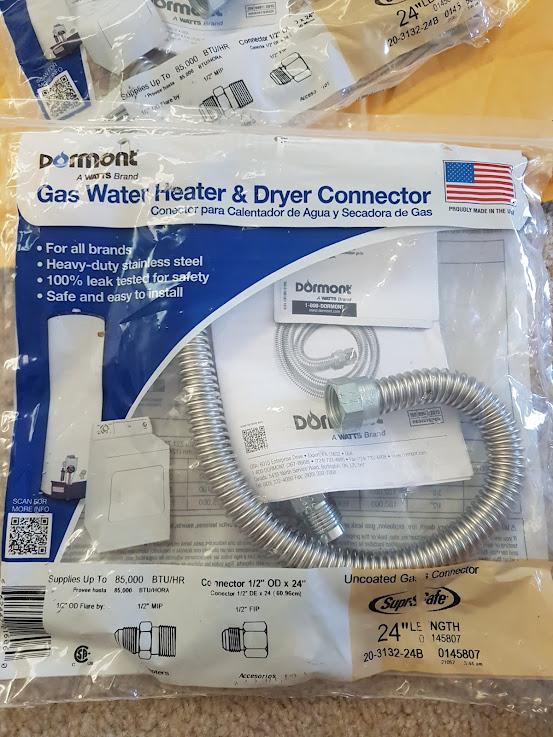
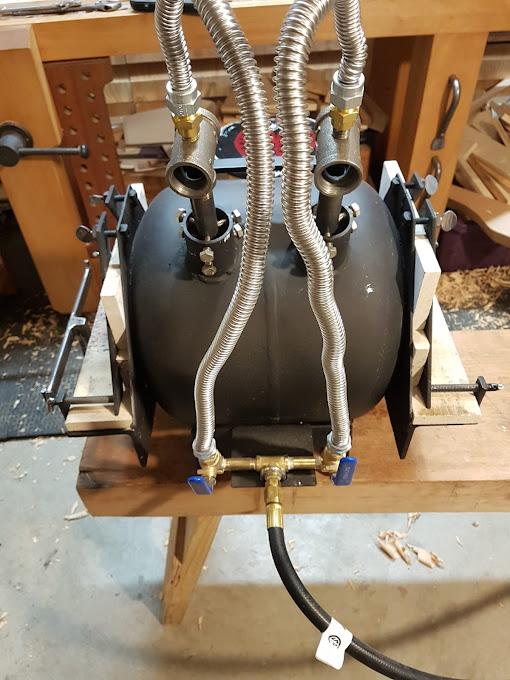
I'm putting together a 20lb propane tank forge with two 1/2" Frosty T burners... I'm trying to sort out the plumbing to the burners and picked up a couple 2' long 1/2" stainless steel gas heater/dryer connector hoses to hook directly to the burners - at the other end they'll each go to a ball valve, then a Tee, then to my 3/8" propane supply hose, regulator, and 20lb supply tank. Looking at the parts, I'm now wondering if there is an issue going from a 3/8 supply hose up to two 1/2" hoses before the burner - I feel like gas lines usually go from larger to smaller diameters... But I figured the regulator would keep it all at the set pressure regardless and the burners wouldn't notice any different. Did I figure wrong?