

Chris Williams
-
Posts
273 -
Joined
-
Last visited
Content Type
Profiles
Forums
Articles
Gallery
Downloads
Events
Everything posted by Chris Williams
-
You need to buy more, and pile it on top of the older stuff. She will only be able to see the stuff on top, you know!
-
Many of these woods DO have excellent alternative uses...
-
homemade milling machine build
Chris Williams replied to Ed Steinkirchner's topic in MIlls, Milling machines, etc
Thanks! -
The lightning stopped (seem to get more "lightning storms" here than rain), so I checked on the kumquat. Turns out it has already made its way into the smoker.
-
That's a good question Thomas. What little I have ready access to has gone into the smoker, but I did recently cut down a small kumquat tree with greening disease. If I didn't cut it into too short of pieces, I will make a handle or two from the trunk to see. All of my citrus is small, so I will need to find people trimming/cleaning up orchards to get big-enough pieces. I am certain that I could find plenty with a little effort. I just now found a reference from NC State talking about how citrus wood is sometimes used in tool handles (among other stated uses). The present uses prompted a study on orange wood from Italy to determine if it would make a good floor product. The test showed it to be the second hardest of (in order) ipè, orange, afrormosia, mutenie, cabreuva, beech, oak, merbau, teck, and iroko. Tensile, compression, and impact tests were not performed. I'm in zone 9b, so I can grow many sub-tropical and tropical species. I'm on Merritt Island, and have a slightly warmer microclimate than my zone. I must admit to not fully appreciating what all options are available to me.
-
Thanks. That link works. Based on Thomas Powers' recommendation some time ago in a different thread (repeated in this one) , I looked up that the local native peoples here used (local) red mulberry as a bow wood. I've got some (non local) white and black mulberry, and wonder how they compare. I'll check the scientific names against the list. I would just try them, but they aren't big enough yet to get a good handle from without cutting the primary trunk.
-
The PDF link is broken. Does it include different types of mulberry?
-
Ladybugs are fierce predators... just ask an aphid!
-
homemade milling machine build
Chris Williams replied to Ed Steinkirchner's topic in MIlls, Milling machines, etc
Thanks for posting this. I admit that when I saw the first picture in your post from last year, I thought "What is this guy doing?" Of course, the next picture cleared it up. I'm no machinist, but would like to pick it up some day. Is it rigid enough to suit you? -
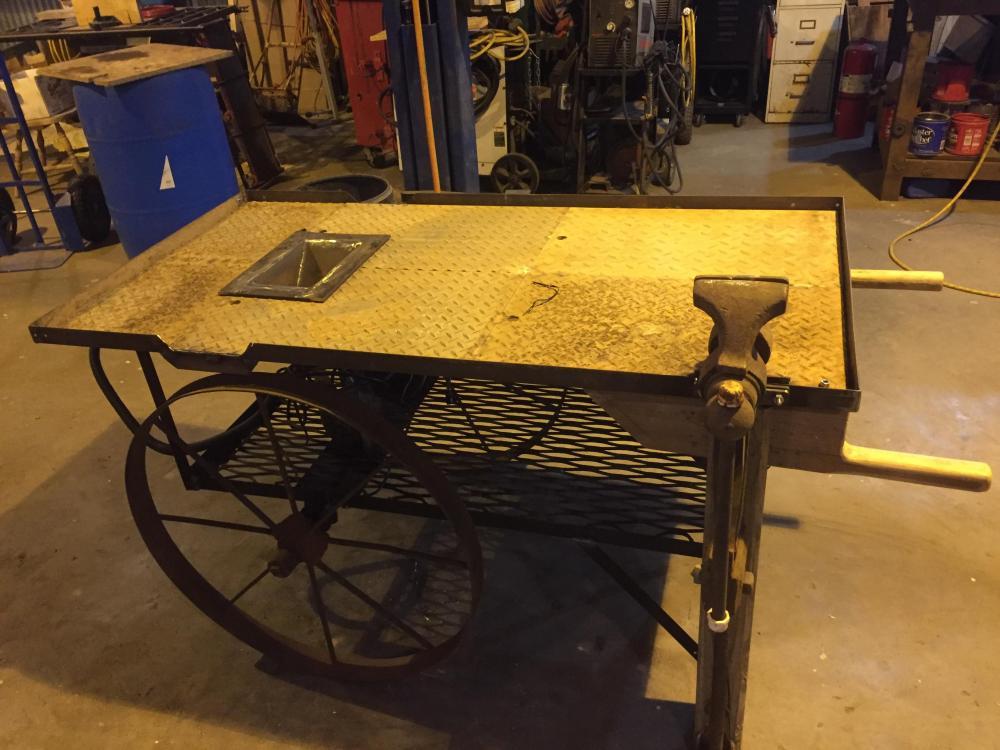
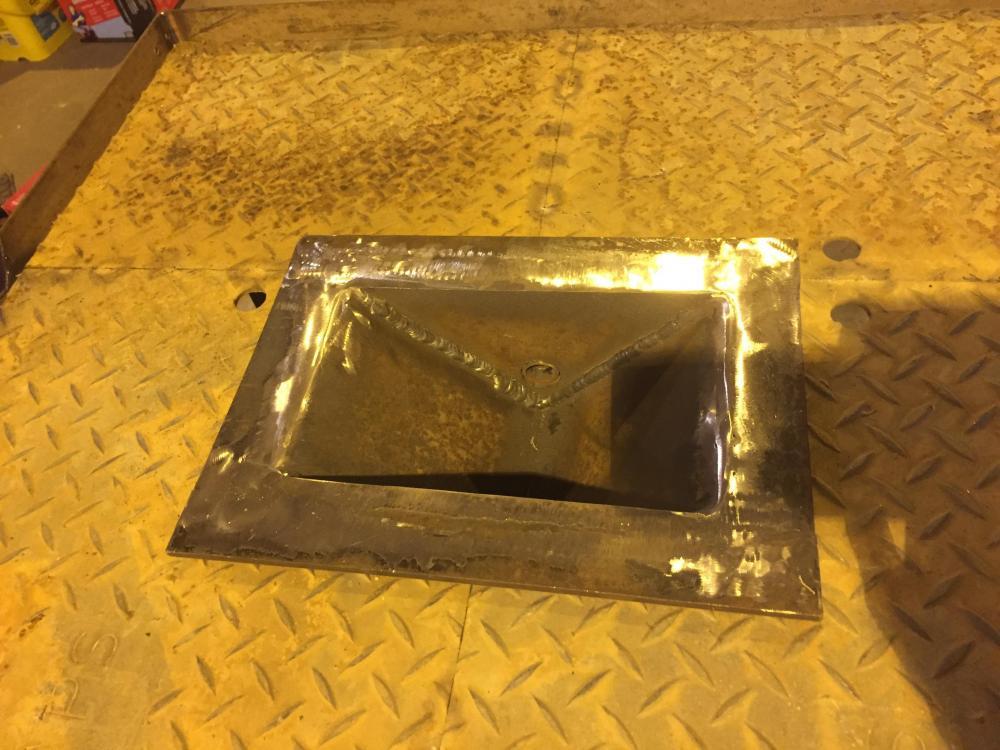
Attaching a piece of square tubing to the anvil stand to use as a hardy hole is a good solution.
-
Thanks for the updated drawing. You have clearly described your space limitations. My strong personal preference would be to have a smaller workbench and separate anvil/hardy hole stand rather than a larger all-in-one bench/stand if I were using that space. Beyond my preferences in work area setup, Thomas Powers' advice to separate the forge from impacts makes sense to me to preserve your investment in your forge. I use solid fuels and would not have thought about damaging refractory in a propane forge. Hot cutoffs, slugs, and your workpieces will be something that you need to watch for with your wooden structures no matter where you place your anvil and hardy hole. For yourself, wear long pants and closed toe shoes -- no synthetics, as they have a nasty habit of melting onto you (or burning) and making burns much worse! Keep a bucket of water and primed water hose ready, especially when working near your house. If you decide to build your design as drawn, please let us know what works, what parts you like, and what you would improve on in the future. I've presented my opinion, but am not here to talk you into it. I would follow Frazer's advice on adding a support for the hardy hole at a bare minimum, but again would prefer the hardy hole in the corner near your anvil stand if I were constrained to use an all-in-one bench.
-
Now that I think that I better understand what you are doing with your drawing, I recommend making separate stands so that you have better access to all sides of your anvil. You can make the workbench and a combination anvil/hardy hole stand, or the workbench and a stand each for your anvil and hardy hole. I would have to know more about the exact materials and exact space to plan it myself, but I am confident that you can think of how you could arrange those items to suit your space. You can use a scale drawing of the footprint that you have available plus some cutout scale drawings of your planned bench and stand(s); you can rearrange the cutouts on your scale drawing to test the fit and find a good arrangement. Then you can chalk or put objects in your real space and walk around it to make sure that you like it. Then build per plan.
-
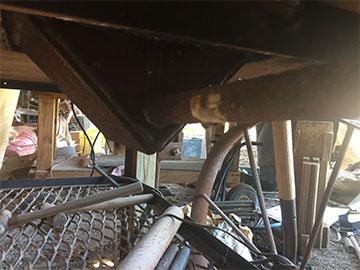
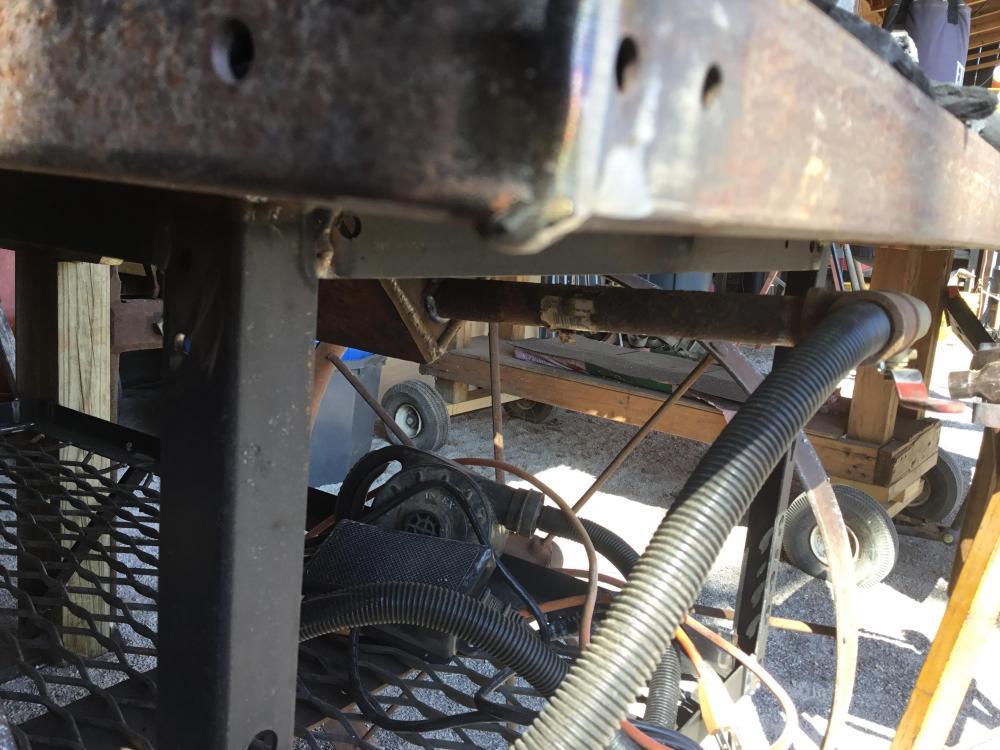
One thing I see is that the portable hardy hole is located somewhere that can flex, and that also doesn't give you maximum access around it. I would place it as close to a leg as possible while still leaving a through hole. Do be mindful of where hot things could go -- make sure that you can see and access whatever falls through the hardy hole or where a cut-off or punched out slugs go. What is the 2x4 structure on the nearside right corner? That is where I would intuitively put the hardy hole (my first preference would be a stand-alone hardy hole), but I don't know what you are using that corner for.
-
Don't get in a hurry and use the wrong tool. Don't get in a hurry using the right tool. Use the needed PPE the first time and every time. You don't have to have the risk of a catastrophic event to take care of your health. Some damage/exposure is cumulative, and every little bit hurts.
-
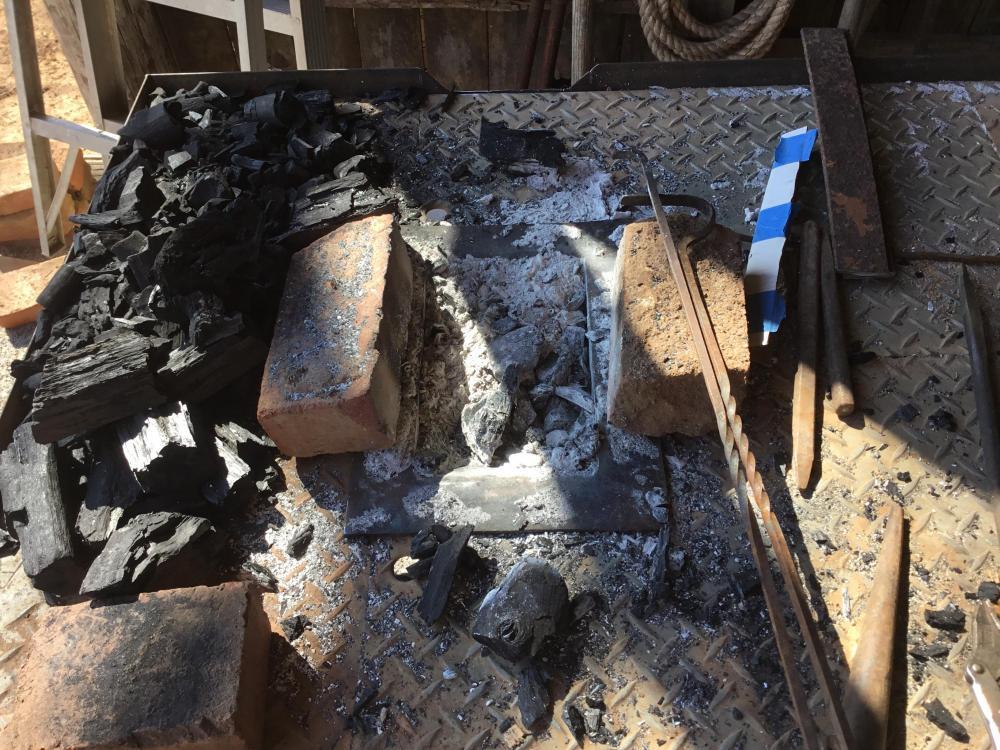
Thanks IDF&C! I figured that it had to be rigid, but I just couldn't see it. I certainly hadn't imagined it being a two person lift. You're welcome Dennis. Charcoal doesn't make much clinker, so you can remove any between fires. I haven't used straight coke (i.e., my coke starts on my forge as bituminous coal), so I cannot speak to quantity of clinker for coke.
-
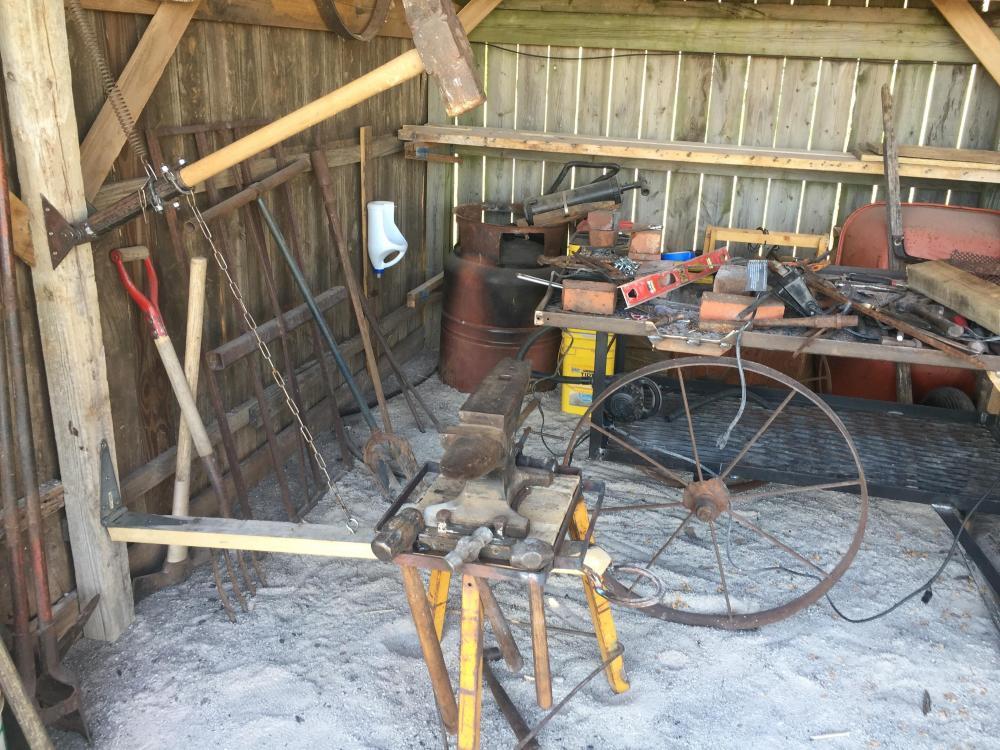
I saved the pictures the last time I went looking for them because of how long it took me to find them again. I still cannot find the other pictures of the treadle hammer in the first picture. How thick is the sheet steel in your pack forge? It looks like it wouldn't be very rigid, but I doubt that is the case based on when and for what it was manufactured. I have been wanting to make one like the WWII Broad Arrow forge in the second link.
-
Mr. Stevens posted pictures of his forge in other people's threads to help them with questions, but I cannot find those threads. As they were located in multiple threads, I hope Mr. Stevens won't mind if I consolidate (at least some of) them here. You may also consider calvary or pack forges. https://www.iforgeiron.com/topic/28685-portable-blacksmith-forge-military-circa-ww-i/ http://www.blacksmithworld.com/en/antique/ww2-forge-cavalerie-1944 The second one is a side blast without a water jacket.


-
What did you do in the shop today?
Chris Williams replied to Mark Ling's topic in Blacksmithing, General Discussion
You can rivet a sheet metal "washer" over the gap while you are riveting the burner port on. Q: When is the preferred solution not really the preferred solution? A: When you cannot accomplish the preferred solution with your resources. Some common phrases associated with the topic: Don't let the perfect be the enemy of the good. Good enough is good enough. Don't gold plate it. Make do. Use what you've got. A bird in hand is worth two in the bush. Every now and then, we all try to do something "right" without realizing that we are defining "right" too tightly. -
You don't think that we are undervaluing your experience, I hope! I think that several valid methods have been presented for lighting your forge, including using the piezo that you have already purchased. If you really just want to mimic your friend's setup, then please let us know how it is set up and how it works for you. For a permanent installation, I do think that you will want to use a material for the spark gap and wiring that will withstand the forge temperature and environment. Maybe you can have them come through your burner outlets and barely protrude inside the forge? The conductor may get too hot and cause combustion behind your burner block, however. Routing the conductors through the door would require support or covers to keep them safe from your work. Also, my preference when I rely on a fixed piezo spark gap to ignite a combustible gas is that I can see the spark from a safe place (i.e., I don't want my face in the flames when it starts! ) to make sure that it is functional so that I don't enrich my surroundings with the gas before I figure out that I don't have a spark. They do eventually wear out, and the gap can be moved too far apart for a spark.
-
Automating disasters in seven easy steps
Chris Williams replied to rockstar.esq's topic in The Business Side of Blacksmithing
Although the quote itself is not Forum Friendly, Samuel Clemmons once stated something about lies and statistics. Just what DO you want the numbers to say? Of course, the problem isn't using data to make decisions. The problem is not understanding what the data can reasonably tell you and with what confidence, but then using the available data to hide that ignorance and justify -- or excuse -- poor decisions based on useless or even intentionality misleading data. -
You can make a "spark stick" with your piezo, a length of tube, more wire (if needed), and something to prevent hot gas intrusion into the working end of the tube (dab of refractory, or mortar, or even silicone). It shouldn't be in the heat long and will keep you out of the flame as well (make it long enough!).
-
Automating disasters in seven easy steps
Chris Williams replied to rockstar.esq's topic in The Business Side of Blacksmithing
I have shown stress analysts SEM images, or metallographic micrographs, or other data with clear evidence of a root cause of failure. I would explain what is proven, what is ruled out, and what may still be suspected but not known, along with the implications. Sometimes that drove positive solutions to problems. Sometimes they would argue that we are not looking at what we are clearly looking at, "because the model says..." -
amazon 66 pound anvil
Chris Williams replied to Jaegers Forge and Foundry's topic in Anvils, Swage Blocks, and Mandrels
Without knowing more about the cast steel anvil on Facebook, I can hardly advocate for one over the other. I can tell you that the 66 lb anvil from Amazon can be had at slightly less than $2 per pound shipped on eBay. You can read others' impressions of it here: I just bought one for my 6 year old to work with while he learns to hit the same place repeatedly. It even came with a tiny cross peen hammer (unadvertised and ~4-6 Oz.) that I will give to my 3 year old. I cannot comment on the quality of it forging yet, but the casting seems to be sound. -
Well, a ~125lb anvil doesn't take up appreciably more space than the 77lb. anvil, and I agree with the others that you will want as big as an anvil as possible that still meets your portability requirements. I also agree with them about buying a bigger used anvil for the money, but that depends on your local market and whether you can confidently pick out a worn but workable anvil from a lemon. TPAAAT or a local market platform could lead to a great anvil at a reasonable price tomorrow... or several months from now. Buy new, and you can be confident in the quality and have the anvil in days. As Glenn pointed out, there are also other makers of quality new anvils with other size and configuration options; you are not "stuck" choosing between the 77lb model 5 and 165lb model 7 if neither actually met your exact intent. I obviously still defer to your judgment as to what is an appropriate size for you to move. That said, I think the Model 5 is sufficient for the items that you are describing. We often send people bemoaning their lack of (usually London style) anvil to watch videos of third world blacksmiths forging blades and other tools on sledgehammer heads or assorted scrap as motivation and inspiration to just get started. World-class swords have been forged on what are basically just blocks with a spike on the bottom. You have been making do, and will see an improvement with a purpose made anvil, either new or used. You have done at least some research on the topic, and I say if you are happy with your selection, then buy it and use it well! Don't let the perfect be the enemy of the good.
-
I've been happy with my Peddinghaus Model 12. I wanted to buy a 5 also, but got vetoed. You can read various perspectives on the Peddinghaus anvils (mostly 12s) here: