
kevin (the professor)
-
Posts
222 -
Joined
-
Last visited
Content Type
Profiles
Forums
Articles
Gallery
Downloads
Events
Everything posted by kevin (the professor)
-
That is so very much better than my first knife. The fit and finish look good, as mentioned above. I like the overall stylish curves. My best advice is to keep posting on forums and keep listening to the things that they tell you. The knifemaking community is just full of people who love to share and teach. Also, look at and draw as many knives as you can. Focus on looking at, analyzing and drawing knives you really do like and knives you really don't like. This will give you the perceptual ability and conceptual ability to really understand what it is you are trying to create. (ok, I am a psychologist, so I get into why things work as well as how they work. go with me, this simple bit of advice was given to me by a true genius in the field, and it made a huge jump in my learning progress). I am only about a year and a half in myself, so I have a ton to learn. But, this is one area where being a student is fun, and most of the experts still think of themselves as students. Nice work. Keep trying and keep sharing. Welcome! Kevin
-
Hello Everyone, It has been awhile since I have posted anything. I had a hard time getting my new forged lined and then fine-tuned properly so I could weld as well as I like. Now that I have everything working again, I made this little knife as a test. It is a pretty basic design, that is also fairly historically-accurate (although I have since learned that guards were used on this size of knife back then, at least sometimes. The handle is just over 4" of the prettiest curly maple I have ever used. It is beautiful. I had planned to carve but this was too pretty as it was. The Blade has 3 bars, the spine is 5 twisted laters of 15n20 and 1080. The other two bars are both Monosteel 1080. The 1080 bars are welded with their flat faces together, and the twisted bar is butt-welded to the spine of the other two. There are no visible weld flaws. The blade is 9" long. This is my favorite style of knife to make. It lets me use the visual appeal of pattern welding in a traditional manner with my hand hammer. I hope you like it. Thanks for looking. I rely on people on the internet for teaching and encouragement, so comments and such are welcomed. thanks, Kevin
-
go with vinegar or ferric chloride. ferric is better if you cut it to about 4 or 5 to 1. it only takes from a few seconds to a few minutes. vinegar takes all night, but you probably have some of that laying around. ebay is the way for ferric - but be careful to check the shipping charges. There are some people who try to trick you with low price for ferric and then ungodly shipping. looking forward to seeing what you create. I love low-layer count twists. kc
-
xxxx, I wish my 10th knife was that good. I think you are off to a wonderful start. thanks for sharing. there are some really good (both talented and friendly teaching types) on this forum. keep sharing your progress. It is fun to watch. nice work. Kevin
-
You could also grind the tang into a stick tang and put a handle around it. Use the tried-and-true method of construction of a pommel cap and a peened-tang. kc
-
looks very nice. If you are near New Haven ct, and you would want to build another, let me know. sometime within the next 12 months, I have to get one of these. I can't use a power hammer here, and I think a press may be better for me due to where I live. Also, Don Fogg rec's that a press is the best single power assist tool to get, if you can only afford one. kc
-
another pwelded seax
kevin (the professor) replied to kevin (the professor)'s topic in Swordsmithing
You Won't Believe This! OK - I have mailed a pretty good number of knives and seaxes to people in the last year. They have all been mailed from my same local post office. So, I have a deal to sell this blade to a fellow in Florida. I wrapped it carefully in cardboard. Duct taped everything together. Stuffed it in priority mail tube with paper in and around it so it could not move. There was no way the point or blade could have come in contact with anything. The tube was packed so full that the seax could not move or rattle, and there was enough to cushion any impact. Add to this, really strong packing tape over both ends. I bought delivery confirmation. Guess what? The tube arrived, but it was EMPTY! The packing tape was torn and the metal cap removed from the end with the point. NO SEAX INSIDE! I suspect that a worker at the post-office overheard me talking loudly with the mail clerk about how fancy this particular short sword was, and simulated a lost item. That was the immediate impression of the buyer, too. I don't think anything but a person could have torn the tape without crushing the tube. Also, if there had been some way for the thing to come out honestly, it would not have gotten totally separated from the tube. An honest worker would have been able to see that the item belonged with the tube and repacked/resealed it. The buyer said he could not remove the cap on the remaining end to get the paper out without cutting the tape, it was too strong and too well sealed. So, both ends were the same, or should have been. most likely, human intervention. But, I can't prove anything. I am going to make this fellow a better seax, but he will have to wait. Somebody, somewhere, has a really nice knife. I doubt that the fully appreciate what they have, though. As you can guess, I am really upset about this one. kc -
steve, very nice. Please don't think I was criticizing when I mentioned small guard. This one has a look that is consistent with a lot of the fantasy stuff while still being unique. I really do see what you were trying to accomplish, and I think you did a very good job. I like what I have seen of the sheath, too. Kevin
-
Steve, I like this a great deal. I would have tried to put less guard on, but I see what you were going for and why. It is jut me. Plus, I couldn't have done as well overall as you did. It looks like it is a strong and solid sword. Where does a "short" sword end and a "sword" start? great job. thanks for showing. kc
-
52100 Integral Bolster Knives
kevin (the professor) replied to Graham Fredeen's topic in Knife Making
Graham, these are beautiful. I really am impressed about these. Really good work. Kevin -
another pwelded seax
kevin (the professor) replied to kevin (the professor)'s topic in Swordsmithing
my name is kevin colwell, with the last name being Old English or Celtic for cool river or well. I am also a forensic psychologist by day, and our field uses the Greek capital Psi to abbreviate it. I plan to do something with the Psi. Maybe some symbol for well or river. Or since I post as kevin "the prof", maybe my initials and the Psi. thanks for input. Kevin -
another pwelded seax
kevin (the professor) replied to kevin (the professor)'s topic in Swordsmithing
Oh man, that was not expected, and made me laugh really, really hard. thanks for that. I actually tried to make the core complex. It has two counter-twisted rods, with two parallel laminate rods outside of those, with layers of mono 1095 outside of those, adn finally, layers of 1080 for edge and spine. The problem - I could not guess the right amount of material to use for what I wanted, so I drew the twisted rods too thin and had to cut and weld them back on themselves to get enough thickness. So, the twists were loose to begin, and then draw out twice. So, you really can't see the twists. It was a learning experience. I need to start with a LOT more material to begin when I am twisting and welding. The welds went well, and it does look like wood grain, but it is a compromise between what I wanted to accomplish and what I could accomplish. Live and learn. I love forging and welding, and don't mind doing it over and over. If it was my livelihood, I can imagine I would be more upset. thanks for comments. I learn a lot and get a lot of encouragement from you guys. Oh - and I polished it a LOT better since I am selling to someone. I realize that I am pretty obsessive about what I want to have out there representing me. I can imagine that this could really become something I have to keep in mind. Kevin -
Hello everyone, I never actually posted this one here. I made it about a month ago. I have been out of comission due to equipment failures. Both grinder and forge bit dust, but have been ressurected. Better, stronger, faster (ok, at least better). This is actually the first thing I have ever sold to a total stranger. Most were either gifts to friends of "deals" for friends of friends. Not to mention the big pile of stuff I had to keep because I was too ashamed to give it away. So, I sold this one really easily. I need to improve, TREMENDOUSLY in terms of handle work, fit and finish, etc. In fact, much good advice allowed me to reform this one a bit, which is probably why people were interested. Now, I need a stamp, so I can mark 'em. Seriously, this is the first thing I have made that I would send to anyone else as being an example of "my" work. The rest are better kept among friends. Hopefully, I will keep getting a little better each time... Hopefully. Thanks for looking, Kevin
-
that should work well as a chopper. Personally, I wouldn't (and couldn't) have gotten that level of polish on a user-type knife. But, that's just preference (and lack of ability). The fit and finish are tight and the knife seems designed properly for its use, etc. thanks for showing.
-
I really like the material and the way the knife works together. It really looks "right." kc
-
wow - that is really nice looking for a 10th sword. much less, first. I am glad that you shared. please keep them coming. kevin
-
pattern welded langsax (first short sword)
kevin (the professor) replied to kevin (the professor)'s topic in Swordsmithing
right now I just do them by hand. I am hoping to get stuff together to buy/make one of the mini's with a bottle jack and compressor. can't do a powerhammer in my neighborhood in CT. I would love any advice about how to keep from getting or how to get rid of slag inclusions in the really long and narrow welds. Its only in the long edge welds where I have the problems. There are not usually any flaws in my actual pattern welded billets. Just when I weld bars to each-other on edge. kc -
JPH - thanks for the comic relief mixed with solid welding and multiple bar technique. I always like people better if they can poke fun at themselves. Just because this stuff mixes science,history, and art doesnt mean it shouldn't be a lot of fun, too. kc
-
pattern welded langsax (first short sword)
kevin (the professor) replied to kevin (the professor)'s topic in Swordsmithing
yeah- it has some small weld flaws along the edge where the pattern welded bar was welded to the mono bars. I am not sure I can get something that long to weld together without any flaws at all. Most of the time, I get a couple that aren't structurally significant but that are visually annoying. Historical pieces had them, much of the time. But, to quote Alan Longmire, "the historically-accurate but damnably annoying weld flaws," show up when welding long edges together in a forge. If I get a way to reliably grind fullers, I guess I could have ground that one out. I started to, but I did not trust myself to grind the fuller with what I had. I want to get a smaller wheel or roller to attach to belt sander to be safe. kc -
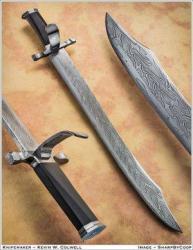
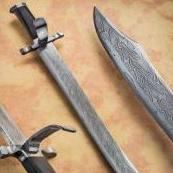
Hello Everyone, I have been planning this project for months, and working on it for over a month. It is my first sword (short sword, but hey, this thing is wicked). So - I have made a langsax sort of like one George Ezell showed me. It is inspired by the historical blade, anyway. The spine and back third of blade is pattern-welded. The rest is monosteel. Guard, bolster, and pommel plate are copper. I had fun hammering the copper with a punch to leave a pattern of dimples in it to take advantage of softness. blade: 19" 1.25" wide 5/16" thick 26" OAL. Spine = 1 bar composed of 18 layers (15n20 and 1095) Edge and middle = 2 bars of mono 1095. Handle = Walnut I did this all by hand with a 4lb hammer and a pos anvil. I am buying a new anvil in a couple of weeks. It is nothing like what a lot of you guys can make, but its a heck of a lot better than buying one! This was really fun. I want to thank everyone who has shared so freely with information, encouragement, and laughs. I am really indebted to the online community for all of the teaching, taunting, history and philosophy.
-
Glad you guys liked it. I had fun with that knife. I like the antiqued finish. i am going to try that again when appropriate. It is just a mixture of vinegar etch followed by birchwood casey super blue followed by steel wool and oil. kc
-
knife for Scoutmaster friend
kevin (the professor) replied to kevin (the professor)'s topic in Knife Making
thanks everyone - I love the idea of the kids seeing the knife and not recognizing any standard name brand on it. I have told the Scoutmaster to try and get them to figure out where he got the knife. I want them to realize that you can make things like that with your own hands. Also, there is a "metalworking" badge for scouts. If any are interested, I will show them enough and supervise them while they work at it (if their parents say it is ok). I have had several adolescents try to convince me that their parents said it was ok for me to make them a knife (they promised). Of course, it is not only a bad idea to give a 5" long fixed-blade knife to a kid without consent of parent, it is a crime. thanks for comments. Hope to create a new generation of smiths. kc -
Feather Pattern Bird and Trout Knife
kevin (the professor) replied to Graham Fredeen's topic in Knife Making
That is a really beautiful knife. The whole thing fits together very well. I am seriously impressed by the craftsmanship/art. thanks for sharing, Kevin -
JPH - that is really nice. I am fascinated by you guys who are able to smelt the stuff yourself. It seems to be the ultimate in understanding your material, and just plain cool. thanks also. kc
-
Hello Everyone, This knife is made per the instructions of a young man who makes really good leatherwork. I am trading him this knife (which he sent me a sketch and asked me to make) for a sheath from him for one of my users. I love metal and wood but don't like leather work. He has some serious talent with it. So - he wanted a knife that was tough and looked the part. So, I left some scale on spine, wood is scorched and stained some. It is made to his specs. 1095 blade, 6" long, .22" wide at spine long flat grind (I am getting a little better with this, I modified my grinder platen and bought good belts and a new contact wheel). None of this stuff would have helped me though, until recently. I have practiced enough that I have a little better grip on the process. I also recommend highly Harvey Dean's flat grinding vid. Plus, it is nice for me to hear a Texan talk since I am in CT. Birdseye maple hidden tang epoxied linseed oil to saturate handle a number of times, and then a layer of acrylic to seal it. I like the dif. hardening line, but I need to practice a lot more with this set of techniques. I really wanted the line farther from the edge, and this was my second try. First was worse. Hope you like. I appreciate advice and comments. Thanks for looking. Take care, Kevin