TwistedCustoms
-
Posts
450 -
Joined
-
Last visited
Content Type
Profiles
Forums
Articles
Gallery
Downloads
Events
Everything posted by TwistedCustoms
-
 Great job on the hot cut and kudos for using up what's readily available.
 -
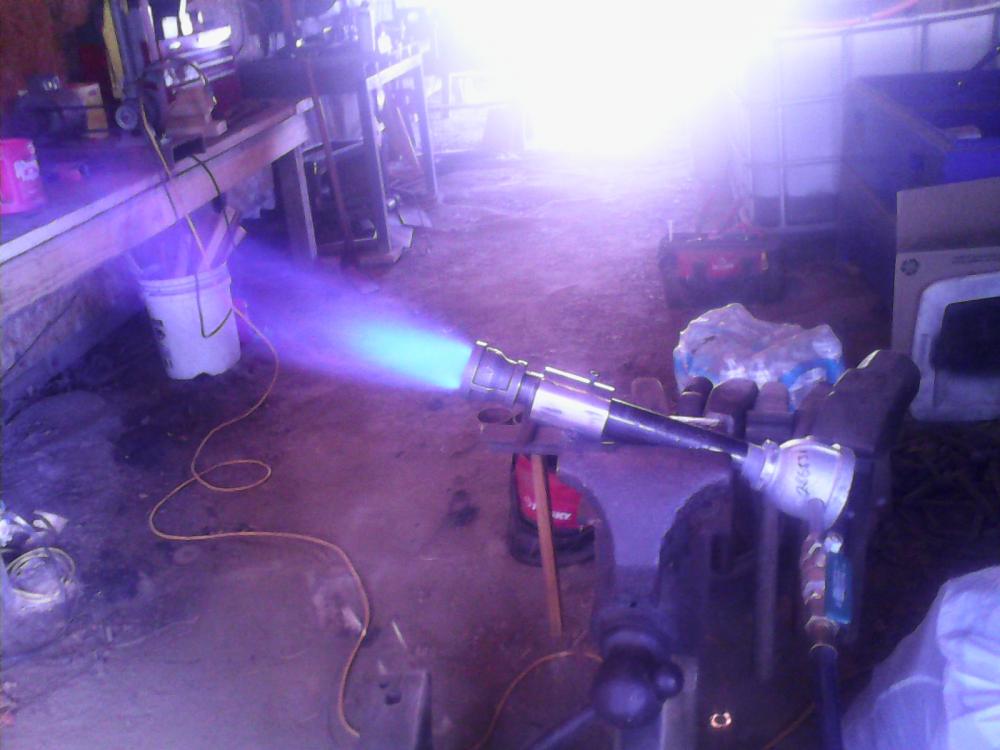
Based on what I got out of the 3/4 Frankenburner I thought 1/2 would be plenty. I can already see where this is going. I bought an old green glass backed Fred Bear recurve when I was kid. Five years later I had built shave horses, fletching and string jigs, acquired dozens of longbows and recurves, both traditional and primitive. I tend to go all the way down the rabbit hole once I look in. I want to get the two brick up and running to serve the requirements stated in my OP but the Two brick won't be my last ;-)
-
Mikey98118, you're saying the gas jet should be further into the throat of the bell? I played with Frankenburner again today when I was done forging and it just will not stay lit without the 3/4 x1" bell on the flame end. I don't understand the science behind it yet but that bell, despite being the " wrong" flare angle is doing some good in the current configuration. I did purchase the 6mmx1 tap needed to use my Lincoln mig tips. I have Lincoln welders so I'm determined to use the tips I keep on hand. I am interested in tuning, improving and playing with this burner because its my first but come Monday I will be building the Frosty T Burner in 3/4 and 1/2 inch sizes. I'm picking up the soft fire brick tomorrow. When the two T burners are put together I'll start " tuning" and adjusting both of them trying .025 and .035 tips. I'll be trying to match one of them to a two brick forge that will fit in a surplus .50 cal amo can. I also had an idea today, maybe not original but it did come to me at the forge. I have lots of mandrils and round drifts. Couldn't I pick up a heat in a length of pipe and drive it down onto the drift forging the flare on one end then trimming the other end to length for the build? I'm sure this has been done, I probably just haven't read enough yet. I'm excited about learning about gas forges. As to lighting/re-lighting the solid fuel, I'm sure I built it up in my mind to be more of a hassle than it really is. Years ago when I brought home one fifty lb sack of coal I treated it as if it were gold. I scrounged pea size pieces out of the clinker bucket, moved heavy objects to reach behind if I dropped a small bit and it rolled under something. Once I started buying tons my attitude became "let it burn, I have plenty". I'm not sure why it started eating at me recently. Frugality must be coming on with old age.
-
What was the job that you turned down?
TwistedCustoms replied to Glenn's topic in Blacksmithing, General Discussion
Glen, I was asked to make fighting spurs this past year at a gun and knife show. I sent the "gentleman" packing empty handed. At the time I didn't think of it as turning down a job but I suppose that's exactly what it was. I live in a timber producing region and we have lots of industrial mills in the area. I often have guys coming up with some form of air hardening steel they have pilfered from the scrap bin at work and want it forged into a knife. Rather than trying to educate them on all the how's and why's I just tell them I don't work with that kind of steel. More than a few of them have taken it hard but they are usually the same ones who think a railroad spike will make as good a blade as D2. Most of my " turn downs" are due to unsuitable or unknown steel the customer wants repurposed. I got a call just today from a man who has some 3/4 round that according to his families oral history he believes is a section of an old prison bar. Of course no specifics about which century or time zone it came from but he says, " looks like pretty good steel, should make a good knife". -
Finally Finished My RR Anvil Stand
TwistedCustoms replied to CTBlades's topic in Stands for Anvils, Swage Blocks, etc
Looks good. That top plate will make a handy flatter surface for straightening stock after drawing out. A couple or even a row of half inch holes along one edge would give you a pritchel for punching and allow the use of two or more moveable steel pins for bending/scrolling.the hole in the end of the track looks good but doesn't have enough surface area around it to support work while piercing but you have plenty of room on that top plate. I would be proud to forge with that set up. -
Thank You for the info! My next round of reading will be about burner size/output in relation to forge size. Years ago I used blunt tip dispensing needles to mix paint on the job. The ones we had were stainless with threads and screwed onto the injector bodies. Barrel sizes were in thousandths and in increments of .005 A quick search yesterday turned up plenty of blunts but with plastic slip on sleeves. I haven't searched in earnest for the screw on type but I'm sure they are out there. They look like a football pump inflator needle but with a known bore size. After sleeping on it I'm excited about how far I got yesterday and will probably end up building three different burner sizes before I settle on one for my new gas forge.
-
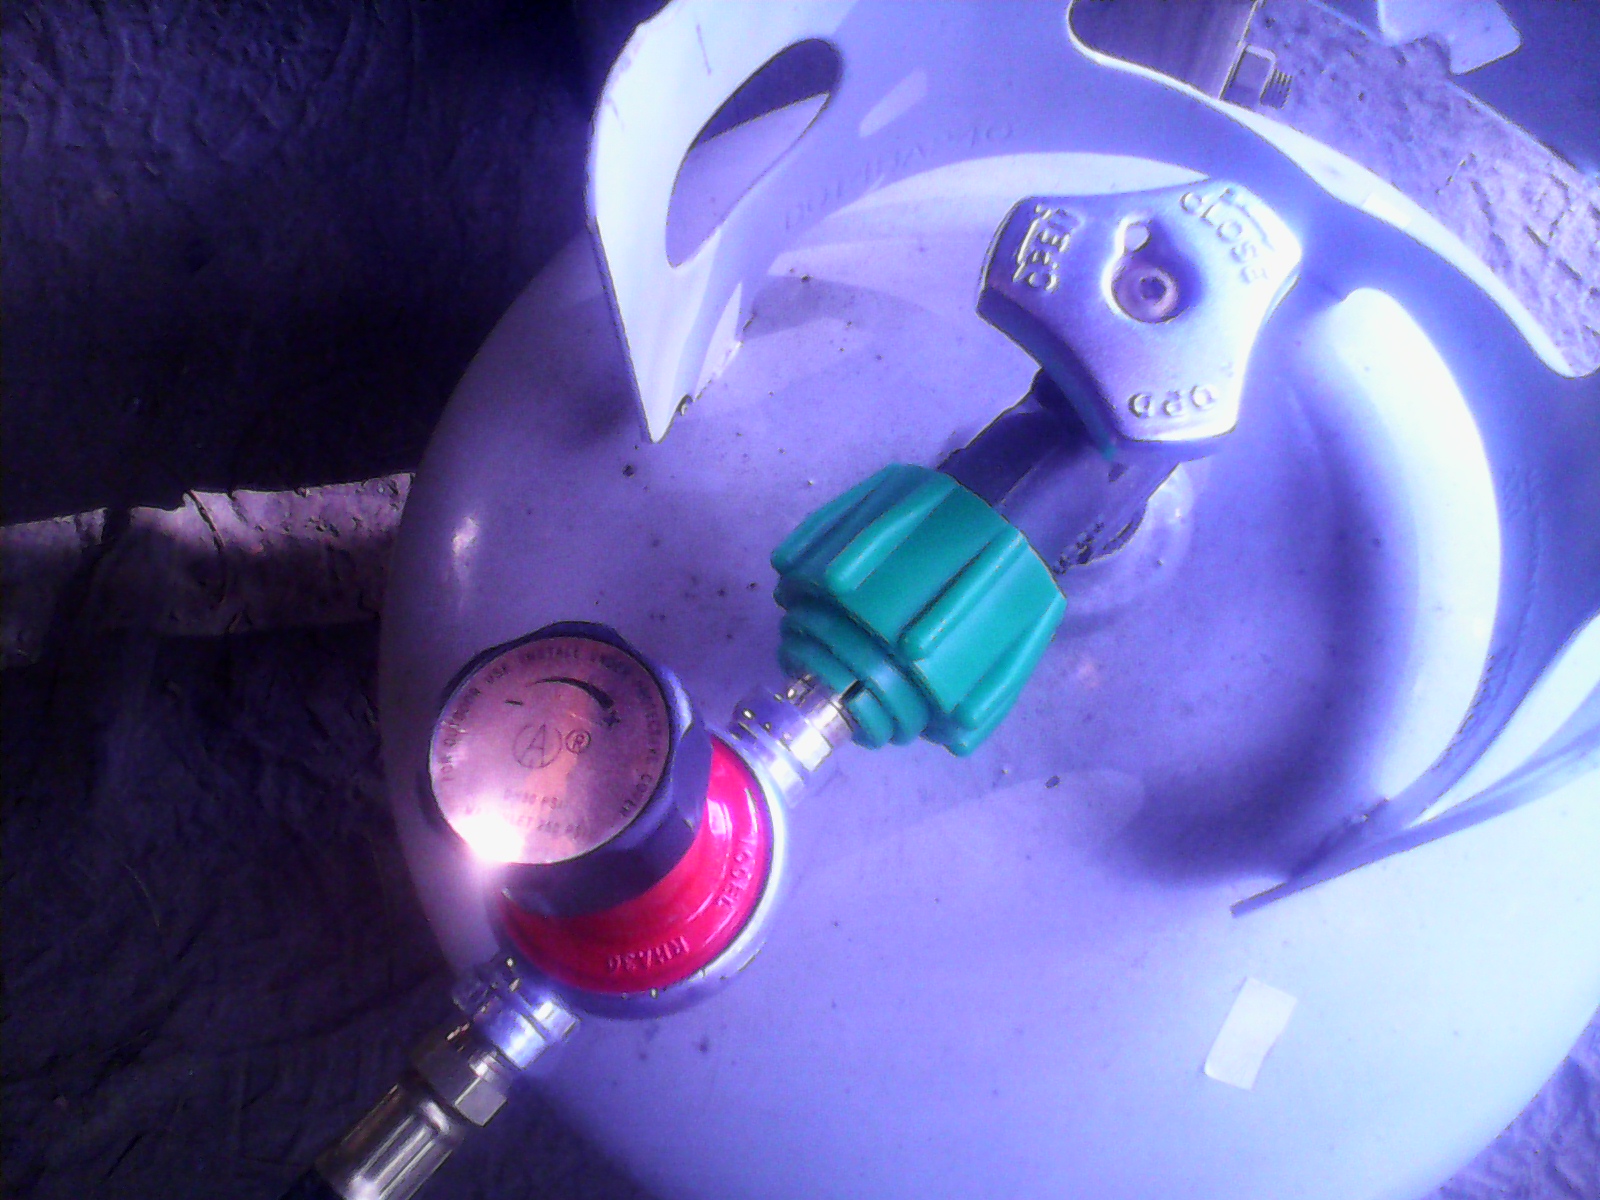
Frosty, that's the kind of advice I need. My first concern was not wanting the burner to blow itself out and continue pouring gas out, or burning back up into the tube closer to the gas supply. I don't know if I will ever be comfortable enough to turn my back on the gas flame for very long. I just don't want anything to go boom. I'm going to buy enough brick to make a few configurations of brick piles before I weld a cabinet together. This first build will be a square cornered chamber. My first plan was to make a two brick forge but I now think I may have built too much burner for that. I don't have a pressure gauge yet so I can't tell you where the pressure was in the photo. The regulator is 0-30 psi and I had it turned down as low as it would go and stay lit. I have lots to do through the weekend but next week I'll have all the supplies here to finish the build. I'll keep updating as it progresses and when I hit a wall will attempt to read before I ask for help!
-
Not as surprised as I was! Lowes, Home Depot, two local hardware stores and two auto supply and No metric taps. I didn't think of a welders supply for the taps. I'm about an hour away from a Granger warehouse with a front desk sales set up so I will get the tap. I'm going there this weekend to pick up soft fire brick rated for 3000f and I'm sure I can get a metric tap set while I'm there. Being new to this I figure doubling the size of the gas jet would be a waste of fuel. The thing I like about Frostys design is that its built around a .035 mig tip.
-
Do not connect a coal forge exhaust system to an existing wood burning vent!!! Do read about forge hoods and stacks first!
-
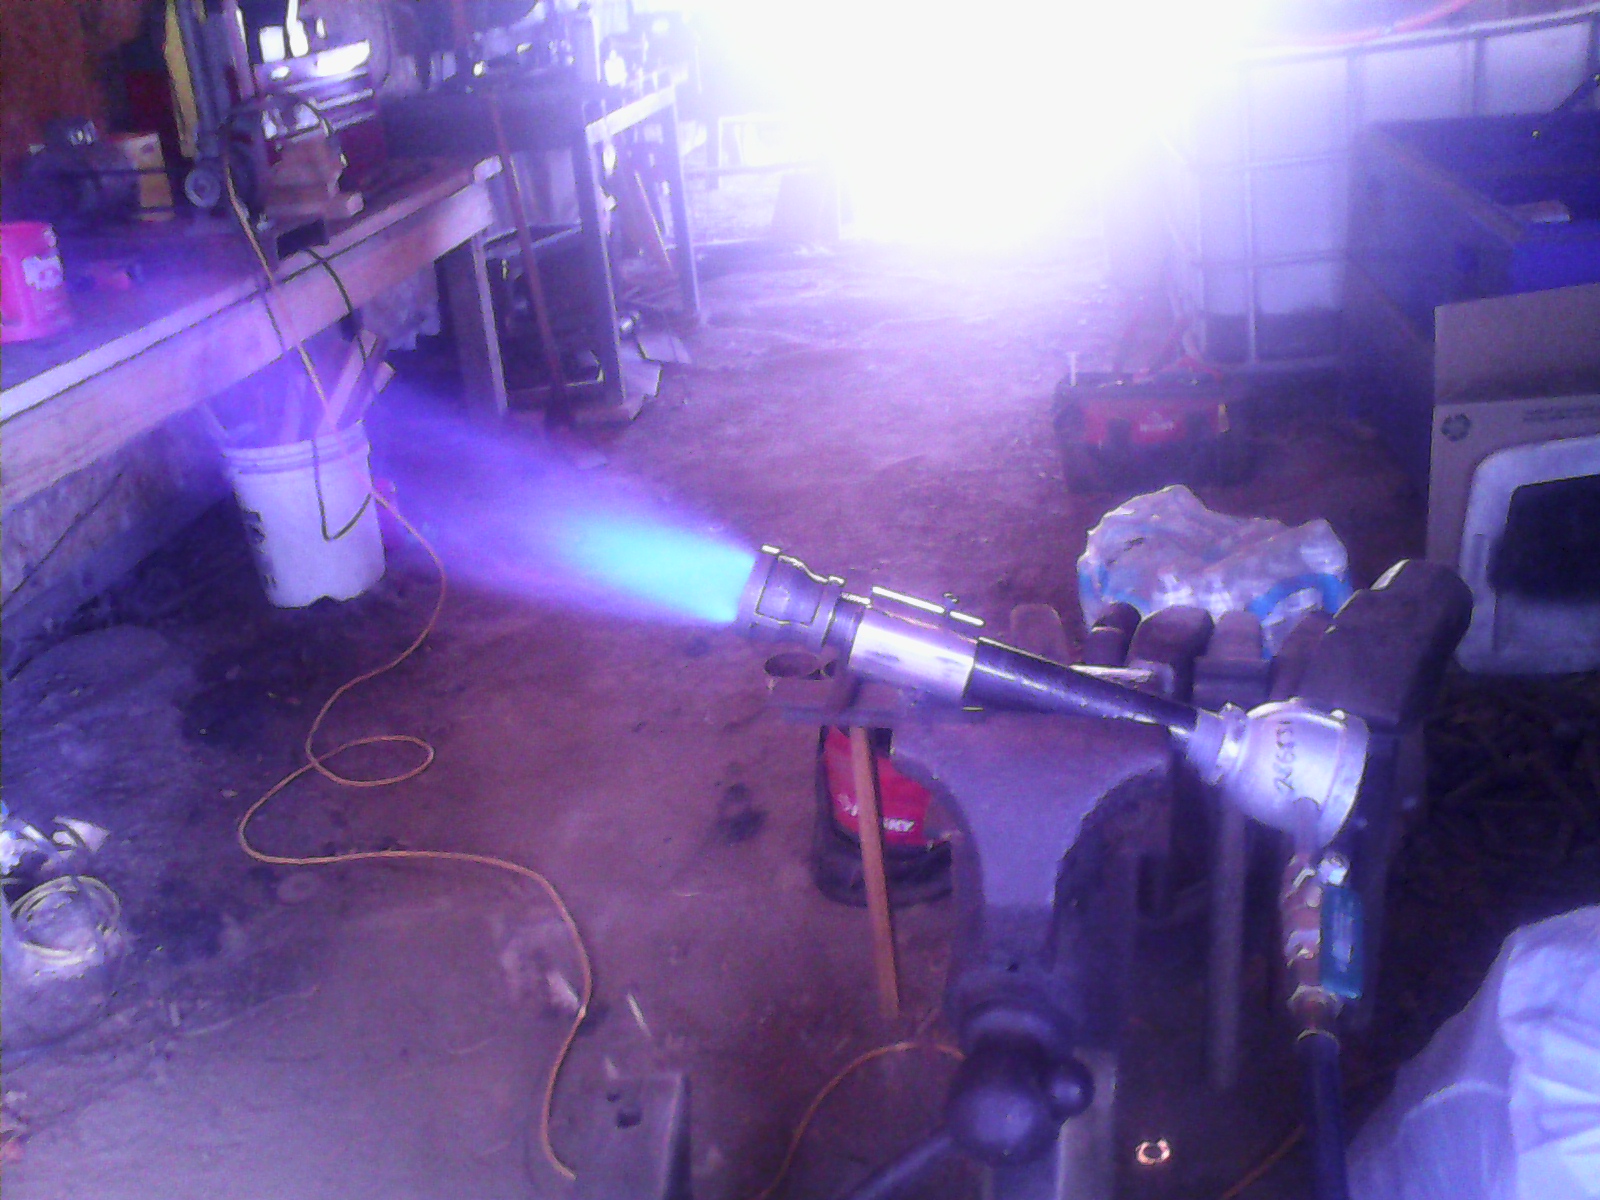
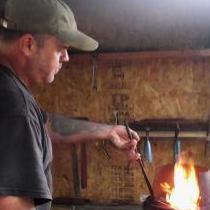
This is my First attempt at building a burner. The very small amount I know about gas forges has been learned on this site over the past few weeks. Thank you to everyone who has contributed to the gas forges section, and a special Thanks to Frosty. I downloaded the T-Burner plans. They are well done and easy to follow. Top shelf in every way and a very cool design. I have all the parts to build the Frosty T Burner but I came to a stopping point due to thread pitch. I couldn't find a Tweco? mig tip locally. I have a drawer full of .025 and .035 Lincoln tips but they are 6mmx1. No problem you say? I went to every business in the small town I live nearest to and no one had metric taps. The T-burner build is on hold until I find a mig tip with SAE threads or a set of metric taps. Since I was already in motion and rounding up parts I was determined to produce a working burner out of parts I could find. I have to stress again, this is totally new ground for me. What I built was based on other burners I've seen online and at a friends smithy. I am not trying to improve, modify, reinvent or tweak proven designs, I just want to build a working burner. My goals for this burner were-1) don't blow myself up 2) don't burn down the shop So far so good..... I have burned a little over three thousand pounds of coke and coal per year for the past several years. That seems to be the burn rate when I'm forging full time. More specifically, that's about five hours actual burn time per day, five days a week with a coke forge. Of that five hours burn time I estimate I'm away from the fire about an hour each day doing other things, file work, grinding, drilling etc. I forge first, then grind and I usually have blades to harden. I let the coke fire burn just to keep from having to rebuild the fire after I grind. Then of course when it's time to harden blades I have a dirty fire, full of clinker and ash so it needs a little work. I'm essentially wasting an hours worth of fuel to save a few minutes re-lighting the forge.(am I the only one who does this?) So on to where I am now. I love forging with solid fuel. I don't want to get away from coal and coke but I would like to shut the coke forge down when I'm done forging for the day. What I want is a gas forge that I can flip a switch and bring a few blades up to quinch temp without relighting the big forge. I won't be welding in the propane forge but I would like to be able to forge up to 3/4" stock with it. At some point I may want to take advantage of the portability of the propane forge so I will be attempting to build something suitable for light duty forging, but the primary function will be bringing blades up to the very unscientific temp of "cherry red" Specifics about this burner, 3/4"x8" barrel, 3/4"x1 1/2" bell for the air intake. The gas jet is a 1/16" drilled hole in 1/8" pipe held into the air inlet bell with set screws. I started with a 6" barrel and it would blow itself out. I had a bag full of parts so I started experimenting with different tube lengths and flares. The 8" nipple will run with a 3/4" straight connector but it seems to like the 3/4" x 1" bell the best. The regulator is 0-30 lbs and I put a ball valve shut off close to the burner. I may never attach this burner to a forge body but I was a little bummed about not finding everything for the T-Burner build today and I wanted to play with fire soooo..... I will be building the T-Burner next week and Frosty, if you're reading this, I will follow your instructions "to the T"(pun intended) Till then, here's the Frankenburner.


-
just blew up at the love of my life and best friend
TwistedCustoms replied to natenaaron's topic in Everything Else
Make it right....maybe after an appropriate cool down time. -
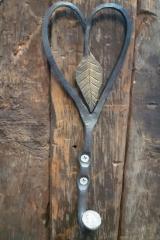 Very cool Daswulf, did you hot brush the patina on the leaf?
 -
Ha! Every time I want to go somewhere on a weekend I'm booked somewhere else. I'll be at the Trade Mart that weekend for the Gun Show but I'm going to try to make the forge council meeting on the 15th. Maybe I'll see you there. Good luck in Clinton, I'm sure it will be a blast.
-
Hi Derek, where will you be demoing? I think I have a grand total of two weekends that are not booked between now and Jan1st and those will be spent hitting flea markets and maybe a quick pop in at the MsAgMuseum. If timing and location work out I'll check out your demo.
-
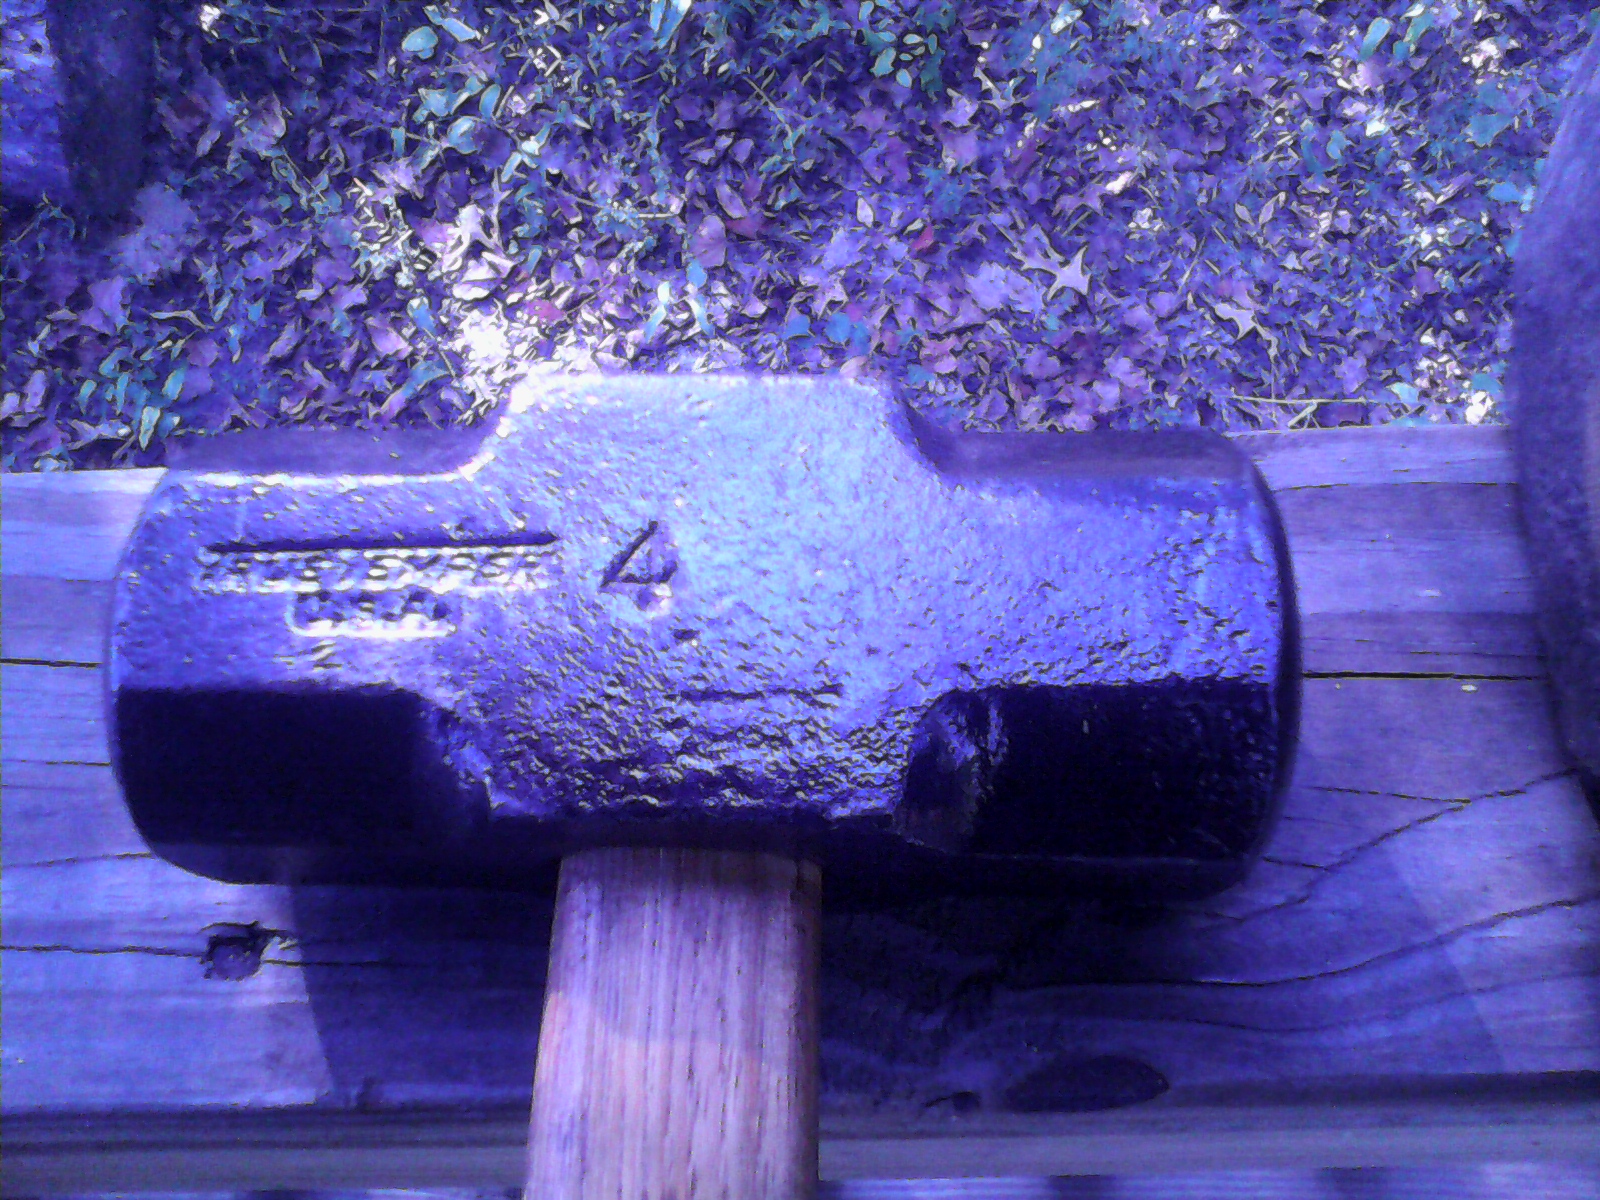
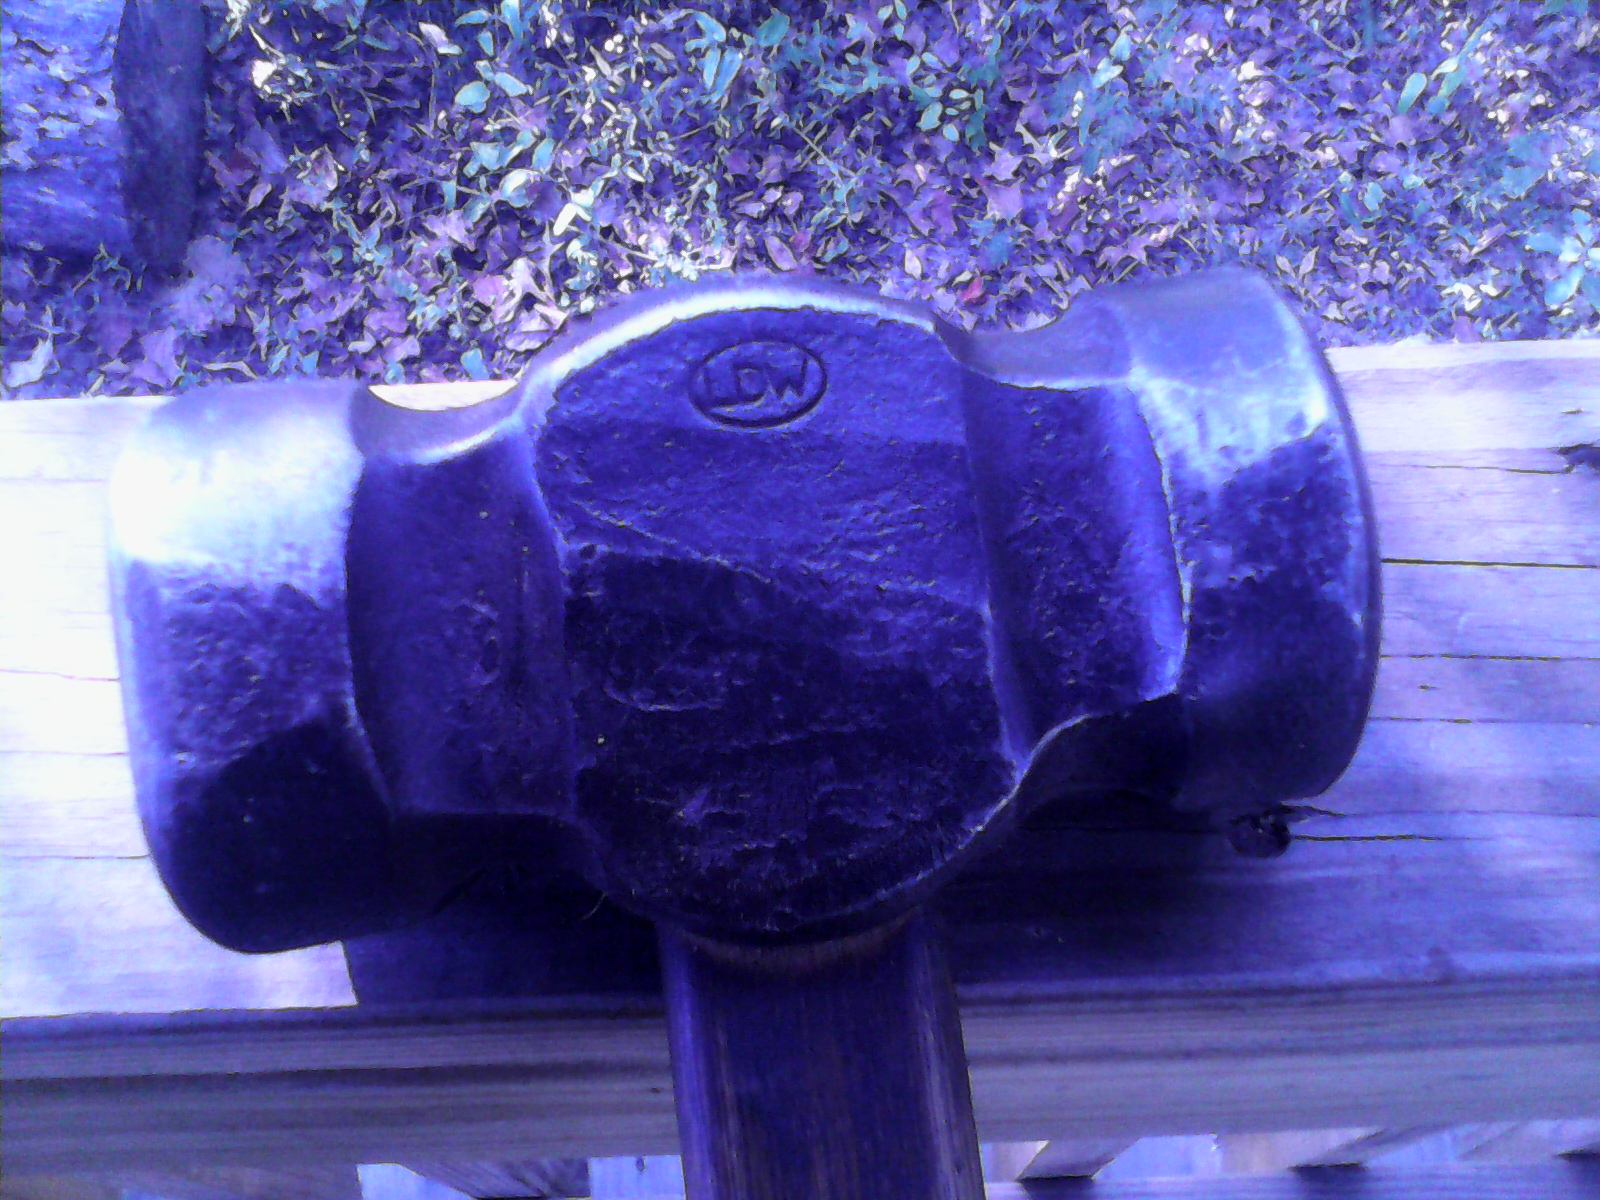
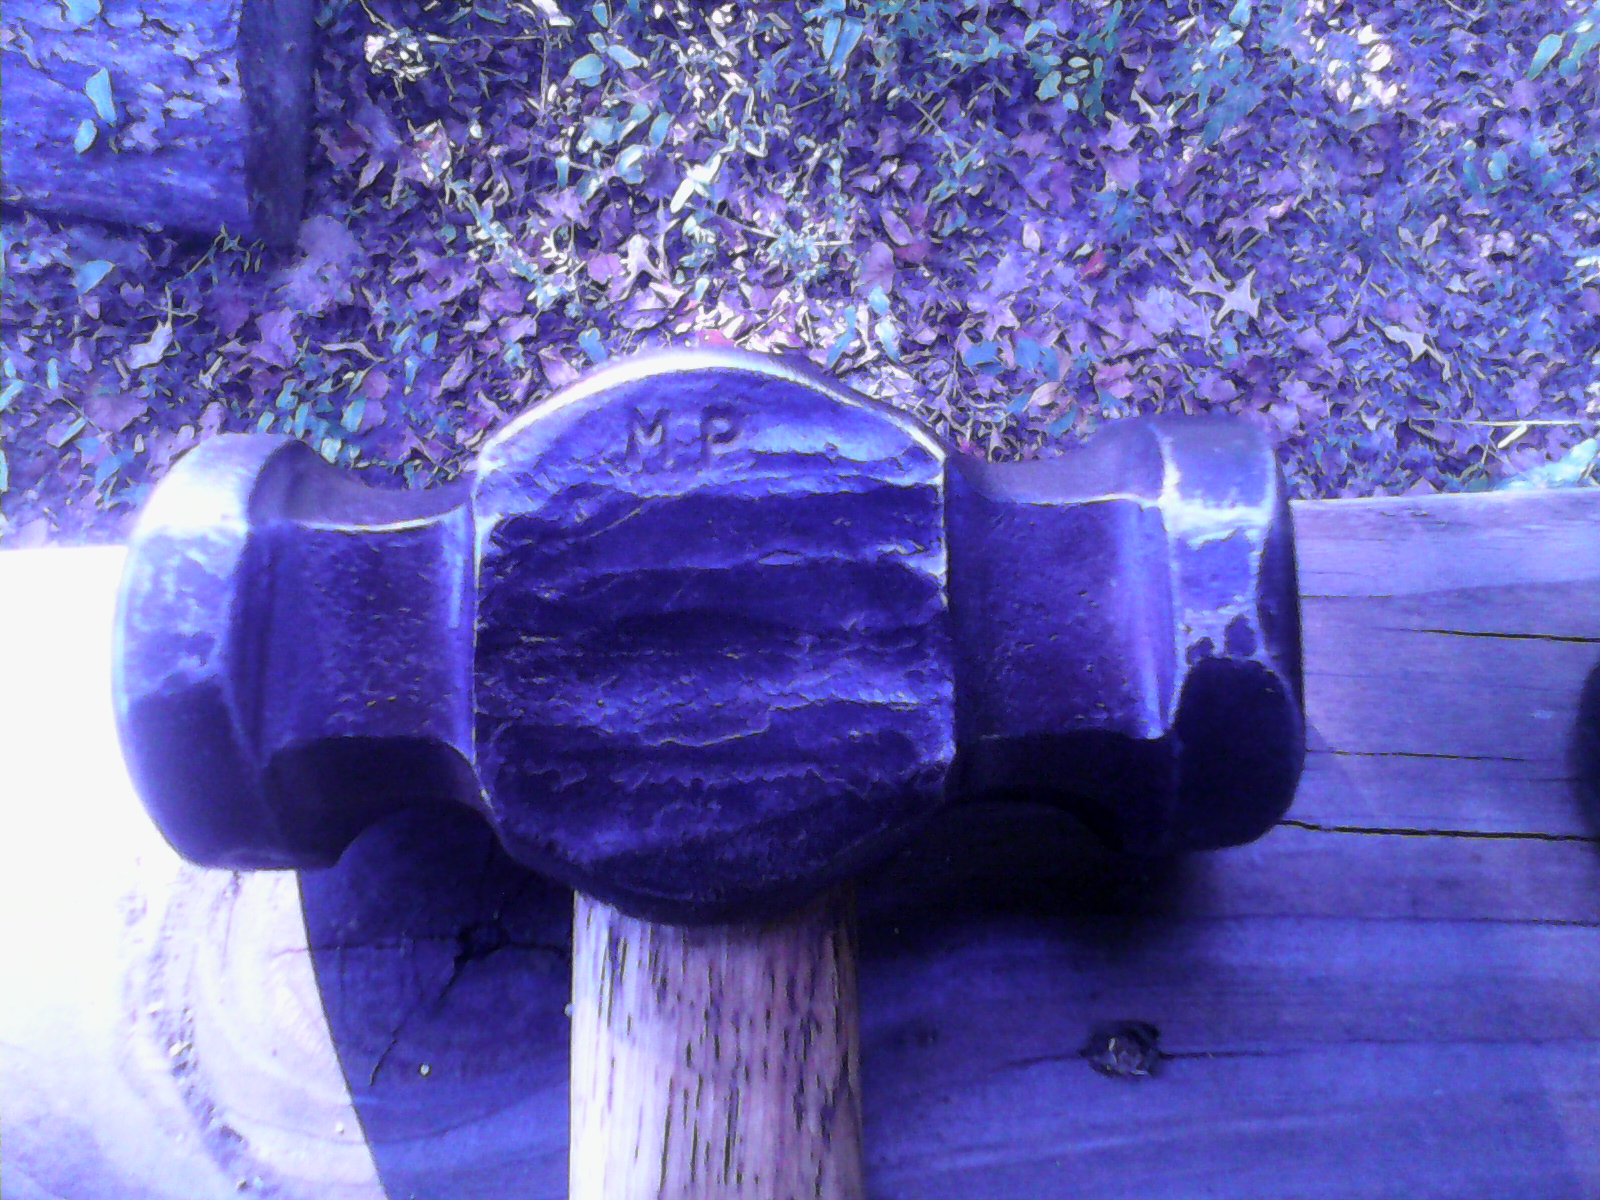
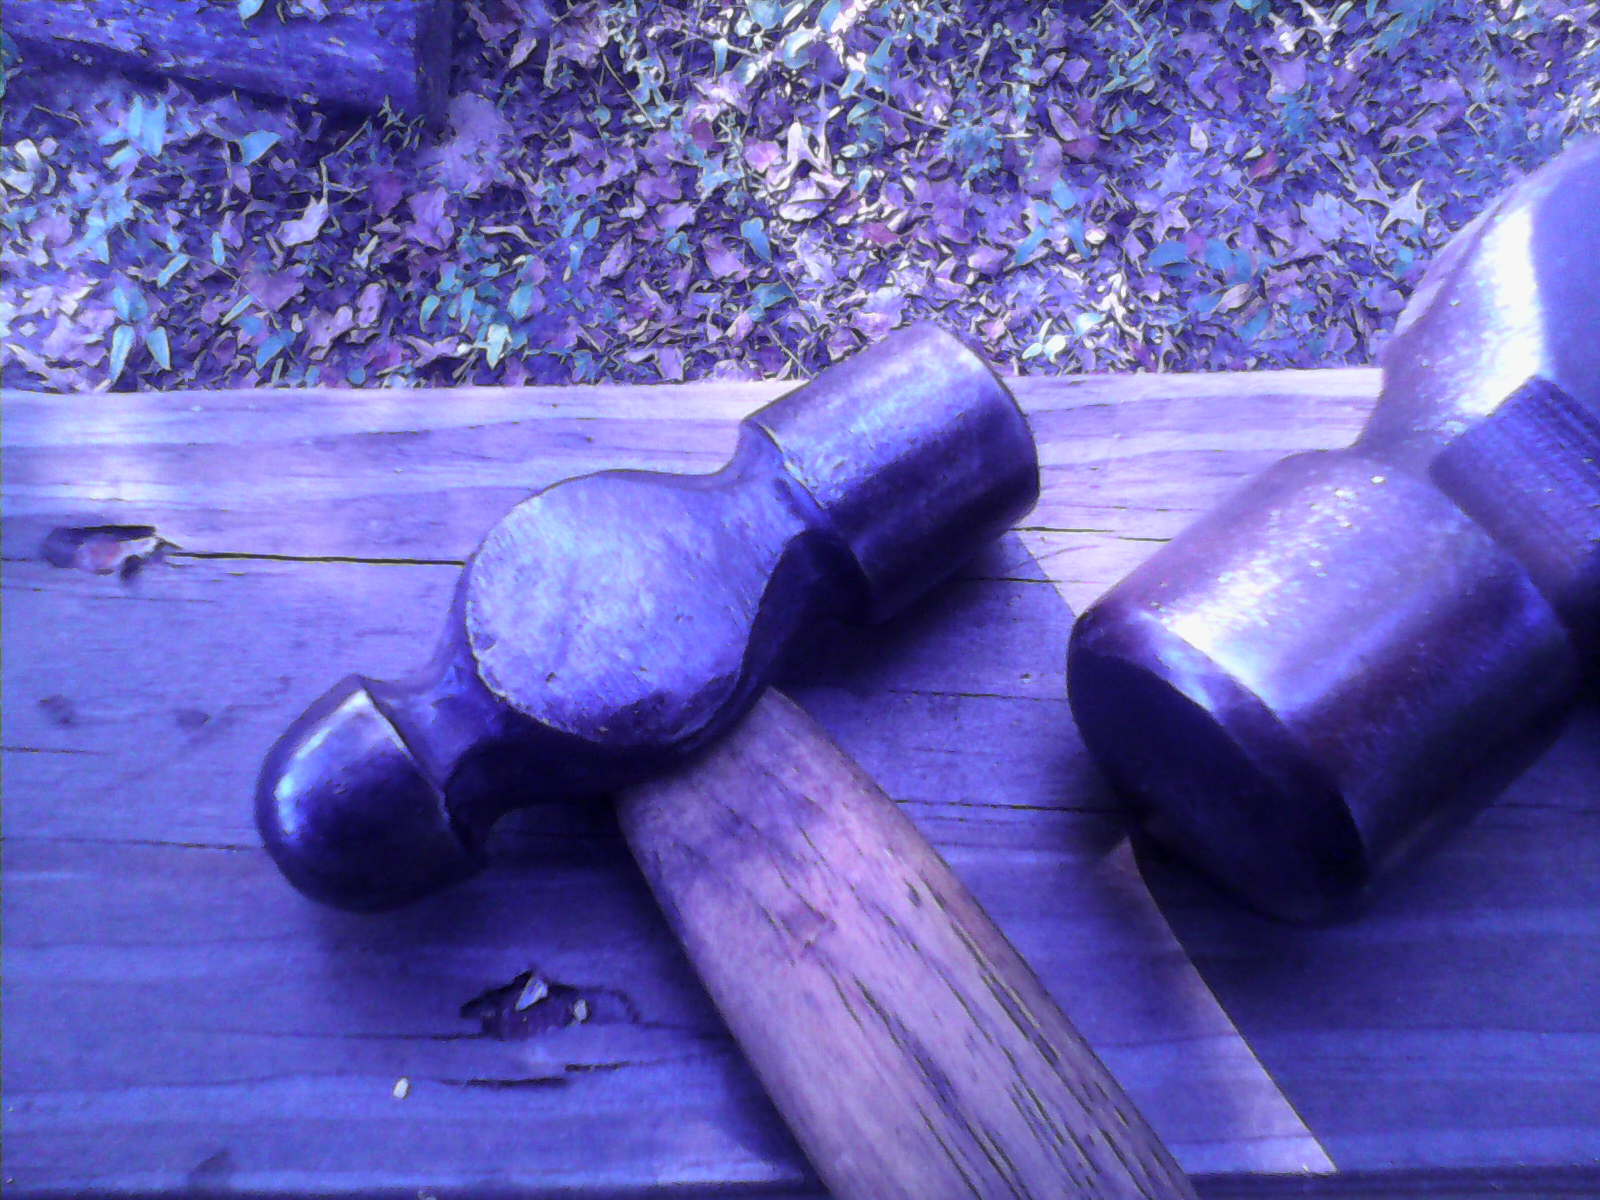
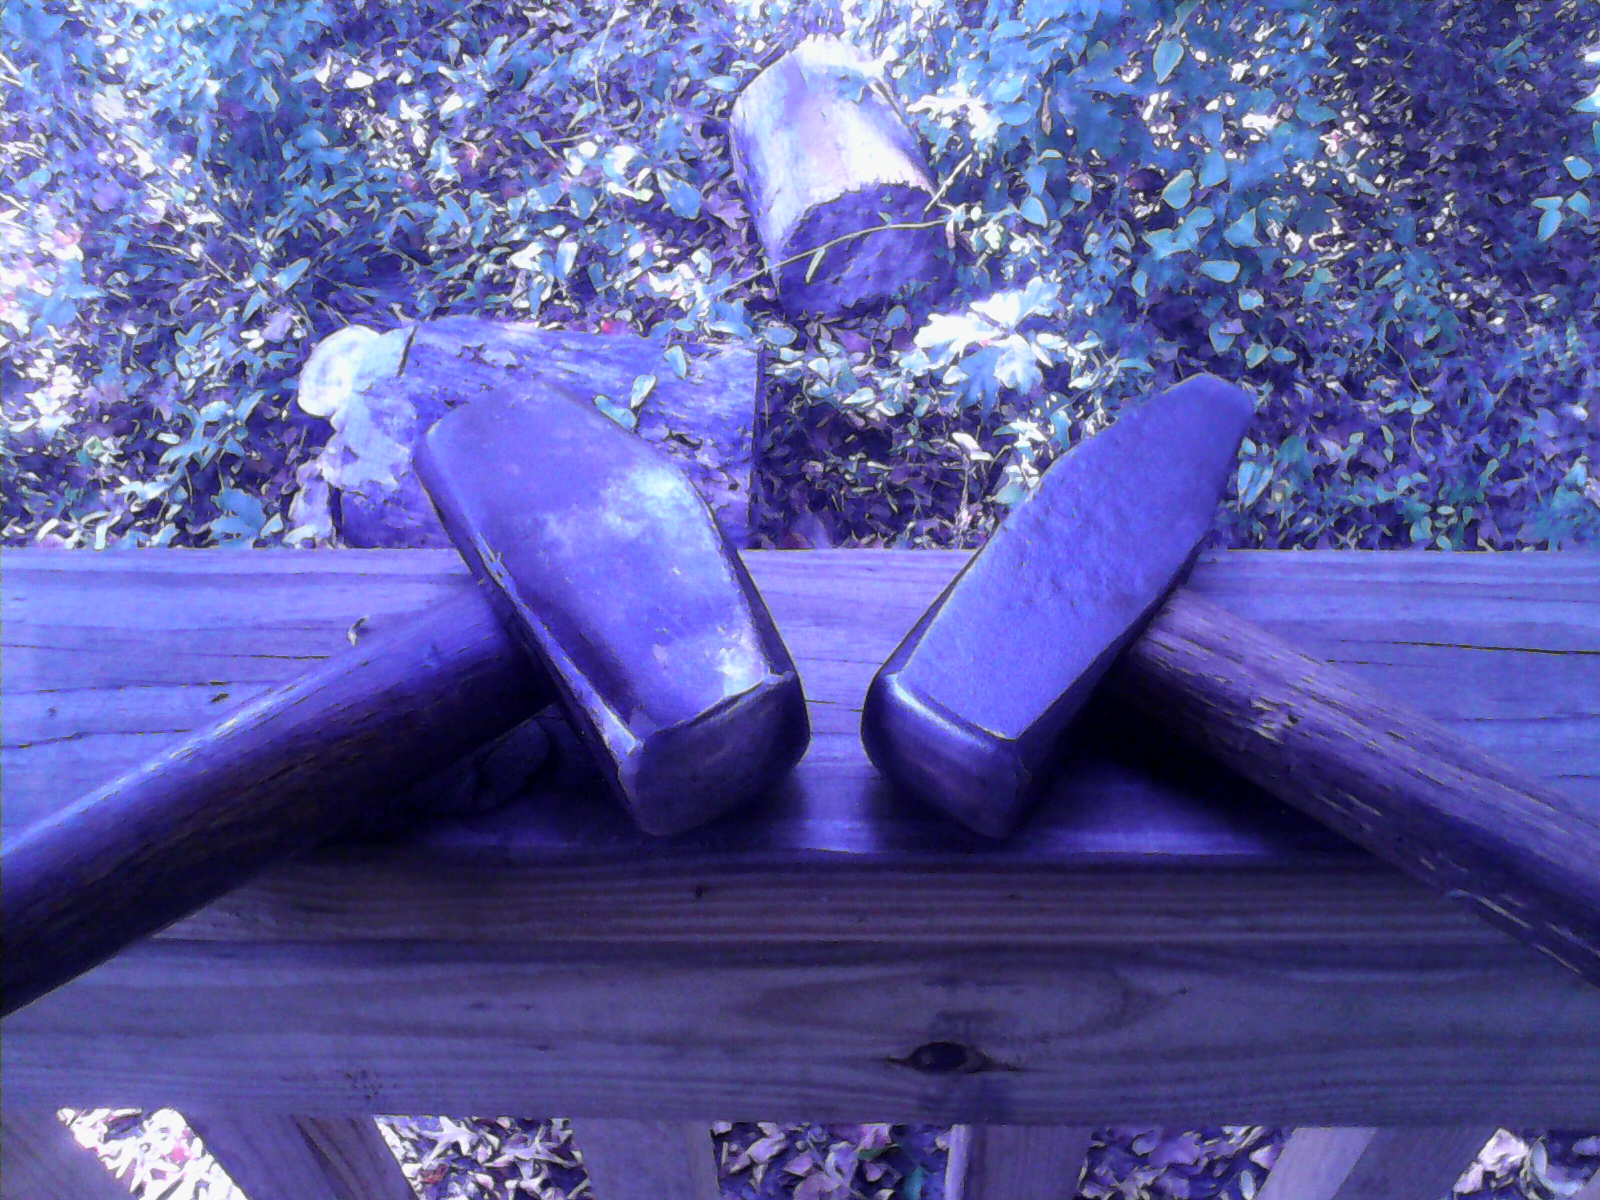
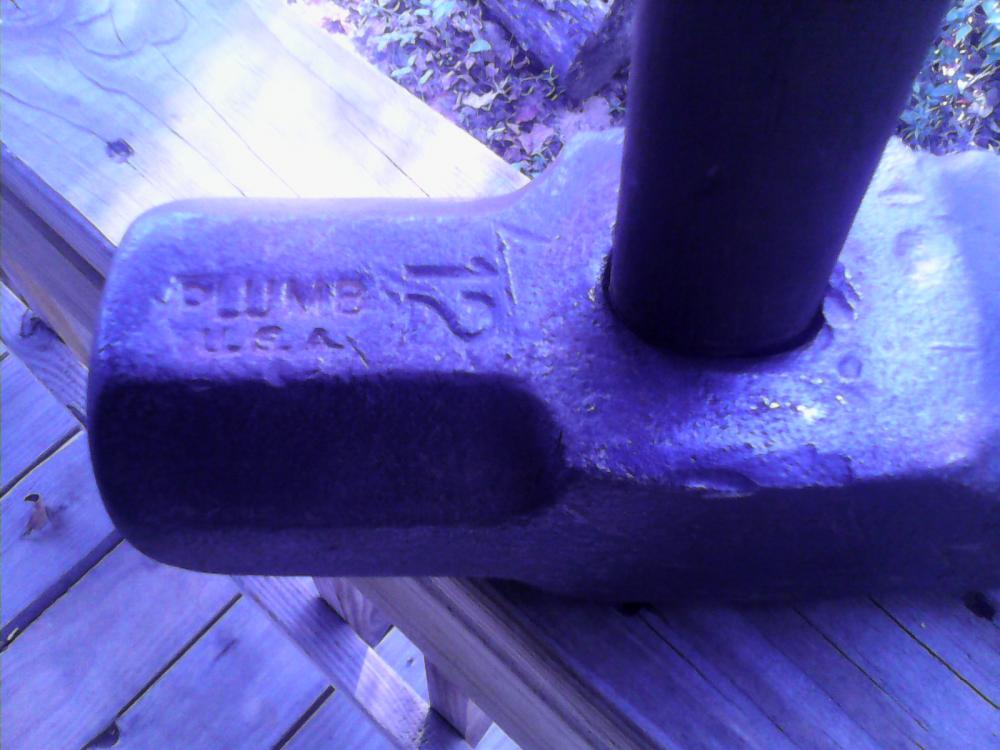
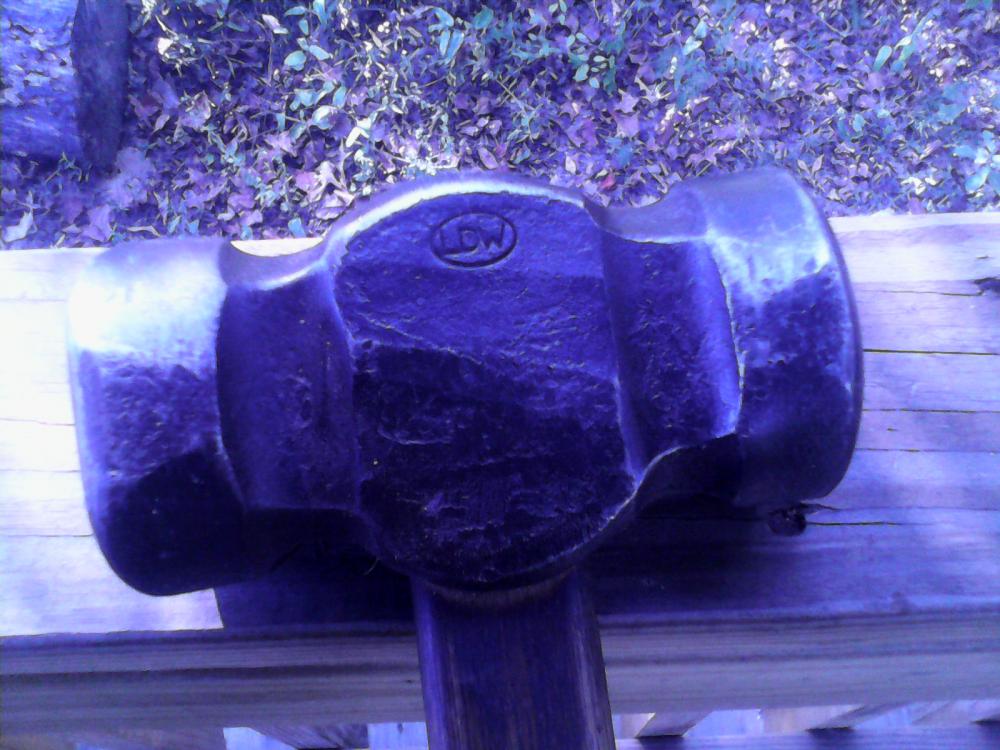
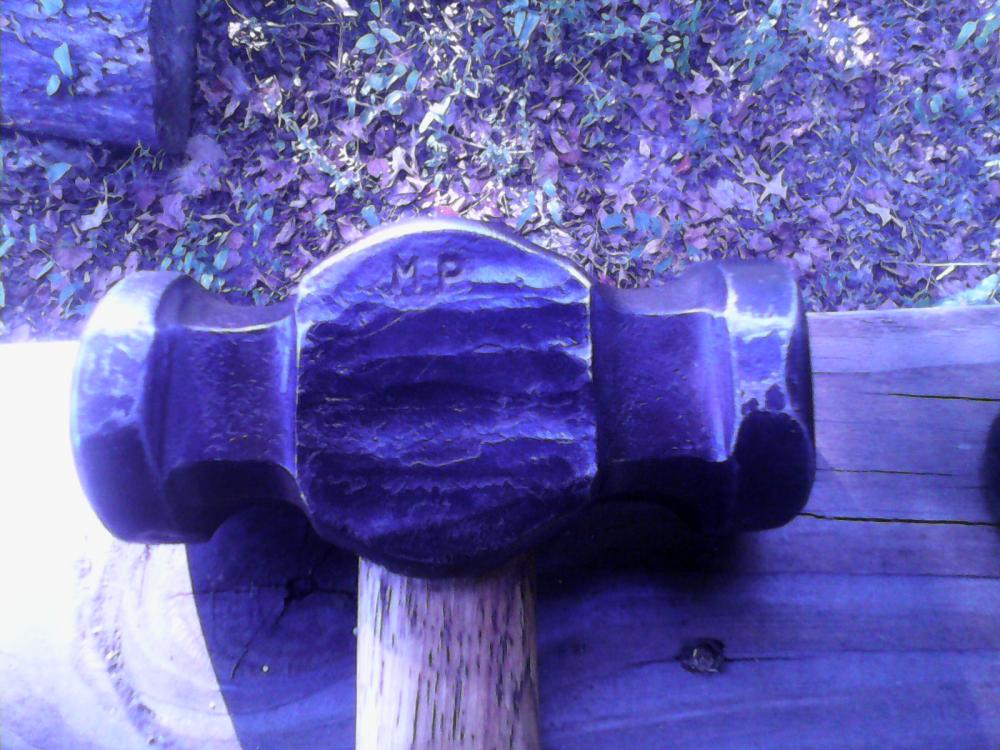
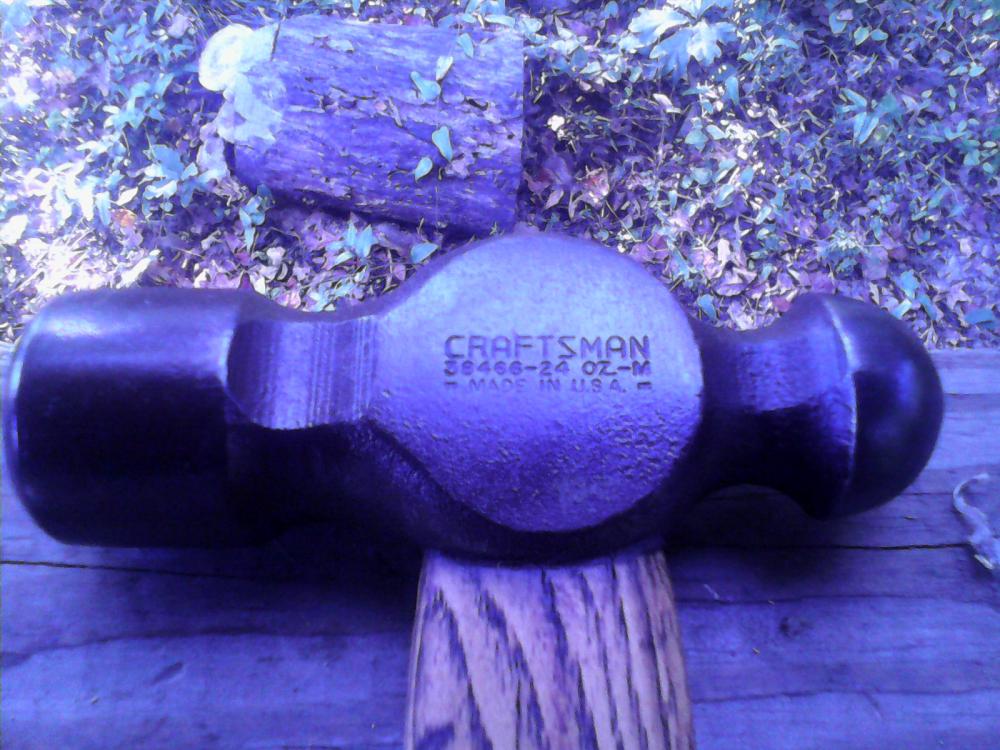
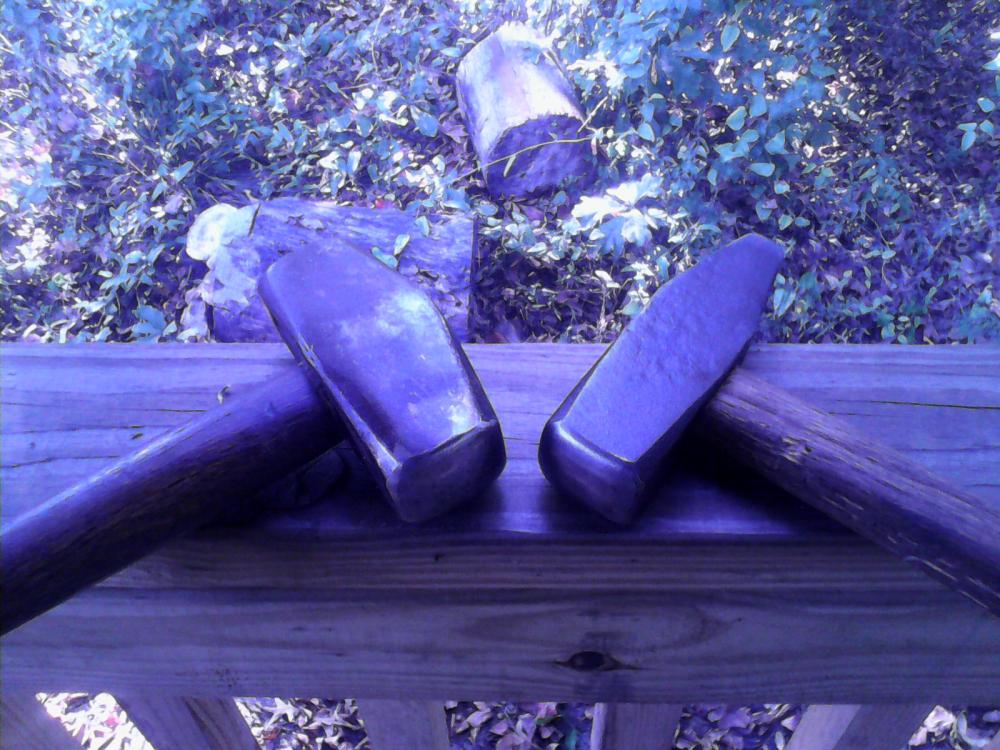
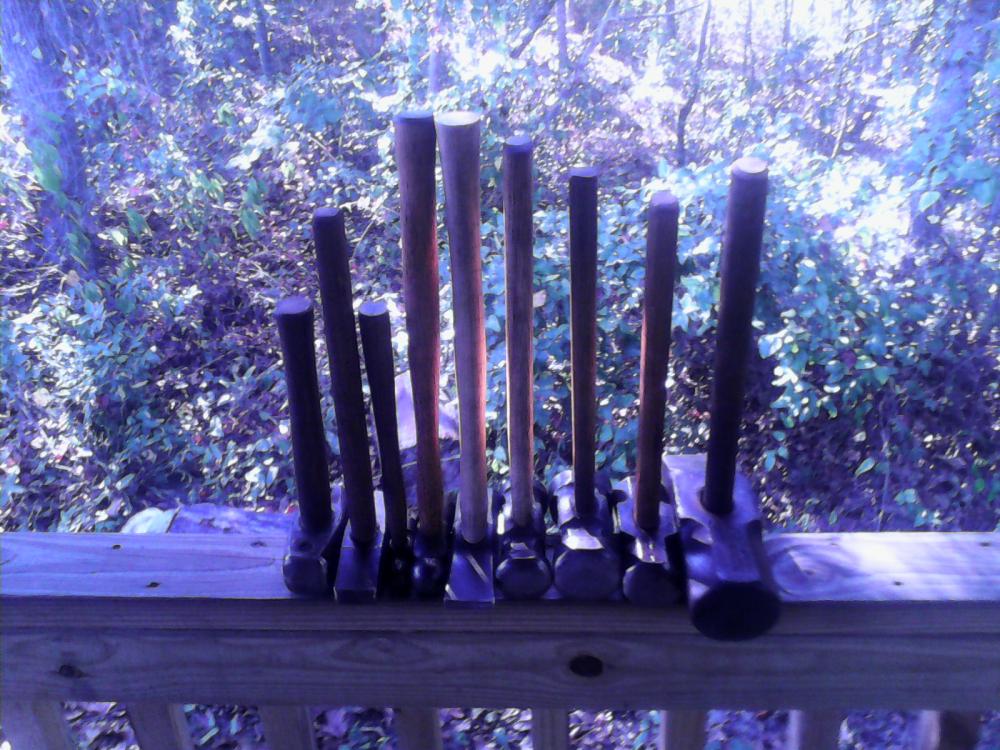
First up is a 12lb Plumb, aka "the persuader". Next is a 4lb Kelly Tru-Temper. Next is a 4lb 6oz rounding hammer struck by me and made by Lyle Wynn. This is the hammer I use the most by far. Next is a 2lb 2oz rounding hammer struck by me and made by one of Lyles students at the "Tools to make Tools with" course he teaches. Next is a 1000g Peddinghaus Swedish pattern. Very nice hammer for the money. Just a little doming on the face and easing the cross peen and it was good to go. The handle is fatter than I like but it was good straight grain hickory so I scraped the varnish off, oiled it and put it to work. I may end up slabbing the sides but with minimal mods it's a keeper.Next up, a couple of Craftsman ball-peens. One is 24oz, the other 8oz. I actually use the 8oz more than you would think. Its great for peening small digits and the tiny ball produces a nice texture on small hooks and widgets. Last is a pair of unknown origins. The drilling hammer is mostly used for tapping on spring swages and punching but I did dome one face on the off chance it's ever the only one within easy reach and I don't want to loose a heat. The cross peen has no makers mark but is stamped 1000, presumably the weight in grams. It is of better quality steel than the drilling hammer and does see a little action from time to time. That is nowhere close to all of them ( I do have a bit of a hammer addiction) but those are the most frequently used.


-
I have some trench shovels, US type dated 1942 that have that arrow symbol. A military collector friend told me those items were US made for the Lend-Lease program during WW2. I don't know if Lend-Lease went into the 1950s, I always assumed it ended with the war but the arrow stamp matches the 42 dated shovels I have.
-
Best blacksmithing advice
TwistedCustoms replied to Glenn's topic in Blacksmithing, General Discussion
The Blacksmiths Retirement Plan. 1) Every time you make a tool put one dollar in the coffee can. 2) Make a million tools. -
Great idea on the track plate Charles, I have one under the foot of my big post vise and didn't even think of it. Easy to find and keeps the whole project on theme to boot.
-
I would up the size of the plate the track is resting on. The lags are only going to keep the anvil from shifting. Your hammer blows will be directed down into that plate and the wood below it. 1/4" will distort in short order. Look around at local shops and see if someone will water jet a small piece of 1/2" AR plate or better yet find a 12" length of forklift tine to weld on the bottom. Either way get a beefy mass under it and that design will work great.
-
Anvil & Swage Identification
TwistedCustoms replied to fishingnathan's topic in Anvils, Swage Blocks, and Mandrels
You will find unlimited uses for that swage block. Right off the bat the smaller round dies are great for welding cable for cable pattern welded knives. Swage blocks and anvils are kind of like motorcycles. Once you own one it's a lot easier to keep than it is to replace. Don't let a good thing slip through your hands, you'll grow into it. And it is a nice one. As to your question about value, whatever you paid for it is what the market will bear in your area. That anvil in my location would sell for between $3.00 and $4.00 USD per pound right now. Two years ago it would have sold for $1.50 to $2.00 per pound. I see swage blocks that size going for roughly $300.00 but the price and the value are not the same. Whatever you paid, you own them now. The value will be revealed by the lifetime of work you produce with them and if you treat them well they will out live you. -
2x72 Belt Sand Paper Grits and Brands
TwistedCustoms replied to b4utoo's topic in Grinders, Sanders, etc
I agree with Buzz kill on the ceramics. They average about double the price per belt but end up being more cost effective because of performance. I've had great results with Norton Blaze belts. -
The 4.5 cutoff wheels I use are mesh reenforced silica carbide. I haven't had one break appart but I don't get them in a bind. I use a 14" chop saw for bigger stock but I prefer the thin wheels in the angle grinder for small diameter stuff. I have used 7" wheels in a circular saw as well, usually because it seems like a better choice than purchasing a bigger grinder for a small project like re-roofing the shop etc. The skill saw with the thin wheels does a good job on high rib steel roofing.
-
I don't do enough fab work to need a big grinder but I have three Makita 4.5" Big box price is $70.00 to 80.00 USD. They are under sized and under powered for some of the cutting I've done with them but they work great. The oldest one is now ten years old and the other two were purchased three years ago. I can't tell which is which now so the older on is still going strong. I keep a thin cutoff wheel on one, a flap disc on another and grinding wheel on the third. They are handy to have around for sure.
-
Help identifying new anvil
TwistedCustoms replied to Fuzz557's topic in Anvils, Swage Blocks, and Mandrels
In the first photo it looks like the stamp says "Vulcan -----(maybe Norris for the second word?) And Sheffield underneath. I have seen Fisher Norris, I have seen an anvil marked Vulcan with the Arm and Hammer logo, but never with the word Sheffield. The Sheffield makes me assume it's English. Forged wrought, not cast... Thanks matto! I have two Mouseholes and always thought they were cast bases. That's why I love this site! Looking at the stamp in the first and second photo I think it is Vulcan "Works" When I first zoomed in on it I wrongly thought it might say Vulcan "Norris" Blame it on old eyes! -
Help identifying new anvil
TwistedCustoms replied to Fuzz557's topic in Anvils, Swage Blocks, and Mandrels
The one with the Arm and Hammer raised logo is American. I don't know how they were made. The English anvils are cast iron with a steel top forge welded on. In the first photo with the cordless drill I can see the demarcation line between the iron body and steel top. Some of the English anvils were made of two castings for the base forge welded at the waist but that one doesn't show a weld line around the waist section so it looks to be a one piece base with forge welded top. Did I mention the top looks great? No saddle or other serious wear. I can see one lifting hole in the front under the horn. I'm guessing there is another in the back under the heel and possibly a third on the bottom. It looks to be a classic London pattern, 19th century but I'm not familiar with the brand. How's the rebound? PS What is that widget in the pritchel hole? I've never seen tooling used in the pritchel