Malice9610
-
Posts
167 -
Joined
-
Last visited
Content Type
Profiles
Forums
Articles
Gallery
Downloads
Events
Everything posted by Malice9610
-
I have purchased steel from both NJSB and Admiral steel, The service from both providers was excellent. In the case of the 1084 I ordered from NJSB, the stuff was fully annealed, and was a dream to work with, pretty much turned me off of working with anything " recycled " for stock removal processes. I have not taken the 5160 I ordered from Admiral steel for a test drive yet, but will be doing some work with it this weekend , I ordered 20 feet of it, they shipped me three 7 foot long sections via UPS, So they sent me a foot for free. I would recommend both vendors, I always check NJSB first, but if they dont have in stock what I am looking for, I check Admiral.
-
In Utah the law ( Guns ) is Concealed is legal with a permit, Open carry is legal for anyone who can legally own a gun. Knives are the same as open carry, as long as you could legally walk in and buy a gun, you are free to carry pretty much whatever knife you want. Switchblades, Balisongs, spring assisted, etc. All are legal here in Utah, its actually not uncommon to see people with 4-6 inch fixed blades in a belt sheath walking around walmart. Personal experience, I was 17 years old, High school student and avid martial artist. School cop comes walking up to me and some friends as we are standing next to my car in the parking lot at lunch and asks us what we are doing. I tell the officer that I am showing my friends my new toys, and then pull out 2 butterfly knives and a pair of nunchucks and a pair of sais's from the back seat of my car. School cop asks me if I know how to use them, so I show him a couple quick wrist rolls with the nunchucks and then flip one of the butterflies around for minute, the bell rings, I put the knife in my pocket, the rest back in my car, and we all walked into the building as the officer is asking me if I have ever used metal nunchucks and how much damage they do. I still to this day EDC a balisong everywhere but the office, as we have a very strict no weapons policy at work and I like being able to pay my bills, everywhere else I go though, I have it in my pocket. Never had a cop give me crap over carrying it, most of them want to know where I got it and if I can do any cool tricks with it.
-
Bulk 1085 steel 20' where to buy
Malice9610 replied to wildvortex's topic in Blacksmithing, General Discussion
UPS will deliver 7 foot packages, at least they delivered one to my house yesterday that was 7.5 feet long. I ordered 20 feet of 5160 from Admiral Steel last week, delivered in three 7 foot lengths. So I got a foot of 5160 for FREE!!!!! Ohhhh and I just submitted the order online from their blade steel section of their site, I didnt need to call them to make any special arrangements, the site tells you they will cut the pieces to fit the shipping needs. I dont see any cut charges on my invoice, so I am guessing free. They do have 1075/1080 From the Admiral Steel guide on their site. 1084 - C 0.80-0.94, Mn 0.60-0.90, max P 0.40, max S 0.501080 - C 0.74-0.88, Mn 0.60-0.90, max P 0.40, max S 0.50 So you are looking at a small variance in carbon, but otherwise they should be similar if not identical with regards to heat treating and potential pattern welding capabilities. They dont have 20 foot lengths listed, longest I see is 60 inches. -
Question about HT with a pipe
Malice9610 replied to HEAP of JEEP's topic in Heat Treating Knives, Blades etc
instead of welding a piece of scrap in, just toss one end in, heat to red, and then hammer shut. Also, I have used this method in my coal forge, and it makes trying to watch for descalecense MUCH easier as the flames are not right against your piece in the fire. I used a cheap piece of 2 inch diameter round pipe for mine, works great. just keep in mind you can easily burn a hole in the pipe and not notice it till you finish your work with the pipe. -
woah, that thing is very VERY corroded, still that is pretty cool, could be a letter opener, could be a butter knife.
-
Knife Making Log, Advanced Class 201: Damascus patterns
Malice9610 replied to Glenn's topic in Knife Making Class 200
I like the color transition in the pattern. it will make a great looking knife. -
well, then it sounds like instead of moving my work into the Garage this year, I should rather build some sort of cover for my forge for this year, and figure out a way to add a handle to my propane forge so it can be moved easily from outside to inside.
-
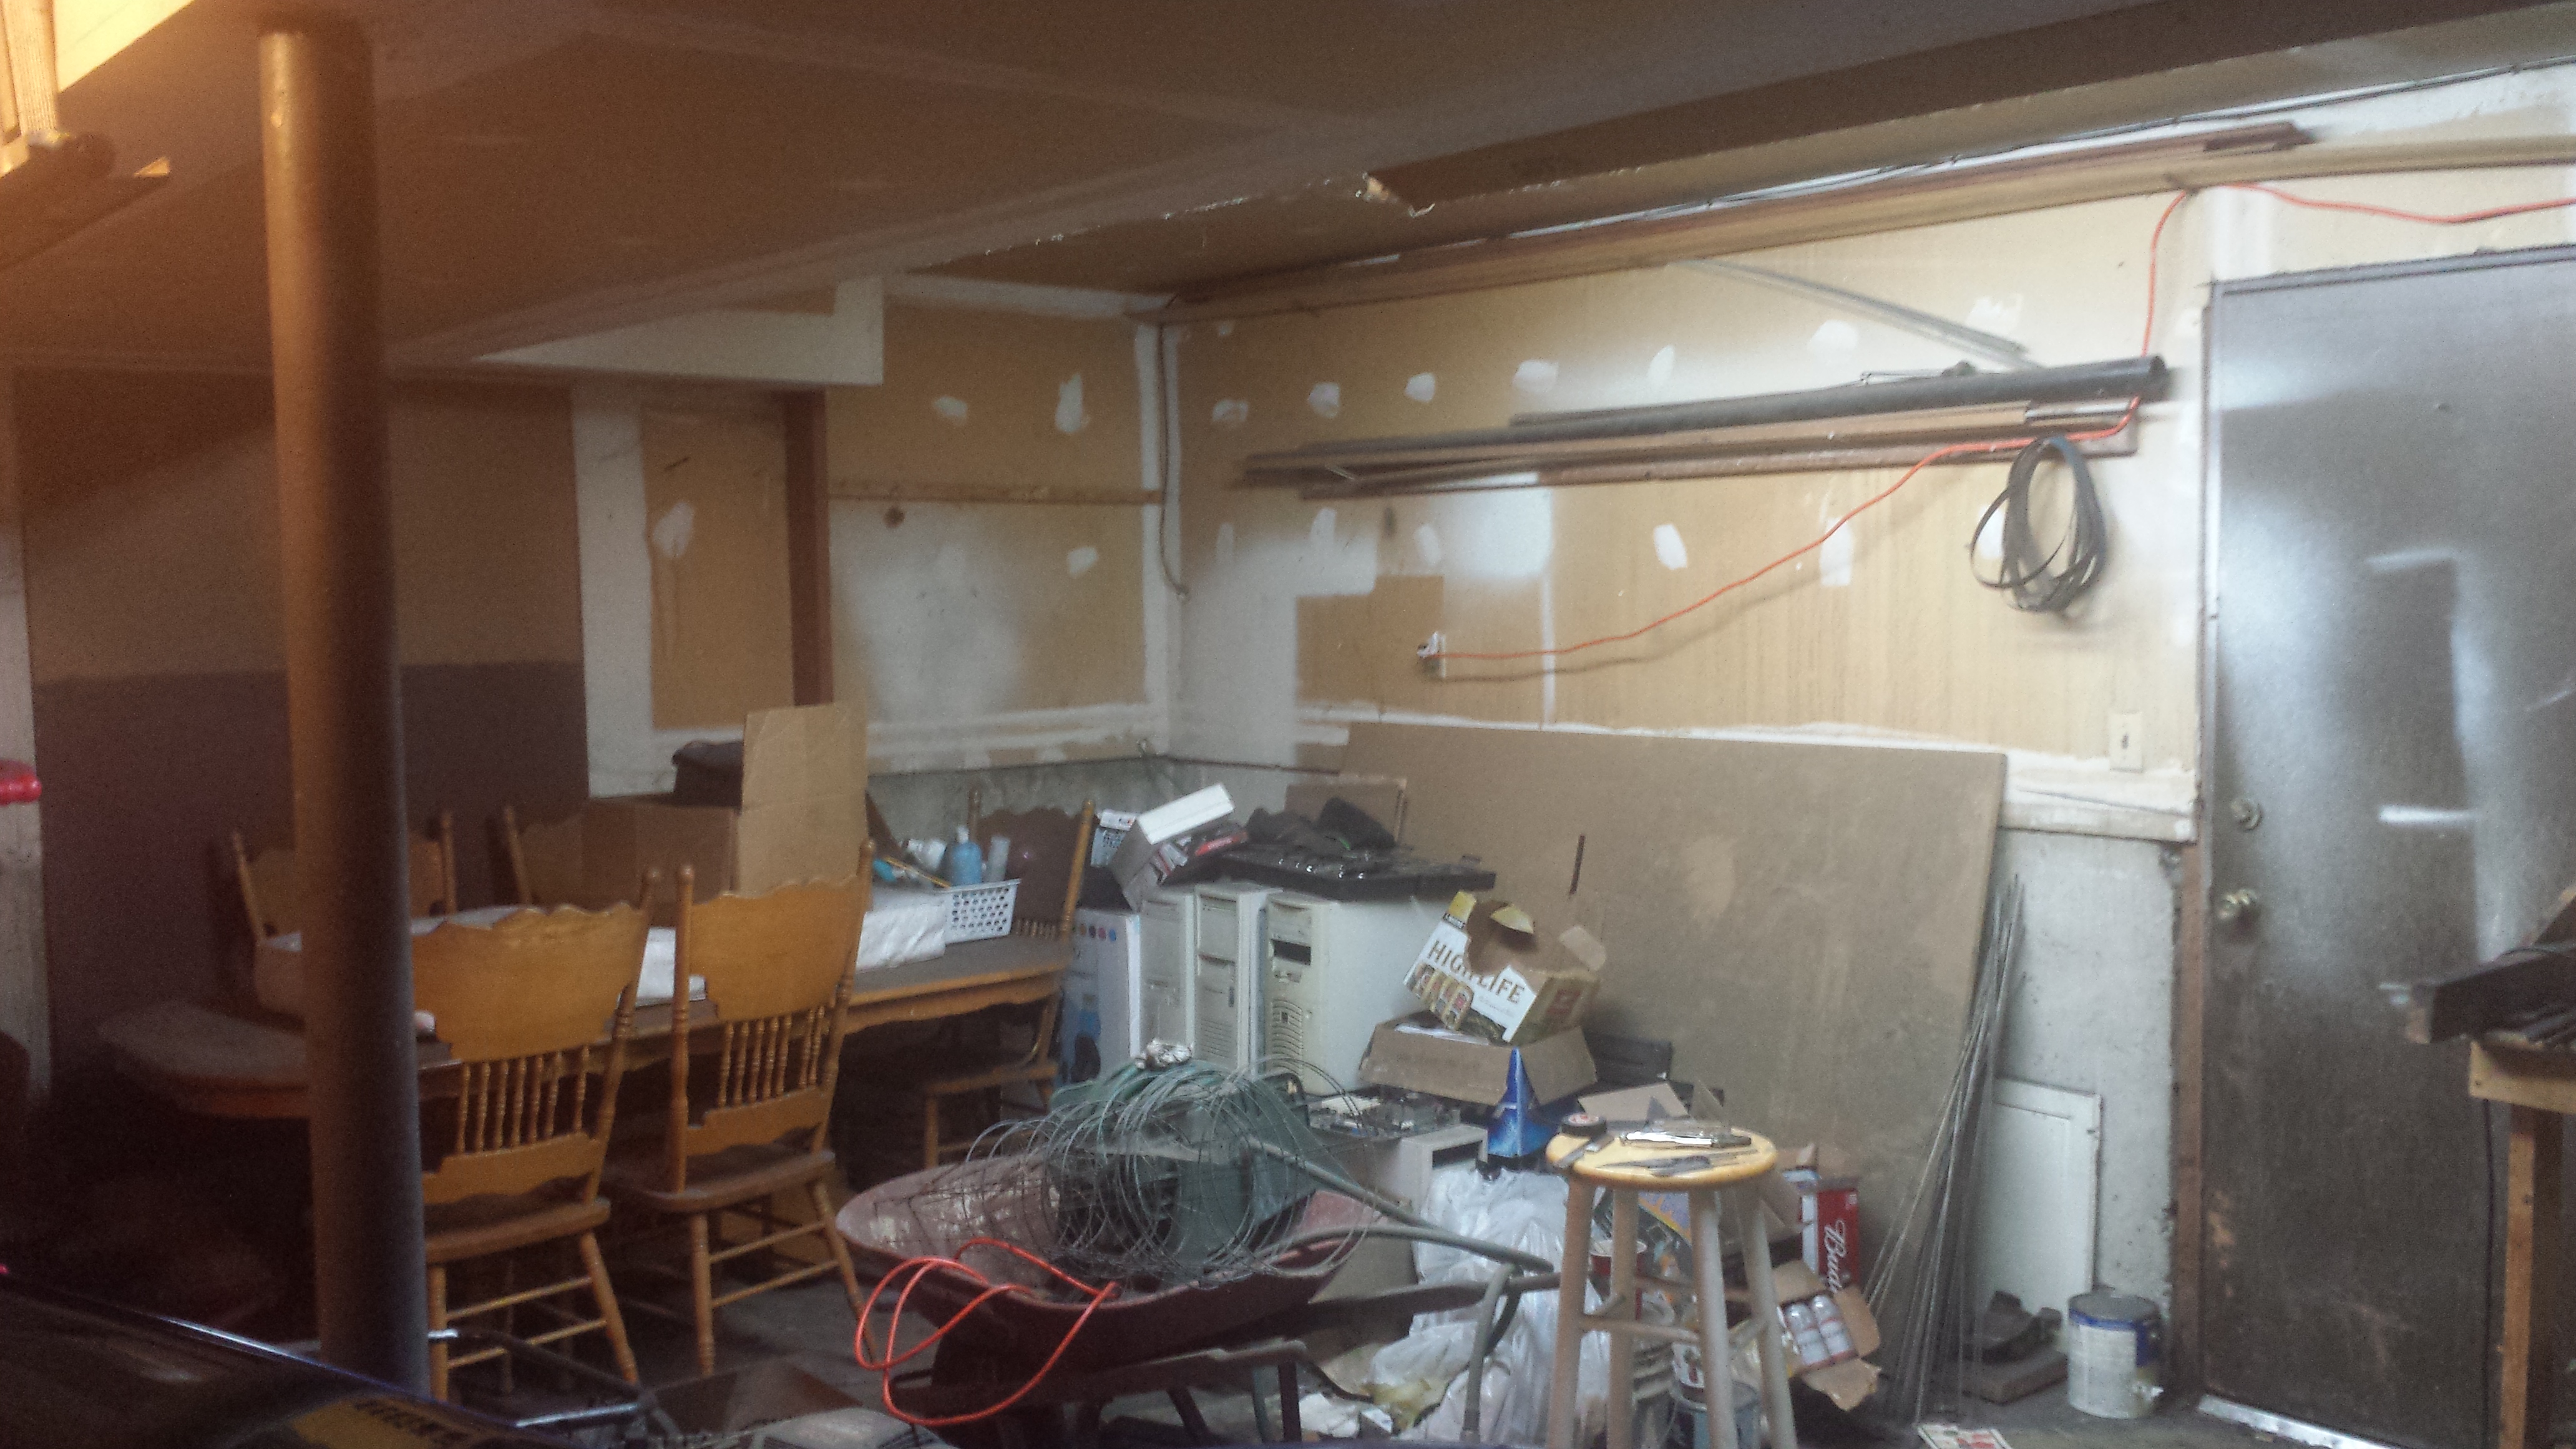
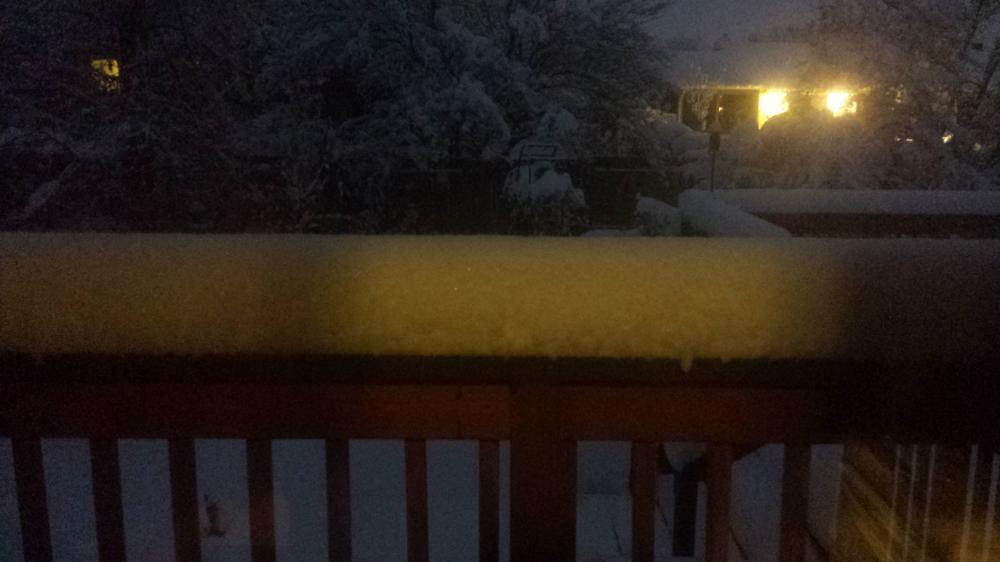
Ok, first off, I have done a bit of research on this already, but considering the difference between knowing what I am doing potentially means serious injury or death, I would like to run the idea across some much more experienced folks before moving forward. As you can see, as of yesterday/this morning the chances of being able to do much outside work wise, is pretty much Nil, That is a shot of my back deck at 6:30am mountain time round about, we got about 2 inches of snow last night, and the rest of it, was what I woke up to yesterday morning at around 5 am. Considering I would like to continue working throughout the winter doing the hot bangy stuff my only real option is to move it into my garage, I have been working on building a propane forge for about 2 months now as finances allow, and am at point now where I can reasonably finish it with a couple more parts ( namely Kaowool and Plistix and some bonding agent for the firebrick ) I have a two car " attached " garage for my house as you can see here. This specific area of the garage, once cleaned of course, is where I intend to place my forge and all hot work equipment. Behind the multicolored board on the far left side of the picture is a standard basement window that is probably 2-2.5 feet tall by about 3 feet wide. There is on the far right, a door that opens into my back yard, and then a standard 2 car garage door at the other end of the garage. Now my thought, is to open up that window, place the forge close to it, set up a sort of hood over the forge to the window, then put a fan in the window to act as an exhaust while keeping the back door open along with the garage door at least part way open to create a cross breeze. I will of course be placing CO detectors both around the forge, and adding more around my house, but as I have two small children ( and a spiteful ex I am again locked into a custody dispute with ) I need to be able to ensure this does not adversely affect their health. Are my thoughts sound on this? Does anyone have any thoughts based on what they can see here to make it better?

-
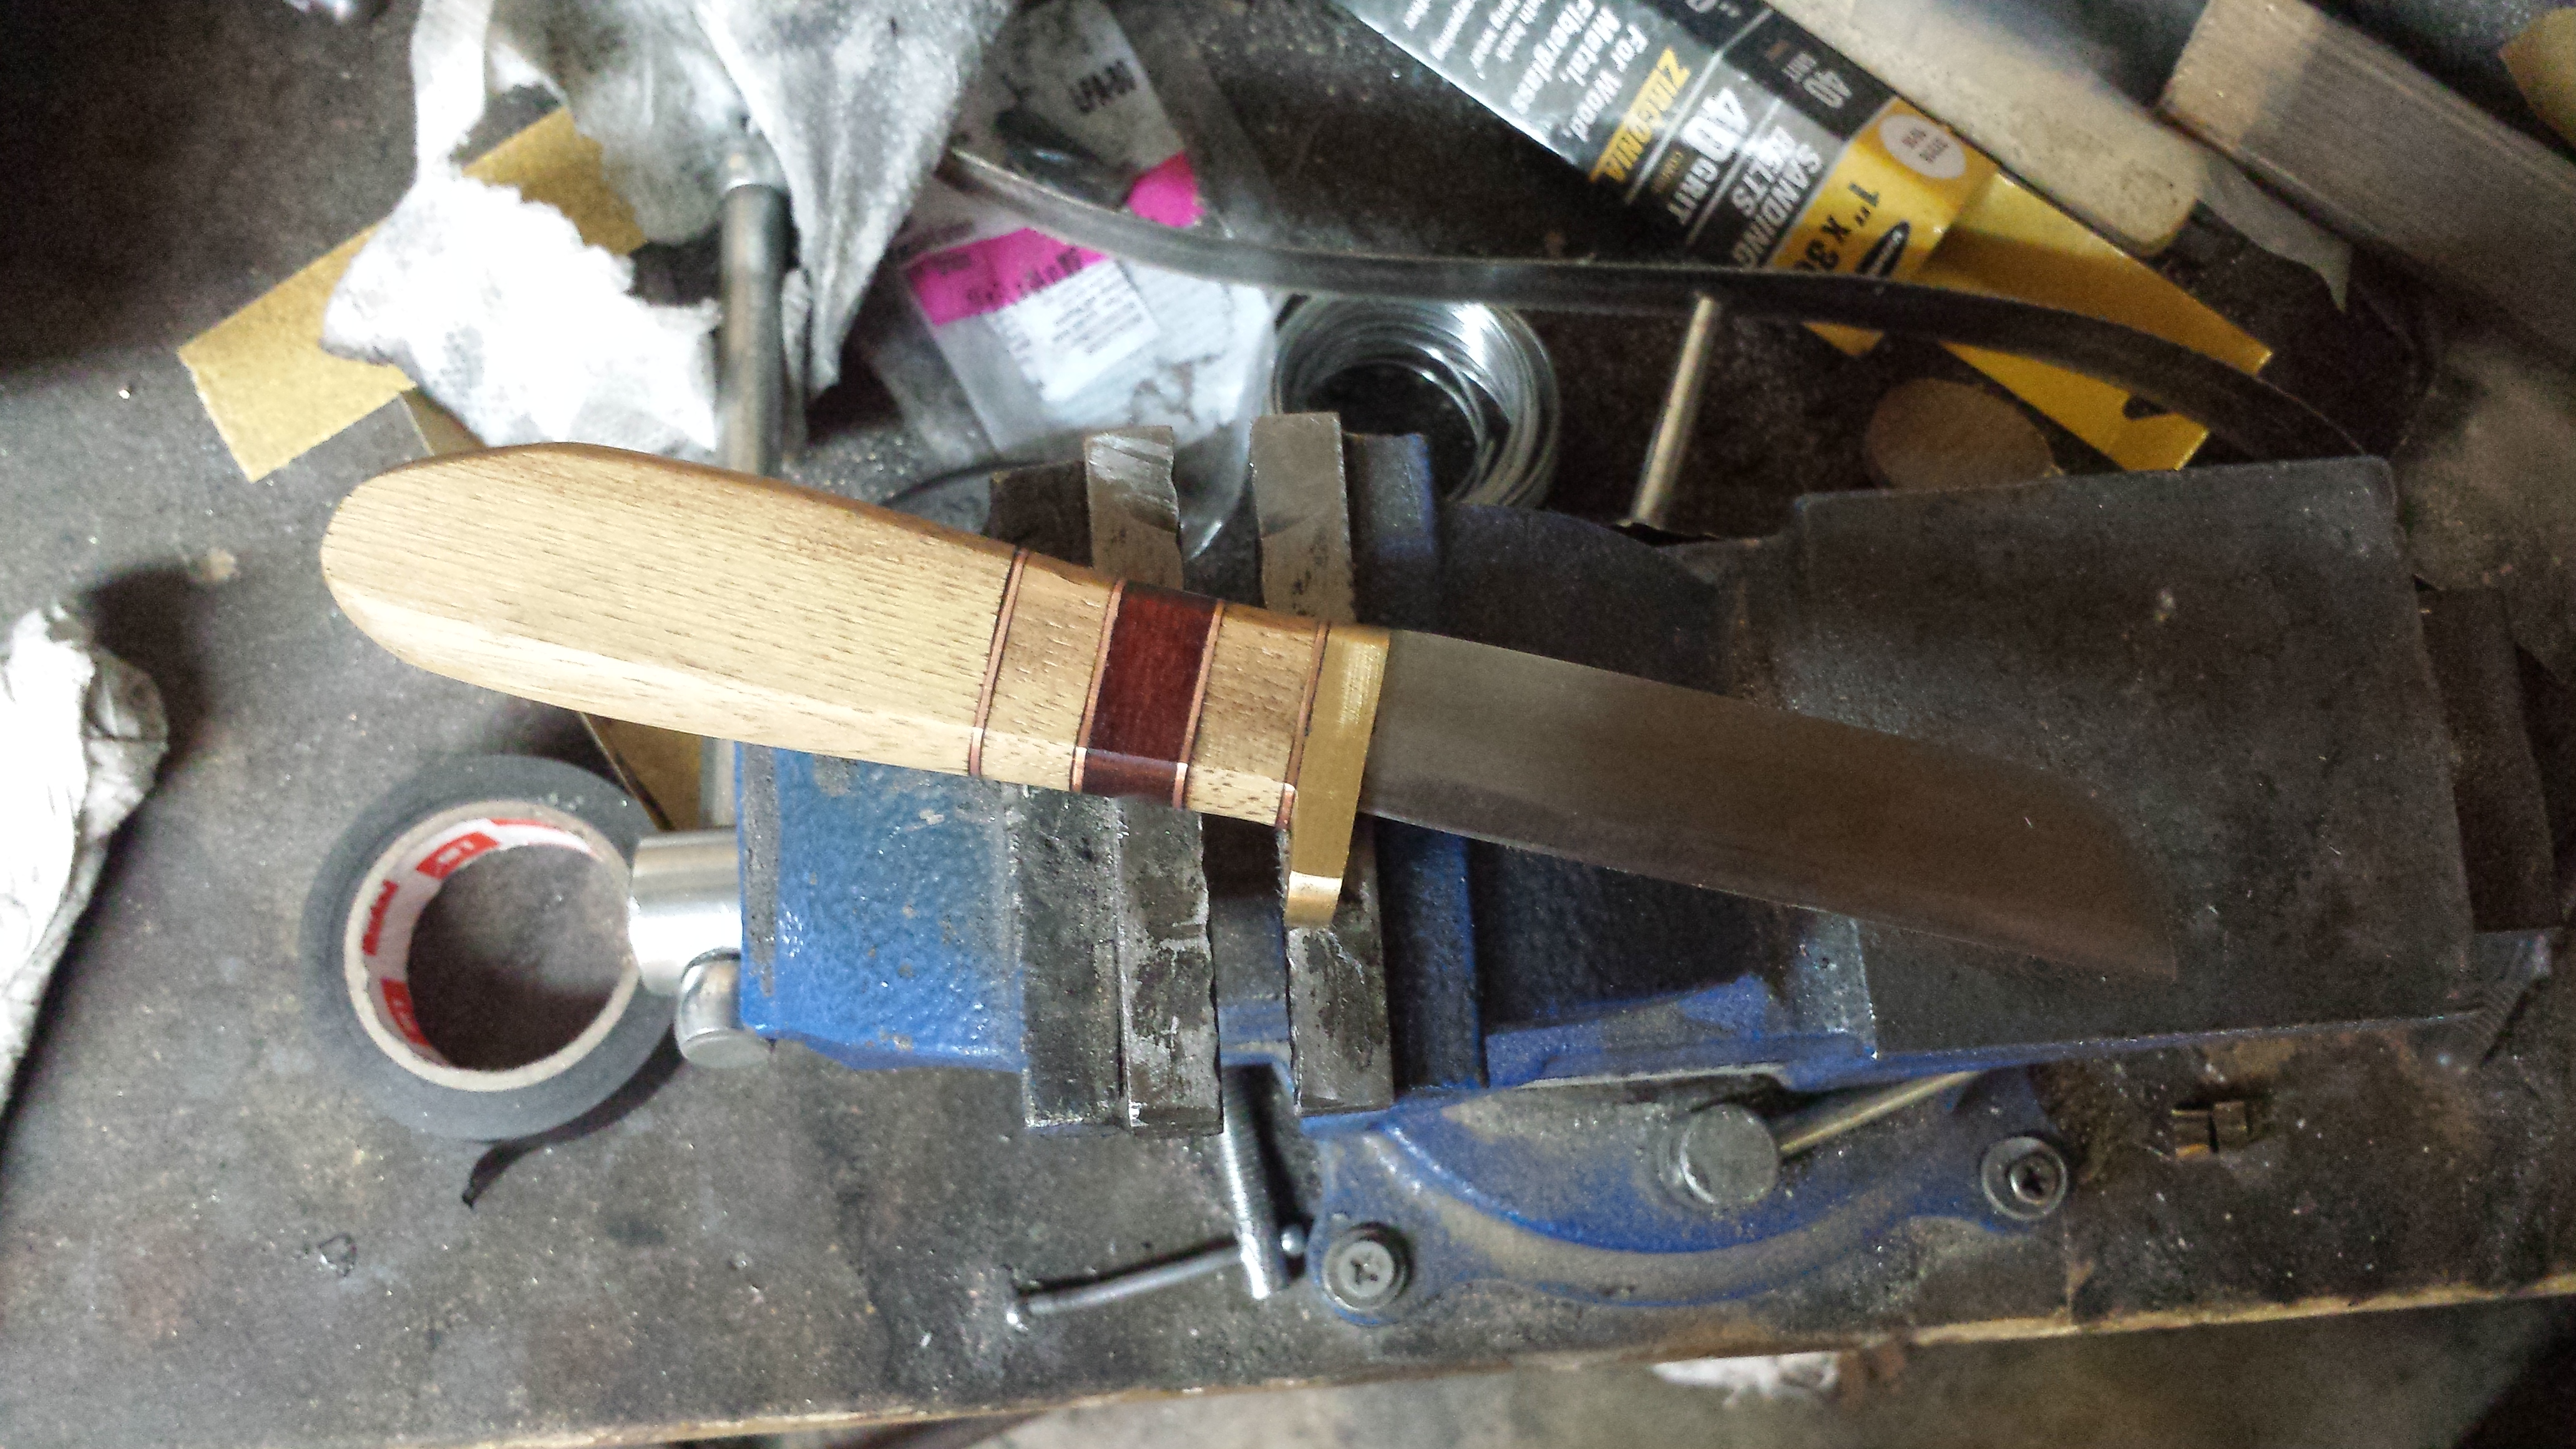
So here is how the knife turned out. However after looking a the picture Robakyo posted I think I have an idea for how I want to try doing the next hidden tang knife I make by using 2 pieces of brass sandwiching a piece of 15N20 to make a similar shaped guard like the one he shows. Need to finish polishing up the blade. but I am really liking how this one turned out.

-
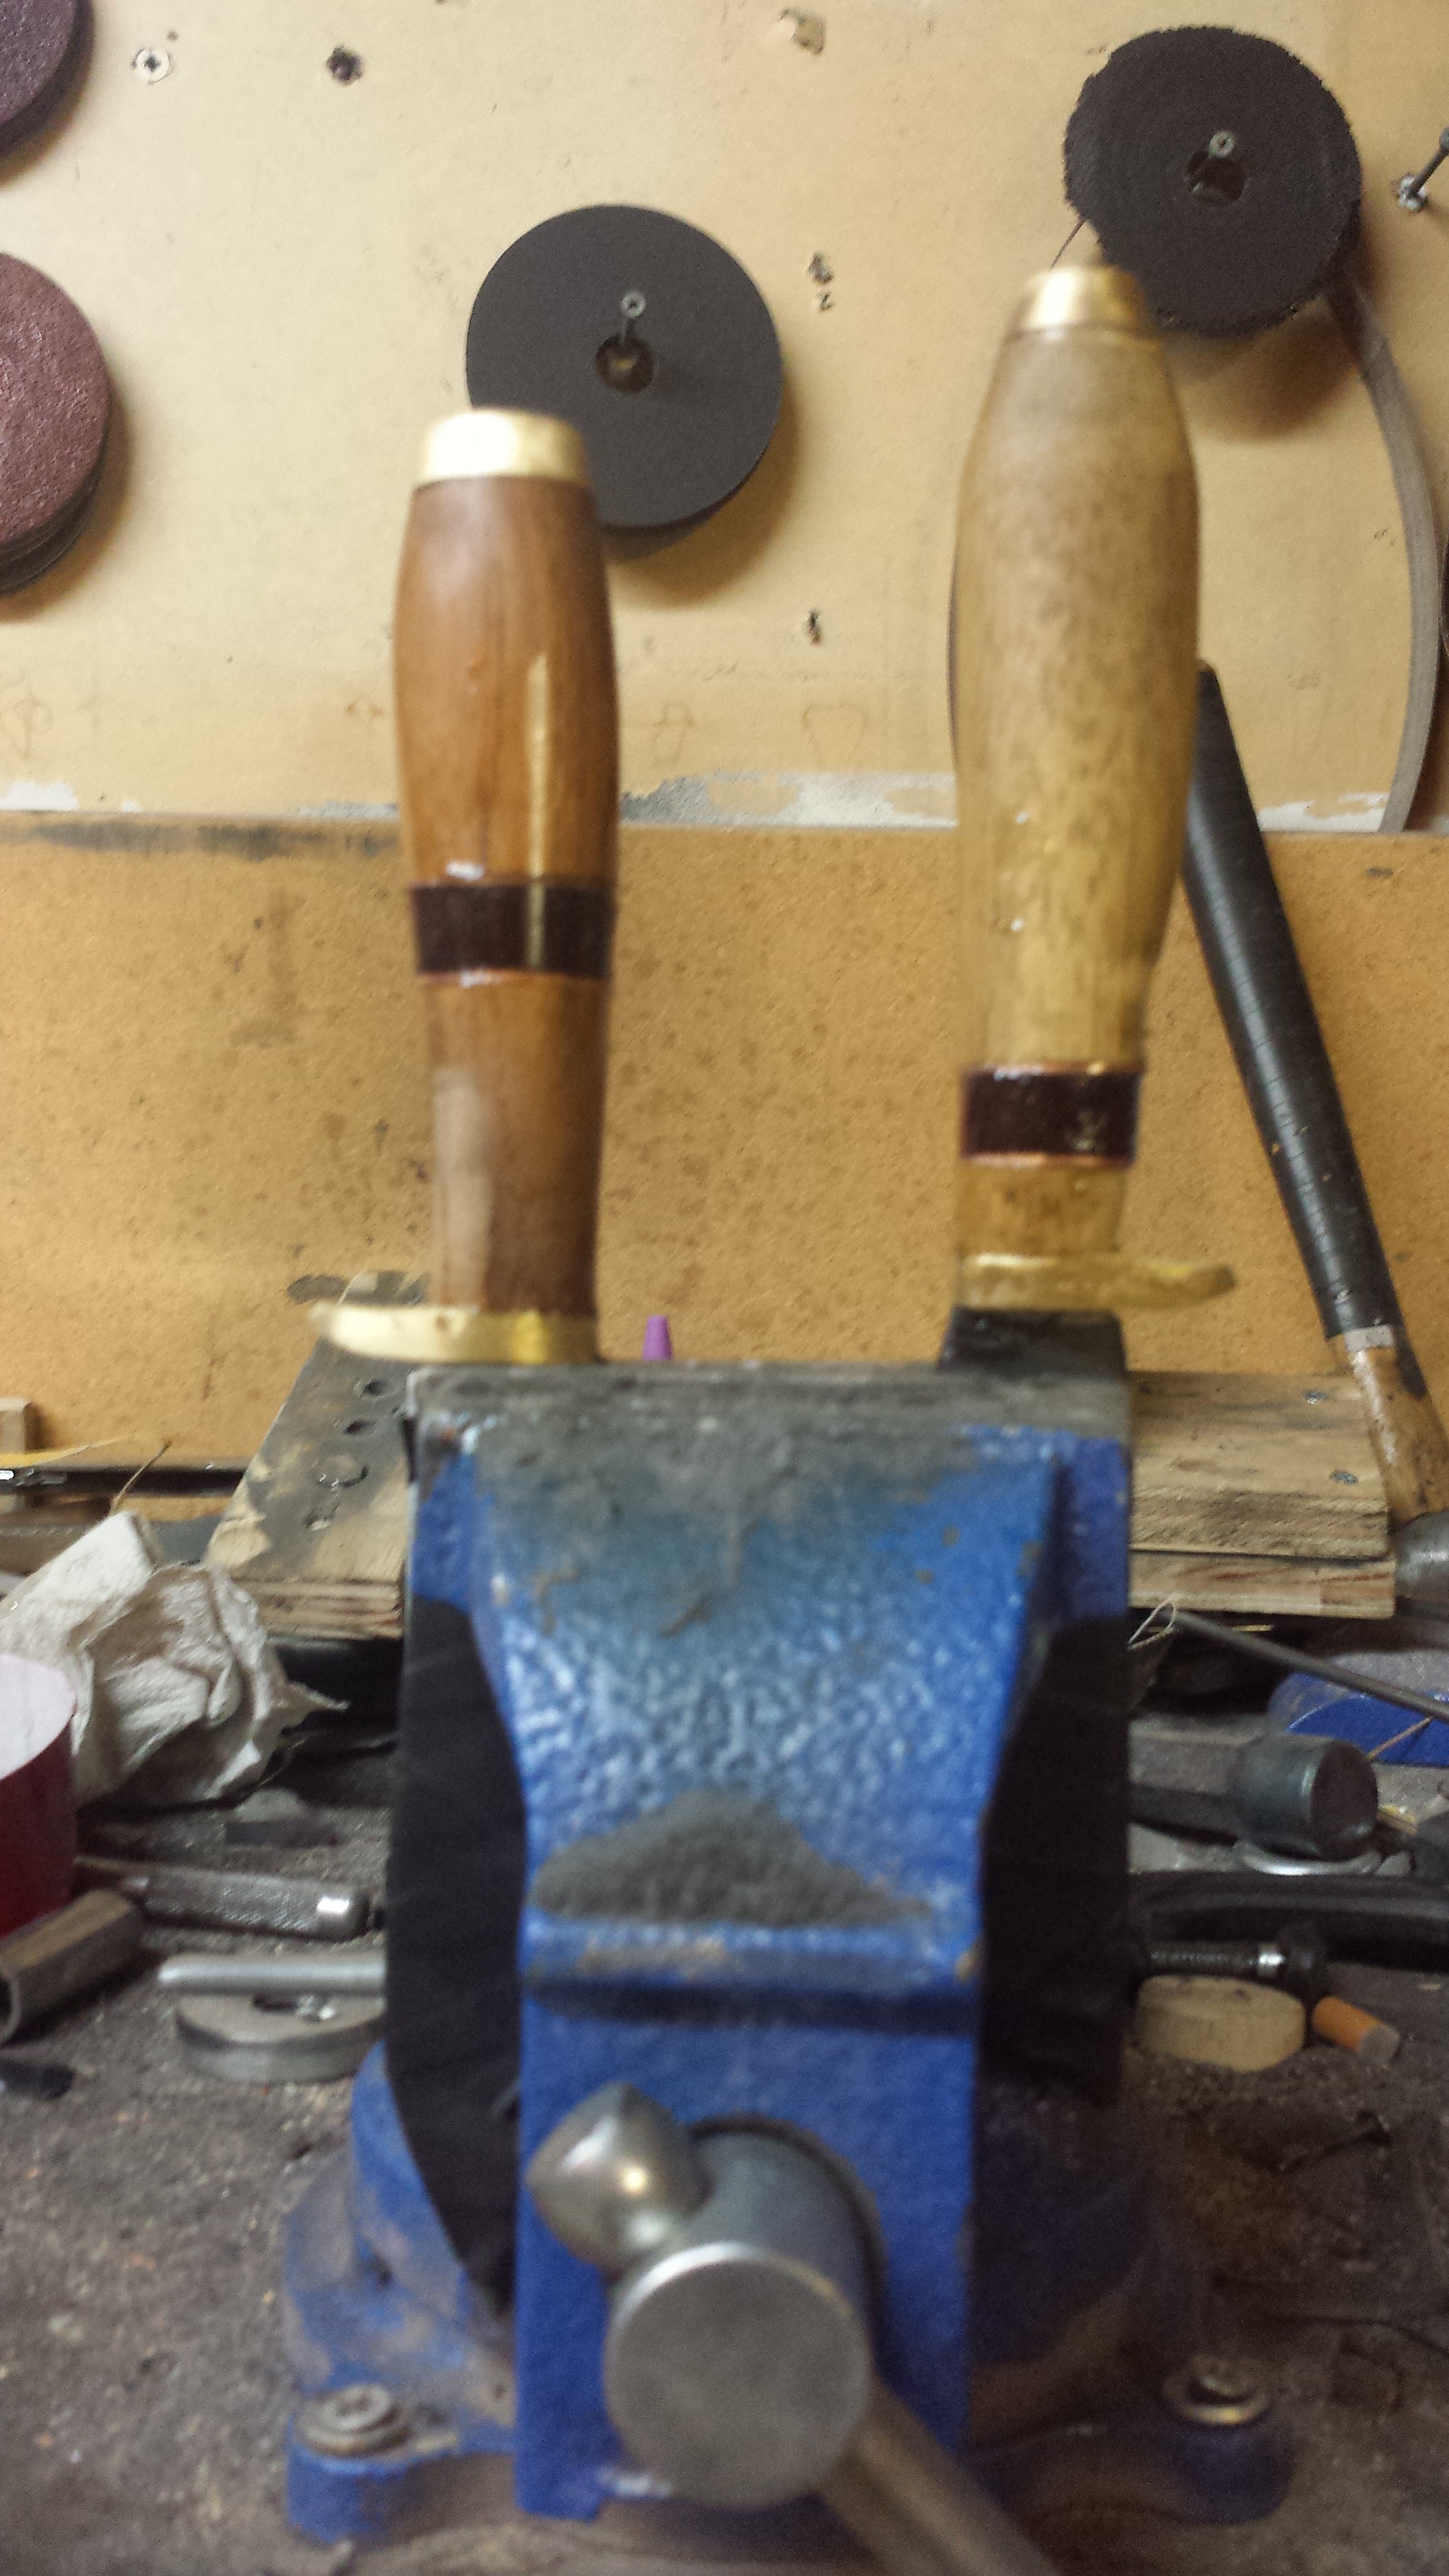
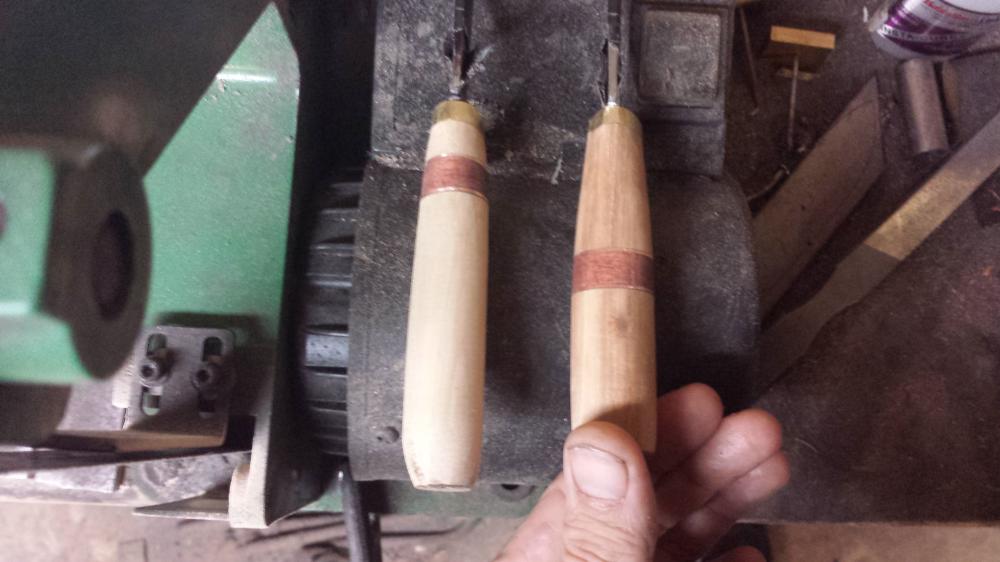
I actually got nearly exactly the same advice on this knife from another maker on another forum. So I pulled this one and the other one I did a similar handle design on apart, and took that advice. Since the knifes are viced at different levels, you cant really tell on the left one, but both of them have a similar flow, I tapered a curve into the handle up into the guard stock to thin it out, and then tapered the blade side down to a similar curve. And to be honest I like them both a LOT better. Now I just need to wait for the epoxy to cure.

-
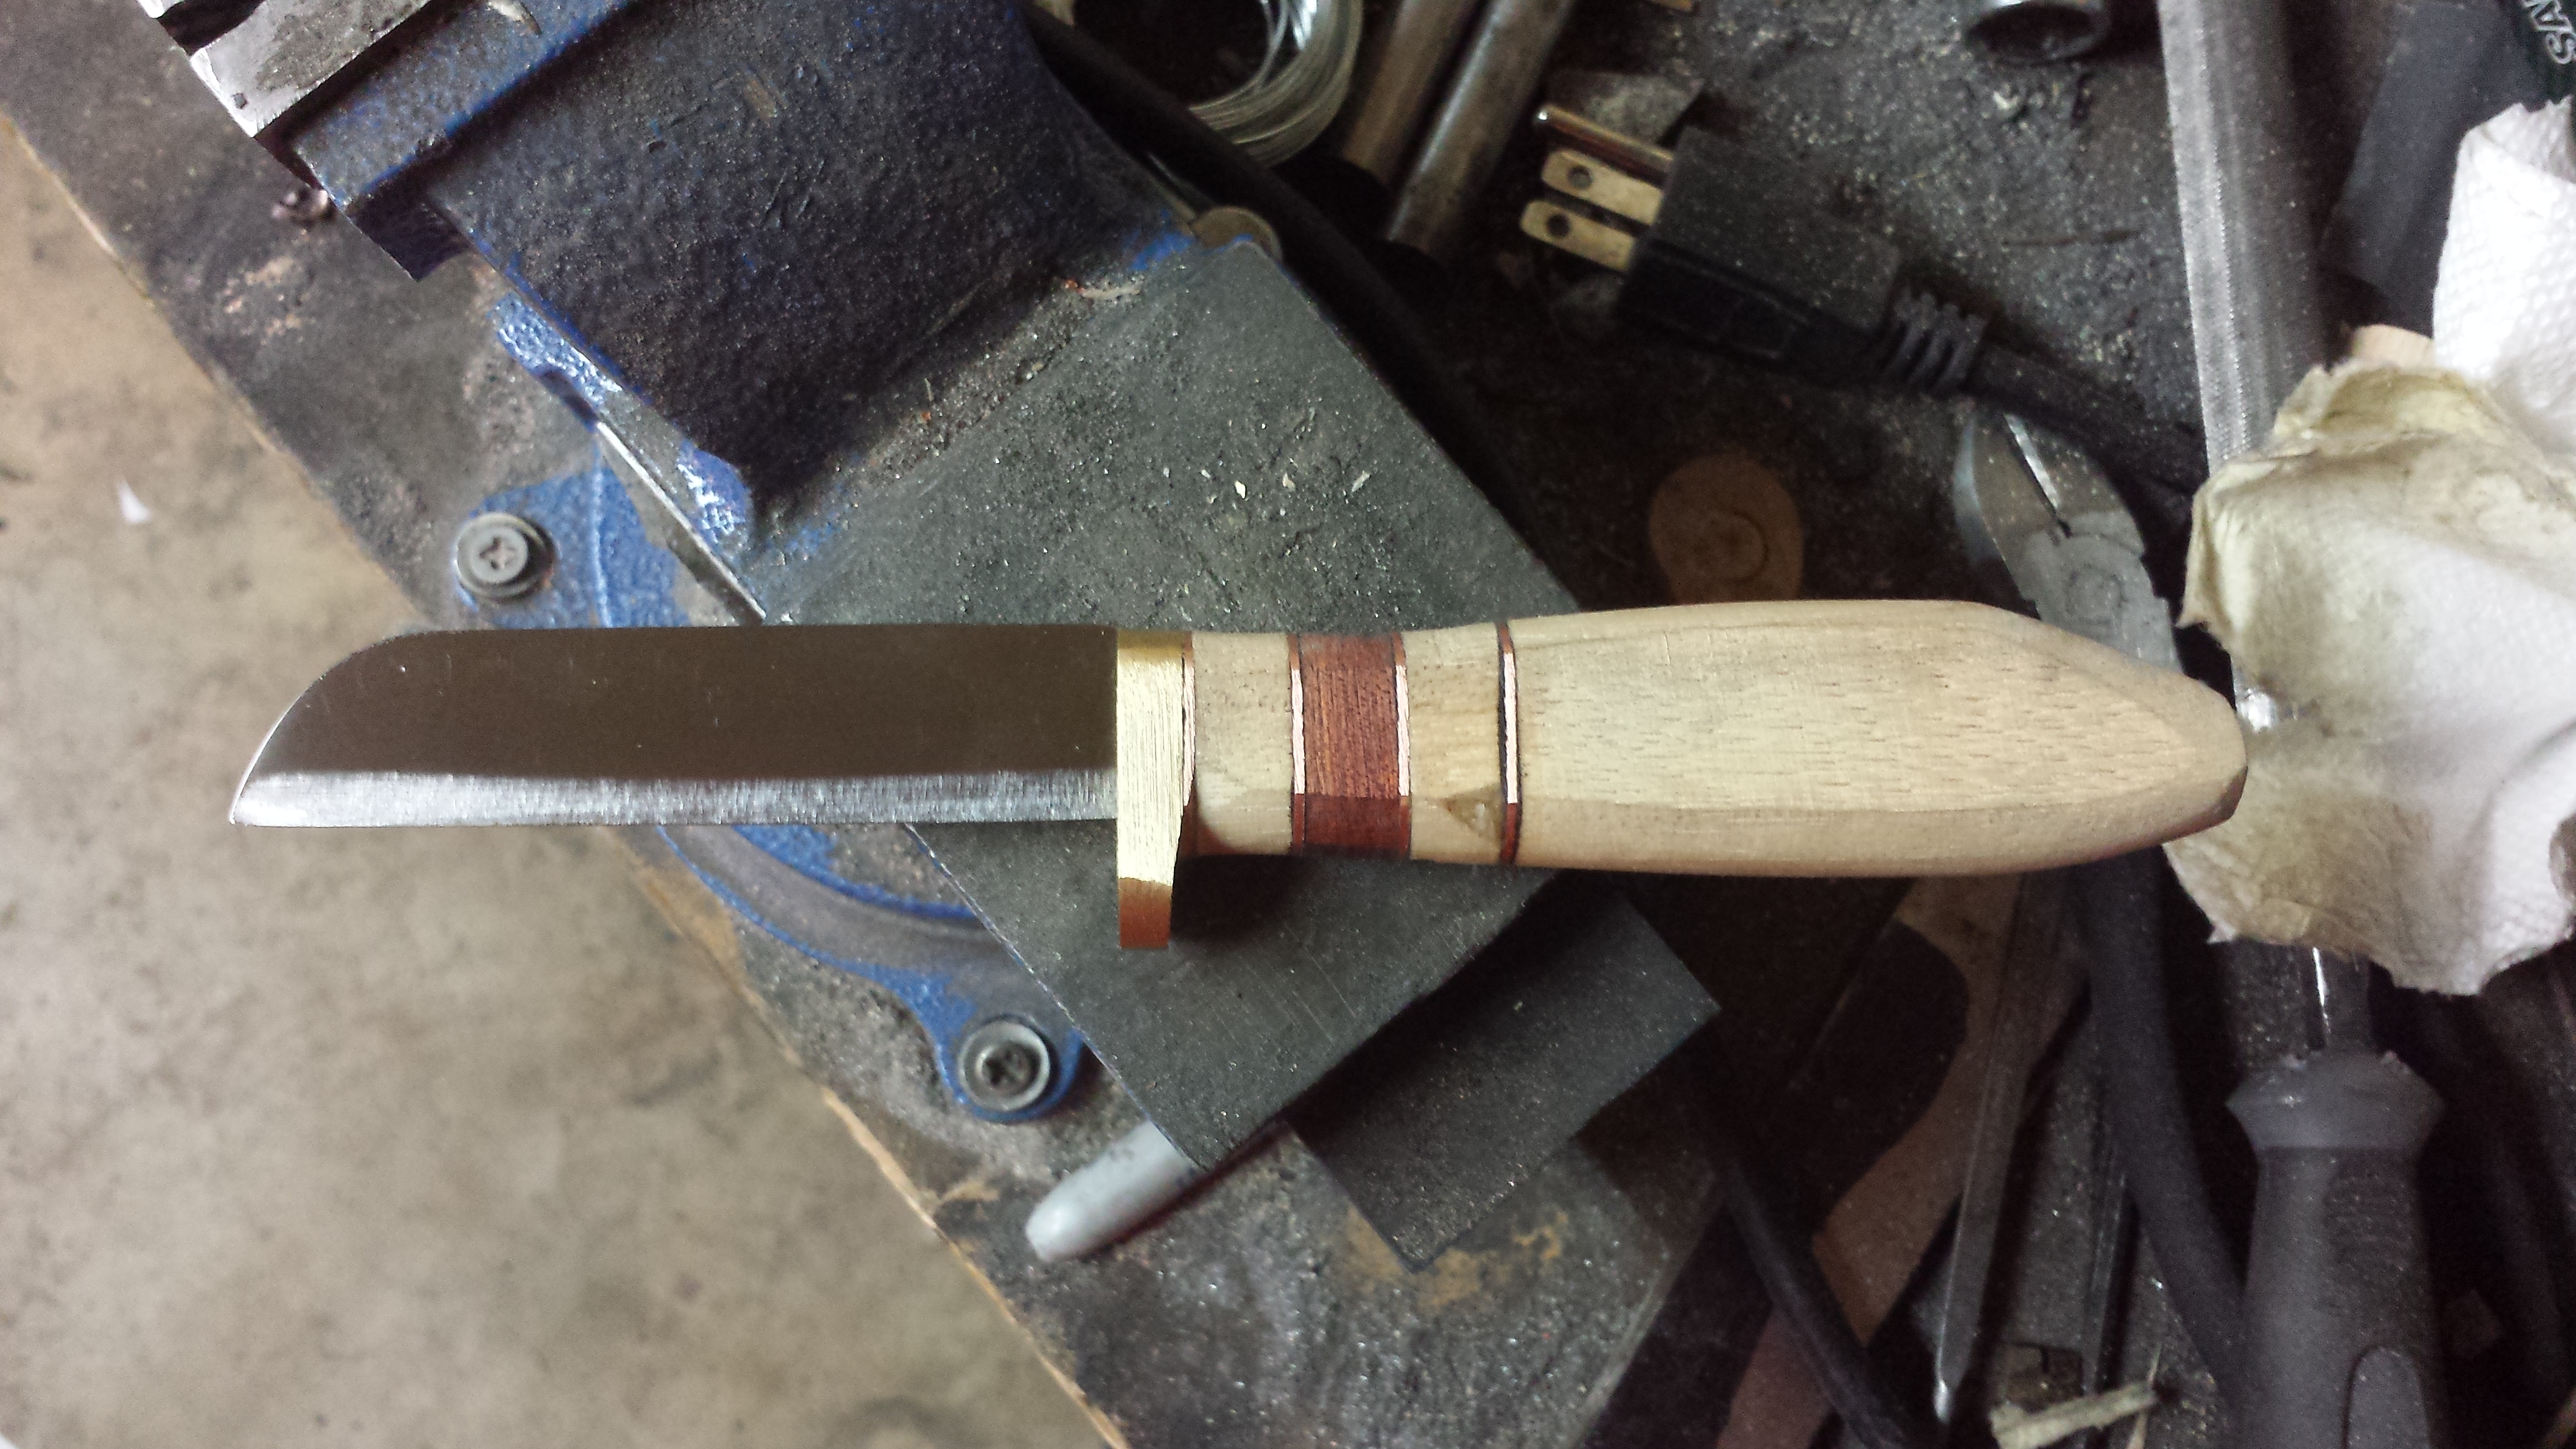
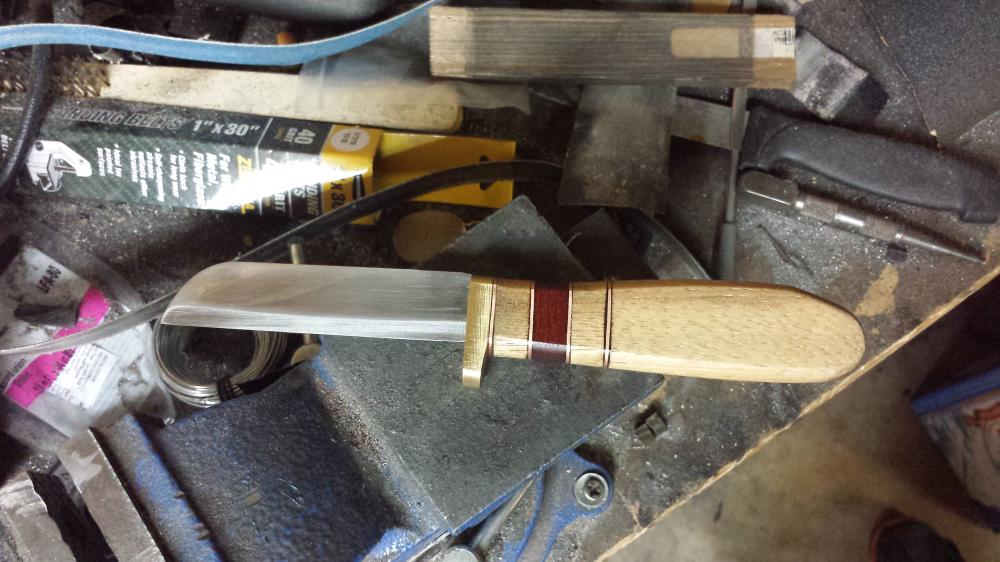
Here is another knife I am currently working on, I actually plan to pull the handle on this one apart, and fix a couple of things I know I could do better, such as the gap in the copper spacer and the guard to blade fit there is a very slight gap. But I would like some advice on a specific aspect of the handle. Is it just me, or should the handle at the guard be closer to the size of the ricasso? When looking at this I as it is now, I get the feeling that the lines would flow better along the knife if that portion of the handle was the same size as the ricasso. Pulling the knife apart to fix the other issues I see would make thinning that area out a lot easier and a lot less likely to cause damage to the brass guard.
-
And here is how it looks after some sanding and shaping of the buttcap. I am actually thinking since I like the color it is now, and the hickory is the same piece from the last handle attempt, I might actually go about the finishing work a bit differently, I was actually considering doing a CA treatment on this since the wood is not stabilized at all. I am going to play around tomorrow with another piece of the wood I have from all this Hickory I have and decide which one I like better the CA or the Linseed oil.

-
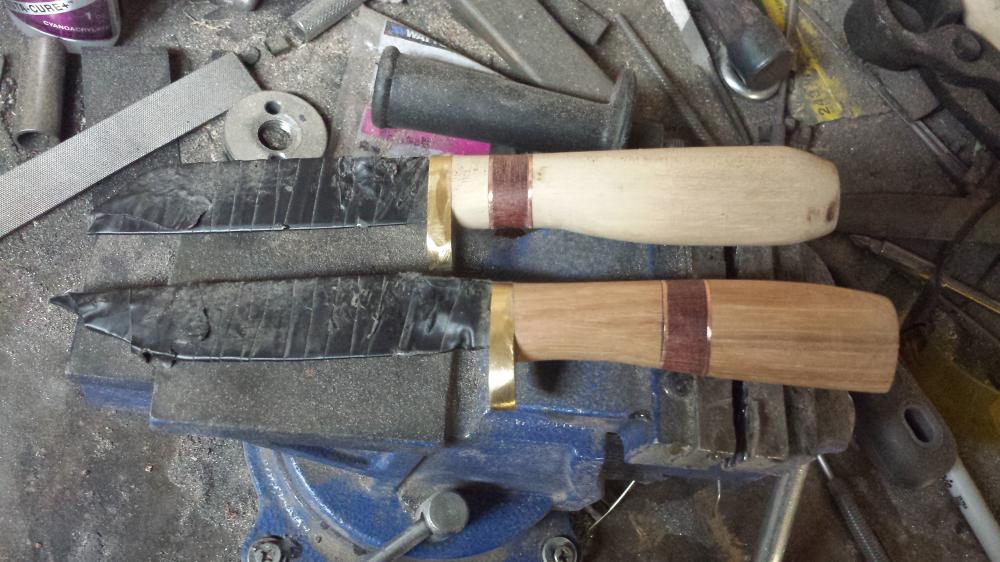
The sheepsfoot completely lacks a ricasso. and getting the guard to fit without gaps was a very frustrating task. I ended up redoing the entire handle including the guard on this one because of the fit on the guard. the other has a ricasso, and a notch where the blade meets the ricasso. cant really tell due to the tape though. Also forgot to add both of these will be getting brass buttplates once the handles are finished being shaped.
-
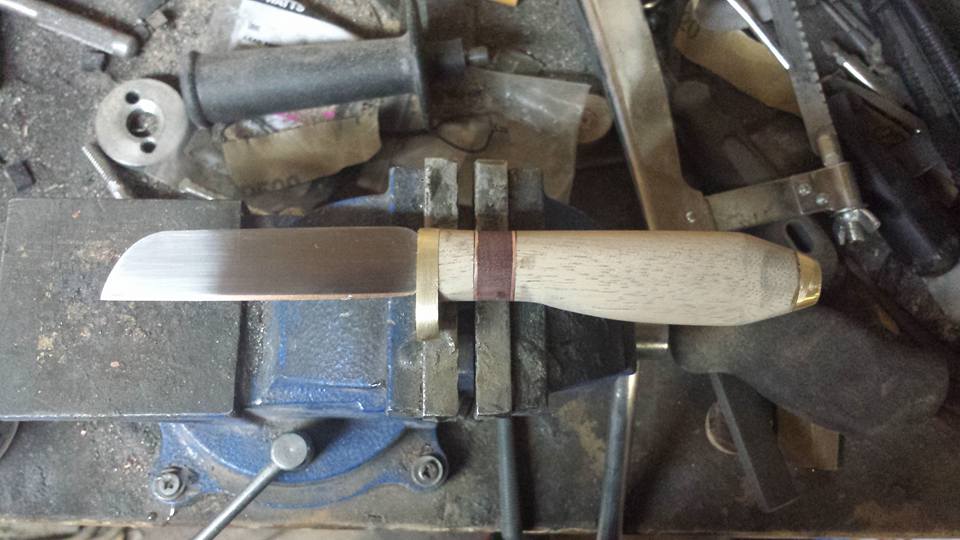
So I had to redo the handle on the sheepsfoot. so I redid it differently, I think I got a much better level of fit and finish on this as I removed the copper spacer directly after the brass, which helped cut down on the damage I did to the brass while attempting to file down the copper to match the wood. Unfortunately I do still have a few gaps on the pieces, but in looking at this picture vs the older model handle, I think there is definite improvement. The other knife is also O1 tool steel. a little over 5 inches long at the blade. I decided to glue these up and shape them at the same time because I wanted to see how the placement of the design elements impacted the work to shape the handles.
-
So I broke the handle on this one, so the next one will be a day or so delayed. Lucky for me, the handle simply " snapped " at a glue joint, I suspect I got the handle material too hot while shaping the handle and it weakened the epoxy. So into the toaster oven it went on low, and about 10 minutes into it I was able to pull all the pieces off intact. Honestly I am actually glad this happened. as now I can address my two biggest peeves this knife has, the guard gap at the edge, and the gaps in the spacers. Hopefully Ill have it back to glued up and curing tomorrow night.
-
I second the chain astonishment.... the knife is awesome, but that chain and belt attachment on the sheath are just nothing short of outstanding....
-
next one is actually ready for drilling the handle out, I will say I think I will avoid doing a copper spacer right after the brass on the next one, getting that piece filed down to the same level as the wood without seriously gouging the brass was a very painstaking and tedious process. More so then the typical knife making goes. thats actually why the guard tapers at the front, had to clean up the gouges I ended up making trying to file the copper piece down, although I do like the taper to it.
-
I got some work on this knife done over the weekend, I took Theo's advice, and rounded off the end of the handle. still fits nicely in the hand after the change, next up is to sand the brass piece carefully to a uniform grit all the way around, then re polish the blade and sharpen it. I am not happy with the gaps on the spacers but after sanding the handle down I have found what appears to be gaps is at least filled in with epoxy. Anyone have suggestions on how to true up wood, I think what is causing gaps like that on my knives is simply the part facing the next piece isnt entirely flat.

-
well it still has some serious work left to be finished before it gets its coating, but these constructive critiques of the knife are exactly why I posted it, to get recommendations from others more experienced on how to finish it out better. I wont get any time to work on it during the weekend, I am a full time single dad during the week, so all my hot work is done on the weekends while my children are with their mother. This makes the third knife I have done like this with the stacked pieces, and on each one the fit gets progressively better, however a lot of that is due to the recommendations I get from those more experienced then I am telling me how to do things better, which I am extremely grateful for. So thank you Glenn and Theo for the suggestions. ohhhh its 2.5mm thick at the spine with no distal taper.
-
I wiIl measure it in a little bit, dinner time and all. I concur on the ricasso statement, I do not like the way the guard is without one, wont be doing another one like this any time soon. on the end of the handle, I am considering the rounding off idea, I just like how it sits in the hand the way it is. and the blade is fairly flexible, not filet knife flexible, but more then my last O1 knife was.
-
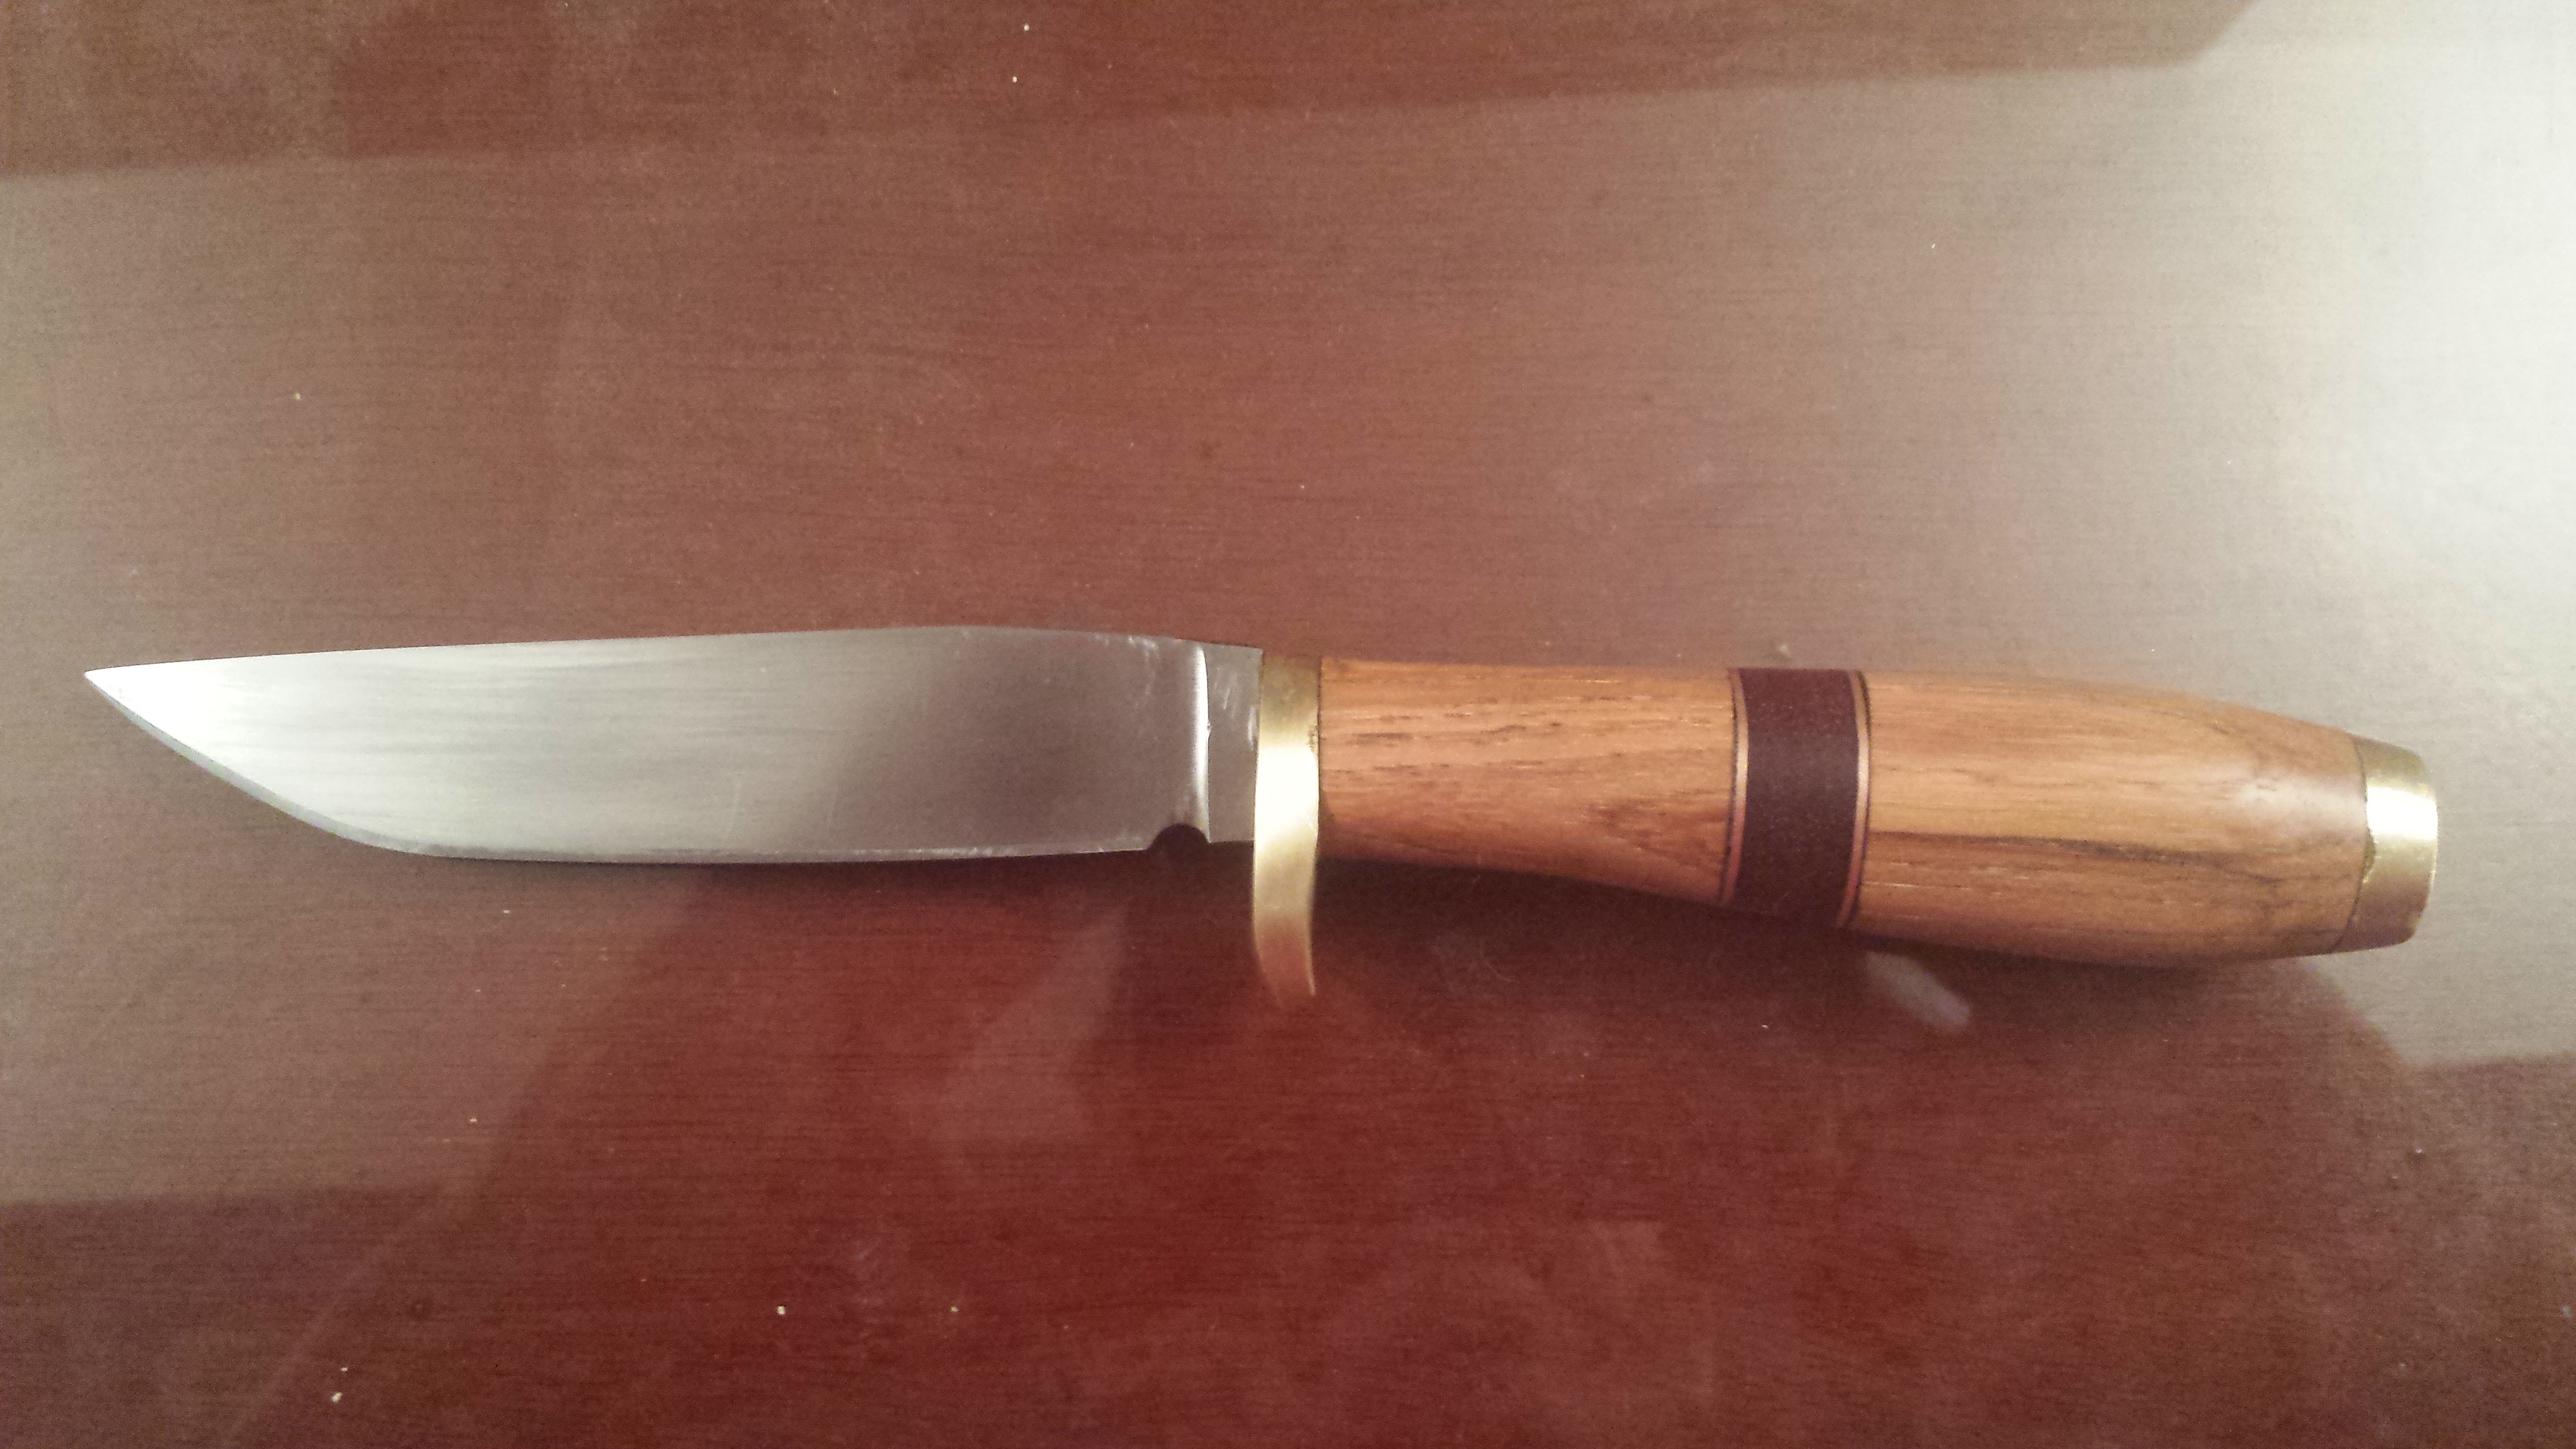
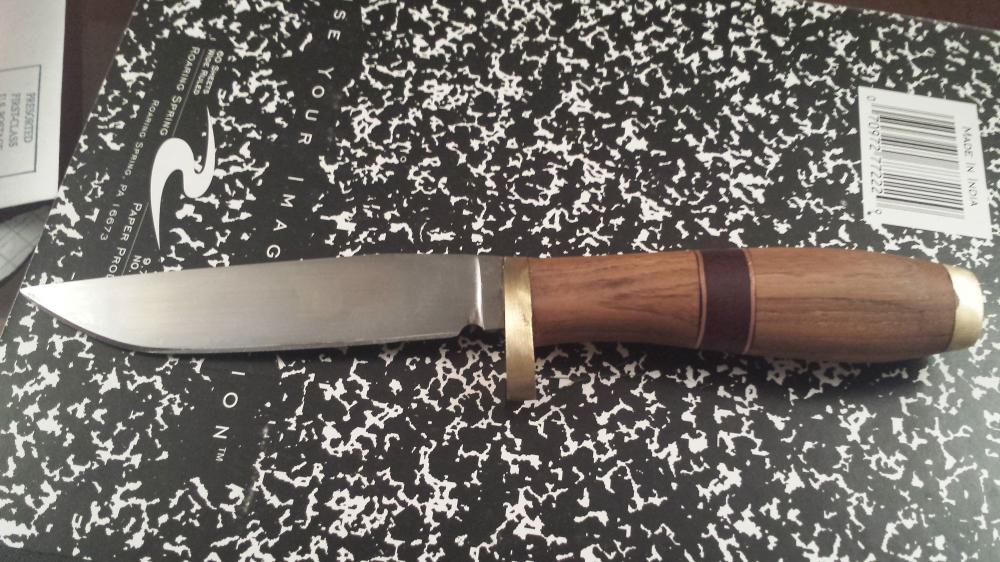
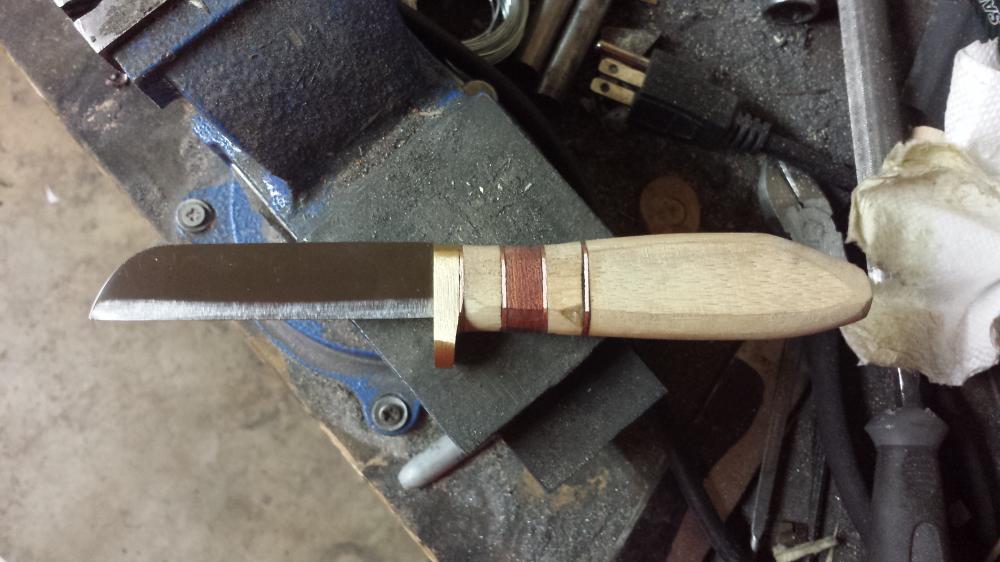
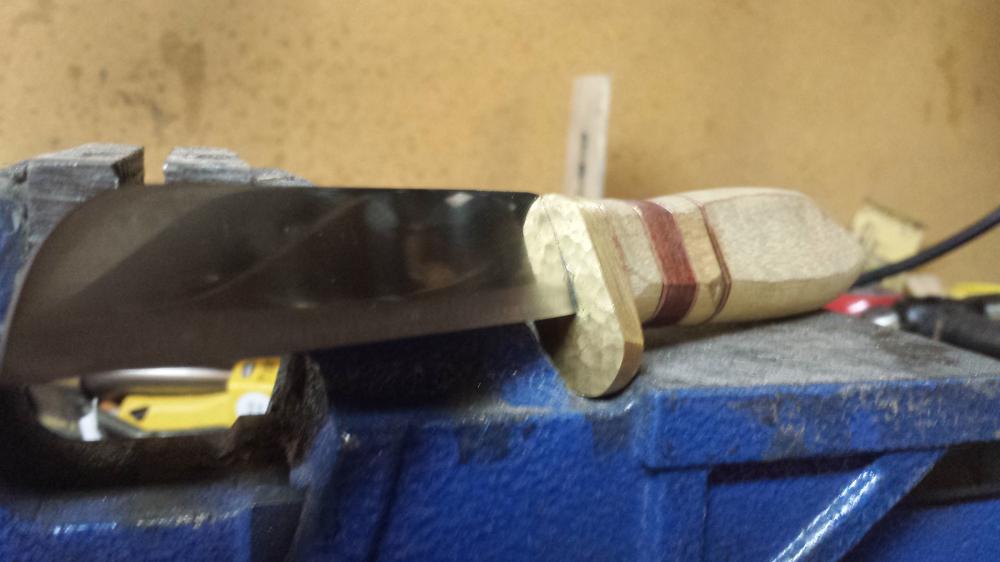
Here is the most recent thing I have been working on. O1 tool steel, 4 inch blade, tempered at 450 deg for 2 hours three times, so I expect it to be around 60 on the hardness scale. Brass hand guard with copper spacers, the red part of the handle I think is Bolivian rosewood, and the rest is Hickory. I still need to finish polishing the blade, I got the horse ahead of the cart on this one, I couldnt wait to see it with a handle. and it needs to be sharpened still, I have a fear of sharpening before putting the handle on. Handle is going to be linseed oil treated.
-
Hey steve..... where do I send my monies? I needs teh supaqwench! Senstrom. That is some awesome work, even if it is a rail spike. I know, they are cheap, easily found, and if you screw one up you dont feel too bad about it, I got my start working on them as well. from one newb to another, I much prefer forging O1 to 5160, But that is a personal preference, But dont source your 5160 from old leaf springs unless you want to spend 10+ hours on a knife, only to have it crack during your heat treating process and have to start over... TWICE.... ( recent personal experience ) But keep it up man, thats an awesome piece you have there, much MUCH better then my first rail spike knife....
-
I did have safety glasses on, and so far nothing has broken where shards came flying off. however your recommendation Frosty about the cloth is one I had not thought of, and will be employing it moving forward.
-
That, for being a first knife, is very VERY nice, hands down better then the first knife I ever made.
-
Yep One end is closed up night and tight ( i wouldnt call it sealed, but its quite close ) and then I just take a few pieces of charcoal from the backyard fire pit and toss them in before adding the knife. my grain patterns on the knives I have destructive tested ( both intentional and unintentionally ) show a serious reduction in grain size since moving to the tube, for the next little while I expect to only do my normalization and hardening cycles in a tube like that.