Malice9610
-
Posts
167 -
Joined
-
Last visited
Content Type
Profiles
Forums
Articles
Gallery
Downloads
Events
Everything posted by Malice9610
-
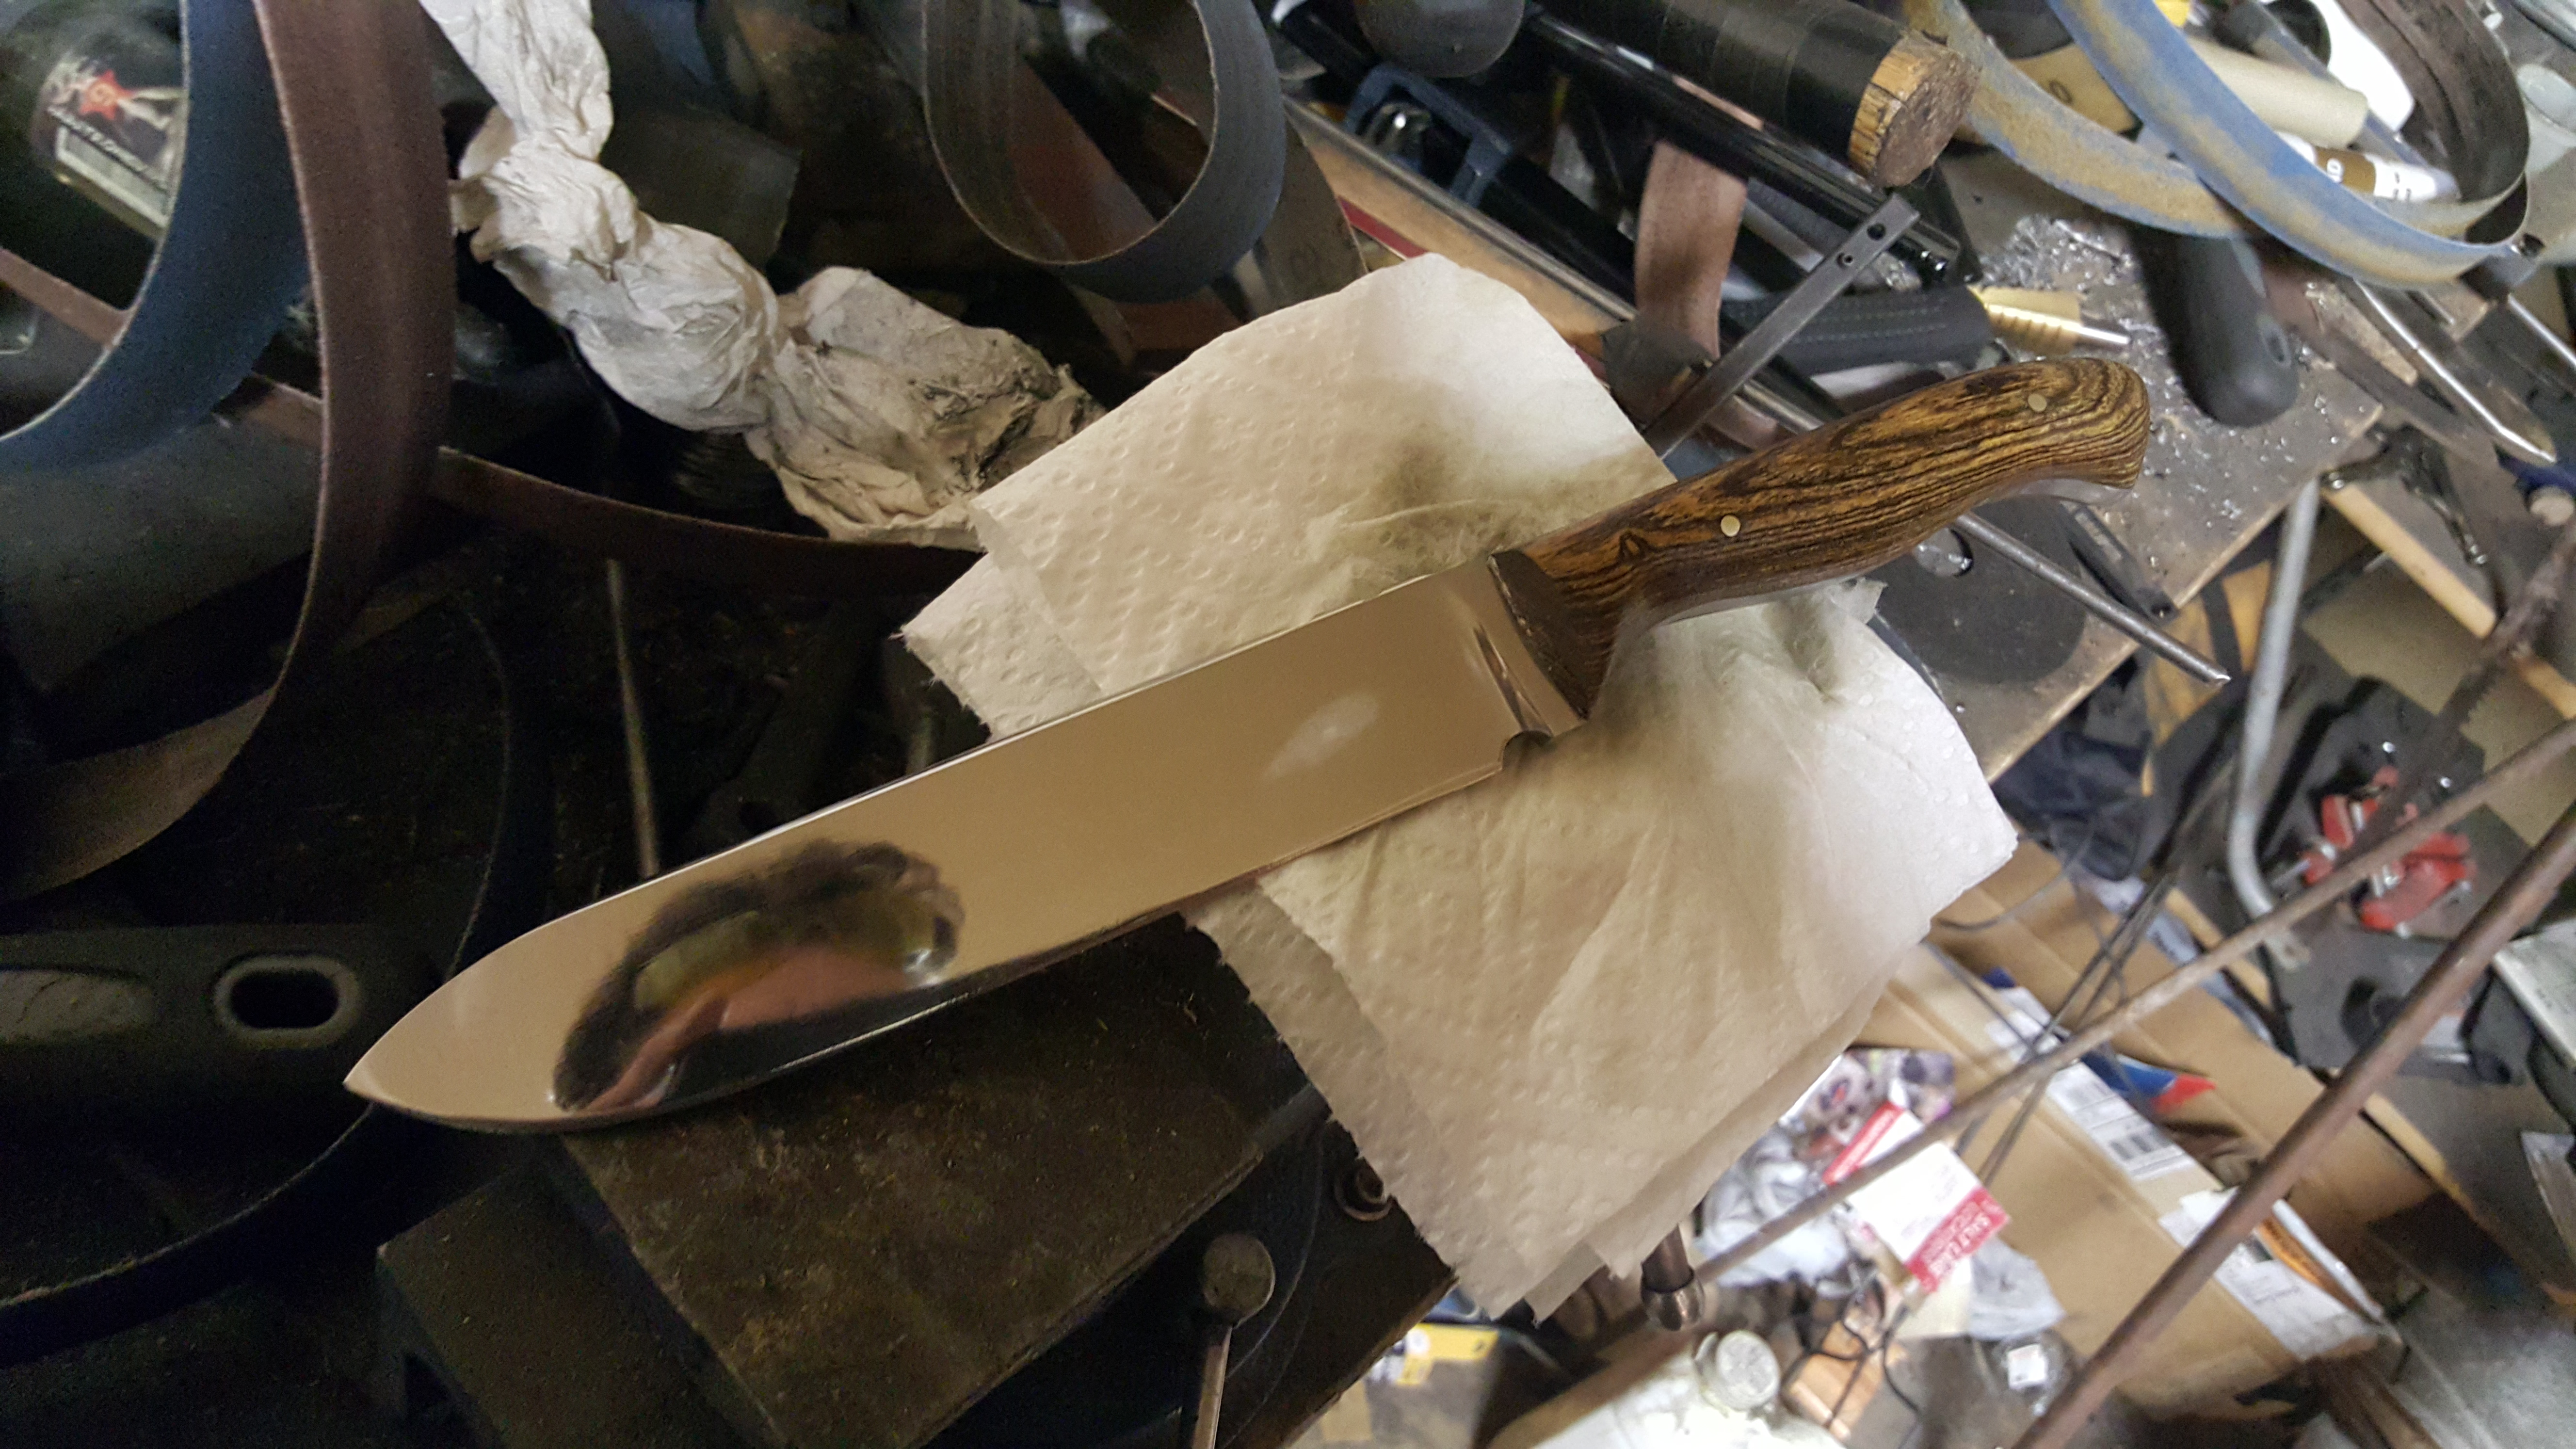
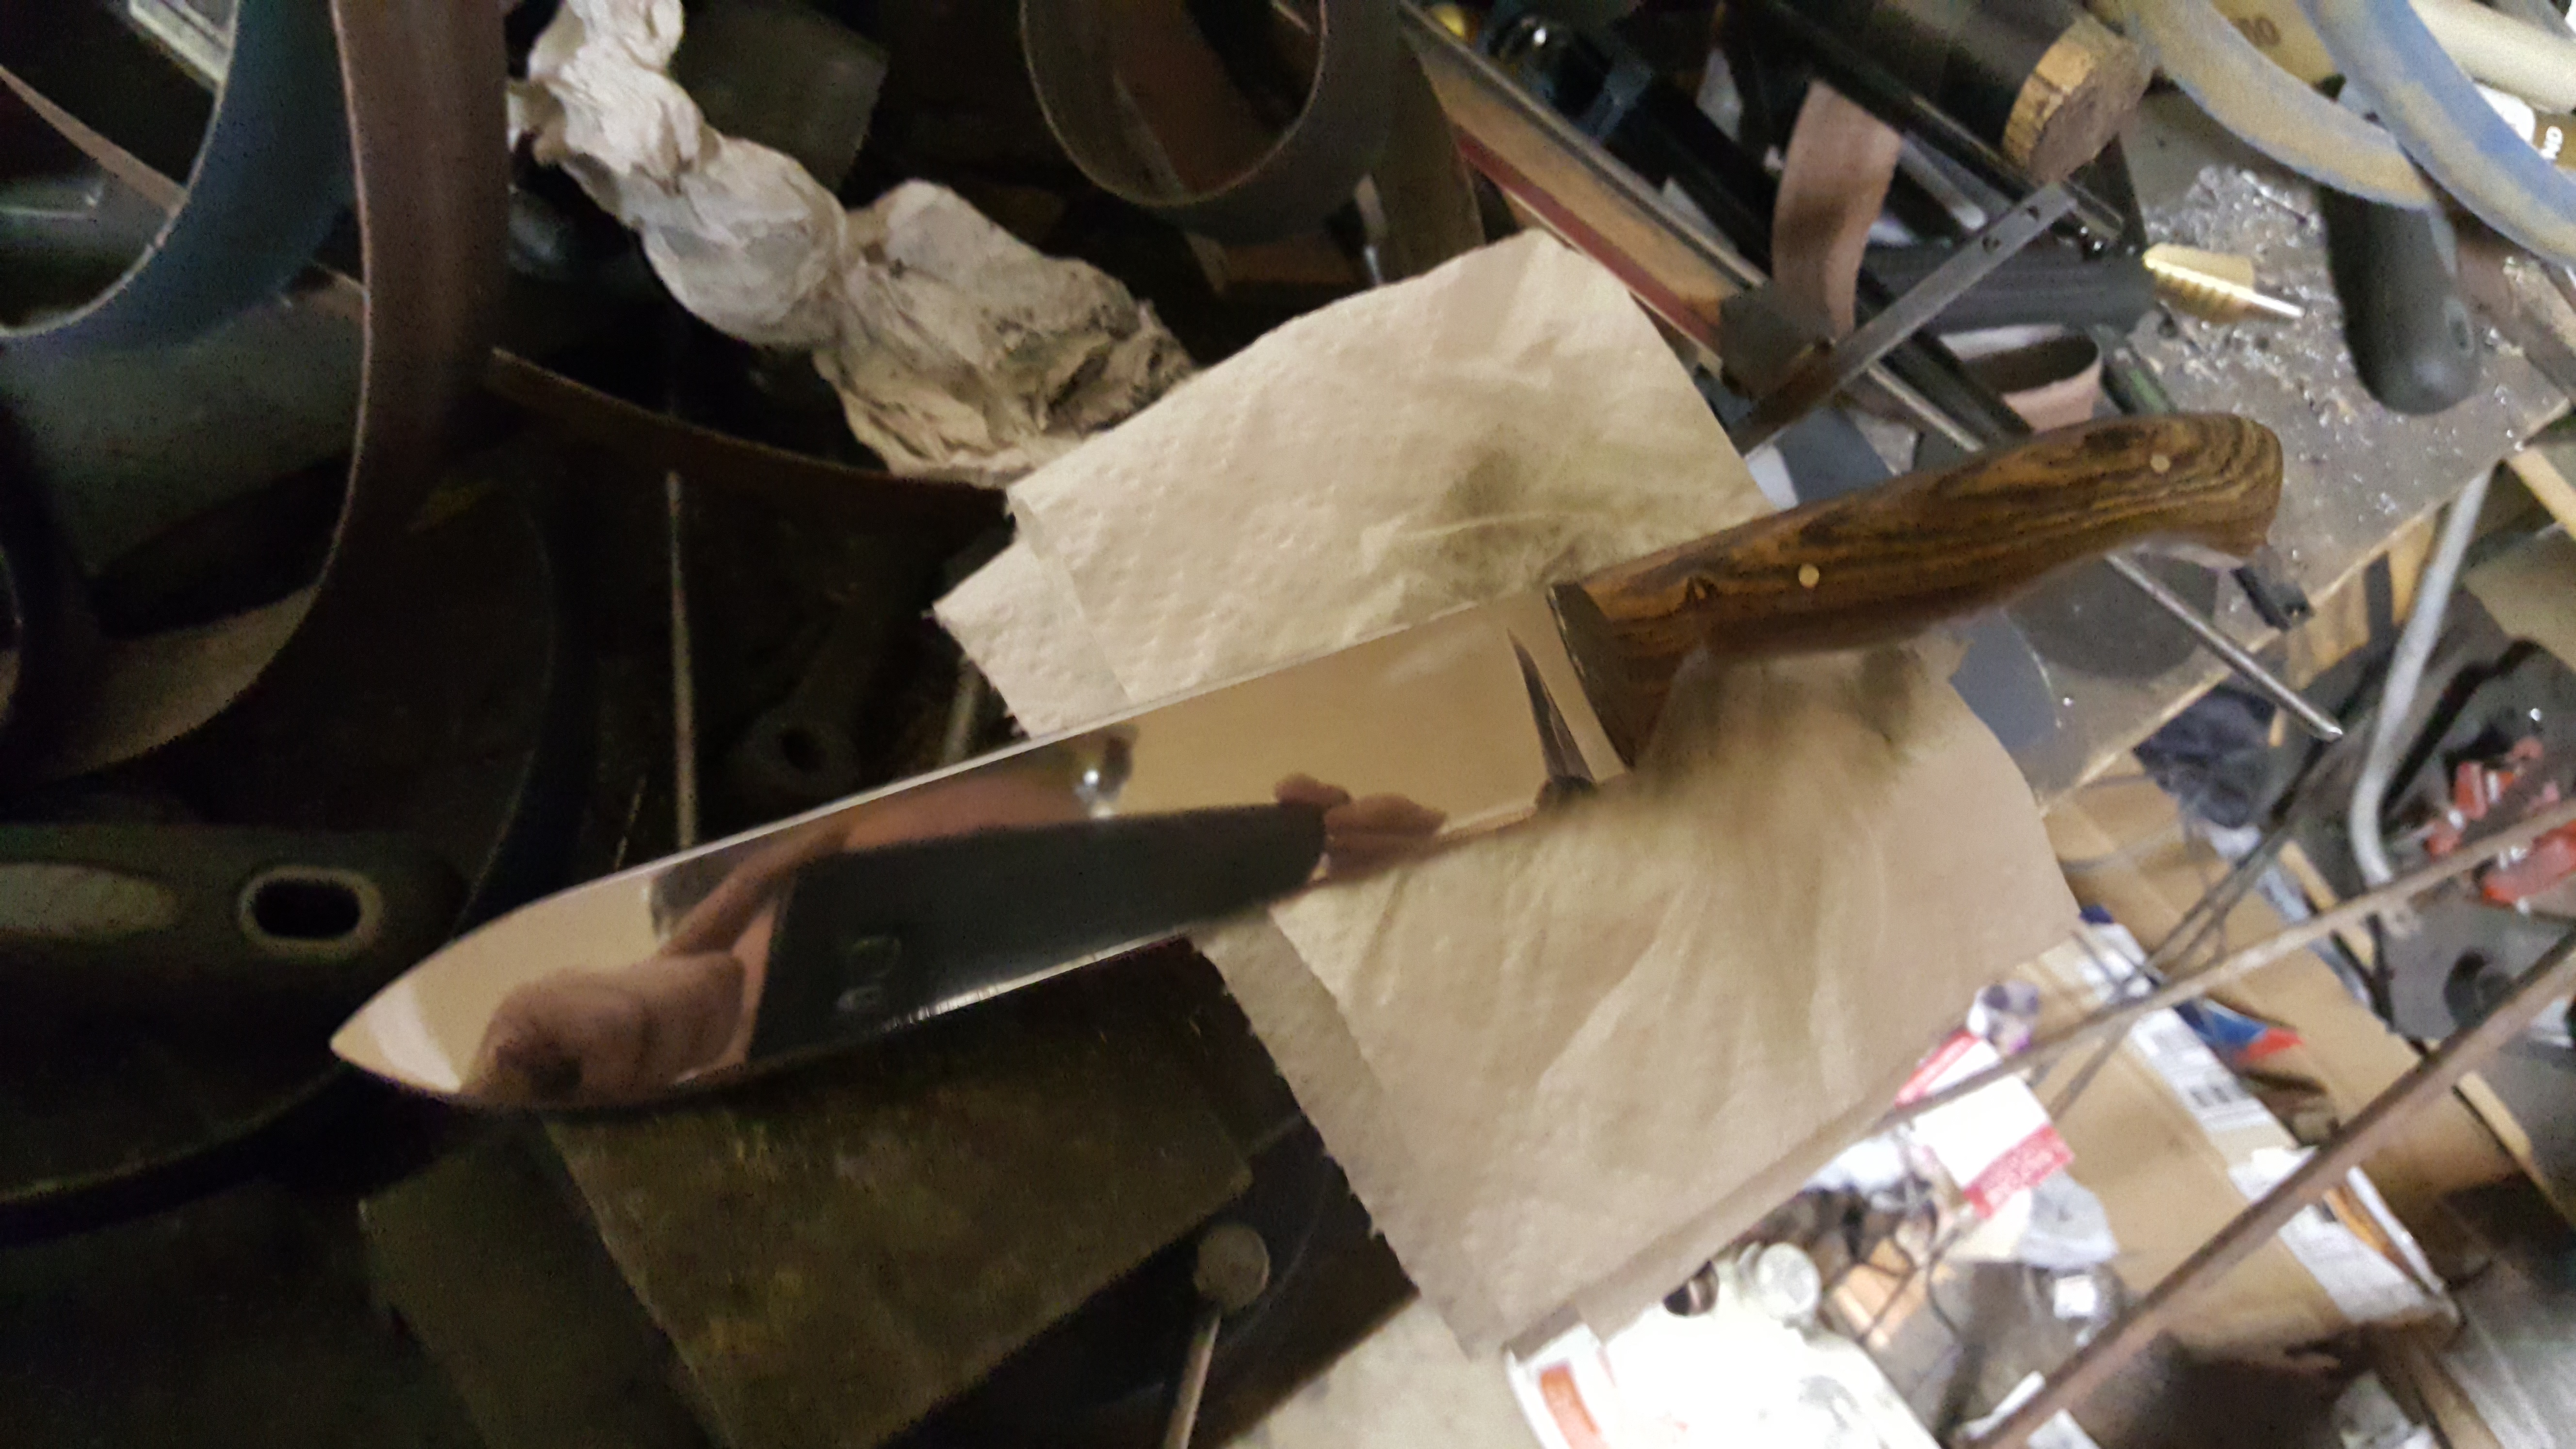
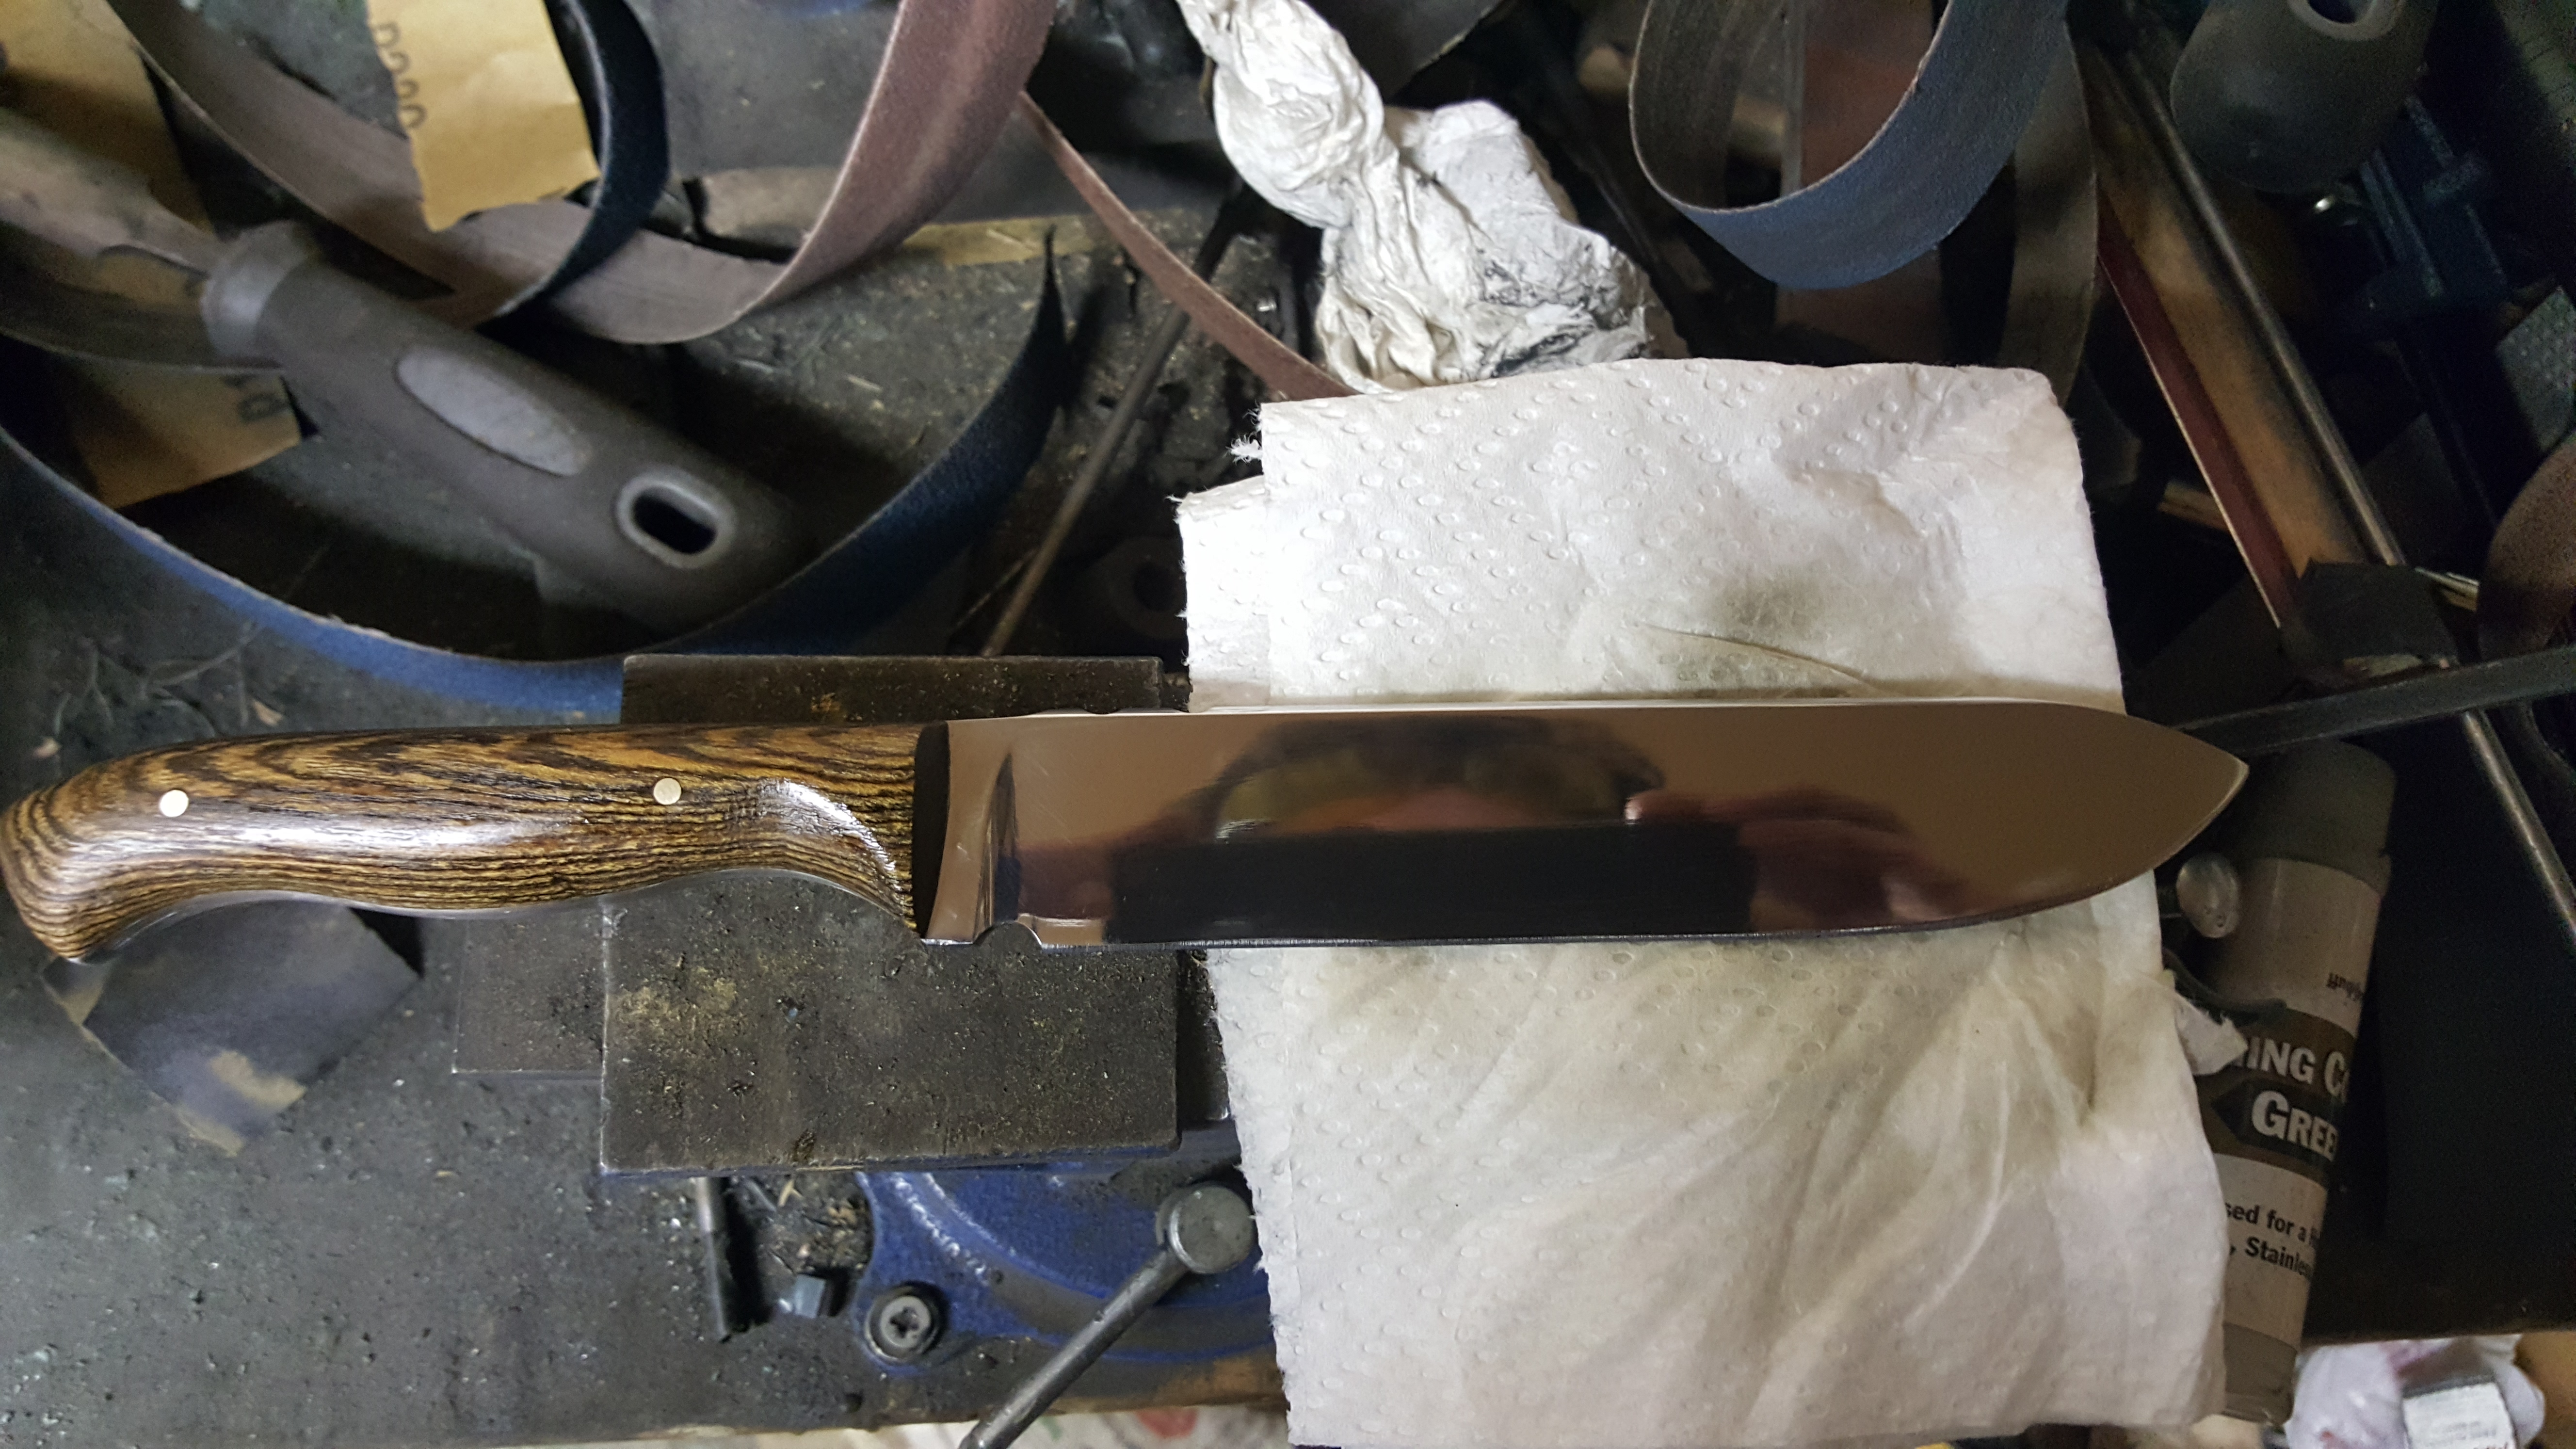
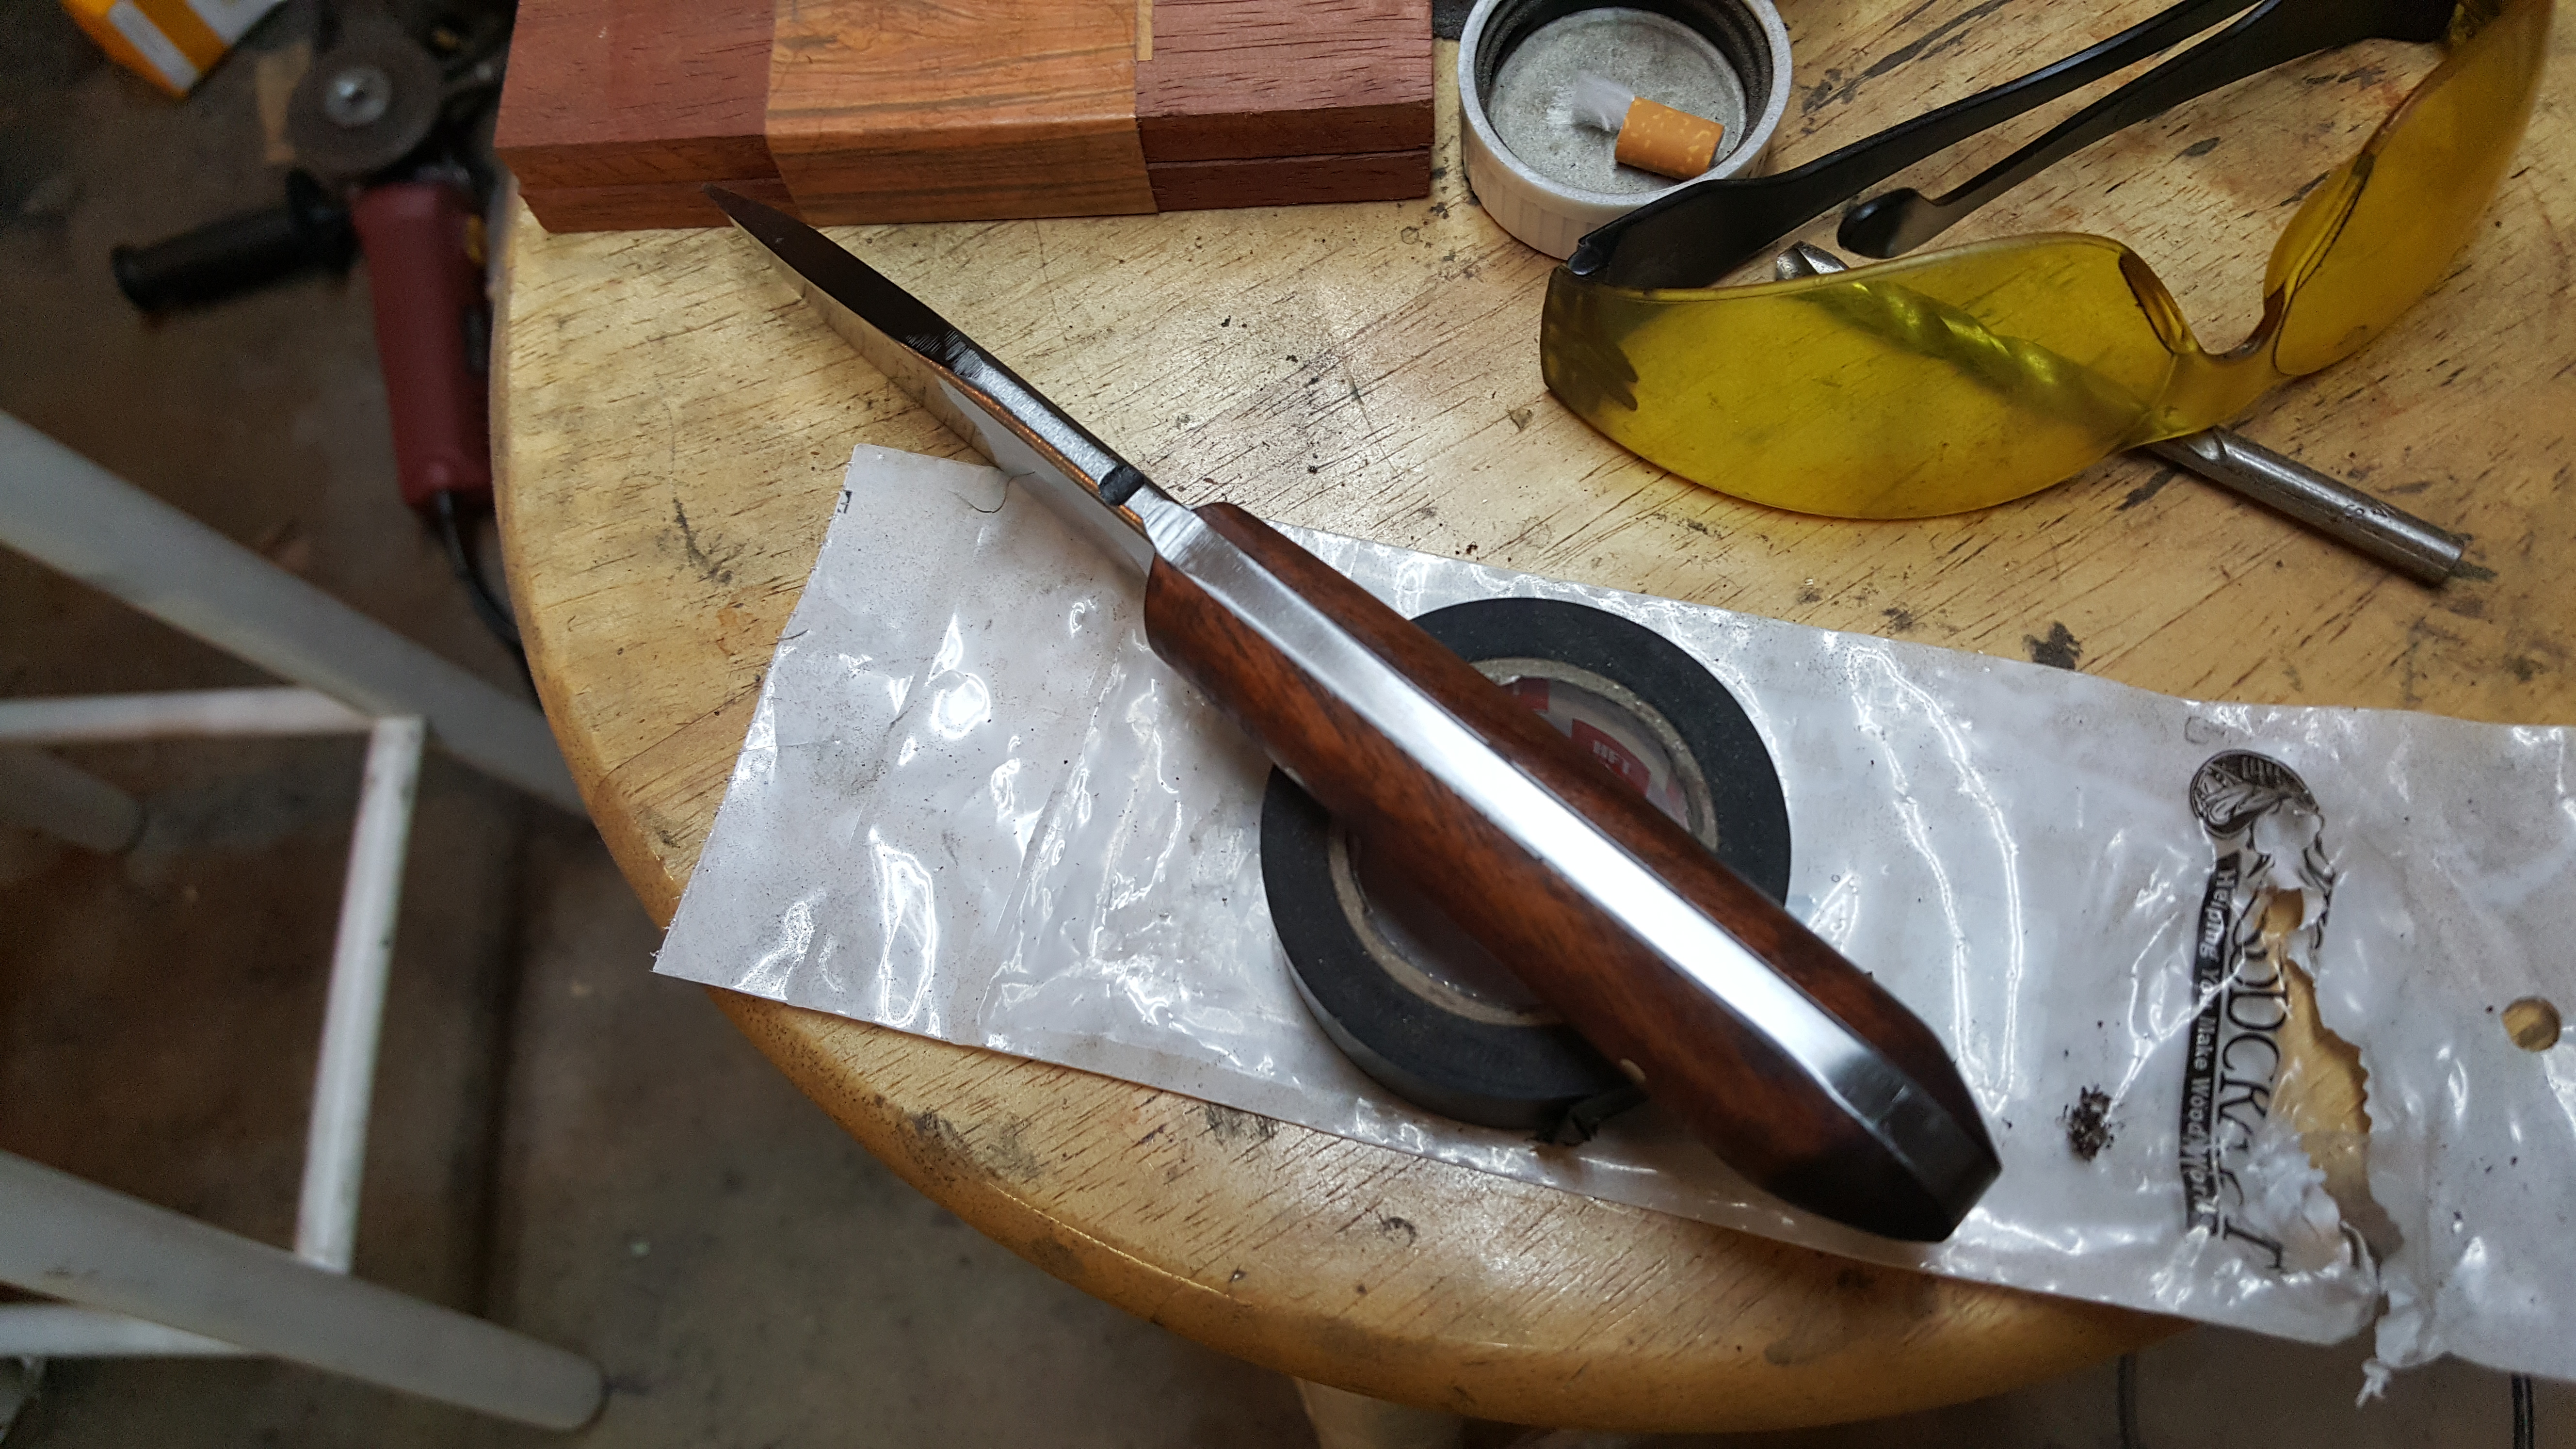
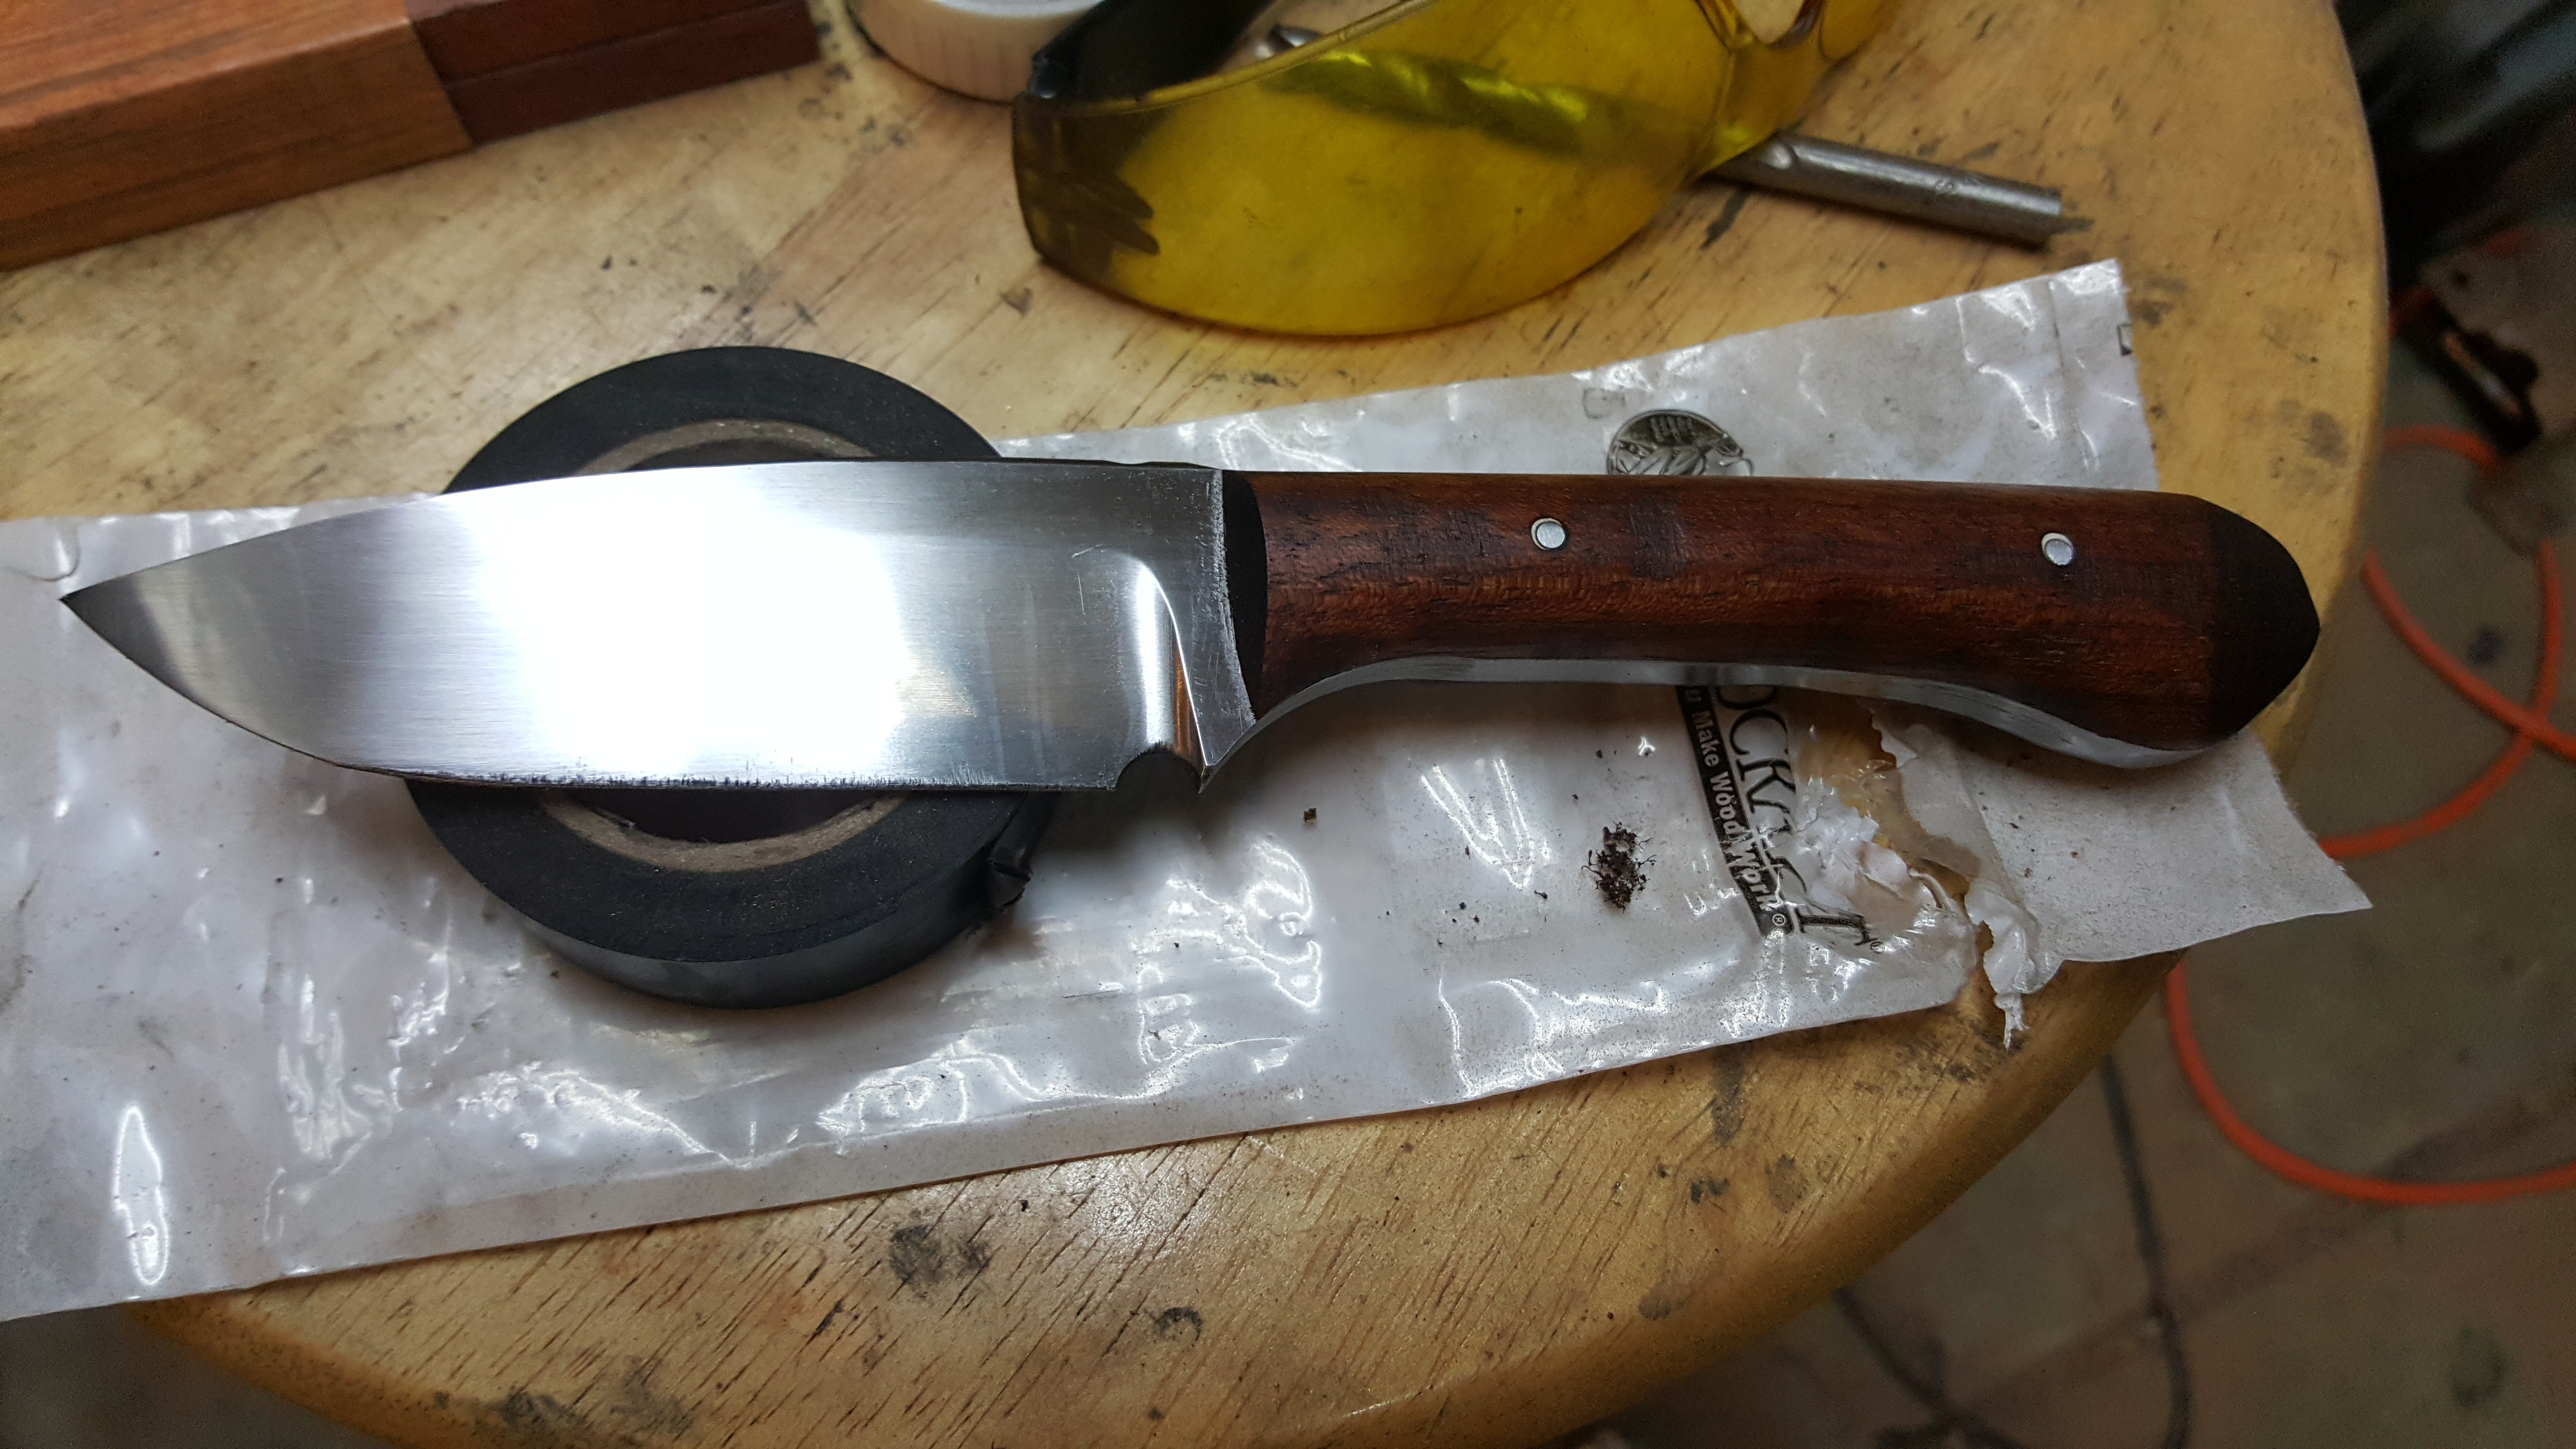
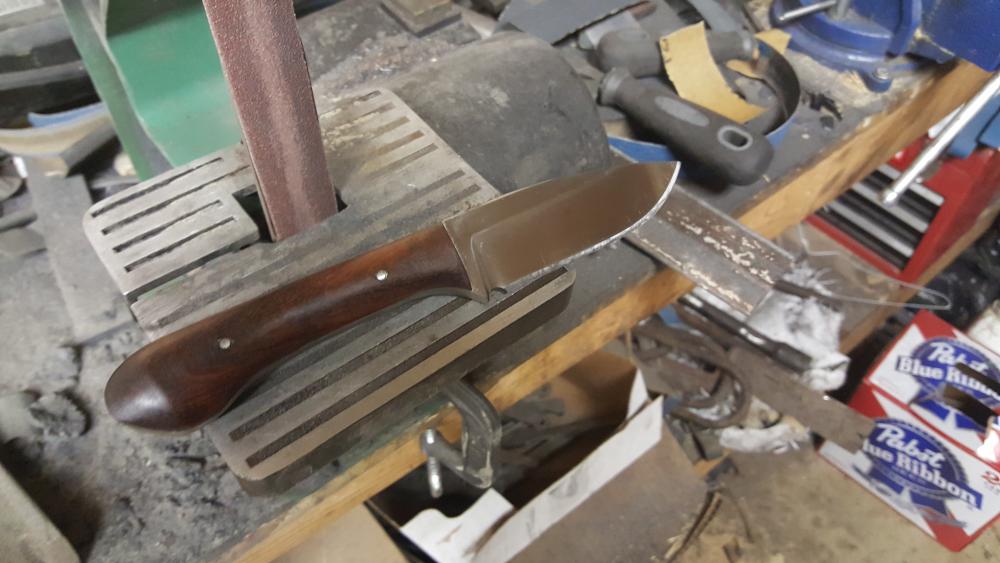
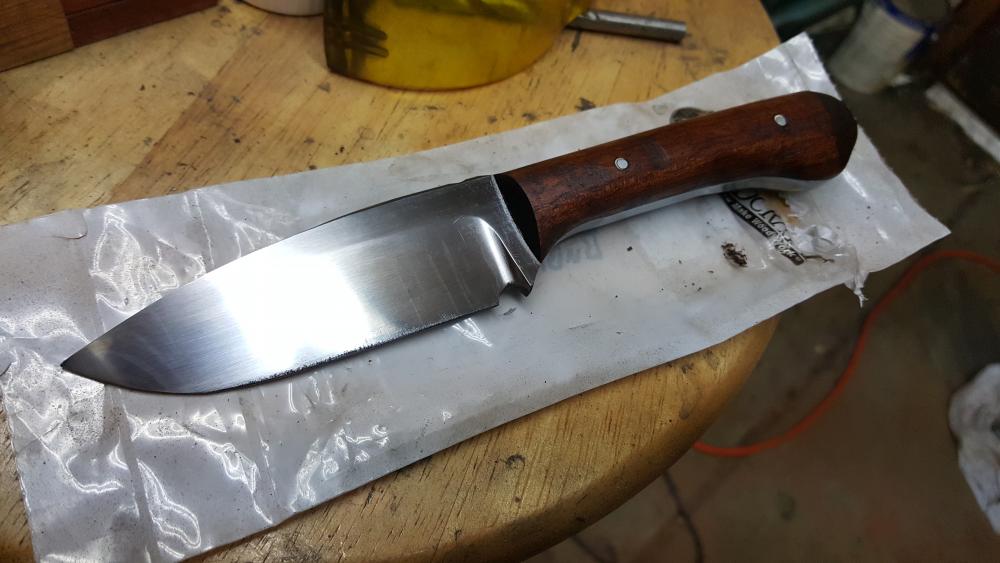
Not sure what to call this, When I first started this, I planned on it being a camp type knife useful in many things but not specific to any. And then the problems started, I had an issue with sanding, not sure if its the 2x4 i use to clamp things too, or my newbishness to blame, but once I hit 500g I could not help but create swirly scratches both about 1 inch from the ricasso, and about 1/2 inch from the tip. On a random hunch, I decided to give my buffer wheel a try, something which has terrified me to no end after reading about the fact a buffer wheel can pull a knife out of a makers hand and bury it into a wall, or the chest of the maker in a split second. At 220g and buffed, it was nice, but I did decide to go up to 500g and then buff it, which while not a full out mirror finish, is the closest I have ever come to such a finish. On the next one I plan to go all the way up to 2000g and give buffing another try. its 5160 steel, Brass pins, and Bocote scales, as it sits right now it still needs a real edge, I roughed it out on my belt grinder ( another first, I normally do it by hand ) so that is another first for me, But this is probably the best knife I have produced to date, and am quite happy with the results even if its not collector quality.


-
Wow.... For all of those of the British lineage, my condolences for your lawmakers being total prats...
-
I would add that you should probably call in sick to work for about a week, unless your job allows you to hang out on here and read for 14+ hours a day.... welcome to the Forum. as others have stated, read the knife making 101 classes, there is a TON of useful info for people just starting out.
-
LOL, I get that all the time to be honest.
-
Yeah, I do need to still make a sheath for it, unfortunately all I have at the moment is Kydex for the sheath, Need to get some leather and some leatherworking tools in the very near future, seen quite a few knives with leather sheaths where there is just as much work put into the sheath as there is the knife, which I am sure would help me add value to my work. once i get half way decent at it. and i do plan to sand the scratches out from sharpening , I think at the end during the sharpening process I got a little rushed which is why one side is scratched up, and the other is not, the girlfriend was on her way home from work, and wanted to leave to get food right after she got home, and when she says be ready to go ( And when she gets home from work ) she expects me to be done working on knives for the night. And thanks guys, I will get a sheath made up for it, and do as Steve says, and ask $110.00 for it and see if I cant sell it for that, If I can, I can afford to get my propane forge done in one shot. which will be nice, I really wanna give another go at pattern welding and have had mixed results attempting it with Charcoal.
-
Aside from Frosty's suggestion of staining the epoxy, Which I might not have much luck on in a dryed state, and some clean up due to scratching it during sharpening, this one is now done. Now my question, which might seem a bit odd. is asking 75.00 for this knife underselling myself, or asking too much? I need to make some money off this hobby in the near future, So I can afford Kaowool and Plistix for my propane forge before the weather turns ugly here in Utah, and I am hoping to make enough in the next few months from this hobby to afford an Evenheat kiln so I can do stock removal knives year round. And Frosty, I have been looking at land up in Alaska recently, My dad would like to retire there, and I have found land there to be dirt cheap compared to land here in the Utah wilds, so I am thinking if I do buy any land, its going to be in Alaska, yay for stock options bought at 2/3rds the company stock value.
-
Frosty..... As always, You have a brilliantly simple solution that I had never even thought of.... Someone hand this man a beer like pronto! And Charles, I am sure you would, This one is likely durable enough to handle it fairly well.
-
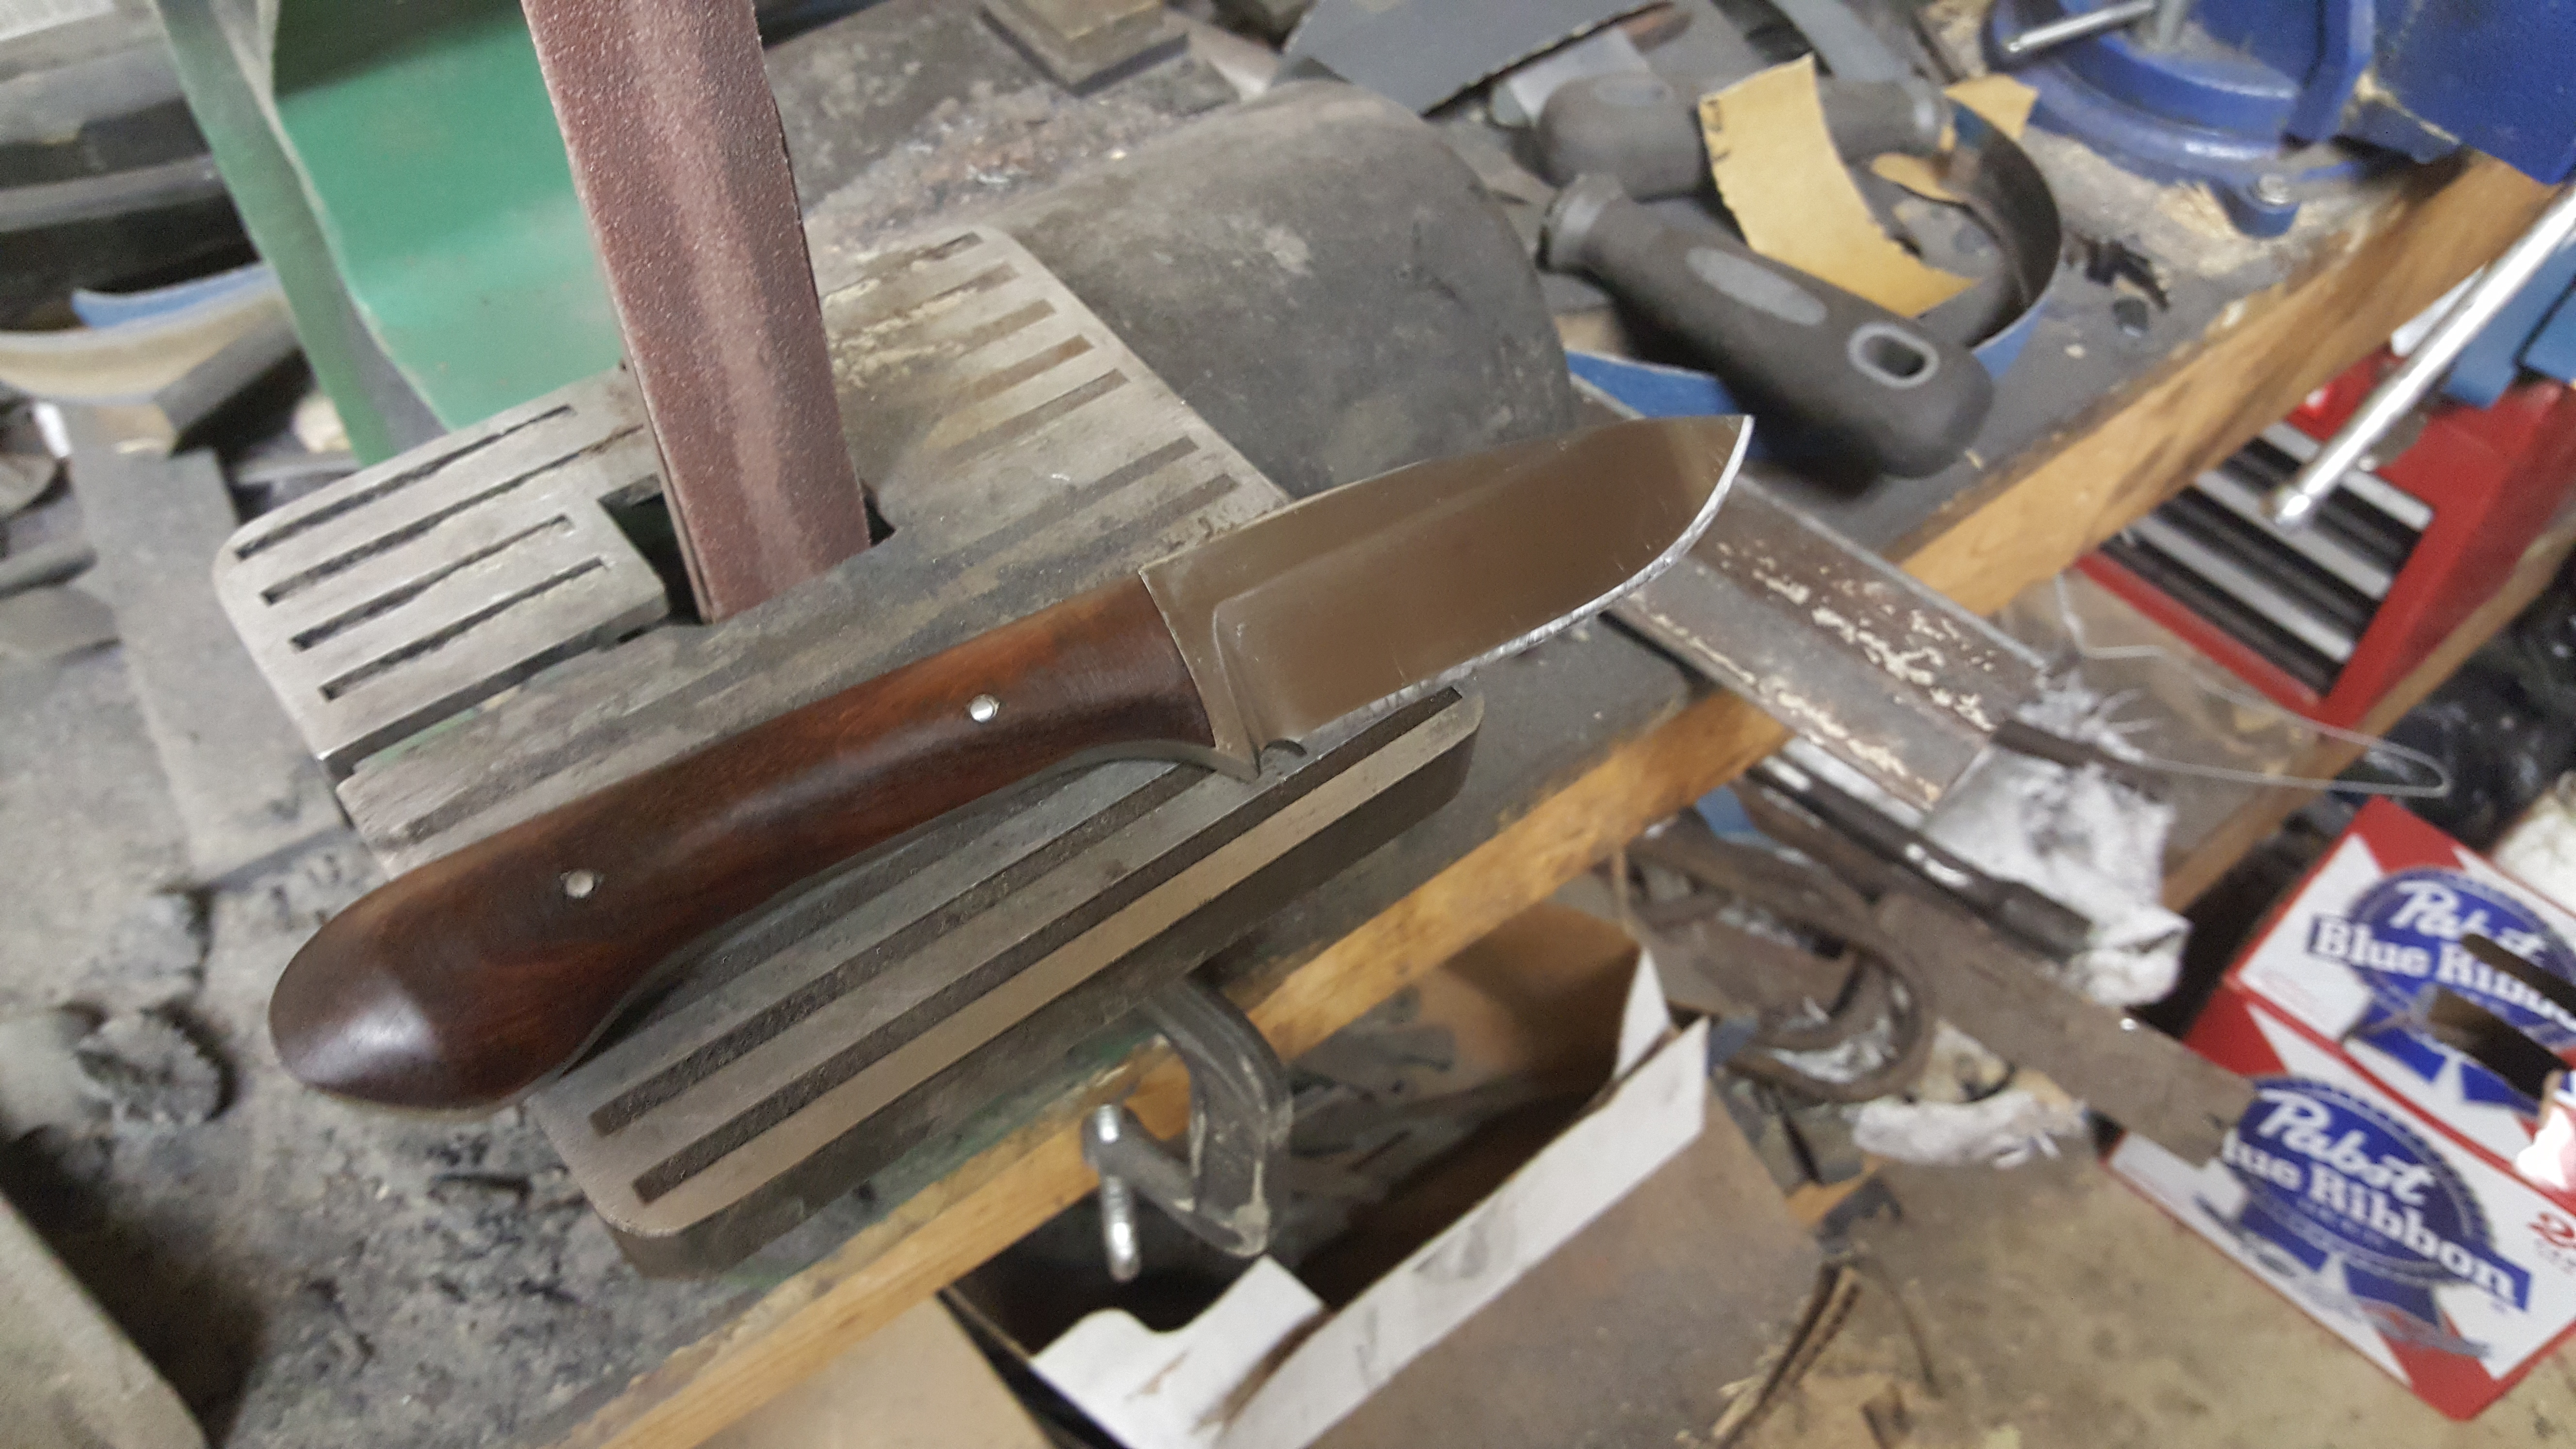
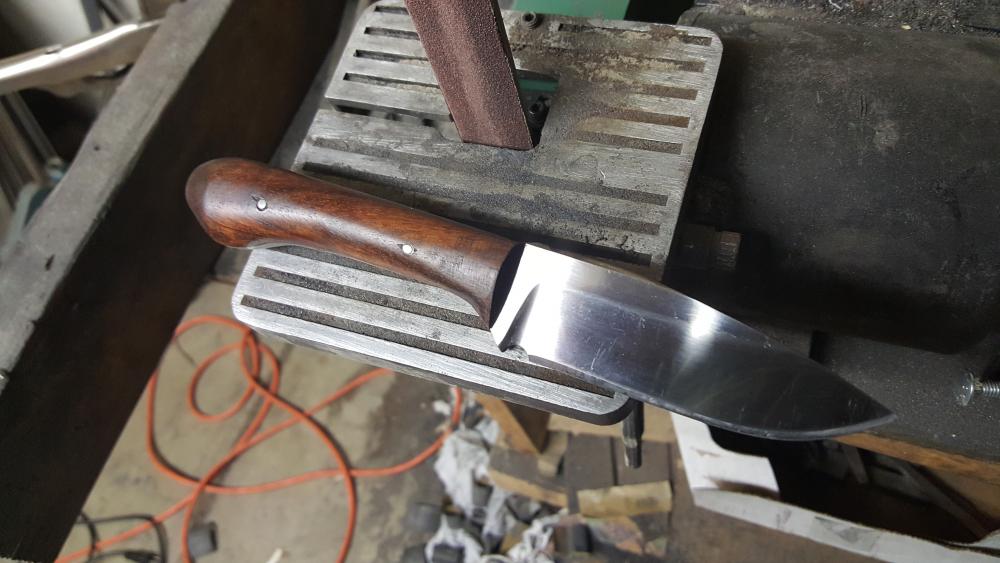
Well..... Originally when I made it, it was clipped instead of a drop, so I guess calling it a clip point now is not accurate, but thats what I have been calling it. Yay for sanding mistakes on a belt sander.
-
Started this knife last month, I would call it about 96% complete at this point. Needs some clean up sanding on the blade and tang areas of the handle. and needs to be sharpened. 5160 steel, Bubinga for the handle,4 inch blade at 1/4 inch thick. I am a bit bent on the pins, the Epoxy I used for this one wasnt clear, so there are little half moons on the pins where the epoxy seeped through. however I am quite happy with this knife otherwise.

-
If there is a way to make the bobble head only shake its head in a disapproving manner with Steves face on it, it would be AWESOME. but it has to be the face image from his avatar to properly get the expression across. Steve has grilled me a number of times over asking questions that have been answered before, always pushes me to find what he speaks of and read it, a lot can be learned from just reading this forum. I know I have. So thanks Steve, for being cranky, but also for having put so much awesome information where it can be found and sometimes guided too.
-
here is that edge shot Thomas. There is a slight dip in it on both sides about mid way into the choil, but I suspect I could sand that out with a bit of elbow grease and some 220g I dont have a good spot to do decent lighting at the moment, the lower side of the blade in the picture seems to be a tad off, but I think thats the crappy lighting as when I hold it up to the light in the same fashion they appear almost dead even.
-
Once I get off work sure. not allowed sharp thingies at work, Had these photos on my phone.
-
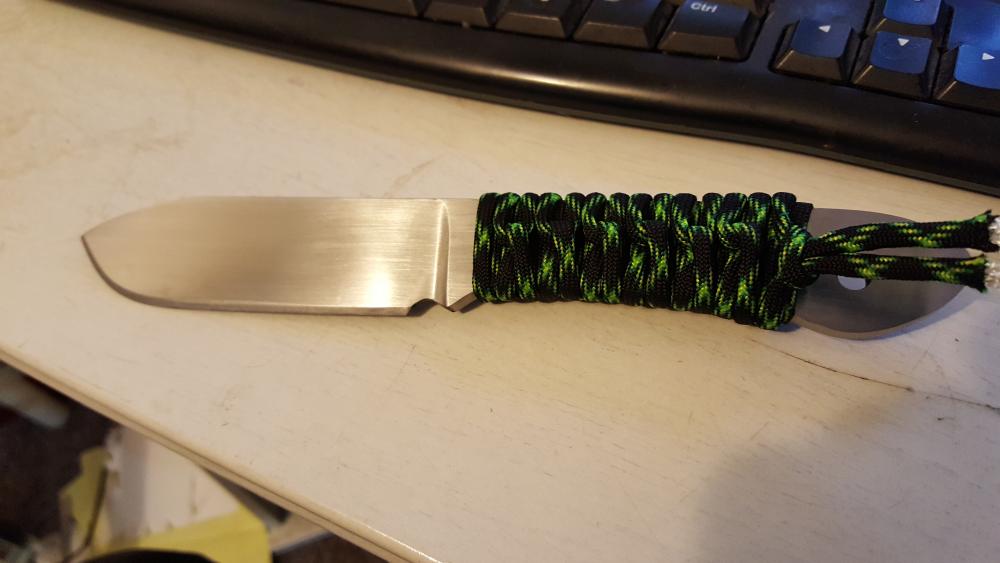
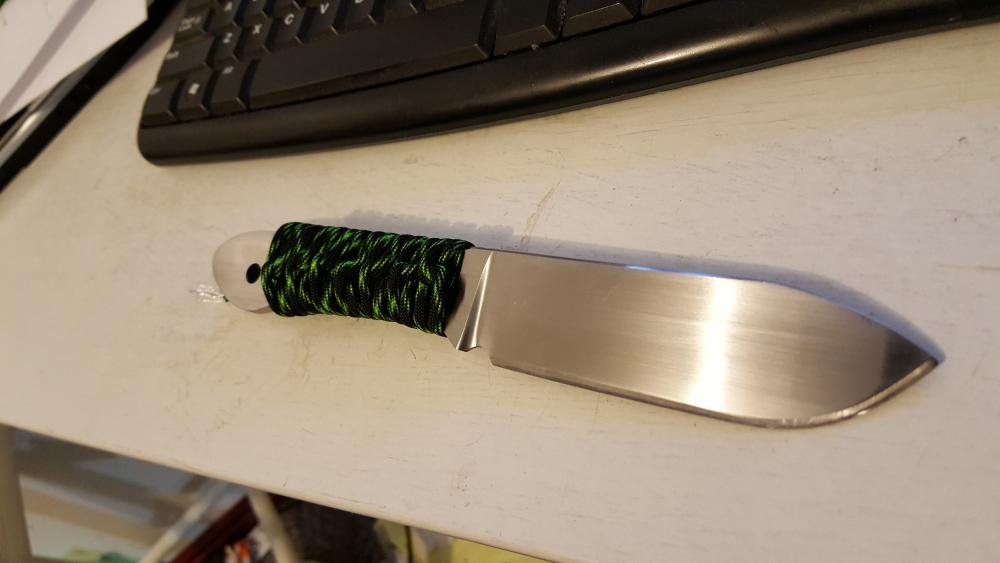
This one was a bit of an experiment that initially I didnt plan to finish off ( I expected to screw it up and toss it in the scrap pile ) as I was just using it to practice getting a smooth plunge cut that I was able to finish out evenly, as Plunge cuts have been the bane of my existence recently. The knife is not yet finished, needs a bit more sanding around the butt to get the low grit scratches out, and I need to properly wrap and secure the paracord on the handle, but overall I am happy with the goal of this particular knife, which was to make a very clean plunge on both sides. Anything stand out to anyone that I should work on to improve with my next one, please let me know.
-
They are not the greatest by any means, but Harbor Freight sells cheap ( and I do mean CHEAP ) anvils, they are barely worth their weight, but 25.00 is pretty cheap to see if you are going to enjoy the forging process.
-
Ill actually be attempting my first forge weld with Charcoal this weekend, depending on how that goes I may rebuild to side blast as I wont be getting any coal any time soon.
-
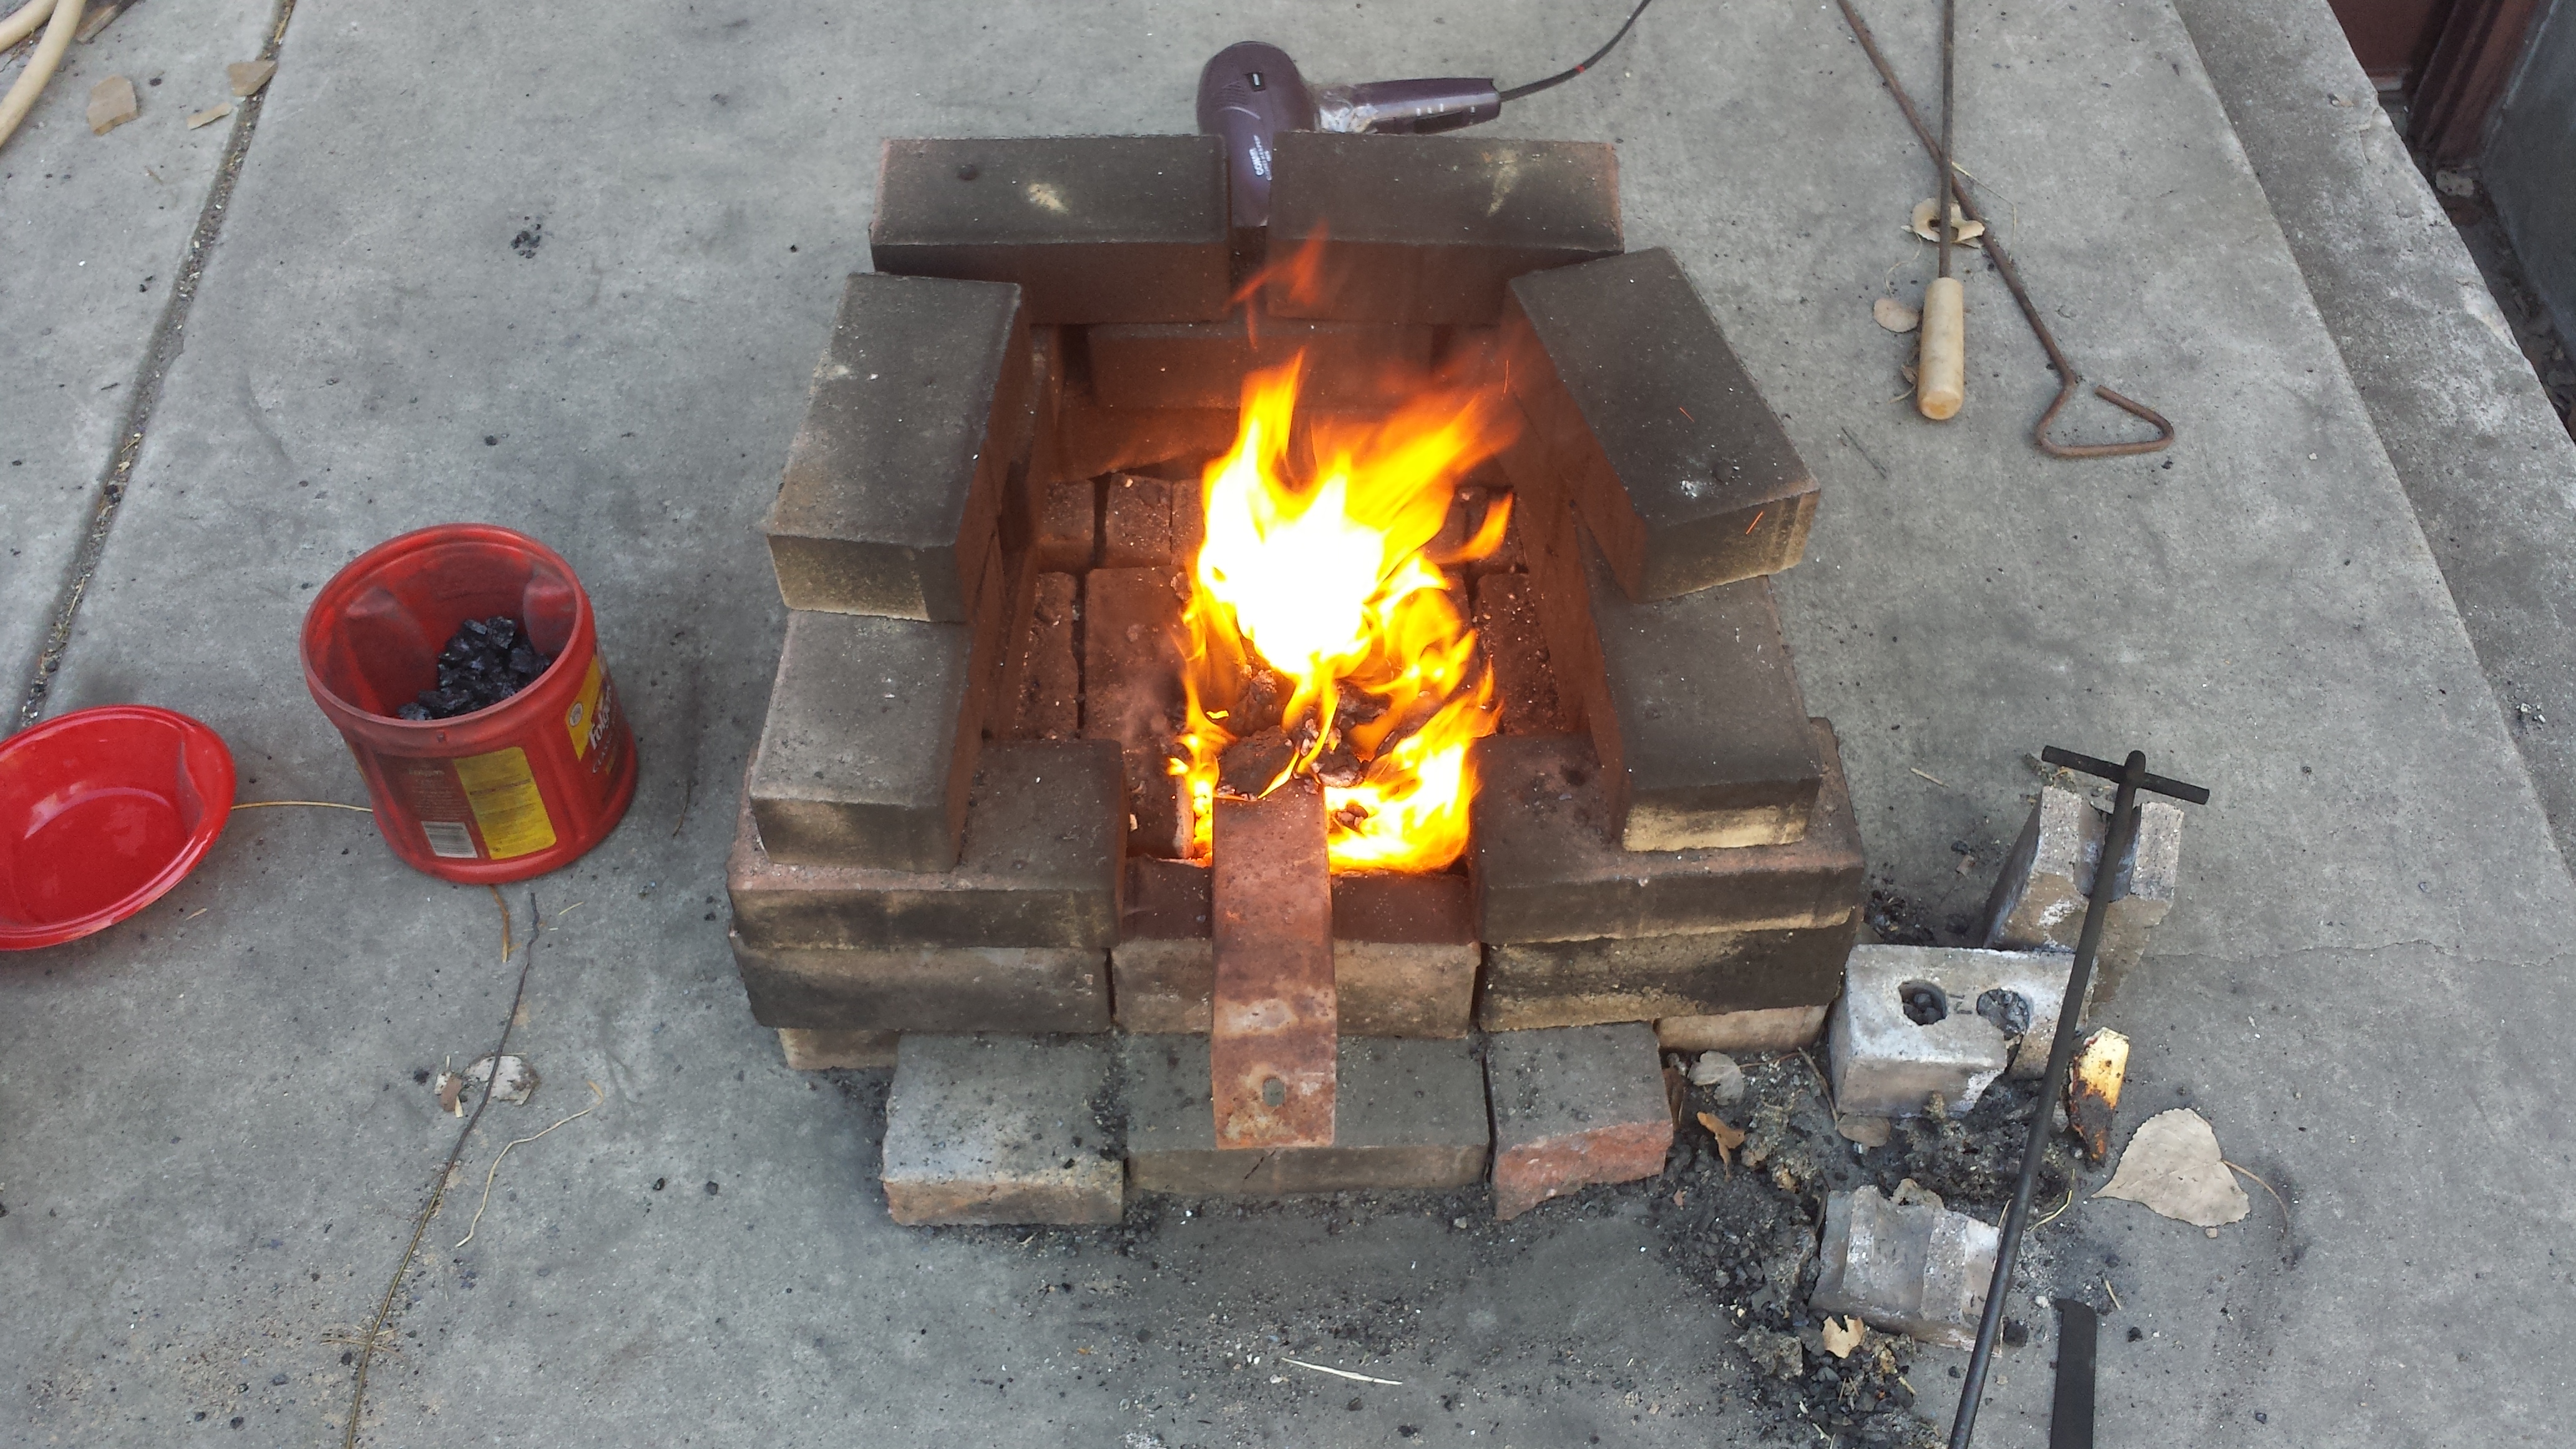
There is my Charcoal / Coal Forge. quite litterally, its just a rough box shape made of bricks, with a fire pot slightly shorter then one standard brick, when full is about 2 bricks stacked sideways deep. Stainless steel pipe runs underneath the Charcoal, with 1/4 inch holes drilled in the last 8 inches or so of it, with the end closed off. Connects to a hair dryer via a copper pipe into the stainless pipe. Total Cost - 14.99 for the hair dryer + 8 dollars for an 18 lb bag of charcoal. ( Royal oak hardwood lump ) Super cheap, super easy, will heat a half inch round section of O1 from cold to yellow heat in about 3 minutes, and will melt a blade in 35 seconds if your not paying attention. Welcome to the most addictive hobby you could EVER find, I dont think even racing is this addictive, ill let you know once I get my dad away from the track to smack hot metal and drink beer with me.

-
I recently switched from Coal to Charcoal due to my coal supplier shutting his doors. Still using the same basic forge layout with charcoal as I did with coal, but with two minor changes. With coal, I used a hair dryer connected to a copper pipe, which fed into a stainless steel pipe with holes drilled in in for the air blast ( From the bottom ) , to get consistent heats, I had to all but seal the copper pipe into the Stainless pipe, With charcoal, even with the hair dryer on the lowest setting, in order to get a good heat and keep from burning my charcoal up very quickly, I had to pull the copper out of the stainless, now I leave about a 1-2 inch gap between the pipes for the airflow, and in some cases offset the copper so only about half of the opening on either side line up. Second thing, as mentioned above, is the fire size, with coal, I typically had a trench about 1.5 firebricks long, by about 1 firebrick deep, with charcoal I found it best to shorten up the length to about 8 inches ( .75 firebrick im thinking ) and nearly double the depth of the fire trench. I have yet to attempt to forgeweld since moving to charcoal, but I am certain I can get the temps needed as it takes about 3 minutes to get a piece of O1 half inch rod stock up to forging heat from cold, and once its been in the fire once, about 10-15 seconds to get it back to forging temps, I actually stick the piece back in the fire, and count out loud because the first piece of metal I stuck in the forge after tinkering with it came out sparking and very VERY yellow and burned, I think I left it in there for about 5 minutes as prior to the changes it would come out dull red after 5 minutes. good luck, play around with it.
-
Yes, one end is closed off, I just stuck mine in the forge, heated it up, flattened one end out and then folded it over to create a seal.
-
I have a machete I am actually working on for my other friends dad, its WAY thinner then this knife is all the way down, I think the thickest part is 1/8th inch. one thing I do like about this knife though, is the fact that you can feel in it how much you can beat on it, with how thick it is, you know you can smack it with a log and not worry about breaking it.
-
Thomas, I would agree, from my limited experience backpacking, however his intent was to replace multiple items he carries when he is out, I suspect this knife will see more baton use then anything else, which is why he wanted it as beefy as I could make it. but he is around the same age as me, and has recently taken up backpacking as one of his hobbies, so his preferences very well may change as he hikes more miles carrying a full pack, And yes, JH, I am in love with Bocote right now, finishes nice, has an awesome character to it, and is quite enjoyable to work with.
-
about 20 minutes before he showed up to check it out for the first time, I took it out and played with it a bit. I have a small " quaking aspen " forest in my back yard, so I have hundreds of the little cloneling sprouts all over my yard, ranging from 1/8th inch thick all the way up to 1 inch thick mini trees, was able to cleave the 1 inch thick ones in a single swing, and no issues grabbing a handful of the littler ones and cutting them clean in a single try, also threw it through some batonning practice with a log about 4 inches round, cut right through it without any deformation of the blade, I think I really have gotten the hang of 5160 and really like how well it works for a knife like this.
-
I made this one for a friend who intends to use it pretty harshly on backpacking trips, I had considered a tapered tang but he was a bit worried it would be less durable, and since I have not had a chance to make one of each to test side by side, I decided to go with the safer option of leaving it full thickness all the way down.
-
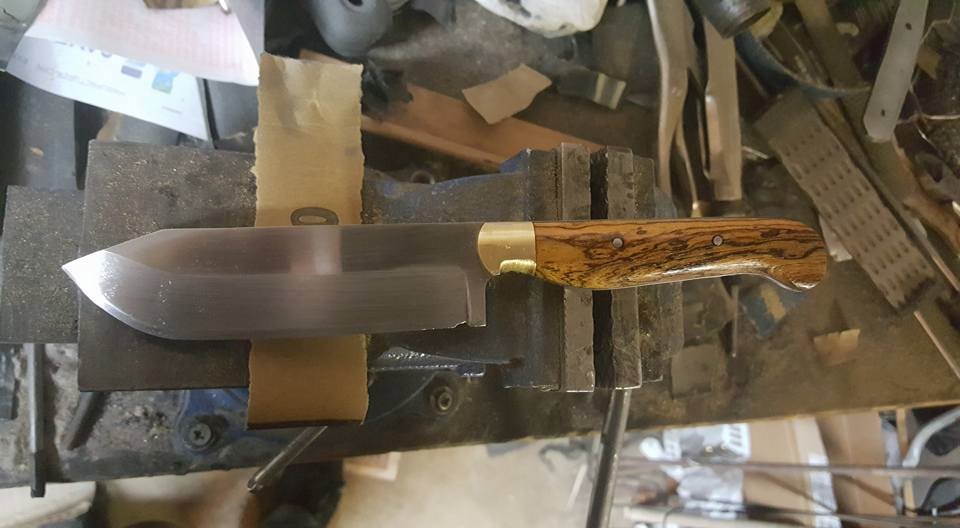
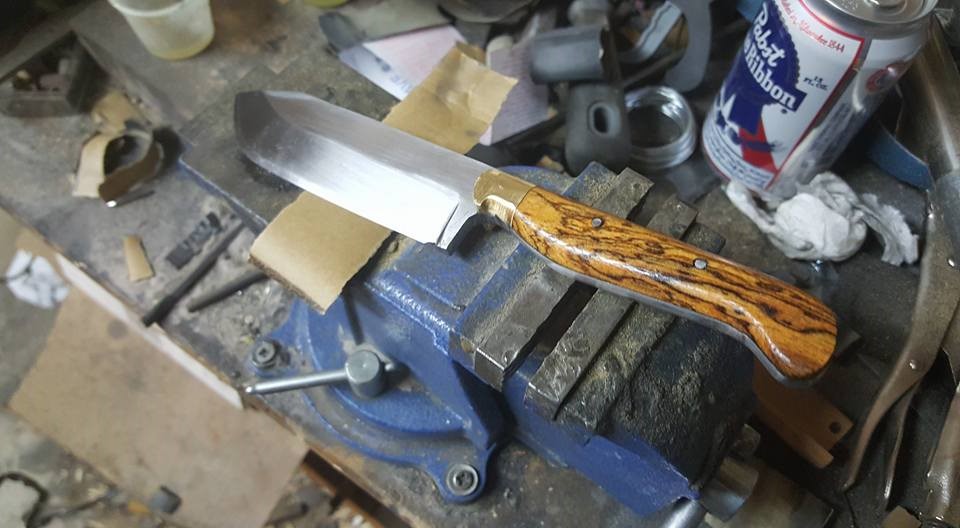
Still have a bit of finish polishing left to do on the spine of the blade, But this is one I just completed for a friend of mine. two things I have decided I need to work on, on the Brass bolster, you cant really see it from the pics, but there is a faint outline of the pin, so it looks like I didnt pein it enough. Also at the handle transition from the blade I should have made it a bit larger, the knife is comfortable in the hand, but could use more meat up in that area. 5160 Steel, 4.5 inch blade, 4.5 inch handle, Brass and Bocote handle materials with mild steel pins. This is actually my first full tang knife with a wood handle so it was quite the learning curve getting everything to fit just right,.
-
One trick that I was told that has helped my heat treating process GREATLY might be something to try. If you are using an open solid fuel forge ( Coal / Charcoal ) stick a pipe in the forge which your knife will fit into, and then heap coals around it. the pipe will help uniformly heat the knife without direct contact with the flames, and since it is inside the pipe, its easier to see the decalescence in the blade where it makes the phase change. also makes it less likely you will overheat the blade. I also use the pipe trick for my normalizations, that way I can watch the blade and make sure it does not get too hot, works a treat for grain refinement. Nice knife, I like how the scale on the blade and the handle material complement each other.
-
I bought a few from FLT Geosystems last year. I think i paid 1.06 each for them back then but now they are 1.99 each. I started with Spikes as well, and quickly moved away from them when I realized I could not properly harden and temper them, Still have like 6 of them floating around my shop, they make excellent wedges for splitting logs, And plan to forge weld high carbon bits into them to make some tomahawks with once I have the ability to drift something larger then the current hardie hole on my anvil will support which is about 1/2 inch.