Malice9610
Members
-
Joined
-
Last visited
Everything posted by Malice9610
-
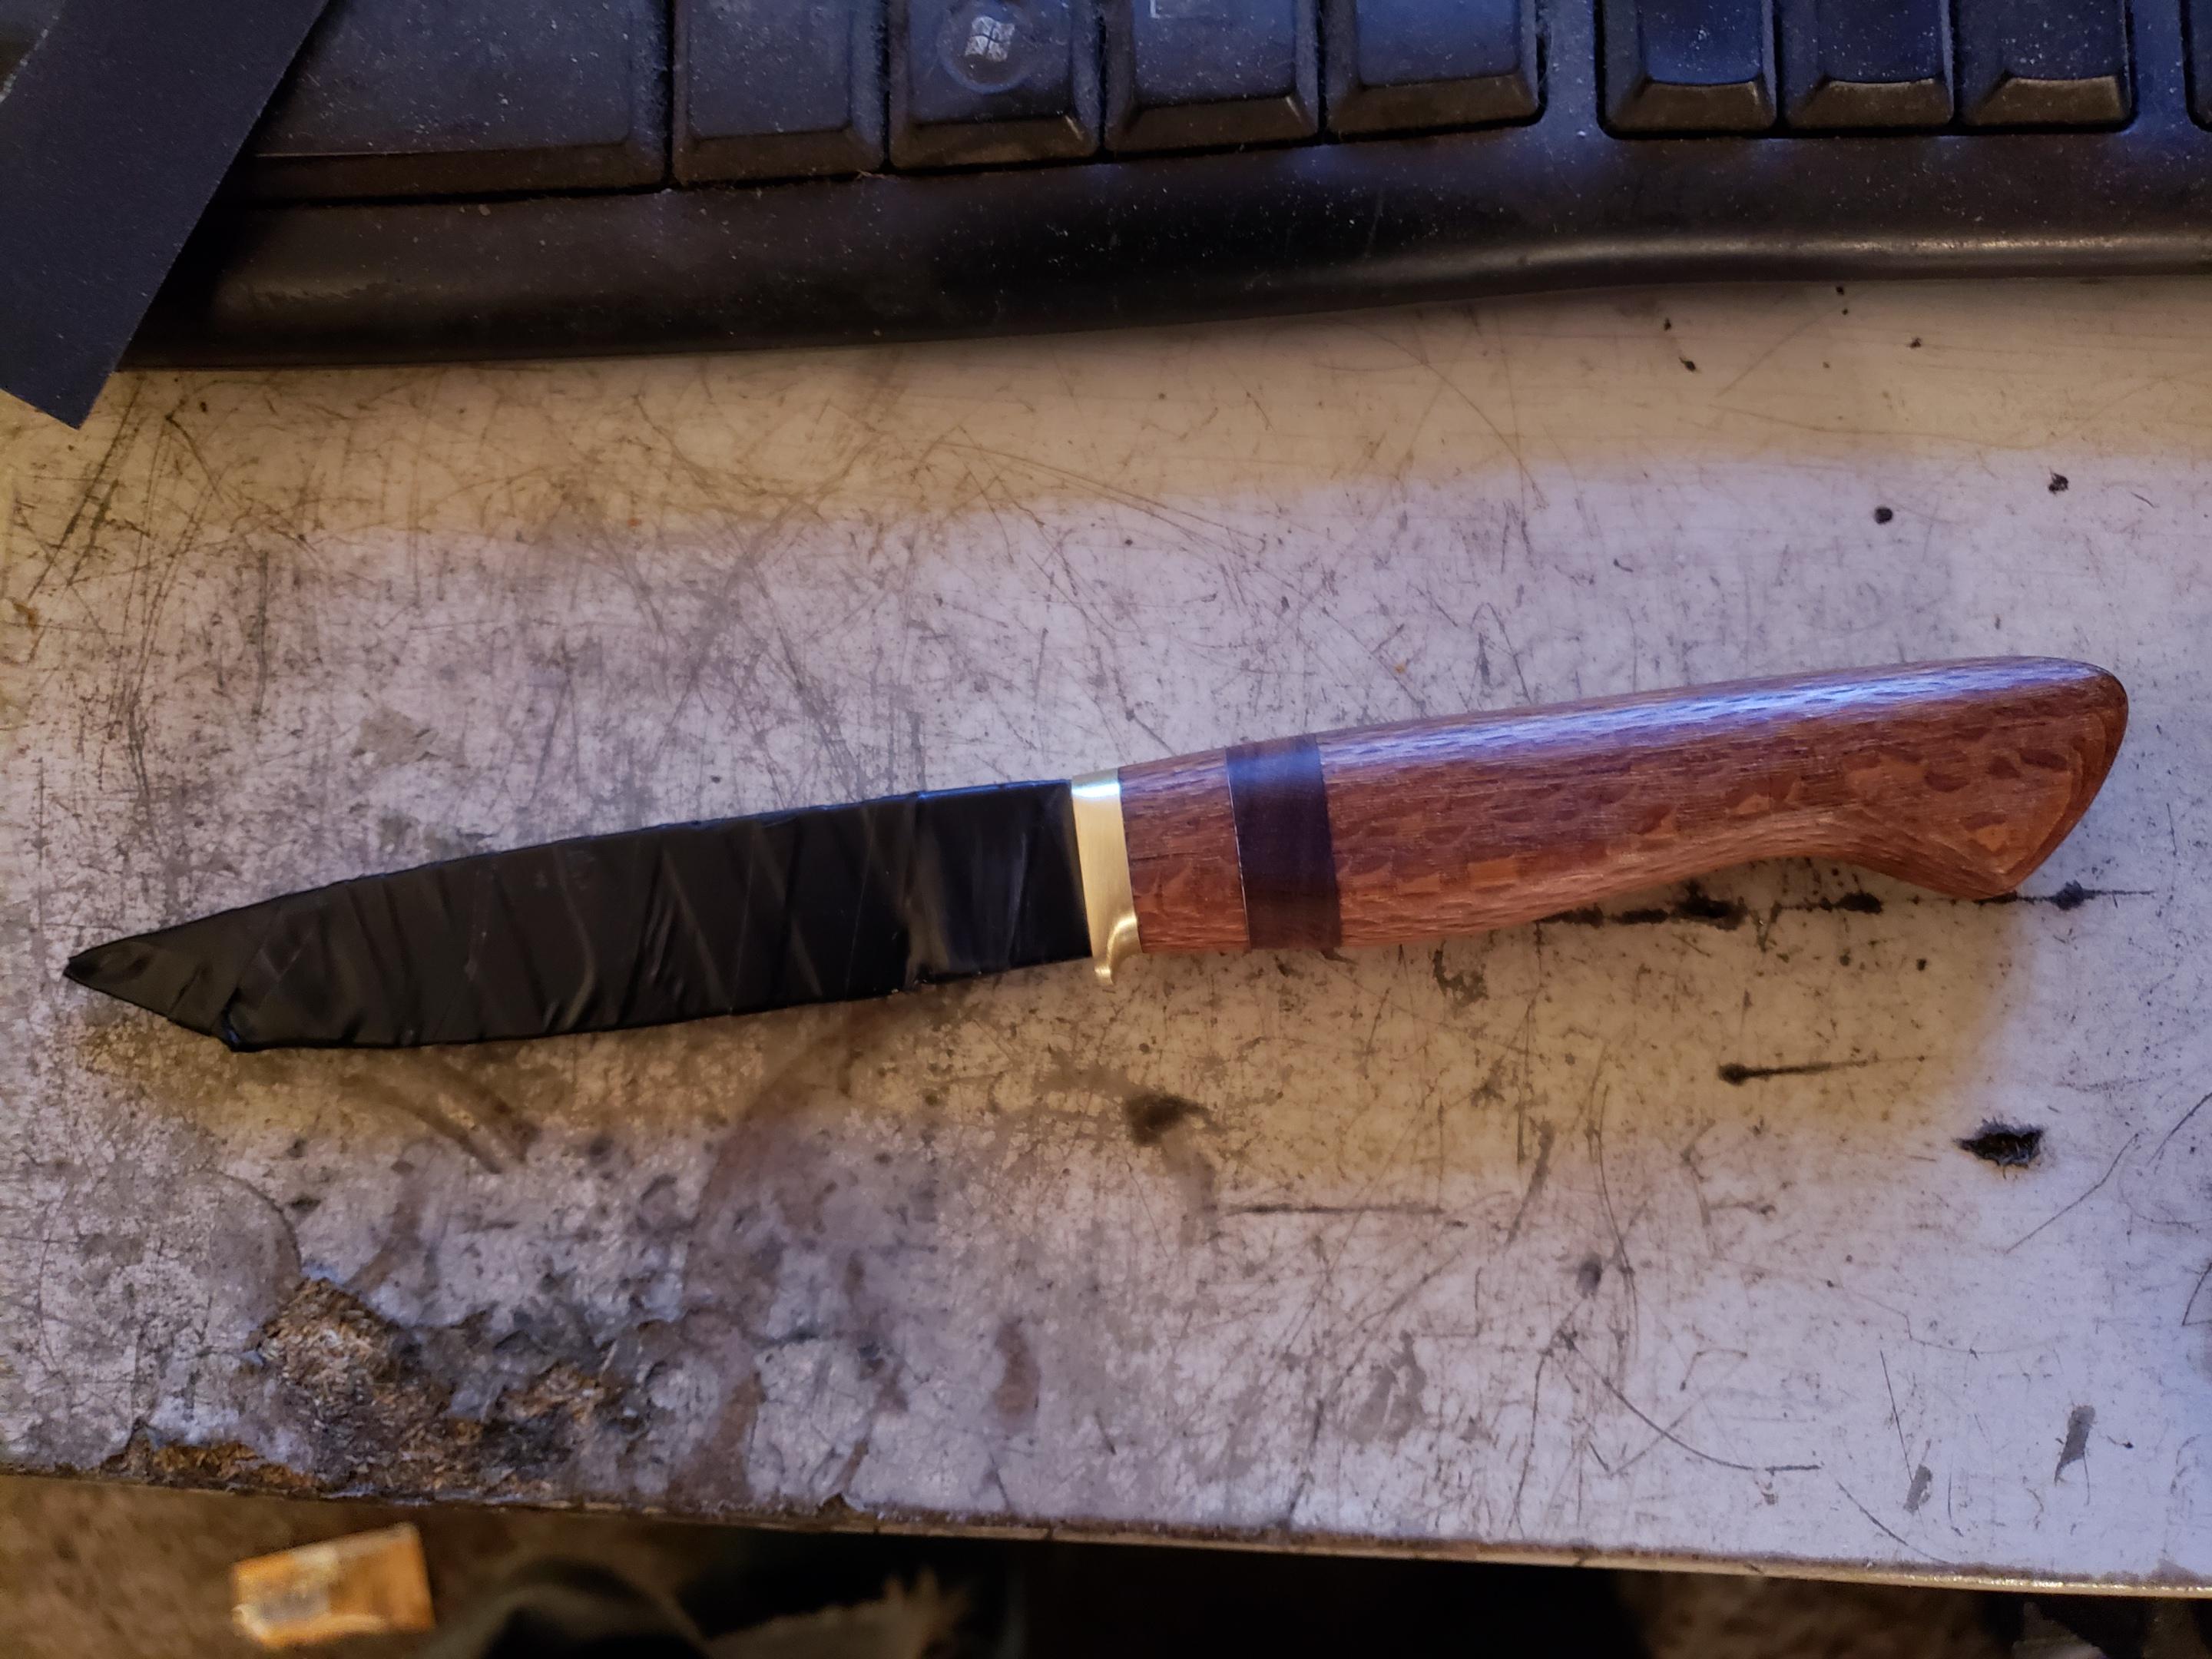
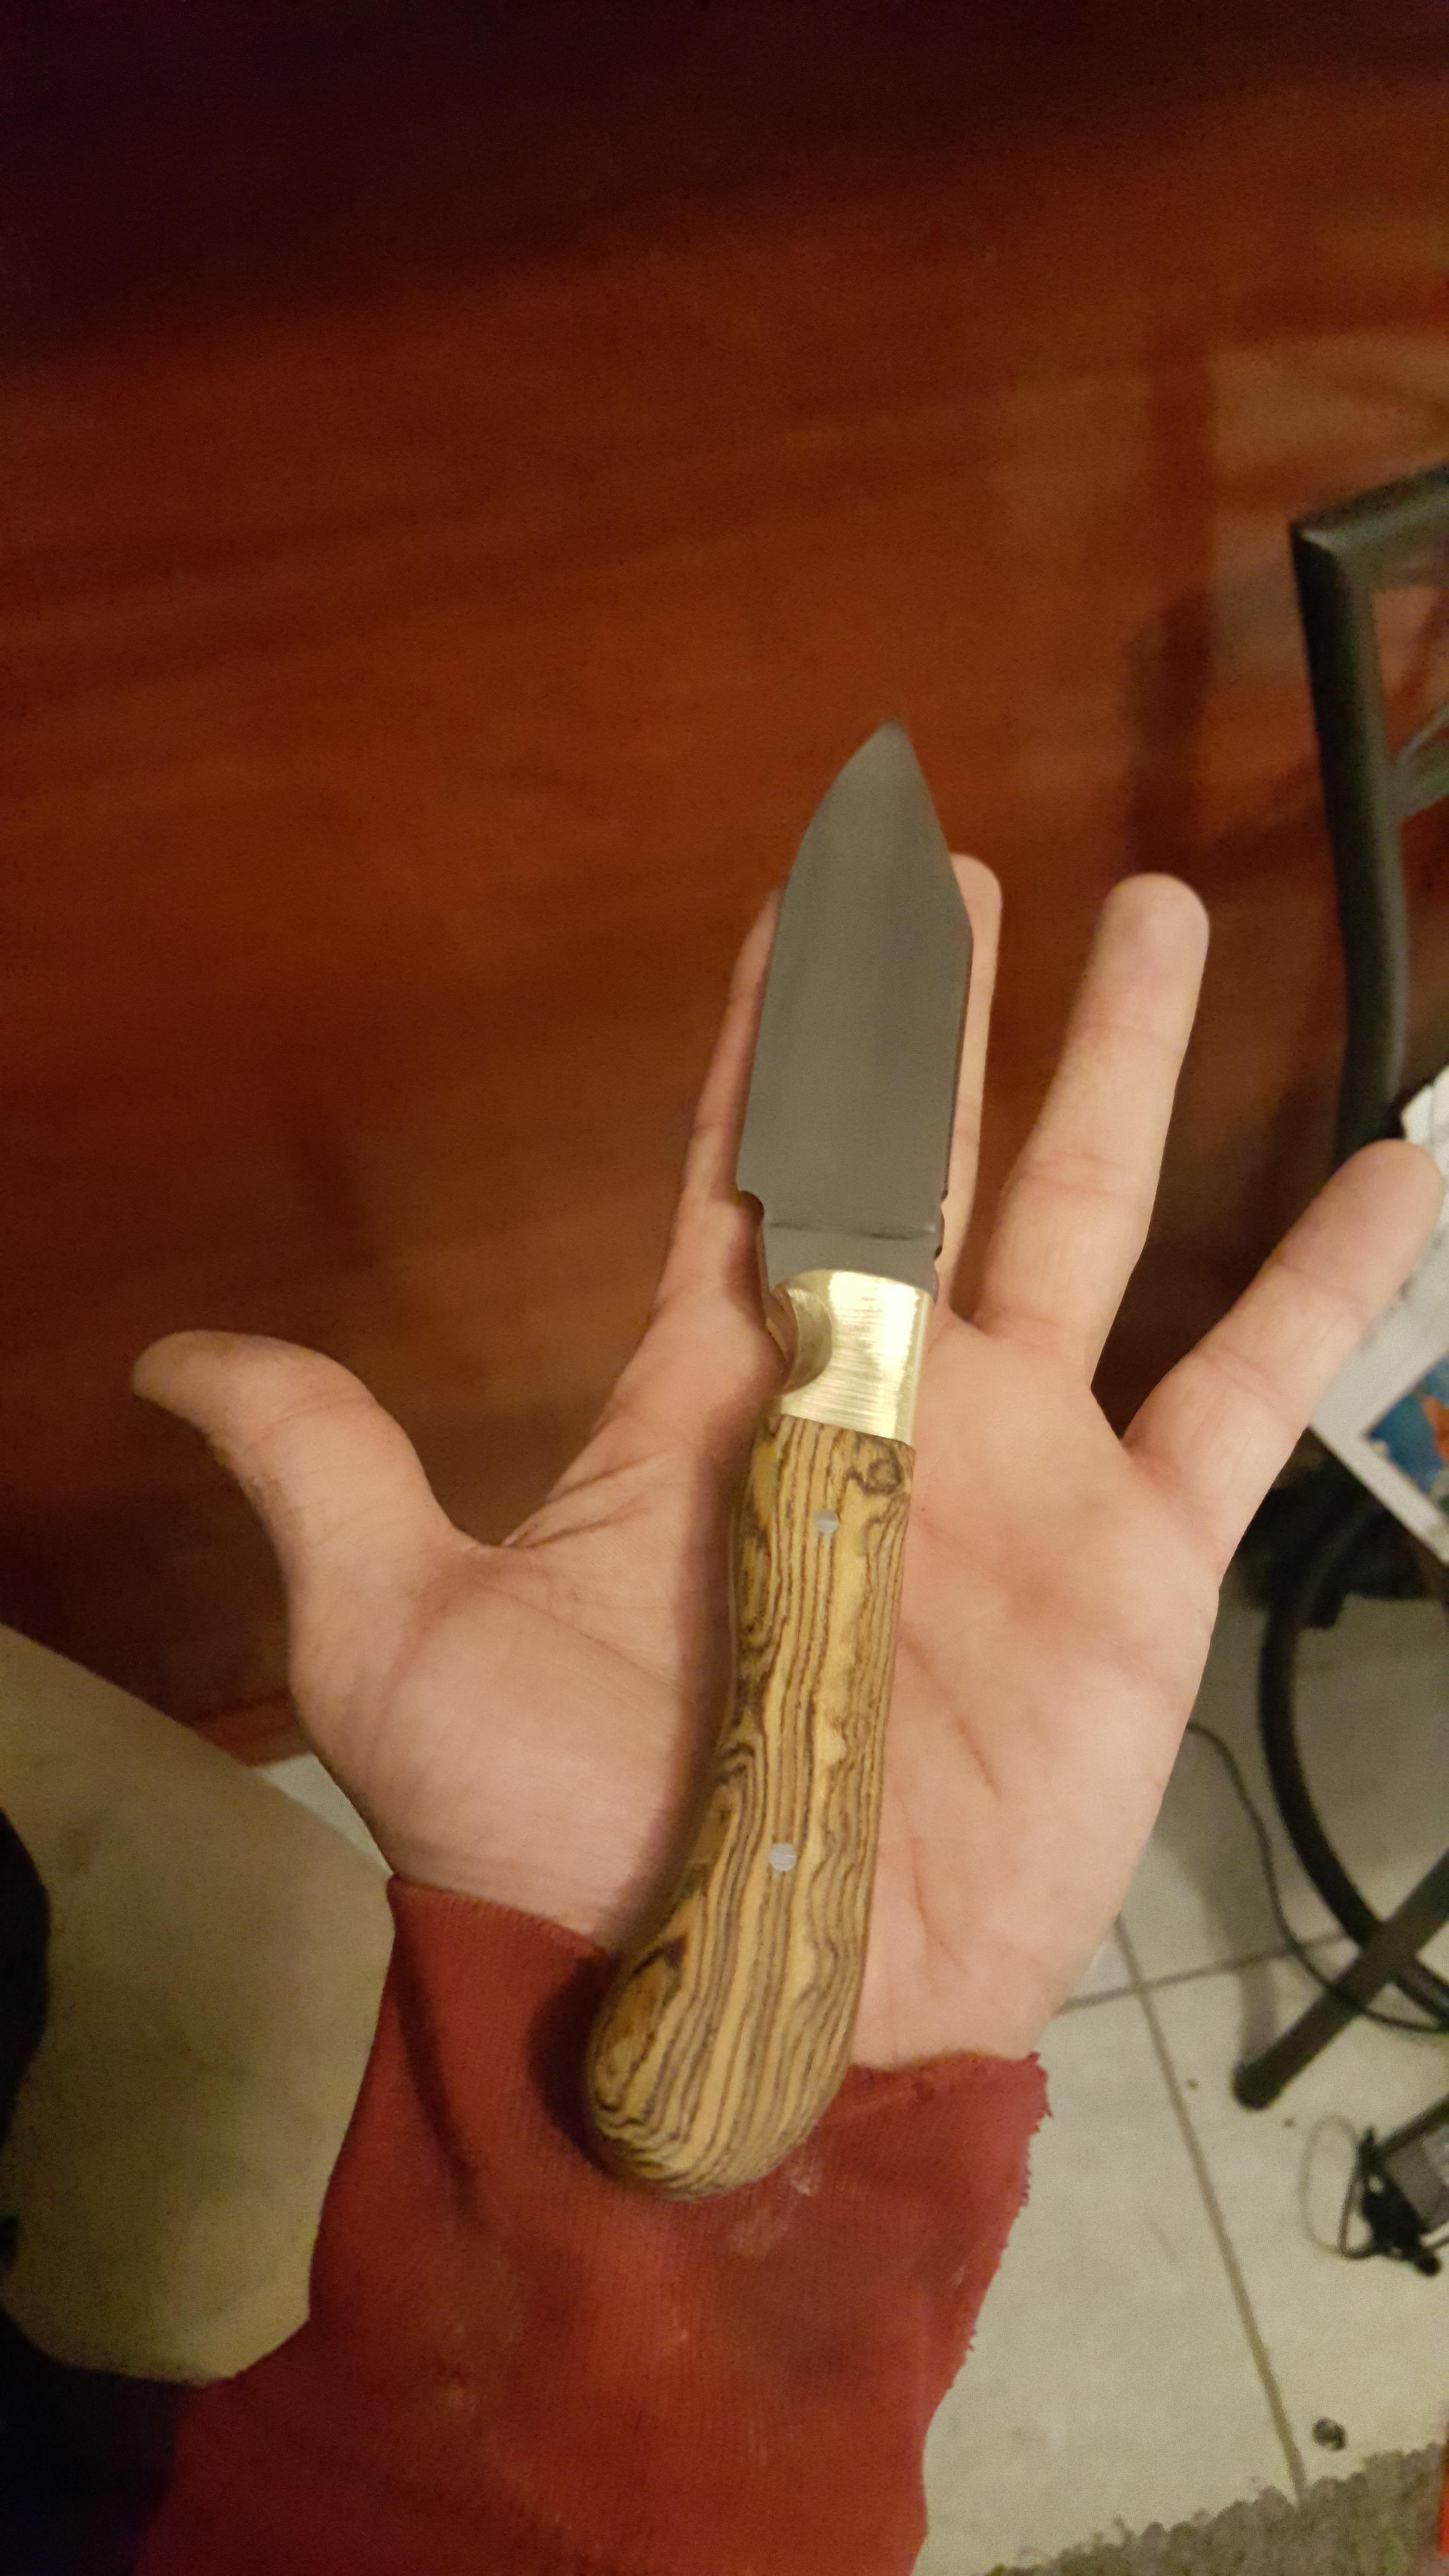
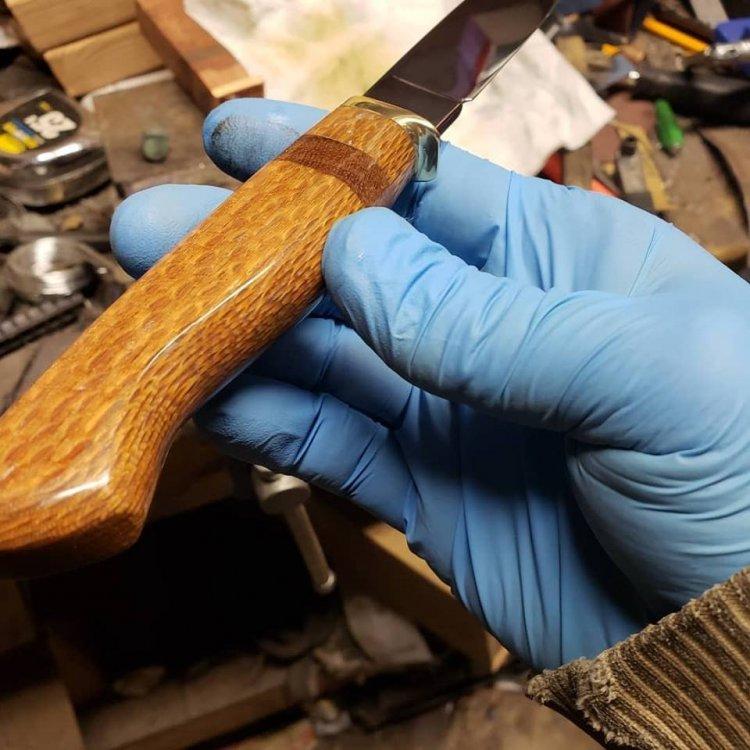
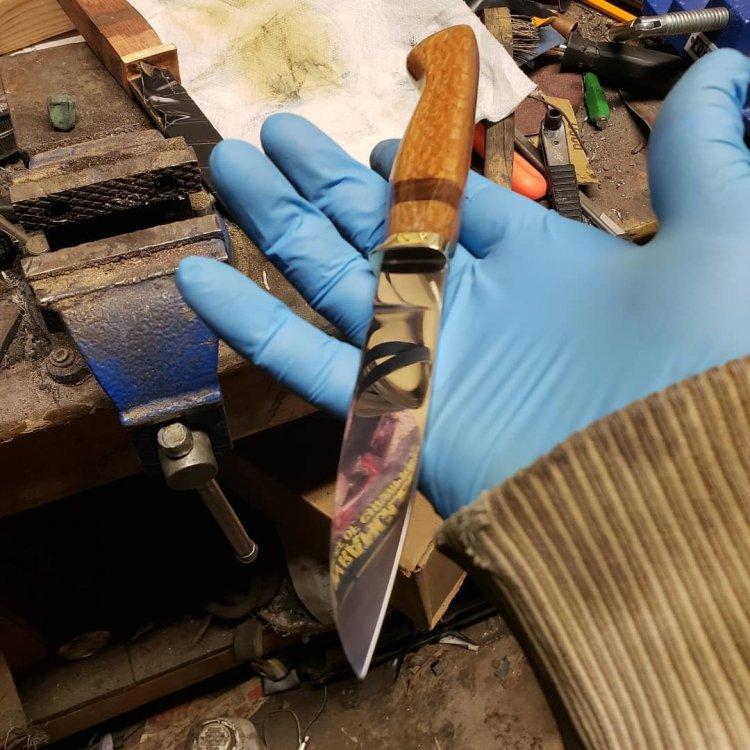
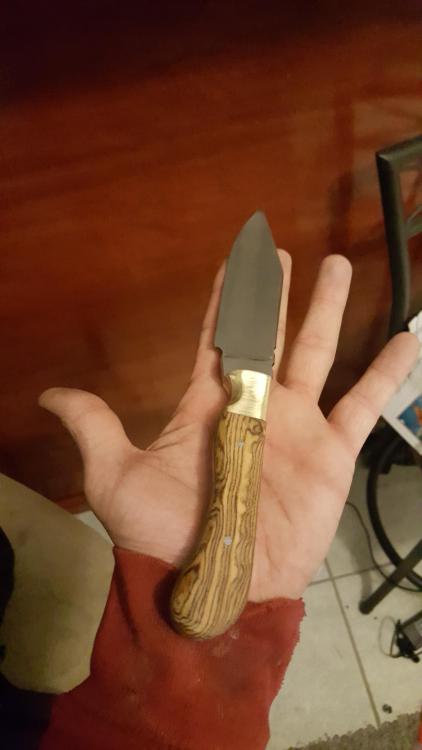
I thought I posted this already, but it would seem I did not. I decided rather then grind the handle off, I would test out the CA glue treatment on it, Which I am glad I did as I really like how the handle turned out after doing so, Granted it took about 20+ coats of CA and I burned through a LOT of 1200g sandpaper, but I am quite happy how it turned out.
-
I think if I had not been so hung up on trying to get the finish " professional " looking, I would be very happy with it, Problem is I have about 10 knives floating around my house right now that I have made, that when I look at them after looking at other peoples work I think to myself " Man you really could have done that a LOT better ". I know its a learning curve and the only way to get better is to keep doing it. I just really wanted this one to be better.
-
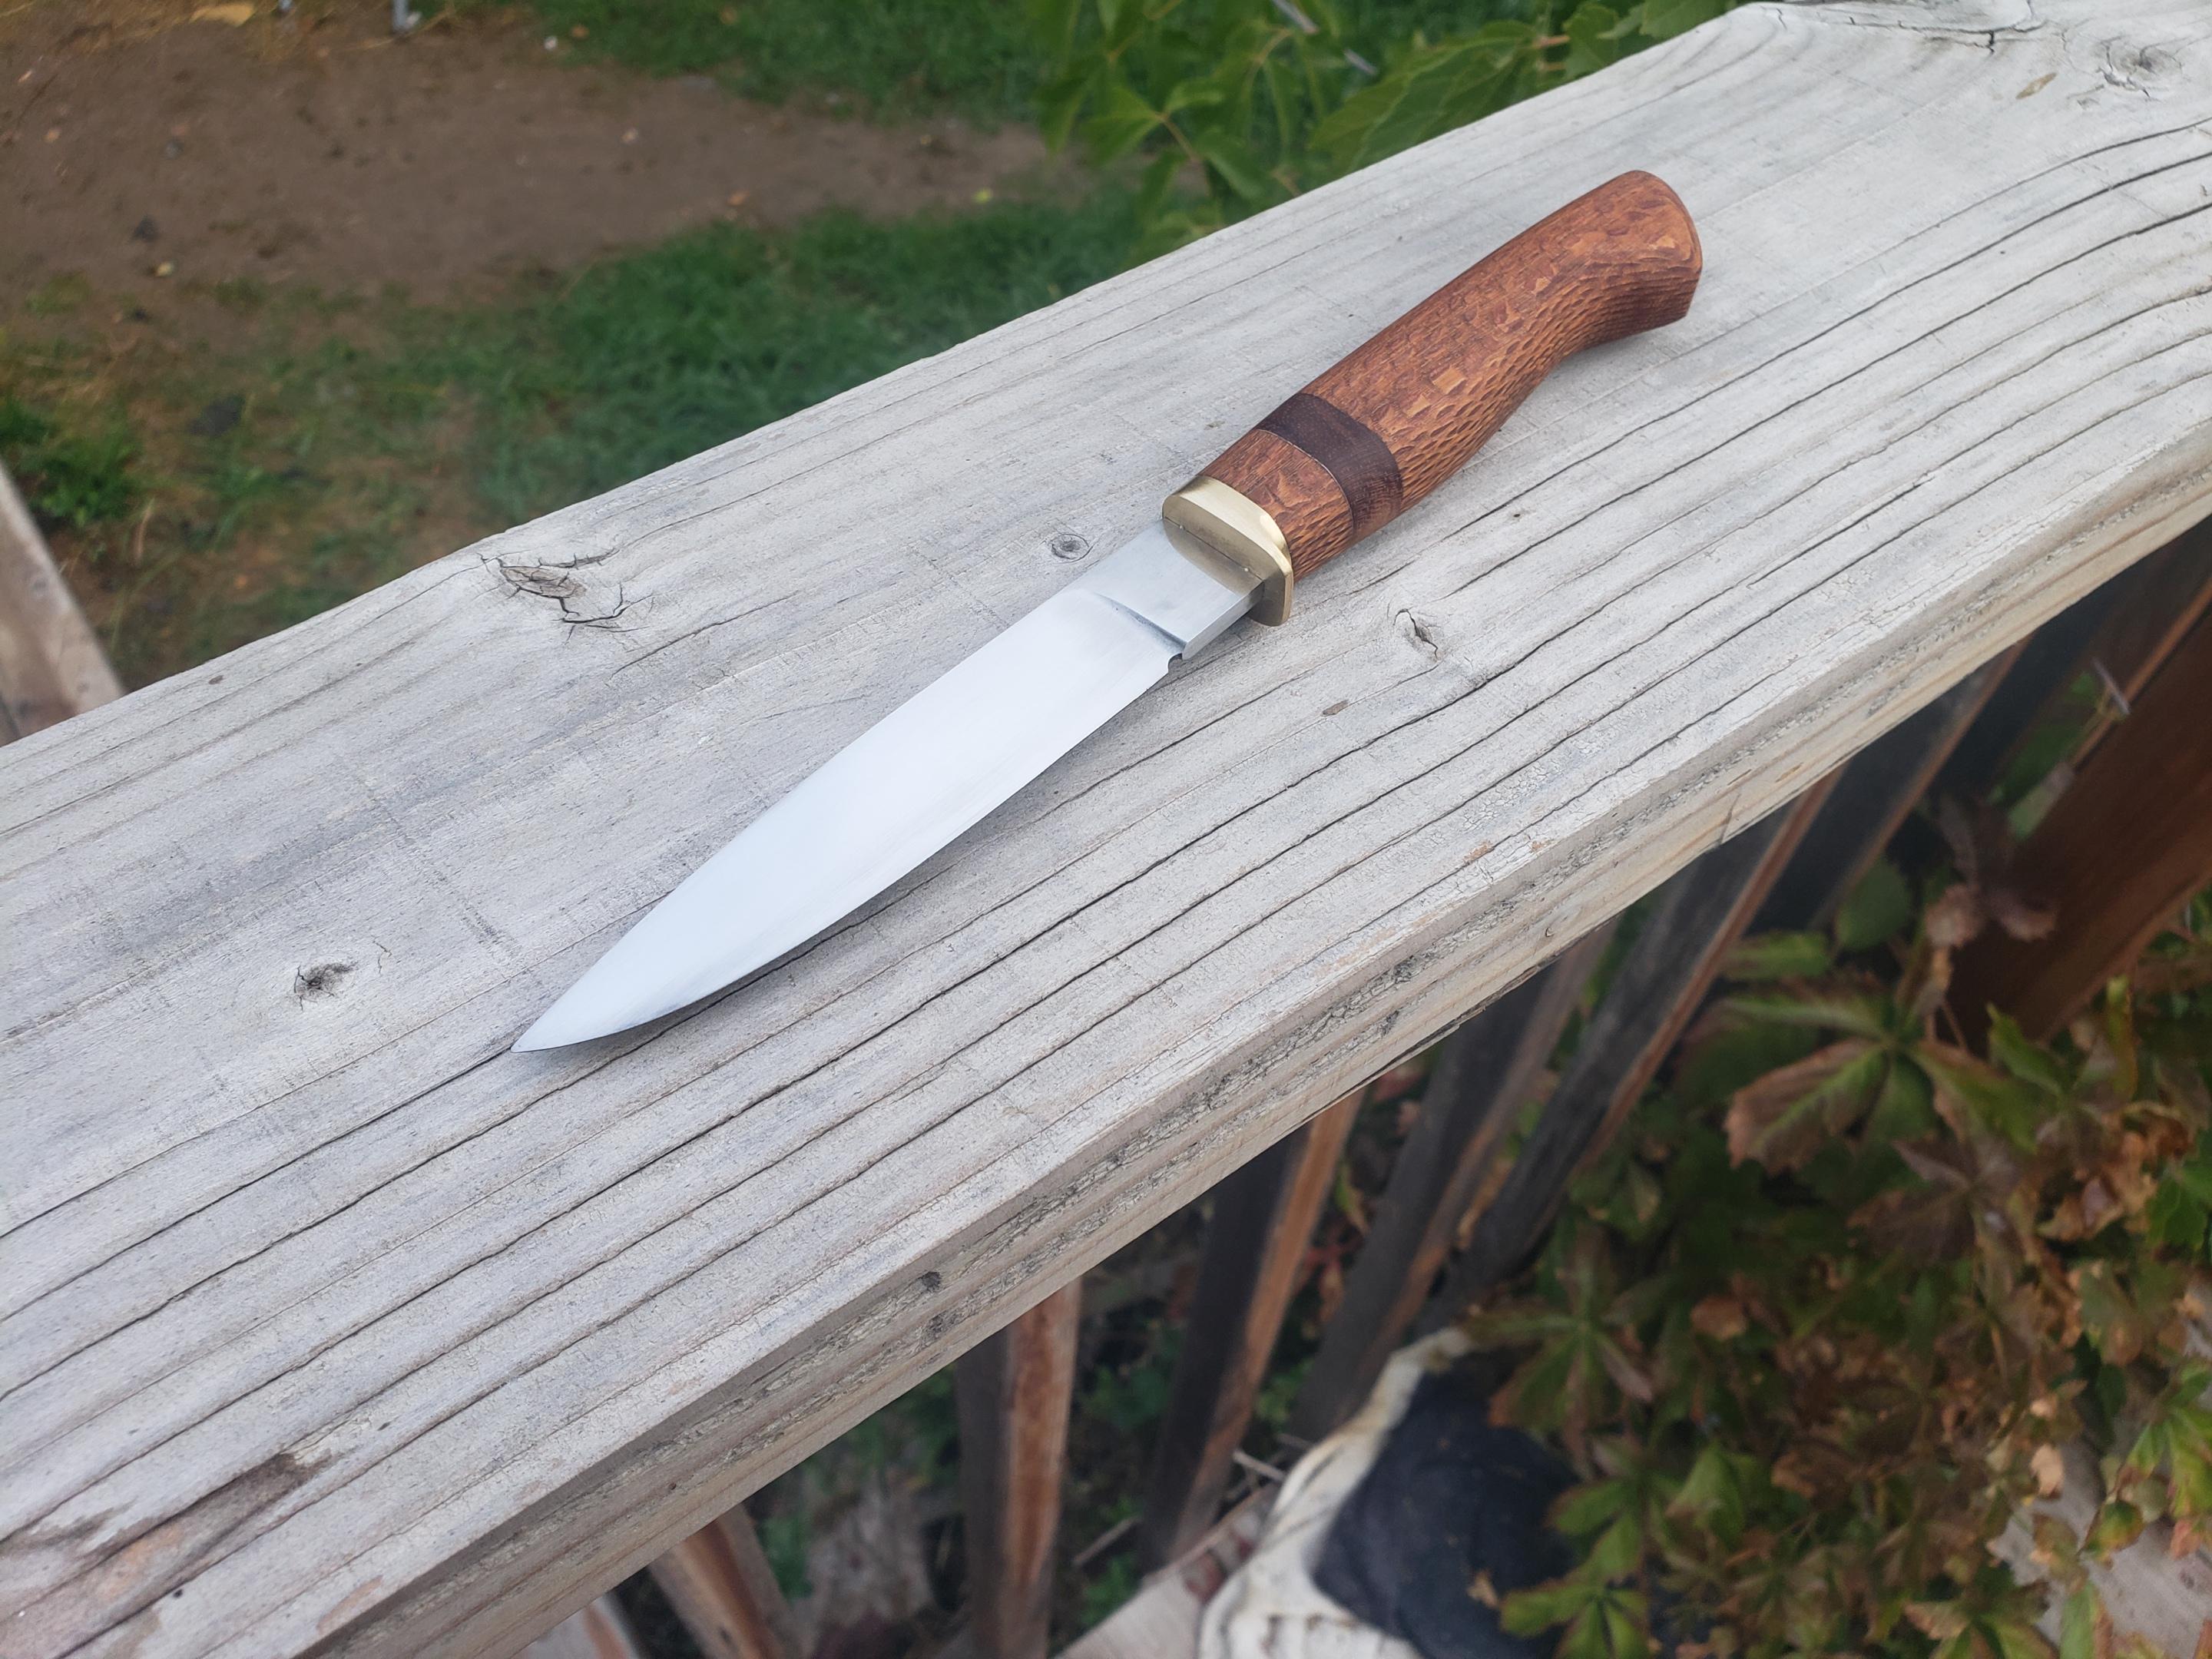
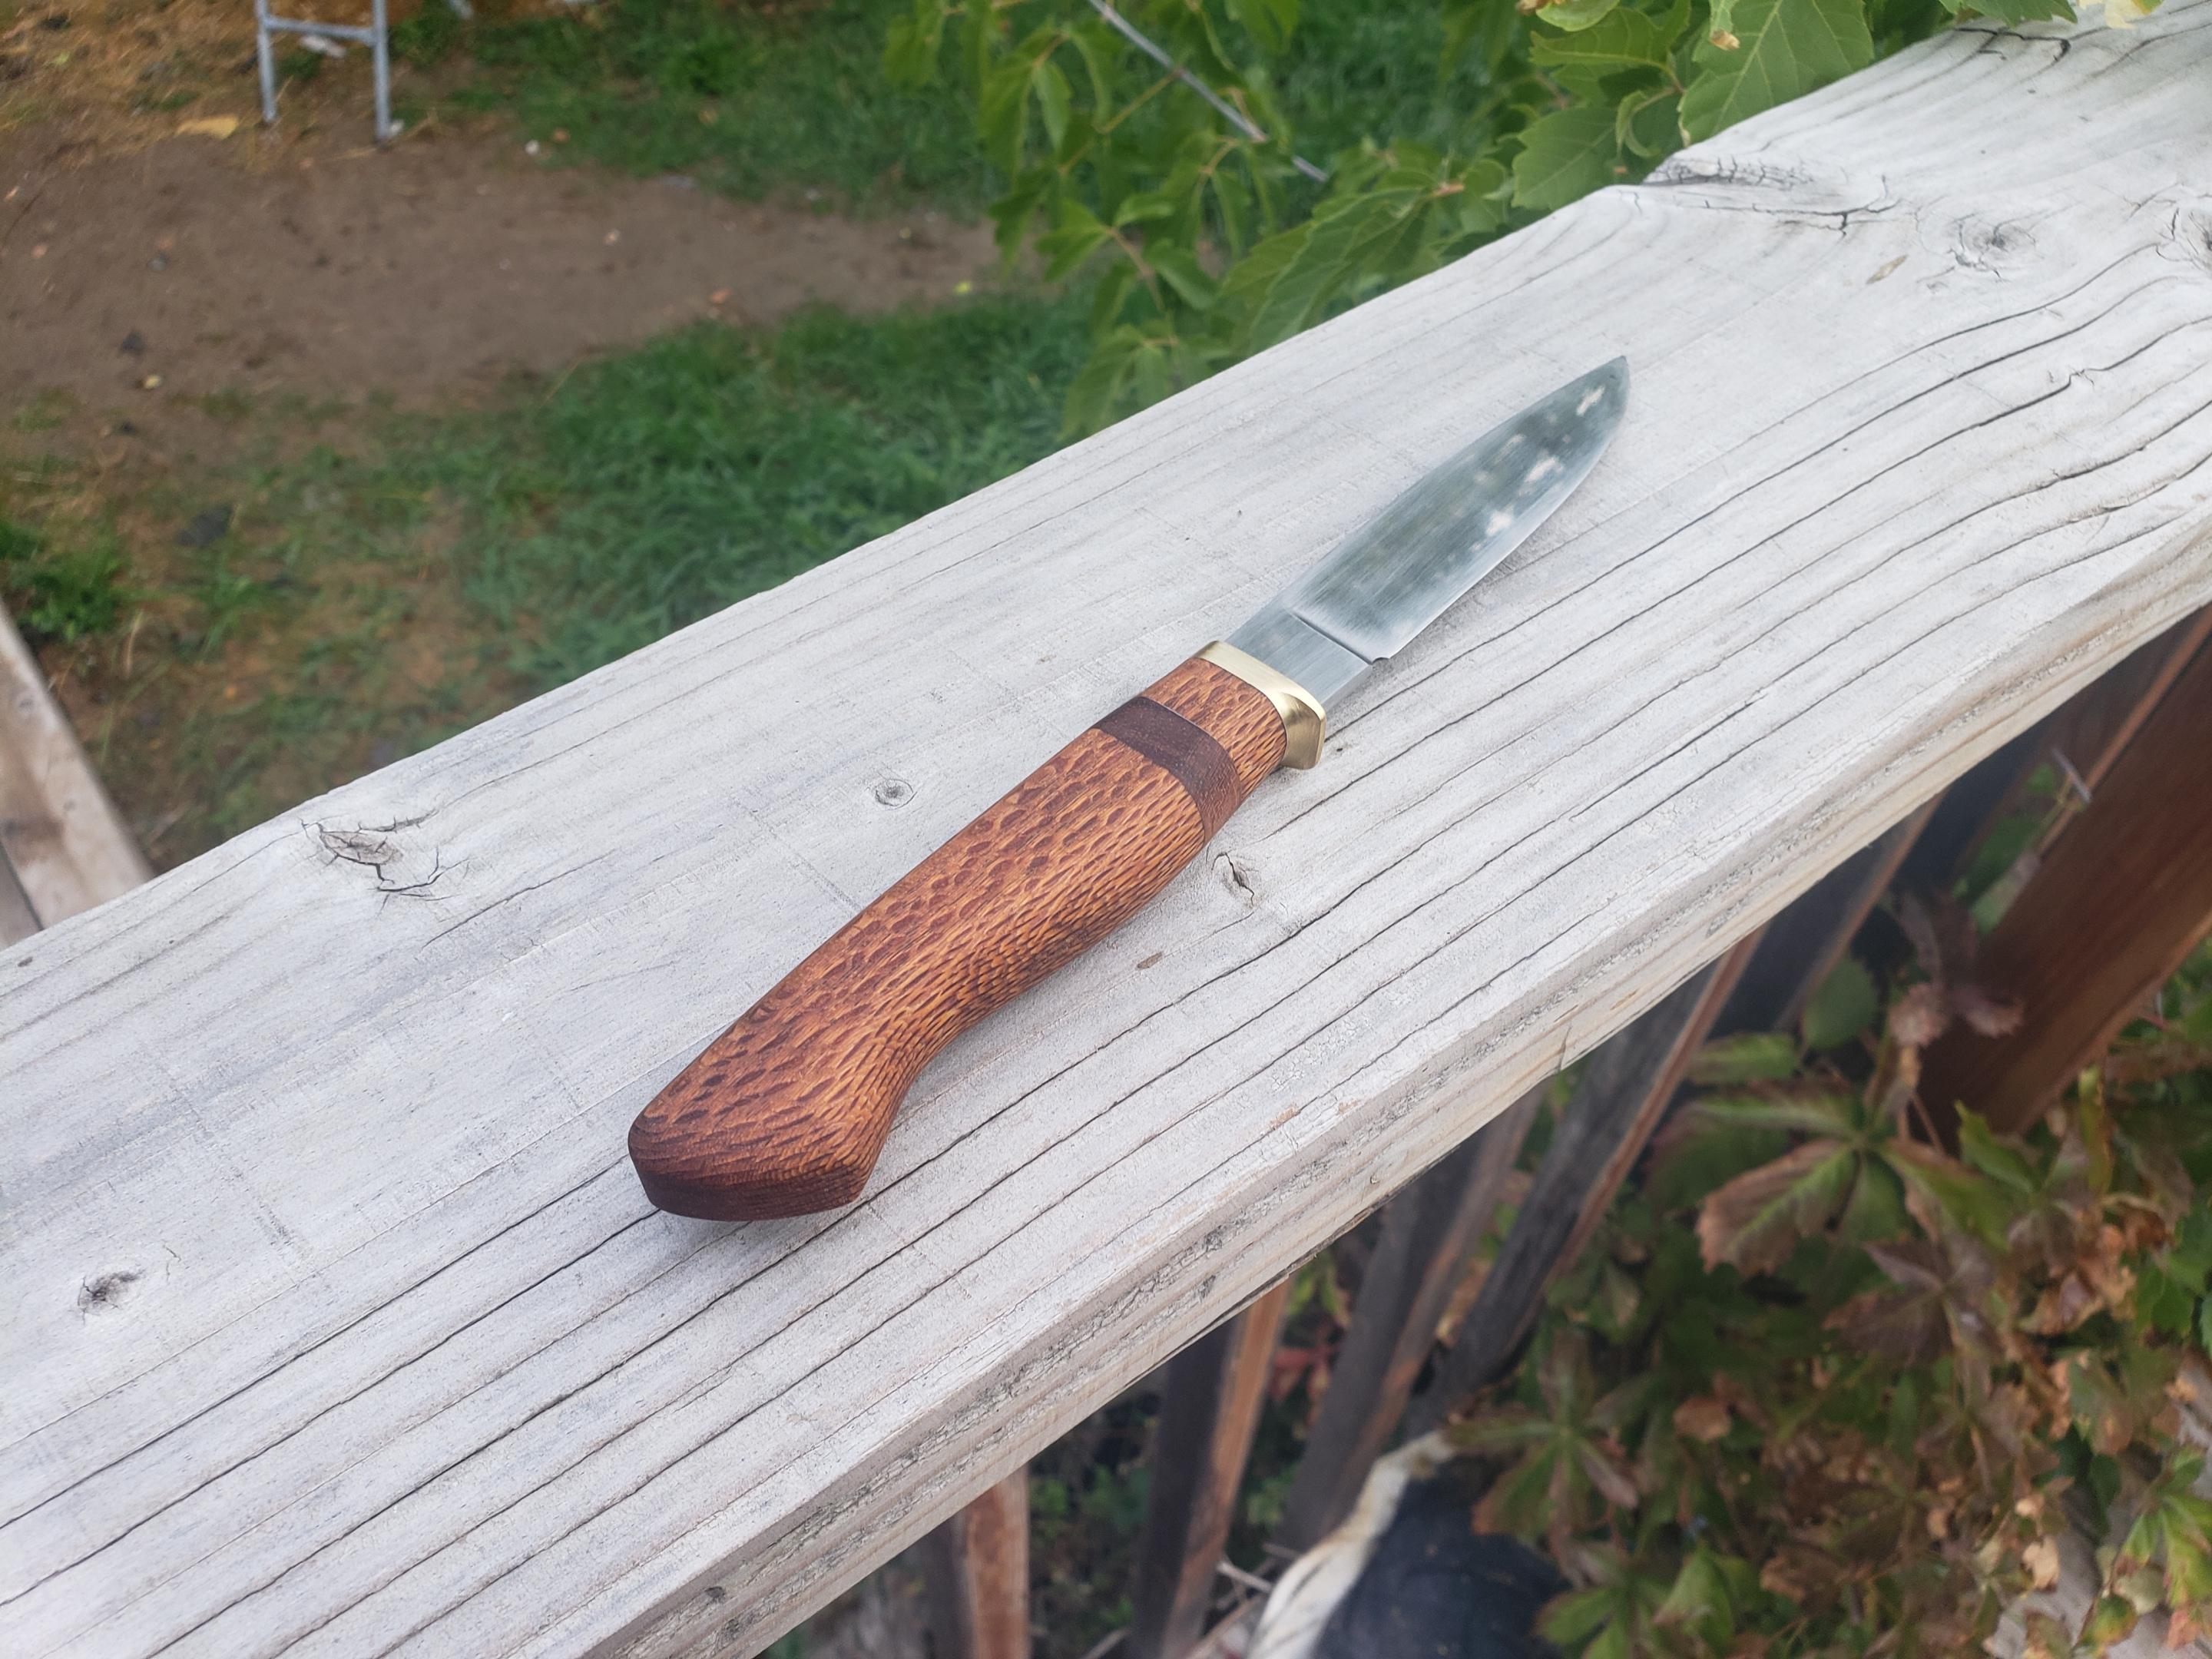
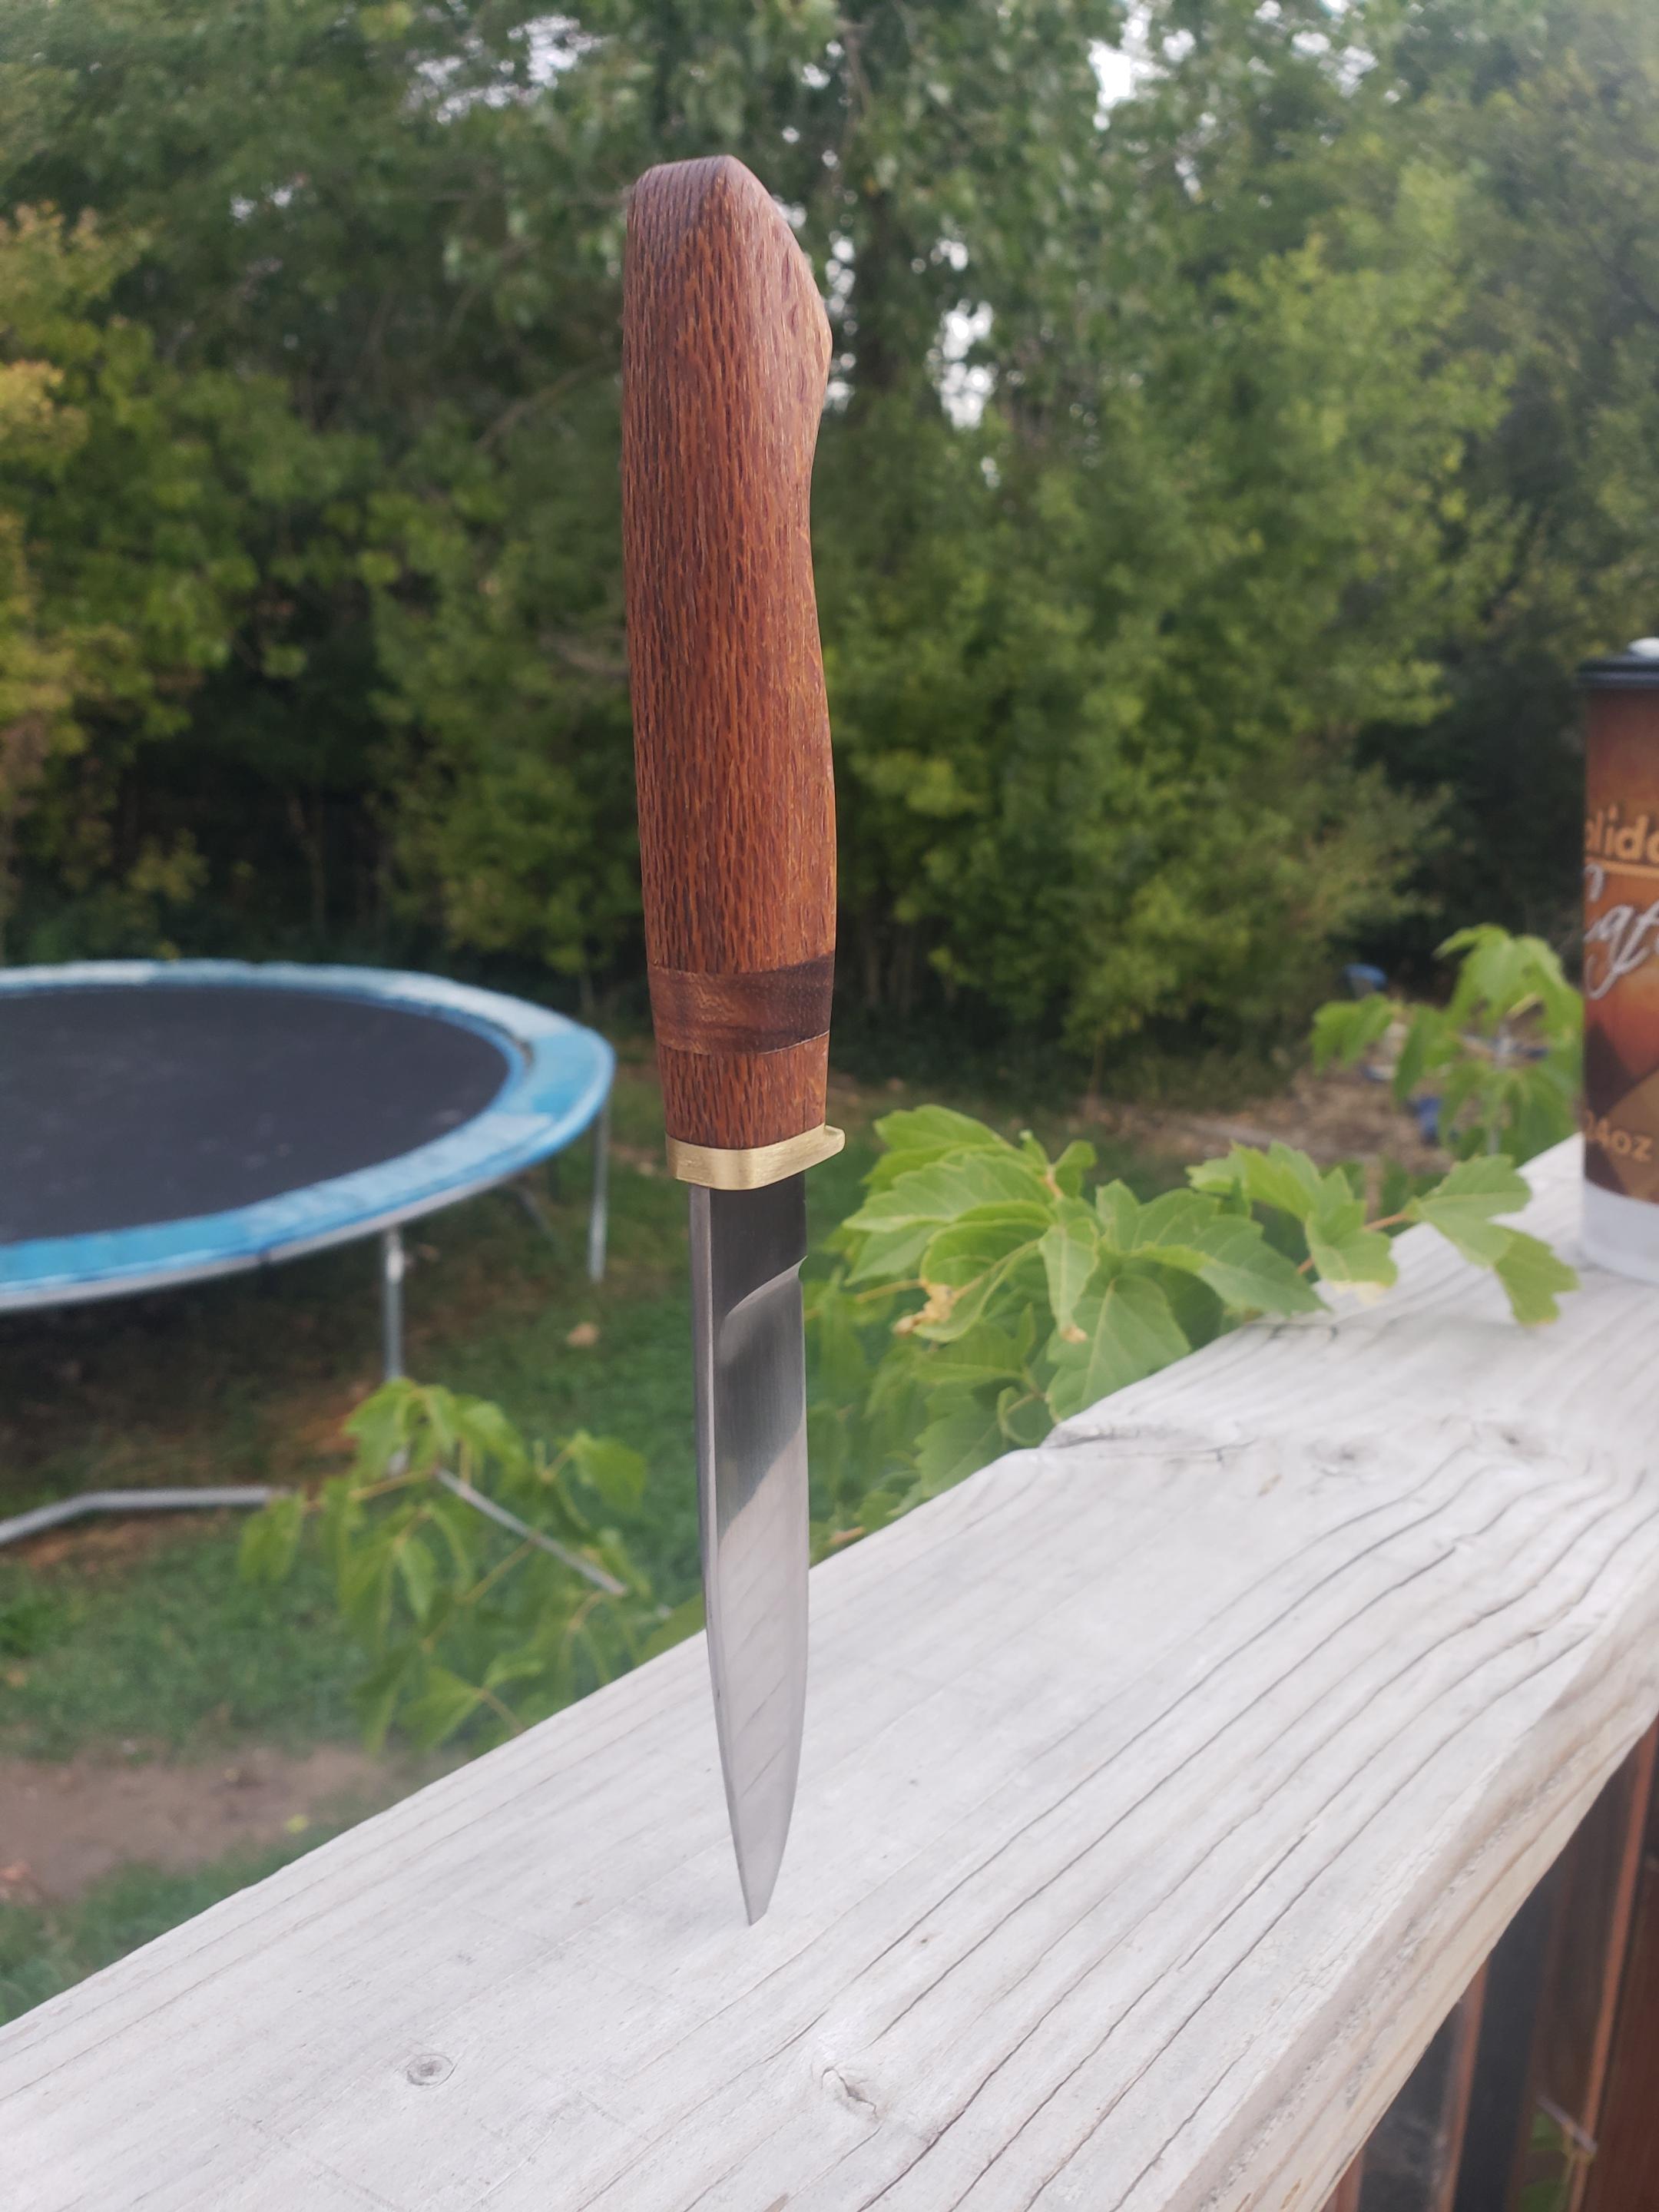
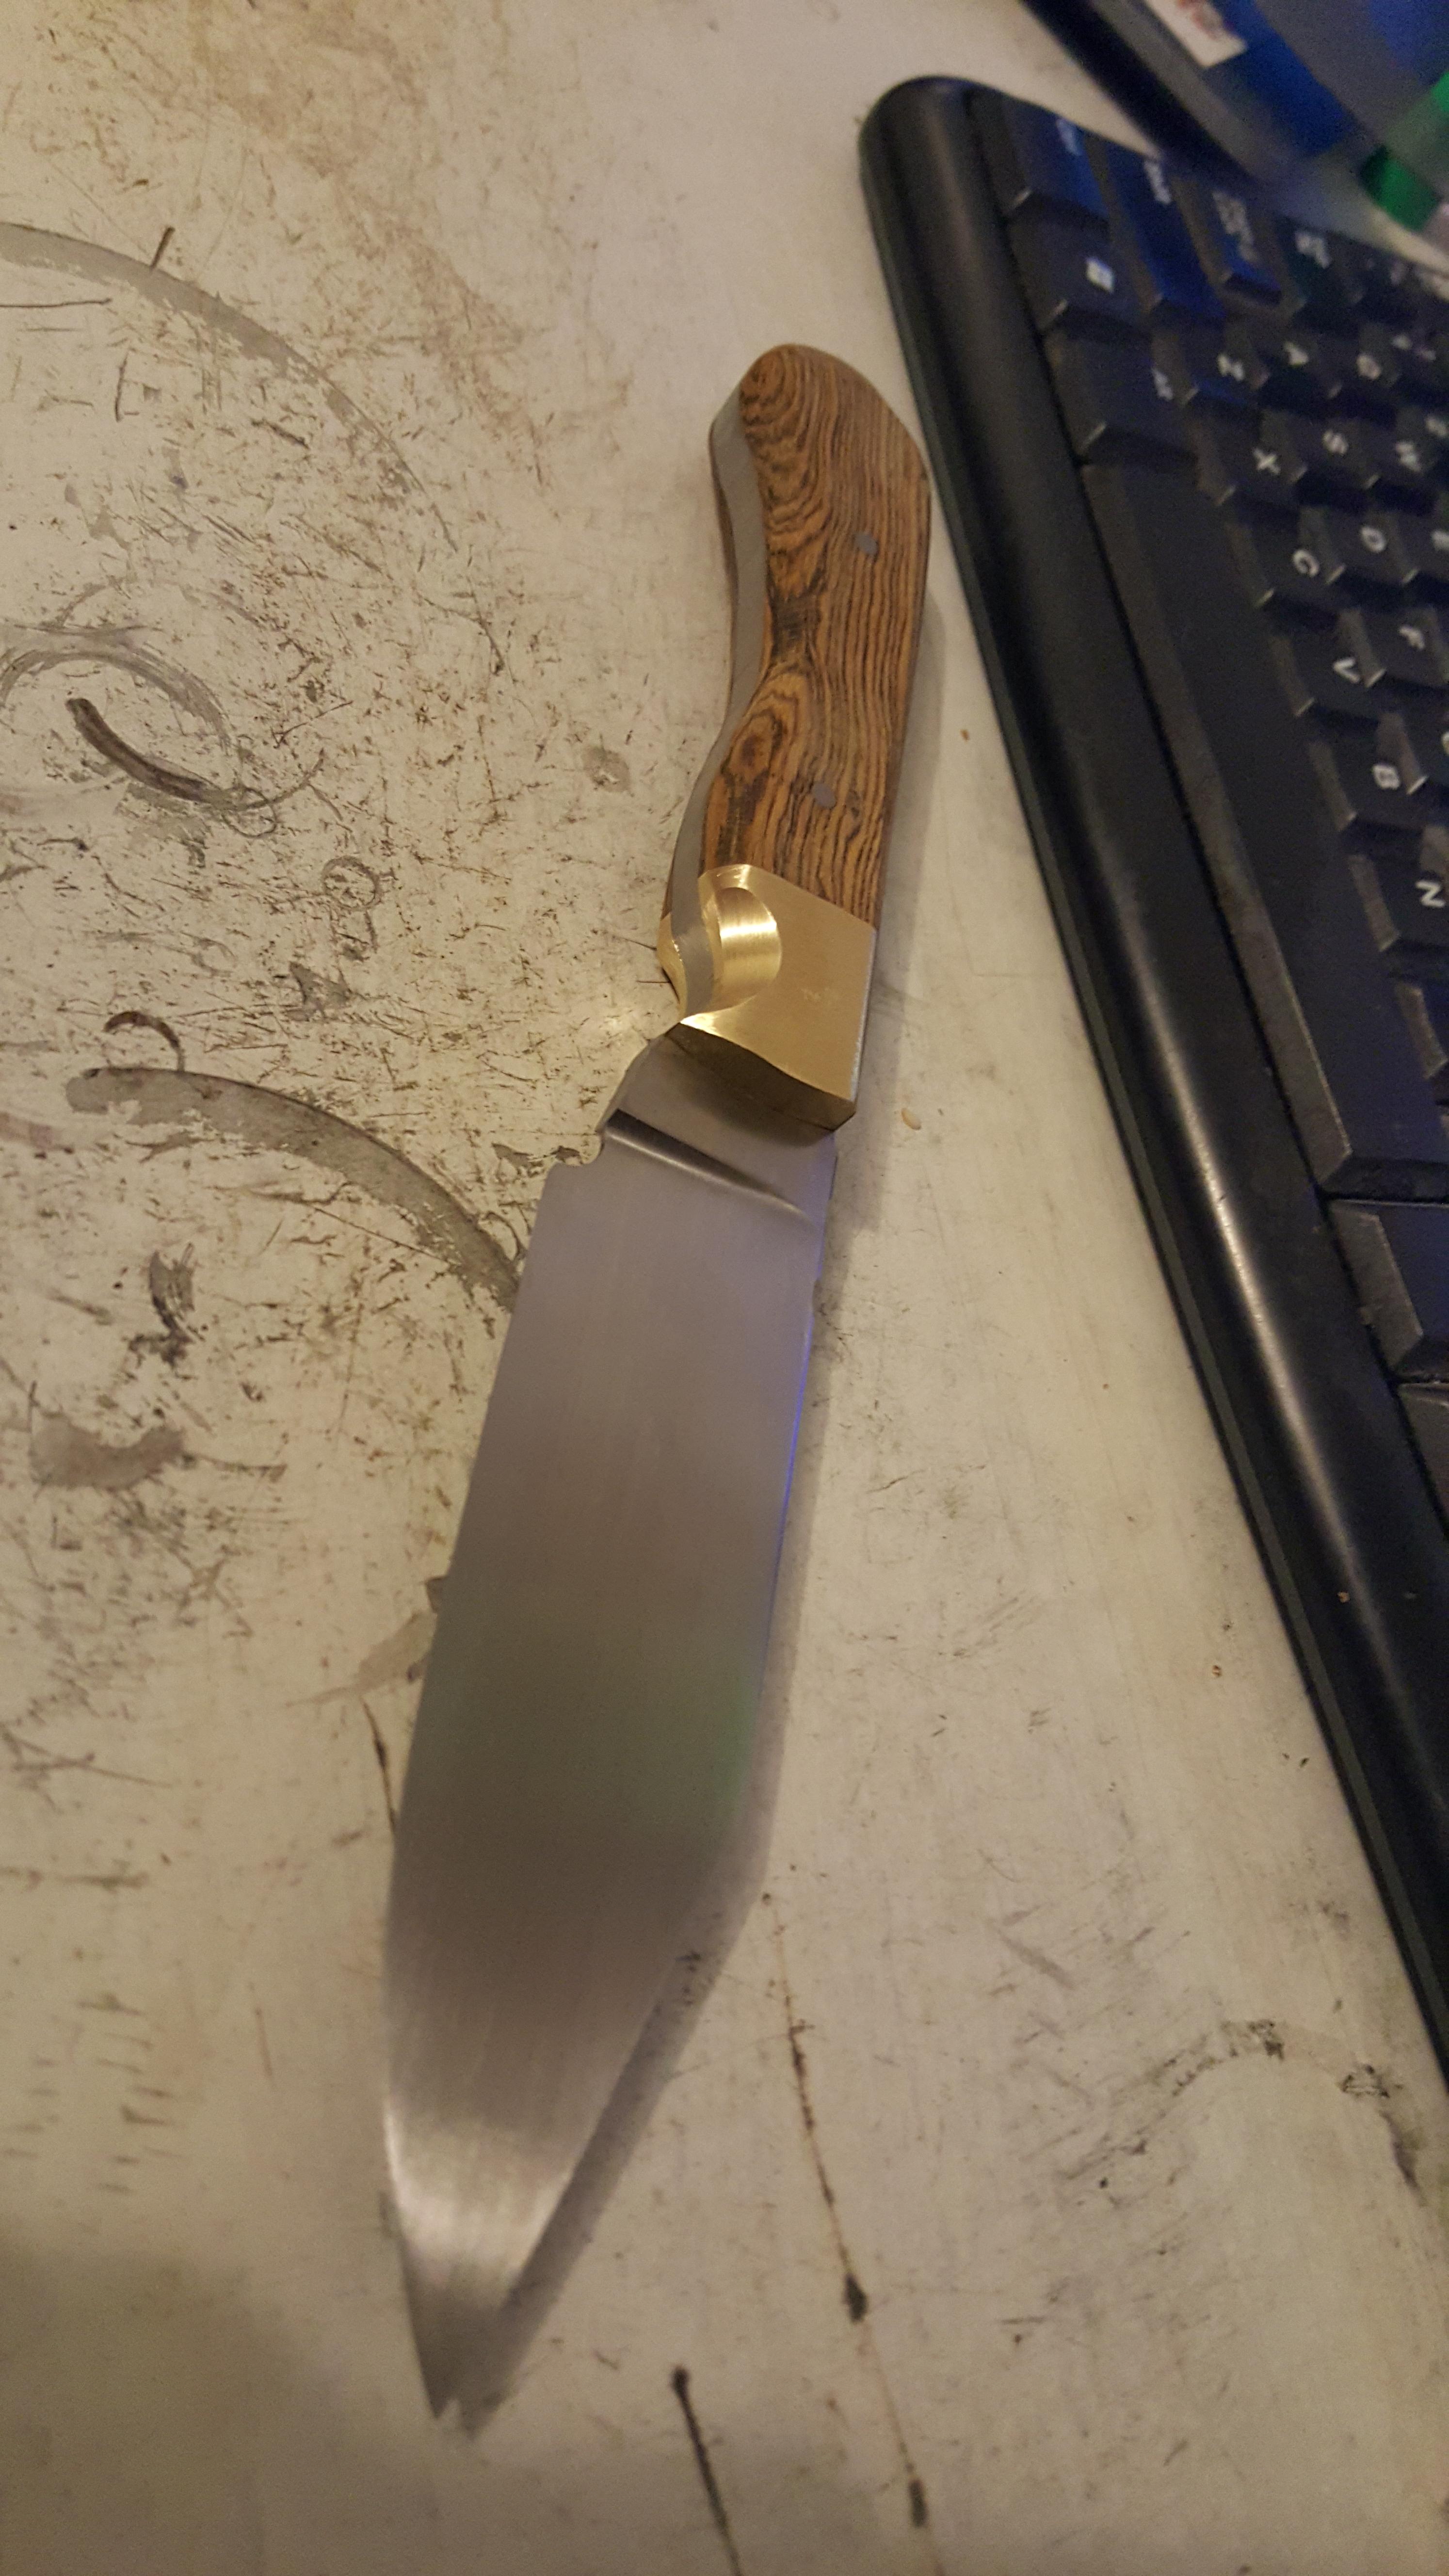
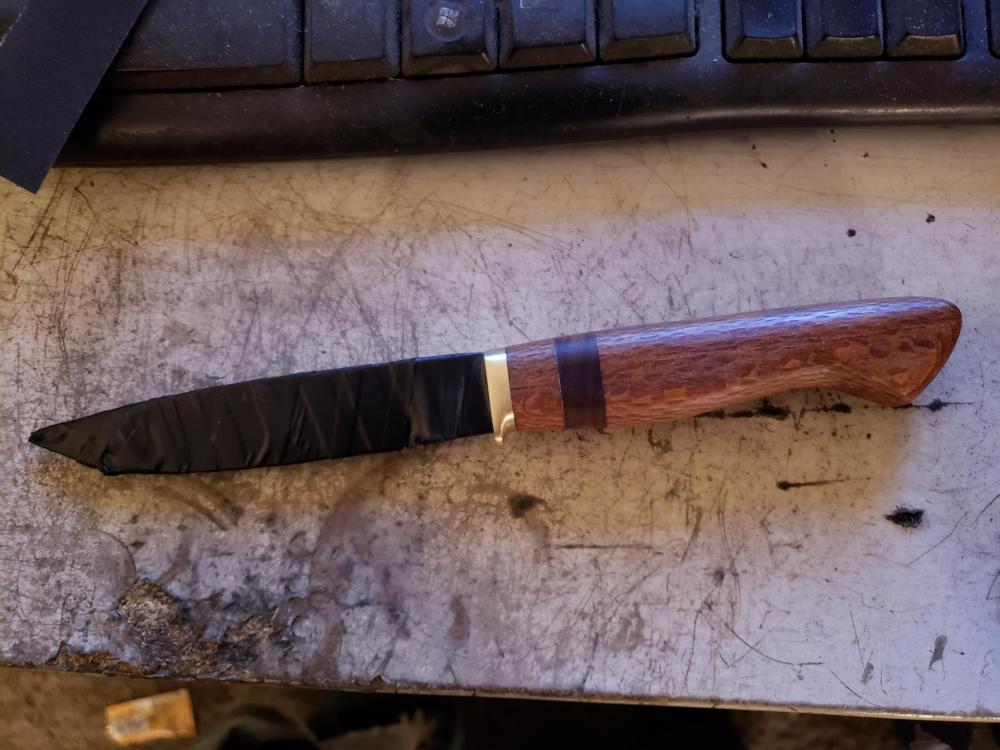
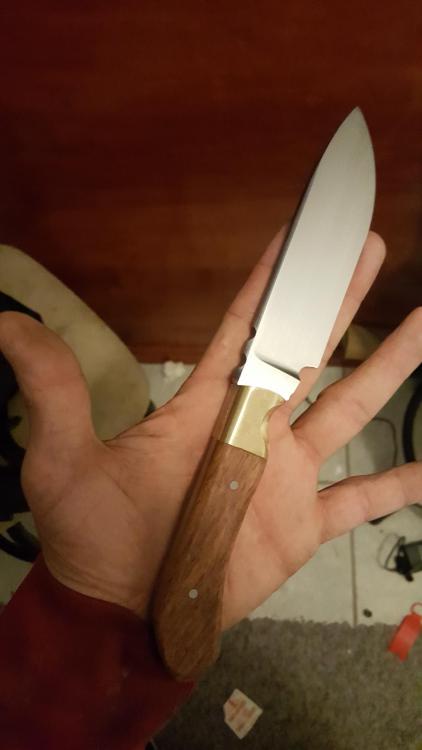
Been working on this blade for months, I recently added another child to my family so time to work on knives has been very limited. With this one I wanted to go for the best possible fit and finish I could do. I probably hand sanded this blade for a solid 20 hours. When I went to start the handle, I cut the main piece ( Lacewood ) in two. flipped the pieces and glued them back together with the spacer ( Rosewood ) and then drilled the tang hole. Did a bit of surface sanding after the glue had cured and there were no lines or gaps. I was elated. I then started to file in the groove in the tang hole to hold the tang, and thats where the problems started. the small bit of lacewood that is directly after the brass decided it did not want to be a part of the handle anymore and it popped off. So I sanded the glue off both of the mating surfaces and test fit the handle probably 100 times before final glue up and I could not detect any gaps at all. Glue it up and move on to handle shaping and sanding cant see any lines or gaps the whole time I am working on it. Get the handle up to 220g and decide I want to see what the handle looks like, so I give it a quick wipe with BLO, and thats when the faint epoxy line in the spacer reared its ugly head. Should have used Clear epoxy not the White.. I am also not exactly impressed with the Lacewood, The block had a beautiful texture, but once shaped it lost a lot of the patterning that appealed to me. Honestly this is probably my best work I have ever made. I just wanted to make it better then it is. Next up, is my first ever attempt at a leather sheath, so at least the knife will have fewer flaws then the sheath will.


-
True.... its probably just best to assume " If there is a forge with a fire in it, consider all metal around it to hot to touch with bare hands " I will probably try that rule out with my oldest. he likes to come out and strike for me, but im always nervous he might decide to try touching something he shouldnt. But I have watched him jump right out of the way as a hot piece of metal fell from the anvil to the ground ( how does that saying go, " If the earth wants an up close and personal look at your work, dont get in its way ? "
-
I would think that one would not need to be explained..... Even I didnt make that mistake and I make ALL the normal mistakes...
-
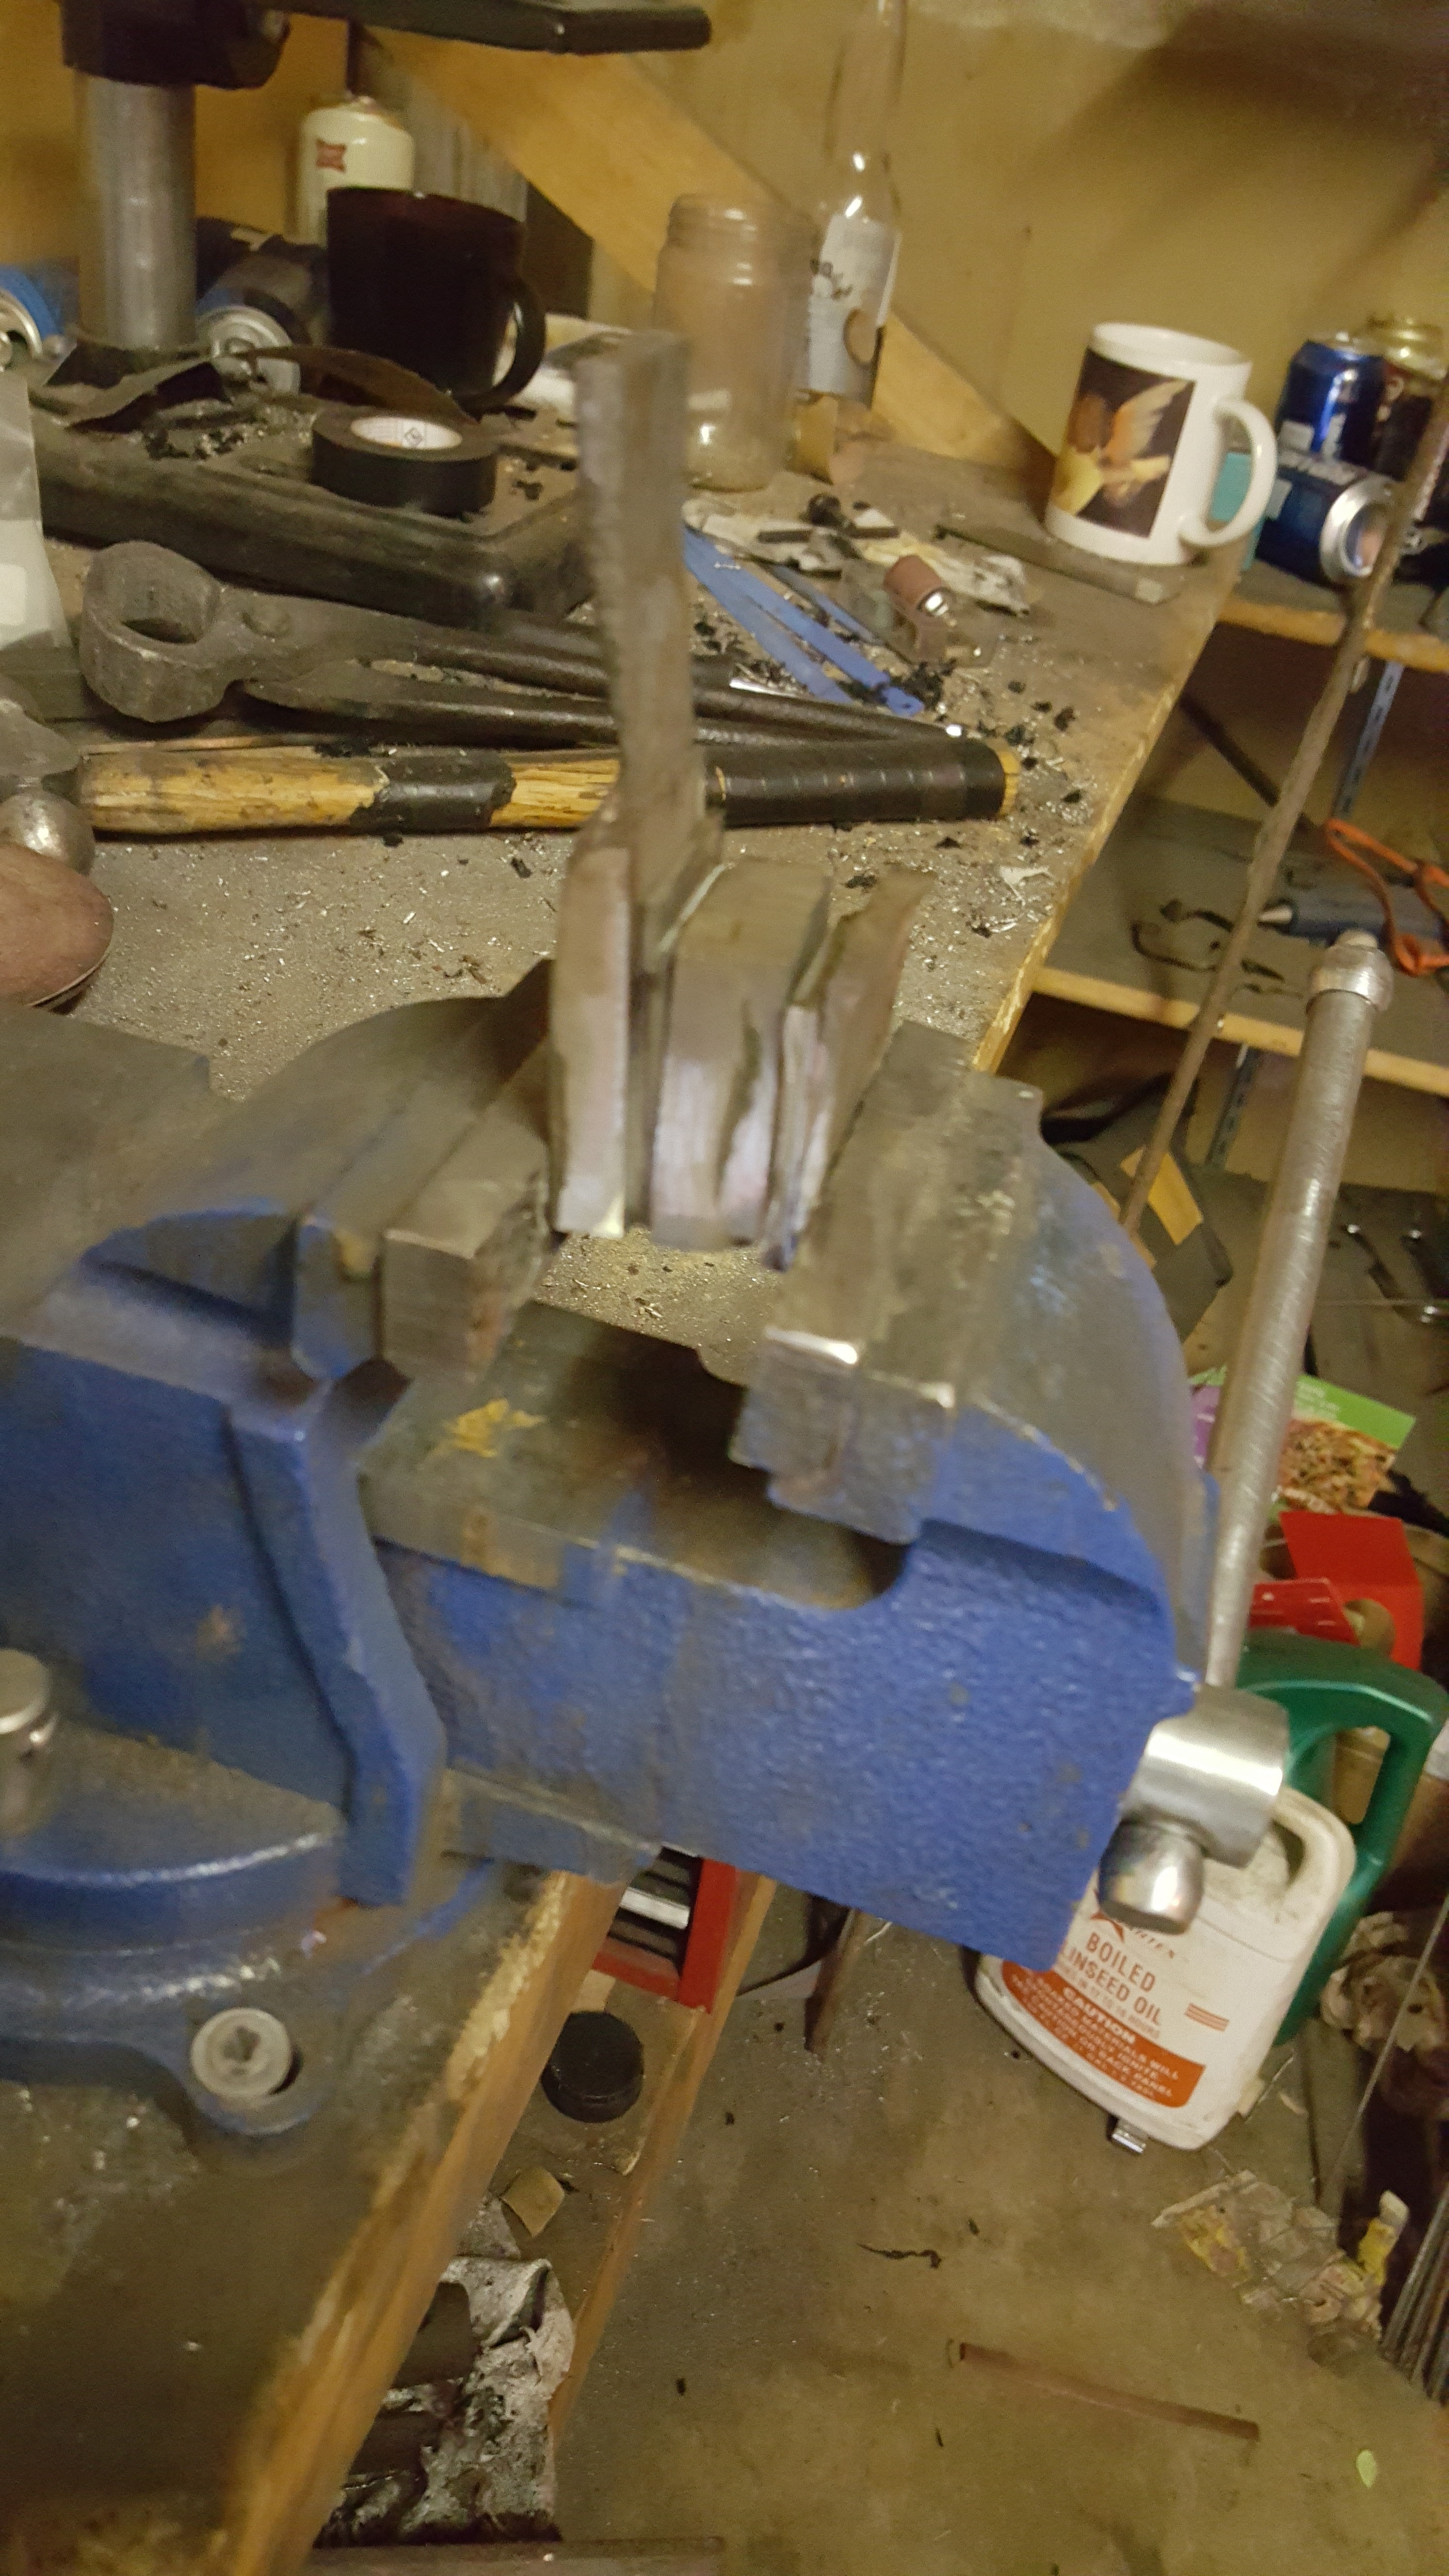
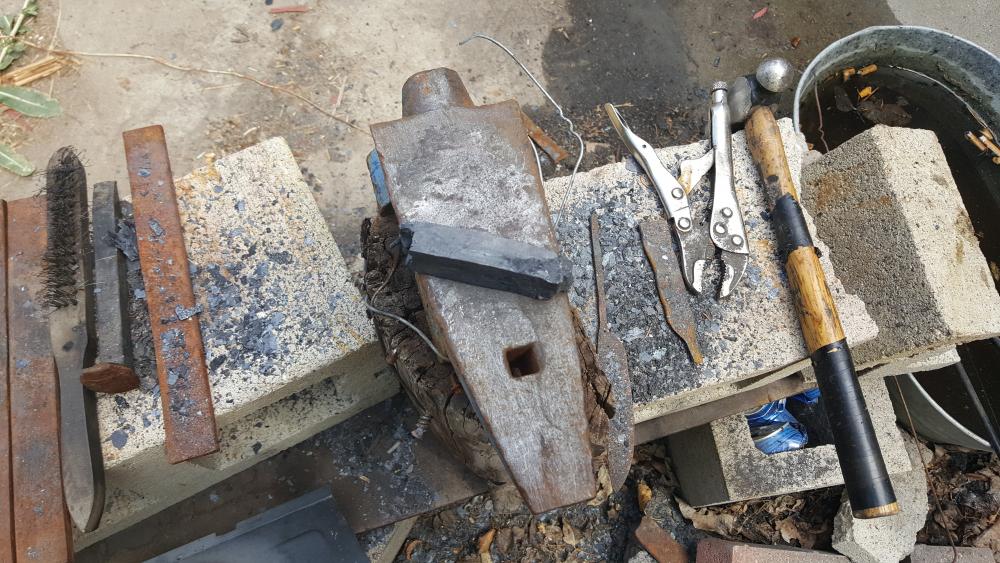
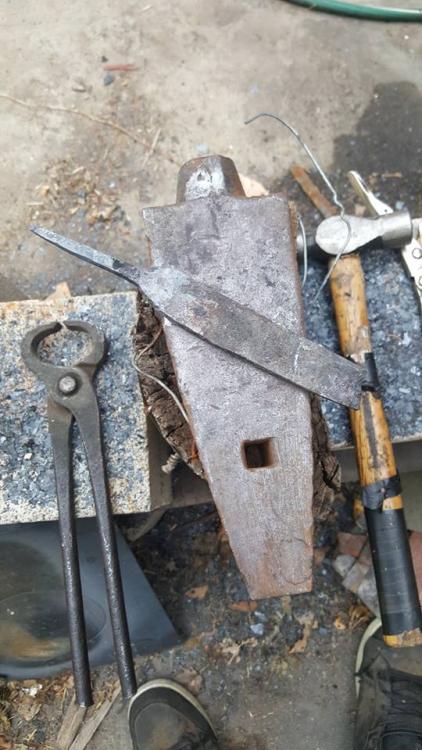
Well, its not spectacular.... But its certainly a good start....... here it is all grinded out, going to heat treat this tomorrow, need to get a couple more to HT point so im not wasting charcoal on 2 blades only.
-
When I was about 12 years old, I found one of these that my dad had made back when he was in high school shop class. the ball was wood. the spikes were old blacksmithing nails. whole thing including handle couldnt have weighed more then 1.5 lbs. of course I played with it, and of course I hurt myself with it, have a nice sized scar on my right forearm from where it decided to bite me. But I was always getting hurt at that age.
-
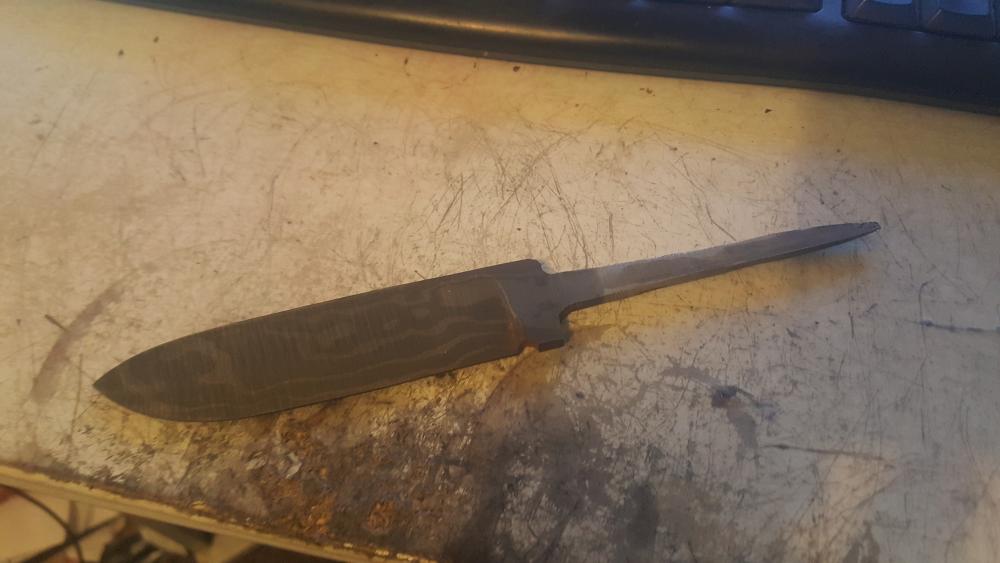
Well I can happily report that I was able to fix the billet. I cut it in half right before the spot where the failed weld started. once I had it in half, the failed weld pieces split right apart, I ground everything clean, cut a few more pieces of 15n20, and restacked the billet. Then took it out and threw it in the forge. Welds took on the first try, and after a few more welding passes to make sure it was all solid I started drawing it out. And for some reason its not allowing me to attach the last of the photos, so I will do another comment for that. Here is where things stand now. Its about .250 thick and fairly consistent thickness along it. There is a half inch or so at the tip that will have to be cut off as it has a massive inclusion in it where two pieces were not exactly lined up, Right now I am trying to decide if I want to file some grooves into it on both sides and go for a ladder pattern with a goal of grinding this down to about 1/8th inch thick at the spine, and then with the stretching the grooves would give it, I might gain a bit more length because as it sits right now, its about a 4 inch blade. Will have to think on it, I have this piece of Sindora Burl that has been sitting on my bar for the last 6 months now, just waiting for the perfect knife

-
I am going to give that a try this week when I fix my current billet I have sitting on my bench, I hadnt thought of that and its a brilliant idea!!!!
-
Well to be honest Frosty, our beer here in Utah is only 3.2% so its not even real beer. You can only buy " real beer " from the state run liquor stores here, and a 6 pack of something good will run you 12 bucks easy. As for the billet, About half of it forged solid, the other half ( towards the handle piece ) has about a 1.5 inch split right down the center of it, So right now its sitting in vinegar, and then I will grind it clean, heat it up and spread it open, grind the crap out of it, and then attempt to close the weld with some more 15N20 so im not trying to weld 5160 to itself. Originally it started off as a stack about 1.5 inches thick and slightly over 2 inches long per piece by 1.25 inches wide, the crack didnt show up till I started trying to draw the billet out.
-
I have tried to do this about a dozen times, and every time I was met with abject failure. forgewelding has been the bane of my existence for the last year or so. But I finally appear to have a grasp on it. I welded this billet up last weekend. its 5160 and 15N20, I think it was 10 layers to begin with. I was told that hose clamps can be used to secure a billet if you lack a welder. So I decided to give this a try, and that did help, but I suspect most of my success comes from letting the metal heat properly. I kind of played a game with it, I put the billet in the fire, and drank a beer, once I finished the beer, I pulled the steel out, fluxed it, and flipped it and put it back in, and then had another beer. Every time I touched the steel, I drank another beer. When I finally went to make a forgewelding pass, the hose clamp popped right off by the 3rd or so hit, but the whole billet stayed stuck perfect. Going to draw it out, cut it, and some clean 15n20 and restack it, I want two pieces, one small one of a lower layer count, and one i cut and restack a couple times for a high layer count. And now I need to order more 15N20.
-
Steve. First. let me humbly apologize for making you think that is how I see you, Because it is not. ( referring to the swords post earlier ) and was just trying to help a fellow newb along. However, you do tend to have Snarky responses to those who do not research their questions first, which I have NO objection to, I am the same way in my own " Primary role " as IT. forcing one to accept a bit of humility in ones endeavors is not a bad thing in the least. It makes one reassess their own strengths and play to them, and address the items they are lacking in. So when I do ask a stupid question, and I am sure I will, By all means, open up the flood gates and let your snark out. It will not offend me, and will only push me harder to ask the right questions after I have done enough research to ask the right questions. Second off, Thank you, For you and Thomas to not pick apart the mistakes I made ( And admitted to ) in the first post, proves I am on the right track to produce quality work.
-
Check the Knives section Frosty, If I recall correctly you like clip points.... and I did check the time stamp, But I would like Northwoodsman to have something to think about besides making swords the next time he comes around... And you guys do bite heads off, Ive SEENT it... and on at least one occasion, I have been on the deserving end of it myself. That does not down play the fact that many of you, have VASTLY more experience then I do. I was taught not to argue with those who know more then I do. If I ask a stupid question, I expect a snarky and sharp answer, I expect to be told I need to research more, and read the response to find the hint as to where and what I should look for. Think of this as paying it forward for all the times you guys have answered a question a million times, I am just repeating the info I learned from having to do the research myself after asking a similar stupid question along with some good life lessons like dont pick a fight with a Curmudgeon...
-
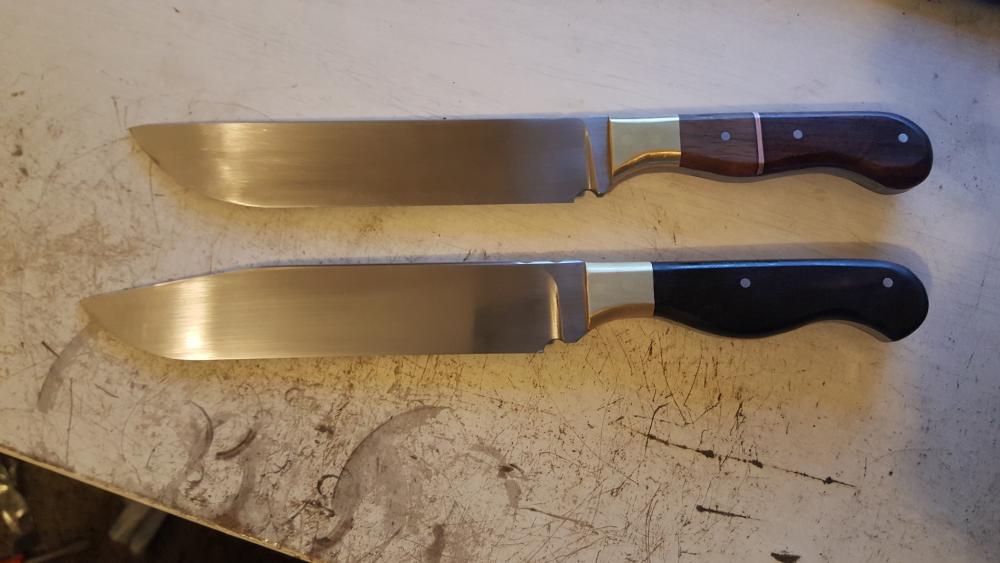
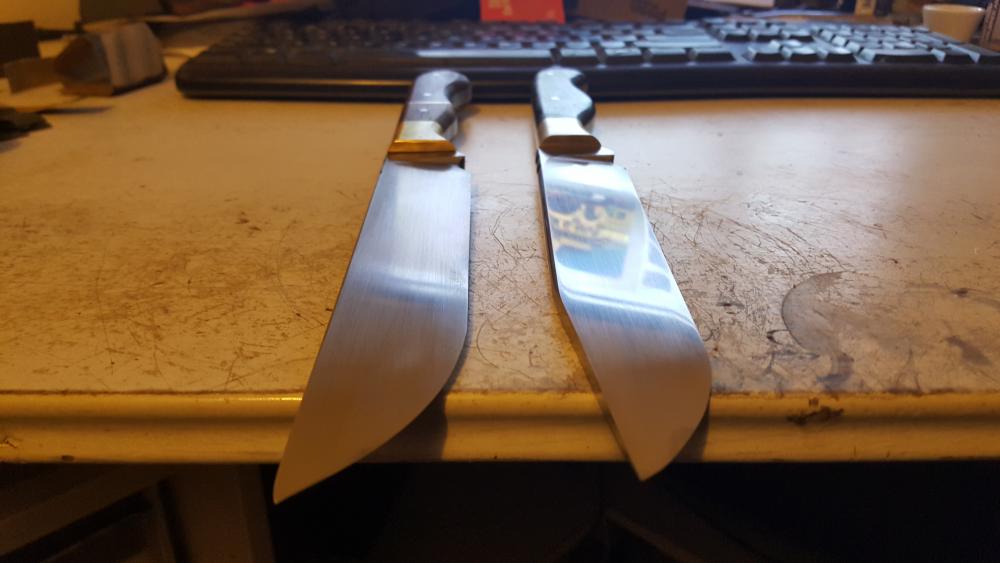
Sorry, I did forget to include specs. Both are 5160, 1/4 inch spines with 6.75 inch blade and OAL of 11.25 inches.
-
Northwoodsman..... As a fellow newb to this hobby, who has asked a few " stupid questions " myself and been grilled by the likes of Mr. Sells over it. Let me offer you a couple pointers since it seems that you are very intent on this hobby. 1. DO NOT Argue, or pick a fight with anyone who has Curmudgeon under their name, If they bite your head off over a question, its because they have answered it many times in the past, and know that the answer exists elsewhere on this forum, or on other forums that are widely known. These gents know what they are talking about, and if they are going to take the time to respond to your questions, they expect you to put forth some effort into answering it yourself first, and bring to them questions that merit them taking time out of their busy day to respond ( JPH comes to mind here, that man is a MACHINE when it comes to cranking out top shelf quality stuff at a breakneck pace ) because any time they spend typing on a keyboard, is time they are not spending forgewelding or polishing up their next beautiful piece of functional art. 2. Walk, before you try to run, and right now it sounds like you are trying to skip both steps, and move right into flying. There is a reason that everyone is telling you to start with smaller blades, and the reasoning is simple, It takes a LOT less work, effort and chance for mishaps with a 4 inch drop point, then it does a 30+ inch broadsword. The skills you will learn from a 2 inch skinner, will directly apply to the work you do on a sword. And if you order say, a 36 inch long piece of 1084 from Aldo. You can either make one sword from that stock, or roughly three 4 inch blades from the same stock. if you mess up the sword, the whole stock is a loss unless you cut off your mistake and you are lucky its at the tip, where as if you make a mistake on a single knife from the same stock, you have 2 other blades to work with still. 3. Read, Crosscheck, read again, and dont take everything you see on YouTube as truth. Many highly respected bladesmiths in both the knife, and sword making world have YouTube channels, and offer EXCELLENT videos on how they accomplish their works. There are far to many to make a list of who to watch, but I will say this. Once you have a decent understanding of the processes, you can then start to spot the makers in their videos where they do something that causes you to go " Wha??? " , Once you reach that point in your understanding of things, that is when you practice and then start to progress. An excellent example of this, is the guys making videos of turning large wrenches into Tomahawks, Did you know that heating Chrome plating is highly toxic. You cant just stick any old metal in the fire and take a whack at it. Which leads me to 4. Do your research on your materials. Some metals you might stick in your fire, can kill you from the fumes. Galvanized steel for example, produces Zinc fumes when heated which have even been known to kill experienced blacksmiths ( Google Jim " Paw Paw " Wilson ), As I mentioned before, Chrome fumes are toxic, but its not just about the metals. Rosewood variants for example, are toxic, While they wont specifically kill you as fast as Zinc fume inhalation can, its dust is still bad for your health. That is not to mention the other dangers inherent with this hobby, Such as fireflies ( Sparks from Solid fuel fires such as Charcoal and Coal ) setting things near your forge on fire. Or the significant amount of Carbon Monoxide put off from a Propane forge being a danger in enclosed areas. Or the fact that the propane lines could leak if not checked regularly resulting in a fantastic yet potentially fatal fireball appearing in your shop area. Or the fact that a high speed buffing wheel can rip a blade out of your hand and bury it to the hilt in a wall after taking off your fingers, and thats if you are lucky, as using it wrong could also launch it into your chest at such a rate you could be dead before you register that it has left your hands. So proper research, proper safety precautions, and proper PPE are a MUST if you intend to keep working in this hobby long enough to reach your stated goal of making a functional sword. I am not trying to discourage you, Far from it, as a fellow newb to this ( I have been doing this for about 2.5 years now ) , I am trying to instill in you the gravity of the situation, This is a hobby that CAN kill you, or maim you, or burn your house down, Or all three. It could also create lawsuits, because if you sell a sword that shatters and kills some innocent bystander. YOU are on the hook for it. No one likes to get reamed out for what they want to do, but this isnt World of Warcraft, You dont just assemble a list of items, click create, and end up with some epic item. You have to put in the time, You have to put in the practice, and you have to do your research. None of us want to see you fail, or die from your interest in this hobby, or see you sued into the poor house because of a mistake. We want to see you survive and be a success in this hobby, The blacksmithing and bladesmithing communities online I have encountered, are some of the most welcoming helpful people I know of.
-
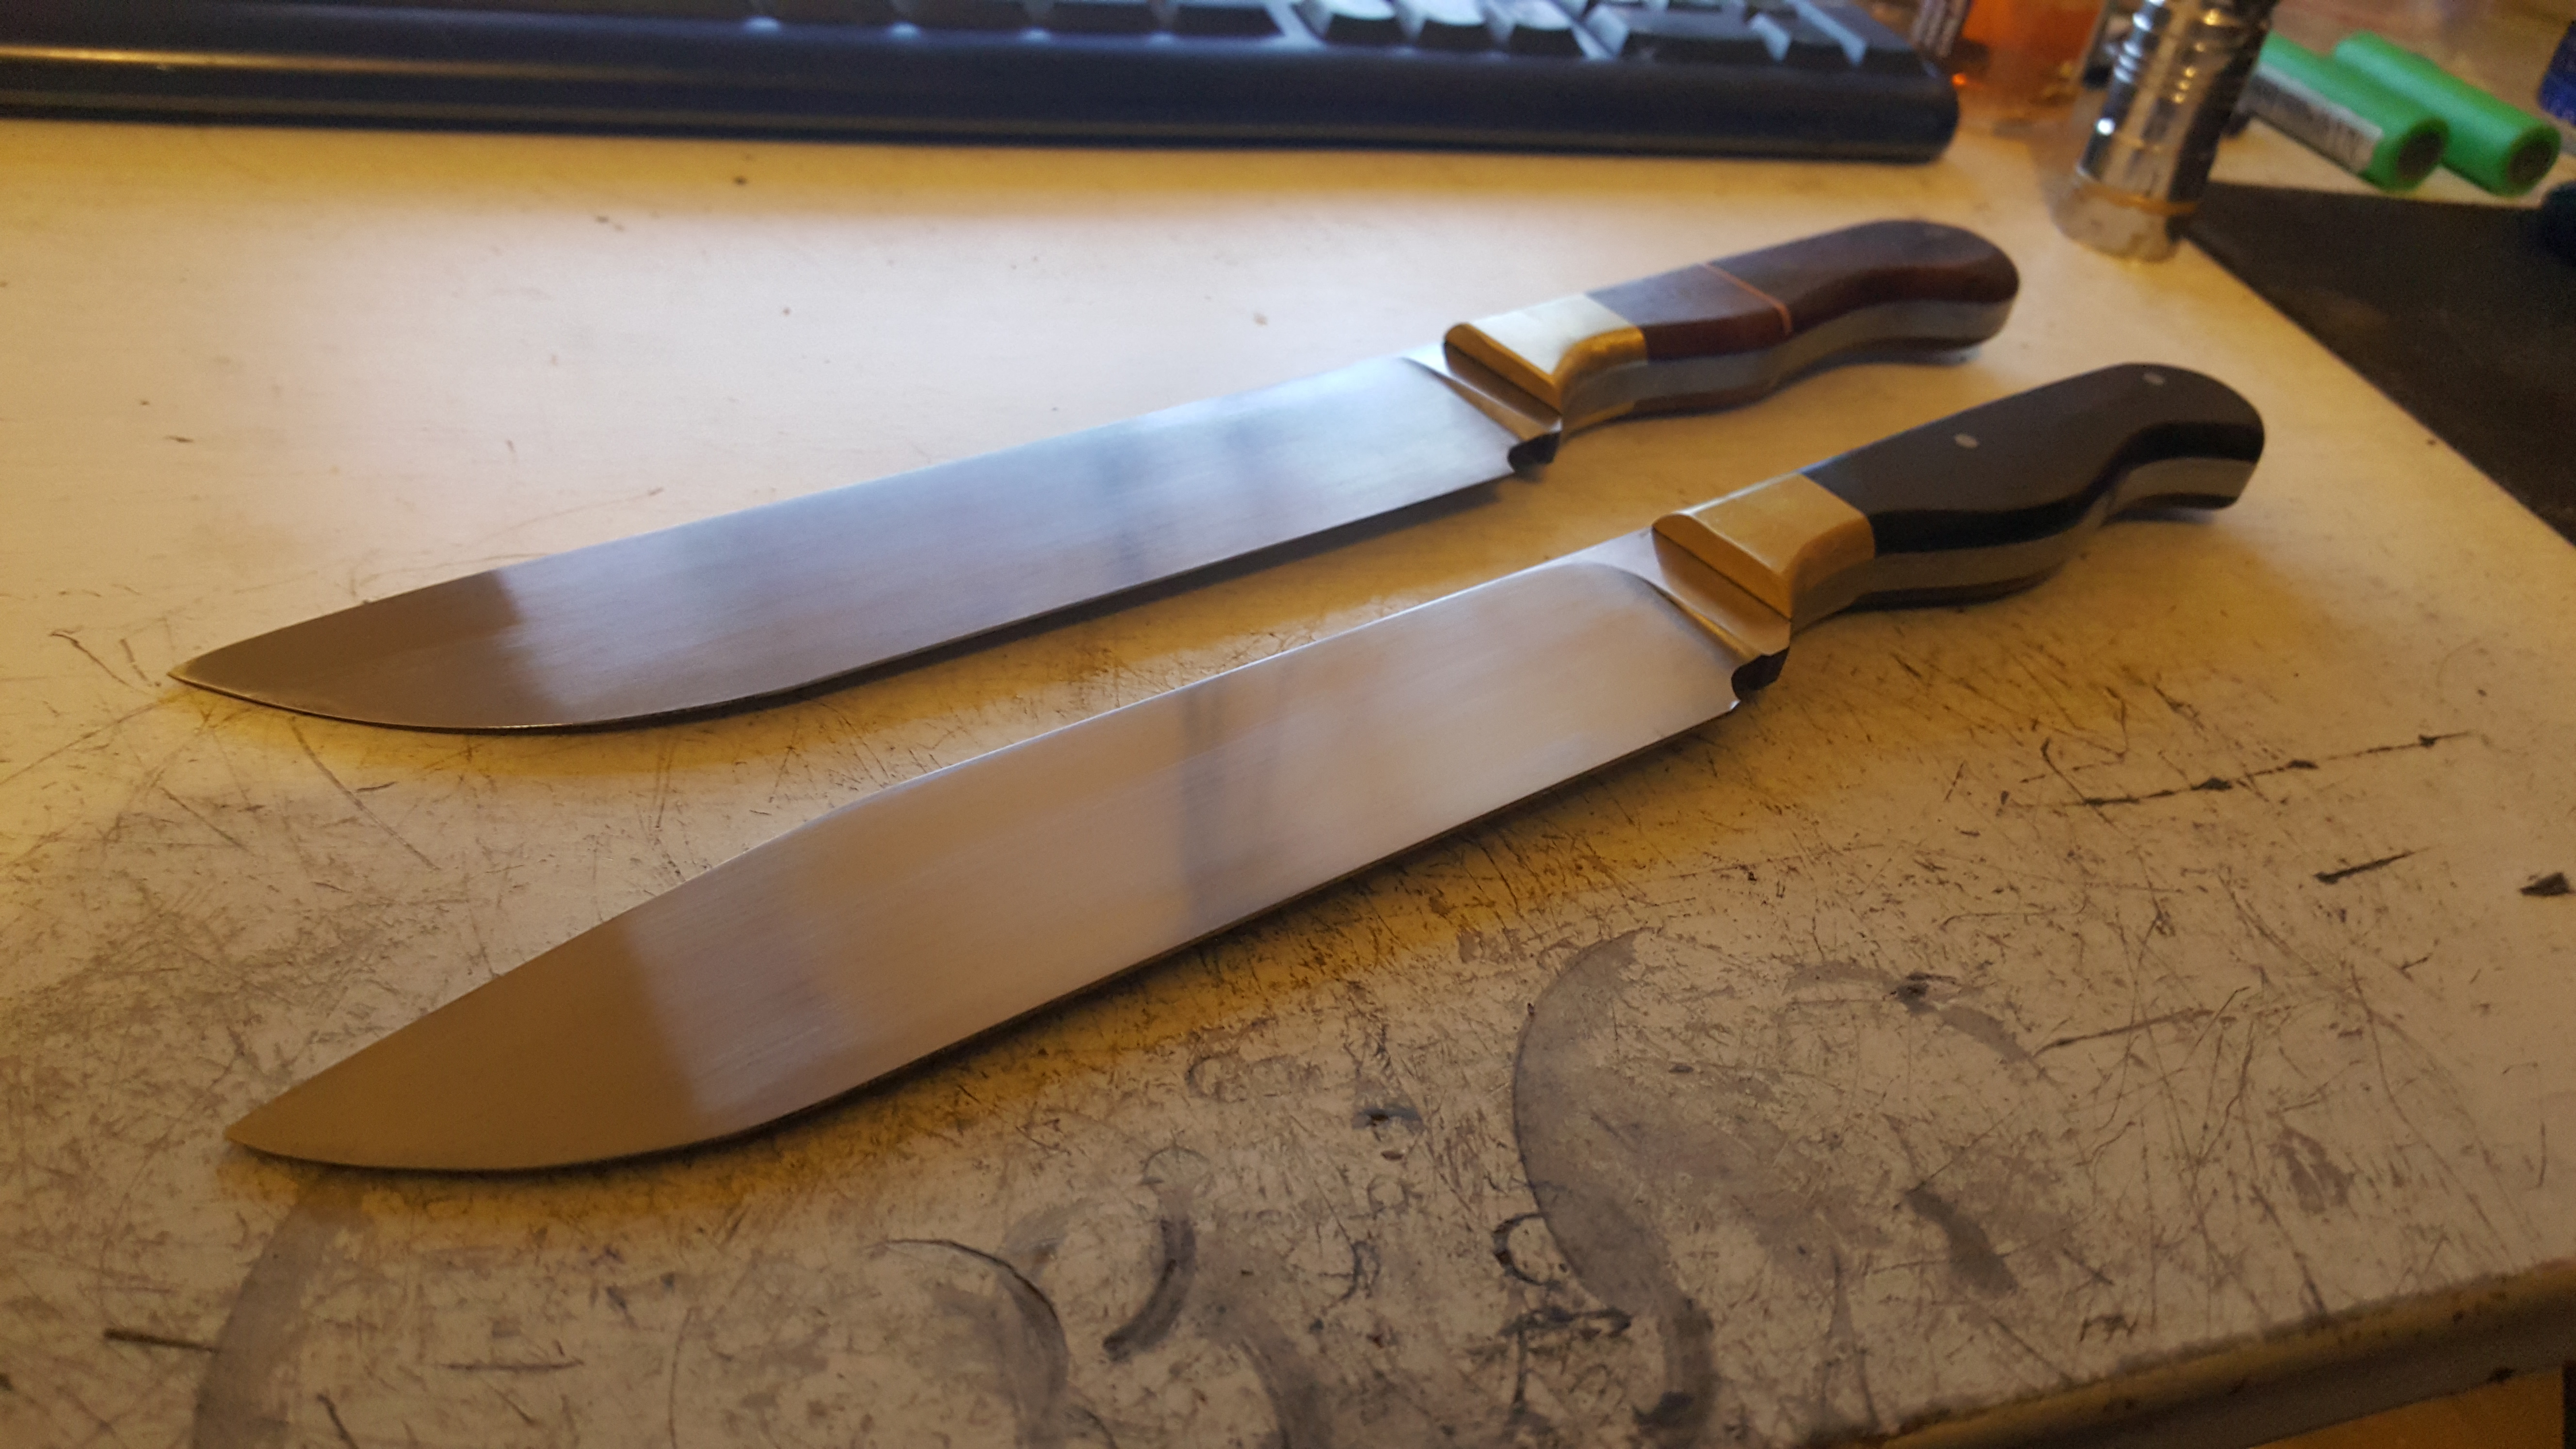
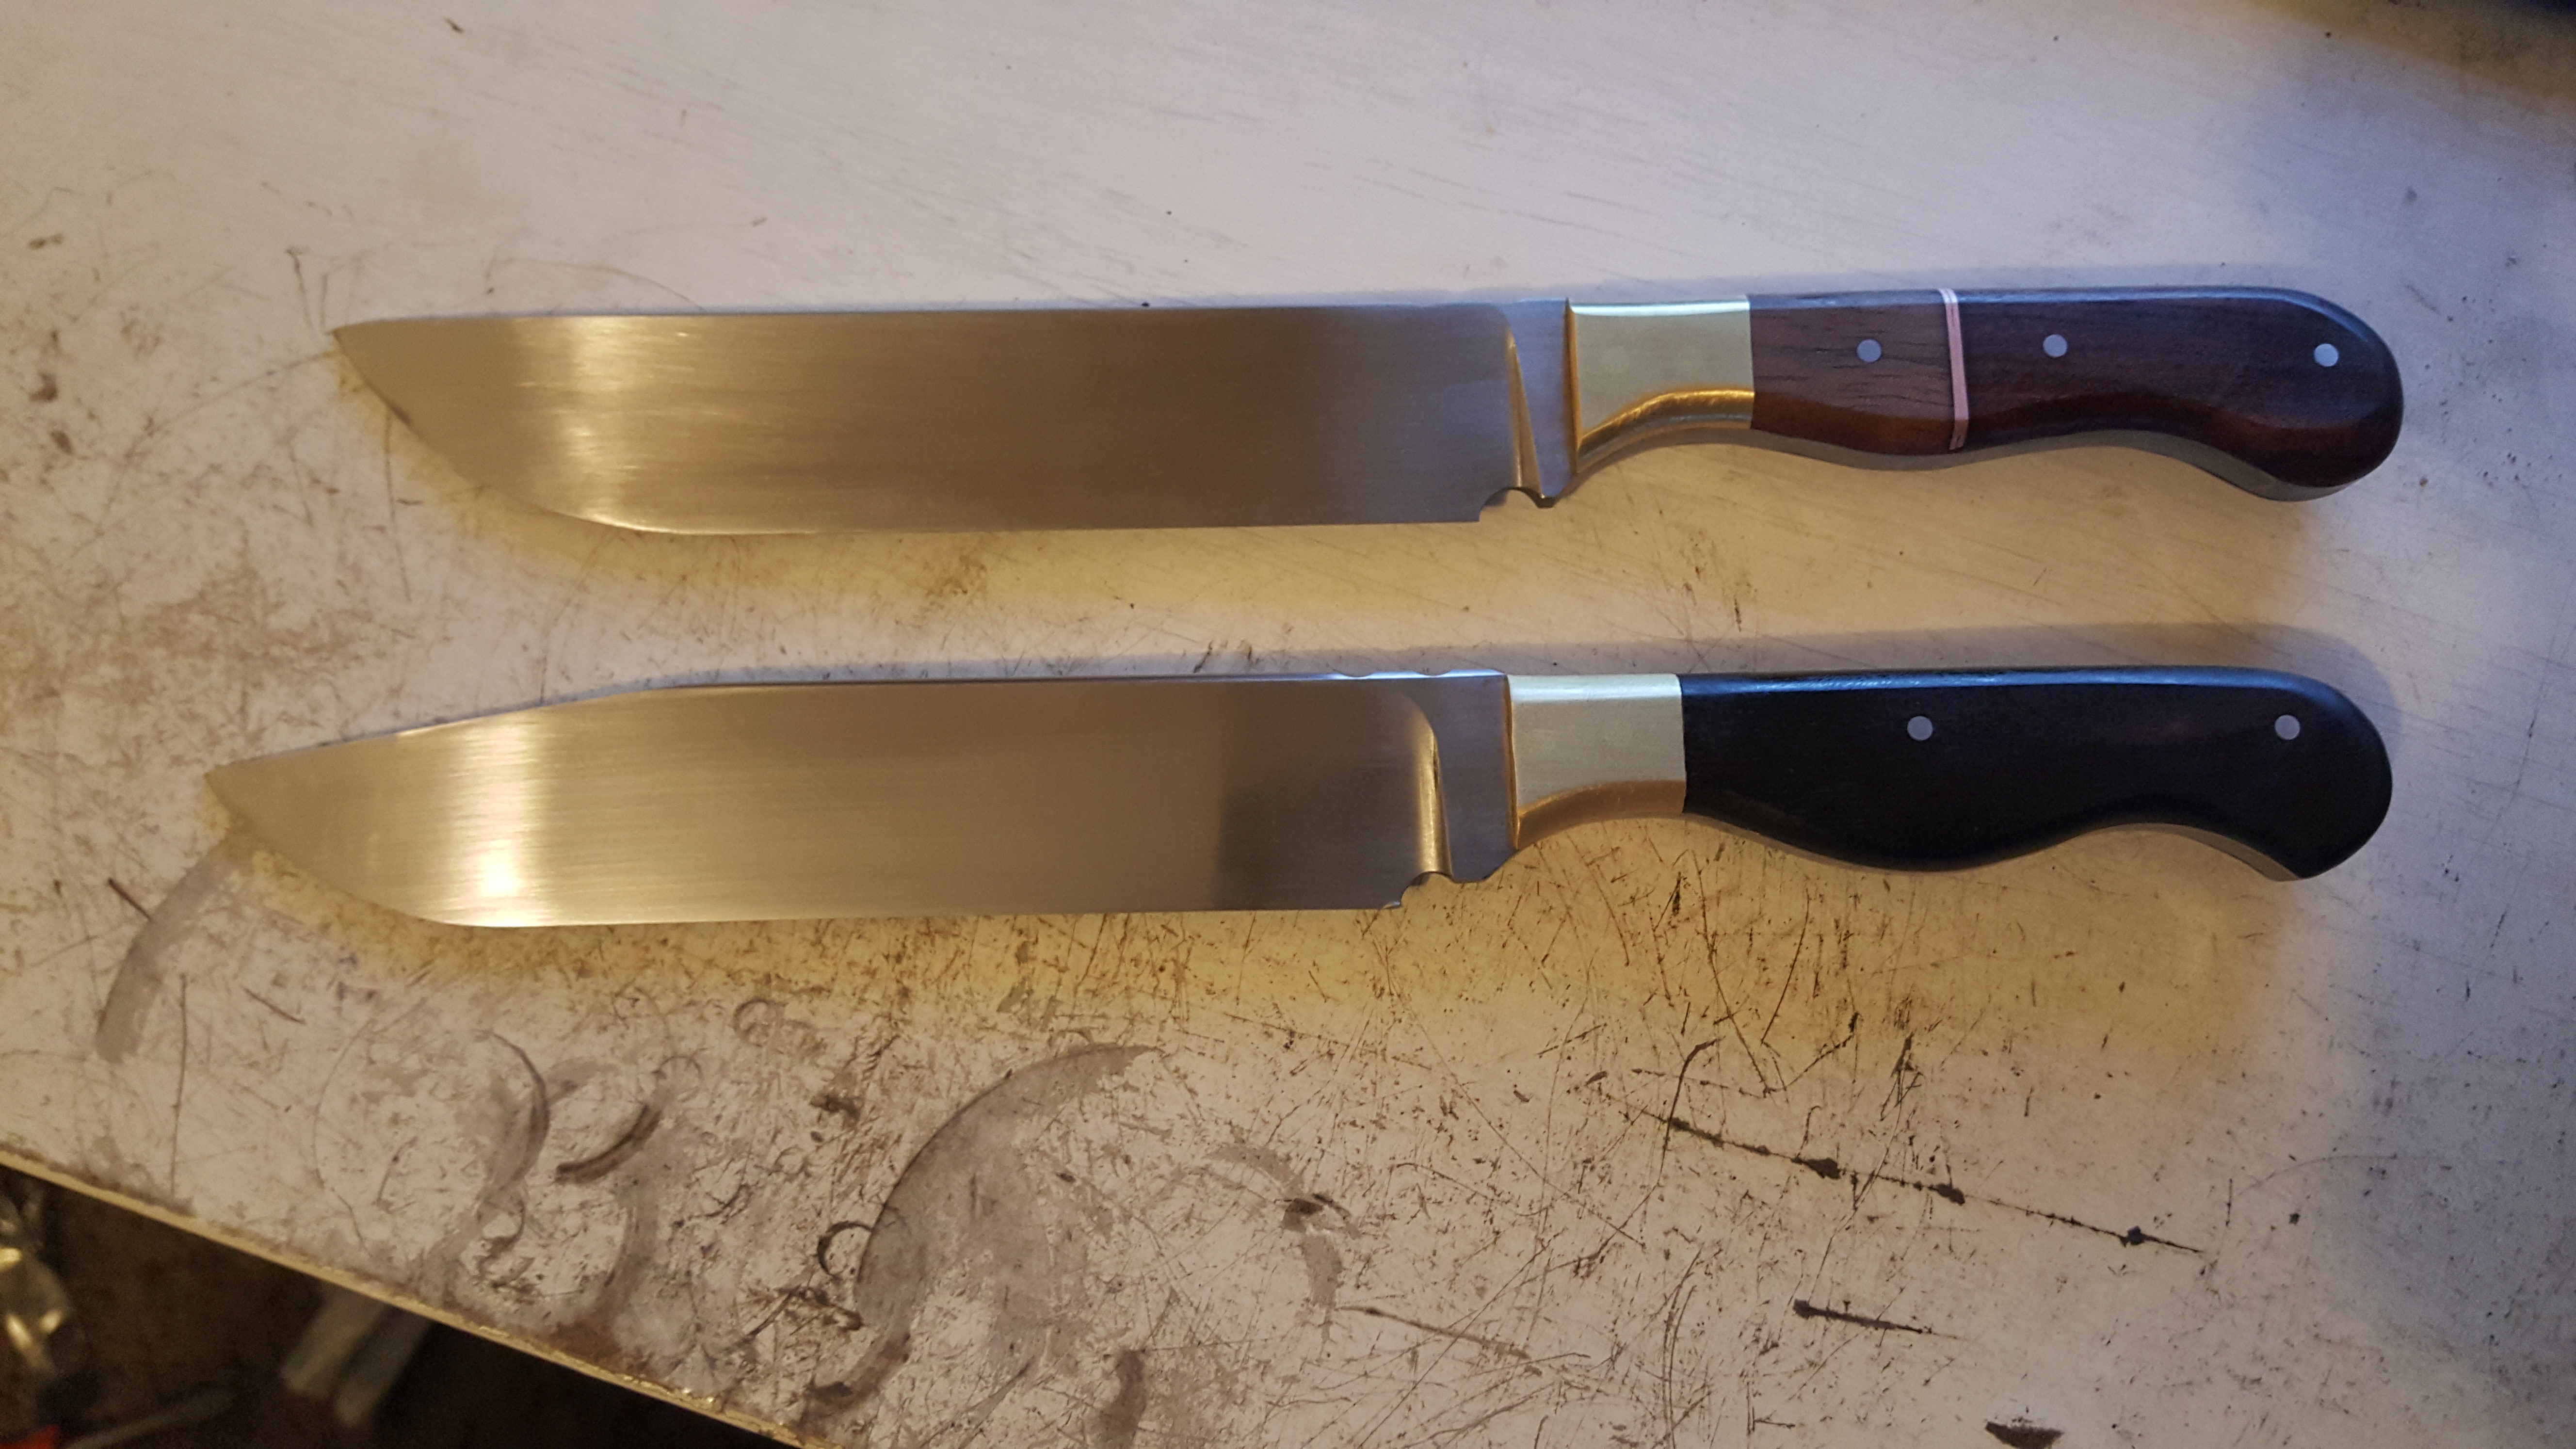
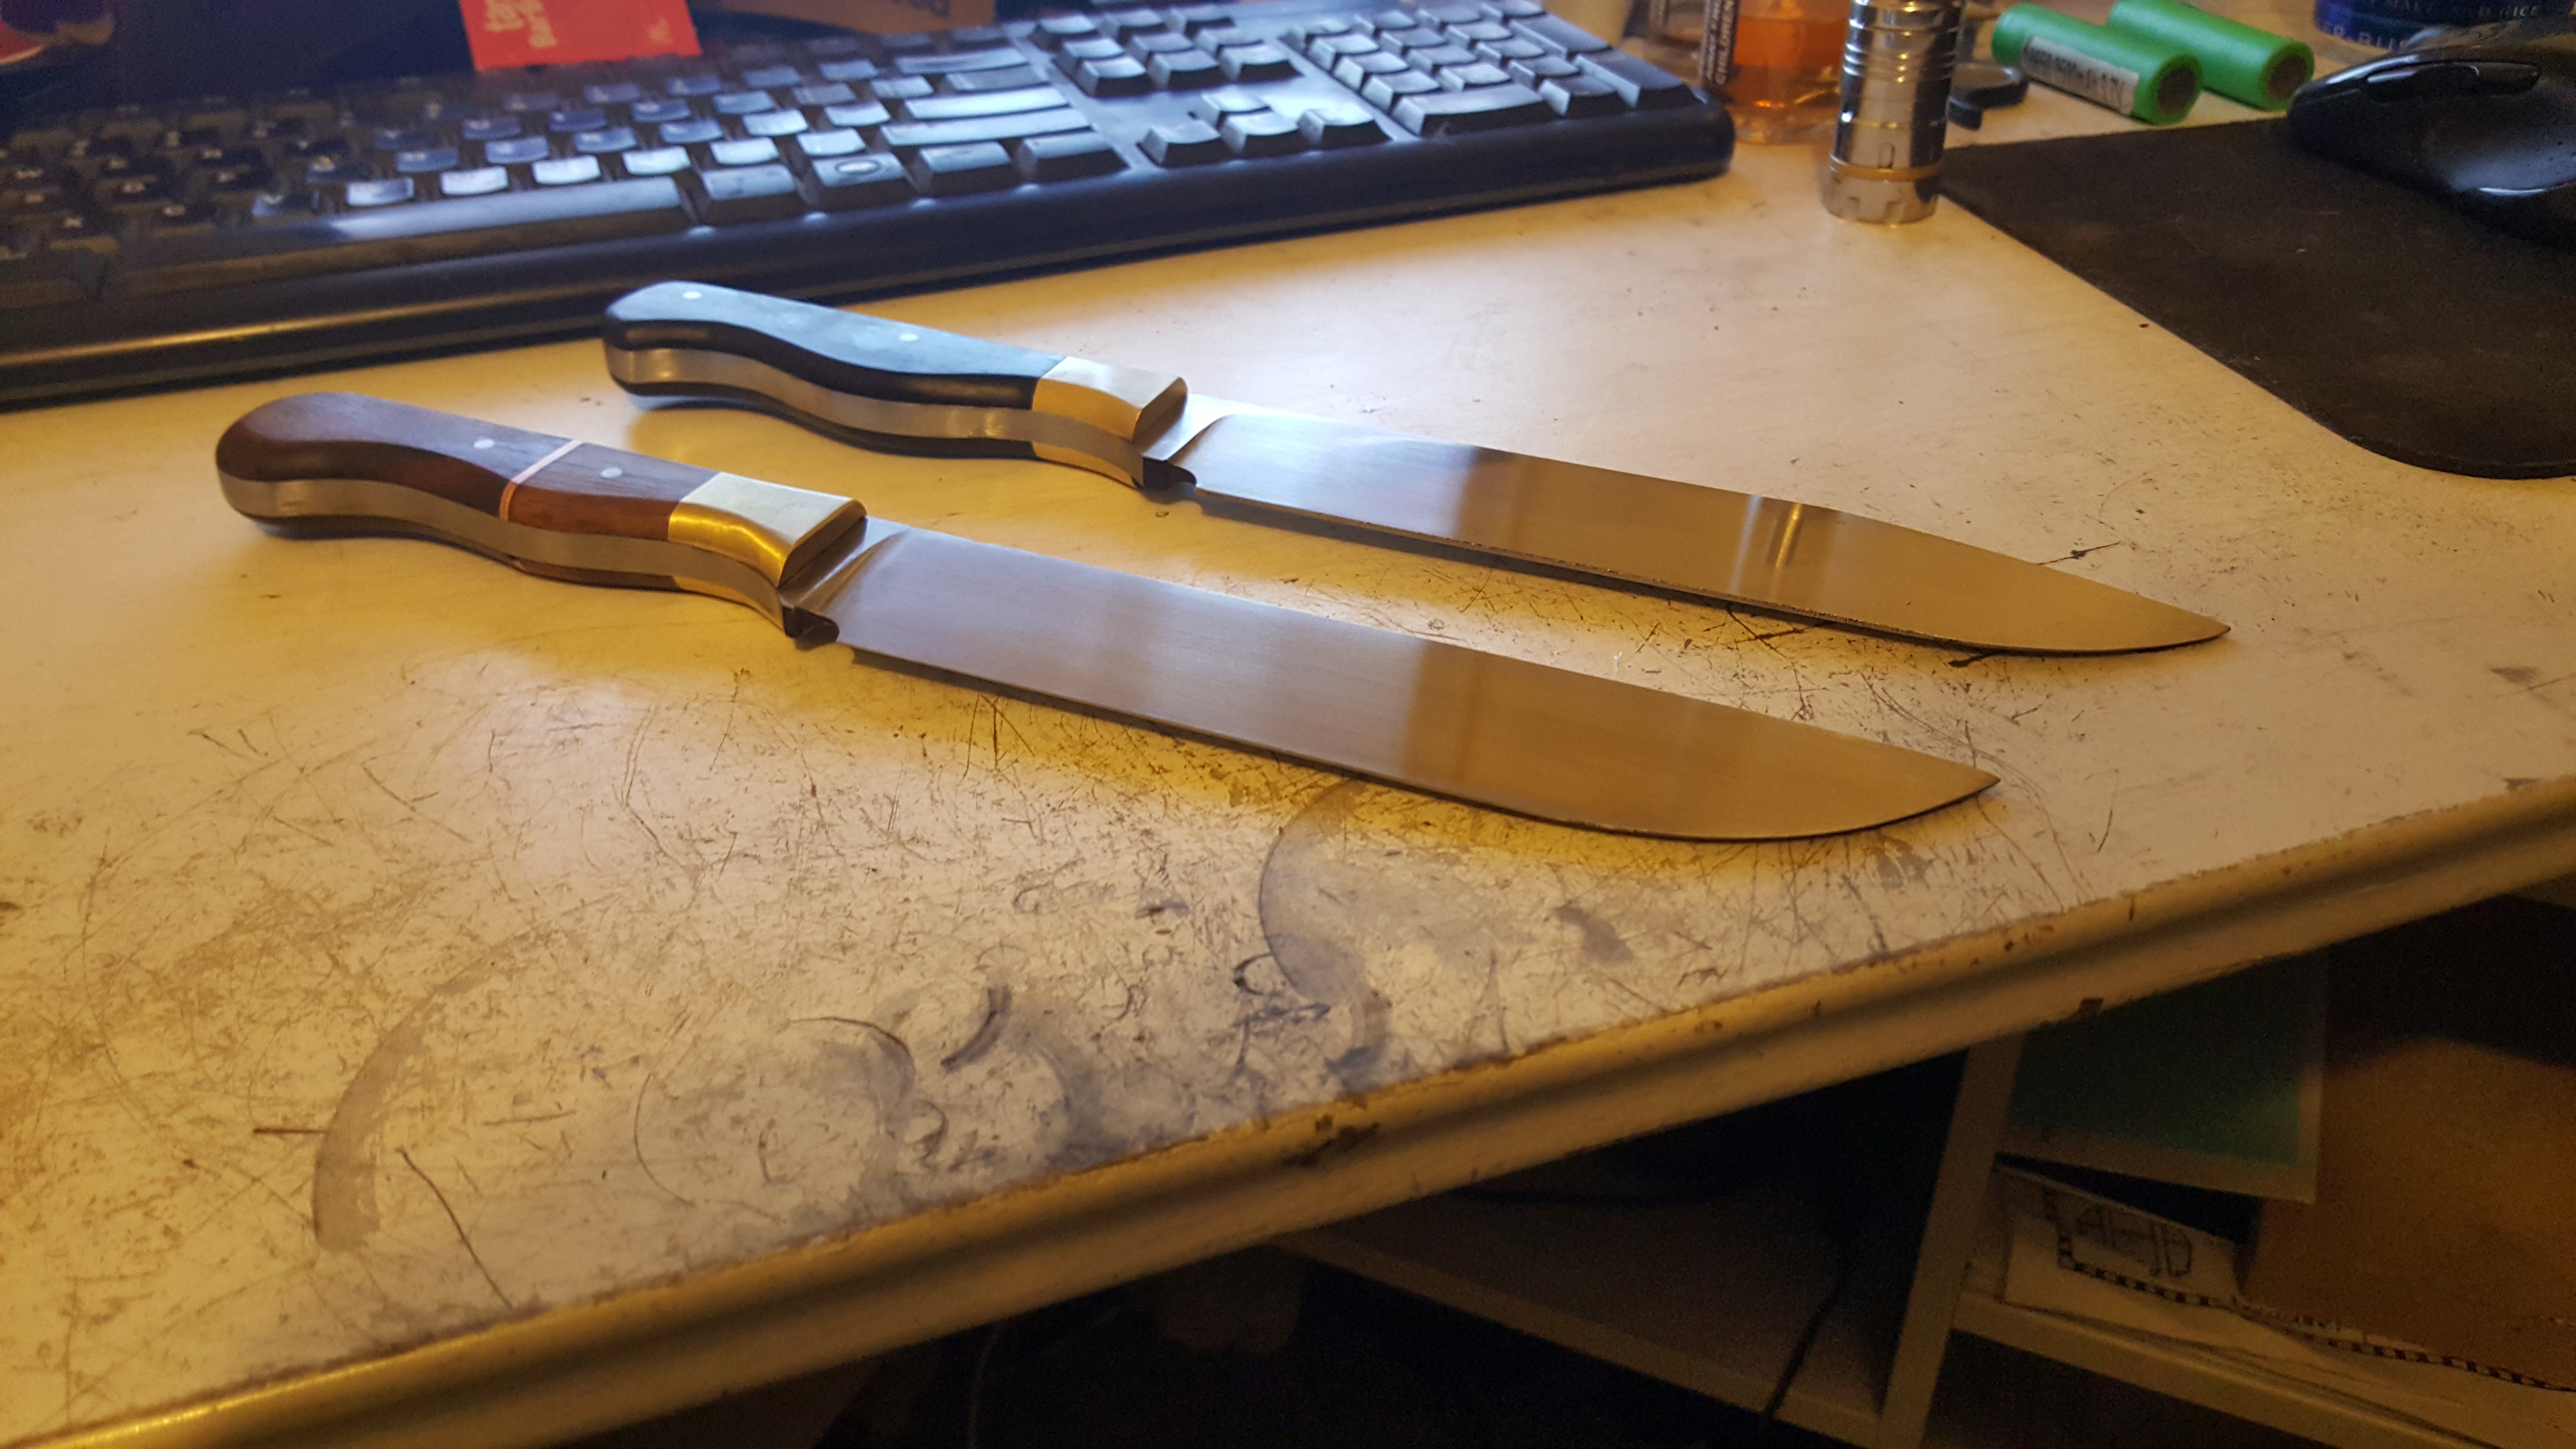
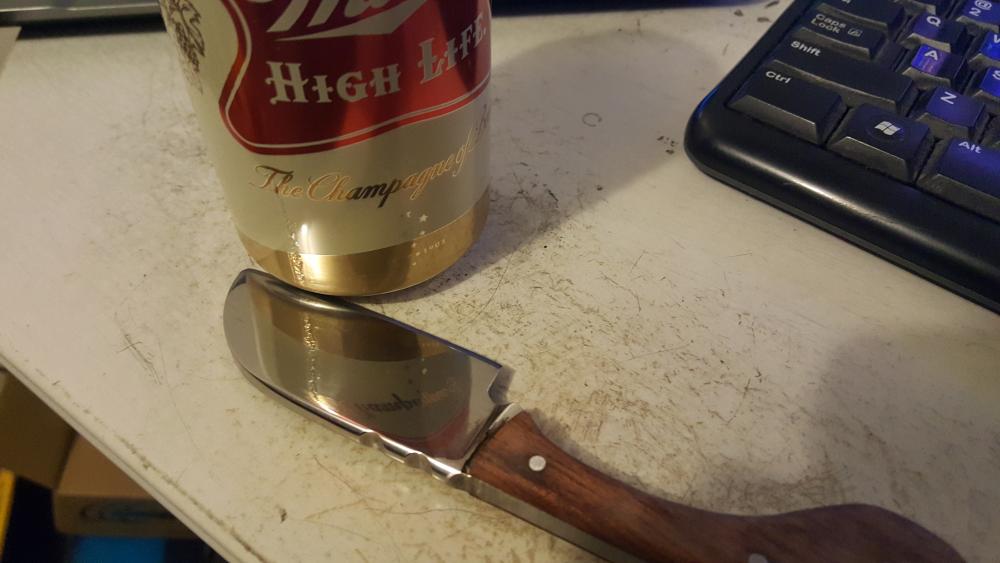
So I started these a few months back, and then worked on other things due to a couple of technical issues I ran into with these. On the straight back blade, I was going to go with just bubinga scales, but when they arrived, they were VERY mismatched color wise, So I decided to use the lighter of the two scales along with a single scale I had of Bolivian rosewood, as the other scale from that set had a massive crack in it. When I fit everything together, I had a gap on one side. Which is what caused me to go with the copper spacers shown, in hindsight, I wish I would have had something to use as a spacer between the two pieces of copper on that one, because you can see a separation between the two pieces of copper on each side of the blade. On the other, the scales are Ebony, and when I ordered and received the scales, they were " flat " after about 2 weeks of sitting in my basement, they had developed a serious warp, so I steamed them, clamped them, and let them sit a few days. After about a week, the warped again, so this time, I got all the rest of the work done, steamed them again, clamped them up and left them that way till I was ready to drill the pin holes and glue this knife up. It has now sat for about 2 weeks, and shows no signs of warping in the handle scales. When I went to shape the handles on this, I decided that Ebony stinks to high heaven when its sanded ( even through a dust mask ) and didnt like working with it due to this ( my shop is my attached garage, do not wish to make the girlfriend irate ) but after hand sanding the scales up to 500g, I found that I really liked the way the scale finished so I will be working with it after all.


-
I was thinking that as well, but have been told " Clip points have a curve " so I was confused. to me it almost has a seax'ish look to it, but I do actually like it. And thanks guys...
-
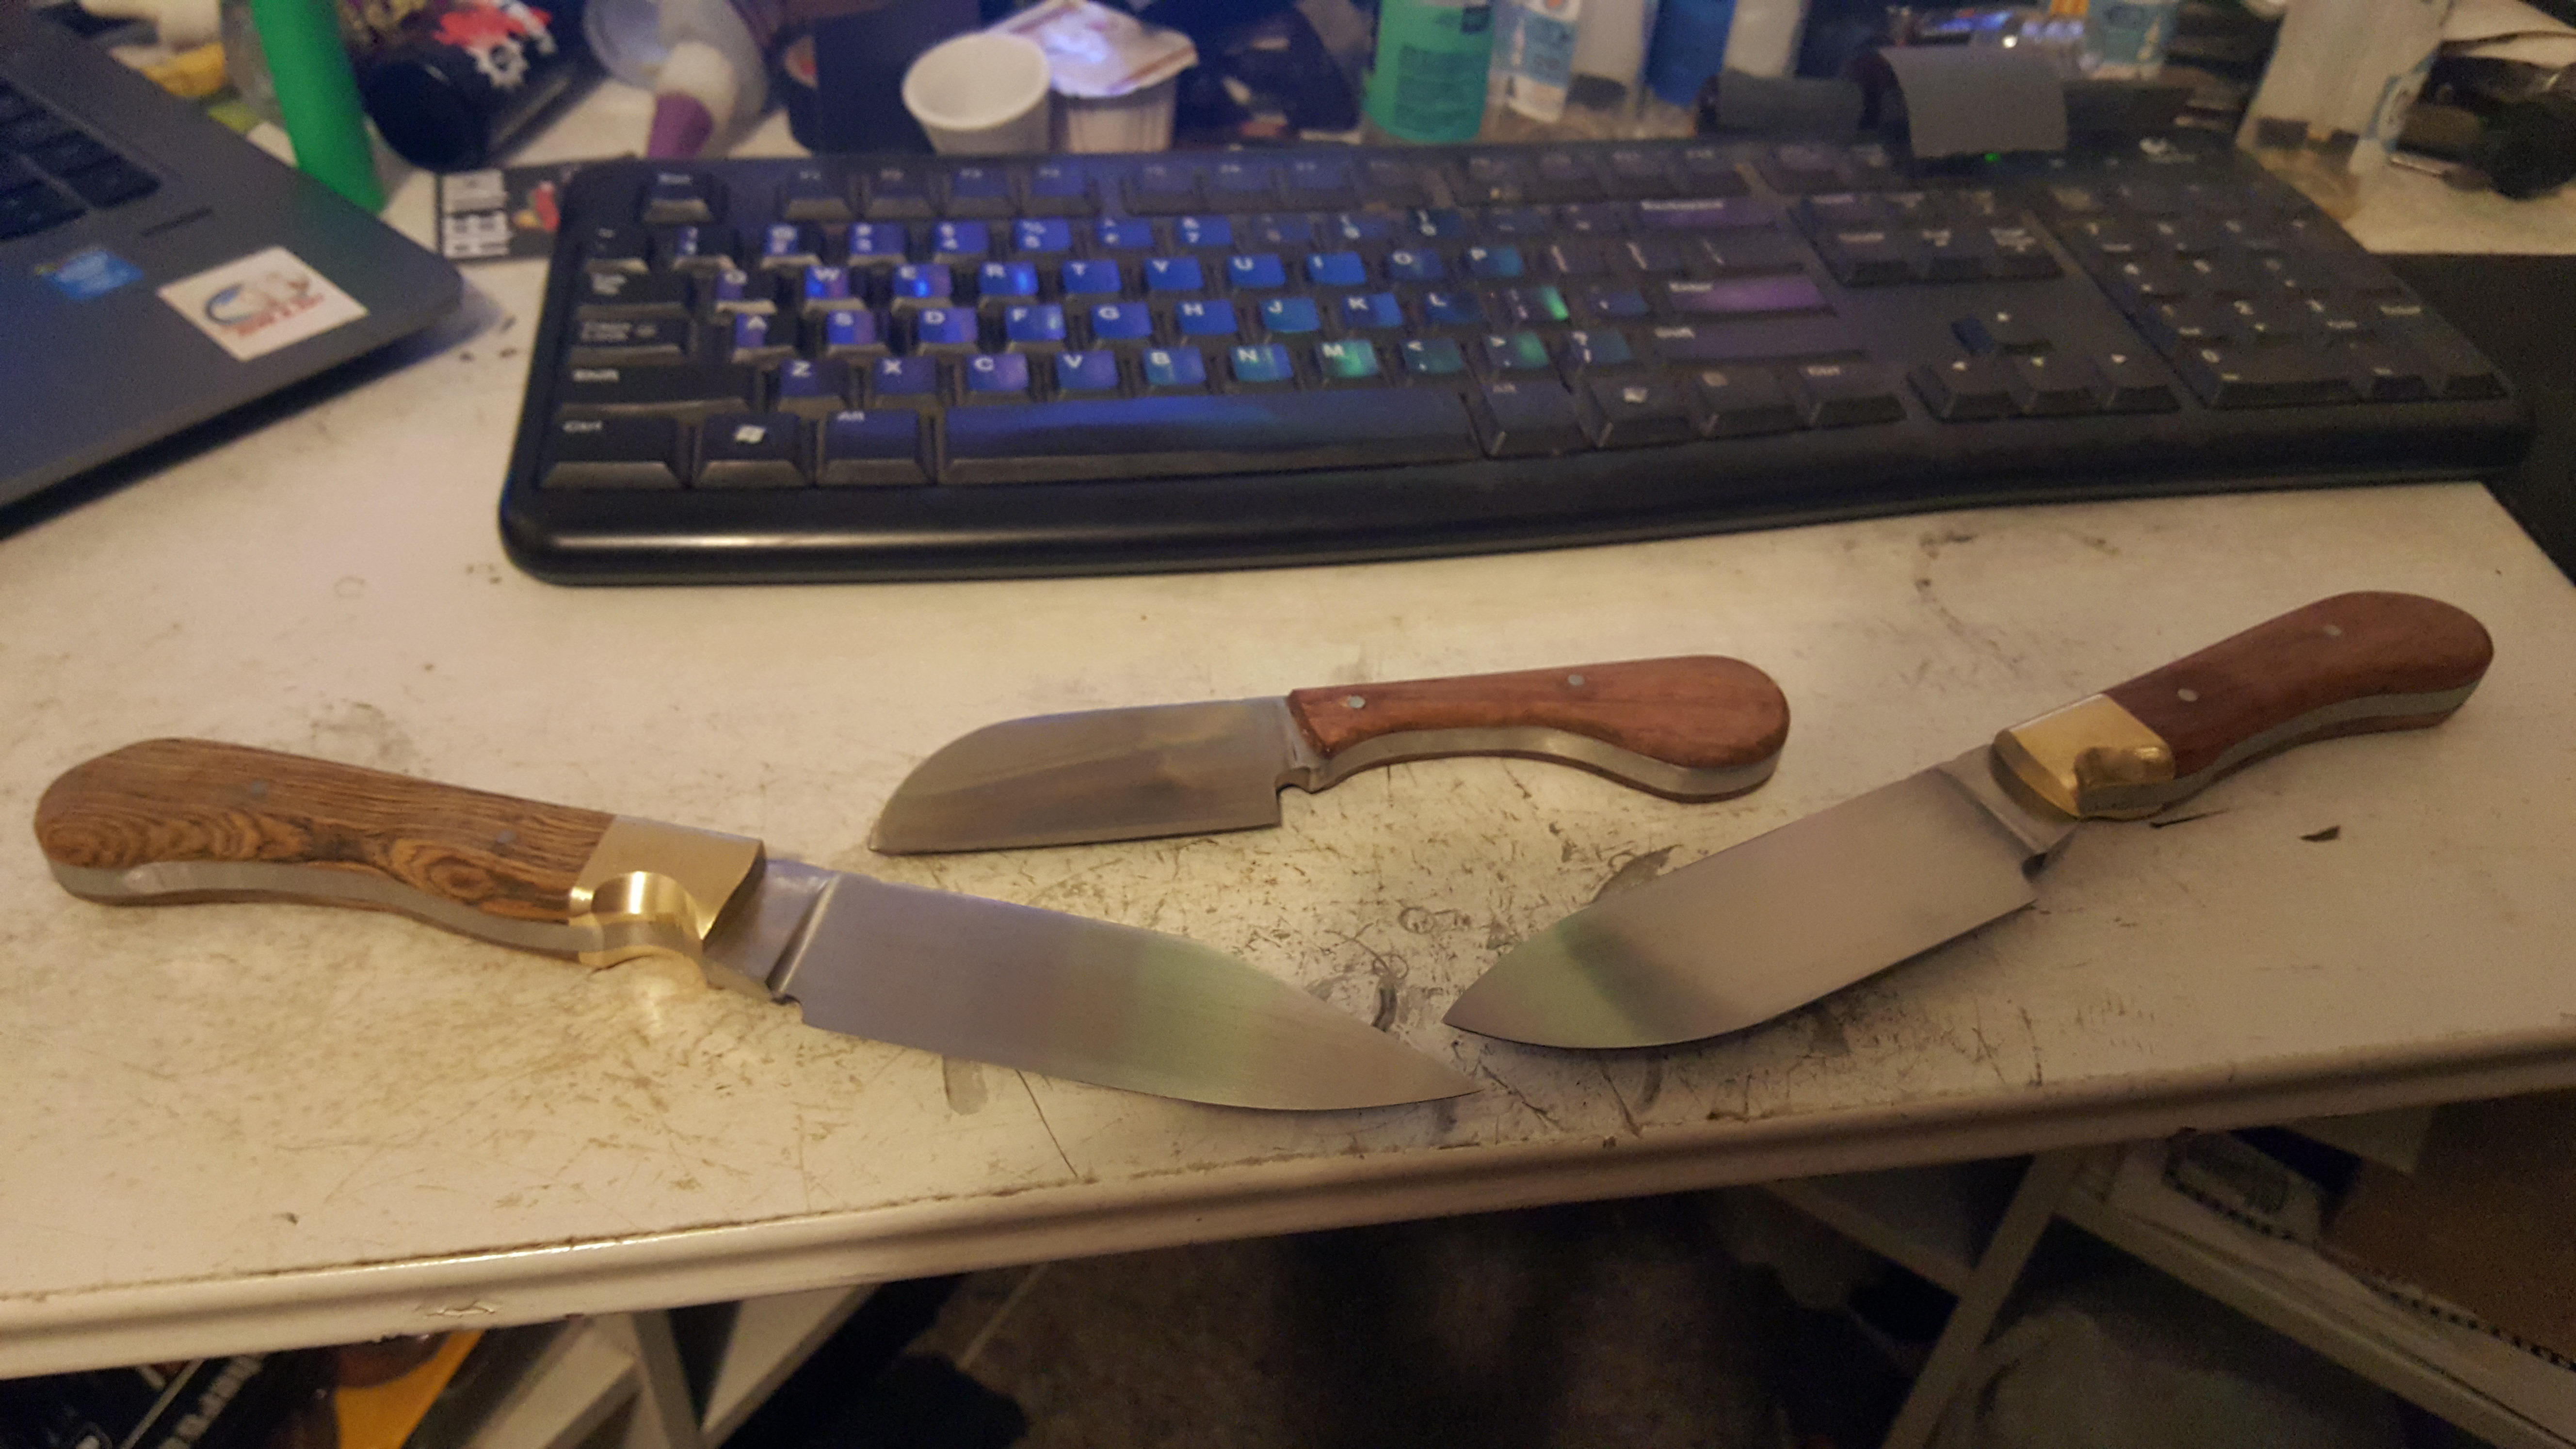
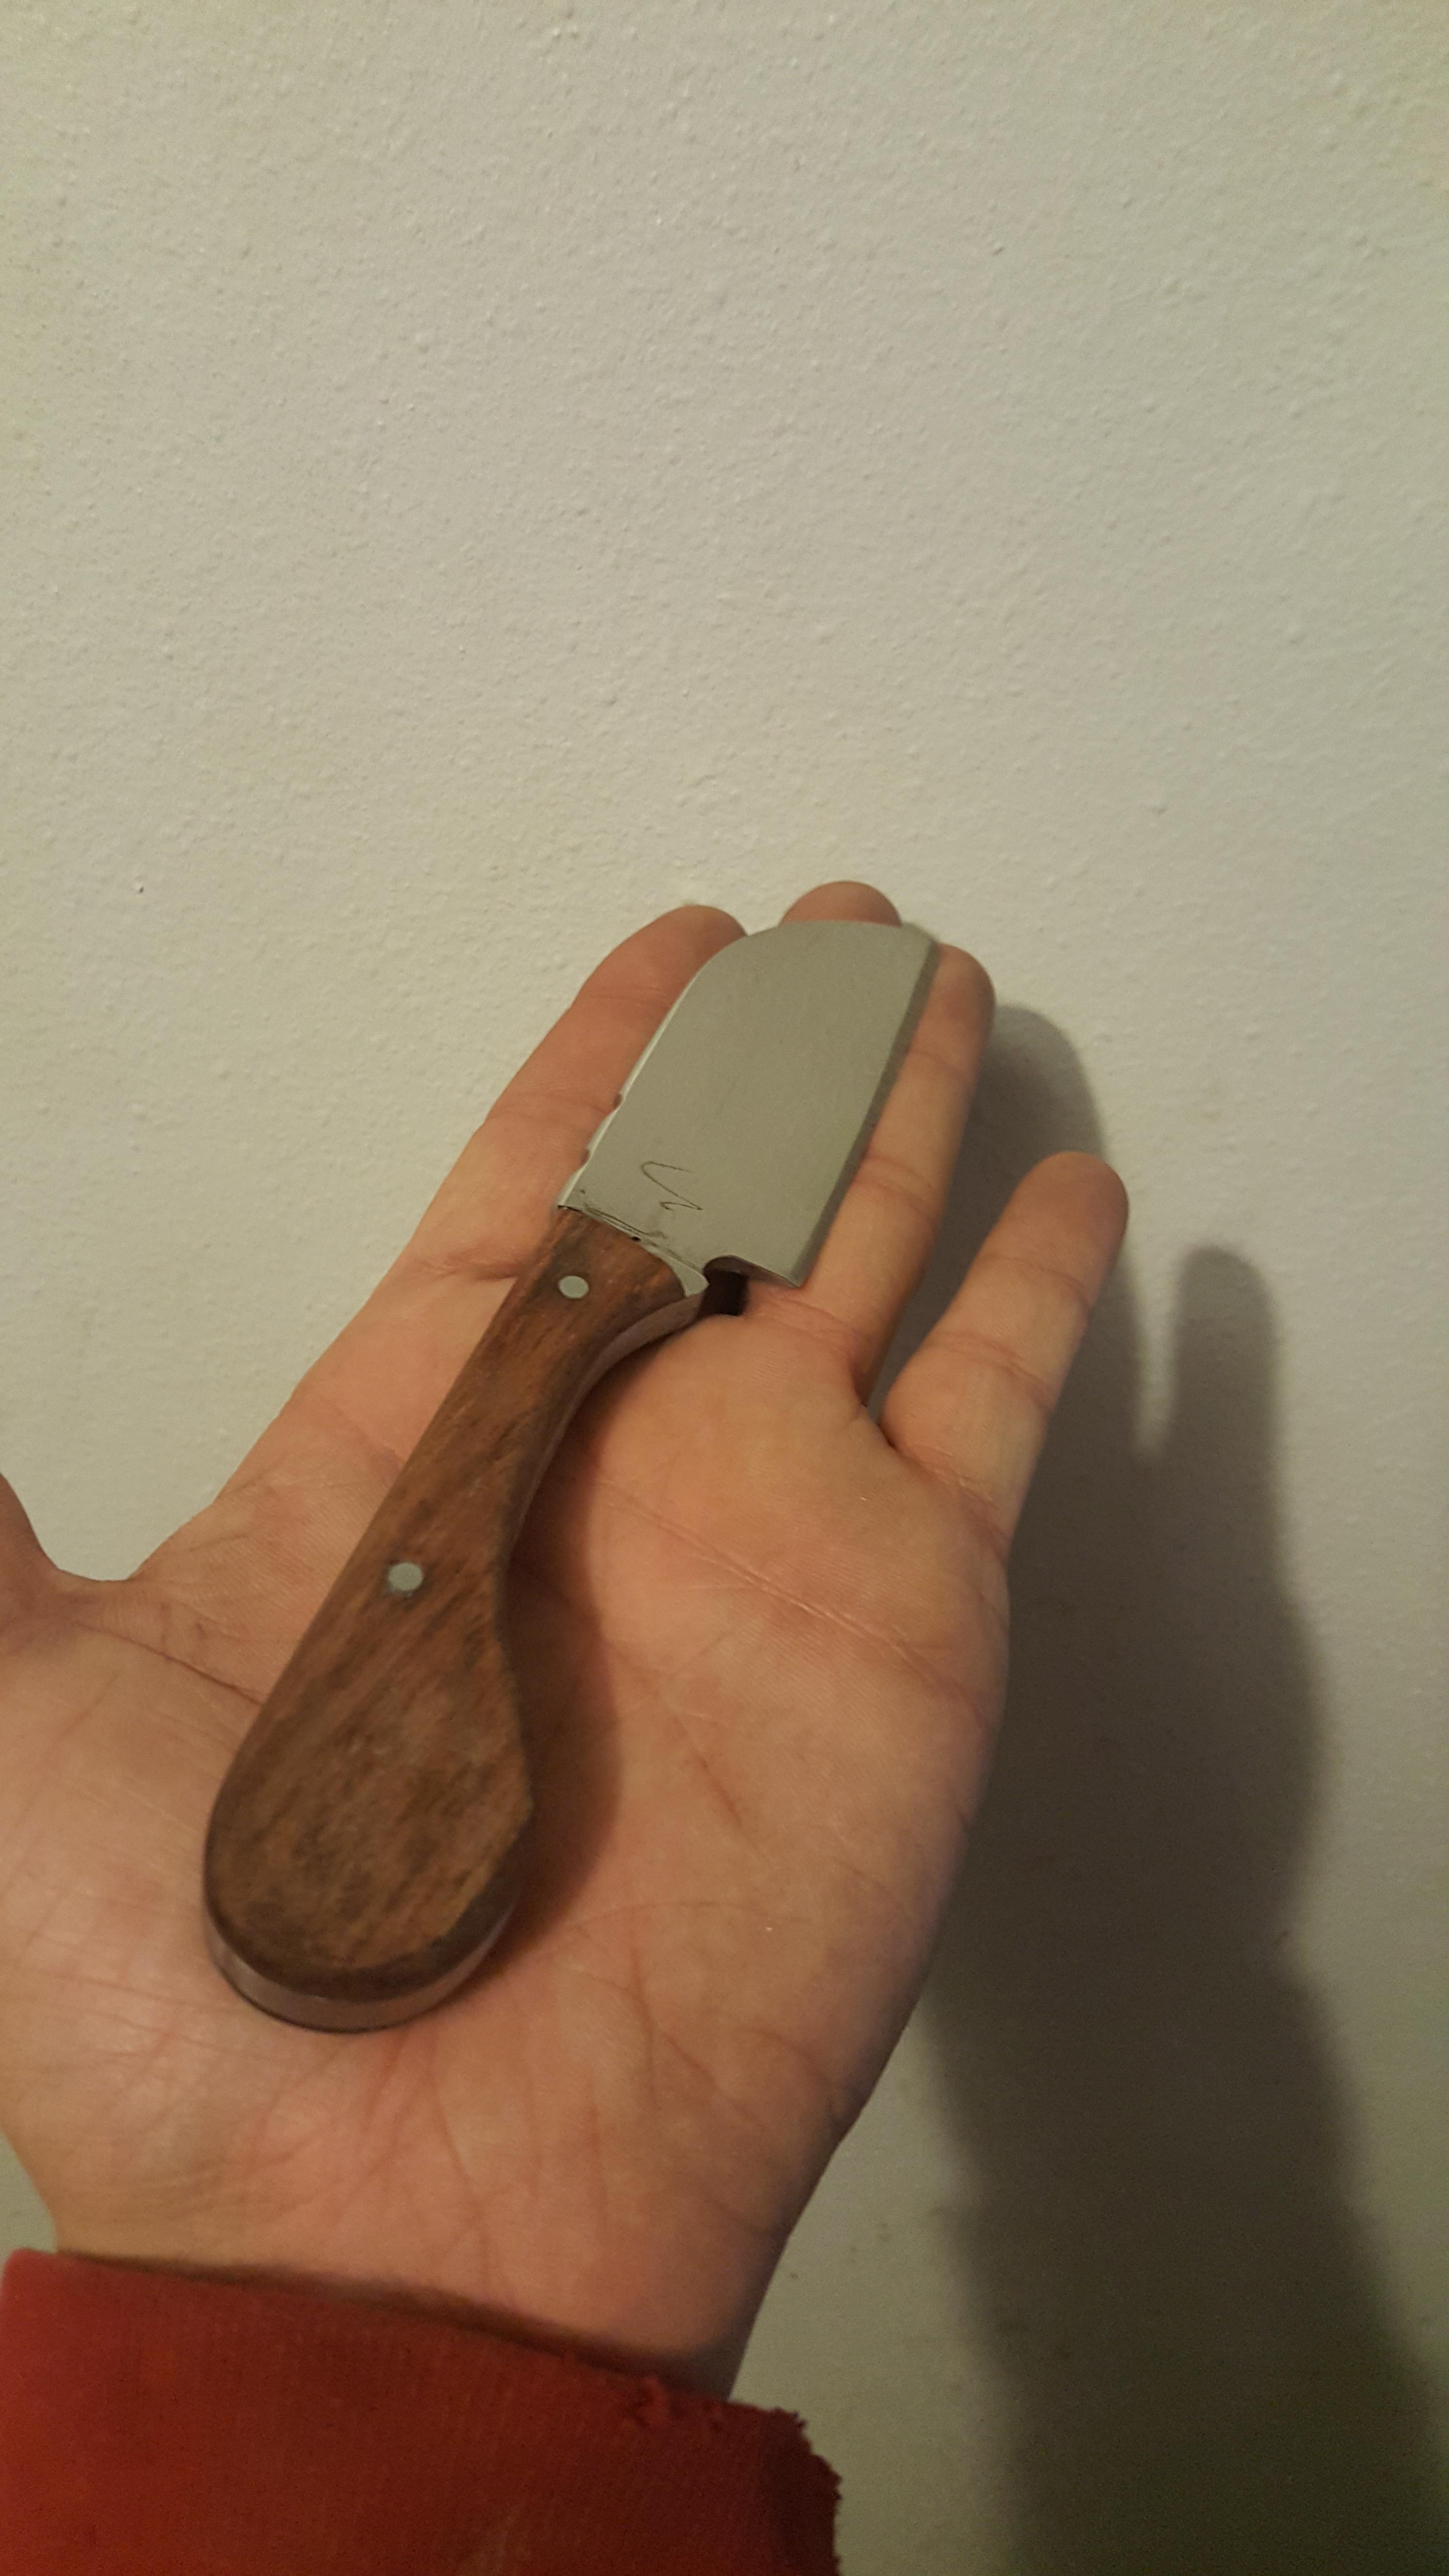
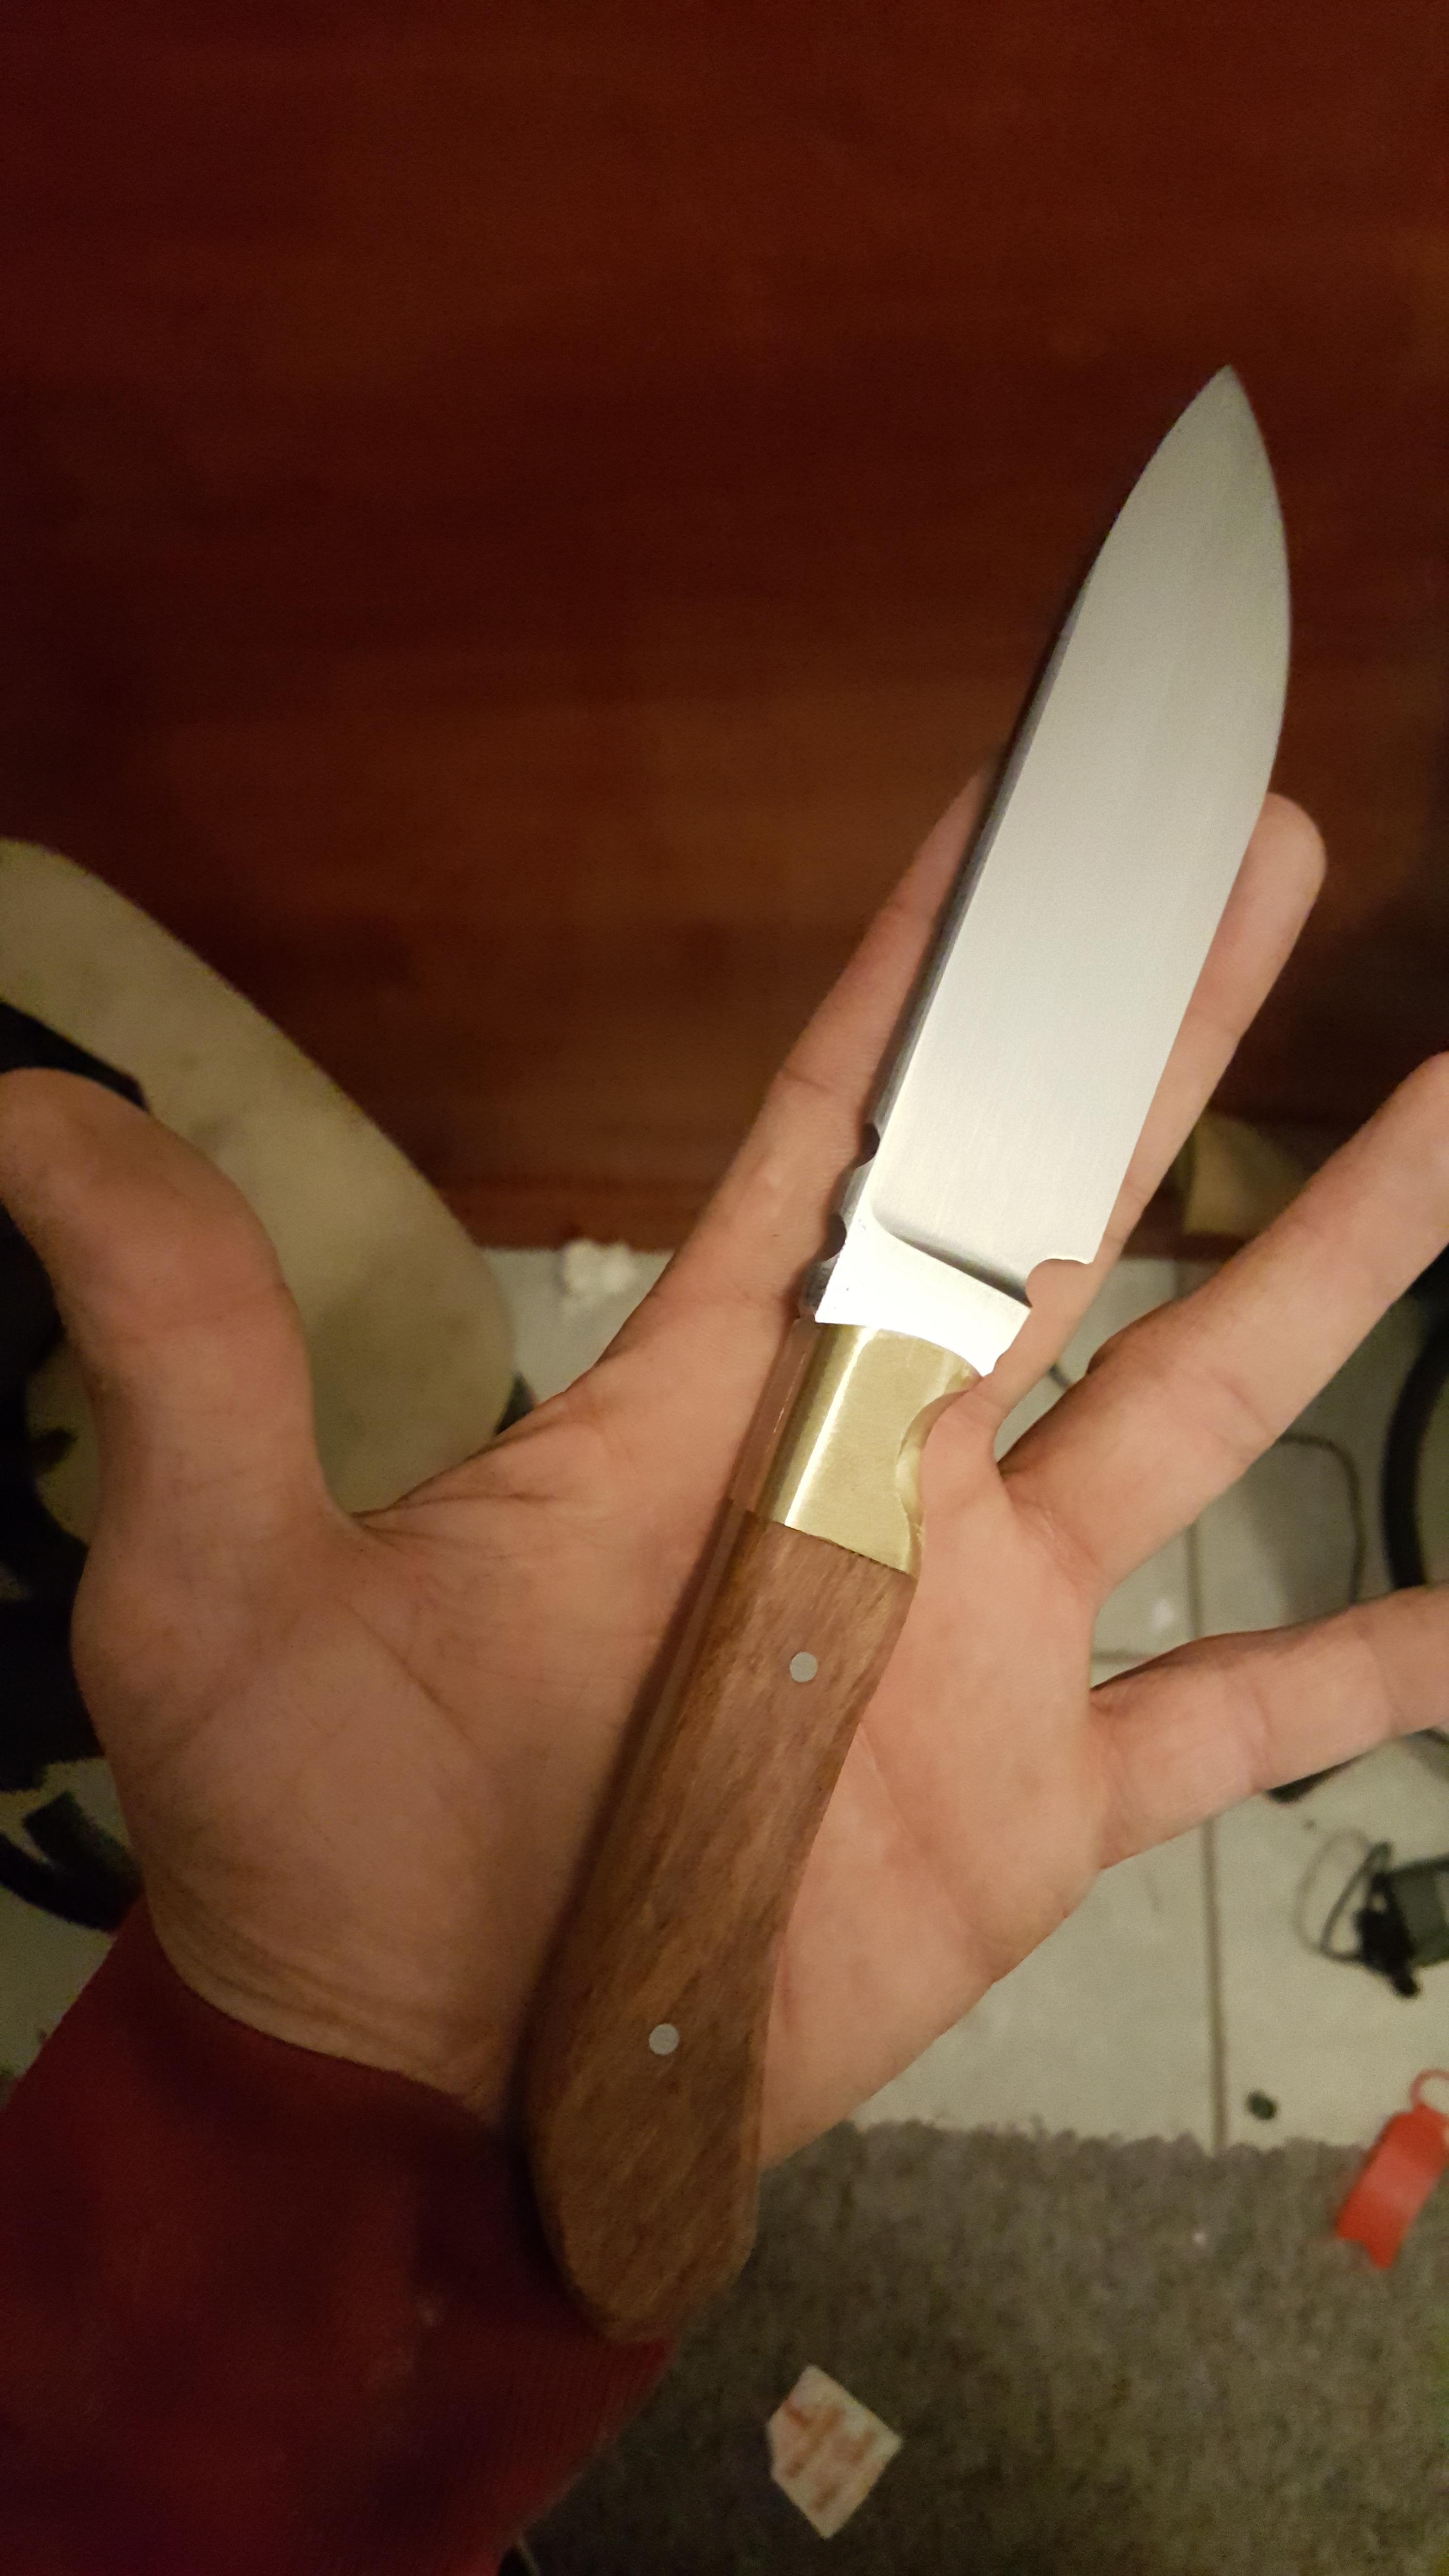
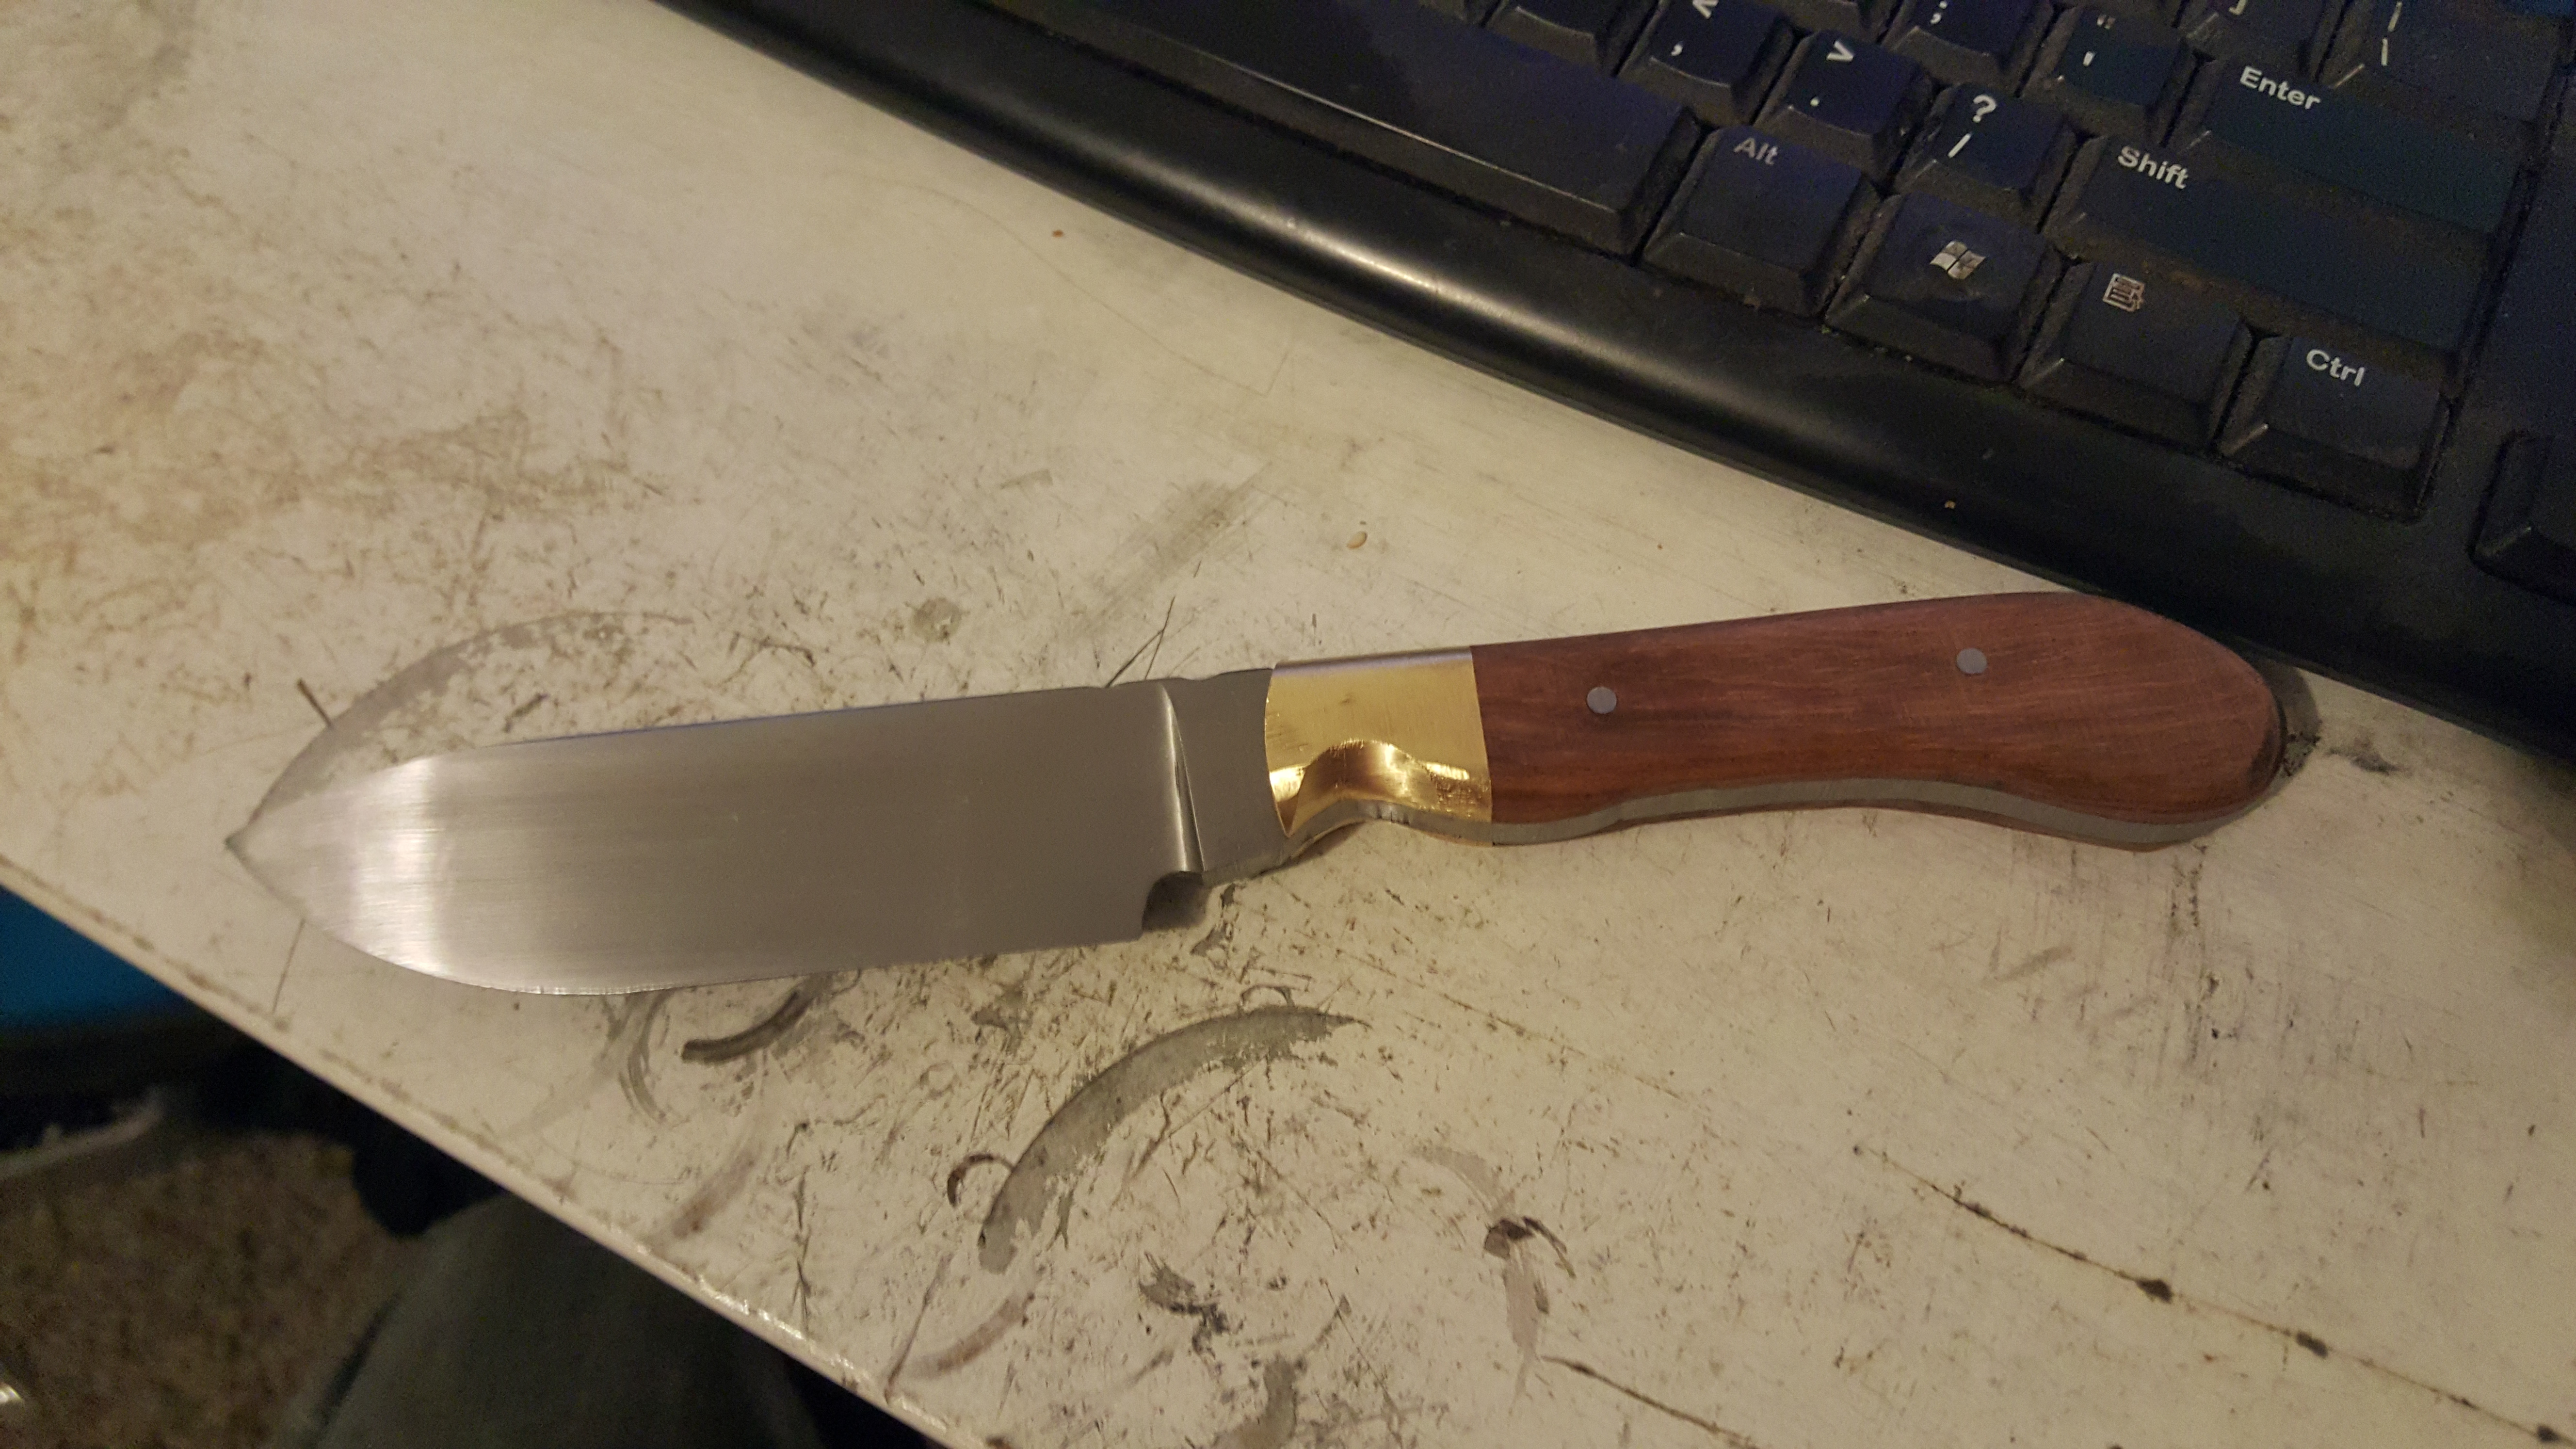
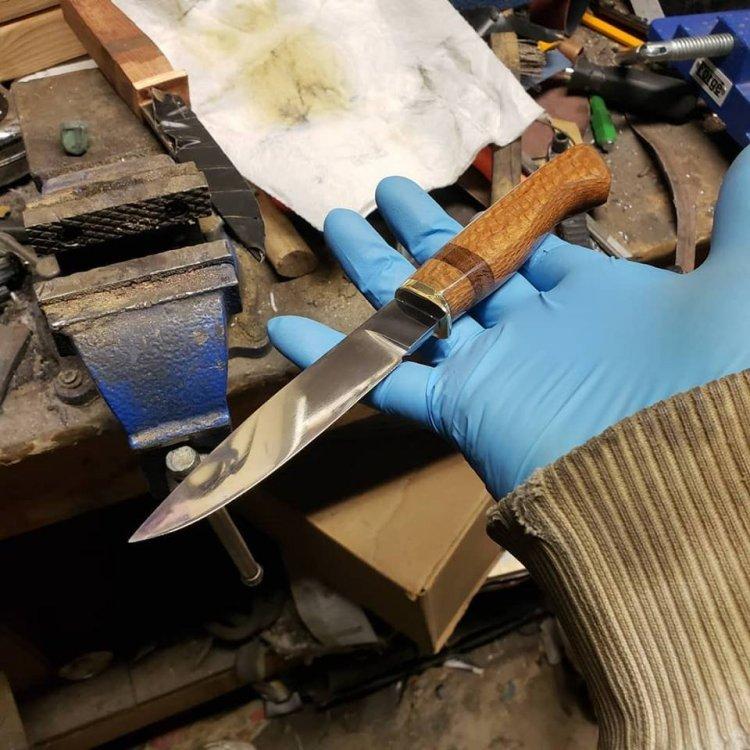
Its been a bit since I posted my recent work here, Been busy with other stuff and whatnot, but still cranking away at learning this knifemaker thing. A little sheepsfoot, a Drop point, and Honestly I dont know what to call the third one, so I have taken to calling it a Hard drop point. All three are 5160 steel, The sheepsfoot has Bubinga scales and steel pins, the other two both have Brass bolsters and pins in the bolsters, and then Steel pins in the scales, drop point is Bubinga as well, the Hard drop point is Bocote. They all still have quite a bit of finishing work left to do, but in my personal opinion, they are the cleanest knives I have made to date. So it does appear that I am improving my skills to an extent. Did a mirror polish on the sheepsfoot, more for the fact that I wanted to give it a shot, you can see the glue on the ricasso I need to clean off on this one, then I need to finish sanding the spine so I can polish it as well, I would like it to match all the way around. Not sure what the little squiggly line is on the blade, It was not there when I taped it up to glue it all together, its not a scratch, and not a crack, its faint unless you hold the blade at an angle, Im going to re buff the whole knife when its ready so I suspect it will go away. The drop point, Cant really see it from this photo, but the bottom finger area of the spine is pretty rough still, will take a good bit of hand sanding to get it where it needs to be, I used a drum sander bit in my hand drill to shape the fingerish grooves in the brass because I couldnt shape it how I wanted on my cheapo belt sander. Needs a bit of clean up but I would have to try to mess this one up at this point. And another shot of the Drop point. The " Hard Drop point " basically this one needs all the same work the drop point does, this one the bottom spine and scales are a bit cleaner then the other, but still needs some work before calling it done. Overall I am pretty happy with these, I have made some really crappy stuff, and these ones look almost worth trying to sell, Spent a good amount of time figuring out a good heat treat on 5160, and have been pretty happy with the results of the steel, so now its time to make them better looking. Thanks for looking.


-
I can second the whole O1 likes to Air harden bit, I have had to start over on two separate projects because I set the piece on the anvil after forging to run use the bathroom, got sidetracked and came back like 10 minutes later to a broken or cracked piece. The last one, sits on my anvil stand, as a reminder to not make the same mistake again.
-
I have the cheapo Harbor Freight 1x30 belt grinder, and have had it for a year, and honestly, it is the most reliable bit of junk I have gotten from there. I have burned through probably 10+ angle grinders from there. but I am still on my original 1x30 belt grinder, for the cost, it was easily one of the best choices I ever made. Belts are cheap for it, but it takes some time to grind, and I second the Gough jig, I used one of those for a while, and it worked great, but BOY did it take some time to throw a bevel on a blade.
-
I just recently sold a knife to my girlfriends uncle. ( Prior Marine aviator, avid hunter, all around xxxxxxx of the family, and a man I have a LOT of respect for ) and when he got it, it was NOT perfect, but he knew going into the deal, that it was not show quality, the man hunts Deer and boar, and wanted a heavy duty blade he could use on such Animals. I was a nervous wreck after shipping the blade to him. And fully expected him to come back and say " I want my money back squid !!!! " But he didnt, he loved it, he was very happy with the weight, very happy with the balance. and while he did notice the slight cosmetic defects the blade has, he said they show beyond a doubt that it was hand made, and that he couldnt wait to show it off to his hunting buddies. As makers, we are our own harshest critics, we know what to look for, we see work from makers whos skills surpass our own, and we hold ourselves to those standards when our experience and skills do not produce such awesome work ( JPH, Stormcrow, Thomas Powers, Steve Sells and others, I am looking at you ! ) but customers are not knife makers ( Mostly ) and do not see the things we would see as flaws. they see the finished product, how it will serve them in the use they intend to put it through, and value in having a tool they didnt have before. Here is the knife I shipped him, The agreed price was $100.00, And this was after he had seen pictures of the knife and knew what he was getting. ( granted I did clean up the Ricasso area / handle area a bit. ) but he was entirely happy, even with the epoxy leaking from the pin holes. Just be honest with your Customers, they will appreciate it...

-
-
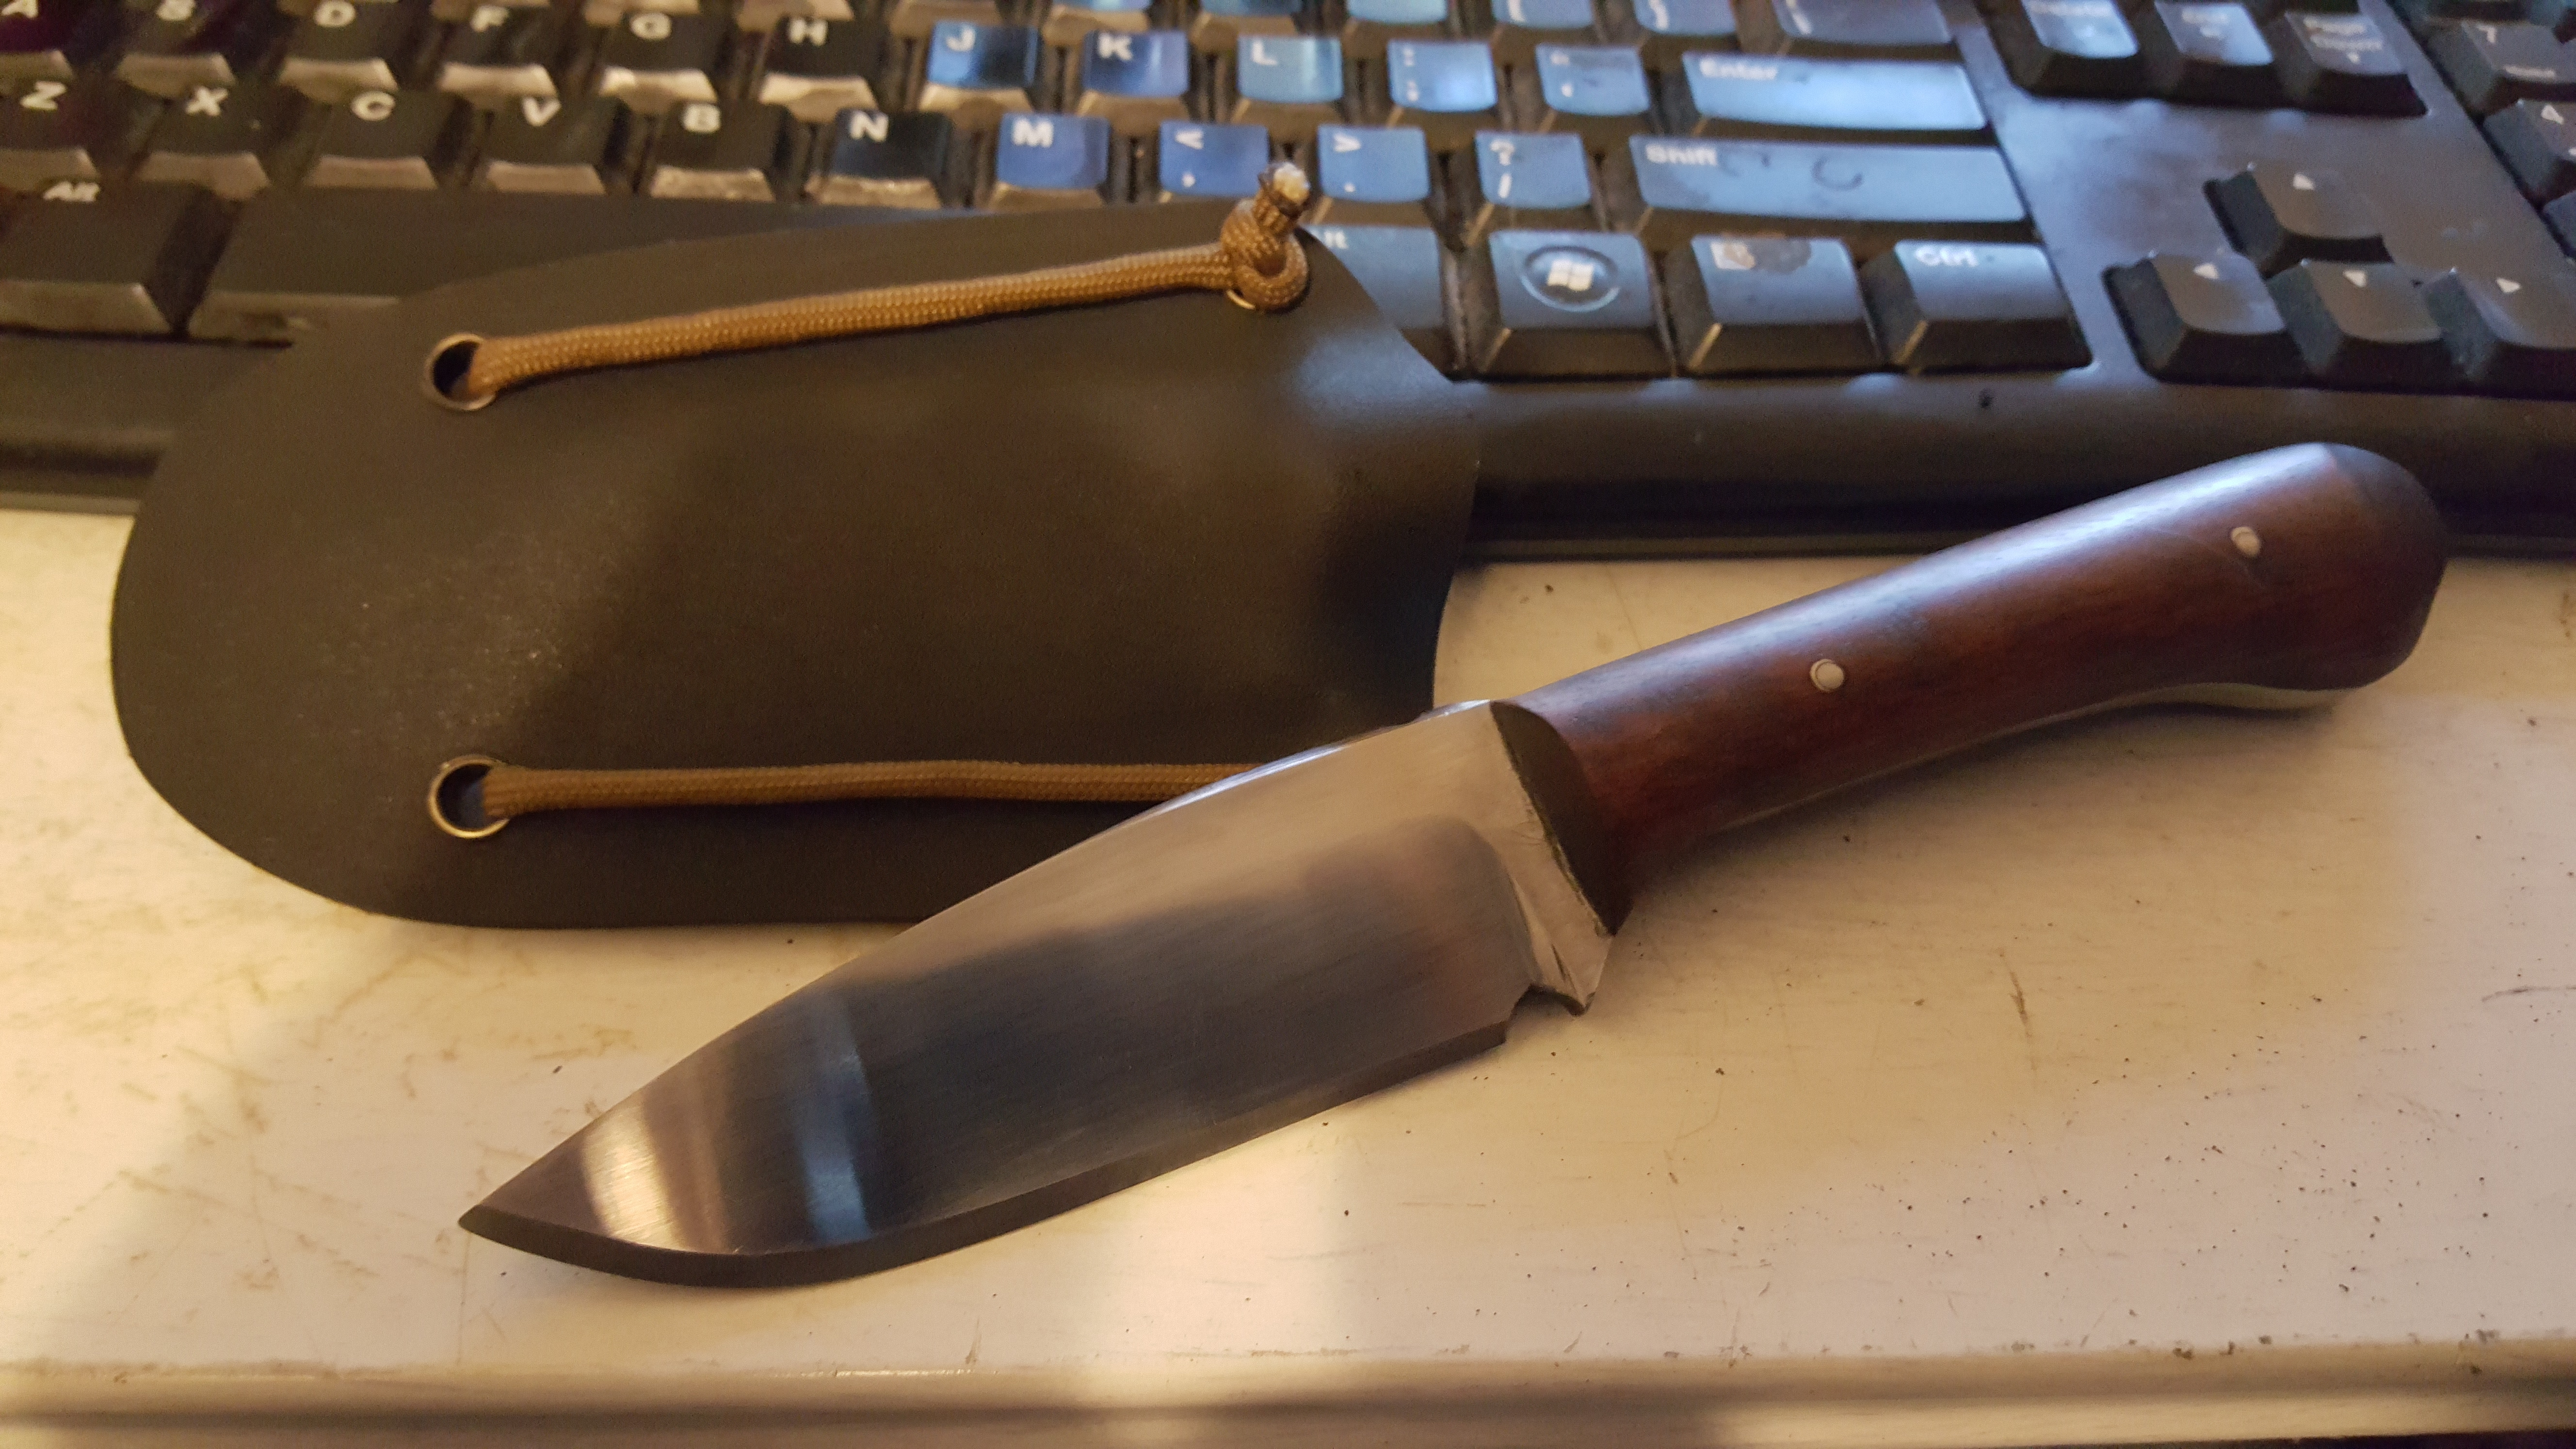
Elegant is for sure the word I would use for this knife, along with Classy and Sophisticated. Great looking knife.
-
Very likely is, its .250 thick pretty much the entire way down, my thought was something that could do most tasks, but not do any specific task better then any other. and replace a heavy object like a hatchet in a camp setting.
-
/Me furiously starts googling Shawn of the Dead references... Shaun: I don't think I've got it in me to shoot my flatmate, my mum and my girlfriend all in the same evening. Liz: What makes you think I've taken you back? Shaun: Well...you don't want to die single, do you?