Malice9610
-
Posts
167 -
Joined
-
Last visited
Content Type
Profiles
Forums
Articles
Gallery
Downloads
Events
Everything posted by Malice9610
-
after looking at it again, I think my " Newb Paranoia " was showing, the holes are not perfect by any means, but they are a lot less oversized then I had thought at least where the brass parts are concerned. As for the wood, I am finding out very much the truth of your words Thomas, the epoxy totally filled the hollow between the tang and the wood, which is making removal an interesting task in futility with the intent of keeping all the pieces. The one I glued up yesterday, is solid as a rock, and in the right place, the one I glued today.... Not so much, the handle slid " down " the tang a good 1/4 inch, leaving about that much of the tang exposed under the ricasso, As i had the blade wrapped and in the vice, I didnt see this til AFTER the epoxy had cured. So a new question, I think I am on the right path, but best to see what you all have to say about this, supposedly epoxy can be ' more easily removed ' if cured, by heating the pieces to around 200-250 deg, that should make it at least soft enough to pry the pieces off to be cleaned, Considering I drew temper on these knives at around 350 - 400 deg, heating the piece for a short period at 250 shouldnt harm the heat treatment right?
-
I will have to look into what I would need to do to make a chisel for this, that isn't a half bad idea, simply lack the tooling to do so at the moment, And I am sure it takes a bit of practice to get done well. And the idea of trimming a hacksaw blade down, now that is pure genius... I never would have thought of that, granted that I have a surplus of hacksaw blades, I will try that method first, to see how things work with that plan, otherwise I will also start looking into sourcing a jewelers saw, again another potential tool I didn't even think of using as I don't have one. I am a bit nervous trying to hot split these pieces, they are essentially 1 inch x 1 inch x 1/4 inch thick, so holding it to do the hot punch would be a challenge in itself. Thanks both of you, I am going to give all Ideas a shot this weekend. Crantius, I have done the epoxy trick with sawdust, had to on my first knife to fill a slight separation between two pieces, but I didn't think to try it using brass dust, So thank you for that suggestion as well, I will give that a shot as well and see how things turn out.
-
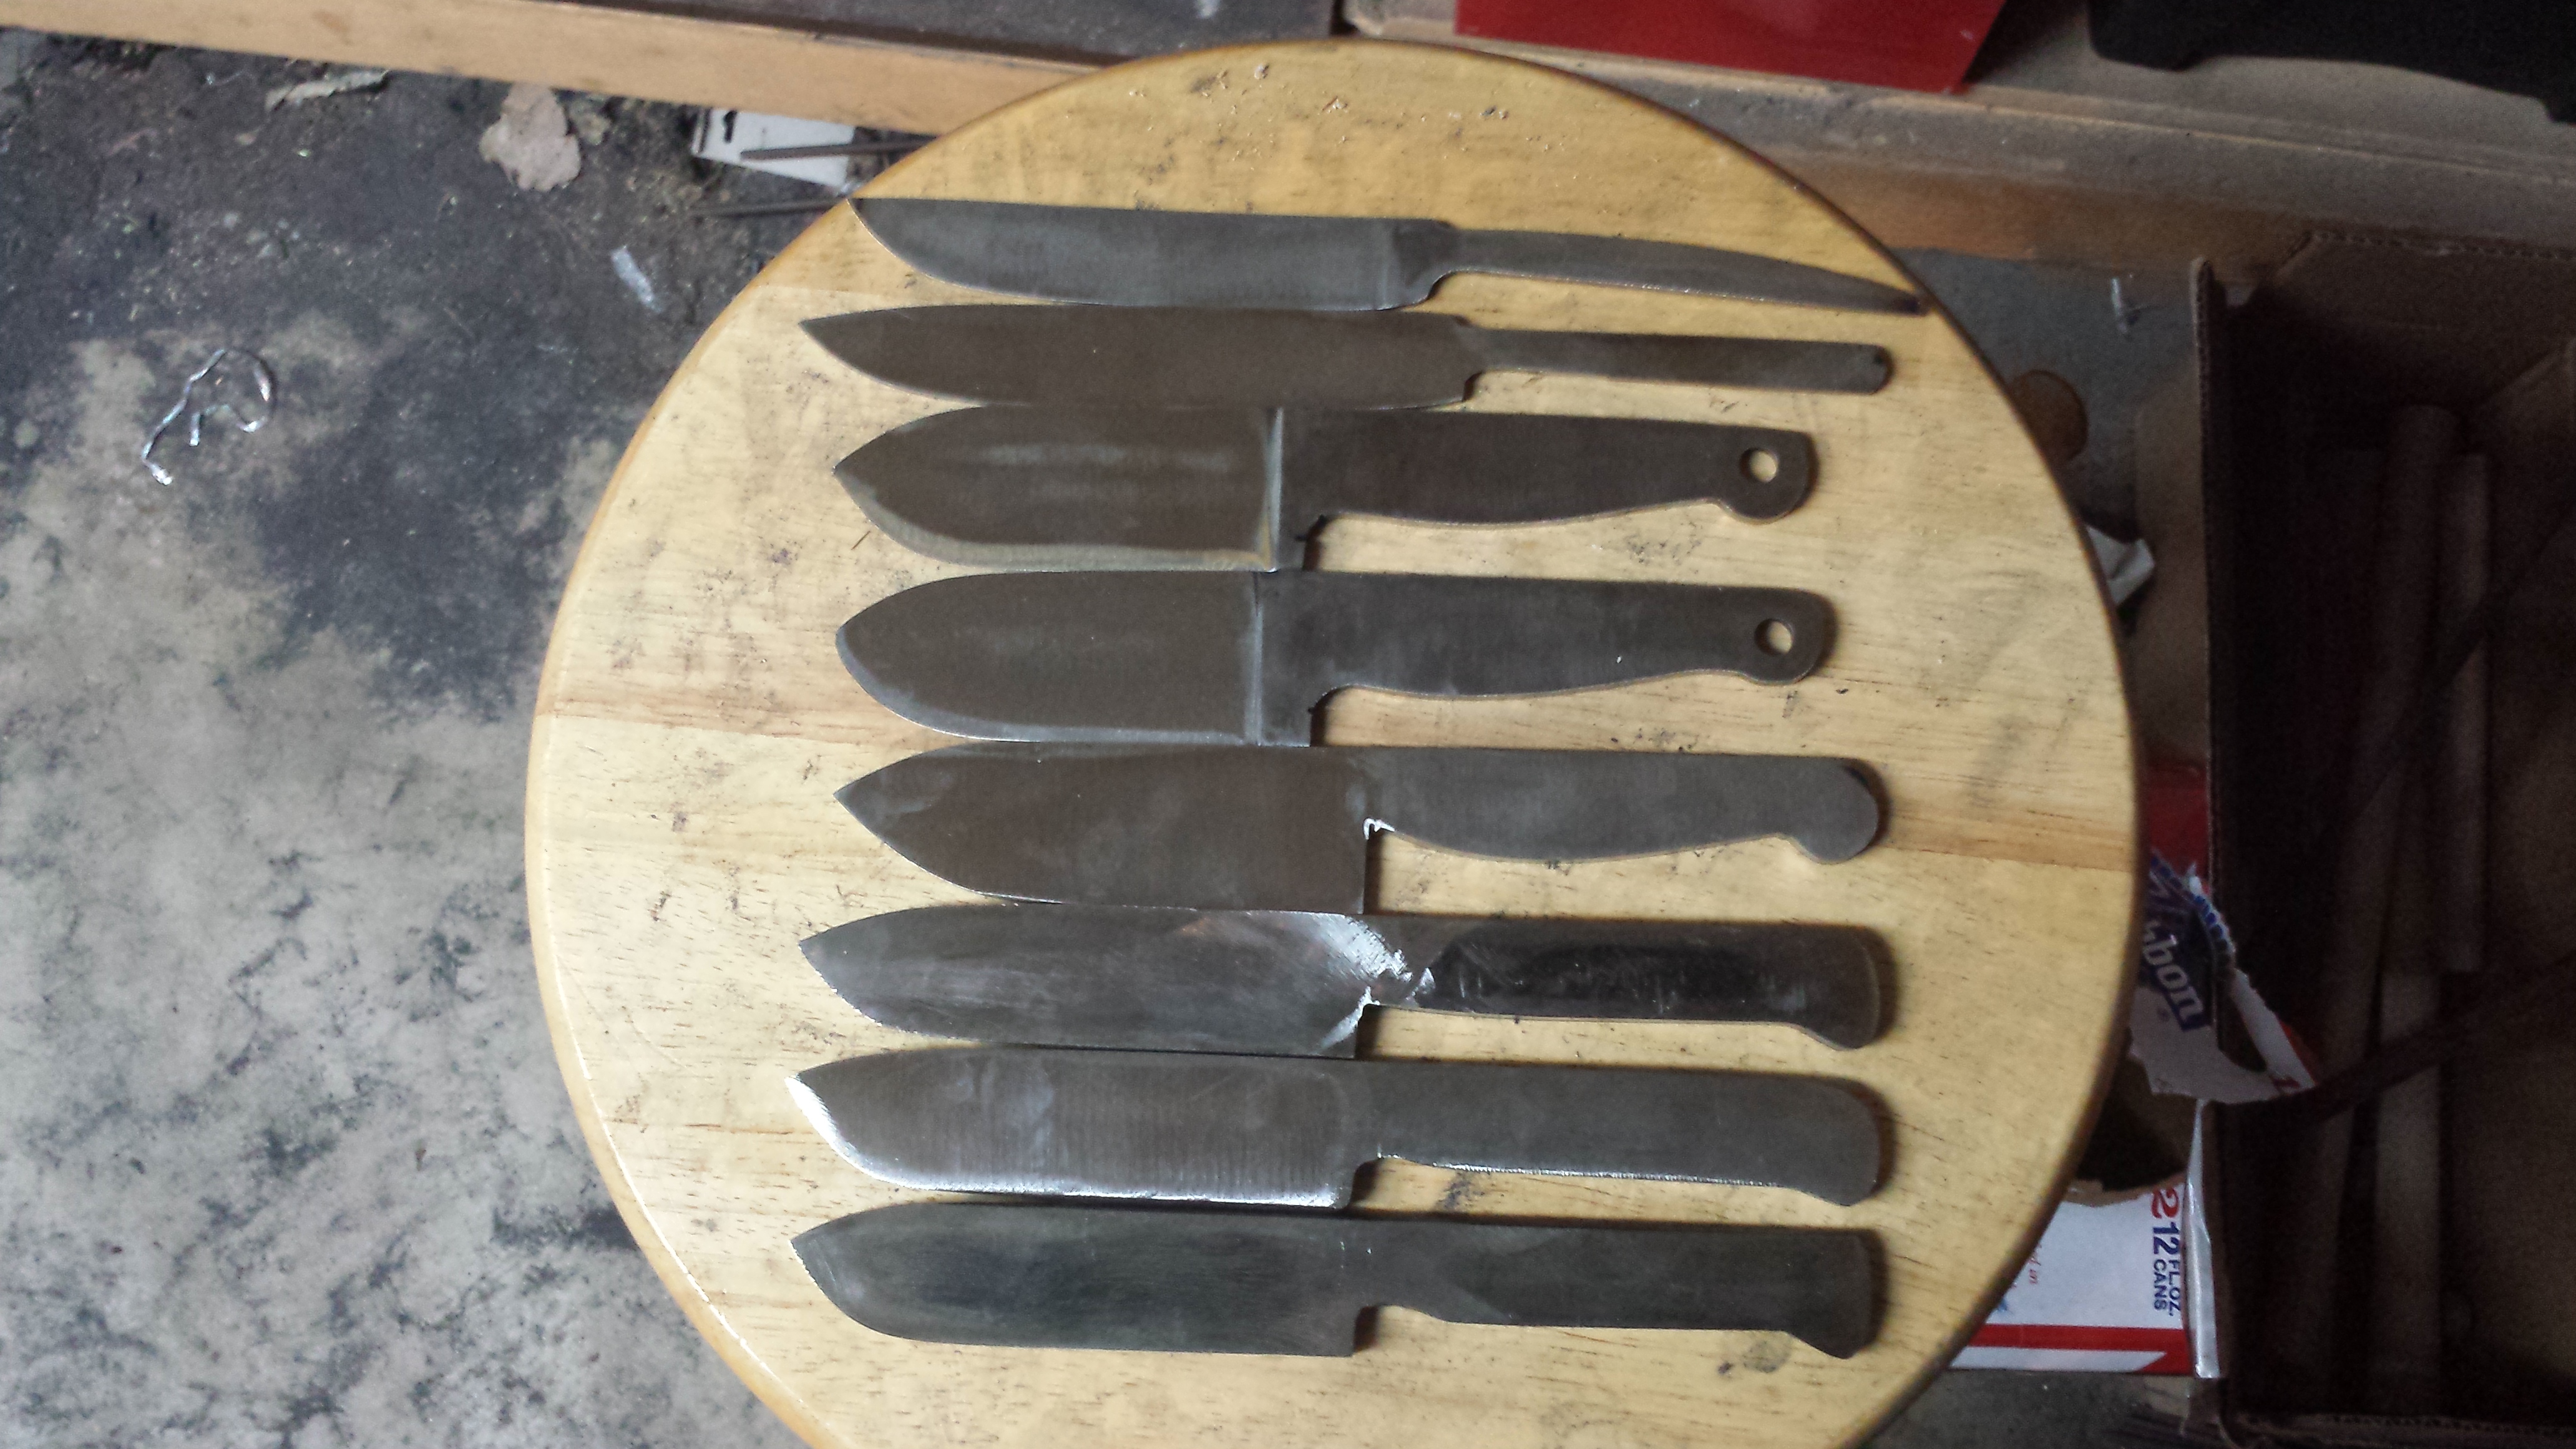
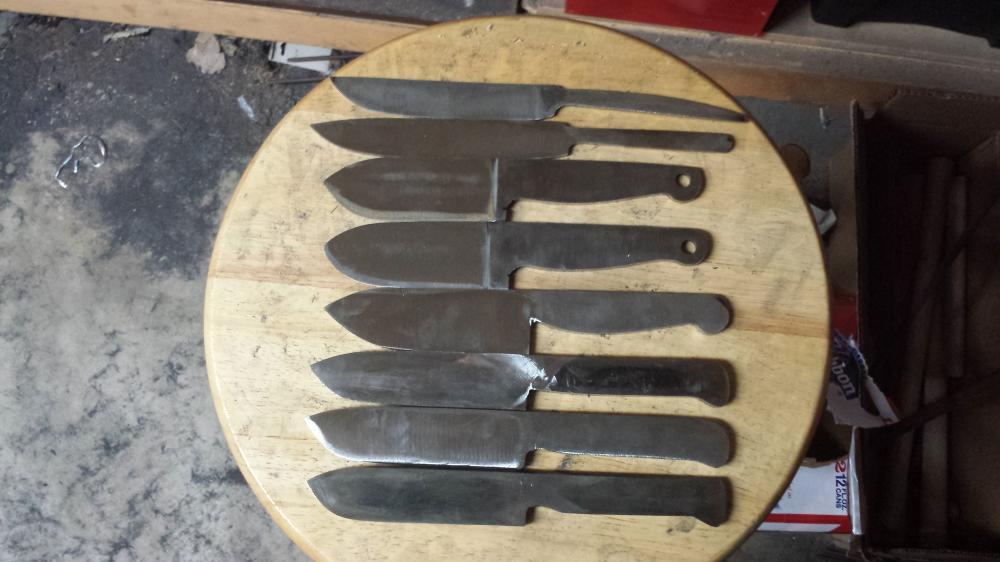
Ok, So I have completed 1 knife total that had a wooden handle, and a couple that were done in Paracord, Obviously working with paracord is much easier fit and finish wise then working with say Hickory and Brass. Right now on my bench, I have a blade that I decided to try something with, and I am not exactly happy with the results, but I suspect I would have gotten better results had I asked here first before just diving into the work. The knife(s) in question, are the top two in this image, Sorry I didn't get other pictures of them in their current state. The one that is already glued up, is the very top knife. What I had done, was take 2 separate pieces of Hickory, One light colored and one dark colored, and cut them to roughly half inch " stackable " pieces, with a 1/4th inch thick piece of brass at the ends of the handle. then drew a line down the center of each piece, and drilled holes into them, To this point, everything looked clean, the holes drilled were a shade thinner then the actual tang, But this is where the problem came up, In attempting to join the holes to make the hollow for the tang to fit in, I found that no matter how I positioned myself, or the piece, keeping the file ( using smaller needle files for this process ) straight was nearly impossible, softer sections of the Hickory would cause the file to remove more material from one side more then the other, and I ended up with oblong holes in nearly every piece. In the wood sections its not so much an issue, however the same issue occurred on the slots of the Brass as well, leaving me with large spaces between the edge of the brass and the tang of the knife. My first thought, was to take all the collected brass shavings from cutting the brass, and just dump it in the holes and heat it up, but then I realized that wouldn't work as I would end up ruining the temper of the blade from the heat and potentially lighting the hickory on fire. So my next thought is to use solder, but then that will clash with the color of the brass. Given the situation I realize this knife will have to end up being a gift for someone instead of sold as I don't feel the finish of the handle is up to scratch at all. Is there a better process to slotting handle material then drilling holes and then using a file to join the holes, I don't have access to a Mill, I do have a drill press, but its a cheap harbor freight one so attempting to use it as a mill would likely destroy it in short order on anything harder then Balsa wood. Given the amount of 1/2 inch O1 rod stock I have, this particular style of knife is something I will be making a good few of in the future, I am sure as I progress my skills are going to improve, but any hints on keeping the slotting nice and true would be greatly appreciated. One thought I did have was to cut the pieces to their " to be glued " thickness, then cut them in half, so I can hollow out an area on each piece for the tang, and then glue them back together before gluing them on the knife, Which would work fine for the wooden portions of the blade, but I am not so sure how well that process would work for the brass or other metal used for the ends of each one, I would suspect there would be a line down the piece regardless of how high a grit I use to finish the outside surface of the brass which I am trying to avoid. I will post pics of them in their current state later today after work.
-
reading some of you take shots at each other is one of the things that appealed to me about this site, reminds me of my dad and his friends ( now uncles ) talking smack to each other as they worked in my dads garage building heavy duty " rod iron " bird cages when I was a young kid. Thank you gents for explaining the meaning Sabering to me, gives me another variable to add to my " consider this " list of things to think about when contemplating a project.
-
Pardon my newbish, I did search the term, but came up with only 5 total results on the site, only one of which didnt happen to be in this thread. What is " Sabering " Is it the curve a blade takes after heat treat, as ive read that blades such as katana's curve during the hardening process due to the difference in thickness between edge and spine, and Bashers reply directly above mine says that he does bevels after he completes the heat treating process on his straight bladed items. Am I right, or did I totally get things messed up?
-
Novice to all but the very basics, in need of help
Malice9610 replied to Jonathan Dracon Michelin's topic in Knife Making
Good luck with it ..... post pictures, Im sure you have noticed people round here like Pictures.... -
Novice to all but the very basics, in need of help
Malice9610 replied to Jonathan Dracon Michelin's topic in Knife Making
If you were heart and soul set on doing purely stock removal, then you will want another piece. If you are feeling a bit gutsy. You could redraw the handle somewhat straight, cut it out, then heat the midpoint of the handle to get your curve, but you would have to account for the increased thickness at the inside part of the bend is the only post process hiccup that should come up. so it depends, do it the easy way, or do it the " hard " way, as you could heat that and bend it in one heat no problem. Hows the O1 flat stock for removal, I have only ever worked O1 in round stock full blown forging, fun stuff, like it a lot more then leaf spring sections which I have far more of. -
Nope, I was the Passenger.
-
Some non knife shaped object work.
Malice9610 replied to Malice9610's topic in Blacksmithing, General Discussion
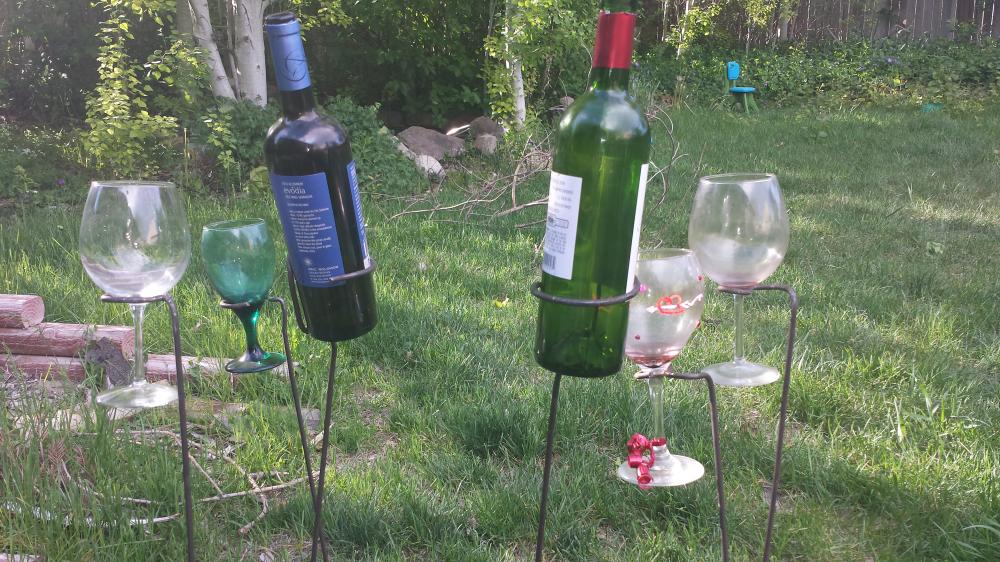
My girlfriend gets mad when I pick up the massive jugs of wine at the Liquor store and ask her why not buy the 5.99 bottle at a gallon, instead of the standard size bottle at 16.99 +, That usually results in a dirty look from her and her saying I cant buy one of of my standard favorites , BUT she did learn her lesson about telling me I cant buy Rum, as I walked around the house all weekend saying " Why is the Rum always gone " till she caved and let me go buy more. I want to make some for Beer Cans/Bottles as well, but Fathers Day is still a good long ways away, so its Wino mode for me for the moment. If my dad has any 1/2 inch stock instead of 1/4 inch stock, I may try to forge weld leaves on them but that might be another try later. -
I made these to prototype my plans to make gifts for my mother and sisters and girlfriend for Mothers Day this weekend. I think I have a better plan for the curving then what I did with these, I just made them free hand cold from A36 Mild just to see if the stock would hold the weight of a full bottle and how hard it would be to form cold. Since all of the ladies in my life are passionate Wino's I figure some well made well formed ones are in order, So going to spend tonight making a bending jig so I can bend them all uniform.
-
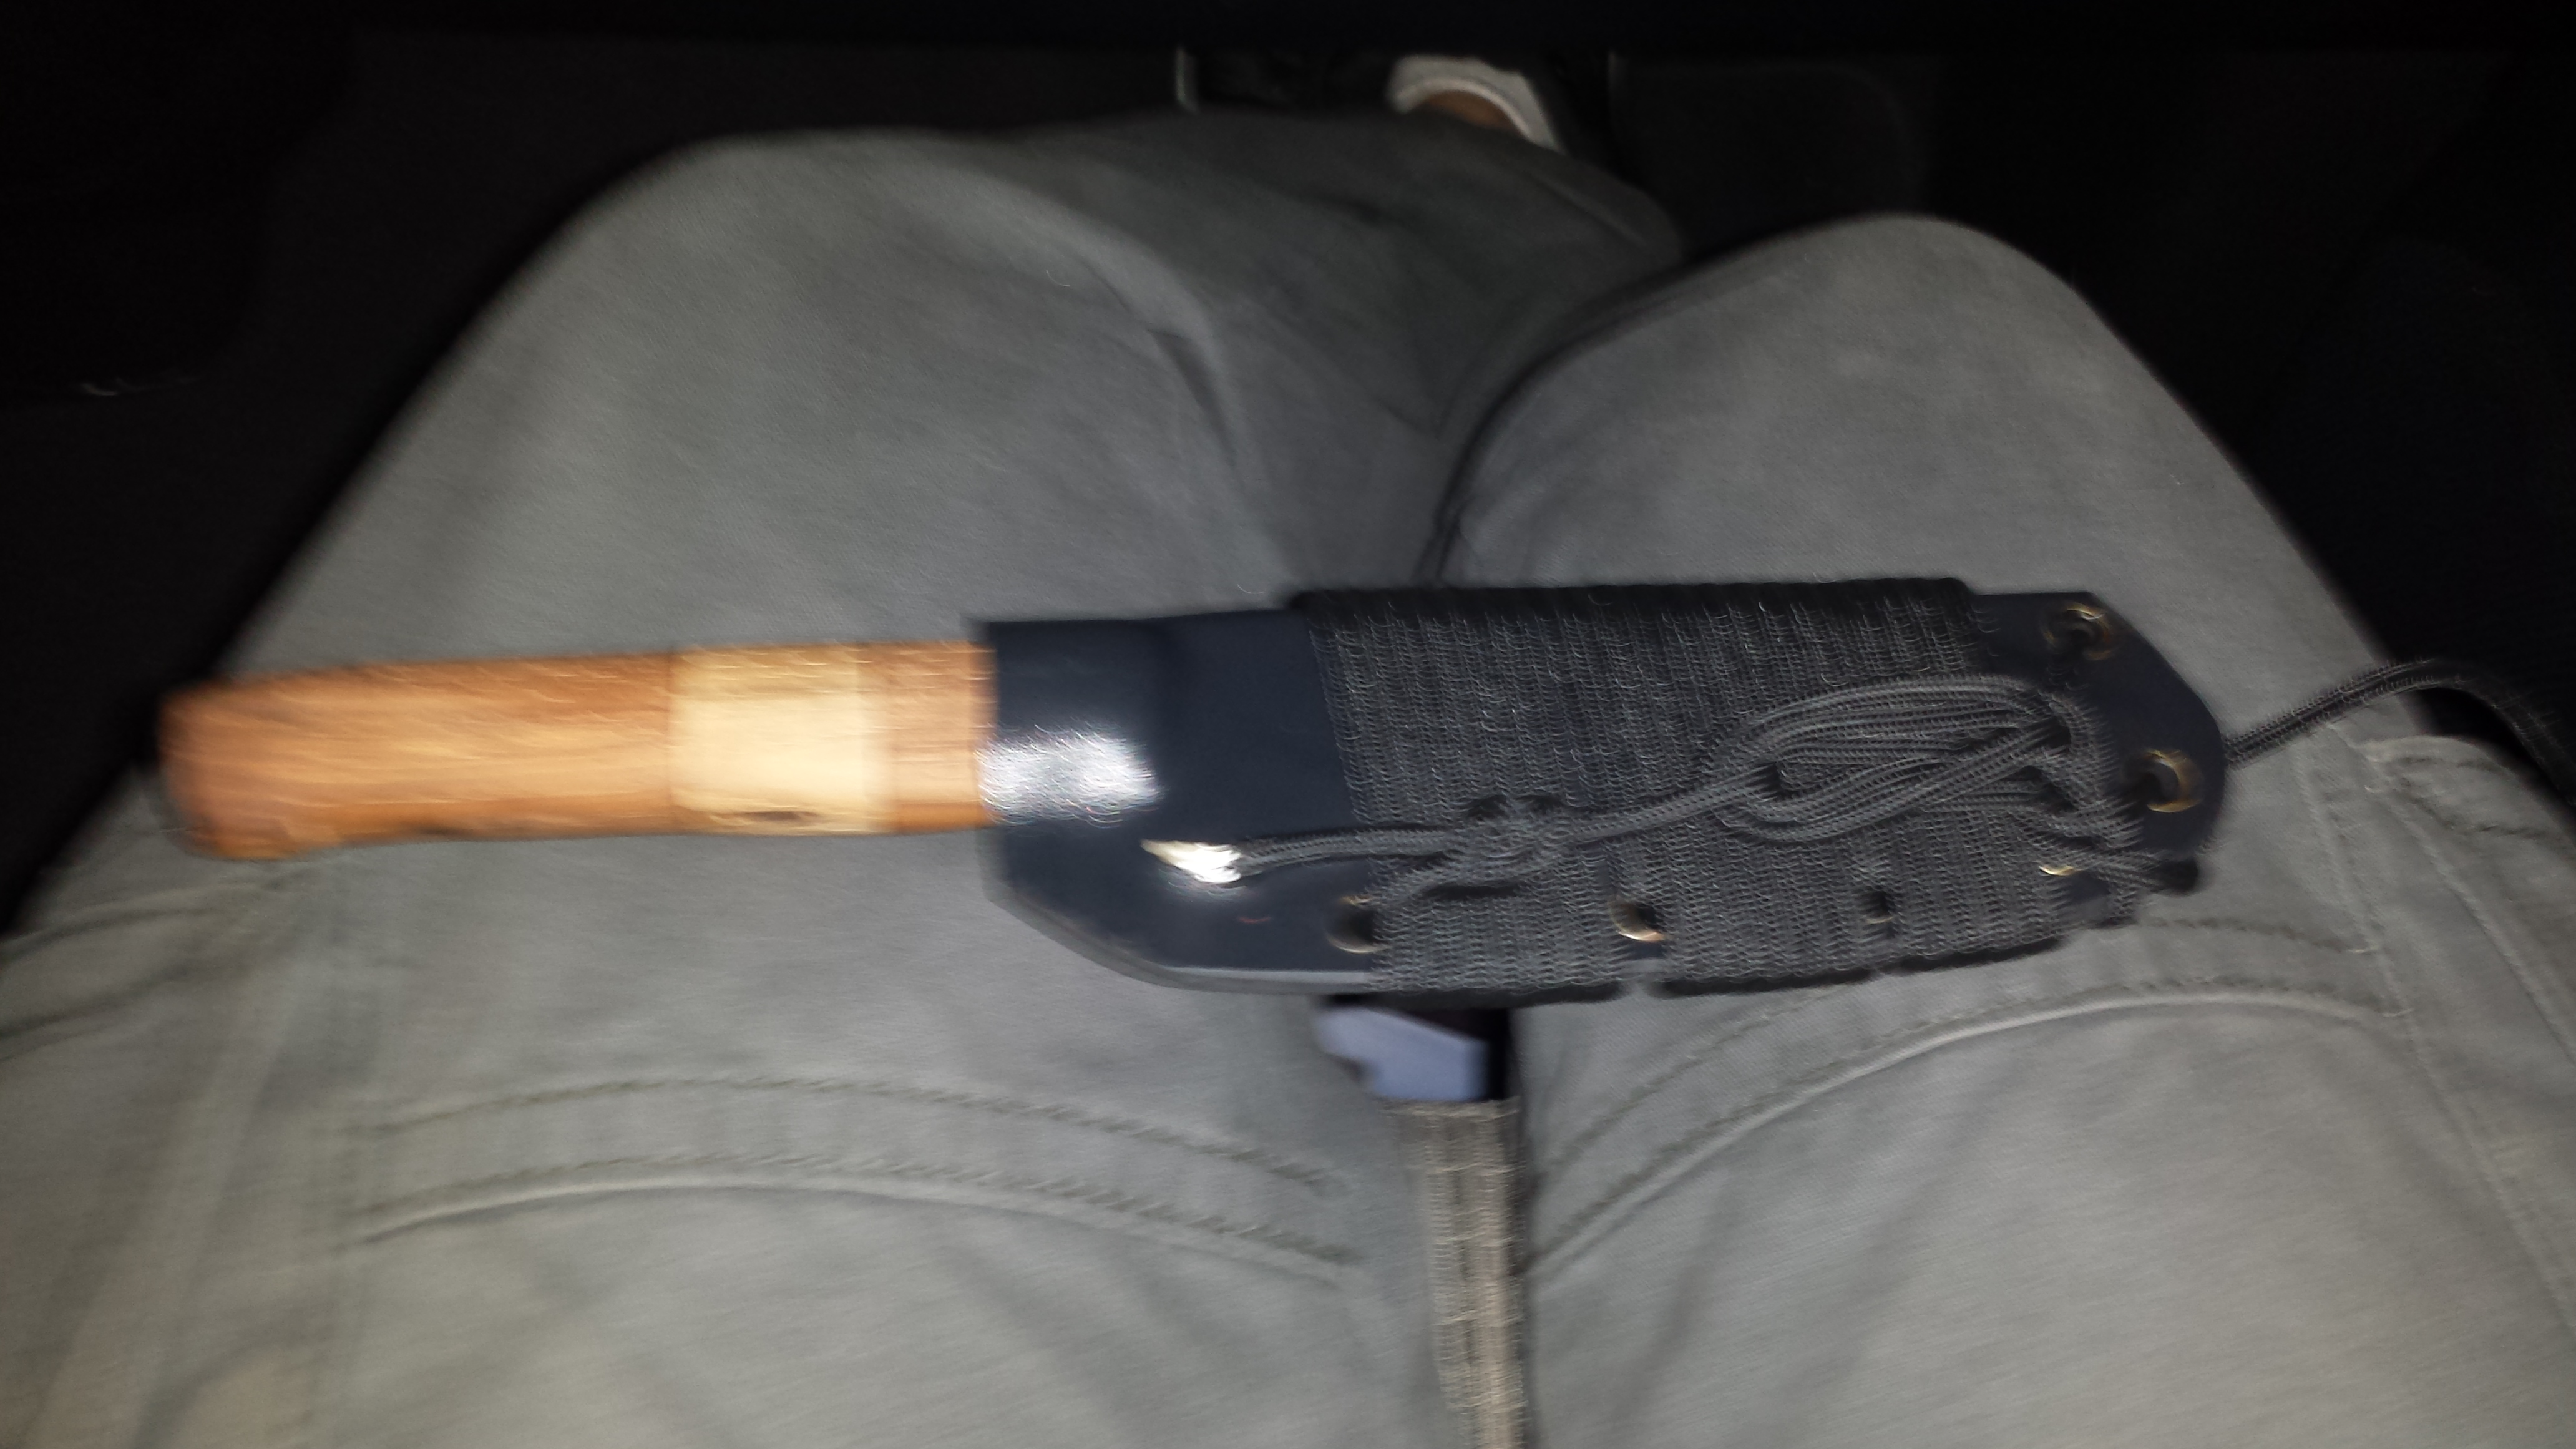
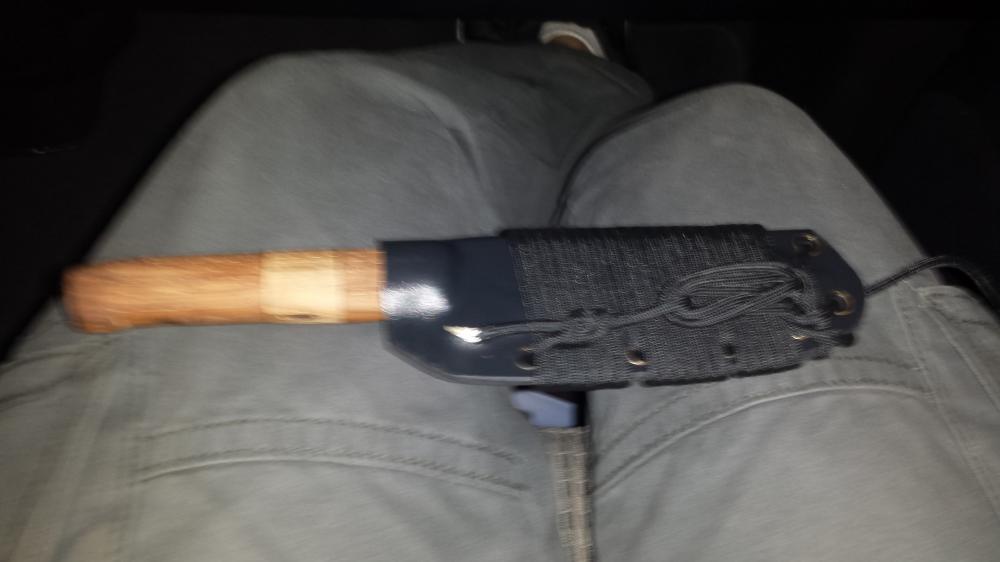
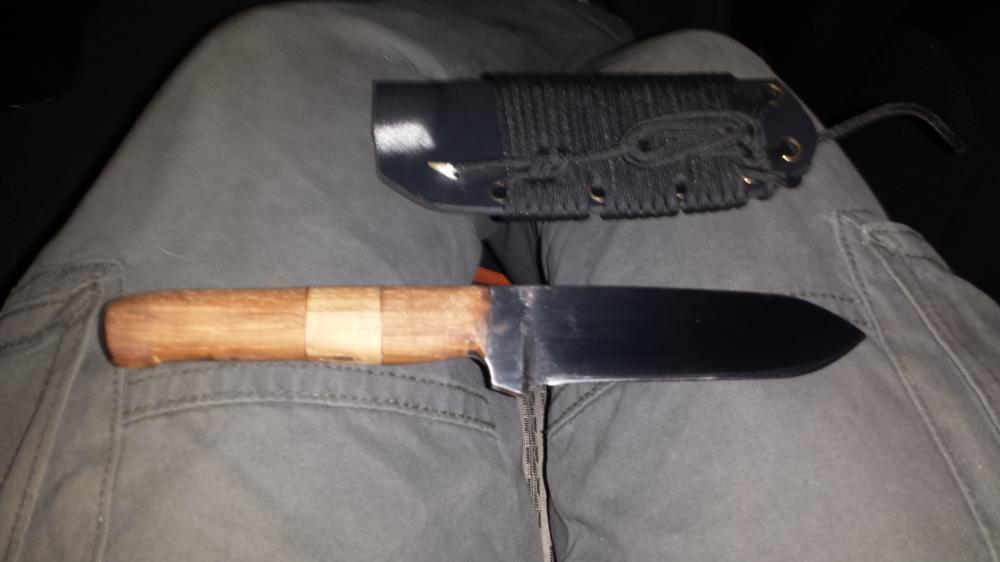
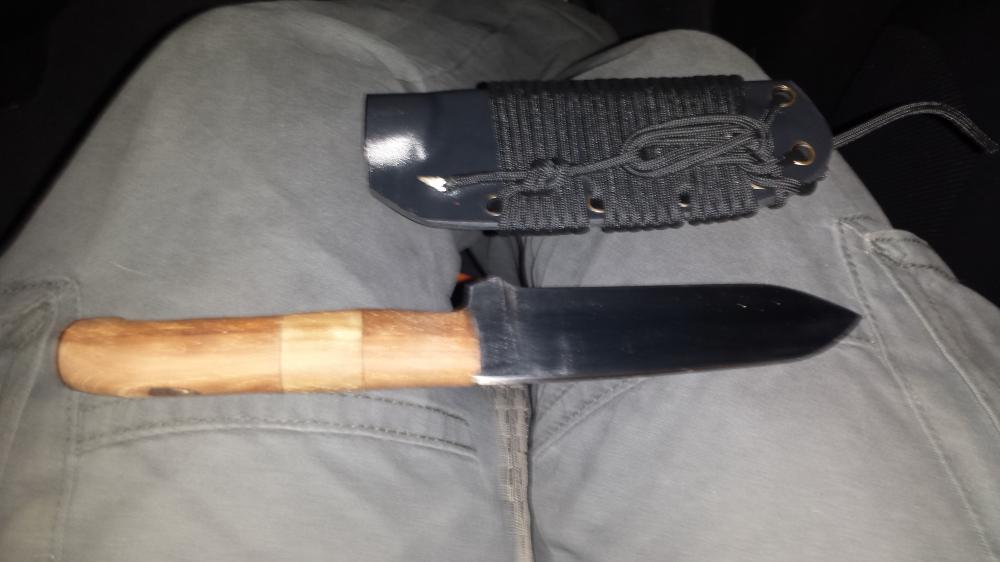
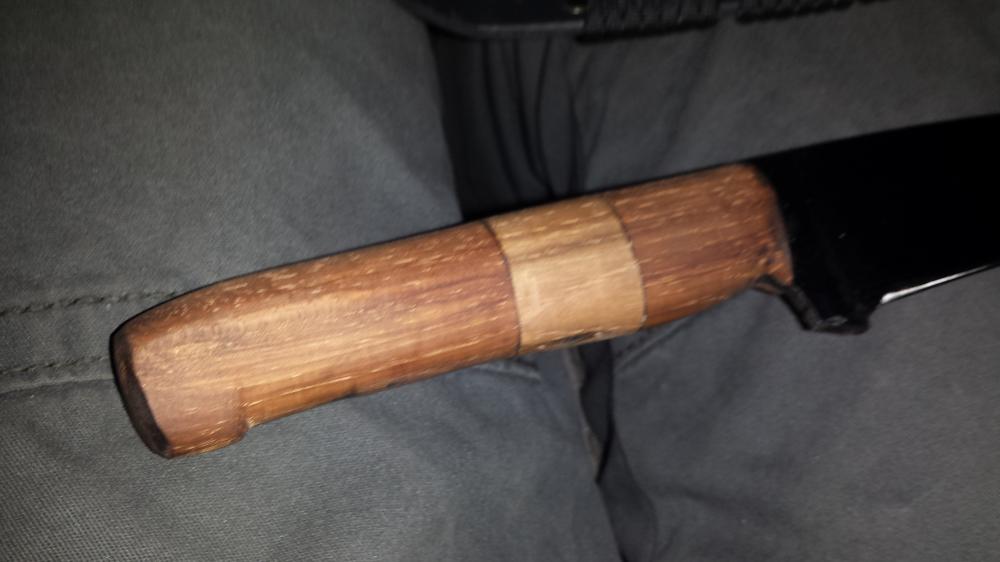
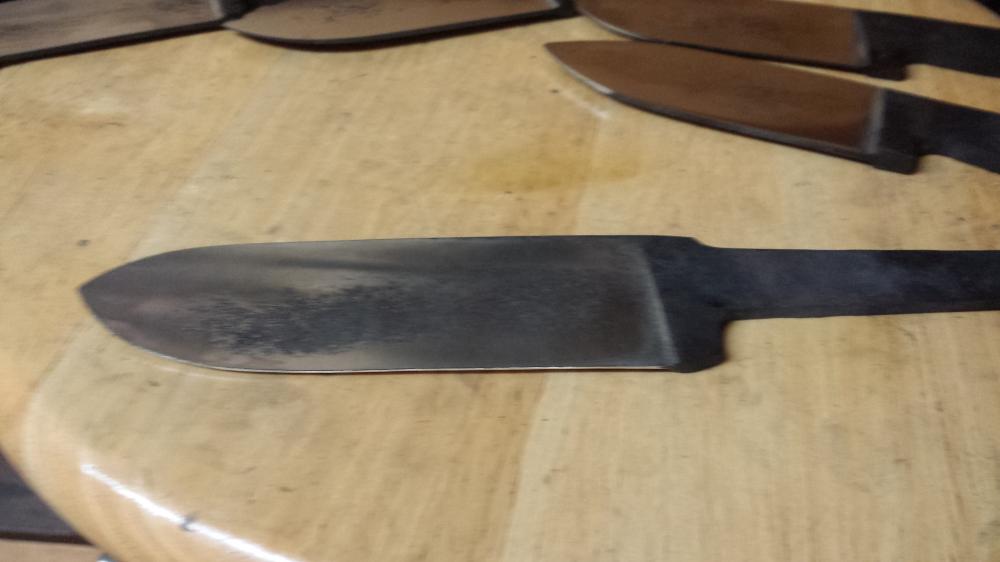
So here is one of the current " Real Knife steel " knives I have been working on, which was one of the subjects of mine and ThomasPowers long drawn out conversation in the Blademaking heat treat forum, Many thanks to Thomas for his help and guidance on getting this piece done. I made this knife for my friend's dad, who is getting on a plane tomorrow to fly to Costa Rica to begin his well deserved Retirement, He is co owner of a lodge resort down there that is on a HUGE swath of jungle land and gorgeous beach property. Considering the environment he would be in and the potential uses this knife may encounter, I went with a more " Chopper " type heat treat even though the knife is not so much a Chopper style. Blade is made of Leaf Spring steel from my sisters 76 Camaro Dragster ( springs came off BEFORE she built it to drag race ) . I didnt have time to get measurements on its exact size as I was literally finishing the sheath when my friend arrived to pick me up to present it to his dad, but I did manage to snap some pics of it while we were headed to his dads house. Sheath is a folded black kydex unit, with about 12 feet of paracord wrap as the " belt loop " as I figured that would work better then a tech lock unit considering the environment it would always be handy to have some paracord on hand. This was also my very first venture into making a kydex sheath, took a total of 3 tries and 2 pieces of kydex to get right as the first was not wide enough for this particular knife, but will work for the other one I plan to finish tomorrow just fine. The handle is 2 different colors of Hickory wood from some " second rate " Tomahawk shafts I picked up with the intent to use on tanged knives. I cut the three pieces, drilled them for the tang then used some small files to make the cut out large enough for the tang. then " tack glued them together and then filled the cavity with epoxy and glued it all up, the whole knife feels very solid, and has a very good balance, I am actually quite shocked as to how well this turned out, I expected it to look much worse then it turned out. My friends dad was extremely happy to get it, and plans to use it primarily for chopping limes and other adult beverage garnishments while he sips mai thai's on the beach, but said that it will accompany him on all of his jungle ventures as well. Sorry for the crappy photo quality, All pictures were taken in a moving vehicle at freeway speeds.
-
Warped during Heat treat, yay...
Malice9610 replied to Malice9610's topic in Heat Treating Knives, Blades etc
That is pretty much what I was hoping to hear, I kind of figured that would be the case with the colors getting a bit higher up on the scale due to time in the oven, but to have that confirmed by one more experienced then myself is better then " i hope so " With that being the case, the handle will be shaped and glued on tonight. Thanks again Thomas, I really appreciate all the help you have been, If you ever find yourself in Salt Lake City, dont hesitate to hit me up and I can treat you to a few cold ones. -
Warped during Heat treat, yay...
Malice9610 replied to Malice9610's topic in Heat Treating Knives, Blades etc
well my thoughts are that it would break potentially because this is one of my first ones, I have a couple other blades that were " practice " ones out of the same section of steel this one came from, that I am going to harden and temper the exact same way today after work, and then do the bend test on them to see how durable it really is, I have till saturday morning to decide to send it with him or not. Its more a " I am not certain i know what I am doing " kind of concern more then anything else. -
Warped during Heat treat, yay...
Malice9610 replied to Malice9610's topic in Heat Treating Knives, Blades etc
Ok, so I have fixed the bigger one, cleaned it up, and triple tempered it. However, I think the oven got hotter then I should have let it get. To be honest, I was looking to go for a " more durable " blade for this one, as its bound for the jungles of Costa Rica on the belt of one of my best friends dad who retires to there this week. I did a file test on it after it had cooled and the edge ( not sharpened yet ) is still VERY hard to remove any stock from with a clean file, But this is what it looked like when I pulled it out of the oven after its final temper. I ran the oven at 400 deg. for 2 hours. I dont have a Temp gauge for in the oven yet, that is something I plan to buy this weekend for when I fix my other knives that warped and start the temper process on my fully forged O1 knives I have been waiting to start on. Did I get this too hot, like I said, I was going for a more " chopper " level of temper so it could stand a bit more use and abuse before it eventually breaks.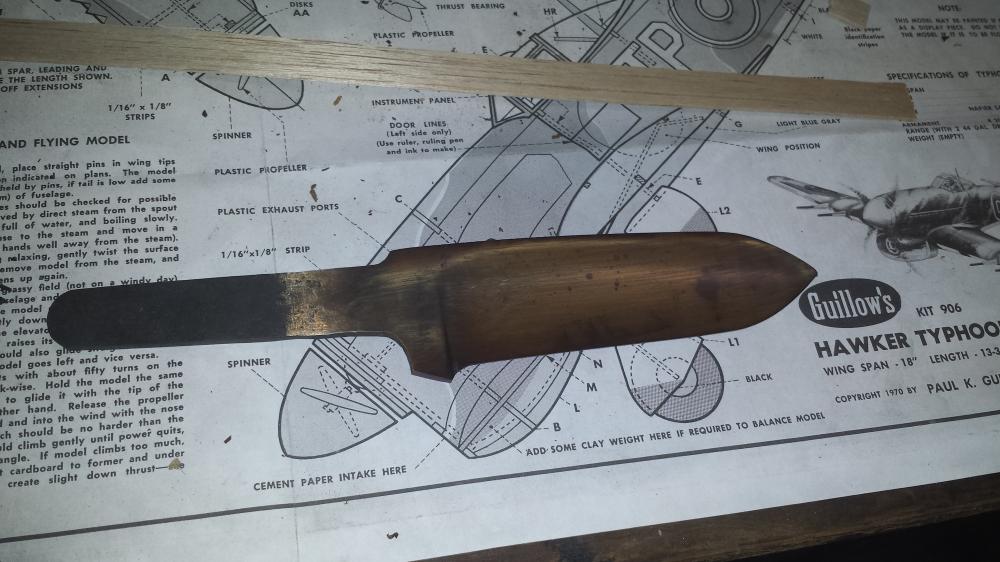
-
Warped during Heat treat, yay...
Malice9610 replied to Malice9610's topic in Heat Treating Knives, Blades etc
Yeah, I prefer to do my grinding without gloves as well, but thats more due to the fact I would rather not mangle my hands because a piece of glove got caught in a rotating power tool of some kind. One of these days, probably a few years in the future after I have a good number of knives under my belt, I plan to take a whack at making a sword, actually have a machete in " MSO " form at the moment that i plan to play around with to see how things work as the blade gets longer. -
Warped during Heat treat, yay...
Malice9610 replied to Malice9610's topic in Heat Treating Knives, Blades etc
Turns out the bigger thinner one was actually quite savable, without another heating, I had left enough steel on each side that I was able to very carefully re flatgrind the two sides without overheating the temper at all. Hopefully will have that knife complete tonight, along with another I have been putting off finishing due to not wanting to waste Epoxy for handles as I have a very limited supply at the moment. Going to redo the file test on that knife tonight just in case, I didnt get any oxide coloring while grinding it back out after tempering, But I want to be certain on this knife that it will stand up to some normal abuse well, its a gift for my friends father who is retiring and picking up and moving to Costa Rica the end of this week. Sorry if my previous comment might have indicated I was going to attempt to straighten the others without heating them first, I do plan to heat them back up, straighten them, then normalize them, then harden and temper them. I just needed to track down a good piece of wood first to make a wooden hammer out of, Lucked out and have a spare 2lb hammer handle to use and found a nice flat cut limb out in my wood pile that would make a serviceable hammer head for a try at straightening these. Thanks again Thomas for your guidance, I very much appreciate the help. -
Warped during Heat treat, yay...
Malice9610 replied to Malice9610's topic in Heat Treating Knives, Blades etc
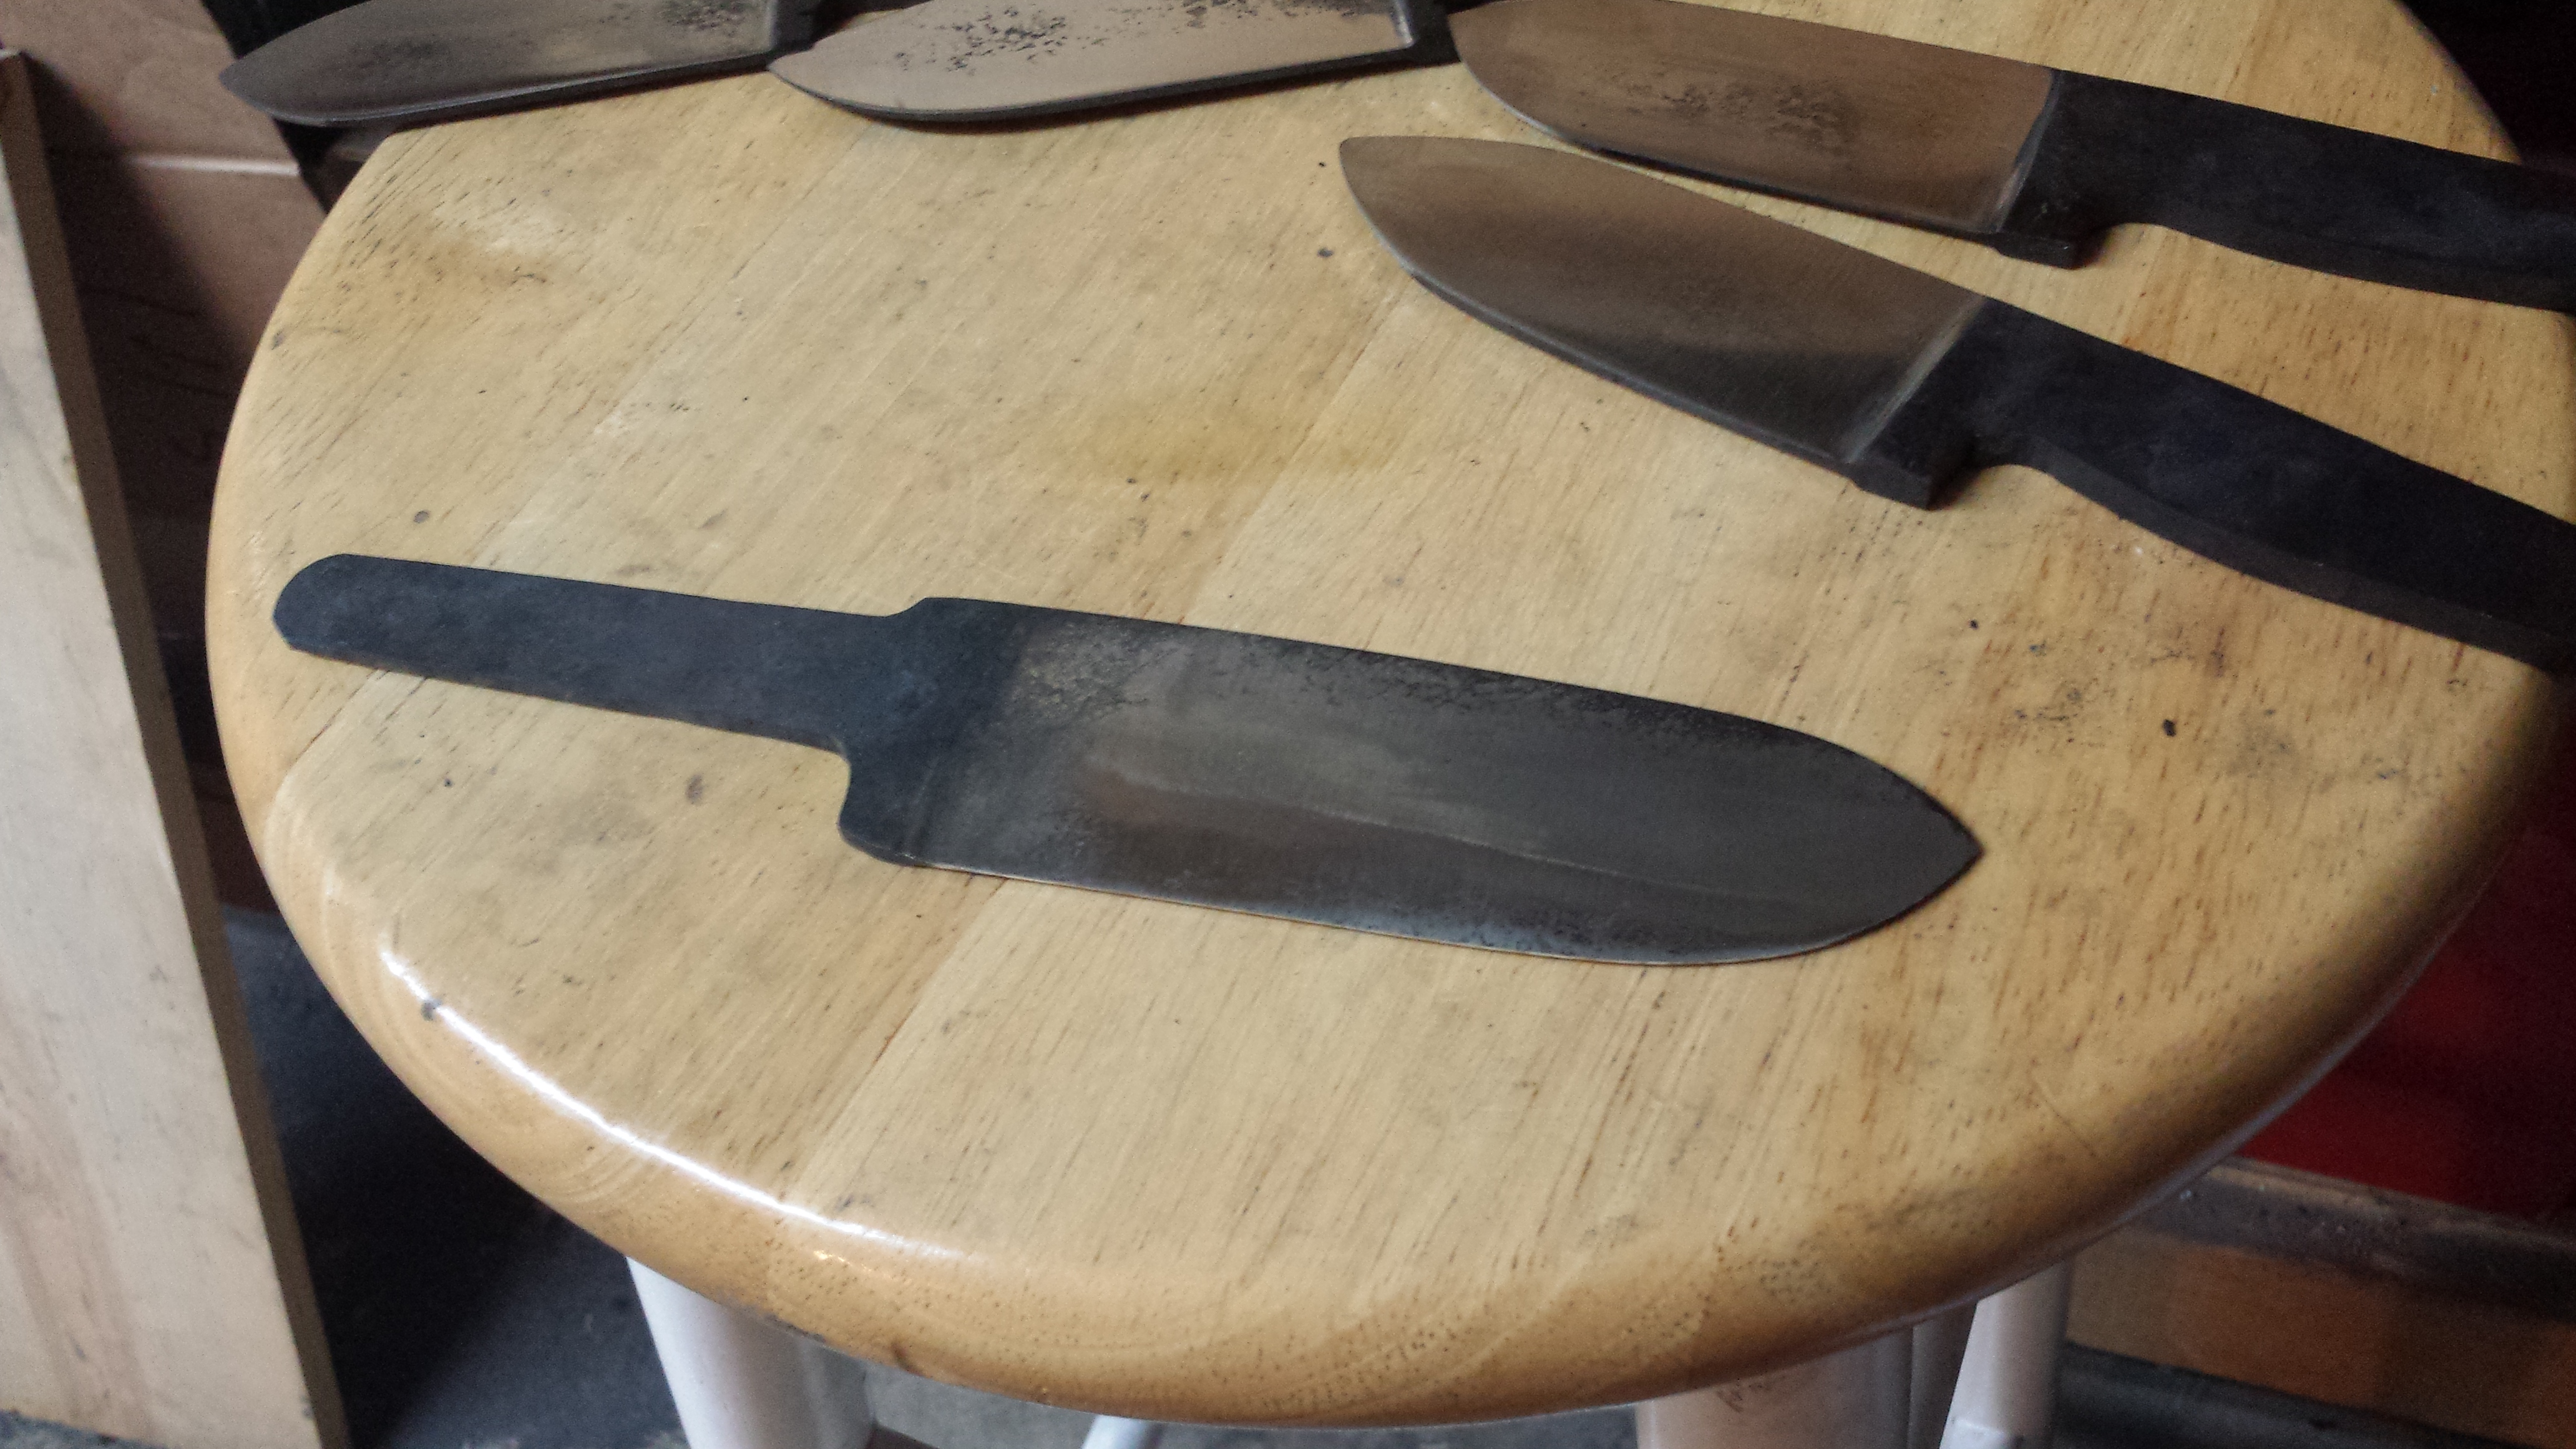
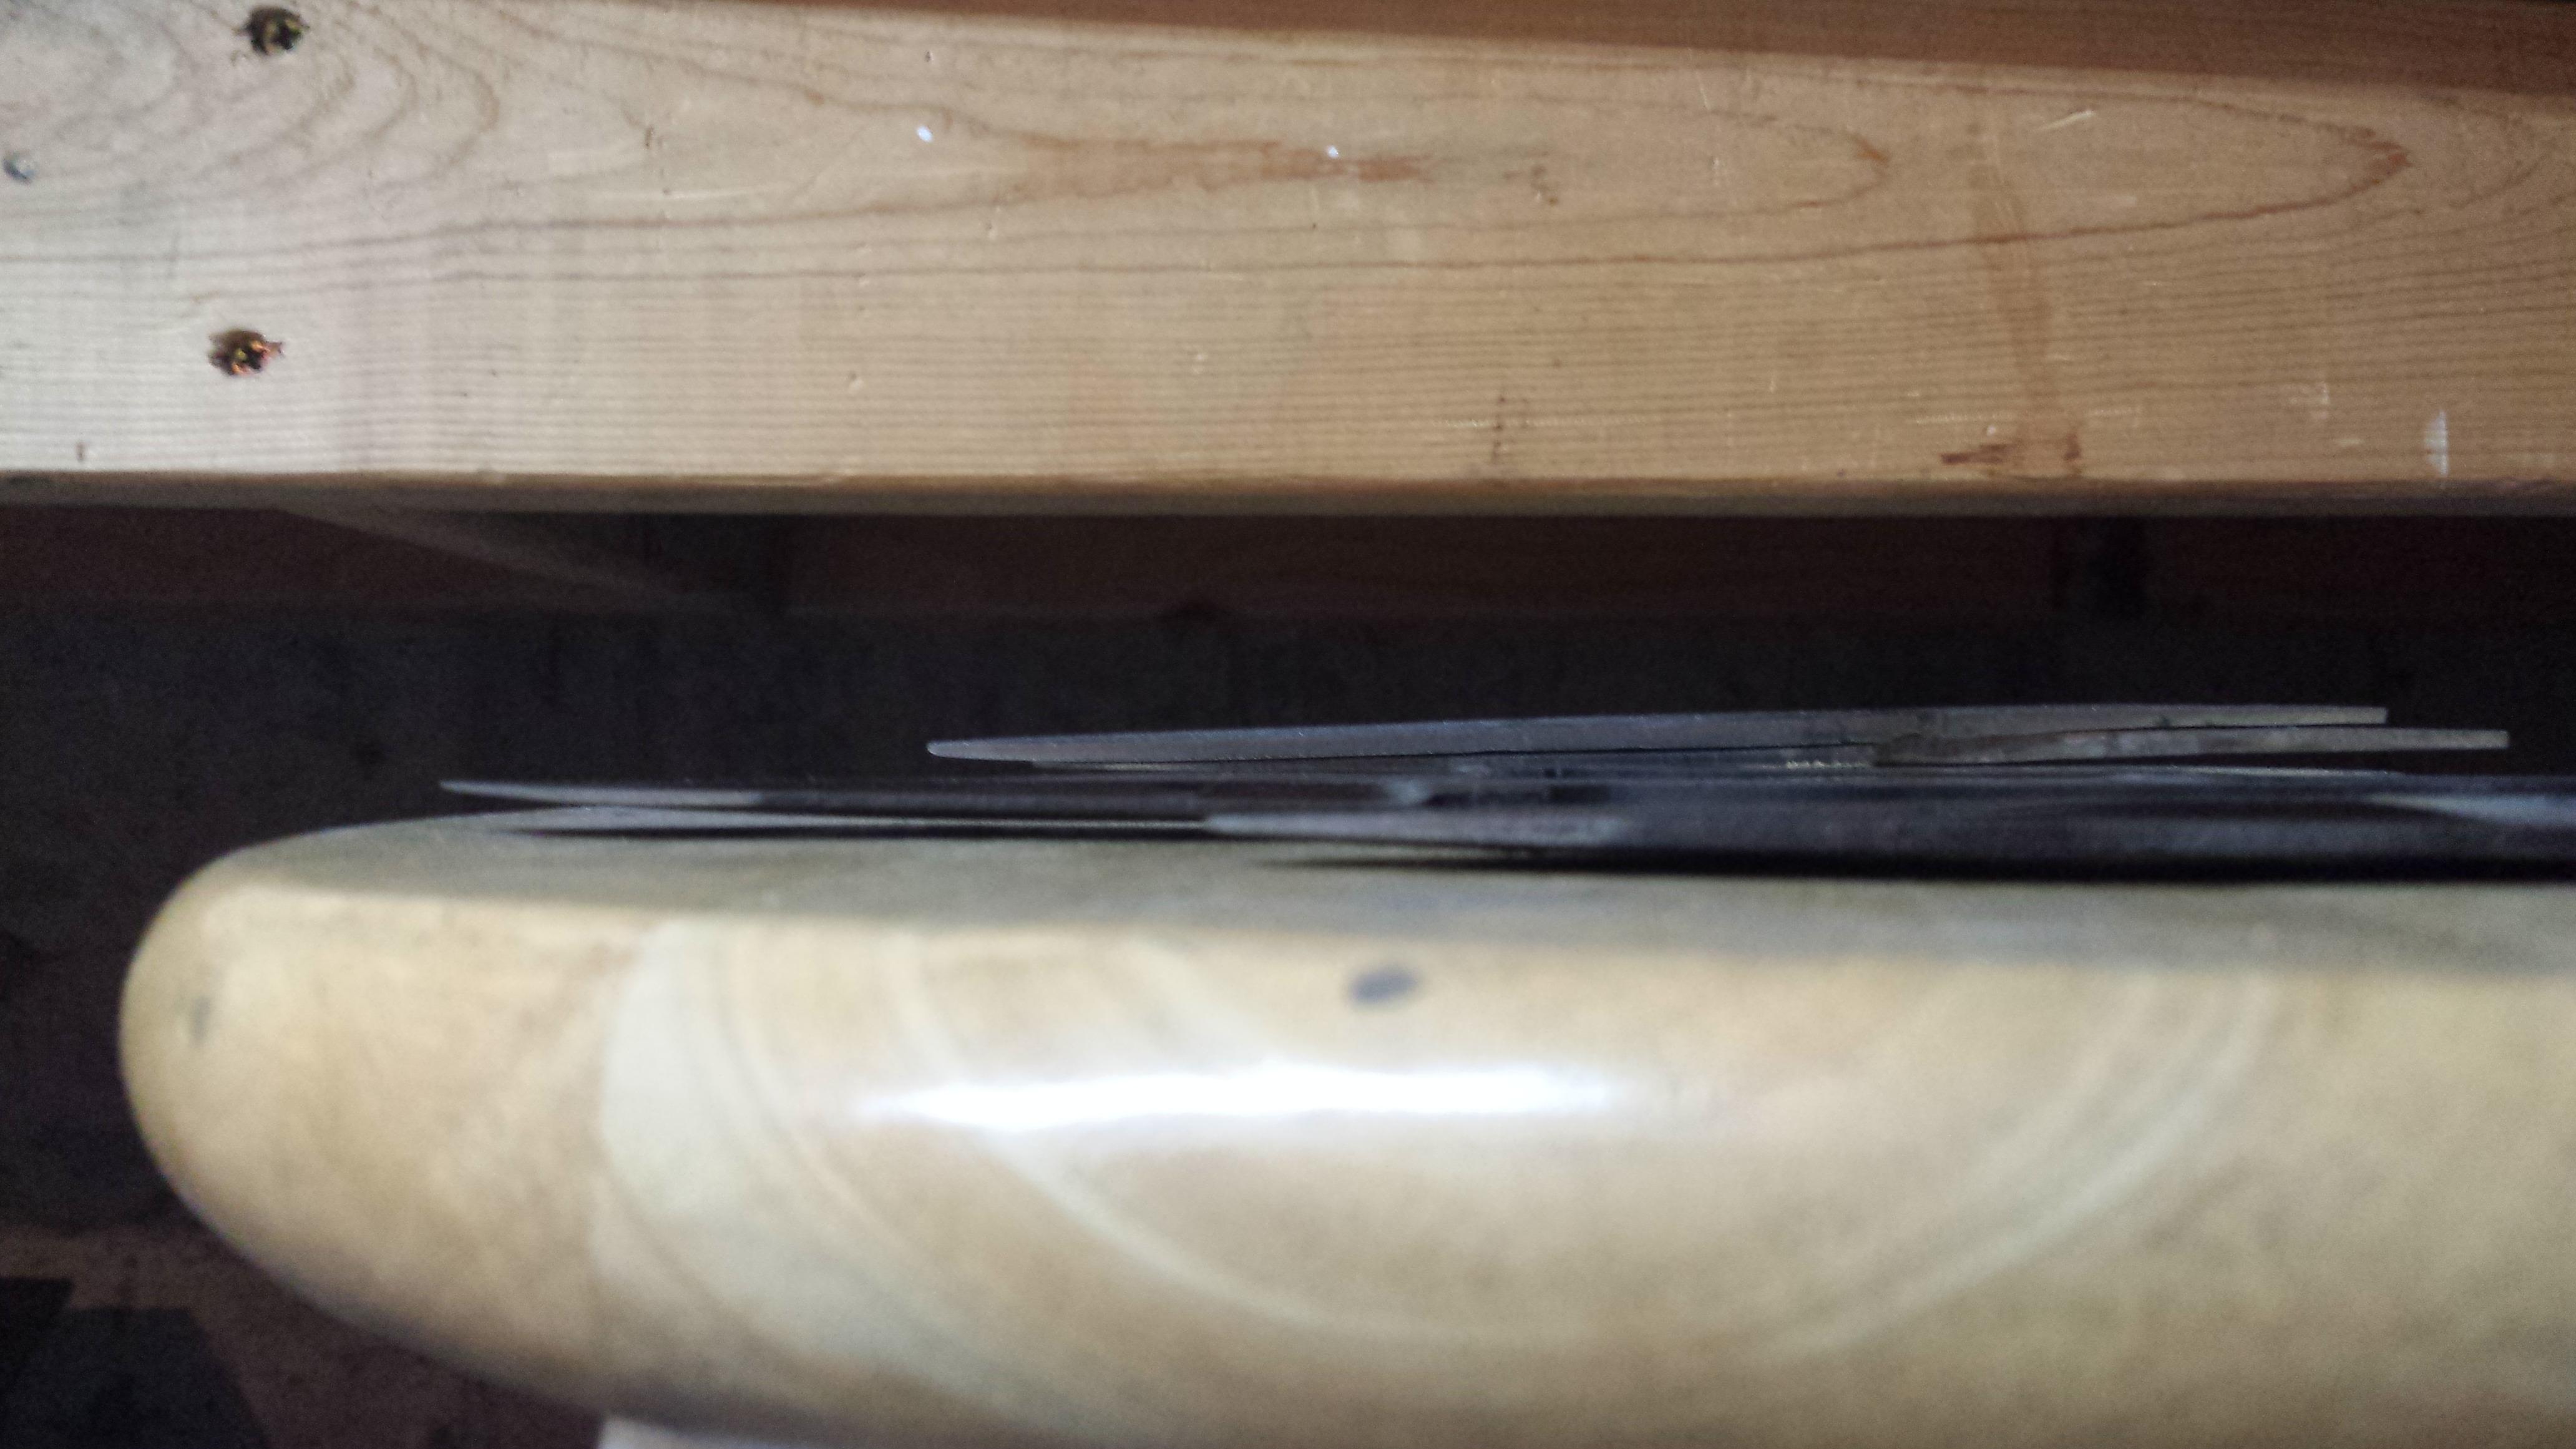
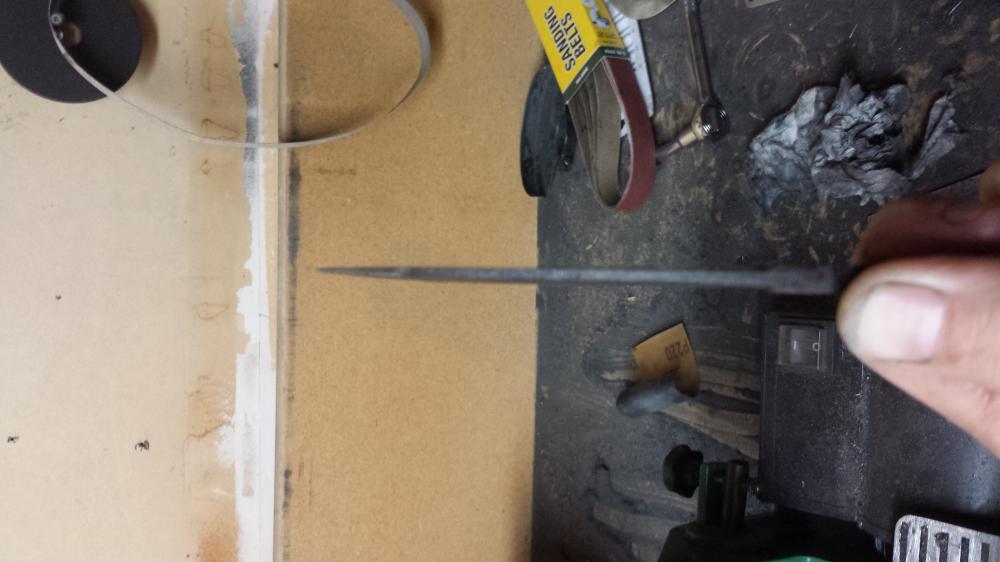
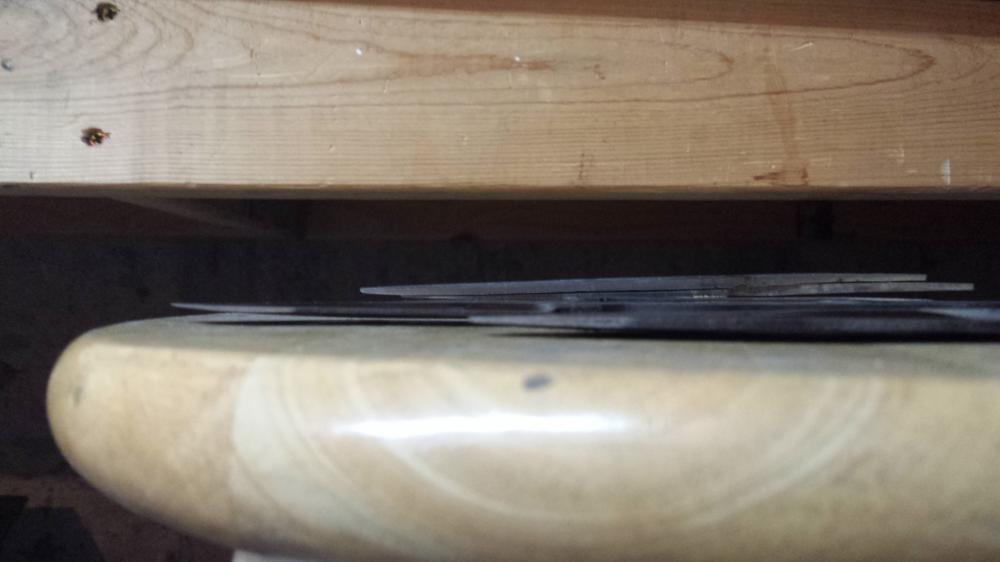
Thomas, I guess this is perhaps a failing of " online research learning " in a sense, as I use the term " Heat treating " specifically to describe the process of hardening and drawing temper of the piece. I can see the logic in stating Normalizing and Annealing also fall into that category, even though in my mind ( even if wrong ) they are somewhat separate processes even if they entail the exact same conditions as they can and do create differing outcomes for the piece. I would consider that a side effect of being an overly analytical geek who must compartmentalize and classify everything. here are the pics I promised, after looking at them again ( post frustration ) they are not that badly warped, and even a wooden hammer treatment might even save the larger one. The bottom two are of the larger knife, as you can see in the first pic, there is an obvious central curve to the knife, on the last one, the outward curve is VERY apparent. but, I am going to take a bash at them with a wooden hammer ( just gotta make one first which should be MUCH easier then making one of metal ) and see if I cant straighten these bad boys out some.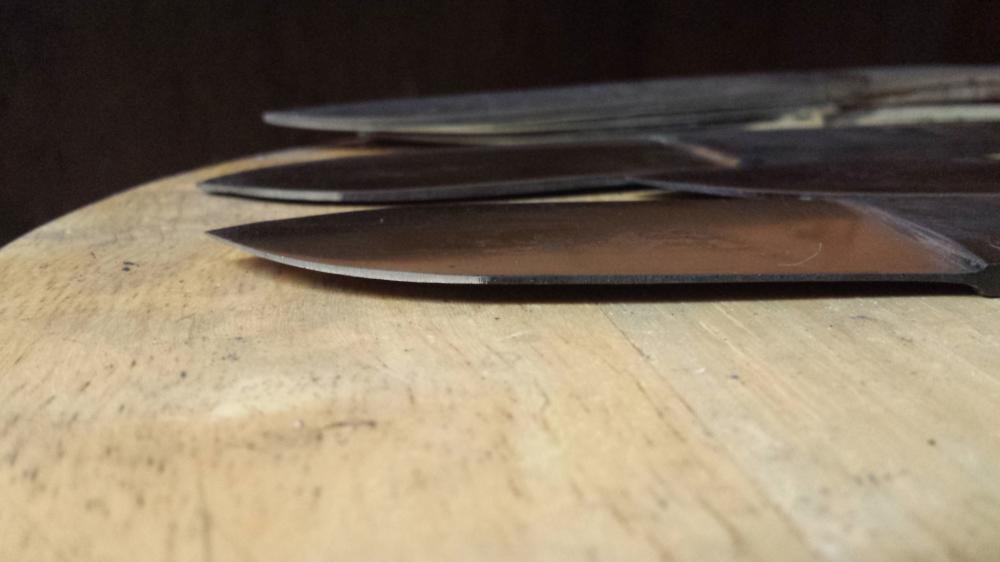

-
Warped during Heat treat, yay...
Malice9610 replied to Malice9610's topic in Heat Treating Knives, Blades etc
Ok. First, I started off with a curved piece about 3 feet long, cut into pieces about 9 inches long, then each piece was heated and flattened out flat, and thinned a little bit ( started off about 1/4 inch thick ) with the goal being increase width from 2.5 inches to about 3 inches wide. Then each piece was heated and left to cool in the forge over night, then cut to a rough knife shaped object. these were then ground down to size, and then annealed to allow for drilling of lanyard / handle holes. then primary bevel ground. Once fully ground, they were sanded up to 400 grit and then heat treated, So I guess in addition to my other mentioned potential causes, I guess doing another normalization run before heat treating very well could have made all the difference. My thoughts were essentially " well they didnt curve back up after flattening them out , how much strain could grinding only put on them " Which is now in hind sight, not exactly the best of plans, at least not in this instance. -
So I took my first whack at heat treating this weekend, and while I was able to successfully harden the steel, I ended up with some warping. I forgot to take pictures, so I will add those later today once I get back home. However, there are a few odd things to this, I think I have it figured out as to the cause, however I would like some second opinions on my very newbish knowledge of the process. First off is the manner of the warp, I treated 5 pieces Sunday, 4 of which were " identical " blade profiles, of very similar thickness, The warping on these blades is also similar, each one warps to the right ( if looking down the edge with the point away from you ) slightly towards the tip. The fifth one started off much thinner then the other 4, and the entire blade seemed to warp creating a convex side and concave side. This knife was also longer then the rest ( 6 inch blade vs 4 inch blade ) Now, I think the reason for these warps, is two fold. First being my " Heat treat bucket " which is a standard metal bucket, However due to the volume of oil I had, the depth was not enough with it resting flat to fully submerge the pieces, So in my newbishness, I tilted the bucket during each quenching, which also caused me to create the second issue, as I was not able to put the blades straight into the quenchant, they went in bottom tip edge of the knife first. and due to the angle I suspect the warp came from one side being angled into the oil more then the other side and /or unintentional side to side movement while putting the piece in the oil. The steel used was old leaf spring, So I assumed 5160, Quenched in heated veggie oil. Heated till non magnetic then put back into the fire for about 30 seconds ( to get back past non magnetic, it was kinda crappy weather yesterday, windy and colder then normal ) to get back up to a bit past non magnetic and then straight into the oil. The file test proves they did infact harden. Am I correct on thinking that the very VERY small amount of time that one side cooled faster then the other, is a possible cause of the warps considering all 4 pieces went from the fire to the oil from the exact same spot using the exact same movement, the warp is on the " correct side " for how I was working. Next step for me, is to find a better container for my oil, so I can put the pieces in straight up and down point down instead of at an angle. I also think with a good normalization and some light hammering I can fix the warp without destroying the grinds and save the 4 similar pieces, But I suspect the 5th one is a lost cause. Also I read on another thread here that in some instances, its best to Heat Treat first, then grind the bevels, but I was not able to find the specific instances this would apply, I would think thickness of stock has a major determining factor on that based on how thin the edge would get on say a full flat ground blade with a 1/8th inch spine might qualify to minimalize warping, is that thinking correct, or are there other factors I have not though of ? Thanks everyone!
-
Those are awesome, That is something I plan to take a whack at making sometime in the near future, I keep losing my cheap storebought throwing knives in the mass of bush I use as a backstop behind my target and my target backup.
-
Either way, that is one slick knife. And an awesome use of a 3d Printer.
-
That mixed review is actually what caused me to buy the 15lb one, with the cheap cost being 20.00, I looked at it as if it survived for even a month, and gave me the ability to work on my skills, It would have been money well spent. Also, I see that Steve has removed my original response suggesting that 15lb anvil and the idea of using Coil/Leaf spring steel to work on, He has a very good point about the stress fractures and the potential for wasted time working on a piece with a flaw in it, as that is a very real possibility.
-
is the handle on that metal as well, and if so, HOW THE HECK DID YOU DO THAT..... Either way, that is an awesome piece,
-
My First Tomahawk
Malice9610 replied to Hunterbow Smithy's topic in Axes, Hatchets, Hawks, Choppers, etc
That is one Awesome hawk, the spike on the back is quite mean looking and the finish on the metal goes well with the handle. I need to get my crap together and take a bash at making a Tomahawk... -
camping hawk or hatchet
Malice9610 replied to homeshow's topic in Axes, Hatchets, Hawks, Choppers, etc
It would seem geekery of the computing fashion and blacksmithing seem to go well together granted all the linux using blacksmith geeks this conversation has drummed up... its nice to be in similar company...