LibrariaNPC
-
Posts
198 -
Joined
-
Last visited
Content Type
Profiles
Forums
Articles
Gallery
Downloads
Events
Everything posted by LibrariaNPC
-
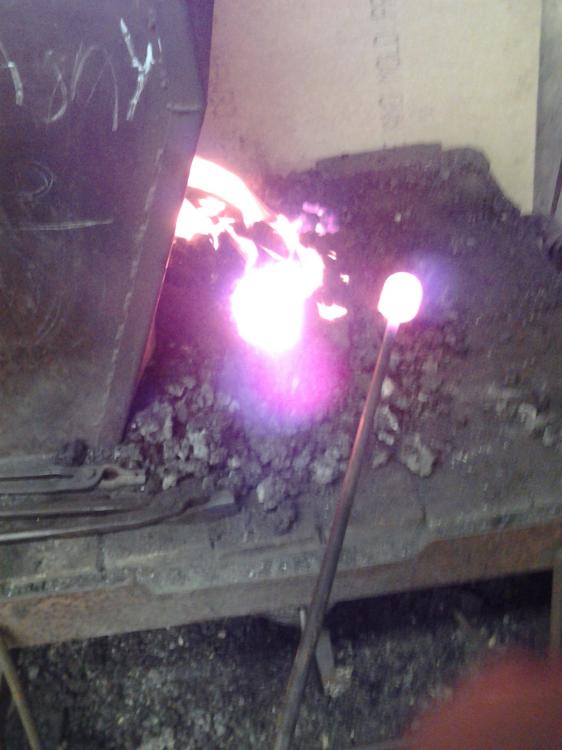
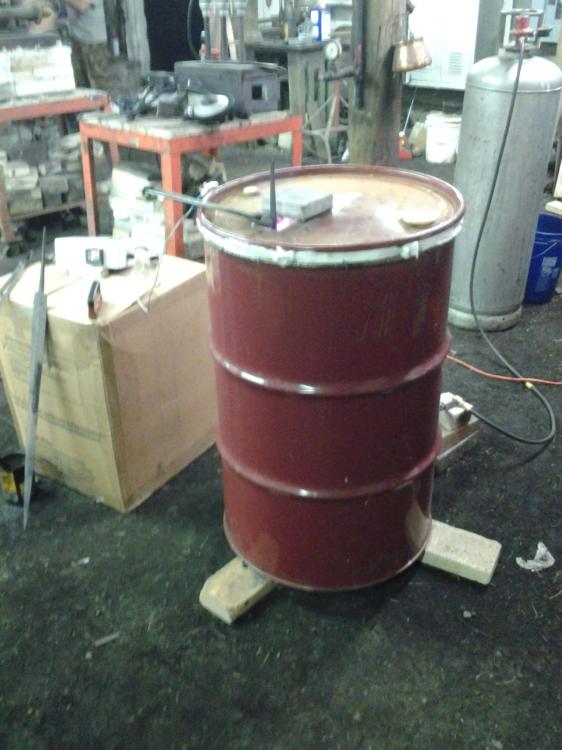
We used standard coal forges for the forging, then uses a 100(?) gallon drum for normalizing and heating up for quenching. This is the general forge. Electric blower on the side with a handle that controls how much air is moving through, handle to remove clinker and an ash bucket underneath. Really basic setup for a coal forge. I normally work with gas when I'm not in class, but I'm getting the hang of it! This was our set up for the normalizing and heating prior to quenching. Typical drum with kaowool and holes cut into it for the burner and to drop in the swords. Simple as that, but it worked very well!
-
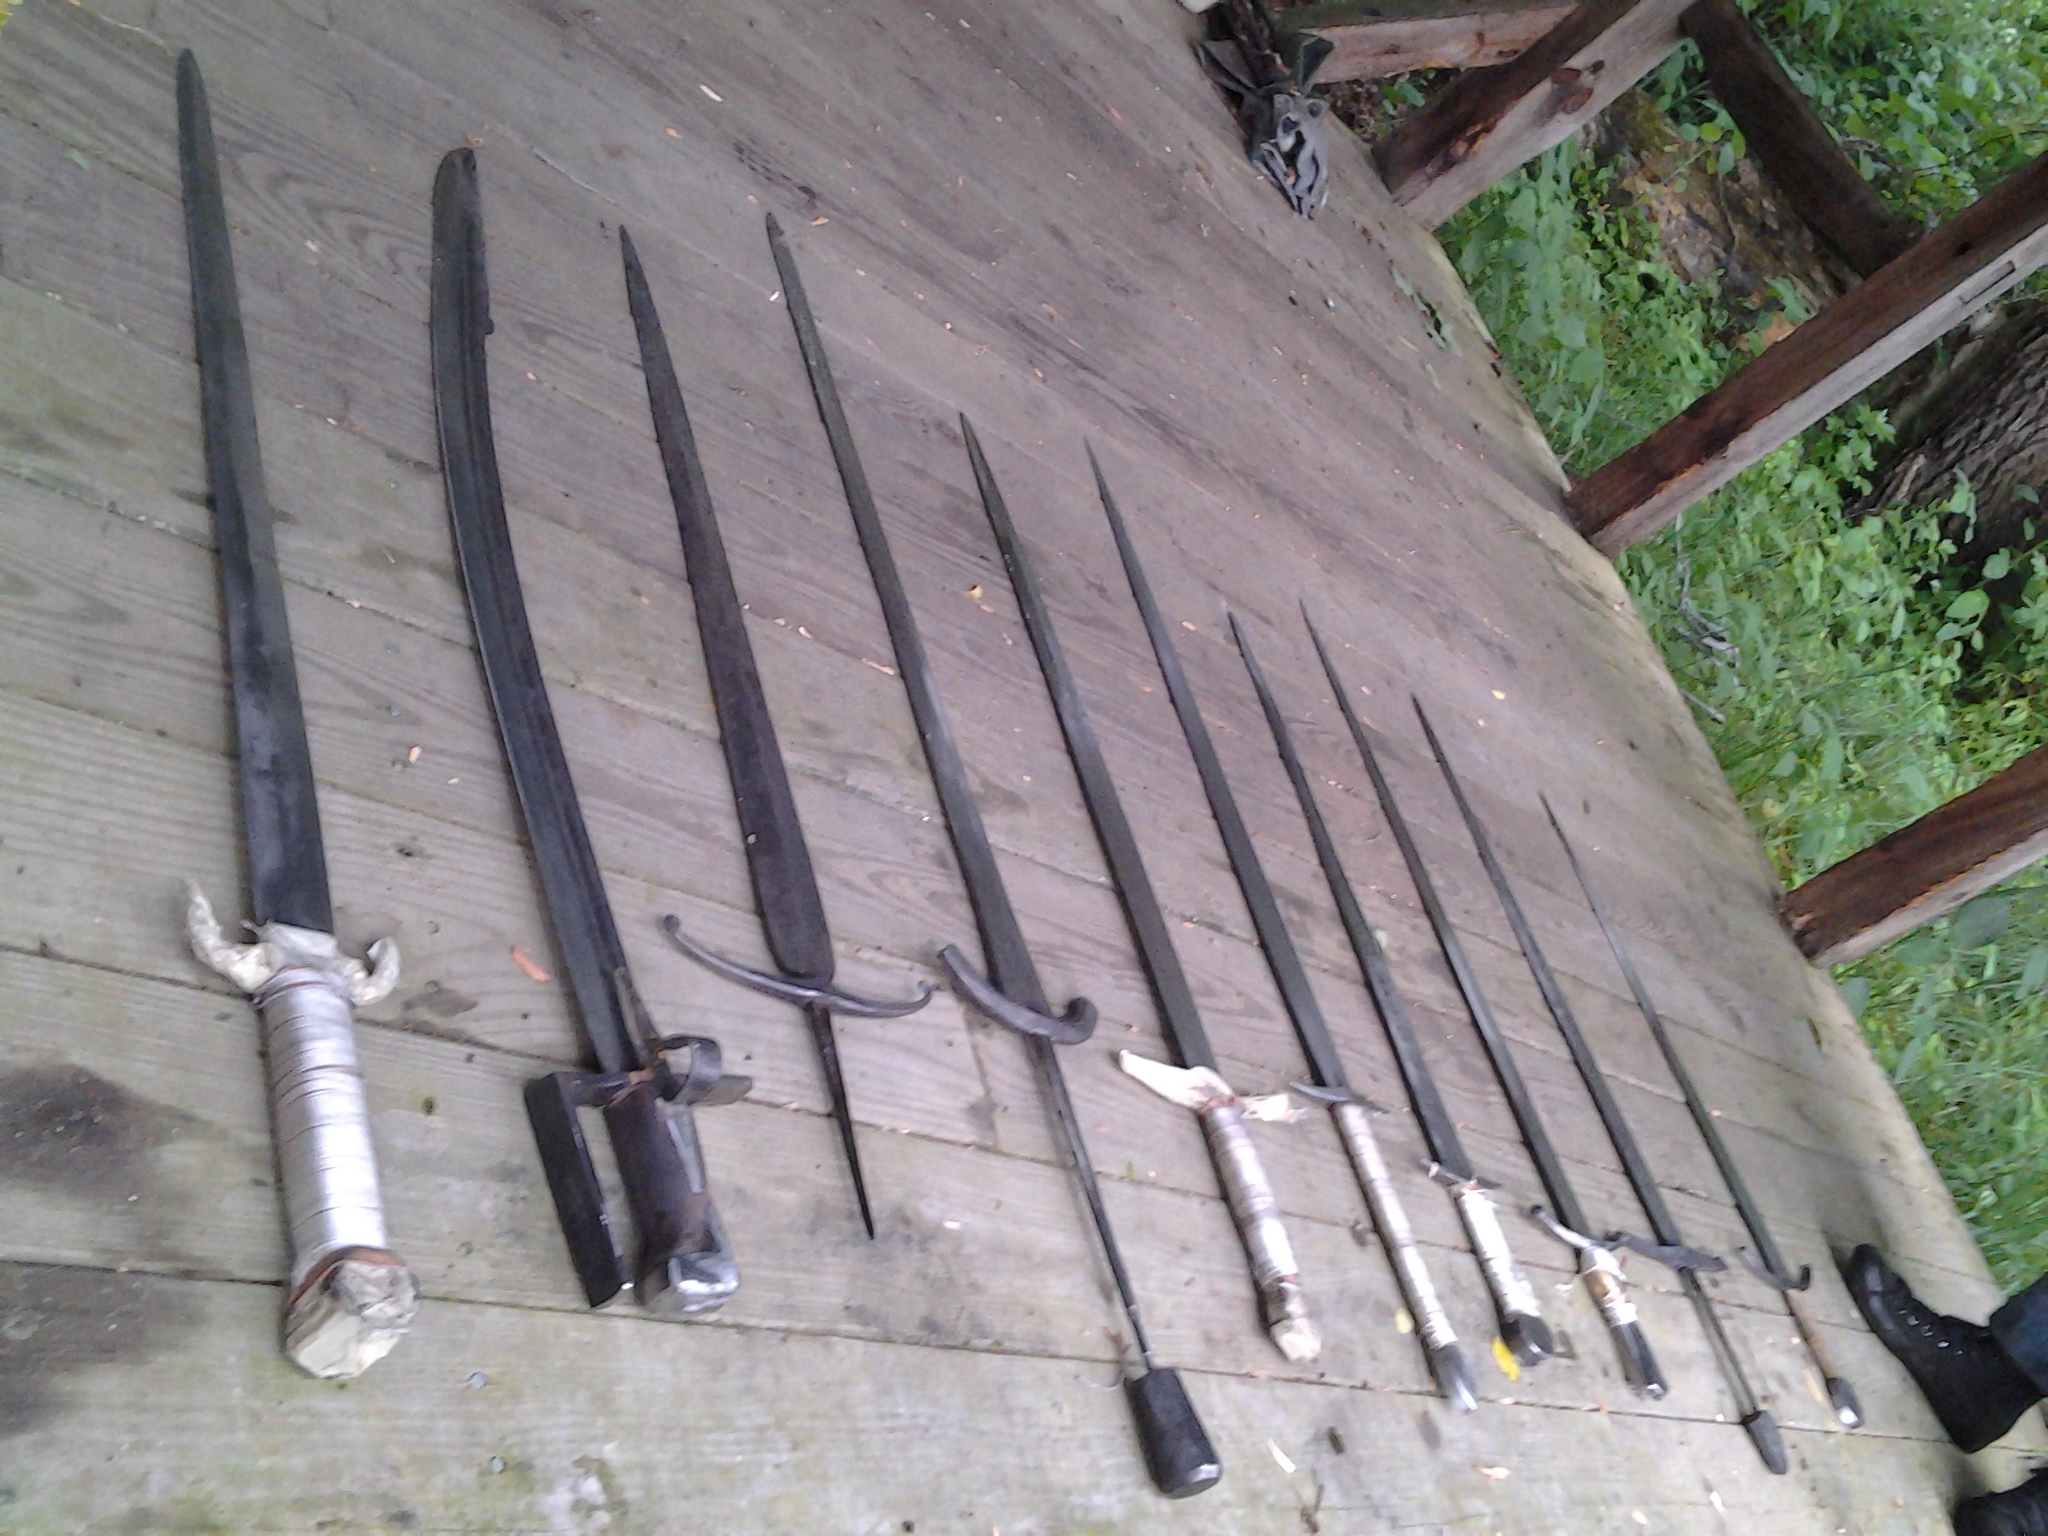
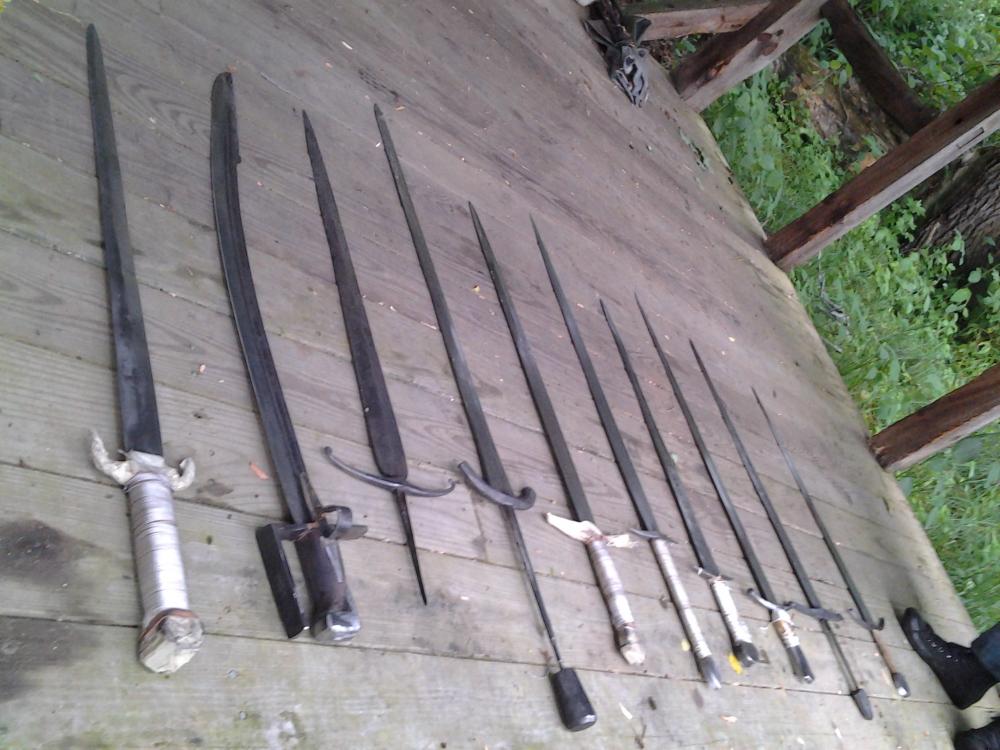
Thanks Shamus! When I get some better photos, you might see what I mean. Thomas, I'll try to weigh it this weekend on my mail scale and see what it gives me. Basher, my hat is off to Sam as well. While he was stressed (especially since we lost about nine hours or so thanks to power outages), he somehow pulled everything off. For comparison, here's a photo of everything made in the class. There were some amazing swords here. The goal was to make a single-handed Type 15, but most of the class walked away with bastard swords of some nature, a few two-handers, and one particular smith walked away with that gorgeous saber. I do plan on continuing on, I just lack the space to store the tools to heat treat a long blade without it growing legs and walking off (for scrap metal) or without a township citation. For now, I'll stick with knives, but returning to make another sword (or more) is on the docket!
-
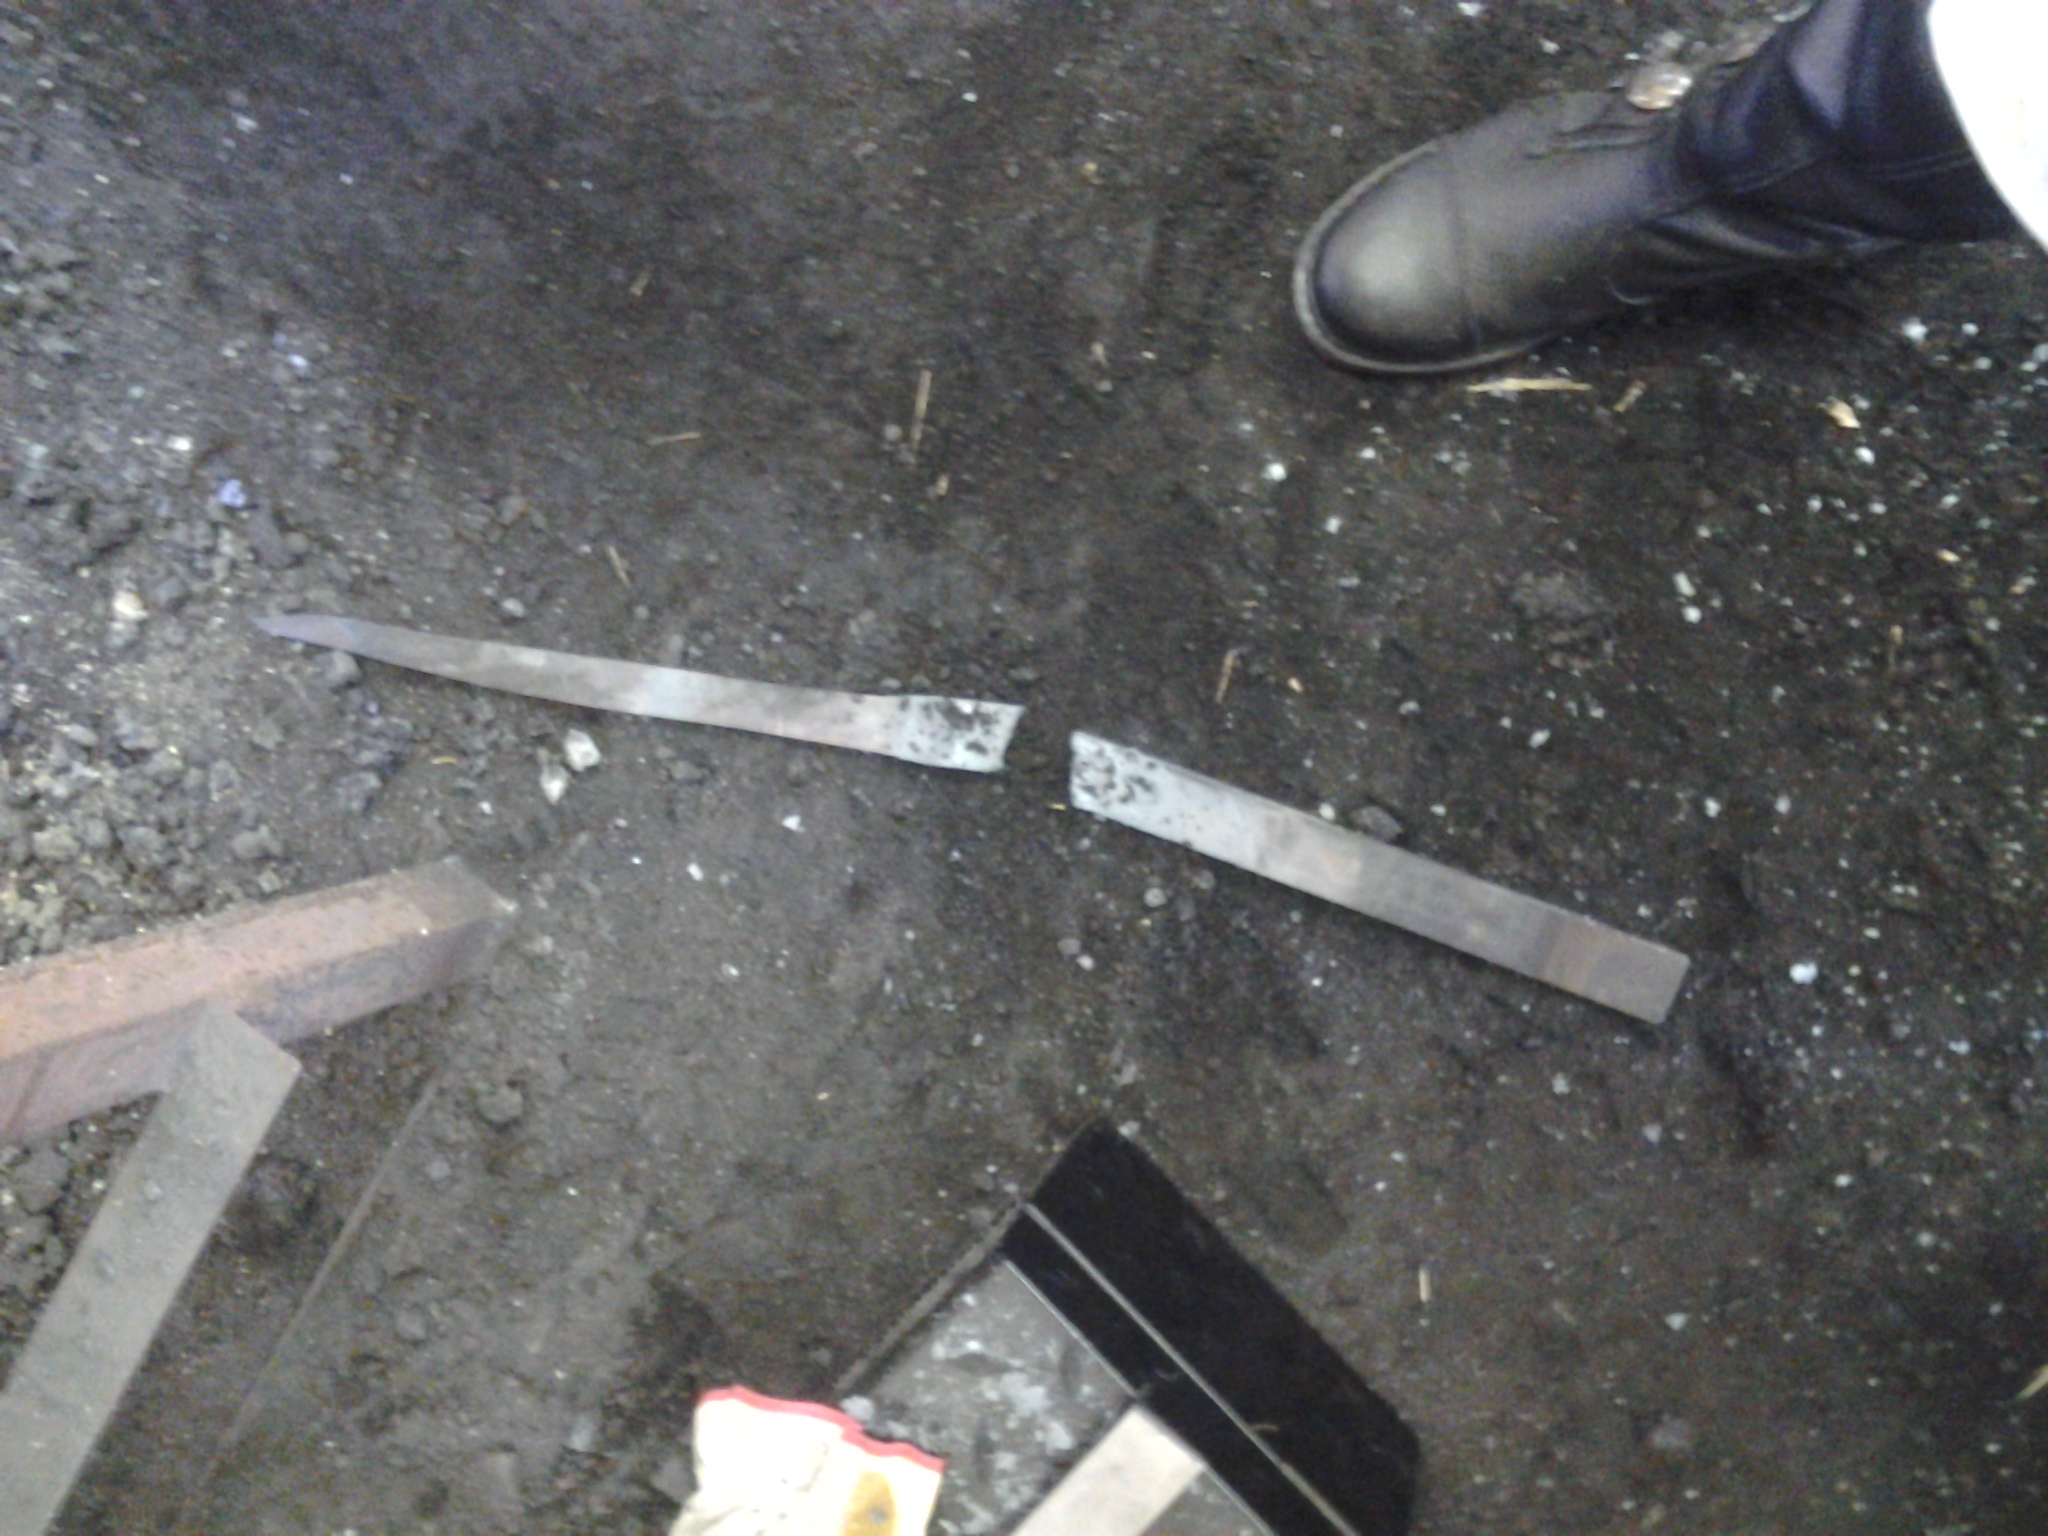
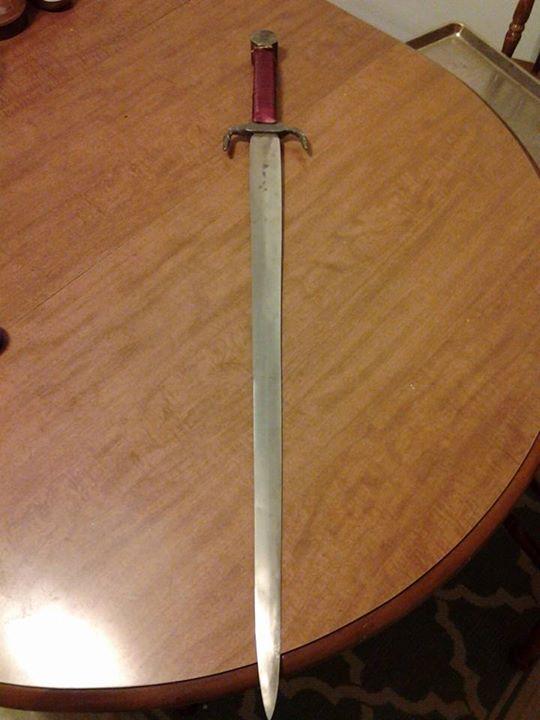
I took a class at Peter's Valley last weekend to learn how to make a sword. My expectations were not high, as I was warned beforehand that most smiths want/need more than five days to create a sword, and I didn't have enough experience prior to walking in; Sam suggested a minimum of one year of experience with a stronger recommendation of two years, yet I've only just started in November. Regardless, I thought I could at least learn the theory behind the process and complete the project later. This was especially true as, on day one, we lost almost half a day due to a power outage and I ended up melting my sword near the end of the day. This is what bad timing gets you, apparently. Even with the setback, I didn't stop. Thankfully I had some W-2 in my car that was close to the same size (the extra metal available was a bit shorter), so I was able to hammer out part of the blade with what time I did have left on day one and finish it on day two, with all of the finishing and fittings done during the last three days. This is the end result. I know there are a number of flaws with it (not quite symmetrical guard, hammer marks I cannot remove, leather not quite folded under the guard, etc), but for all of the setbacks and my lack of experience, I'm impressed I was able to finish! I'll try to snap some better quality photos later and share them here for better input.
-
J: I'll look into that after I get back from my class and fire up the forge. At least I know my tiny 1lb hammer can be put to use! M Cochran:Thankfully the vice problem isn't major, but it does cause problems if I want to work on hot metal. I'm considering a future investment in a proper post vice that is free standing (and easy to move for now), but I lack the materials to make that happen right now. My most used tool outside of the forge and anvil is my Rigid angle grinder, which is how I'm using a wire wheel. It's nice, but I have a feeling it's a bit too fast for the metal at times.
-
I didn't think it was safe to do that without possibly damaging the metal, especially with how thin it is. I assume if I do the process again, I should just do short passes with high-grit flapwheels to clean off the oil and the like?
-
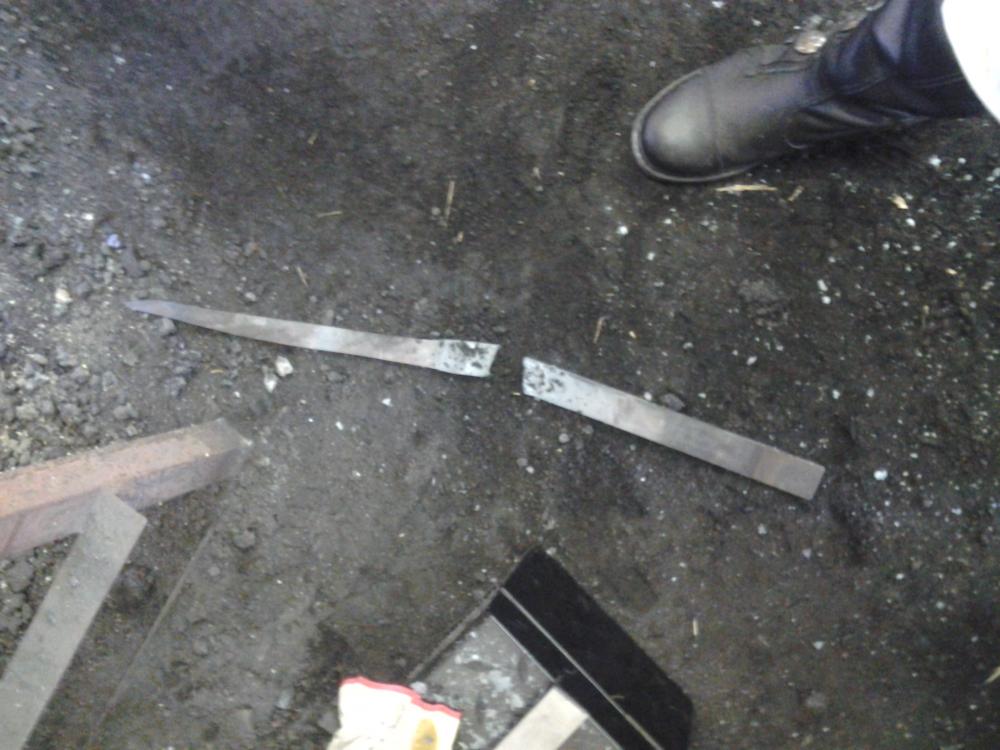
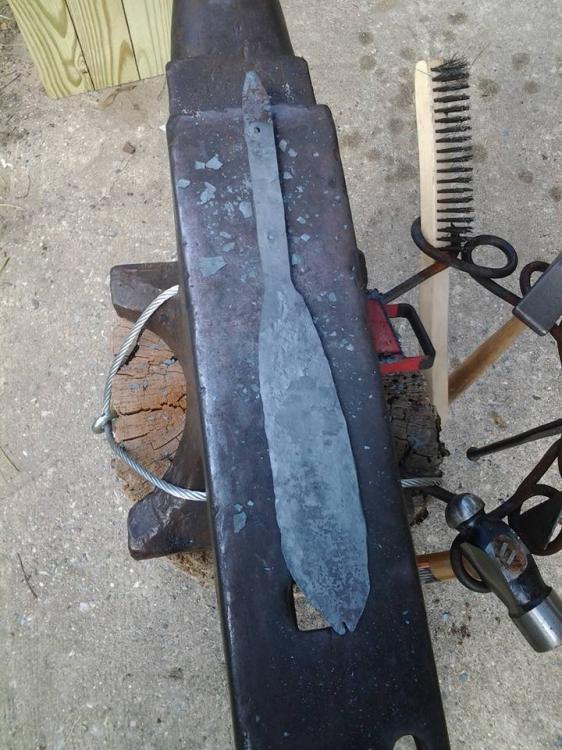
M Cochran: I'm currently in the process of hunting down some polishing tools I can use with my drill (as I lack a bench grinder) as well as higher grit flap wheels, so this may take a while. I hit a bit of a snag with the heat and my tools this weekend (batteries overheated within 15 minutes and wouldn't recharge due to heat), and I also snapped a small bit of the handle of the bush knife (that little bit hanging below the blade) on my vice when I was trying to define the blade with a file a bit more. Also ran into a few problems with my vice (the bolt came free, so I can tighten but not loosen the grip with it), so some of this may be on hold a bit longer as I try to get things fixed or replaced. I've also been scrambling this week to get prepared for my class this weekend. Hopefully I'll be able to show my progress on a bigger blade and, if all goes well, I'll be back at my forge next weekend working on knives while waiting for materials to arrive. I should also note that the triangle blade is just going to be polished and mailed out. It warped a little bit between tempering and cleaning (wire brush was able to bend it). Thankfully it's just a display piece for a friend's convention table, but I will snap a photo if I can get it cleaned up any further.
-
Sorry for the wrong word usage there. These blades were forged/created via stock removal, annealed, cleaned up a bit, set in the gas forge to soak/normalize, heated to a non-magnetic state and quenched in 200 degree F canola oil, ran two 1.5 cycles in my oven at 375-400 degrees (innaccurate knobs), and soaked in vinegar overnight to help break up the scale and oil. As of this morning's grinding and cleanup with a wire wheel, this is what they look like. I hit each one with a wire wheel/cup to get rid of the caked on oil, then a 25, 35, 60, and 120 grit wheel from my angle grinder, ending with the wire wheel one more time.Next I'm going to hit them with some high grit sandpaper to ensure all of the edges are good and clean, then either look into a polishing pad for my drill or just call it good. The bush knife needs some sharpening (put on the bevel with the 25 grit wheel and cleaned it with a file as I don't have a belt grinder). The top knife won't be given an edge due to the request (lapidary I know wanted to showcase handles at his shows this summer, so he wanted a non-edged display piece that won't kill him as he makes a handle), and I'm curious how to even sharpen that bottom one. Thinking of just grabbing my chainsaw files at this point and going to town on it. . .
-
Never said it was a bad one, I just said you seemed to like it! Besides, if I wasn't asking questions, you'd think I wasn't paying attention. I do appreciate the help with everything so far!
-

Little bit of weekend puttering
LibrariaNPC replied to Dogsoldat's topic in Blacksmithing, General Discussion
@LastRonin: What do you mean? If you are referencing the blade of the Space Marines from Warhammer 40k, then no, because that's more of a single bladed chopping knife. If you mean the Greek name of Ishtar, then I'm really confused. -
First Blacksmithing Class - Peter's Valley
LibrariaNPC replied to LibrariaNPC's topic in Blacksmithing, General Discussion
Thanks! I don't every expect to be perfect at anything, regardless of training; I'm just happy with the end results for the first time with these tasks! -
I've been noticing the silly putty reference, and it is interesting to see how it moves; it's why I'm experimenting now! Thank you for the explanation on pre-forms; I've been trying to work with them for leaves (using round stock), but can't seem to get a feel for it. I guess I just need more practice! In my first class, I walked in expecting nothing (I'm the guy that nearly failed wood shop, so. . .), but I seem to at least be somewhat competent with bladesmithing. I know there's a LONG way to go, but I know I learn every time I fire up the forge, so clearly I'm not wasting my time! Thanks for the input; I'll look into things when time permits and see what else I can learn!
-
Little bit of weekend puttering
LibrariaNPC replied to Dogsoldat's topic in Blacksmithing, General Discussion
Yeah, I agree it's better than nothing, and as I said, I learned something, which means all I really "lost" was a bit of time and some metal. I'm curious what I'll do to it as well, but I'll keep everyone posted in the forum somewhere! -
Thanks! JW really likes triangle blades, which is why that one turned out the way it did. More grinding than shaping via hammering, though, which I'm trying to get away from (so I can learn how about shaping the metal). What exactly do you mean by pre-forms? I'm not familiar with the term, and would love to hear some of your thoughts and experience there. On my next blade, I'm going to try attacking it from the tip first; first by having the metal mostly flat and hammering down the corner, flip it and repeat the process. I THINK that might work. . .
-
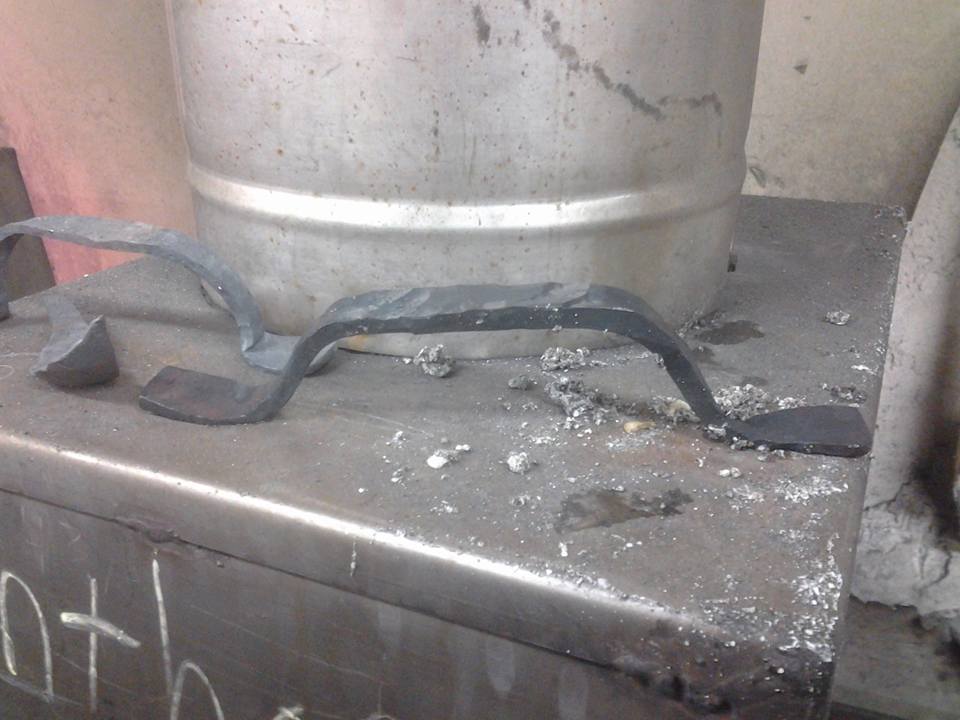
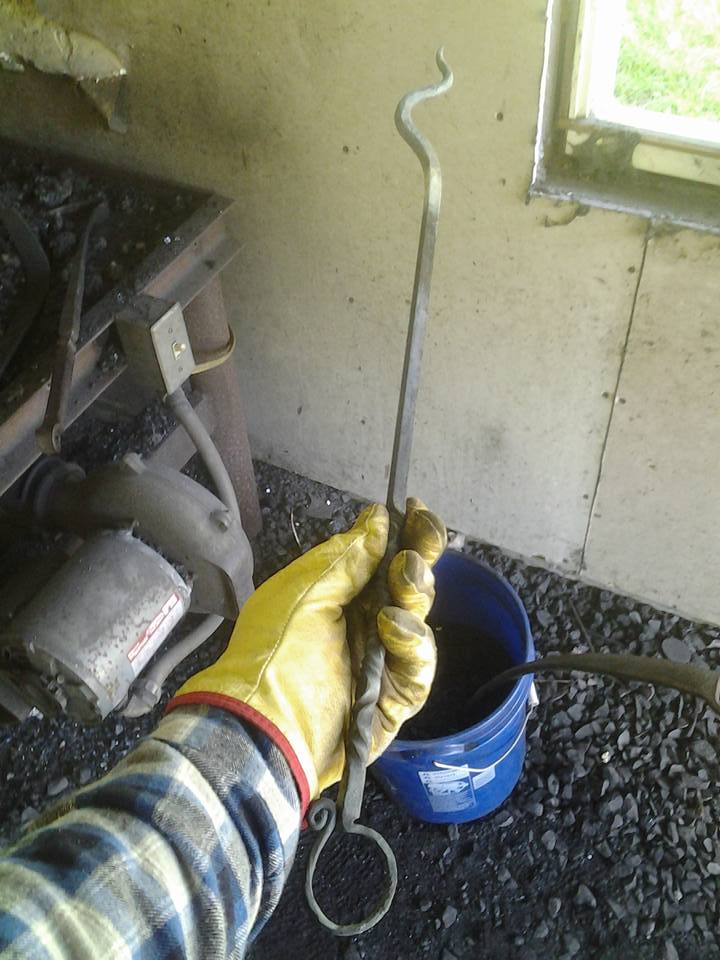
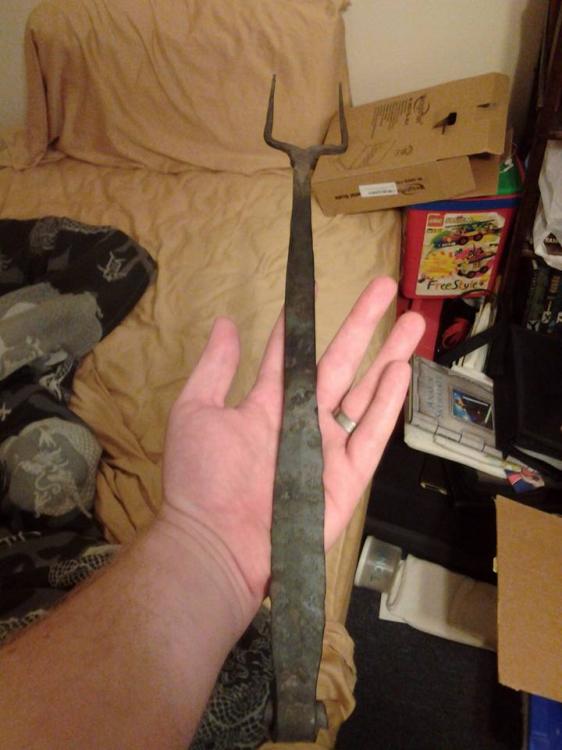
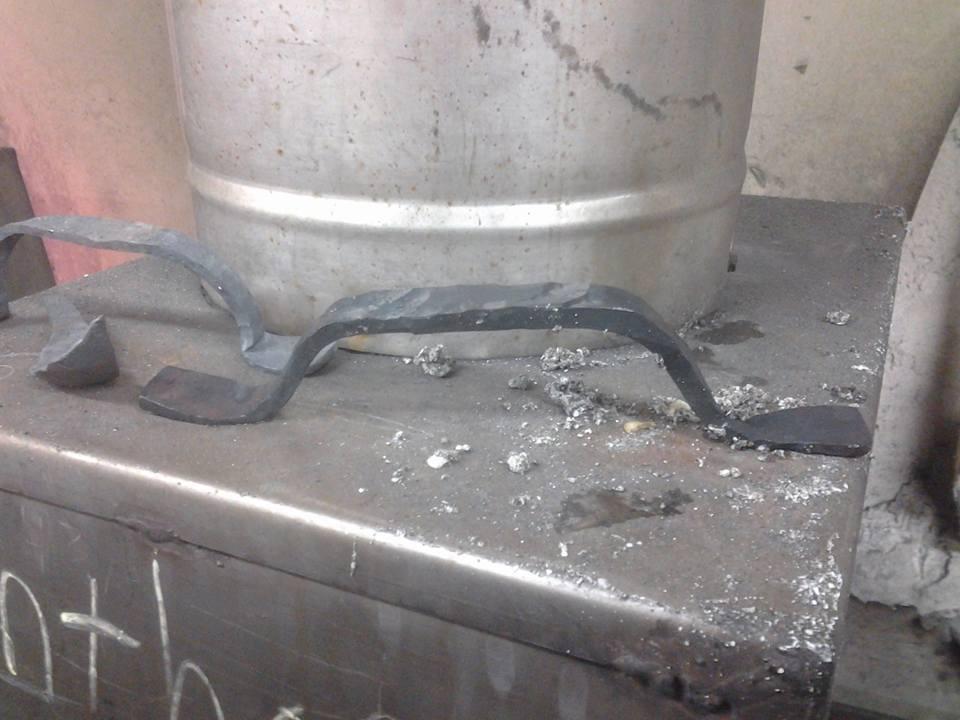
Technically the topic is true; my first class was in bladesmithing, so we didn't get to cover a bit of the stuff we did this weekend. I took this class on Memorial Day weekend at Peter's Valley School of Craft in Layton, NJ. The class was taught by Sam Salvati. I'd have posted the photos sooner, but I've been too busy with things at work, visiting the NJ Ren Faire with my wife, helping my family move, and preparing for my wife's birthday that I forgot to share what I did! I know none of this is really "art," and most of it is amateur at best, but as a beginner, I'm reasonably proud of what I hammered out in two days of class with shared tools (one guillotine for 11 students, three hot cutters, etc). A flesh fork. The bevel on the handle needs a bit more work, and I know I need more practice for fishtail scrolls. You also can't see the marks we put on the handle, but it is what it is. My first attempt at a handle (front) with an attempt at a leaf (left) that I made during our free studio time at the end of the day. The handle in the back is NOT mine, but an example I was shown during our free time. It's not entirely level, and the sections to attach it to the door/gate aren't perfectly matched, but for a first attempt at the end of a 14+ hour day, I'm pretty proud! Two of the hooks I made for the class. The one in the back is a simple hook to be mounted via a screw/nail, while the one predominantly in this photo is my first attempt at an s-hook (made a mistake with the top, but tried to make up for it).These were the first projects made on day one before lunch. I also made another hook with a long nail to drive it in or, with some work, I can turn it into an over-the-door hook; I haven't photographed it yet. Final class project of day one was a fire poker. Reverse twists for the handle (torch and a twisting tool were abused here) with a ring at the base (didn't turn it the right way after making the shoulder, but it still works!), standard taper on the end with a bit of serpent waves for ornamentation. Not super pretty, but I like it! And that's my first non-bladesmithing class. I have a sword class that begins next weekend (no delusions of finishing a sword in five days, but at least I'll learn the techniques), and unless the job hunting goes REALLY well, a Damascus class in August at the same location. If the weather keeps holding, expect to see more of my random work!


-
Little bit of weekend puttering
LibrariaNPC replied to Dogsoldat's topic in Blacksmithing, General Discussion
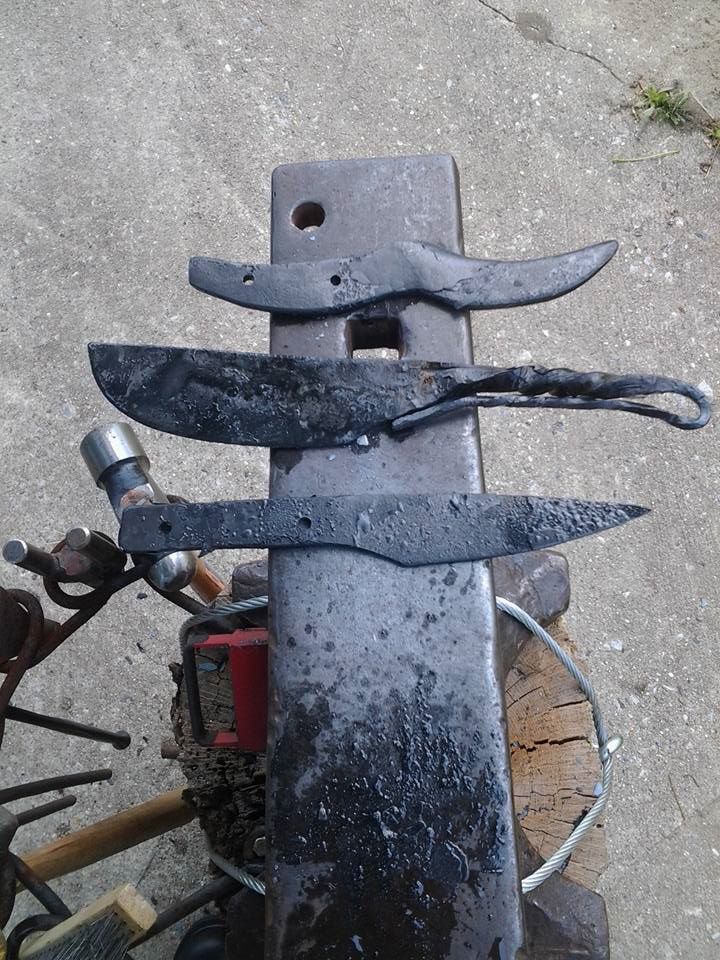
I was working on a few knives this weekend now that the weather was finally working with me. Heat treated three projects I've been working on for the past few months and hammered out another experiment. Not too proud of this weekend's work, but at least I learned from it! Poor attempt at a double bladed knife; realized I messed up the tip but didn't have the means to weld it, so I'll just be grinding it later.
-
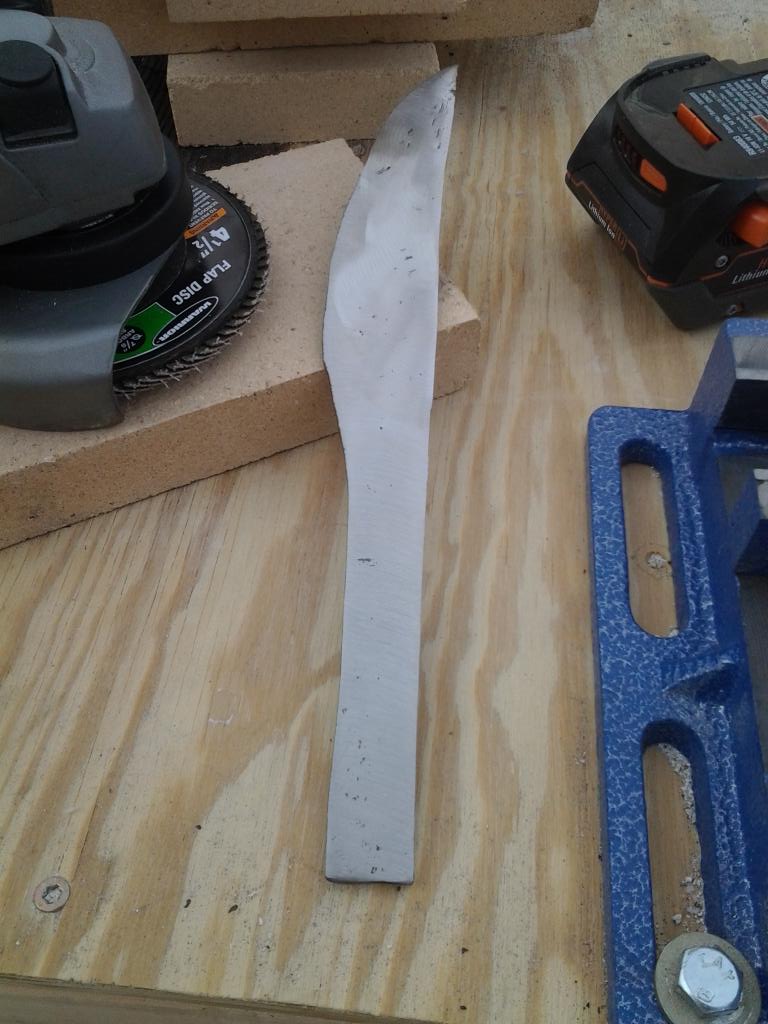
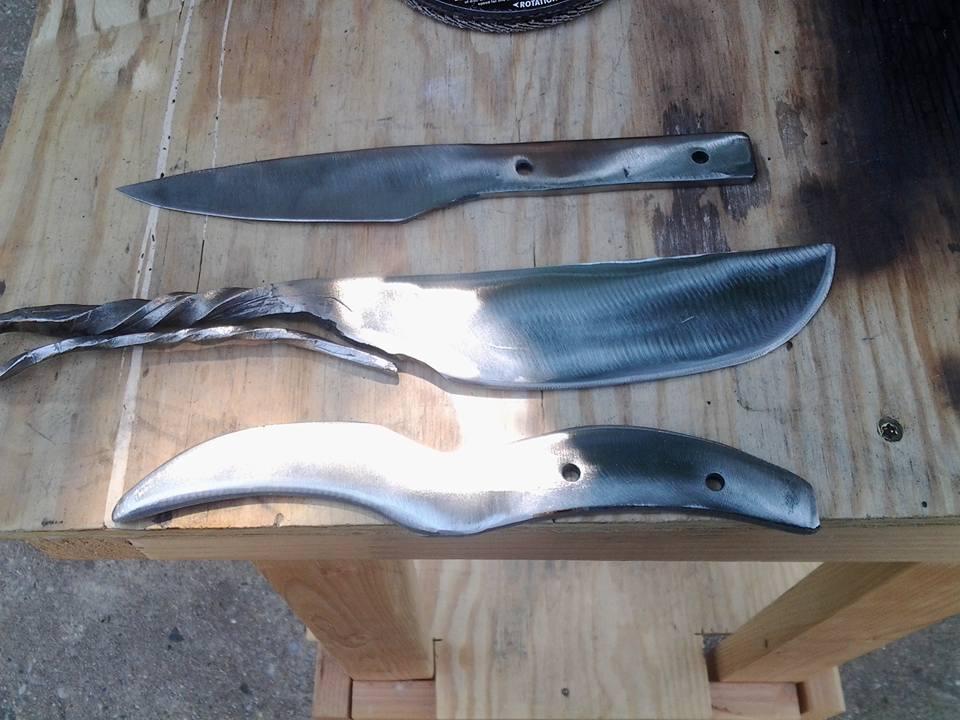
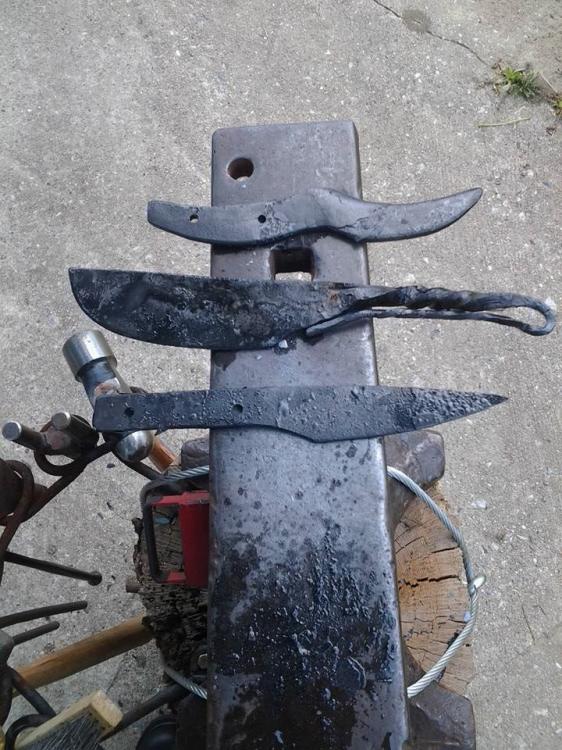
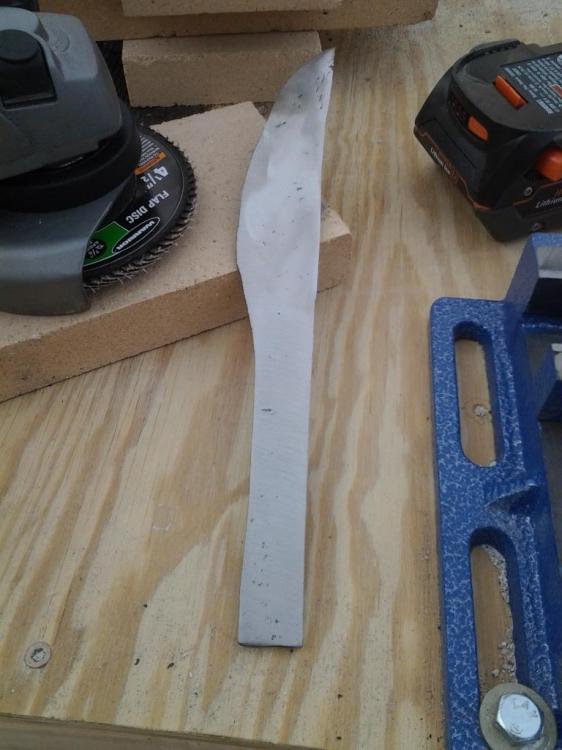
Hello everyone, Now that the weather has been nicer than before (we've had a lot of rain on my few days off), I was able to fire up the forge and the grinder again to get rolling on some new (to me) bladesmithing projects! This was a knife I started earlier this year on my little Horrible Freight anvil and my one brick forge (heating by a plumber's torch). I'm surprised I was even able to get this far with it! It's changed a lot since this photo was taken back in January(see below). Three knives here, immediately after quenching in canola oil and before being thrown into the oven for heat treating. The top one is a bit of a joke that I made via stock removal after watching the trailer for Jurassic World too many times in theatres and remembering the opening scene of the first movie (my wife thinks it's more like a moustache, thus the angle for the photo). Made from W-2, original stock was 8" x 1.5" x 0.187". Since the blade is a bit of a joke, I might pick up some paracord and start using that for handles, just to try it out and learn how to make some handles via knots (at least until I get a more permanent shop with woodworking supplies). Anyone have any tips for knots/approaches? The middle one is my first attempt at a bush knife. Did a lot of tinkering with it and had to cut off the point (didn't get the right angles), but the rounded blade makes this one a bit more interesting (and a nice chopper to to blade-heavy balance). Made from the same W-2, measuring 8" x 1.5" x 0.187".Yes, I did hammer the 1.5 inches down to that little taper you see there. Some people think it's crazy, I thought it was a fun experiment. That, and I wanted to really test out the 134# Hay Budden I bought earlier this year, so what better way than with an awesome knife concept? The bottom knife is the blade I showed above, after some creative grinding. Before it was a little too odd shape-wise (big belly), so after chatting with JWS about it, I cut it down to this triangular-shaped kitchen knife. This one is made of 1084, originally measuring 8" x 1" x 0.187". This one I'm not really proud of, but I did learn from it. The goal of this was to practice making a double edged blade due to a sword class I'm taking next week (no, I do not have any delusions of leaving with a sword, just learning how to make one and possibly learn some transferable skills). Didn't really turn out as planned (especially the tip), but I learned from a few mistakes here and should be able to grind it into something useful at the very least. Not sure what I'm going to do with the handle yet due to lack of woodworking supplies, but I'm sure I'll think of something beyond a twist! I'll snap more photos after they are cleaned up/polished. If I luck out, I can start again on Wednesday. Otherwise, it's just a matter of when I can get outside around my work schedule and not be fined for noise as I set up in the yard ^^;
-
Nice! I can say I am exceedingly jealous (debating on how to set up a temporary shop in the yard of rental properties), but I hope you enjoy that!
-
So that sharp angle between the blade and the handle should be grinded down a bit more to be a smoother transition and be a better finger rest?
-
Could you elaborate on what you mean by "grinding the lower one back"?
-
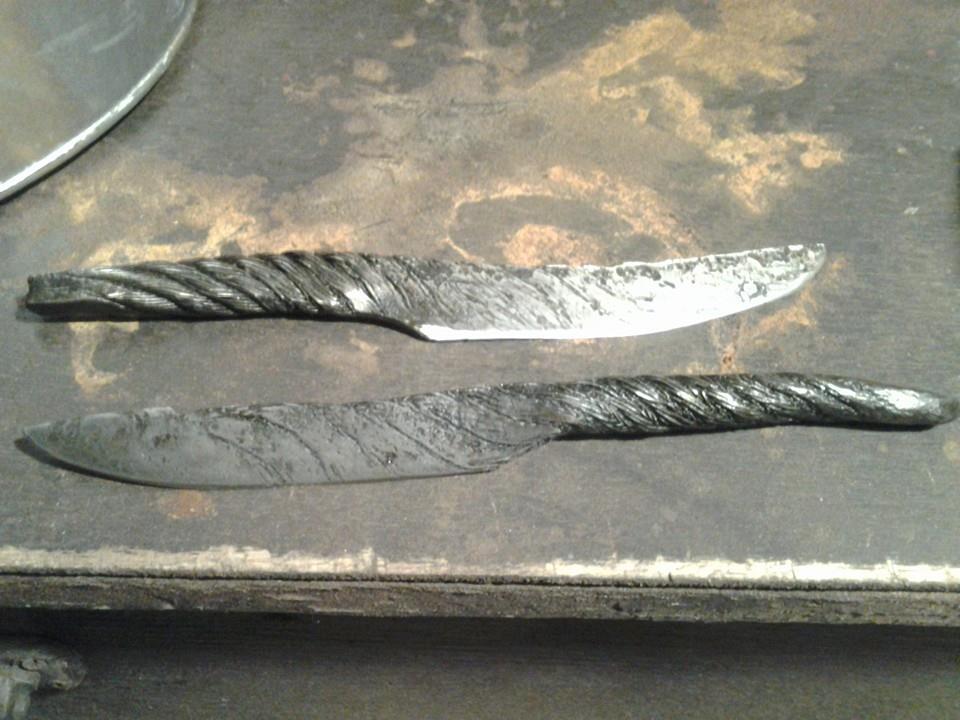
Hello again everyone! I've been silent for most of the winter as I've been working on reading due to the poor weather that has kept me indoors instead of in the yard hammering away at metal. This weekend, I took a class with JWS and hammered out these two knives. I'll be cleaning them up and snapping better photos of them (and my other knives) once time permits. For now I'll leave these here for your enjoyment and input!
-
Thanks for that information! I'll keep that in mind after I get a few more projects under my belt (and now that the weather is getting nicer, that should happen soon!)
-
Technicus, thanks for sharing that video! A local blacksmith just told me about it this past weekend, and I'm looking at attempting this when I fire up the forge this weekend (need a set that's a bit more reliable for spikes). Frozenforge, that's a really awesome handle. Care to share how it was done for us newbies? As for the original topic: the others already put in a lot of good details. My wife found that a number of people make hatchets and gardening tools, so she's been pestering me to get more practice in to make these things. I've seen some snakes, wall/coat hooks, and I might be using spikes to make handles for my tool stump.
-
Blacksmithing as a college student
LibrariaNPC replied to MouaChan's topic in Building, Designing a Shop
I've been able to put my entire setup, with stock, in my 2013 Veloster, which only has a bit more space than my old 96 Civic. I also used said Civic for moving, and you'd be surprised with just how much you can put in there weight wise without causing an issue; as long as you aren't off-roading with a couple thousand pounds, you should be okay! Also, as I previously noted in my post: I also rent and cannot make modifications to my apartment. Everything I use for smithing (forge, anvil, tools, etc) is hauled in and out every day I plan on working. As long as you have an empty space to work with, whether it's a yard, driveway, etc, you'll be able to set up shop. As for "picking things up" to act as the anvil and forge, you've gotten a good bit of that information here in this thread. An anvil is nothing more than a solid, hardened material that you can do your work on. I've read about people using heavy chunks of granite as an anvil with some success. If you don't want to buy an actual anvil, go out and try to find something that could still fulfill the same purpose; check out shops that make headstones and ask for junked stone that is large/heavy enough for your needs, or you can hit a scrapyard and find some railroad track or an I-beam, but you'll need to do some work to get that to work out for you. As for a forge, it's not something you can just "pick up" at a local store (at least not around me). If you're trying to do it "on the cheap," you can either take the advice of those that gave input on making a viking forge (if you can work with coal), or considering making your own gas forge. In your situation, I'd for with the gasser, but that's just my opinion. There are MANY instructions out there for making a One Brick Forge, which is nothing more than a single refractory brick, some refractory cement/clay, and a torch (about $40-$60 depending on your suppliers). I went with a Two Brick Forge (I can send you a link for the design) with a Bernzomatic TS8000 (totaled around $100 without fuel or attachments). I was able to make an 8 inch knife out of it, but doing more than a basic heat treat of the blade was out of the question; if I made something smaller blade-wise, though, it would have been perfect. Also, as Frosty mentioned, you'll probably want to start with something different if you don't have instruction. I lucked out and had a good teacher that focuses on bladesmithing, so I started by working with him for a class before even trying to forge a blade on my own. Shaping can get dicey, and heat treating is a challenge when you aren't certain of the process. If you're really adamant about it, be prepared for a lot of reading, but it's doable! One of the best suggestions for someone in your position that wants to learn how to make knives: Wayne Goddard's $50 Knife Shop. It's severely dated in some areas, but it has a lot of tips and tricks for getting started out with only a few tools and a very small space. -
I personally use a set of 4x6 boards cut down and bolted together as my anvil stand. I'm waiting to make a new stand for my 134# HB I just got two weeks ago (waiting for payday), but the set-up worked out well!. As for the ringing, I've heard two suggestions that I haven't tested yet: 1) Put a bolt in the pritchett hole 2) Put a rare earth magnet under the heel. I hope that helps!
-
Basics of Heat Treating Video
LibrariaNPC replied to j.w.s.'s topic in Heat Treating Knives, Blades etc
I'll be reviewing this once I finish shaping the knives I started! I know we covered it in class, but I figured a refresher wouldn't hurt!