

Hofi
-
Posts
1,086 -
Joined
-
Last visited
Content Type
Profiles
Forums
Articles
Gallery
Downloads
Events
Everything posted by Hofi
-
NETT, I use WD-40 BECAUSE OS SEVERAL REASONS 1 IT IS VERY EASY TO USE 2 IT IS BEEN SUCKED BY THE WOOD VERY FAST AND DEEP 3 IT DRYES VERY FAST 4 IT IS CHEAP 5 IT IS N O T LEAVING ANY STICKY LYER 6 I DO IT ONLY ONCE IN A HENDLE LIFE TIME 7 THE WAY I (SWING -HOLD) ''GUIDE'' THE HAMMER I LIKE THE HENDLE TO BE AS SMOOSE AS POSIBLE FROM THE LONG USE IT IS EVEN SHINY AND AS THIN AS POSIBLE AGAIN. SOME TIMES I AM JOACKING THAT IN 200 YEARS OF FORGING MY HAMMER WILL BE '' HENDLE LESS'' HOFI
-
BP1012 Making Hammer Handles Written by HOFI TRY THIS BP IT EXPLAINS MY WAY HOFI
-
IForgeIron Blueprints Copyright 2002 - 2008 IFORGEIRON, All rights reserved. BP1042 Forging 1-1/4 inch ball and Fabricating the Spring Tool by Uri Hofi I had an order for many railing pickets (50) forged of 1-1/4 inch round steel with a ball on the end with taper forging to the ball. The ball element. The spring tool attached to the bottom die of the air hammer. In the next photo's I'll demo the fabricating of the tool and the forging technique. A piece of 2-1/2 inch x 2-1/2 inch steel from an old farming frame which is known as a very good steel. On the lathe, drill the 1-14 inch hole and cut 10 degrees off the face of the upper side to get a crowned form for the air hammer upper die hits. This will be explained later. Marking the middle cutting line. Cutting on the middle line with my little band saw. Cut the bottom part on the line. Grinding the cut and rounding the sharp corners. Marking the neck bays (opening) and the neck depth. I want the size of the ball neck to be 3/8 inch on the end of forging, so I grind 1/4 inch on every side (will be shown and explained later). Preparing for the spring. The steel is 3-1/4 inch x 5/16 inch the length is 52 inches. Incising the groove for the bend with 5/16 inch fuller. Shay my student and helper that comes to study and help. The bend. Welding the corner. Grinding to fit the inner radius of the bottom die. Holding the parts together under the upper hammer die to press the parts together while welding with 2900 rod sami ss to hold the vibrations and hit of the hammer. Mark the center and heat with a rosebud and fold the flat into the upper pert of the tool. Ready for weld. Again with the special electrode. Finishing the weld. Final grinding and polish. Fabricating the spring opening system. Close and open view. We must camfer the bar to get max forged volume to have a full nice ball. If you do not have a lathe, you can grind it. Out of the forge. Open the tool to insert the steel. Forging while rotating the steel. When finish open with the handle and take the finished ball out. One can leave it that way but according to the order I had to forge taper to the ball. WHEN FORGING LONG AND HEAVY STEEL (1-1/4 inch X 4 feet). The tool is open before hold itself and after inserting with only a touch on the handle it jumps close to forging position The set with the hot steel and the suporting leg. Finished forging. 6 different forms forged with the tool in different speed of turning and power. With the other hammer forge the taper acc to the design. The final form. When forging, one can rotate faster or slow to get different texture. The spring tool again. One can see the 1/2 inch bay from the front side to get the 3/8 inch neck and the 1/32 inch bay or opening on the other side to let surplus material to flow out and fall. The opening system is a must because the spring is strong and it eases the inserting of the hot steel (You do not have to go around and to open the tool). Hope every thing is clear
-
IForgeIron Blueprints Copyright 2002 - 2008 IFORGEIRON, All rights reserved. BP1041 Candle Holder 02 by Uri Hofi This candle holder starts the same as BP1040 Candle Holder 01. Mark 1-1/4 inches from the end forming a square. On the air hammer with a 1/4 inch fuller we incise both sides. With the tool which is rounded a bit o the bottom we forge a defined shouldered neck. With the double fuller we neck deeper the incision to get a 5/16 inch neck. On the narrow side of the combination draw forge the end neck. With the other air hammer different dies we forge to the end length 12 inches. On both sides the same measuring with the compass and forging the corners. With a 5# double ball pien hammer we forge the end piece to a greater and thinner square. With a smaller ball pien hammer we forge the end piece to the rounded swage. Bend on the fork to 45 degrees. Center punch and drill a 4.5 mm hole. Forging a 1-3/8 inch long point from 5/16 inch round Cut to 2 inch length. From here the operation is as explained in BP1019. The man that helps me with the bp is ''shlommo errel'' long time student of mine (11 years) Heat local heat and bend 15 degrees approx. Heat all the length to dull red 1500* and bend on the fork to the final rounded form. Aligning on the fork. The finished candle holder.
-
Thomas Dean I personaly fabricated the chimney system at the ''OZARK SCHOOL'' when I was teaching there. ALL the school the tools -hammers -tongs chisles -drifts- fullers- and all the sampling boards were forged by me acc to the system at my school in ISRAEL. AND THE CHIMNEY TOO. HOFI
-
''BRAKE DRUMS'' are a very good and cheap solution !!!!!!!! very easy to fabricate operates very very good and very verstile in sizes, deep -shelow, small or big diameter. last very long because the quality of the casting. I fabricated some of them for my students and offered to many newbies and they are still heating steel all the last 10-12-13-14-15-16- years and they will go for more !!!!!!!!!!!!! and if ''1 milion people say something may be ,only may be they are not wrong'' LISTEN'' HOFI
-
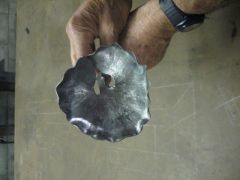 flower element
 -
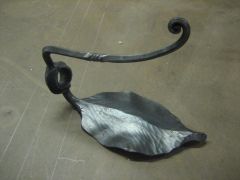 the leafe holder without the bottle
 -
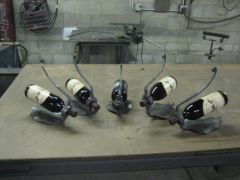
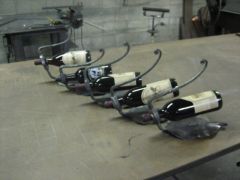 the ''group'' of wine holders
 -
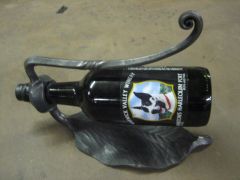 wine bottle holder
 -
 the ''wine bottle holders of the group
 -
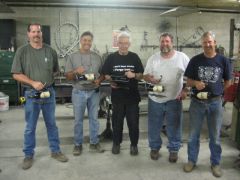 the florida people with the elements forged in the ''advance free form air + hand hammer '' class
 -
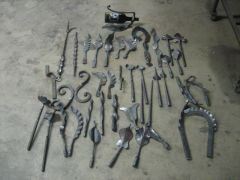 the elements forged in the advance hand-air hammer class at fine metale smith ny
 -
HELLO JIMMY from very far away I can only send you a very fast healing greetings . and many roses Hofi
-
You are right !!!!!!!!!!!! Hofi
-
Johannes In Holland all the classes are full to the end of 09 in august in REINSTETTEN OCHSENHAUSEN AT ''ANGELE MASCHINENBAU'' I think there is still opening for the air hammer and hand hammer classes u ''ll have to call johannes angele 0049-7352922614 in berlin u''ll have to call MARTIN ZIEGLER REGARDS HOFI
-
Yue are invited to visit me on your visit to Israel on the first two weeks of august I amdemoing and teaching in Germany on the last week of september and the first week of october I am in Hlland and Germany and some were in the end of the year in the usa for two weeks. so if you want to visit y have to set the apointment before coming E-mail hofi@ein-shemer.org.il phon in the smithy o4-6374382 the websit is
-
very very ''sweet'' hammer Jr Hofi
-
Hello To prevent more speculation about my new designed ''HOFI'' anvil here are some photo's and explanation. 001-002 2 views from the back side withe the adjustable tray 003 The ''lego'' 004 The adjustable tray and the water can under the prichel holes 008-009 Two top views 001 The water can for instant cooling and the small drift to fall stright in when punching holes four prichel holes 3/8 inch, 5/8 inch, 1 inch, 1-1/4 inches The base of the anvil is is big and heavy down and makes the anvil very stable one can also upset on the base in the rear and front parts The BAYS allow the steel to go down all the way to the floor The three leg base plate is 1 3/4'' thick The three legs on 22 degrees gives a very good and absolute support Tanvil is ''seating'' on the steel plat with two guide pins and there is no need to ''chain '' or bolt or ''nail'' it The bottom of the anvil is ground and the plat too ! There is a 100 % contact between the anvil and the steel base The anvil is 120 kg 265# the width is 4'' the length is 34'' The steel is 6150 very tough steel HRC 55-57 A CD about the use of the anvil will come together with the anvil The anvils are now in test use for three month at my smithy and in Germany The moment i''ll understand that the test time is over we will start to market them The world distributer will bs Jhannes Angele from ''ANGELE Mschinenbau'' in Germany THE PRICE IS NOT FIXED YET NOR THE AGENTS IN THE USA The moment we will be ready it will be announced in the site hofi
-
Hello the Ken Marmelstein e-mail is ken.marmelstein@nike.kom call him for more information Hofi
-
I had the same problam , use liqued soap and a fine brush to fined the ''leack place'' and repair NO problem after. Hofi
-
IForgeIron Blueprints Copyright 2002 - 2008 IFORGEIRON, All rights reserved. BP1049 A Tour of My Shop by Uri Hofi The forging station. In the center is my Hofi anvil, from two sides the vises one on the left low 30 inches, the other is 40 inches and on wheels to be able to move it to the right position and place. The coke forge with the channel of the chimney going through the wall out and on top a small gas forge that I use many times for pre-heating before heat with the coke fire. By doing this I save time and can produce more in the same time. You can see the small plastic black drum for the coke, and the big blue durm for water. The swage block that I can move to the place needed and the wooden stump to straighten hot steel with a mallet.. The green in the left is one of the two "shahinler" 60 kg air hammers the silver two burner gas forge on wheel trolley, and the rosebud. The system is arranged in a way that every thing is near and around and so there is no need to walk a lot. The tools (AND I HAVE MANY TOOLS) are arranged on type of shelves in colored families. This way I know every tool place and always to what place to return after the job is finished. The chair is to have a seat and rest every once in a while (73 YEAS OLD) Another view. The opposite side to the fire, the two air hammers and the 75 ton press. The air hammer tools and dies on the shelf in the back of the air hammer. This shelf accommodates on the upper part of the anvil tools and swages. The small drawers are for the chisels and drifts from 3/8 inches to 1-1/4 inches ready for use according to the need. On the bottom, the different drifts for hammers axes and the aligning bars for the holes punching. My belt grinder. I have two with very heavy suction for the sparks. Another view three anvils in the line with the coke fires, in the back one can see the flypress. The second room, every room is 24 feet x 42 feet. Lathe - the hole in the lathe is 2 inches so it can accommodate big steel diameter the head is 4 chuck and not a 3 chuck, so I can work round and square material. Milling machine one 80 years old. The belt driven drill press and a very powerful modern one. Assembly table 1 inches thick 4,2 feet x 4,2 feet. Another assembly table 5 feet x 7,5 feet x 3/4 inches thick with all the accessories needed on the shelf below. The third room contains a 4 foot x15 foot table with two heavy duty I beams 6 inch x 6 inch covered now with 1inch plywood on this table I assemble the staircase railing window railing gats and more. In the future Iâll give a special BP on this type of table. The beams are adjustable to what ever width is needed. Grinding, brushing and polishing station. The table is made of old steam motor flywheel. One of the anvils in the line is my first anvil got as a present from a family that the great grand father was a black smith, The anvil was completely abused and destroyed. I had to put it on the milling machine and to cut of 1/4 inch and still reweld one edge. The round bick was broken and I welded it too. The point of the bick was broken and this was also welded and grinded. The anvil is no more then 45 hrc and work fantastic. It was my anvil for the first ten years is now more then 100 years old. Every thing that I work, with or forge, or cut the steel for the job, I move with trolleys. You may see part of them in the photo. The whole smithy, plus the gallery, plus the school and offices are in a 24 foot x 240 foot building. In the Blueprint, I show only the first section of ''the smithy''. The smithy 70 years ago was a poletry (chicken) house. Thank You for visiting my shop. Hofi
-
IForgeIron Blueprints Copyright 2002 - 2008 IFORGEIRON, All rights reserved. BP1048 Side Draft Chimney by Uri Hofi This is the forge station in my school. The side draft chimney works very well. The square tunnel is 13 inches x 13 inches with a 4 degrees down slope to prevent the rain water from flowing back into the fire. The tunnel is some 4 feet long, but it can be 1-2 feet more if needed without any problems. The tunnel is fabricated from 3/16 inch regular sheet metal (black), and painted twice with silver paint. After 15 years it is not rusted yet. The stainless steel pipes are 12 inches inside diameter. The height of the chimney is 10 feet. In this case I wanted the chimney to go up as near as possible to the end of the roof. You can clearly see it. On the tunnel there is a 2 inch high coller that the chimney tube is seated on. There is a collar band holding the chimney with straps bolted to the wall. They can be seen in the photo. There is no rain hood on top of the chimney as it would slow down the air flow. This is the reason for the 4 degrees down slope of the tunnel so that any rain water flows out a drain hole and not into the forge. In the school we have 11 chimneys, and 3 more in the shop, for a total of 14 chimneys of this design. Additional material: Because of the large amount of air being moved up the chimney, you should allow for the same amount air to enter the building by opening a window or door. The large amount of air being moved up the chimney also has the benefit of keeping the horizontal and vertical chimney pipe cool. Hofi has zero clearance in his set up. Some folks using this set up have reported the horizontal section of chimney at the wall, being cool to warm to the touch. The forge should be of sufficient distance from the wall so the heat from the forge does not affect the wall. You can mount a thin sheet of metal (or other nonflammable material) with a air gap between the material and the wall in order to protect the wall if needed.
-
In 2004 I Was Invited By The Seki Knife Forging Association To Give A Demo Class To 54 Japanes Knife And Sword Smith For A Week.they Wanted To Learn More About Modern Forging And I Was Lucky To Be The One They Invited. My Translator Was A Student Of Mine That Lived Ther 10 Years To Study The Craft And Art Of The Japanies Tredition Of Knife Forging ,and Spoke Fluent Japanies And To Day He Lives In Potland Oregon. Heving Been There Lerning A Lot But Still Knowing ''nothing'' On The Tredition And I Was Forging With Their Hammers Tools Mechnical Hammer And Study The Grinding And Polishing Techniques I Want To Say Something From My Heart And Hopefully Offending No One. This Is A Very Very Old Tredition One Must Be More Humble And Learn Much More About Before Criticising Or Moking Or Being In Polite To A Fantastic Cultuer With Fantastic Achivment One Must Be More Hamble When He Stands Before 3000 Year Of Tredition. This Is An International Site And Not Privet American One Think How The Japanies Feel When They Read Some Of The Reaction Here. I Am Invited To Come Again To Seki Next Year And Stay For A Longer Time To Study And Learn More Deeply The How And The Why Not Only Knife Forging Also Mokume Gane And Casting. One Can Not Learn The Cultuer Of A Nation If He Do Not Understand The Spirit. I Am An ''expert'' Of Doing Things Not Acc To The Tredition And Some Times Against The Tredition But I Love The Tredition I Admire The Tredition But It Is Not A Religone And I Do Not Worship It And Ask Lots Of Questions To Learn And Always Understand More. Hofi
-
Johannes Johannes Angele Speacks Very Good English And Eaven Better Franch U May Use My Name Good Luck Hofi