
Rashelle
-
Posts
504 -
Joined
-
Last visited
Content Type
Profiles
Forums
Articles
Gallery
Downloads
Events
Everything posted by Rashelle
-
I'd be bribing her yahoo2. BFN I won't bother sharpening friends knives if they put them through dishwashers or bottoms of sinks. I tell them it isn't worth my bother if they treat the knives like that. The rule in my kitchen is if you use a knife, you immediately wash and hang it back up. Or you don't use my knives. Had some friends that I was almost certain they invited my over for dinners periodically so they could ask me to help them cook. They'd then give me a nice dull kitchen knife so I'd spend the rest of the food prep time sitting in their kitchen sharpening knives. I used to joke with them that that was why they invited my over.
-
I'll look forward to it Frosty. Coyote do try to get to one of the Mentoring center events. Lots of learning opportunities, even though it's a drive. The yearly conference is in May so there is a 3 day event coming up. Should be worth the drive, lol.
-
The NWBA has a permanent location at the Longview Fairgrounds. I demo and sometimes help teach other volunteers at Fort Vancouver. There is some overlap amongst NWBA and Fort personnel. I work at and teach at Trackers PDX. I'm still the board member in charge of the NWBA's monthly events, somehow, lol.
-
A membership is required to attend the monthly events for the NWBA. Due to insurance. On the plus side there is a quarterly membership that's $15.00 as opposed to the yearly membership. Members pay $10.00 for the monthly event. Normally that is a 3 hour demo from a paid demonstrator followed by open forge. We occasionally have workshops and just flat out open forge days. Next one is April 23rd. Demo will be by Berkley Tack, in place of Tim Gabriel as Tim is having eye surgery. Berkley always does a good demo. So needless to say the small fee's do NOT cover the cost of the events. These are provided to promote outreach and education.
-
Fish Spear with rolled socket
Rashelle replied to TwistedCustoms's topic in Spears, Arrows, Pole arms, Mace/hammer etc.
From the "blob" on the end, chisel in the barb and then chisel or grind the edge/point. Forgot to put that part in earlier. Frosty is much better at wording things. -
Fish Spear with rolled socket
Rashelle replied to TwistedCustoms's topic in Spears, Arrows, Pole arms, Mace/hammer etc.
This is on my list of projects to do. Something you might try is when you draw out your tines leave material at the ends, a blob in effect. Use that material to make the barbs and the point of the tine. Hope that made sense. -
Serious Blacksmith Skills
Rashelle replied to SReynolds's topic in Blacksmithing, General Discussion
Oh, I'm not blaming the kids for not knowing. Like you said they are not exposed to it. My full time job is teaching, mostly youth, blacksmithing and bladesmithing. So I'm doing what I can to reverse that. They can't know if they had no exposure. I am proud at how far some of them have came in a short period of time, with exposure. In the 8-9 month "apprentice" program where they come in one day a month. One of their first projects was a all wood tool box. Peg and glue construction. Hand saws and both powered and manual drills were used. Files and rasps were used for clean up as well as sand paper. As they went they made the tools that went into the toolbox, that they used for further projects. They (and youth from the other classes) can identity a tool that needs fixing and fix it by themselves without asking me, other then if it's ok to use a belt sander. Exposure is important and they are not to blame for not being exposed. I don't even blame their parents, as many of them don't seem to of been exposed through their life either. I just try to be available to expose them. -
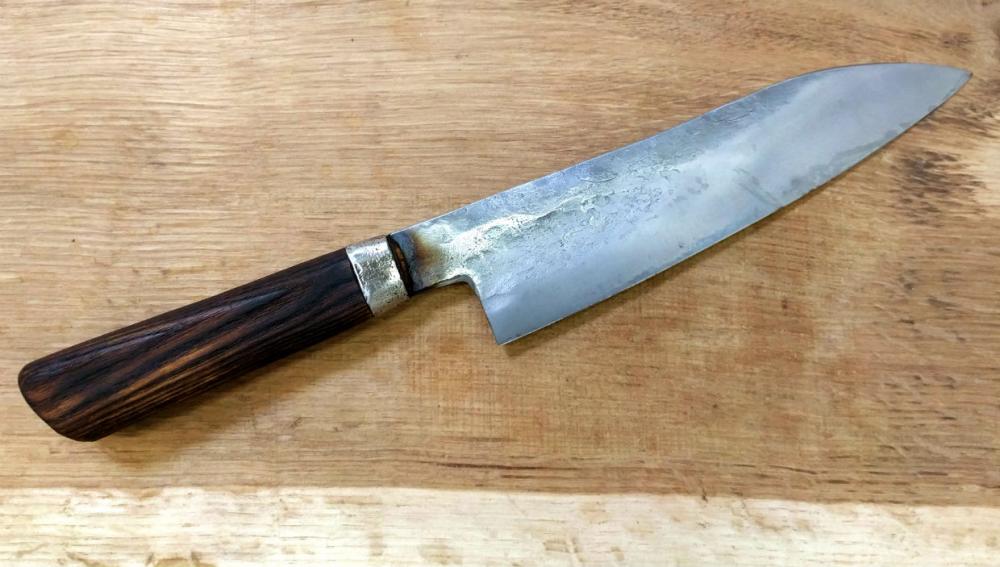
Cool, Steve and you're welcome. We put the fullered groove in with the cross pein. Feels nice and lightens the blade. My assistant at work (who's on this site somewhere), wife's a chef and she liked the lightness and feel of the blade. I might of mentioned to her now he will need to get a good belt sander, for himself to make chef knives with. She agreed. Heehee. Thank you Daswulf. I plan on making more so I can remember and ingrain it into myself. Definitely a style I want to remember, same as for the forging order of it.
-
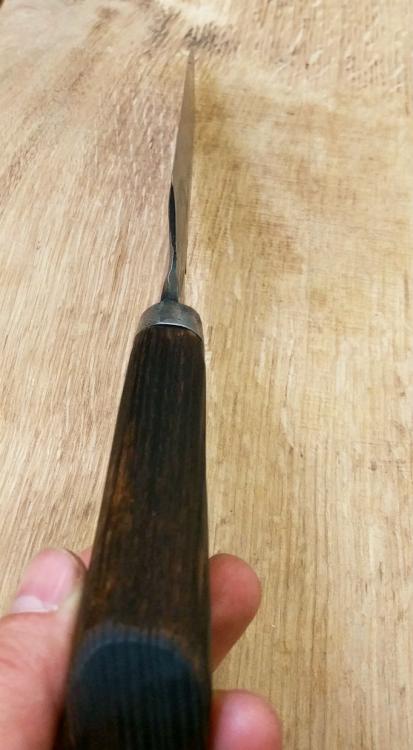
Thank you Charlotte and Steve. I learned a lot of new things during this class. For example I never realized that the Japanese chef knives were suppose to have the fullered grooves at the base of the blade for finger holds and that the bevel at the base is thicker for chopping where the bevel at the tip is longer and thinner for slicing.
-
Serious Blacksmith Skills
Rashelle replied to SReynolds's topic in Blacksmithing, General Discussion
You're not out of touch Frosty, there is a huge lack of hand skills amongst todays youth. I blame wee and the odd movements pretend skills on computer games induce. -
From the heal of the bade to the tip in a straight line, disregarding the slight curve is 7 5/8". Thank you yahoo2. I grin when I look at it even at pictures of it. Prior to this my favorite kitchen knife was a french chef knife followed by a small craft knife I demo as a first knife for youth students. After the class I went and made a small Japanese hammer, the tongs for holding each end of the knife, and started one of those wooden blade straighteners for just in case.
-
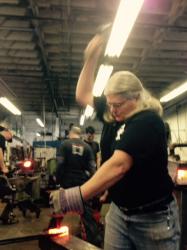
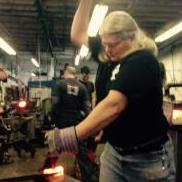
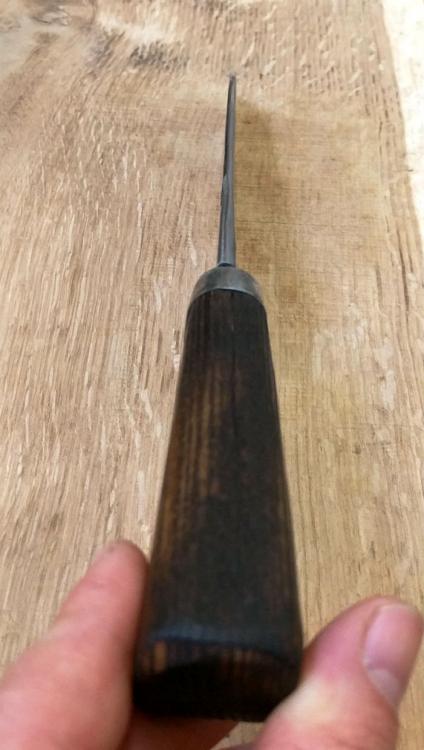
Realizing I can always improve and it's good to have further instruction. I took a class with Arnon Kartmazov weekend before last. I was not able to make the third day so Arnon made the handle and Nitzan Lillie did the stainless steel ferrule. I forged the 1095 blade and Arnon sand blasted it. Hardened in oil at 1450F, tempered in oil at 350F twice. Clayed spine before hardening. Handle is torch toasted hickory, then sanded and waxed.
-
Black smithing for child
Rashelle replied to Allen1975's topic in Knife making Class General Class Discussion
Where I work, I teach week long youth summer camps. Blacksmithing mostly, other weeks are bladesmithing. I'm pretty sure I've had 9 year olds in the blacksmithing classes. I'm not sure if the bladesmithing isn't one or two years older. Though I'm pretty sure exceptions have been made on an individual basis. So I'm not advertising on here PM me for more information. Note this is in Portland Oregon. So yes youth can blacksmith and bladesmith. Just have to remember there is always a potential for burns, etc. -
Like Judson said. Make the tools to make a bow. Years before I started blacksmithing I cut and ground a farriers rasp to a bowie shape, then ground to bevel the edges. Oak stained mahogony handle slabs. Made sure to do all the work cold. Sharpened it up and used it as my main tool when making self bows. Lasted over 15 years. Till it disappeared.
-
I wouldn't bother making a steel longbow in the first place. If I did it'd be a spring steel. Much more efficient to make a wood or composite bow then a steel one.
-
On a bow the place you want the least weight is the limbs. Specifically the limb tips. Steel recovers slower then wood, or composites. Though the potential draw weight may be higher for a given size. Yes occasionally crossbows have been made using steel prods. They are slow. The bolt fired can be heavier but it will be slow. Think in terms of being punched by a light weight boxer vrs being shoved by a heavy weight. I'd rather be shoved by the heavy weight. I'll still fall down and go boom whichever got me but I'm more likely to be knocked out by the light weight punching. Heavy weight moving slow can push a heavier weight further but a lighter weight moving fast can penetrate further. (Ok that's a short simplification without going into lots of detail.) You can read up on bow limb construction int the Bowyer Bibles.
-
Age limit at blacksmith group meetings
Rashelle replied to matto's topic in Events, Hammer ins, Where to meet
I have had 9 year olds out perform the teenagers. I've also had even younger kids explain correctly to their peers what I was doing when they were going by, from small time exposures. What really makes me proud is some of my on going 10 year olds. Some of the time student tools get abused. I've had during demo's 10 year olds anticipate my need for a tool. Go through the can with the correct tool in it, select a better one, put goggles on and regrind the working and struck ends as needed, then bring me the tool. This is without my asking. That makes me PROUD to have taught them. Thinking about it brings a smile to my face right now and a tear to my eye. There are even some of the same students with a learning "Issue" or so who are ahead of older and actively help and advise the less experienced in spite of age, size, or other differences. On their own without my prompting. -
Age limit at blacksmith group meetings
Rashelle replied to matto's topic in Events, Hammer ins, Where to meet
FC I am with Glenn. A youth is not legally responsible and someone has to be responsible for them. I am a board member for a blacksmith association and we have went around in circles for months on this issue. On an individual basis as long as someone is responsible it can be a good thing. Thing is someone some way is responsible. Note I am also the blacksmith co-ordinator (in other words head blacksmith) at an outdoor survival school, where we do teach youth blacksmithing. I believe in teaching them these skills. In an organization whether where I teach or where I am a board member there is supervision and responsibility for them. The responsibility is not just lightly passed off to whoever happens to be in the building and of age. -
Figuring out ROI (return on investment)
Rashelle replied to Mullsmith's topic in The Business Side of Blacksmithing
Hi Mullsmith. I just read the last couple of todays replies and have forgotten most of the previous ones already from the start of the thread. So forgive me if I'm repeating what's already been said. What is pertinent numbers for me is not necessarily pertinent numbers for you. I am going to compare myself with a professional smith who I look up to. I myself am a full time blacksmith. There is no way my work is comparable to the work of Darryl Nelson. (Who I am about to compare myself with.) He can do work something along the lines of ( I compared a thing I made with his time once and I'll leave that out of this discussion ....just suffice to say I want to be better and thus will not hesitate to compare my stuff with people who are much better then me), he was working at a pace like 32 times faster and much higher quality of work then mine. Now flip that around and students of mine are doing work that in some cases takes them days that I can do in minutes. My records of shop time for a given project won't line up with yours until you develop the tooling and proficiency to catch up with me meanwhile I am striving to develop the tooling and proficiency to catch up with Darryl. Keep track of your time don't worry about others time. It takes you as long as it takes "you". We all may be on the same journey but we each take our own path. Hope that made sense. -
Different size punch for different size heads. No one exact for everything sized punch. Go with what looks right and adjust from there. Then after making a few for a particular size you can mix and match making each head/ face different.
-
No pictures visible, just a minus sign with a circle around it.
-
Heehee now you're sliding down the path to the dark side. Making tools to make more things. Fun!
-
Curved, though there are other ways like a cut off disk making grooves, the dremel, or air tools, etc. I thought there was a topic on here somewhere where people did a knife blade like that too. You might look for it.
-
Here is a thought that may work. Forge the arrowhead like normal, possibly a little thick, then chisel out the flakes. They would be pretty much alternating on the sides of the arrowhead and not lined up anyways if they were knapped. Forging a trade point is like forging a leaf where you bevel the lobes and leave the center thick. If it's messy you can file or sand down the sides prior to "knapping" with the chisel or if needed something along the lines of a dremel.
-
Help- Square or hammer eye drift
Rashelle replied to Jakejackson's topic in Axes, Hatchets, Hawks, Choppers, etc
If using you tube as a guide. Watch Brian Brazeal, Alec steele, Mark Aspery, or Brent Bailey forge a hammer. There are others I can't think of at the moment. Slightly different tooling for each. Brent slits and drifts, Brian uses a sharp punch, Mark uses a slot punch. Brian a long handled drift, Mark a short non handled one, etc. Choose your style of work and tooling from one of them and make what you need.


