Rashelle
-
Posts
504 -
Joined
-
Last visited
Content Type
Profiles
Forums
Articles
Gallery
Downloads
Events
Everything posted by Rashelle
-
Unfortunately no. Drove myself nuts just getting the phone to get that one picture. Lol made myself even more nuttier trying to resize it to get onto here. Darn putery stuff gives me headaches. He's still got a couple hooks to make for it, maybe he'll bring it back in next class. He plans on giving it as a gift though so don't know.
-
Attached is a picture of a students utensil rack. Made by him today in class. He had previously made the center punch used in layout, the chisel, punch and bolster used. He also made the rivet.
-
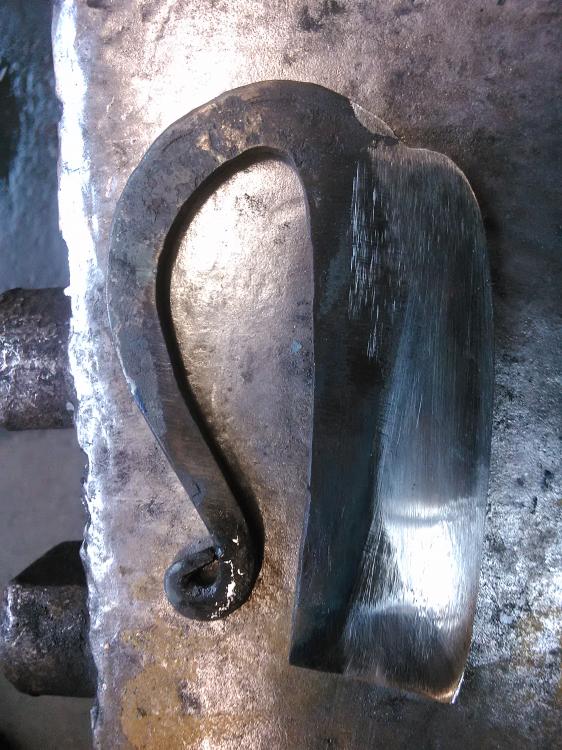
You can use a glut. If it's all leaf spring do like Thomas said and stick some mild in between. If it's mild with a high carbon bit use a mono steel hacksaw blade or similar as a glut in the area that don't weld well. Do like Judson said also on the placement in the coal fire. Keep the part your not welding out of the hotter part of the fire, using the sides and edges as a heat shield. Watch your heat and don't let it spring open. I normally do my blade first (backwards I know). After wrapping. Then place the blade at the far side of the fire past the sweet spot and weld back. You may want to do it in reverse. Weld the eye area first then work up towards the blade area, inserting the bit when appropriate. Try using a lighter hammer when doing the initial weld also helps.
-
A few things come to mind. Used steel like already mentioned may of had an existing crack, lighting will affect perception of heat: if it's dark out the steel will be at a lesser temperature then it would appear if it was bright out, there is a steep transition with a lot of hammer marks all over so could be a cold shut was induced when fullering down then enlarged as the piece was worked. Or a combination, small crack induced when starting the fullering process, worked down, enlarging as worked, with some heating issues. Might be other things, but that is what comes to mind. When shouldering in ensure the transition is forged clean. Any overlap can enlarge into a major cold shut.
-
Fur Trade Post AXE FIND
Rashelle replied to James Bay's topic in Axes, Hatchets, Hawks, Choppers, etc
The bit is the sharp end, the eye the hole, the poll is the blunt end. Rather then me saying it looks like wrought iron I should of said looks like a wrought iron axe one of the rangers at the Fort I volunteer at has, where there is a rather large museum collection of Hudson Bay era artifacts. -
Fur Trade Post AXE FIND
Rashelle replied to James Bay's topic in Axes, Hatchets, Hawks, Choppers, etc
Cool. Looks like wrought iron, probly had a higher carbon steel bit forge welded i. Though not necessarily. Can you take and post more pictures. Of the bit area, poll, and weld line where it split, along with an inside the eye view, please? See if you can see weld lines also. Like along the poll and the crease from the eye to the bit. Might be a heavily corroded steel one also. It is hard for me to see details. At the Fort where I volunteer, there are wrought axe heads with pitting as opposed to visible striations, such as appear like wood grain. Can you see more detail? -
I'll second Smoothbore. I've been accused of making items just for the excuse to make the tooling to make the item. I like tools and tooling. Even if all the difference between existing tools is a millimeter bigger or smaller on the punch. Or a curve for a chisel.
-
Get your 1045 nice and hot and do it fast. As stated above will depend on complexity of the leather stamp. Remember that you have a good chance of messing up your leather stamp. I did it twice in the past. Each time I was more satisfied when I went and filed in the marks on a different piece of steel. Making a specialty stamp as long as it's not too complex can be pretty easy. Simple shapes with simple filework goes good. Another issue with the leather stamp approach is depth of stamping into the target steel. Which is to say not far.
-
This cold hearted woman, ROFL, has a couple other ideas. On flowers and roses you can get precut blanks that you finish forging out, you can cut preforms out cold or hot as well as forging them out from the get-go. Lilly type candle holders are nice. A rose can be riveted together or a tenon forged and peined. Heart pendants are good. Brian Brazeal or possibly Alec Steele had a you tube video. I don't remember. Hearts take just a little practice. Leaf pendants are also nice though not utilitarian. A tiny rose can be forged out of copper. Make multi layers by cutting out some sheet copper. Lot of things you can do.
-
You could make hooks on the coat/hat rack look like leaves and branches. The axle looks like a thorny tree to me.
-
Why not just clean up one face and use that one? If you need to spread material one direction use a top and or bottom tool. Not that there is anything wrong with forging it into a cross pein, though you then get to guess at heat treatment.
-
3 3/4" I remembered. LOL One of the students asked a question and as soon as it was answered I remembered and ran across the shop (ok not literally) and measured.
-
What to do with bad practice blades? Learn from them, test your heat treat and sharpening skills, and discard. Use them as practice pieces to learn more, try out that neat idea for a handle on the scrappy blade, or differing things. Then scrap them. The only failure is a failure to learn.
-
I'll try to remember to measure tomorrow. When I went to do so tonight, someone from outside had seen the forge fire and wondered in. Which distracted me from what I was doing. (I'd just added insboard to a forge that did not get welding heat, for a upcoming axe class, and had welded a sample axe.) As I had put the axe back in and was moving across to get the herb chopper is when the guy came into the shop from out in the dark. Luckily he was across the shop, in the doorway, when I noticed he'd came in as my reaction to being startled is rather aggressive. As is an adrenaline dump into my system with accompanying reflexive combative movements, distracted me. The good thing is he wasn't close enough to get hurt, and I am freshly reminded that my reflexes work. He was one of the adults that have taken some of the schools classes and had wanted to get into some of mine, so we chatted a bit.
-
Thank you. The blade on my original example from the smaller stock is 3 1/4" corner to corner straight across the blade. On the thicker stock I'll have to check when I get into the shop later. I've got to go pick stuff up for converting one more of the propane forges to being able to forge weld for a 2 day axe class next weekend and cut said stock for two axes per student, as well as stock for practice forge welding. Luckily it's day 10 of 11 in a row and I already have the rest of the weeks stuff cut. Go in get the forge ready, cut stock, make a couple pair of axe tongs, then home. I'll try to remember to measure the demo one still at the shop. I'm not sure of the students example as I was rushing helping students and quickly took the pictures with my phone last night. He took his home with him, ......... darn it, heehee.
-
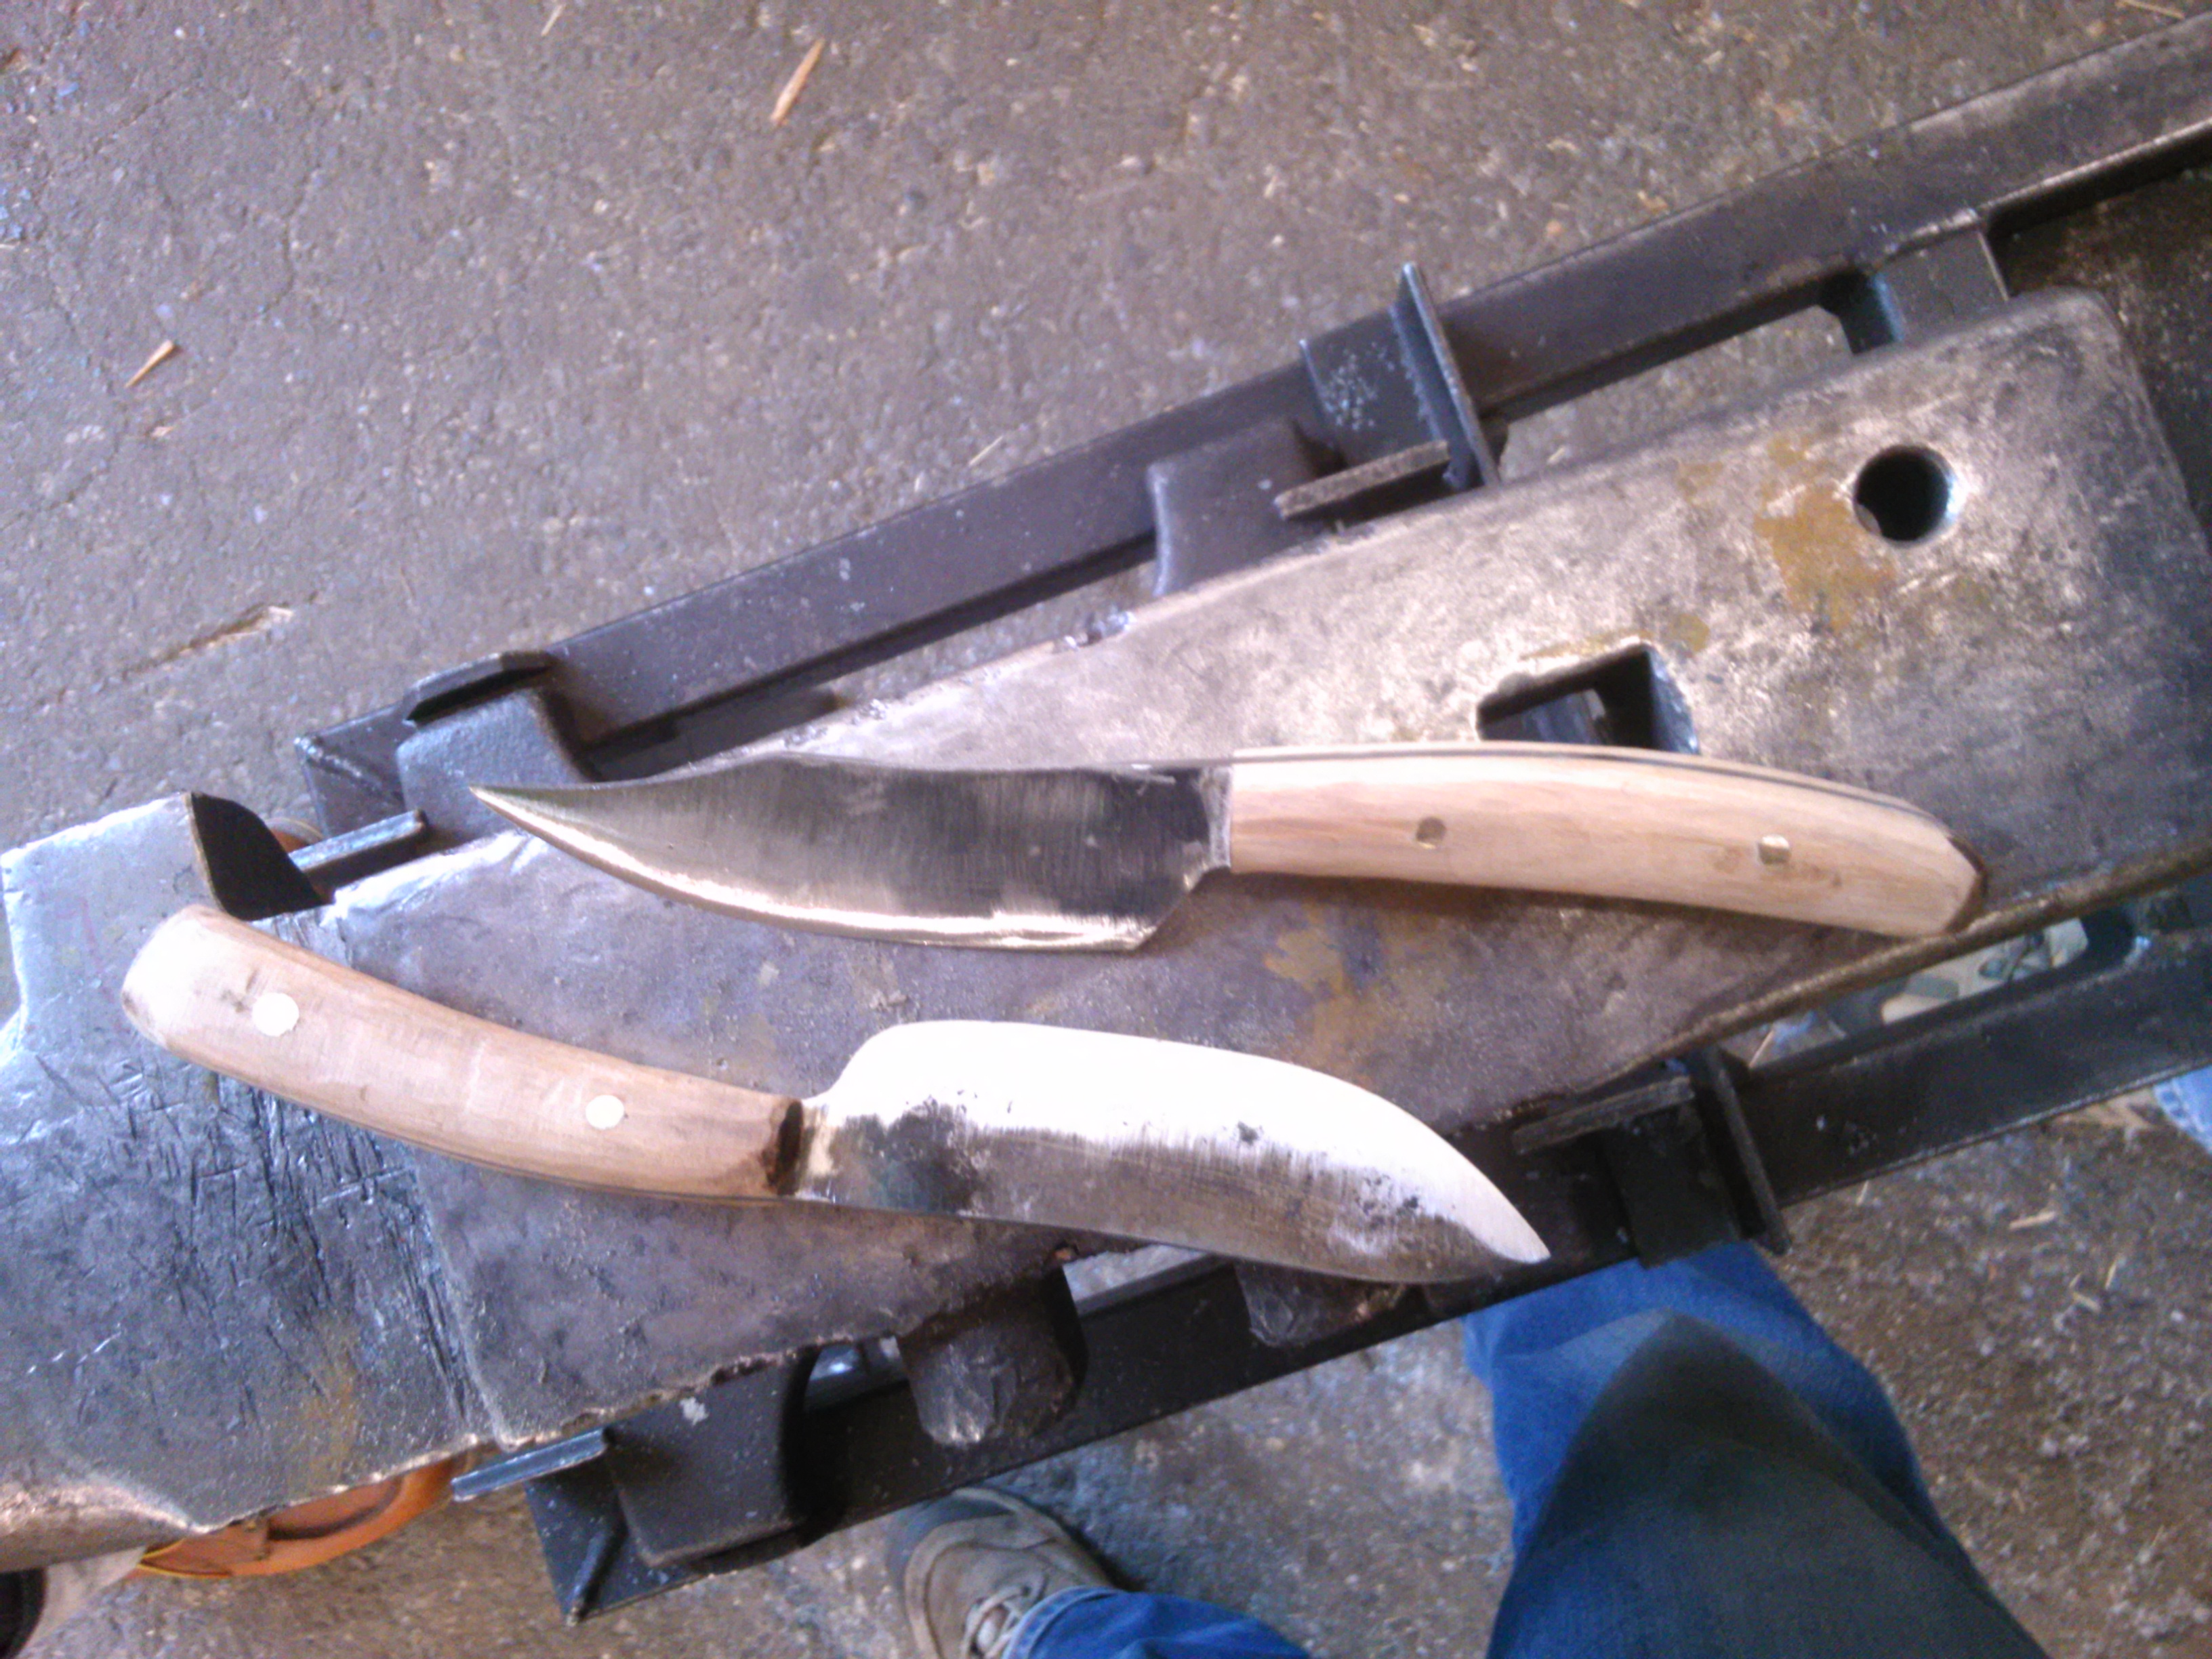
Thank you Charlotte and TJ. LOL Charles I wish I could of done that stuff for schooling. I forgot to mention the knives are forged. The house mouse started as 4.5" of 1"x3/16" 1080. And the bigger knives as 5.5" of same. I think I like an earlier incarnation of the house mouse better that used 1/8". I just couldn't remember what I used, heehee. So when I cut the stock for the students I opted to give a little extra just in case. Might make it a little easier for them next time. As it is meant to get them started and while they are annealing they forge the bigger knife, while that is annealing they grind the mouse, etc. Nice flow with no down time. While they are grinding the blade bevels I use the band saw and rough cut their handle slabs. Think I might use a jigsaw in future and let them cut their own slabs. They use the drill for pin placement and the small 1"x30" belt sanders. I do whatever needs the other equipment. Which is minimal other then stock cutting. Some will profile or bevel with files also. Which is cool, time permitting though, heehee.
-
Hoping this works. Here are a couple knives made by my students the last couple of days. They each went through a one day basics blacksmithing class then later went through the two day bladesmithing class. On the bladesmithing class they first made a "house mouse" (my name for the design since it looks like a cartoon mouse to me) herb chopper/ulu, they then made a larger belt knife. Each one is 1080, edge quenched in oil, triple tempered to straw on the edge. There is a little more finish work to be done on them, then sharpened. Handles are full tang with hickory slabs (we use hickory in the bow making classes a lot) and brass pins.

-
Show me your Bottle Openers!
Rashelle replied to Arbalist's topic in Blacksmithing, General Discussion
Making a drift like that now has me thinking of forging a drift in hex then cutting in between the corners with a chisel, refining with a file if needed. Great another thing on my list of things to do, heehee. I'm set to be busy for years and years. -
disappeared reply, I give up.
-
A texturing hammer has different textures on the face. Not the normal smooth face instead a structure that when hit against the steel leaves surface marks. I use a small double pein with slightly different sized peins for texturing leaves, often. The pein marks I use make it look like surface ridges, when hit upon the leaf surface.
-
Needed - Simple projects for tenons
Rashelle replied to beammeupscotty's topic in Blacksmithing, General Discussion
ROFL. I think I was and am still tired. Shelf thingies turns out are countertops. Shelf brackets are different. The hold the pots and pans thingies are like a type of trivet with no legs. Maybe I just think of trivets as for cooking with and am trying to rename the ones for after cooking. Heehee I'm too short to put hot pots and pans on the shelves, or is it the shelves are too high? Either way that'd be disastrous .......... for me and my feast. -
Needed - Simple projects for tenons
Rashelle replied to beammeupscotty's topic in Blacksmithing, General Discussion
Forgot trivets darn it, lol. Those thingies you put hot pots and pans on on wood tables and shelf thingies also. -
Leafs in 1/4"-3/8" for key chain starting stock. Not very large stem. Note 3/8" can make a rather large leaf. So depends on thickness you are going for. You can go relatively thick and fuller in the veins if needed. Remember to reduce weight for key chains though. Key chains can also be used for pendants. Fullered or, chisel cut veins, texturing hammer, wrinkled edges are all nice touches on leafs.
-
Needed - Simple projects for tenons
Rashelle replied to beammeupscotty's topic in Blacksmithing, General Discussion
simple plant hangers. I'm working up some in the next couple few weeks for the same purpose. Will do a couple different ones for the different skills/capabilities of the different students. As my classes can have a hugeeeeeeeee ability difference. Plant hangers, sign hangers, brackets for shelves, etc. Candle holders with tenon into a saucer/cup. -
Yup. The funny thing is, it really can be a decoration. Look at wrapped handle tomahawks and such. A leather wrap can very much make the piece really stand out. Just there is always the ....... "What's under the wrap" thought that pops into my head.