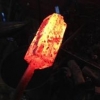
kayakersteve Posted January 15, 2014 Share Posted January 15, 2014 Well, I am getting better with each knife. This billet started as 11 layers of 1095, 1084 and 15n20. Folded to total of 66 layers and did my best to create ladder pattern. Here is where I am at - I etched to see pattern and am happy so far. Needs further finishing, then will re-etch and do scales Quote Link to comment Share on other sites More sharing options...
TheoRockNazz Posted January 15, 2014 Share Posted January 15, 2014 Very nice! What's the handle going to be? Quote Link to comment Share on other sites More sharing options...
kayakersteve Posted January 15, 2014 Author Share Posted January 15, 2014 Haven't decided on handle - I have some dark green micarta and aged oak laying around. Quote Link to comment Share on other sites More sharing options...
Rich Hale Posted January 15, 2014 Share Posted January 15, 2014 If you would like some comments on that pm me.. Quote Link to comment Share on other sites More sharing options...
kayakersteve Posted January 15, 2014 Author Share Posted January 15, 2014 Rich - Feel free to post any ideas here - I can take constructive and even deconstructive criticism well. Remember, this is simply a hobby to me - I have no intentions of trying to make a living out of selling knives or anything else I make. I post stuff because I have enjoyment out of what I have created knowing full well that the professional knifemakers would probably do things a lot differently. Thanks, Steve Quote Link to comment Share on other sites More sharing options...
jeremy k Posted January 15, 2014 Share Posted January 15, 2014 I think this area (circled in the picture) will be an issue - needs to have a radius, so it will not be a stress riser during heat treating. Quote Link to comment Share on other sites More sharing options...
kayakersteve Posted January 15, 2014 Author Share Posted January 15, 2014 Jeremy - the wip is already normalized, edge hardened and tempered. I think you are seeing the hardening line Quote Link to comment Share on other sites More sharing options...
jeremy k Posted January 15, 2014 Share Posted January 15, 2014 Steve - no - what I see is a square inside corner of the tang/blade area - that may be an issue as a stress riser and can cause cracking or breaking. Although maybe it has more of a radius than it appears. Quote Link to comment Share on other sites More sharing options...
kayakersteve Posted January 15, 2014 Author Share Posted January 15, 2014 Jeremy - wasn't sure what you meant. In general, are sharp / square edges prone to stress? Now that it is heat treated, is the stress issue still relevant? Quote Link to comment Share on other sites More sharing options...
Steve Sells Posted January 15, 2014 Share Posted January 15, 2014 yes it is Quote Link to comment Share on other sites More sharing options...
kayakersteve Posted January 15, 2014 Author Share Posted January 15, 2014 Ok - I might keep this one as is and experience this phenomenon first hand. Keep the critique coming as I learn from mistakes Quote Link to comment Share on other sites More sharing options...
jeremy k Posted January 15, 2014 Share Posted January 15, 2014 Steve - you can still save this blade - normalize - re-grind in area shown in picture then re-heat treat. I would put a minimum of an 1/8 inch radius in that area of the inside corner. - no sense in not finishing this blade as the rest looks good.Use google images for "damascus kitchen knives" to see the radius in that area of other knives of the style your making. Quote Link to comment Share on other sites More sharing options...
kayakersteve Posted January 15, 2014 Author Share Posted January 15, 2014 ok - Loud and clear - Will do. Thanks for tips and help - I'll keep posting as I go along. Quote Link to comment Share on other sites More sharing options...
Rich Hale Posted January 15, 2014 Share Posted January 15, 2014 Patternwelded steel looks different after etching when it is either hardened or not..I prefer the look of an etched heat treated blade as there is more contrast. So I never edge quench a blade. Your blade has a lot of sanding scratches on the blade....A way to help with that is to finish the surface so that in a bright light you can find NO scratches at all before etch. Maybe even up to 1200 grit..if you find scratches back down to coarser grits until they are gone then back to finer. For a low layer count blade I like to etch for a lot of topography...long etch times..You can see and feel the depth of texture. For this blade you could use more..I do not measure how much,,just keep in mind That after etch you want to sand only the high spots...not in between..Use a steel . copper or brass backer for the fine paper. The will stop you from sanding the low spots. If you make the cuts for ladder pattern closer together it will make it easier to stay out of the low spots. That sharp corner is aproblem..You can fix it with a diamond file and be done with it..covered in knife making lessons; The knife needs a ricasso...How to in lessons. JKs thought on a curved line where your forefinger will touch blade is spot on. You have a good start...hope this helps. Quote Link to comment Share on other sites More sharing options...
kayakersteve Posted January 16, 2014 Author Share Posted January 16, 2014 Rich - Thanks for your great suggestions. I only etched to see the pattern, knowing I had more sanding to do. I think I will do the file as you suggest. On to ricasso next - Thanks again! Quote Link to comment Share on other sites More sharing options...
Rich Hale Posted January 16, 2014 Share Posted January 16, 2014 I thought I saw the blade was beveled all the way to the handle end..that would not allow a ricasso. Quote Link to comment Share on other sites More sharing options...
Charles R. Stevens Posted January 16, 2014 Share Posted January 16, 2014 Not being a knife maker, but being a chef knife user, running the egde the full length if the blad is a good thing. If you stop short, then as time goes by, the edge is sharpend so that, unless grount off, the small bit of material that looks so nice, acts as a stop preventing the blade from cutting all the way to the cutting board. I believe that's the riccasso your referring to Rich? Quote Link to comment Share on other sites More sharing options...
Charles R. Stevens Posted January 16, 2014 Share Posted January 16, 2014 Sorry, they're dirty, awaiting after dinner clean up. Quote Link to comment Share on other sites More sharing options...
Rich Hale Posted January 16, 2014 Share Posted January 16, 2014 No Quote Link to comment Share on other sites More sharing options...
kayakersteve Posted January 16, 2014 Author Share Posted January 16, 2014 Hey rich and all, Thanks for the many tips....the main thing I have learned is that i HAVE A LOT TO LEARN! I have seen many references to the stickies in knifemaking and ignored them as others have. Well, I have started to take more time to go through these and can only say WOW! What a wealth of information. Thank you for again directing me and any others that may read this thread. I am sure I will make more mistakes, but will start using these great references more as well. Again, thanks Rich - I had only etched this balde to see the pattern as I am relatively new to making my own pattern welds - I know it needs much more smoothing. And the reference about going on to the ricasso was pertaining to my next knife. I have more material from this billet to do another knife and was going to start making another new billet this weekend as well. I think I get more satisfaction out of making pattern welds than actually making the knives! Thnaks for great tip about the ladder pattern as well - will try that soon. Quote Link to comment Share on other sites More sharing options...
Charles R. Stevens Posted January 16, 2014 Share Posted January 16, 2014 Safe to assume the "no" was directed at me? The blades I showed didnt have a "riccasso" as I feel a chef' knife should not. Quote Link to comment Share on other sites More sharing options...
Rich Hale Posted January 16, 2014 Share Posted January 16, 2014 Wot you describe is not a ricasso Quote Link to comment Share on other sites More sharing options...
kayakersteve Posted January 27, 2014 Author Share Posted January 27, 2014 Well, here is the finished project - I learned a ton on this project which will help with my next. Quote Link to comment Share on other sites More sharing options...
njanvilman Posted January 27, 2014 Share Posted January 27, 2014 Steve, Nice pattern. I like damascus when you can really see the layers. Great work. Quote Link to comment Share on other sites More sharing options...
Dodge Posted January 27, 2014 Share Posted January 27, 2014 very nice. What steels did you use for the blade? Quote Link to comment Share on other sites More sharing options...
Recommended Posts
Join the conversation
You can post now and register later. If you have an account, sign in now to post with your account.