
John B
-
Posts
3,598 -
Joined
-
Last visited
Content Type
Profiles
Forums
Articles
Gallery
Downloads
Events
Everything posted by John B
-

Teaching a total beginner?
John B replied to Everything Mac's topic in Blacksmithing, General Discussion
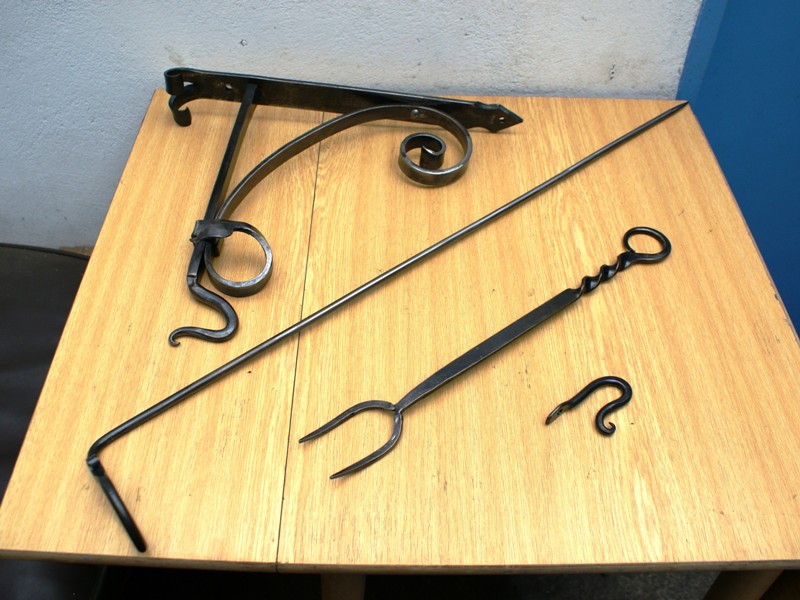
Hi Andy, If its only the one day, what you have planned seems ok, but I would consider rearranging the items. Personally I would siuggest you start with the fire rake, that can cover all the skills in your project 1depending on your design, then project 2 introduces slitting and drifting and whatever else you want to include, then you should have a good idea of what can be achieved in the time remaining and do a quice nail or hook. This is what I do on a one day course, skills are featured, and the items are only the result of these graded skills. Also no need to use tongs on the wine/beer glass holder (could be a bird feeder hanger, but these introduce bending and a little bit of thought as to designing, wine glasses go in horizontally, beer glasses slip in from the top) Then the BBQ fork brings in more skills, Finally the hook is treated as an exercise in production techniques and using tongs, punching holes and using a hardie to cut off. My notes for making the fork This exercise is suitable for an absolute beginner and can be made in half a day comfortably Skills learnt; Use of forge, hammer, hot cut chisel, wire brush, files, necking in using guillotine tool, fullering spring tool, or blacksmiths helper tooling. Marking out using a cold chisel, centre punch, oddlegs, tape or rule. Drawing down; square, round and tapers, Forming an eye or ring, Bending sections to shape, Forming a twist, putting it right when it goes wrong Finishing using vegetable oil if to be used for food use, Not an oil containing nuts, Or for a decorative finish a wax compound, clear lacquer or other finish Material used; 16 x 5 x 400mm Mark out For the handle, twist will be done by eye to the discretion of the maker, ideally to suit a hand's width (100mm or 4”) and the fork end can be shaped to students liking Centre punch to indicate where to work sections from, 65mm (2.5”) from each end to allow for drawing out, initially using a light blow without pre tapping the punch with the hammer prior to the marking blow as it will probably be displaced if you do, then when happy position is right deepen the mark Use oddleg calipers or dividers to mark on a centreline for the fork end Use a cold chisel to mark in ready for splitting the bar hot for tines, This line is used to locate the hot cut chisel when at working heat. Again initially using a light blow without pre tapping the chisel with the hammer prior to the marking blow as it will probably be displaced if you do, check each mark as you progress it down the line, then deepen when satisfied it is correct position, check each time for position prior to using a heavier deepening blow, otherwise it may look like a map of a railway sidings yard and you won't know which line to choose to hot cut. They can then call it a day or go on to make other items to complete their initiation into the basic skills, this being what tehy make on a three day session. Have fun and enjoy.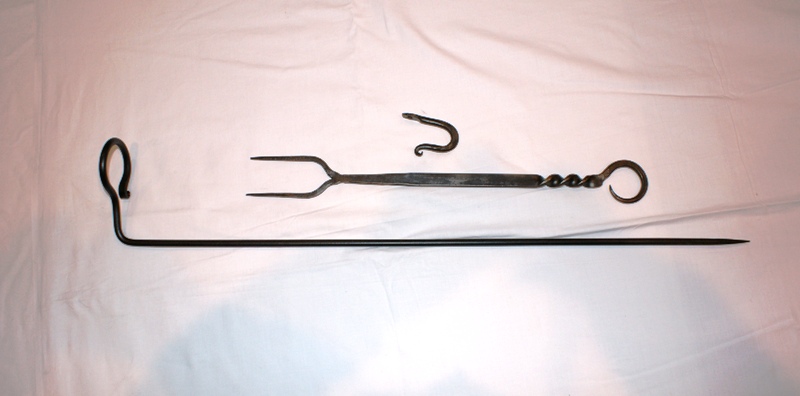

-
Welcome to the site BJ, If you are anywhere near to Exeter anytime, feel free to call in on one of the days we are forging at Westpoint, see the Blacksmiths groups section for further information, Good luck, have fun and enjoy your new journey into the world of hot metal.
-
getting started supplies
John B replied to Zeba's topic in Blacksmiths and Metalworkers Association of the South West UK
Mistakes Glenn, been there, done that, got the T shirt, and no doubt will continue to carry on making them, while you are breathing, you never stop learning. -
getting started supplies
John B replied to Zeba's topic in Blacksmiths and Metalworkers Association of the South West UK
Are you quoting my wife ??? Those who don't make mistakes, never do anything. It is also one of the reasons why this site is so good, if their is some doubt regarding information, someone will usually step in to query it and get an answer. Not necessarily a definitive answer, but an acceptable one. -
getting started supplies
John B replied to Zeba's topic in Blacksmiths and Metalworkers Association of the South West UK
My Mistake, when we bought coal in from the South Wales and South Yorkshire coalfields we used to break down the cobbles into smaller pieces, even to the size of the sweeping up slack which was down to a fine dust like consistency, and we also used water on it to control the fire (Hence slack tub), Nowadays it comes prepacked and sorted, It is the smaller sizes that are prefered by the majority. Some wet it, others don't, depends on what works best for you. Check with smoke control regulations as it is not classed as a smokeless fuel, but semi smokeless. Apologies again for the mistake, -
getting started supplies
John B replied to Zeba's topic in Blacksmiths and Metalworkers Association of the South West UK
General opinion from a number of 'smiths who have switched to it, How you manage the coal fire also determines favoured size. Seems to work better/easier than great lumps by bringing workpiece nearer to the heat from the burning fuel -
getting started supplies
John B replied to Zeba's topic in Blacksmiths and Metalworkers Association of the South West UK
Hi and welcome to the site, if you are in South Wales you should be aware that at Methyr Tydfil there is the Ffos y fran land reclamation scheme which is producing open cast coal suitable for forging, this can be sourced from local coal merchants under the name Gloda, it comes in a choice of three sizes, as smiths we tend to use the cobbles. A local supplier can be found here http://www.supaheatfuels.co.uk/steam-raising-coal-13-c.asp As for metal, there are many steel suppliers, try yellow pages steel stockholders, or you could look on some of the small industrial estates and see if there are any fabrication or metalworking companies, If you ask and explain what you need it for they may be able to help, also scrap yards, (or recycling facilities) have metal, including car salvage yards for metal to use for tooling. There are many blacksmiths in your area, so visit and ask them if they can help. Have fun with your new past time, if you are ever passing and we are open feel free to drop in at Westpoint and have a chat and a cuppa. See www.blacksmiths-training.org.uk for dates when we will be there. -
Pleasure to meet you Ben, and thanks for your contribution to the day. I think you made a good start and look forward to next time when we get down to the more serious (but fun) stuff.
-
Hi Ben, Welcome to the site, You may benefit by a visit to one of our members days we hold at Westpoint near to Junction 30 services at Exeter on the M%, we have one this Saturday if you fancy coming along and see what we have to offer and how we can help you. If you scroll down to the Groups Forum and check out the BMASW at Westpoint section, you can see some of the things we get up to Look forward to seeing your progress and enjoy doing it.
-
One method I find effective is to soak an old towel in sunflower oil and drape that all over the face and bick of the anvil. To keep it in place I have a steel plateI I use as a cut off sacrificial plate that has a peg in that fits into the pritchel hole and covers the face of the anvil trapping the oil soaked towelling where it is needed. I do keep it under a shelter outside away from direct rainfall.
-
blacksmithing do's and don't's
John B replied to Mark Ling's topic in Blacksmithing, General Discussion
Why ???? There are times when it is advantageous to have the horn facing left, The anvil is just a tool, use it to its best advantage. One particular "Do" is always be prepared to question what is occuring and why, there is no proper way, just a safe way, some ways work easier than others. One particular "Don't" is don't assume that because someone seems to be knowledgable that they are, and can back up their talk with actions. -
a different style leaf key chain, atleast for me.
John B replied to Mark Ling's topic in Member Projects
Would that be a branch of the "wroughticus metallicus" variety ? -
Hi Frosty, To get some idea for others to work with re clearance/working angle needed, what diameter is your pritchel hole, and how thick is the anvil's heel
-
Forbidden Need a confidence boost
John B replied to ThomasPowers's topic in Blacksmithing, General Discussion
Books, here are two free downloads that will serve you well as a guide to the craft, http://www.hlcollege.ac.uk/Downloads/cp_wrought.html and http://www.hlcollege.ac.uk/Downloads/cp_blacksmith.html Print off what you are going to do, and it doesn't matter if they catch fire or get disfigured, you can always print off another replacement page. Remember there is no right or proper way to make something, just what works for you and do it safely. Have fun and enjoy. -
Show me your Bottle Openers!
John B replied to Arbalist's topic in Blacksmithing, General Discussion
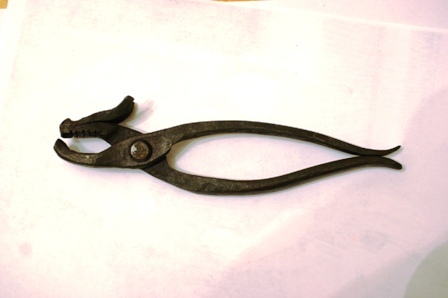
These work well for twist tops, they were originally made for a live forging competition, 45 minutes to make something to crack nuts with, and were made from an old car spring, But my wife used them when she damaged her wrist and couldn't get to grips with the twist tops on bottles.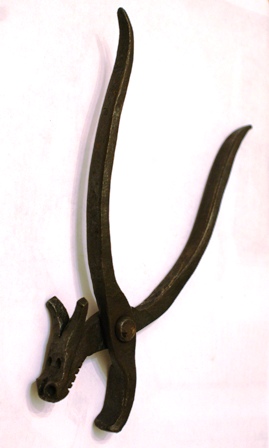
-
Appreciate your problems sourcing known steels and their cost, In my experience although of unknown metallurgical specification, Torsion bars by virtue of what purpose they are employed to serve have always made good serviceable hammers and other top tools. The only way to find out is to make some tooling and try that tooling out, different samples of a similar size with different heat treating cycles will give you some idea of what the material can be used for. Identify weach piece and make a note of what you did to each one for future reference. It is all good experience, have fun and enjoy
-
You are welcome Strine, The ends of the spine can be drawn out for your end tines. Cutting the blank, if you mark it out and drill through with 5/8" or 3/4" diameter drill where the slots are, and then use a saw or angle grinder to cut down from the outside edge of the bar to the hole's centreline, you can then draw the tines down, this also has the advantage of smooth transitions on the corners, equal spacings that can be accessed to finish forge, and maximum metal available to draw down for the tine, and all the tines should be similar as each had same volume of material if cut this way, gas axe can produce differing profiles unles you are very good with one. Personally I would go with this drill and cut method if you are going the forging route. If it's only to be used on mulch, then welding on bits should be OK, Whichever way you choose, enjoy and let's see the end product, and its test runs.
-
That is normal factory practice, and what gives the reduced sections along the spine as you see in the , The video (like most you see on You Tube) is somewhat deceptive and the next proceedure shown on the video is not on the same type of fork as the one as being drawn out under the rollers, Doing them by hand I would start from the centre ones working outwards and twist the "Fingers" back towards me and out of the way of the hammer/anvil, then draw the isolated one down, Repeating at each side, It is a long an methodical process, and you will need some tooling to give the forged spacings between the tines. Try a smaller sampler first,say a manure fork, and see how you go, video yourself and when you playback you can spot where you can improve.
-
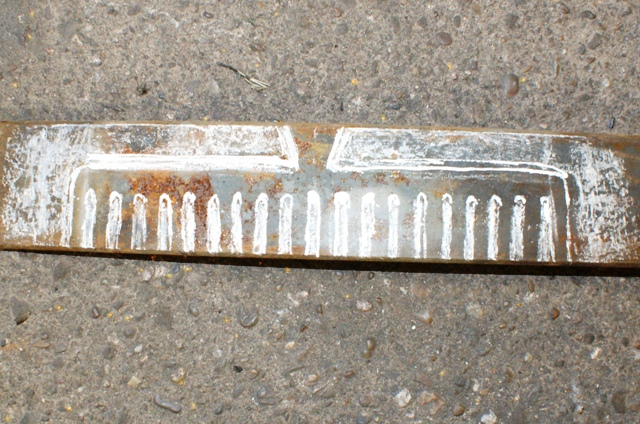
Something along these lines, this would have 20 tines, for a one off project I would tackle it like this one that I just marked out on an old leaf spring, adjust your sizes to suit volume of metal in drawn out tines Hard going these especially without a powerhammer, gas forge is better than solid fuel, Try a smaller sample first Good luck with it.
-
Hi Strine, welcome home, Used to make them years ago in a similar manner to that shown in the video, which does not help if you don't have the rolls etc, Having said that I have also made multi tine forks without that tooling, and without a powerhammer, just a couple of strikers and basic tools, The principle is the same as in the video, at around 2.47 it shows a twisted blank for the four tined fork, and prior to that, forming individual tines. which is relevant, We started with a leaf spring, and gas cut a shape out similar to a dumpy short wide toothed comb with the required number of teeth (tines) and a post in the centre on the opposite side for the tang/socket. These were then individually drawn out, starting from the centre and alternating the working sides similarly as in the video, (In your picture, you can see the reduction along the spine of the tines at each section as you work out towards each end.) Access and spacing are the key points, and some tooling like a set hammer for between tines may help. Otherwise it is a straightforward if long process. A Powerhammer would be advantageous to say the least, Have fun and looking forward to seeing pics of the completed item. I posted this in the Groups section BMASW Westpoint Forge, but you may have missed it. circa 1926 advert. I served some time here as a part of my apprenticeship, but not quite as long ago when this was published, same range of tools plus one or two more,

-
Is this the result of what is now termed "dehydration"? When I worked in the foundry and forge in my apprentice days it was never mentioned, there was a technical name for it which served as a warning and one you took notice of, and your fellow workers would also be alert to it and warn you, Something along the lines of "You thirsty then?"
-
July Members day
John B replied to John B's topic in Blacksmiths and Metalworkers Association of the South West UK
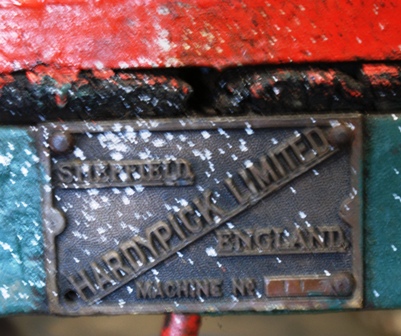
Came across this old advert for Hardypick on Grace's Guide, circa 1926, no sign of a powerhammer, but this would have been used to point the picks for their pneumatic Hammer Drills, as an apprentice they wouldn't have let me perform on the powerhammer anyway, (under one freeing the workpiece stuck in the top tool on a drop stamp was OK, but near the operating switch was a definite NO NO ! ) I can remember seeing power hammers there in use, but not this type specifically, But then I wasn't taking that much notice then, too busy with other apprentice duties. The ID plate on the machine is the Plant number for audit purposes.
-
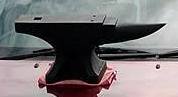
Thought the pointy bit may be a problem with "Dangerous projections" on the bonnet (Hood), so mounted it sideways, and obscured the view, so moved it back a bit, should be OK here! No doubt someone will advise me if its OK or not there.


-
Way to go Frank, Most of my customers seemed to have slimmer fingers than I have for some reason, and the ladies like a smooth edge. Keep the clients happy, even do a sample twist in the opposite direction to one shown for the lefties.
-
Teaching Class; With Disruptive Student
John B replied to SReynolds's topic in The Business Side of Blacksmithing
A British creche defined as " a nursery where babies and young children are cared for during the working day." differs from the US definition, " a representation of the nativity scene. " Thats fine Dad approved, and it didn't disturb the class Things are way different at each side of the pond, you asked for an opinion, That was mine. Life's too short to waste time, especially mine. it's the only time I'll ever get. So long as you are happy with your situation, great. Have fun and enjoy.