
John B
-
Posts
3,598 -
Joined
-
Last visited
Content Type
Profiles
Forums
Articles
Gallery
Downloads
Events
Everything posted by John B
-
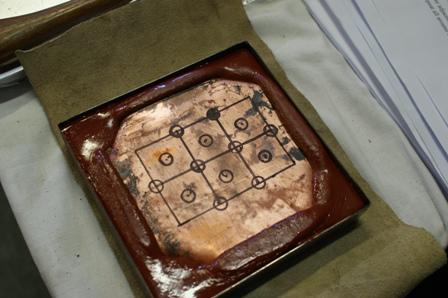
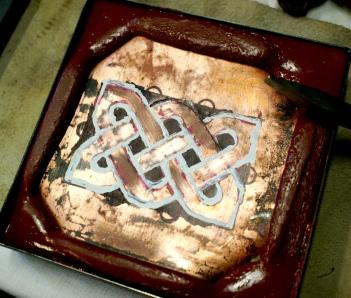
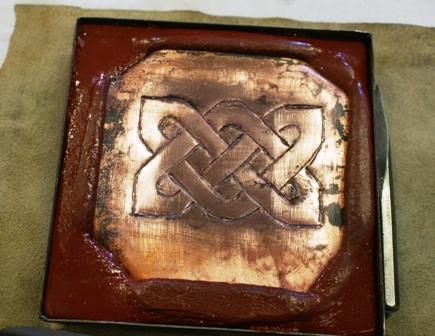
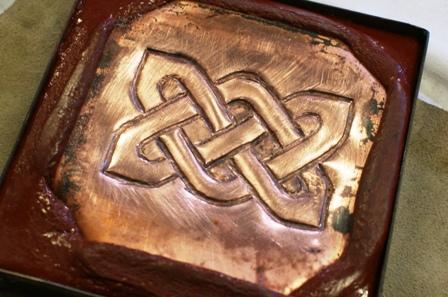
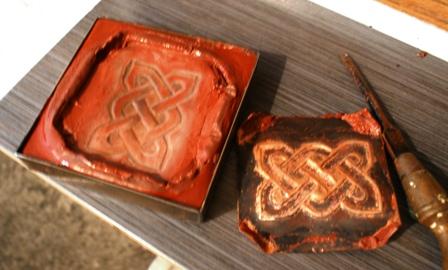
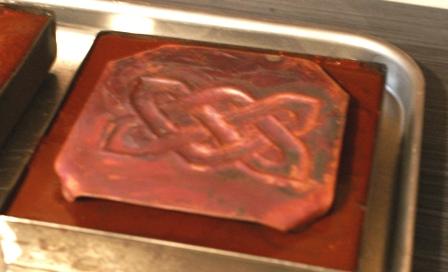
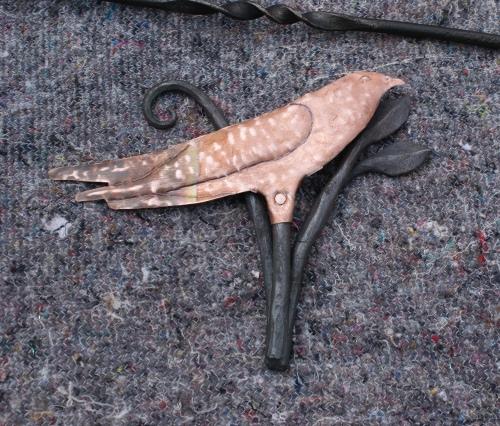
Hi Frosty, I would still call it repoussee, although on a small scale, the material was worked from both sides to give the definition and depth I wanted. i personally prefer working on lead backing, but this is not practical for current class time and health and safety restraints. I normally make up the pitch blocks, pitch, tallow, fine grain sand but this time I managed to purchase some jewellers pitch and this was a sample run to see how it performed. I took some work in progress pictures although not of a very high quality, just to see where it was going wrong, and as a reminder as to proceedure. In retrospect, choice of subject was not an ideal one, but worked out reasonably well. Just got to decide what to do with it now. Tools used were small punches and chasing tools. Material was annealed, pattern marked on the sheet and embedded onto the pitch and the outline and knot direction marked on. Clarified the route to take, and then chased in the outline, and defined it. I then refined this defining which started to give some depths and heights, I then removed it, cleaned and repositioned it so as to raise it from the underside. I then continued to work it, repositioning it a couple of times until I was reasonably satisfied with the result. Hope this helped sort out some of the semantics, there are a lot of grey areas, which does not help in black and white definitions.

-
Bit more to do yet when I get time Not engraved but repoussed

-
Agree entirely Steve, One of the problems using steel of an unknown specification, but if he is using hiigh enough carbon steel, then no need for case hardening, surely it would be a straight forward Harden and Temper to required state for tool's usage.
-
Case hardening is as you rightly say a hard coating, it does not lend itself to tempering as Hardening and Tempering back affects all of the item not just the surface.
-
Hi Thomas, Iam not old enough to remember bumping in to Theo for a discussion, but the iron then was fundamentally different to the metals today. One of the main problems these days is that some want immediate results without the hassle of working through things. That is one of the objectives of this site, we pass on our experiences so that others don't have to start from the very beginning each time. Unfortunately it is still expected to give instant results, and that is not always possible, they have to put some effort in. If you try describing "Cherry Red heat" to a colour blind person, (or anyone else ) then that is not particularly helpful. However if you show and demonstrate the heat colour to them, they can better assimilate what you are trying to convey, and thus achieve the result required. There are no APPS available for blacksmithing that I know of yet, so it's listen look and hands on. Here in the UK that is one of the reasons for the National Blacksmiths Competitions held at 10 major shows, it gives interested parties the opportunity to see a wide range of forged items, Traditional and modern, sculptural and artistic, and the chance to see a range of 'smiths working live making named items in a specific time range. What some of these competitors achieve is phenomenal and definitely educational for picking up tips on tooling and techniques. Have fun, get it HOT and hit it.
-
You may not have had much luck, but the salt and wholemeal flour works, and was the method used before the commercial powders were available or even thought of, and a lot less costly. It is a method I regularly used, as Kasenit over a period of time, tended to rot out the containers it came in, and no better results were achieved. Please dont Dumbify it just because you cannot get it right, it's not a matter of luck, it's patience and application. Pack hardening requires carbon rich materials to be in the container in close proximity with the item to be treated, and a long soak is required for results.
-
Yes it is that simple, the "Red Heat" wants to be a top end of the red spectrum, put your powder on, reheat and quench in clean water. Before case hardening powders were available, one of the methods used was: Take a spoonful of wholemeal flour, add two spoonfuls of salt, add a little water and make into a smooth paste, Heat the end of the item to be hardened until the paste will stick to it, When you have the item coated where you want it, heat the area to a bright red heat, and plunge the item into cold, clean, soft water and agitate while cooling. The coated area will be appreciably harder. Case hardening is to add wear resistance, and is not suitable for edge tools, ideal for increasing longevity of tooling made from lower carbon steels
-
Local garages and places like Kwik Fit, Go and ask, and explain why and what you need them for, and if you have something you have made, then take that along to show them, most have springs and other useful stuff in their scrap/recycling bins, Alternatively go around local industrial parks and locate small engineering or specialist vehicle refurbishiing/repair centres and go and ask. Car boot sales are a good source of cheap tools, hammers old files etc Country shows usually have stalls with tools for sale and you can get a bundle of various chisels, or crowbars which are ideal toolmaking materials, and often cheaper than byuying a piece of new tool steel from a distributor. Agricultural machinery repair centres are a good source of heavier section items, power take off shafts, transmission bits etc.
-
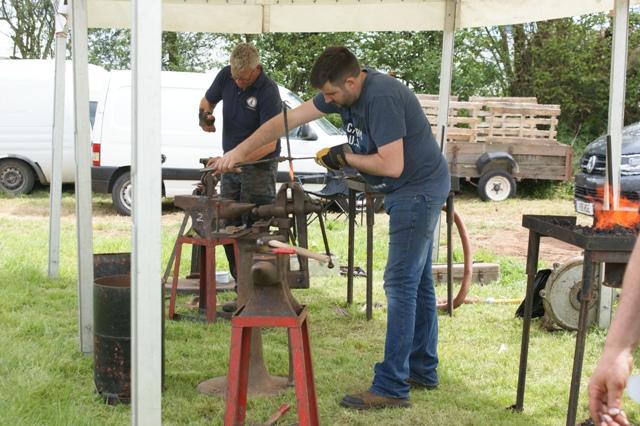
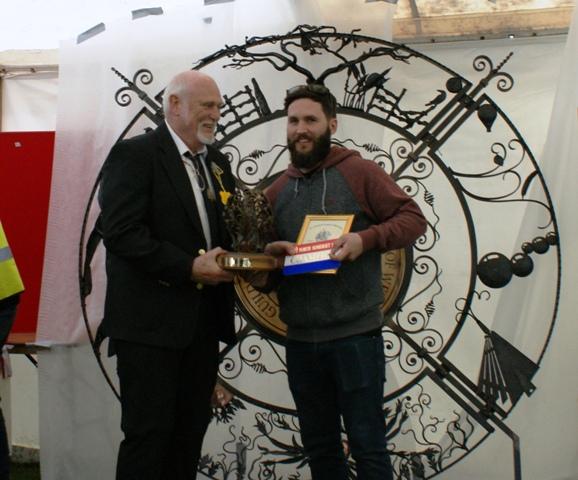
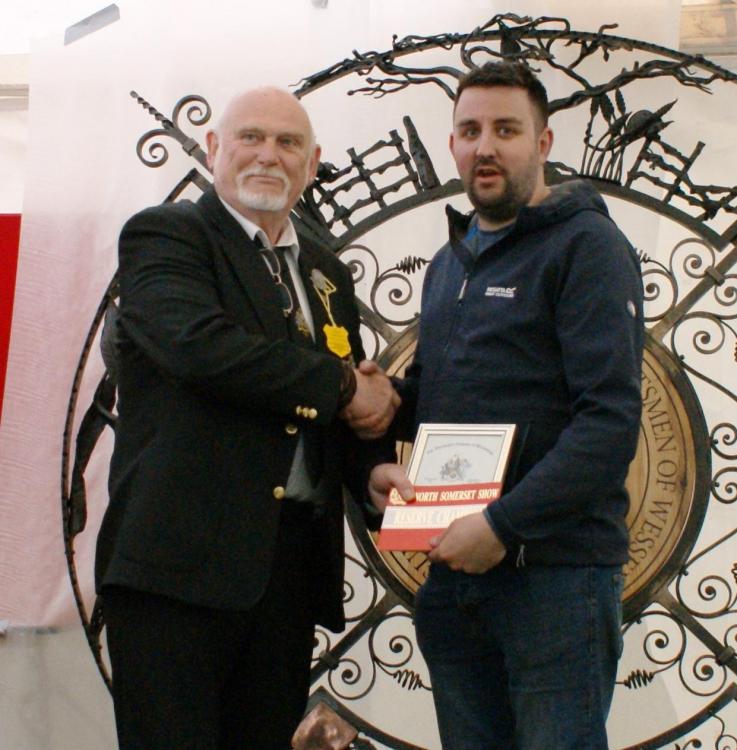
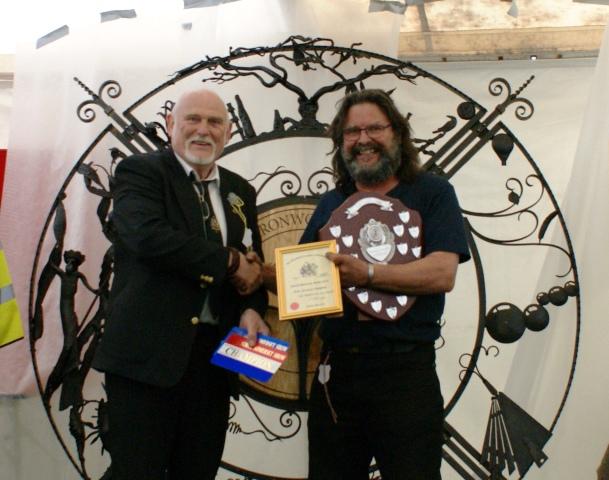
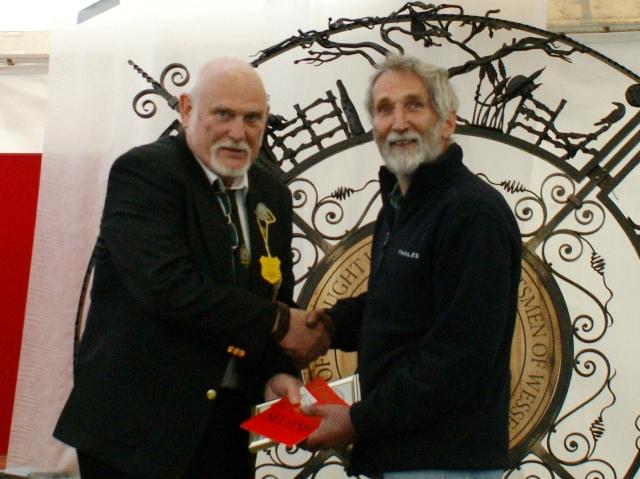
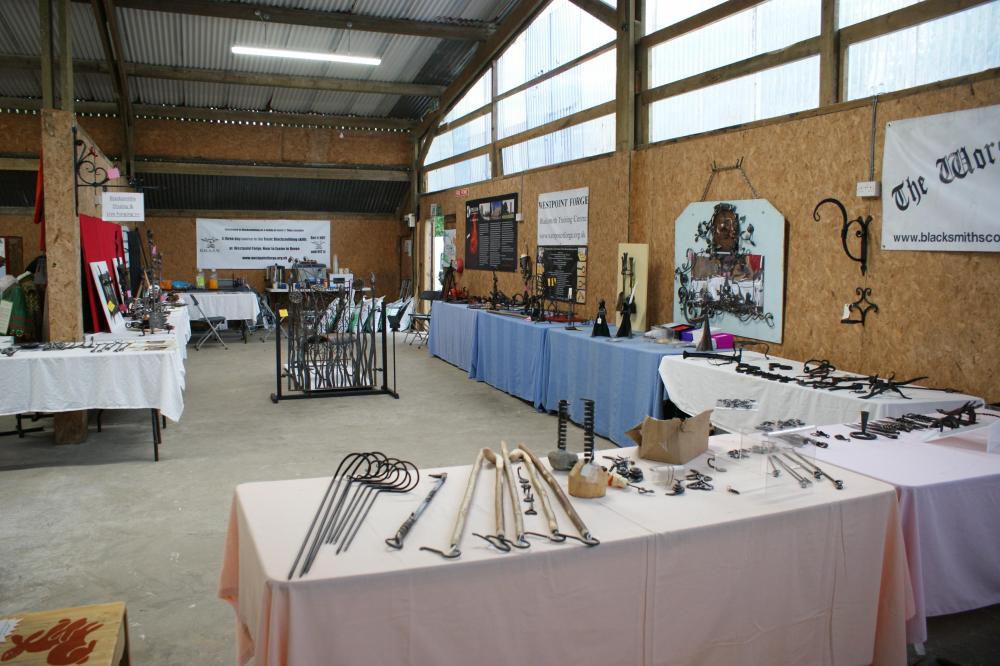
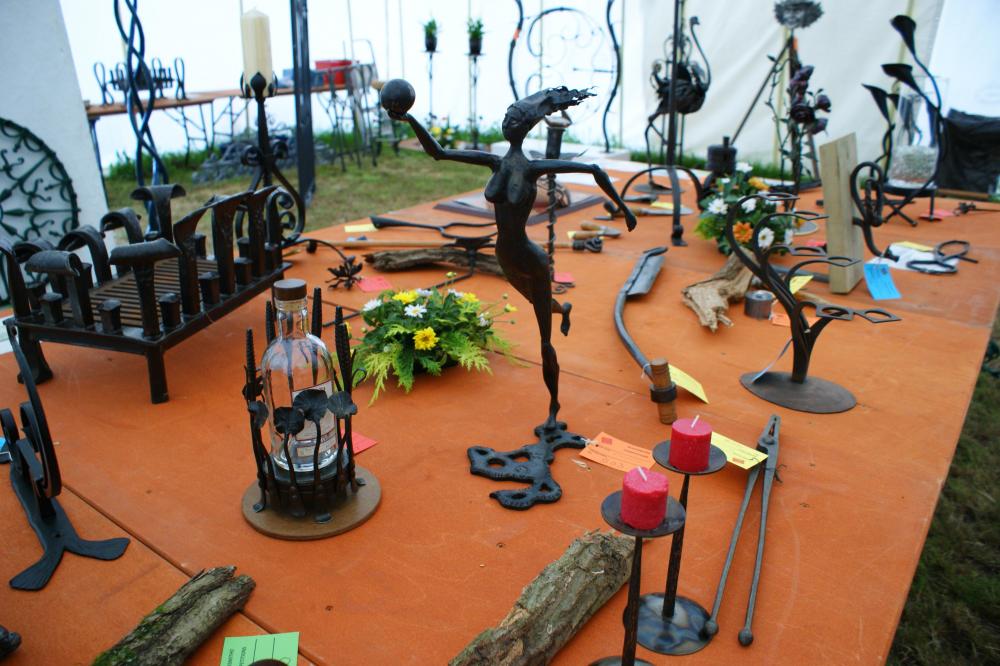
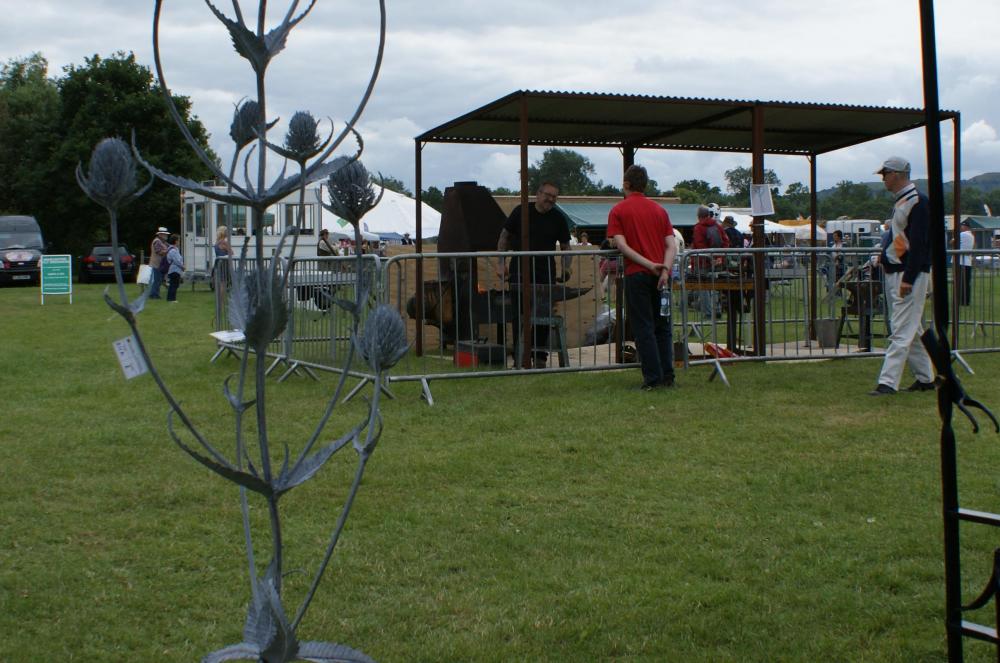
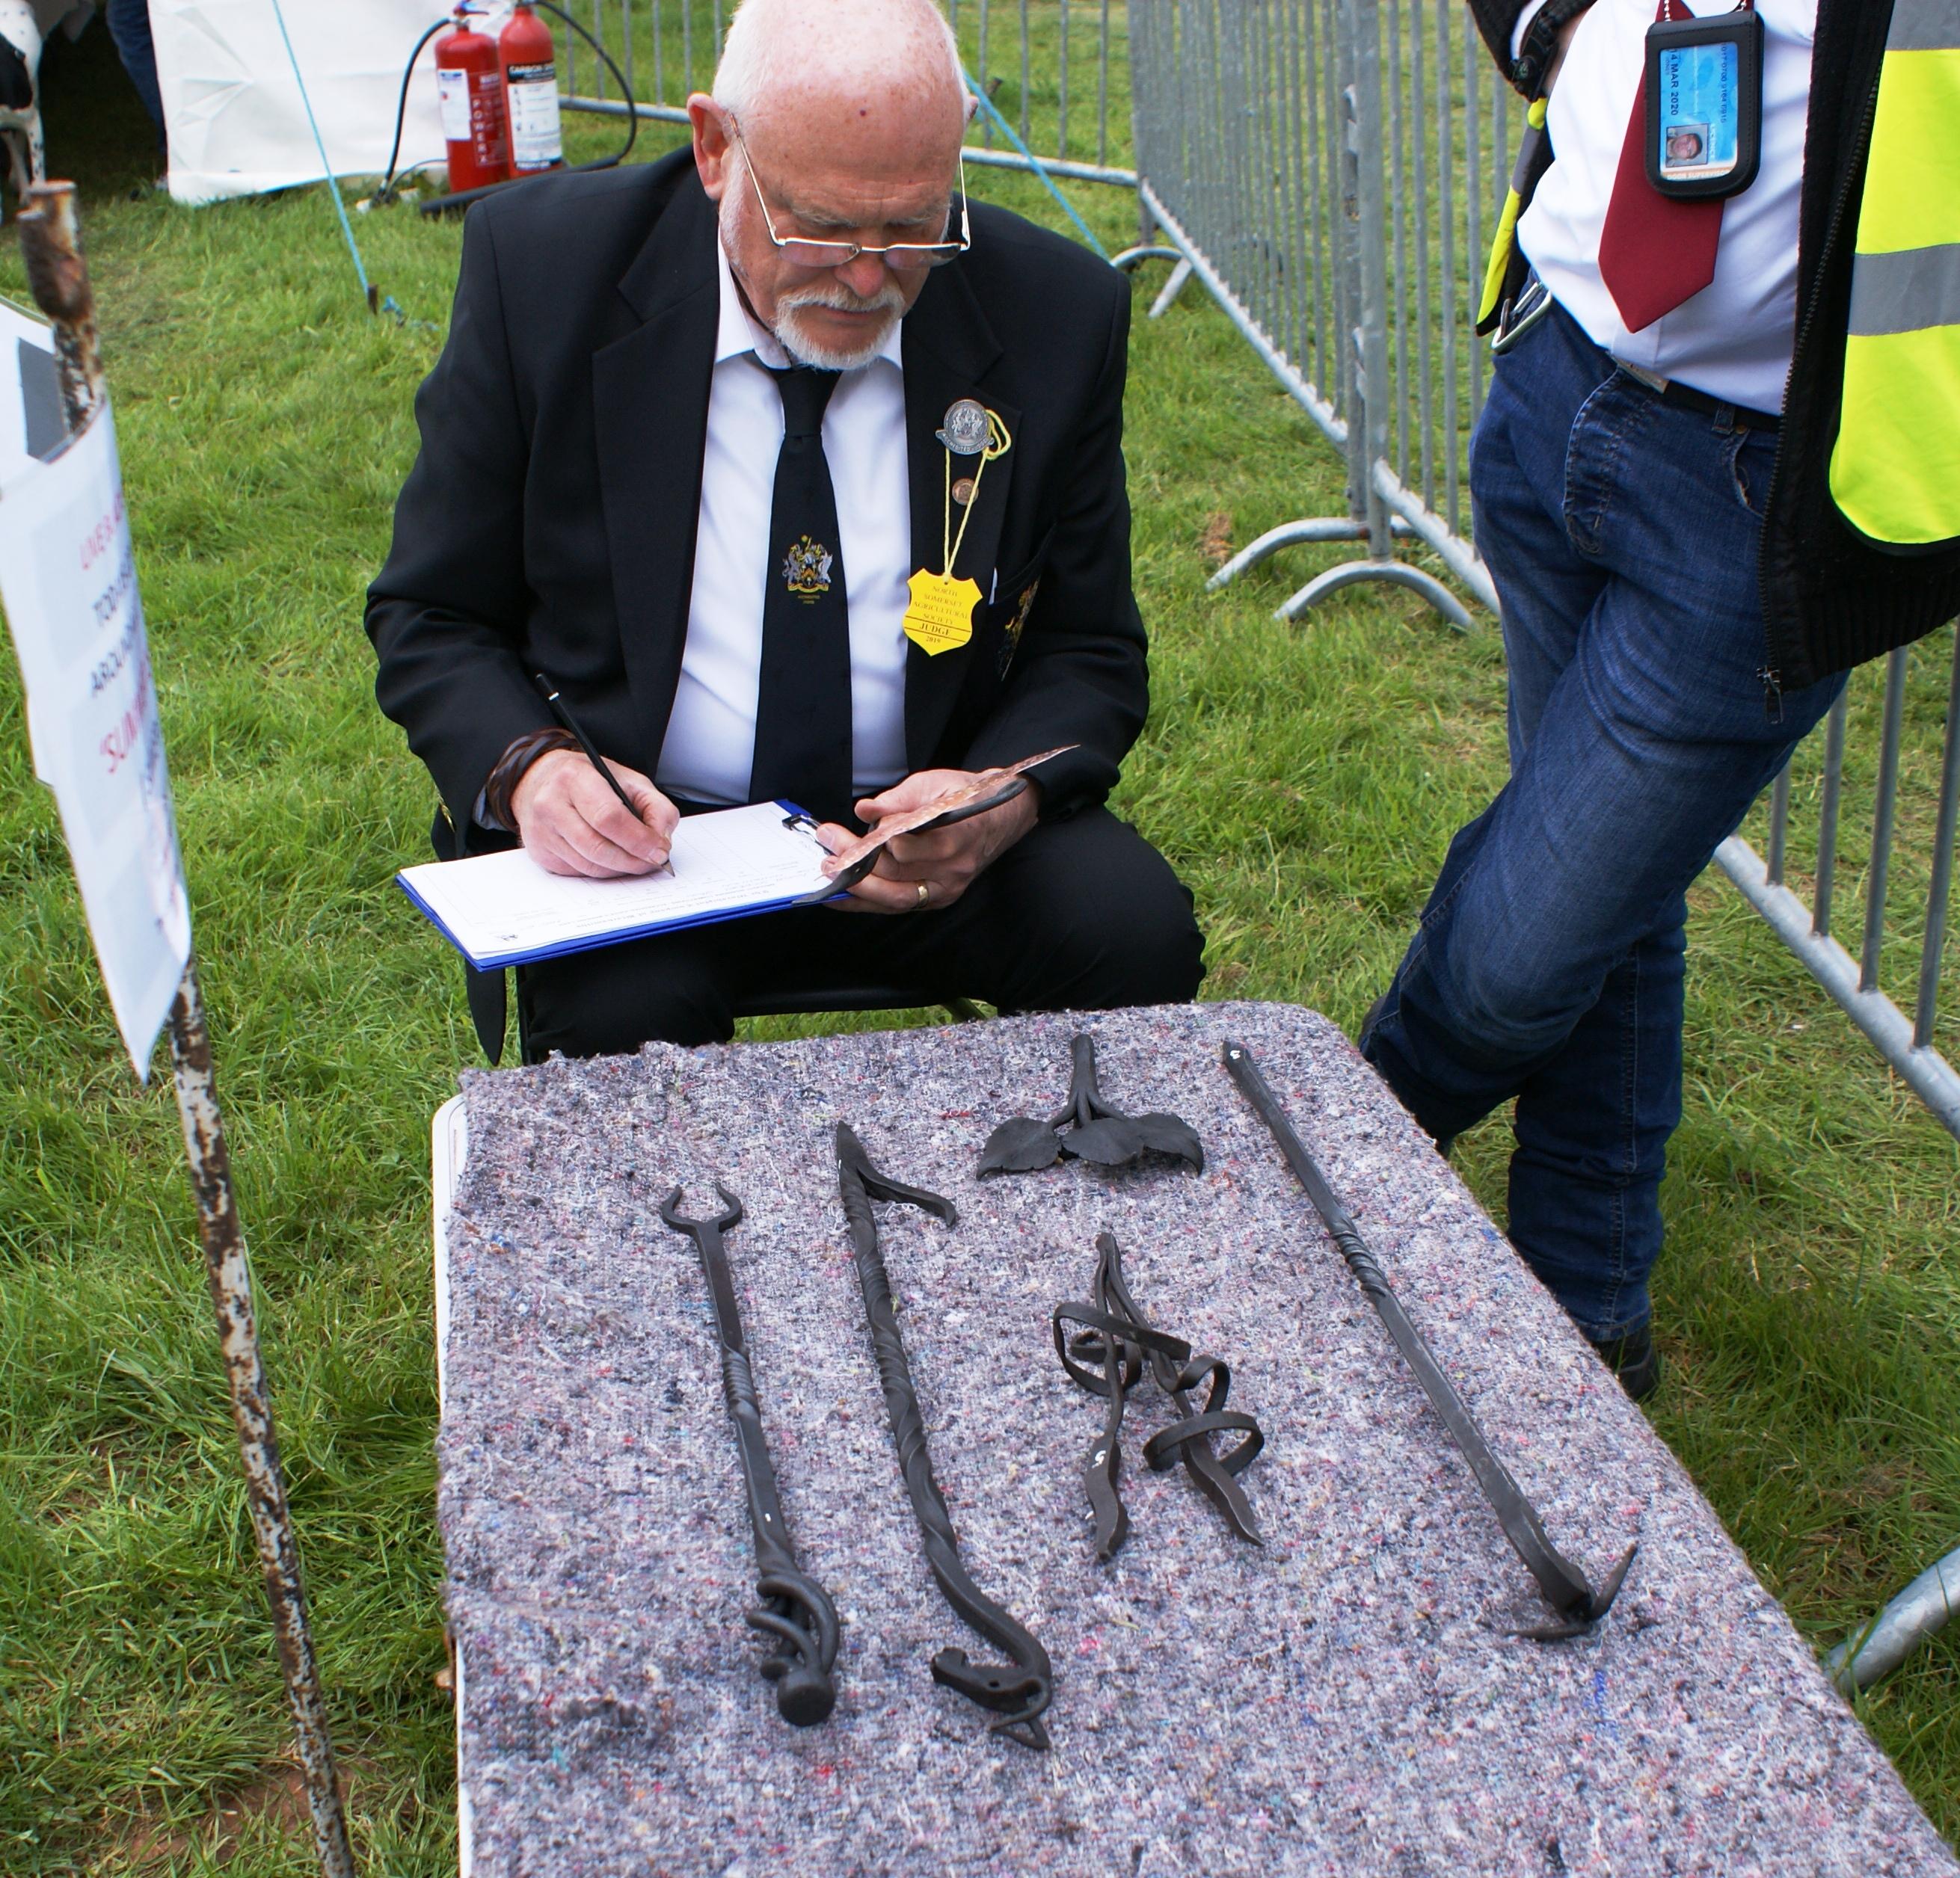
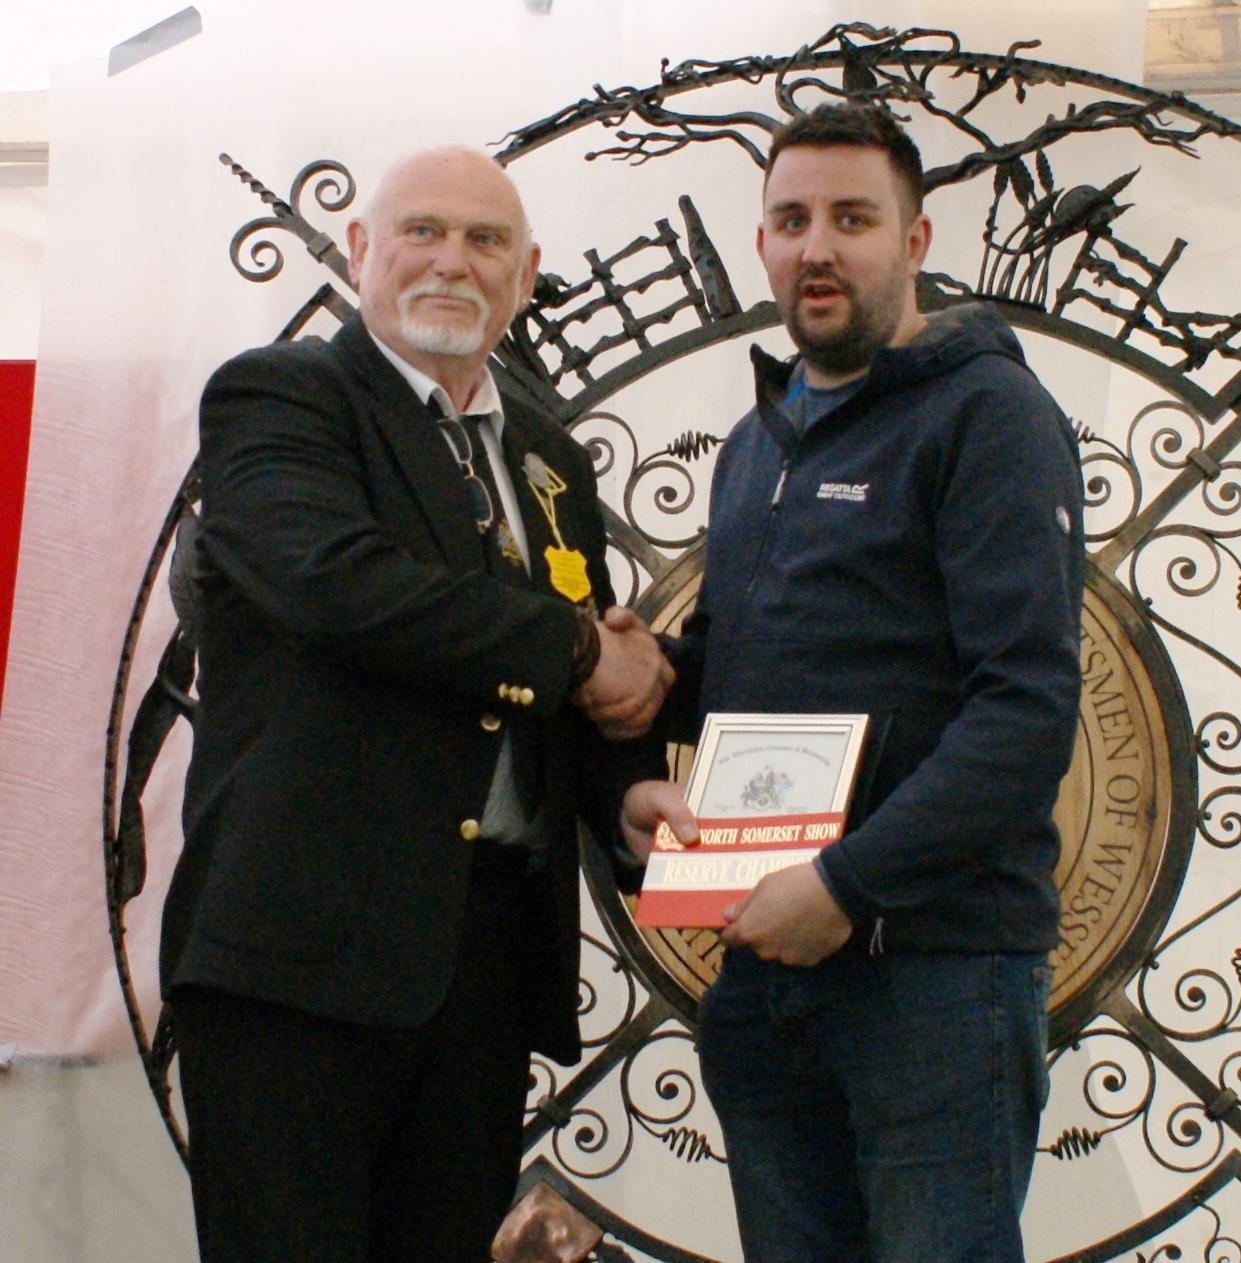
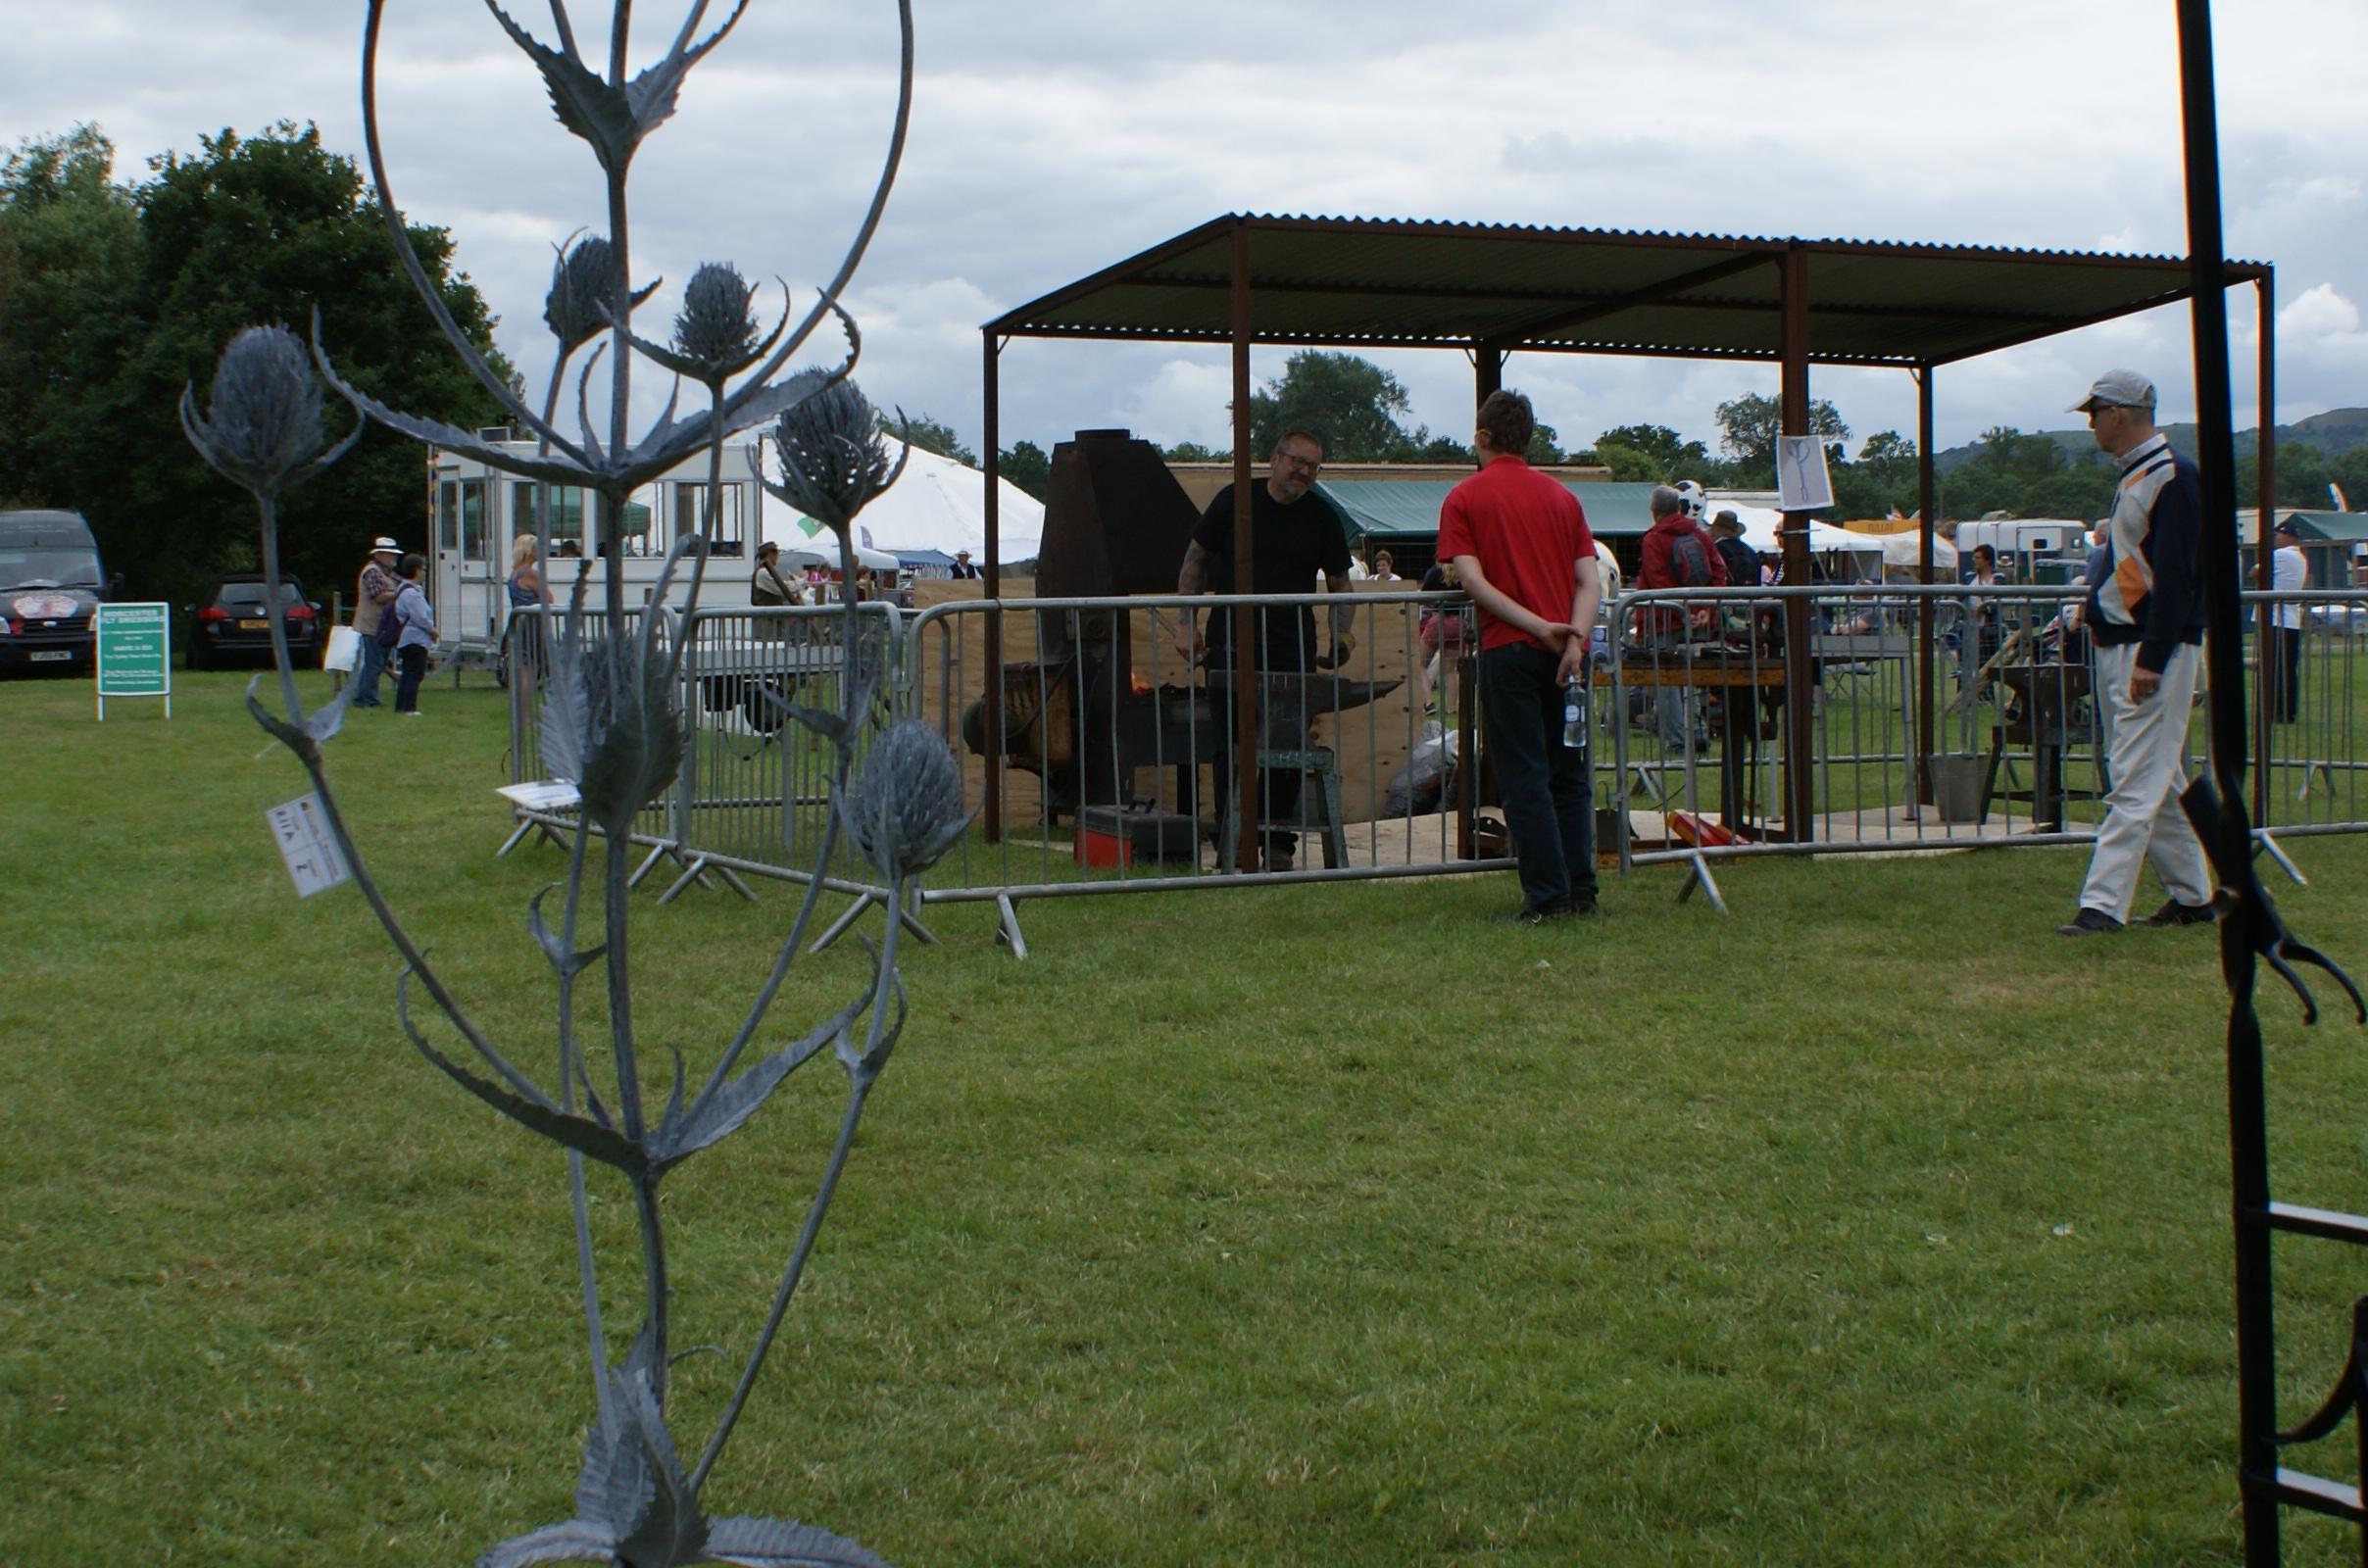
 This years National UK Blacksmith competition started with the North Somerset Show. Next one is the Devon County Show May 16, 17, 18 at Westpoint showground near to Exeter. All the shows have an excellent display of static ironwork and live forging competitions and demonstrations taking place throughout the shows, Entry is open to all, but only the UK based 'smiths are eligible for points towards the UK Champion Blacksmith competitions. Entries are all judged by the approved Judge, no matter from where the maker is based. A piece made may be declared show champion without reference to the 'smiths origin, the objective of the competitions is to bring the very best of the smiths craft before the public, and promote blacksmiths in general, entries from Non UK residents are encouraged, it is great to see the differing styles of 'smithing from around the globe. Some pictures from the show. The live competition pieces were all completed within two hours. Each show is judged by a different member from the judging panel. This show's judge was Merv Allen, a familiar face on the international Blacksmithing scene and one of those involved in organising the 2014 International Blacksmith Festival at Westpoint. The live competition was based upon the theme Summer is a coming a 12th century folk song. The live forging area in use. The judging of the live competition The entries from the live competition Reserve Live Champion's entry The Show Champion and reserve Champions Static classes where the best from each class are judged against each other Show Champion Olly Bramston Reserve Simon Hall Live Champion Keith Mahoney Reserve Live Champion Tony Hollis Hopefully see you at one of this year's show.
-
But you should be able to choose one that seems to work best for you. Not just for welding, but for all 'smithing skills. It's the variety that broadens and adds to the experience memory bank.
-
There is no THE WAY, settle for one that works for you and is safe, more variety you try, more experience and confidence you will achieve. Get it hot and hit it, (but not too hard when setting your welds initially, MY experience)
-
A great opportunity for anyone interested in seeing some top quality forged and fabricated items, and to see blacksmiths working live on the forge, consider visiting one or more of the many shows on the NBCC National Champion UK circuit. These shows have a range of static displays of forged and sometimes fabricated items, each show having different class criteria, and also live forging competitions and demonstrations. It's a great opportunity to see and talk with fellow 'smiths having a wide expeience of the craft, and happy to talk to others about it. Details of show dates and venues can be found here; http://www.blacksmithscompetition.co.uk/ Come along and have a chat, or enter the competitions, you will have a great day.
.thumb.JPG.24f16524e0b4d5eb6393fe79f47f9309.JPG)
.thumb.JPG.bf4d0e6c794c6691955c7eaf7f113cbd.JPG)
-
What advice would you give to you?
John B replied to Glenn's topic in Blacksmithing, General Discussion
It's a great hobby , but a xxxx of a way to make a living ! Get it HOT and HIT it ! -
What did you do in the shop today?
John B replied to Mark Ling's topic in Blacksmithing, General Discussion
Even harder if you don't anneal it first ! -
Thanks for the appreciation Aus, just the tip of of a ginormous iceberg so to speak. A lot of this knowledge seems to be cyclical, a lot easier to pick up now with the internet, Wish it had been available when I originally started (I am still learning, will be pushing up daisy's when I stop). Most of thes were figured out from pictures or examples seen, thats the beauty of the craft, Normally in a coal hearth you are generally working on up to 6" long heat , and do one operation at a time, If it goes pear shaped (wrong) then sacrifice it to the Hearth God and let it be devoured, or make it into something else, Its amazing what can come from a simple error. Get it Hot, Hit it and enjoy.
-
I also think that the distribution of the heat is a major factor in any twisting being undertaken. On this old example the right hand end was slightly cooler than the left. So many variables, tricky to tie them down, but all worthy of consideration.
-
Garden shed to Blacksmiths workshop
John B replied to neddidge's topic in Building, Designing a Shop
I automatically go into SLEEP mode when I am not in the forge, does that count? -
It is apparently how the Claydon knot is made, so credit to the man, I only stumbled around trying to emulate it, It seems quite common in the US, but not over here in the UK, a potential client came in asking if we could make something to match a pictured item, and the item had the Claydon Knot for a handle, Normally i would refer the person to the maker of the item as I don't like the idea of poaching work from other smiths, but as I knew of no one making this item in the UK, I had an attempt to make one. In the end, they didn't want to pay my asking price, like a lot of potential clients, they don't appreciate the amount of time and effort put into making bespoke items, so no order placed. Bonus was I now know how to make my version of a Claydon Knot. Priceless.
-
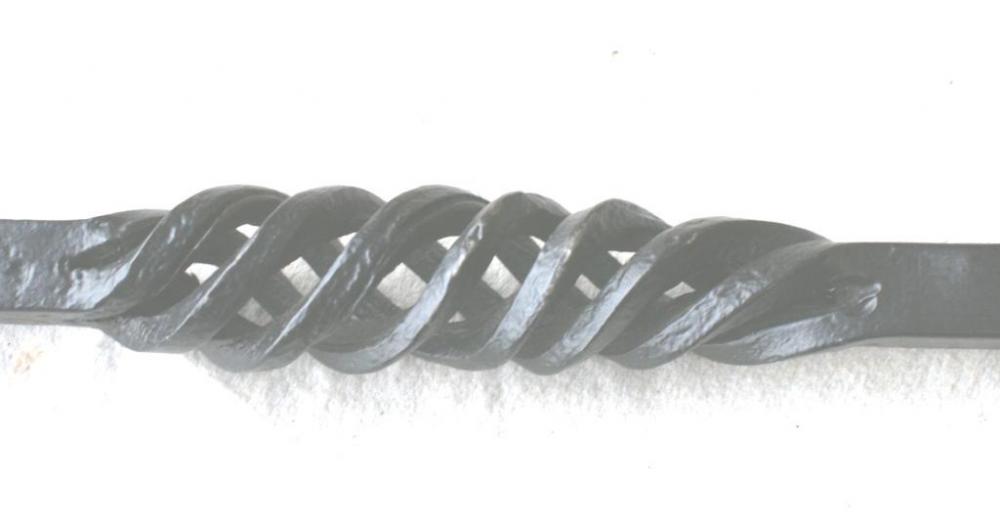
There is a reason for that, the first two attempts had excessive material on the inner core although from the same diameter material, This caused the S effect. By reducing the number of rods in the inner section, when the outer section is placed and twisted to form the cage, the inner section does not bind up and cause the S effect If you look carefully you will see five rods internally, six rods externally. Which can cause problems other problems. on the plus side, no mandrels were needed or used in the production of this item But it's all good fun Enjoy
-
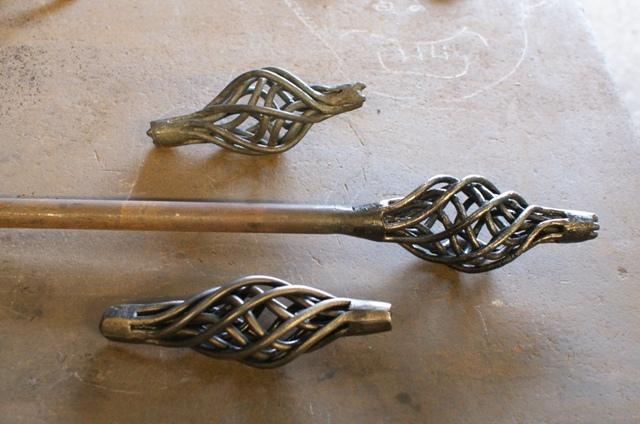
From JLPS previous item ; There is a point with 4 rod handles though that can fail to be graceful or pleasant to look at.. This was what we were discussing.. Of course there was much more to the conversation so was paraphrased.. " I think this pic of the experimental stages help to illustrate its not just the 4 rod handles that edict applies to. To follow on the "If it looks right it is right" this is a pic of the progress to get on to produce something I was comfortable with, your opinion may be different. My preference is ths lower one, Third attempt.
-
It is what it is, an experiment when I tried to make a Claydon Knot, that was the fourth playtime, There are other developments that occurred as I was trying to get comfortable with . Here are the others. All were done using 5mm rod(3/16") 1st attempt 2cnd attempt 3rd attempt I only used 5 rods, but cannot find a picture which is a shame because I quite liked it as it left a pentagon effect on the end view. Don't be frightend to play, the worst that can happen is you learn something from it, even a disaster is a good example of what not to do! Enjoy
.JPG.6b172c3894bb8a644ffa7c02a735c149.JPG)
.thumb.JPG.6f31567b77eba0e799ecb53de912ec91.JPG)
.JPG.7b16a5e22f7e0e3fe7d85e463488b6fb.JPG)
.JPG.617a12ec765960b55d19e322ab7dedf1.JPG)
-
Thanks Jennifer, I like to us as few tools as possible, hammer, hearth, anvil and the occasional leg vise usually, This is just a result of the amount of twisting as it closes up the rods after the ends are welded, then I rolled it up on the anvil and brought them together, both ends, and to get the bunched up section in the centre, placed one rolled up section into the pritchel hole on the anvil (or you could use a bolster plate as in the picture) and tapped it down, the other end then can be easily opened up into the cage. I should have firewelded a ball end on, but forge brazed on a ball as an afterthought, The pointed end was a result of trying to determine how good the fireweld was, the finished item has been lying around for a good few years now, so it seems to have taken successfully. Hope this has been of assistance.
.JPG.aa8c246142ad01d6d53ed9e801d44d19.JPG)
.JPG.be02a1d6f2e8fa0d3953ac347d67a103.JPG)
-
Flat twist Blacksmith basket..
John B replied to jlpservicesinc's topic in Blacksmithing, General Discussion
I think you done brilliant, long may it continue ! -
There are many items that fall into the "Fail to be graceful or pleasant to look at" category, I was always a devotee of the "If it looks right, then it is right" mantra. I must have missed your discussions in the conversation, even ugly items can be transformed by a relatively small amount of adjustment/tweaking. Beauty being in the eye of the beholder. "Certain shapes have the tendency to draw the eye," Certainly they do and as smiths we can produce left hand and right hand items, particularly useful in twists when making features, a right hand and left hand pair can influence the overall appearance of an item, either making it appear to be wider and lower, or taller and narrower, depending on how the items are arranged. Ideal for gates or firebaskets and where they are situated. "out of these 4 handles which is your eye drawn to the most?" I'm sorry but after many years of experience in this and other fields,I cannot bring myself to have an opinion on such a lack of information, I would have to consider any other factors before thinking of what (in my opinion) would be best for a given situation. So I am opting out of answering this directly, I know which I consider to be the most difficult, but after all they are basically the same format. And here's one for those who don't know which way to twist for the better (Tongue in cheek) And this falls into the " can fail to be graceful or pleasant to look at." category quite easily if not manipulated correctly. This was a third attempt to get the build up to look something like what I liked, and felt comfortable to both eye and hold. Now I can feel OK to do it proper, this was helped by electric welding rather than in the fire, I am sure you can realise why. I suppose its an "arty item" in its own right viewd as an object, but I cannot get my head around this "it's art" thing, there has to be more to it than that for me. Enjoy yourselves.
.JPG.6c4a63c00cf9c1c884ae03fde207f4e5.JPG)
-
Flat twist Blacksmith basket..
John B replied to jlpservicesinc's topic in Blacksmithing, General Discussion
Arrow shape is a better idea for universal use, May get round to making my Mark two version (sometime). She also opened up some memories for me too, amazing what gets filed to the back of your mind when you get on a bit.


.JPG.4b5e16a33d7331d0487aea1e268cb641.JPG)
.JPG.0286006163ed22ba3bbc0f581ae9e7e0.JPG)

.JPG.c87b2eea3528f5e77adda093f4179af4.JPG)