
Frazer
-
Posts
1,403 -
Joined
-
Last visited
Content Type
Profiles
Forums
Articles
Gallery
Downloads
Events
Everything posted by Frazer
-

Need some tips and tricks on building a charcoal forge.
Frazer replied to NguyenHoang's topic in Solid Fuel Forges
If it's only the bottom 4 pieces you may not even need to break them apart to move the hole. Just make a second one in one of the wall pieces and plug the old hole with something... dirt, mortar, a small piece of brick from your new hole, whatever you have. It doesn't have to be air-tight/pretty so you can fill it with anything so long as it isn't going to burn up on you. Honestly, before you bother making any changes, fire it up a few times and see how it goes. After a few sessions you may discover other things you want to change or decide that things are fine the way they are. I do think the back wall will be more of a nuisance than a benefit. The nice thing about solid fuel is you don't need to worry about containing the heat like you do with gas. That leaves the fire more open for long, large and/or oddly shaped items to be put in. The more you box your fire in (too high of walls/a back wall, a top) the less access you have to it. It seems like what you have there will work. Down the road you will likely end up modifying it based on your needs. That's half the fun. When possible, try not to make things permanent until you're sure it's the way you want it to stay. That's one of the reason the JABOD is so effective. The firepot can be molded and reformed in many different shapes and sizes; nothing is permanent. -
If I remember (and my phone can capture a semi-decent picture) I'll try to post a WI spark test later today. Once you see the difference it's pretty clear. Not that the spark test is fool proof. Sparks from some cast iron and tools steels can be deceptively similar to WI. I've been fooled once before by a block of mystery steel I found in my house when I moved.
-
It didn't work for me either. WI = short dull red-ish sparks with essentially no forking Steel = orange/yellow sparks with longer trail and forking/sprigs depending on carbon content Based on your picture that's steel not WI.
-
Need some tips and tricks on building a charcoal forge.
Frazer replied to NguyenHoang's topic in Solid Fuel Forges
Methinks it would work a little better if the tuyere came in an inch or so higher and at a slight downward angle. I would also make sure the brick that makes up the back wall (perpendicular to where your air is coming in) is removable so you can put a longer stock in the forge. Think trench, not box. -
Video of Industrial sized forging
Frazer replied to SinDoc's topic in Blacksmithing, General Discussion
It looks like they are using coal fines as their punch lube/release agent. That's what I use and they work, well, just fine. I have more fines around than graphite slurries.. -
Video of Industrial sized forging
Frazer replied to SinDoc's topic in Blacksmithing, General Discussion
I'm sure the guys in the latter half of the video the end have some sweat running down their face. You can also see there are (and I'm stating the obvious here) safety procedures they're following while working around the hammer. For example the guy around 5:30 keeps his tongs flat on the "anvil" lets go of the piece every time the hammer is about to come down. A similar precaution is taken (letting go of the handle) with the guy around 7:30. I think it's safe to say if the reins/handle jump in an unexpected way he would loose the battle of competing forces. -
Video of Industrial sized forging
Frazer replied to SinDoc's topic in Blacksmithing, General Discussion
On this large of a scale it does make it easier to see what's going on. The butchering dies they were using to form several diameters along the shaft in the first 2 minutes or so are exactly like those you would put in a guillotine tool for making tenons. I'm guessing they use a lot of H series tool steels in that plant... -
At the bottom of the dialog box where you type your reply there is a hyperlink "choose files..." if you click that it should open up a second window where you can select your images. Once you click open the images will appear in a tray below your reply. If you click an image it will be inserted into your message wherever your cursor is at the time. You can resize the image before submitting by double clicking it in your message and changing size field. Welcome aboard! It's very cool to know the history of your anvil so well. Looking forward to seeing it.
-
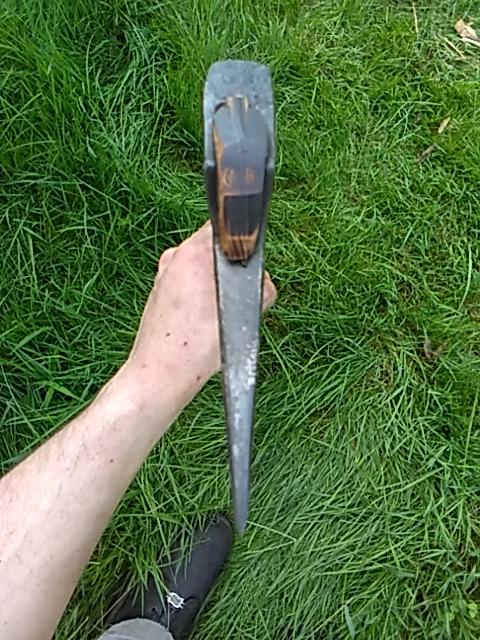
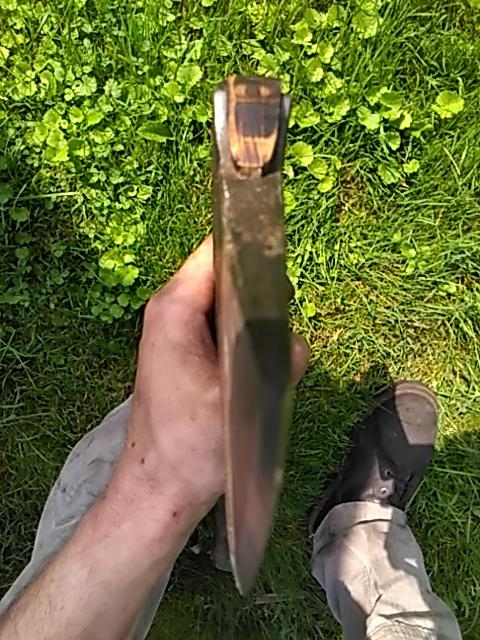
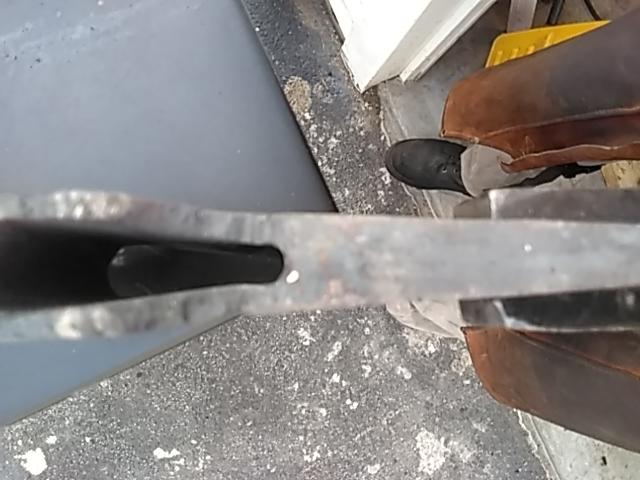
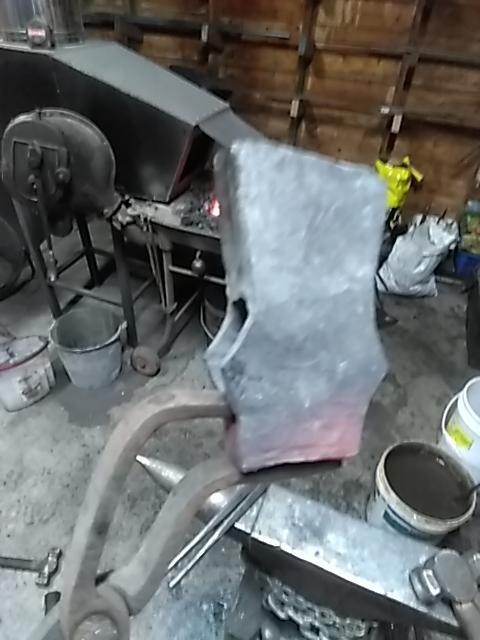
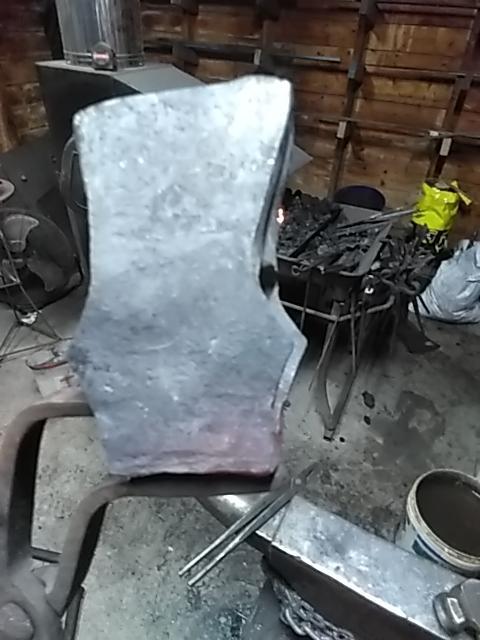
I just finished a wrapped and welded axe head. I started with ~3lb 2oz of steel and ended up with a 2lb 5oz axe head. I could have saved some of that material by forging the blade down further.. Most of that weight was lost while grinding the blade down. It sounds like you want to slit and drift the eye which may conserve more material depending on how you go from there. Your mileage may vary.
-
A swedge is an additional unsharpened bevel ground down the spine of a knife. It's not a fuller. More of a "false edge" on the back of the knife + some aesthetic flair. I think the purpose is to reduce the thickness of the tip by having two flat grinds converge. Slim, I'm not a knifemaker so I don't know if there is a preferred order to the grinds. I don't see why it couldn't be done either way, but I'll defer to those who have more experience with such things. Anyway, welcome aboard!
-
I don't know much about hoof pics, but out of curiosity what are the rough dimensions of the wood blanks you use for the handle? Judging by the picture (and assuming I got my scaling factor right) it looks like 7x2.25x7/8".... ish...? P.S. I'm reading my tarot cards and I see a CNC plasma cutter in your future?
-
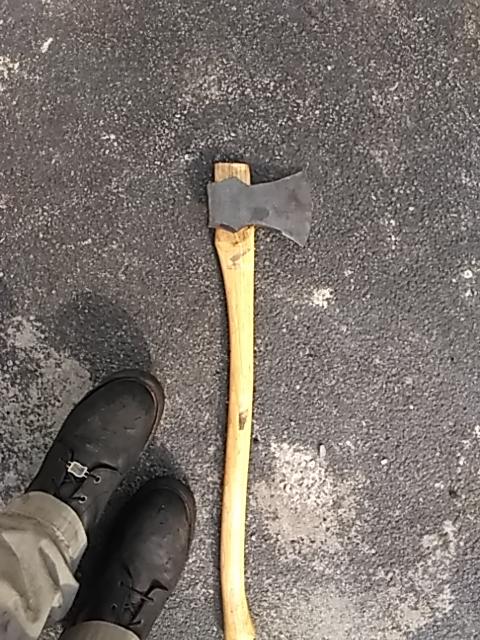
It turns out I am keeping the big one, I made a lighter one (1lb 12oz) for my coworker and it's going on an 18" handle. While grinding the first one I started thinking that I should have drawn the blade out further. It was (and IMO still is) thicker and therefore shorter than it needs to be. It makes the head look small for the handle even though the weight feels right. I made sure to forge the blade down more this time. (Geez, now that I try to take a picture of it that blade is not straight.) Anyway, thank you both.


-
I don't have a smartphone so the image quality isn't great. Regardless:

-
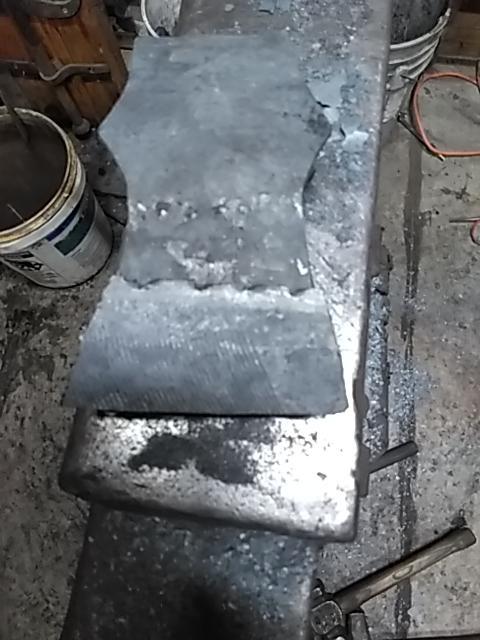
Done. Final weight of the head is 2lbs 5 oz.

-
Is this anvil worth buying??
Frazer replied to sidesaddle queen's topic in Anvils, Swage Blocks, and Mandrels
I got my 151# soderfors, a post vice, a bench vise and a few other smaller items for $700 (and a 10 hour drive). Personally, I wouldn't pay $1000 for those. Better deals are out there. That being said I am cheap (or frugal, whichever you prefer...). If the seller is willing to negotiate, the anvil passes the ring and rebound test and the screw box in the vice are in good shape then they will make for good tools. I don't know what prices are like down there in TX so I can't provide a "reasonable" number. As a side note, did he use the hardy hole to mount the post vise? I cant tell if they are just staged that way for the picture or if that's how they were being used.. You could always remove the vise to gain access, but that seems like a lot of work. -
First real (I hope) anvil - would like opinions
Frazer replied to Tefkros's topic in Anvils, Swage Blocks, and Mandrels
You might want to read it a second time -
First real (I hope) anvil - would like opinions
Frazer replied to Tefkros's topic in Anvils, Swage Blocks, and Mandrels
I would use it for at least a year and before you decide whether the dents/blemishes are a problem for you. Sometimes "flaws" on your anvil turn out to be features. Great find and welcome aboard. Just in case you haven't seen this yet: -
Of course there are limits to what we can do as blacksmiths. For example, my neighbor from 2 doors down came over to me yesterday while I was working and asked if I could make a connecting rod. I told him that handmade isn't the way to go for those sorts of items. The problem is that he associated forged/handmade with stronger and of superior quality. However, in this case even the cheapest most mass produced connecting rod conveniently delivered to his front door would be far superior to anything I can make. Everything has it's place. While there is certainly a huge push for convenience most people simultaneously want some items to be cheap and other items they can show off to their friends because they're handmade/"one of a kind". Modern blacksmiths usually produce the second group of items and what they are depends on the customer's priorities/interests. I'll add that I am also a hobby smith. The few things I sell are usually to family friends and the like.
-
Senior Pedro, that's a fine shop and quite the progression. I wish I saved some pictures of where I started 3 years ago to where I am now. SinDoc, I hear you. It's been very humid here too. Don't bother with the flap wheel. That will be a never ending battle and nature will win. A little bit of surface rust isn't going to hurt anything. Heck, my whole life has a layer of surface rust on it. If it bothers you, lightly oil the surface of the anvil if you know you'll be out of the shop for a few days. An anvil doesn't have to be clean to do its thing.
-
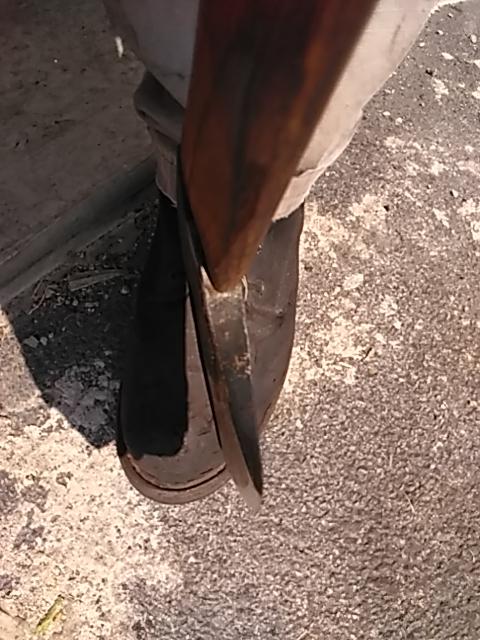
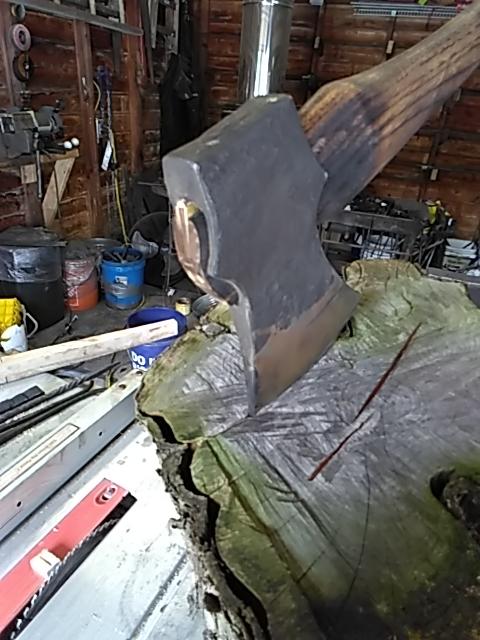
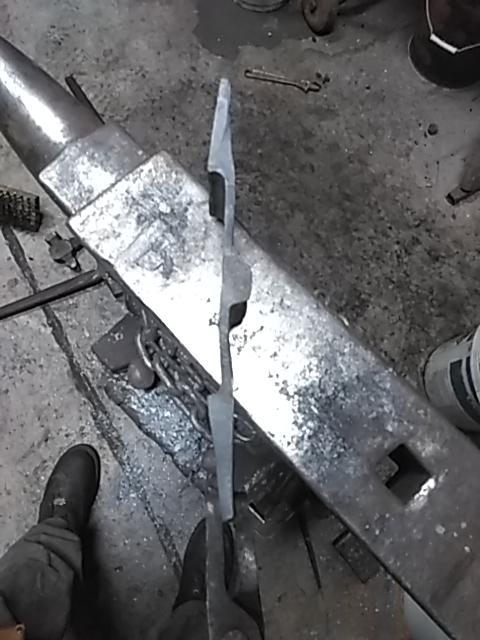
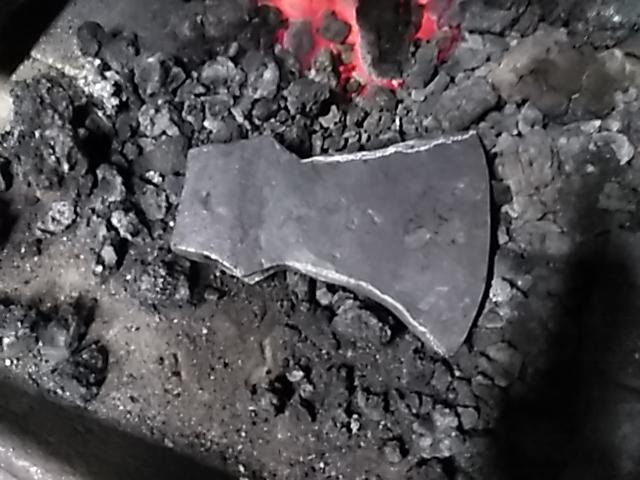
M.J., nope, no delamination. To be honest I am somewhat surprised by that. That was a lot of material to get up to a welding heat and flipping an axe that is ~4.25" wide really disturbs the fire. The eye still isn't perfect on top (right image), but I think it's good enough for me to go in and clean it up with a file. Latticino, That's a good suggestion. I'll put that in my memory banks for the inevitable day where I run into issues. I think I had a lot of beginners luck on this one. Your tip to go back and fuller the set downs that make up the eye was HUGE. That nice shoulder made things so much cleaner. Jennifer, the eye is made to fit a commercial handle for a 2.5# axe head. I don't mind making small handles, but for a larger one like this I think a standard size eye is the way to go. Sooo, my original plan was to grind this down to the weight my coworker was looking for... but I've kind of grown attached to it.. I think I'm going to leave it where it is (~2.5#'s) and keep it as an axe. I started a smaller version today. I mean, I have make sure it wasn't just beginners luck right?
.jpeg.b128c0ca4fbc22eef18f3bbd834e28fe.jpeg)
-
What did you do in the shop today?
Frazer replied to Mark Ling's topic in Blacksmithing, General Discussion
JHCC, that's probably because the larger sizes don't come in most of the cheapo sets. 14mm (~9/16") is a good size IMO. At least that is the one I use most often. Bigger would be fine, but I wouldn't go any smaller than 1/2". Note: Don't use the chromed wrenches, only the black ox ones. -
What did you do in the shop today?
Frazer replied to Mark Ling's topic in Blacksmithing, General Discussion
I like to use large Allen wrenches I find at the tool thrift shop (which are usually high alloy steel or S-something tool steel based on my research). Spring steels (ie, coil springs and the & style RR clips) work well too. I always harden and temper the working end. -
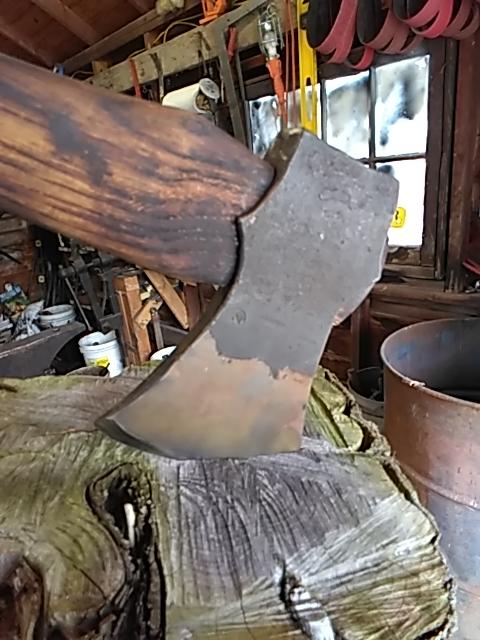
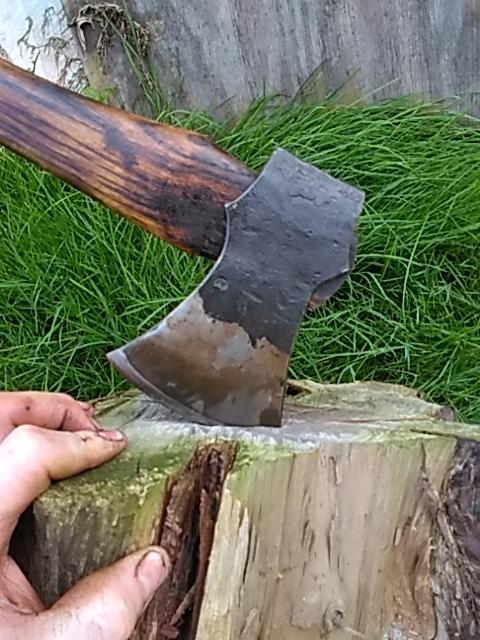
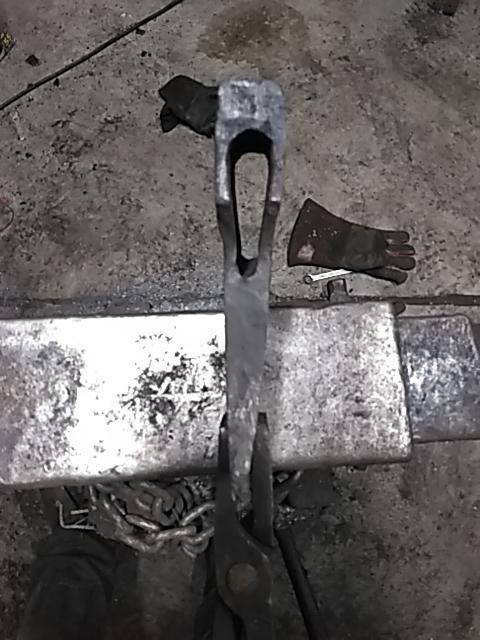
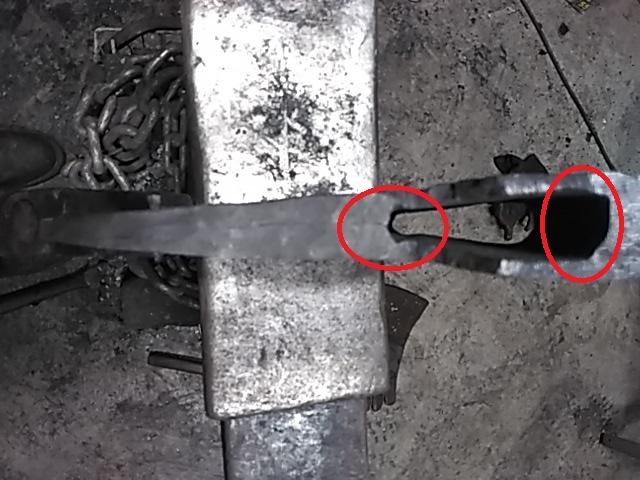
My first "full size" axe. I need to make a larger drift to clean up the eye and I'll probably even out the blade a little.. Then there is some profiling and a lot of grinding left to do. Still, it's getting there. The eye isn't as clean as I would like it to be on top, but I think I can fix that with the right size drift.

-
The statement on sellers website that follows the line you have there is: It seems like a recommendation to increase the lifespan of the blower. Whether or not the manufacturer of your blower recommends the same is unknown. My suggestion: If it has feet/mounting brackets, use them to position the blower in the most logical orientation. I would think that most electric forge blowers use sealed bearings that won't need to be oiled, but I could be wrong..
-
Can't argue with free! Hopefully the problem with a the table saw is something simple. Bring a multimeter.