
Frazer
-
Posts
1,403 -
Joined
-
Last visited
Content Type
Profiles
Forums
Articles
Gallery
Downloads
Events
Everything posted by Frazer
-
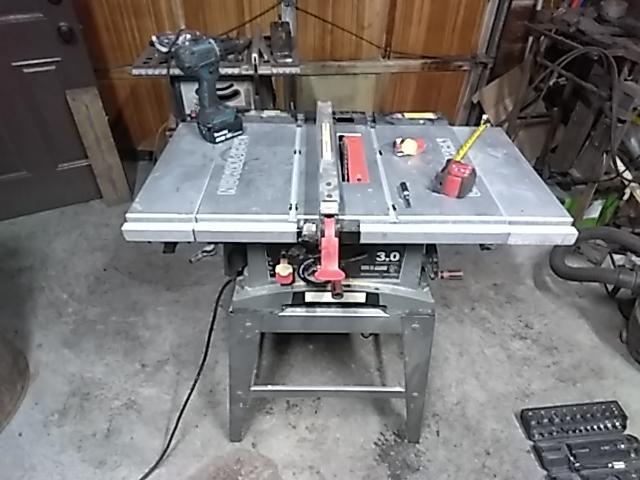
Bantou, nice score! I found a free "broken" table saw. I brought it home and there was no continuity which left two options. I checked the motor and, while filled with sawdust, it was fine. I took apart the switch and some burnt sawdust had fouled the contacts. After cleaning them up with some sandpaper it fired right up. I ordered a new switch just in case. $8 is not too bad for a table saw.
-
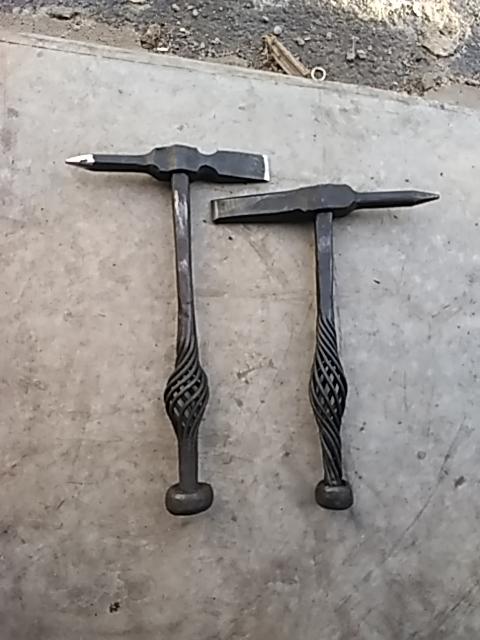
Very nice! I think I like the two at the 4 and 5 o'clock positions best.
-
On IFI??? Never. We always stay on topic! There are 506 pages of this thread and within those pages are innumerable side discussions and digressions all of which eventually circle back to things following someone home. You never know that you'll learn when you click on a tread; the title doesn't always tell the full story.
-
German Shepherds are my favorite breed, but I like any (well trained) dog. Newfoundlands are nice too if you want to own a small bear and don't mind slobber. My brother has an Irish Setter who, while very cute, is categorically insane. So, much to his chagrin, I call her mutt. I told him I will call her by her name when she can be good... I fear the day might never come.
-
Glad I could help. Nice job! And you found some free 1050 as well? You'll make a fine blacksmith yet! I agree with Neil about the eye and dressing the face a little bit, but you can make those modifications as you see fit. I actually like having a couple light hammers around. I think the smallest one I have is a steeled wrought Iron hammer weighing 225g. It was the first hammer I ever made. I'm looking forward to seeing the next one! FYI: https://www.iforgeiron.com/topic/54645-using-the-name-on-the-forum/
-
There shouldn't be any kickback if the part of the board that's being cut off hangs off the end of the table/sawhorses and is allowed to fall freely after it's cut. Very little risk of the blade getting pinched that way. Regardless you should always keep your digits away from anything that's spinning and maintain a firm (not a death) grip, with both hands on the saw.
-
I haven't gotten that far yet. I did try to get into the distribution business, but I was not well received.
-
No methane reactor around here, but I do have a methane generator I've grown attached to.
-

Preparing a white-tailed deer antler to be used as a knife handle
Frazer replied to Donal Harris's topic in Knife Making
George, TurnTex is the company, Cactus Juice is the product. I don't know how they came up with the name... The resin does have a sweet cactusy scent? There aren't many cacti in NY and I can't say I've spent much time sniffing them.. Frosty, agreed. I've done wenge, padauk, zebra wood, spalted maple and walnut. The first 4 don't take too long, a few to several hours. The walnut takes (comparatively) a very long time, 20+ hrs. It's done when the bubbles stop and/or it no longer floats. Whichever comes first. I have no idea where antler would fall on that list. It also isn't really made for filling voids, cracks yes, but gaps/voids no. -
It's not a monopoly.. technically. But that's semantics. Why do they advertise? So they can honestly say during their quarterly meetings, "Well, sorry ladies and gents, there just wasn't any room left in the budget to innovate! It looks like we will just have to keep doing what we have been doing!". Also PR and such. Note that many of their commercials fall in the "We here at ACME inc. are dedicated to helping x, y and z causes" and "The customer comes first", "yadda yadda blah, *insert corporate message*" I dislike commercials in general..
-
Preparing a white-tailed deer antler to be used as a knife handle
Frazer replied to Donal Harris's topic in Knife Making
Hm. I stabilize wood with Cactus Juice, but I've never thought of using it on an antler. -
What did you do in the shop today?
Frazer replied to Mark Ling's topic in Blacksmithing, General Discussion
I think you'll find drawing out stock on the edge of the anvil can be a very efficient method of moving material quickly. Those sharp edges will make this process more difficult and may introduce problems unnecessarily. I will also note that anvils with sharp corners are more likely to chip if you accidentally hit them. However, this might not be as much of a concern with a piece of RR track unless it were to work harden over time. Just something to keep in mind. If you look at any forged item where material has been isolated (tongs are a good example of this) you will notice that in almost every instance there are no sharp corners at these transitions. This is purposeful to avoid stress risers. Whether you had an improvised anvil, a brand new one from a modern maker or an "antique" anvil, the recommendation to correct an edge like that would be the same. Add a slight radius, use it for a while, add a little more if you feel like you need it, and so on until you're satisfied. The nice thing about an improvised anvil is that they are relatively easy to modify, customize, repair, replace, etc. so I wouldn't worry too much about making modifications. Especially minor ones like this. Some people add a gradually increasing radius along the edge of their anvil so they have a range to choose from depending on the project. If you want to keep an area with the sharp corner then keep it. However, I doubt you'll end up using it much down the road. -
What did you do in the shop today?
Frazer replied to Mark Ling's topic in Blacksmithing, General Discussion
I generally start with the jaws and work back to the reigns, but either way works I suppose. What type of tongs are you making? It might be worthwhile to take a flap disc and radius the edges of your anvil before going much further. Those sharp corners can introduce cold shuts while drawing out your stock, setting down material for your boss, etc. -
Welcome aboard! Nice knife. What's the handle made of? If you're looking for fellow blacksmiths (and perhaps bladesmiths) in your area try searching for a local ABANA affiliate. Do a web search for "Montana ABANA Blacksmith" and see what comes up. There will likely be some crossover between blacksmiths and bladesmiths at the meetings. At the very least you'll be able to find some folks with similar interests.
-
....Didn't trade the wife for tools? *grin*
-
Effect of two different chimney diameters?
Frazer replied to Lutz's topic in Chimneys, Hoods, and Stacks
I agree with Glenn. You wont get the full performance of a 10 inch stack no matter what you do. However, if you go this route, make sure the opening on your side draft is sized for the smallest diameter of pipe in your stack. (i.e. less than 50.25 sq. in) -
I'm still a little green to hazard definitive statements on the subject.. A little birdie tells me I'm not up to par.
-
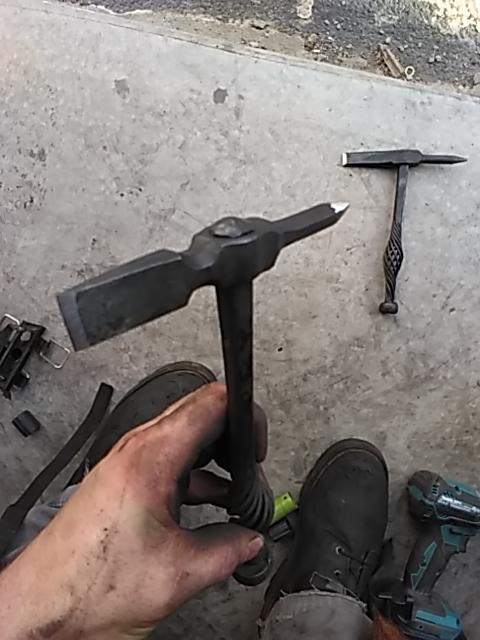
The real question is at what range does it become a driving hammer? The "prototype" can go in iron in the hat for this month.
-
Damascus welding in induction forge
Frazer replied to jason0012's topic in Induction Heating, Oil forges, etc
I like the pattern. I've had good luck with low layer twists and when I take the plunge and make a knife it's my go to method. Has it been hardened yet? It looks like there are a few spots that didn't quite take.. Sometimes those will open up during the quench and it's a bummer. I have an integral that now lives in the "box of shame" after one small area split open on me.... Oh well. If it has already been hardened/tempered then they're no big deal. But I'm not a bladesmith so what do I know. -
Frosty, not bad. I like v2 better (even though the basket isn't as nice). The head was a little too long on the first one. M.J., please do. Mr. Willow/Rojo Pedro, gracias.
-
Do you have any pictures you would like to share? Also, welcome aboard!
-
Working on my first forge. A question or dozen.
Frazer replied to Turby333's topic in JABOD - Just A Box Of Dirt
Don't loose hope so soon my friend! Even if you have to buy it new (the most convenient and therefore expensive means) a sledgehammer head can be had at most big box stores. You have dirt, a vessel of some sort to hold it*, an air delivery device*, fuel*. If you really wanted to you could probably have a fire and hot steel by the end of the day. Your first set up isn't going to be perfect. Mine sure wasn't (and it still isn't)! The best way to learn is by doing. You can improve your setup as you go; figuring out what you need and what you don't. There are very few true barriers to getting started, but you can overthink your way into building them up. Then you end in a perpetual design loop waiting for that "one last thing" you "need" to get started. Sometimes KISS is the best way. My first forge was a Weber grill lid, flipped upside down, firebrick, dirt, black iron pipe, 2 ball valves (added later for air control) and a hairdryer. I think I spent $15-20 since I (or my family members) had just about everything I needed laying around already. * I assume you do anyway, and if not these things ave readily available -
Working on my first forge. A question or dozen.
Frazer replied to Turby333's topic in JABOD - Just A Box Of Dirt
JHCC's profile picture does show one good use of I beam for an anvil.... stand -
Working on my first forge. A question or dozen.
Frazer replied to Turby333's topic in JABOD - Just A Box Of Dirt
When searching for an improvised anvil, you want something solid. It is often said here that if you have a piece of RR track that you're using as an anvil you should stand it on end to maximize the amount of mass under the hammer. In theory, you would stand the I beam on end for the same reason, but even the heavy walled beam is too thin to be used in that way. When used in the way you're planning a LOT of energy is dissipated into the I beam as it flexes at the web and as the whole "anvil" vibrates. You are also left with a very thin sweet spot where the web is. To provide an extreme case that illustrates my point, suppose you had piece 1/8" sheet metal that was 24"x24" and another piece of round stock with a 3" diameter that's ~10" long. If I did my math right, the two pieces of steel weigh about the same. However, ask yourself, which would make for a better improvised anvil? Why? This is just meant to be a thought exercise that might help you in your search for an improvised anvil. Save your money. Pick up cheap a sledge hammer head, take the handle off (or don't), set it in a stump (or wooden stand of some sort) and you'll be on your way. -
Welcome aboard! Might I commend your attention to the following: