Frazer
-
Posts
1,403 -
Joined
-
Last visited
Content Type
Profiles
Forums
Articles
Gallery
Downloads
Events
Everything posted by Frazer
-
What did you do in the shop today?
Frazer replied to Mark Ling's topic in Blacksmithing, General Discussion
In any case, the correction was imminent due to JHCC's eminent command of language. The hammer strikes again. -
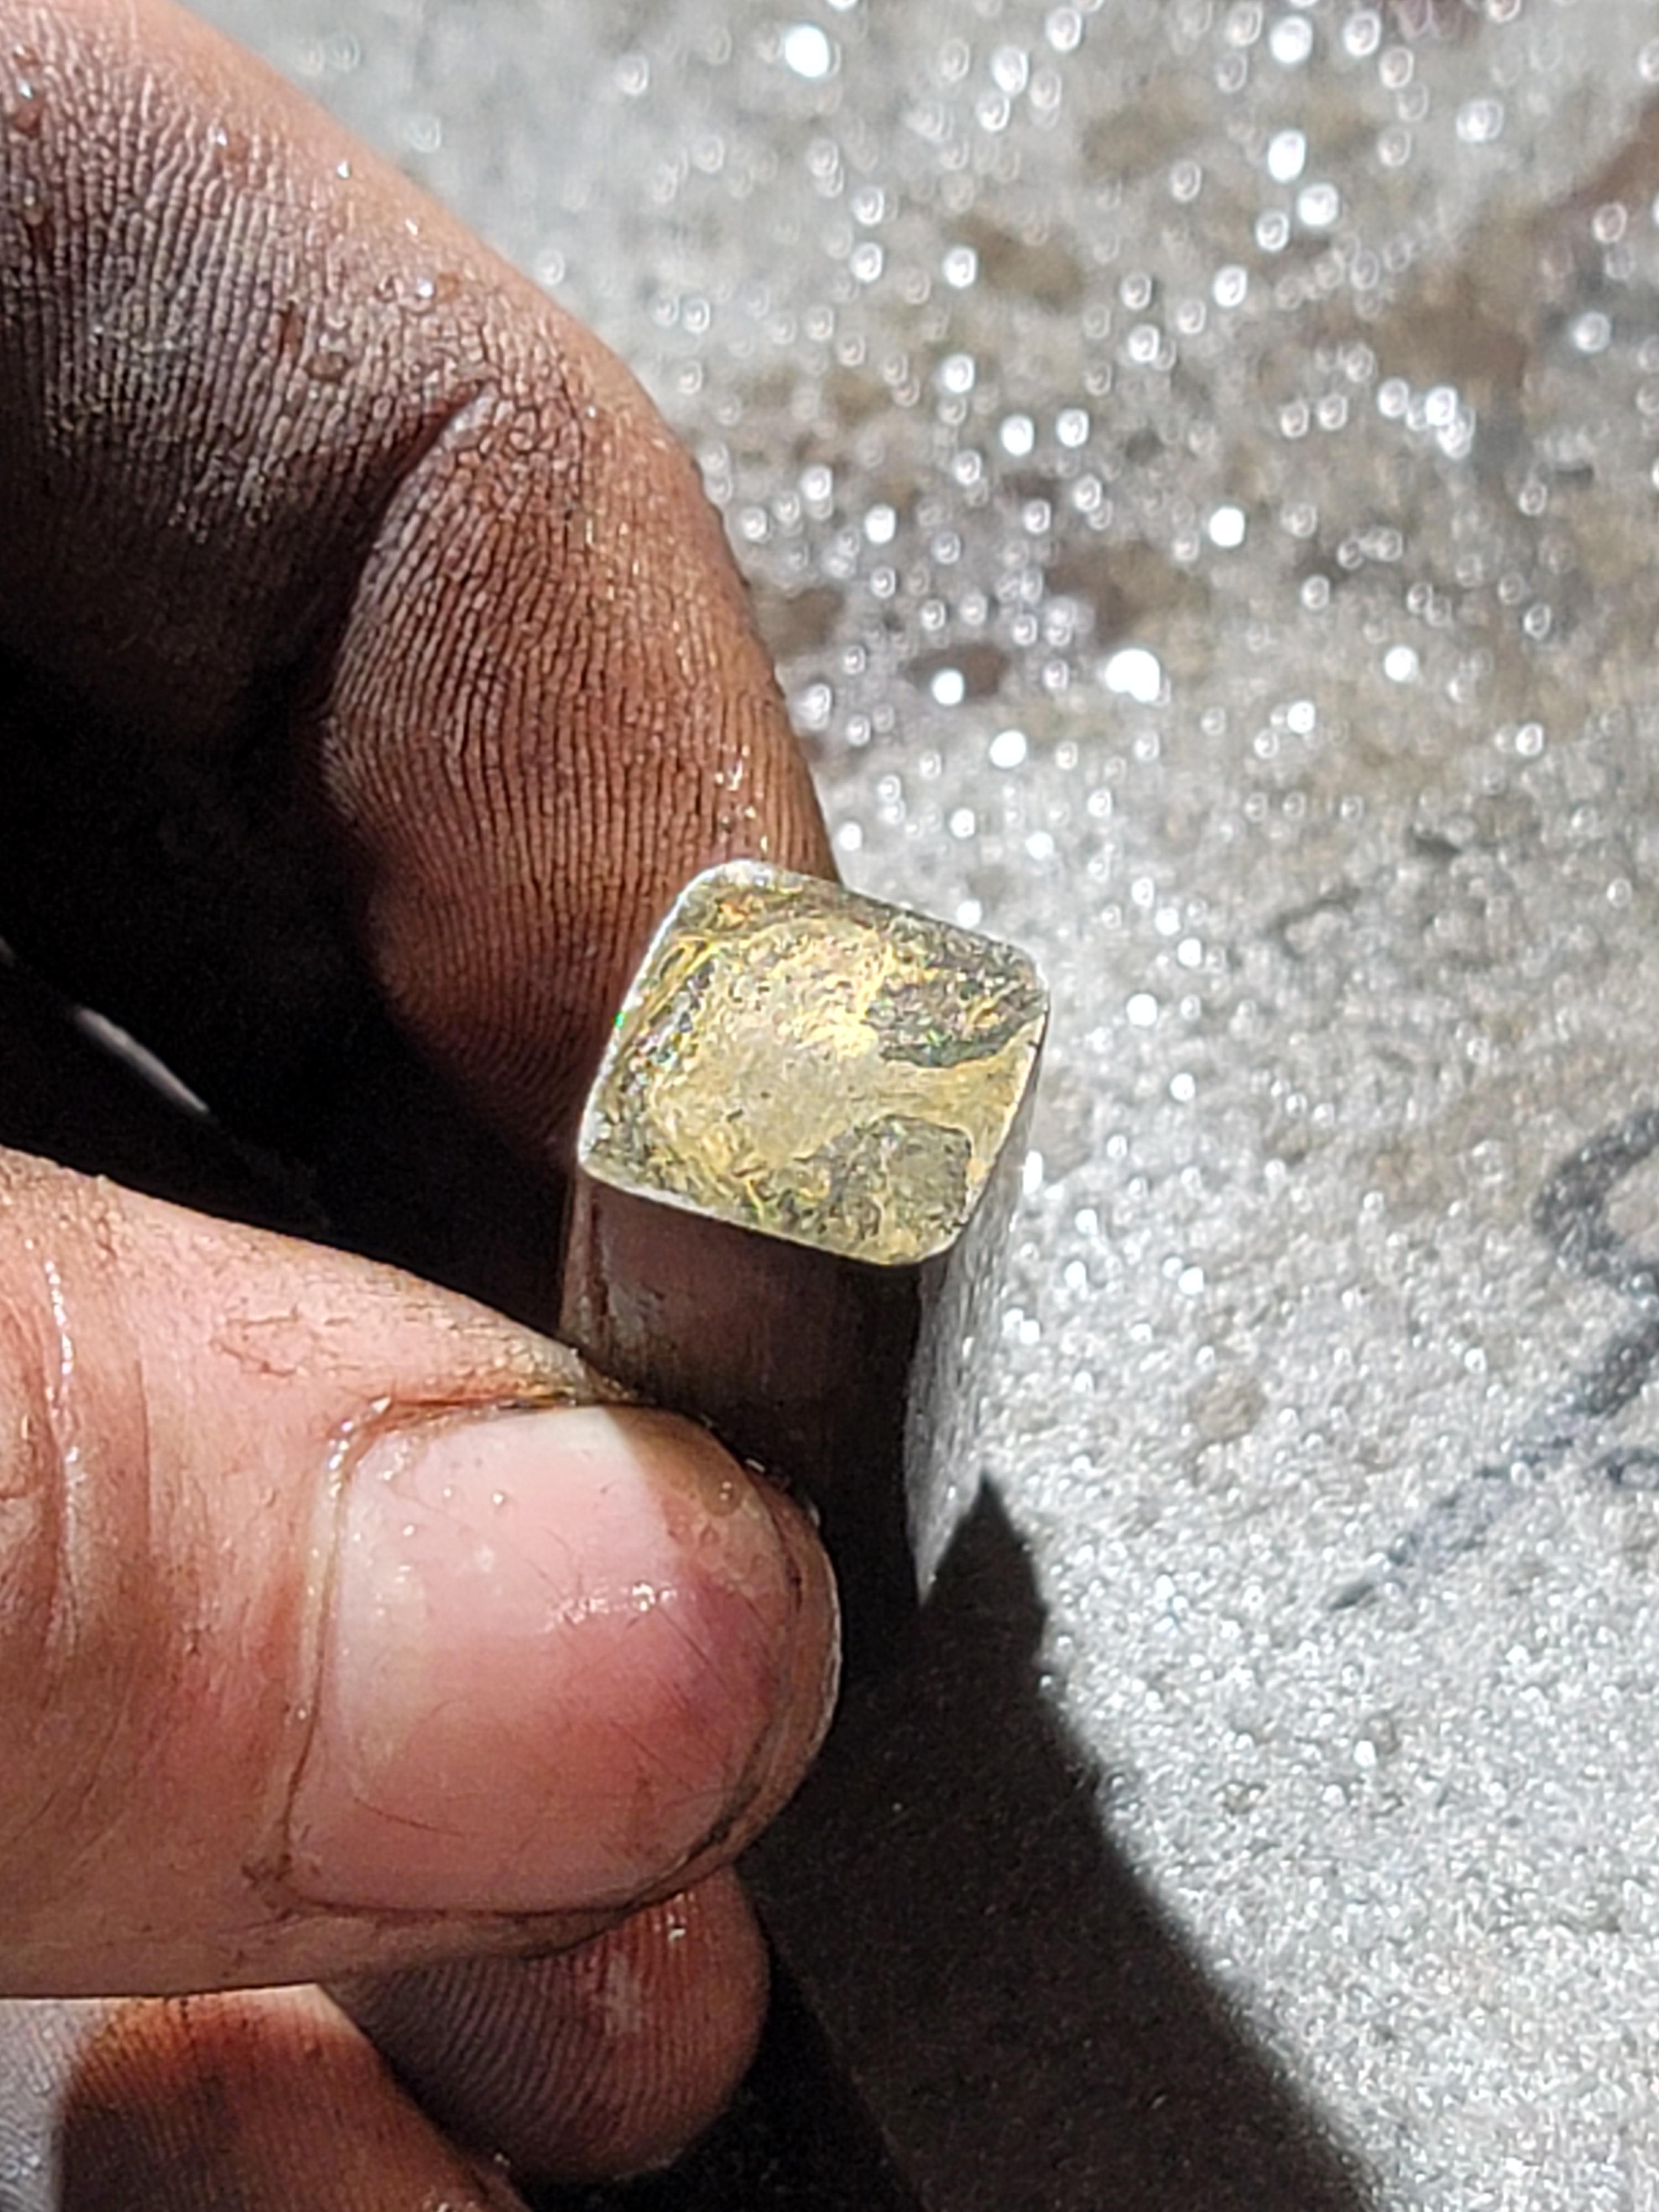
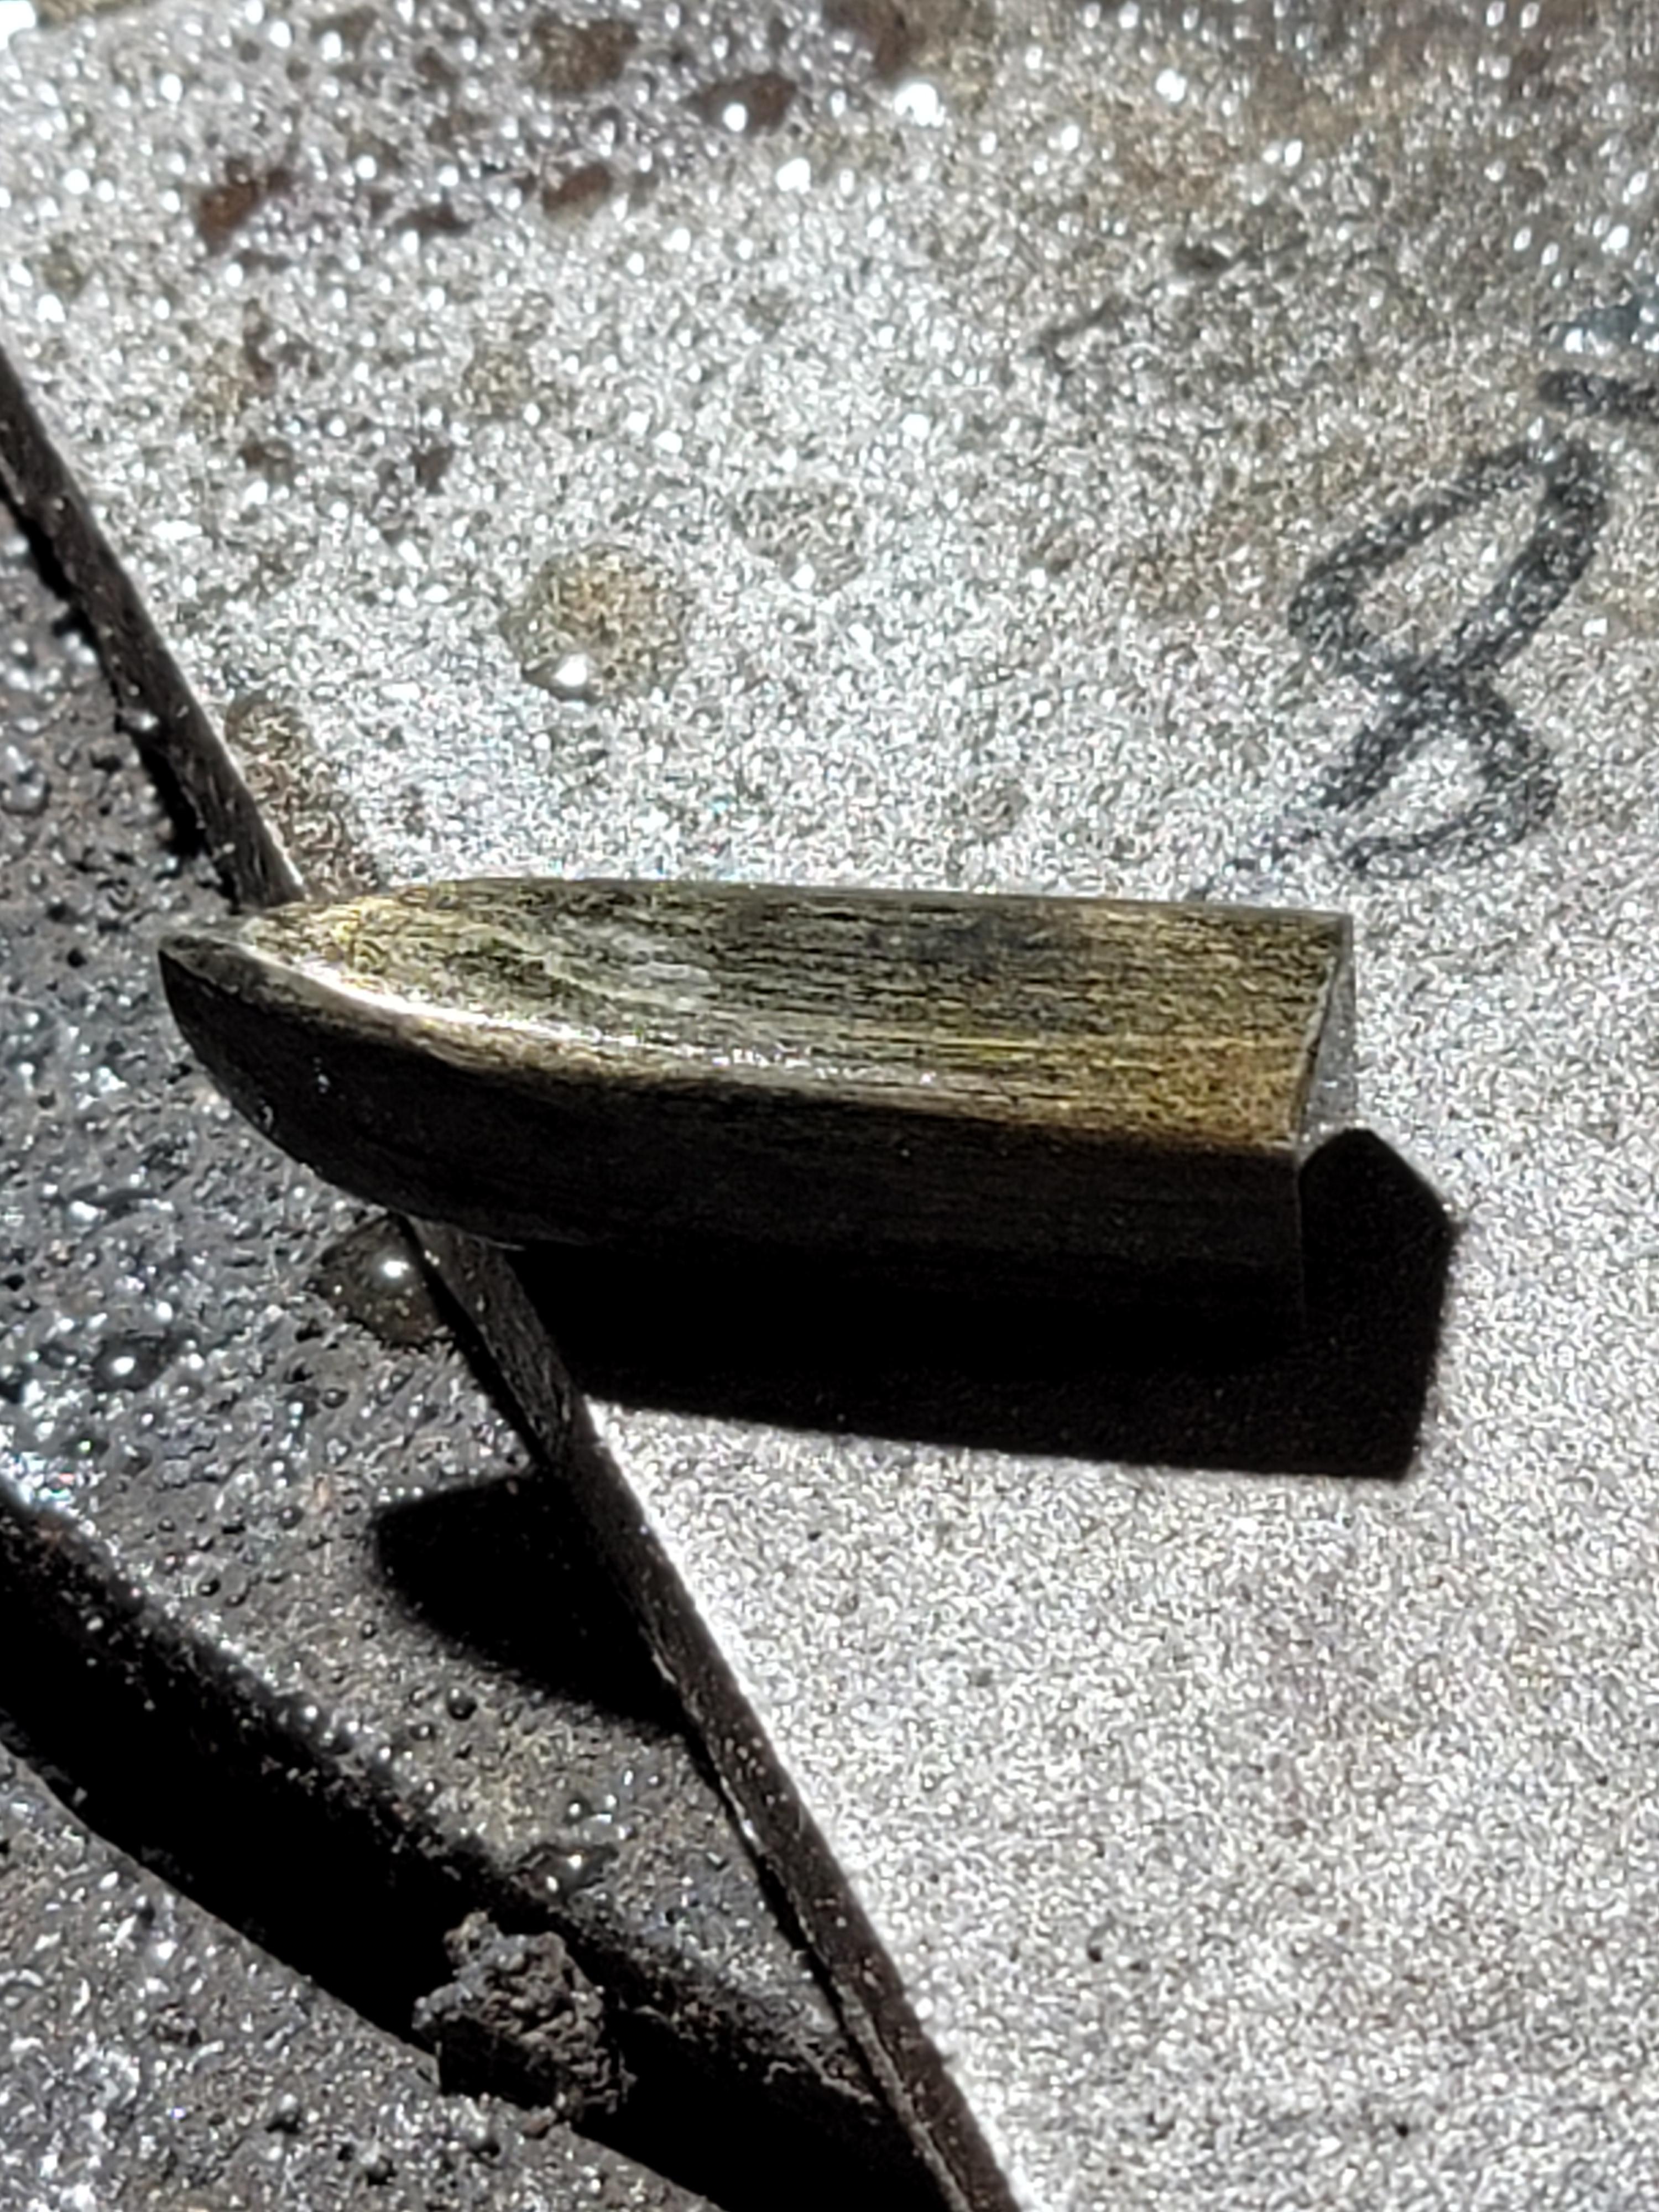
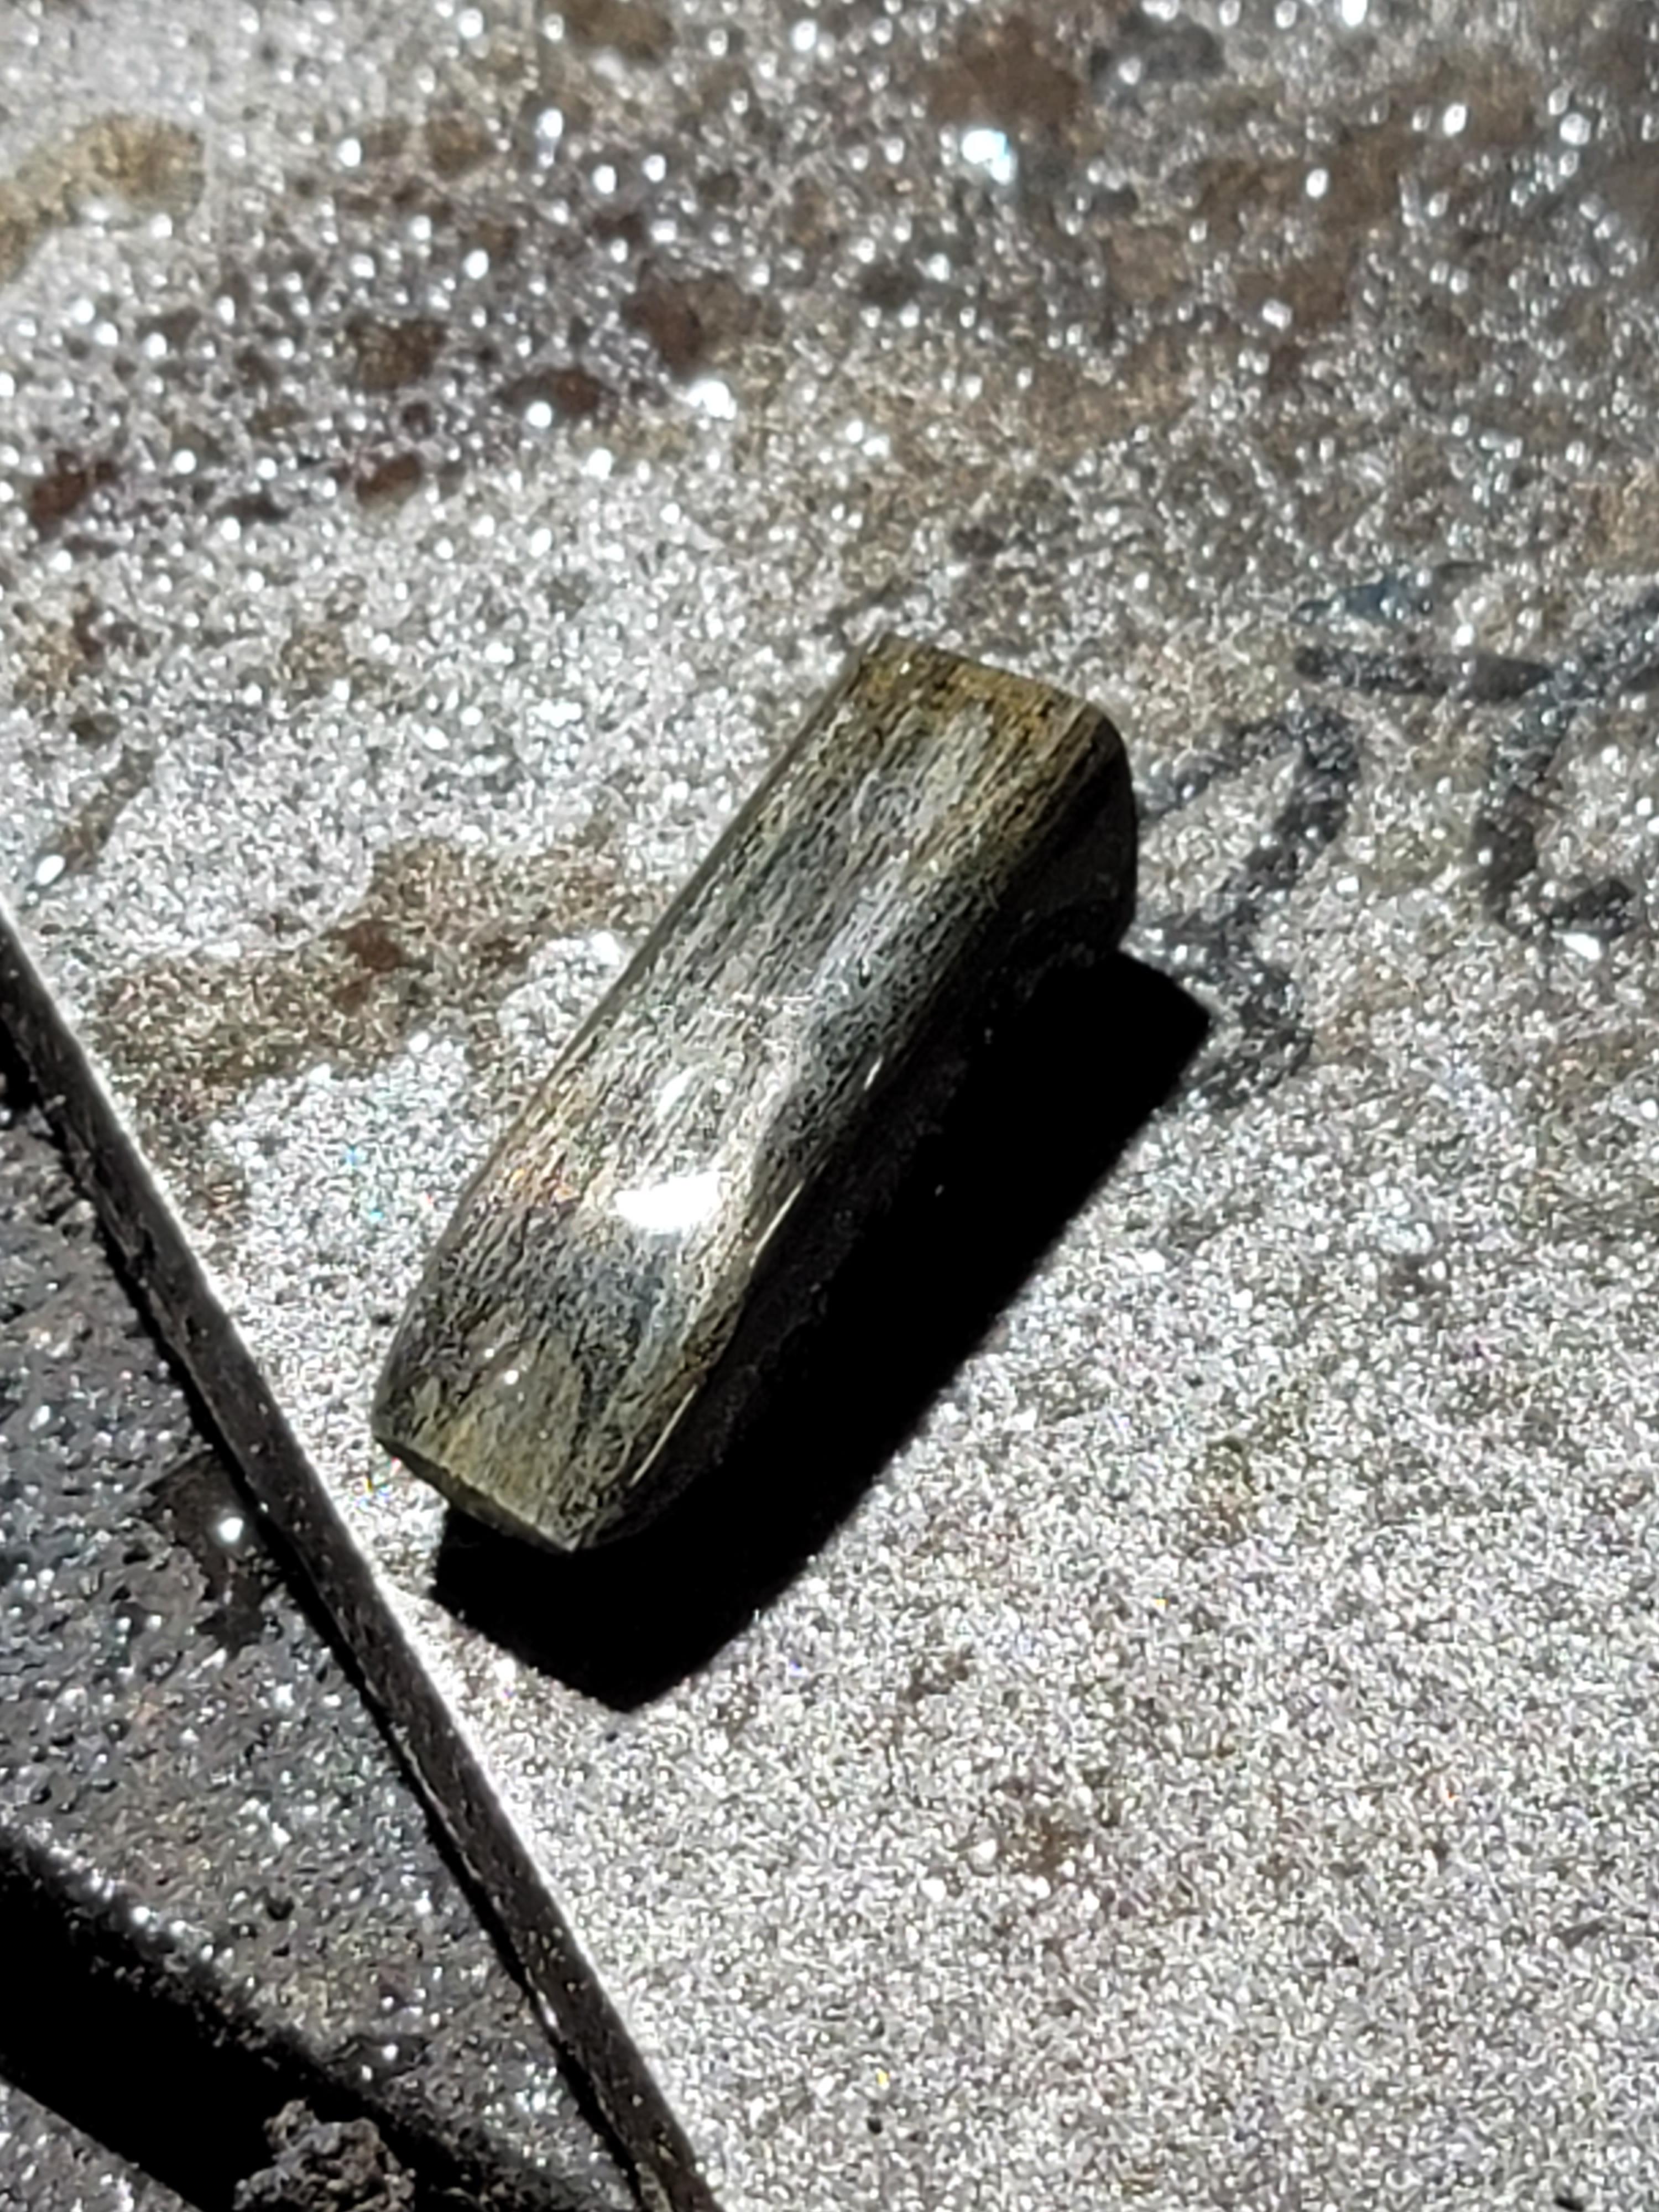
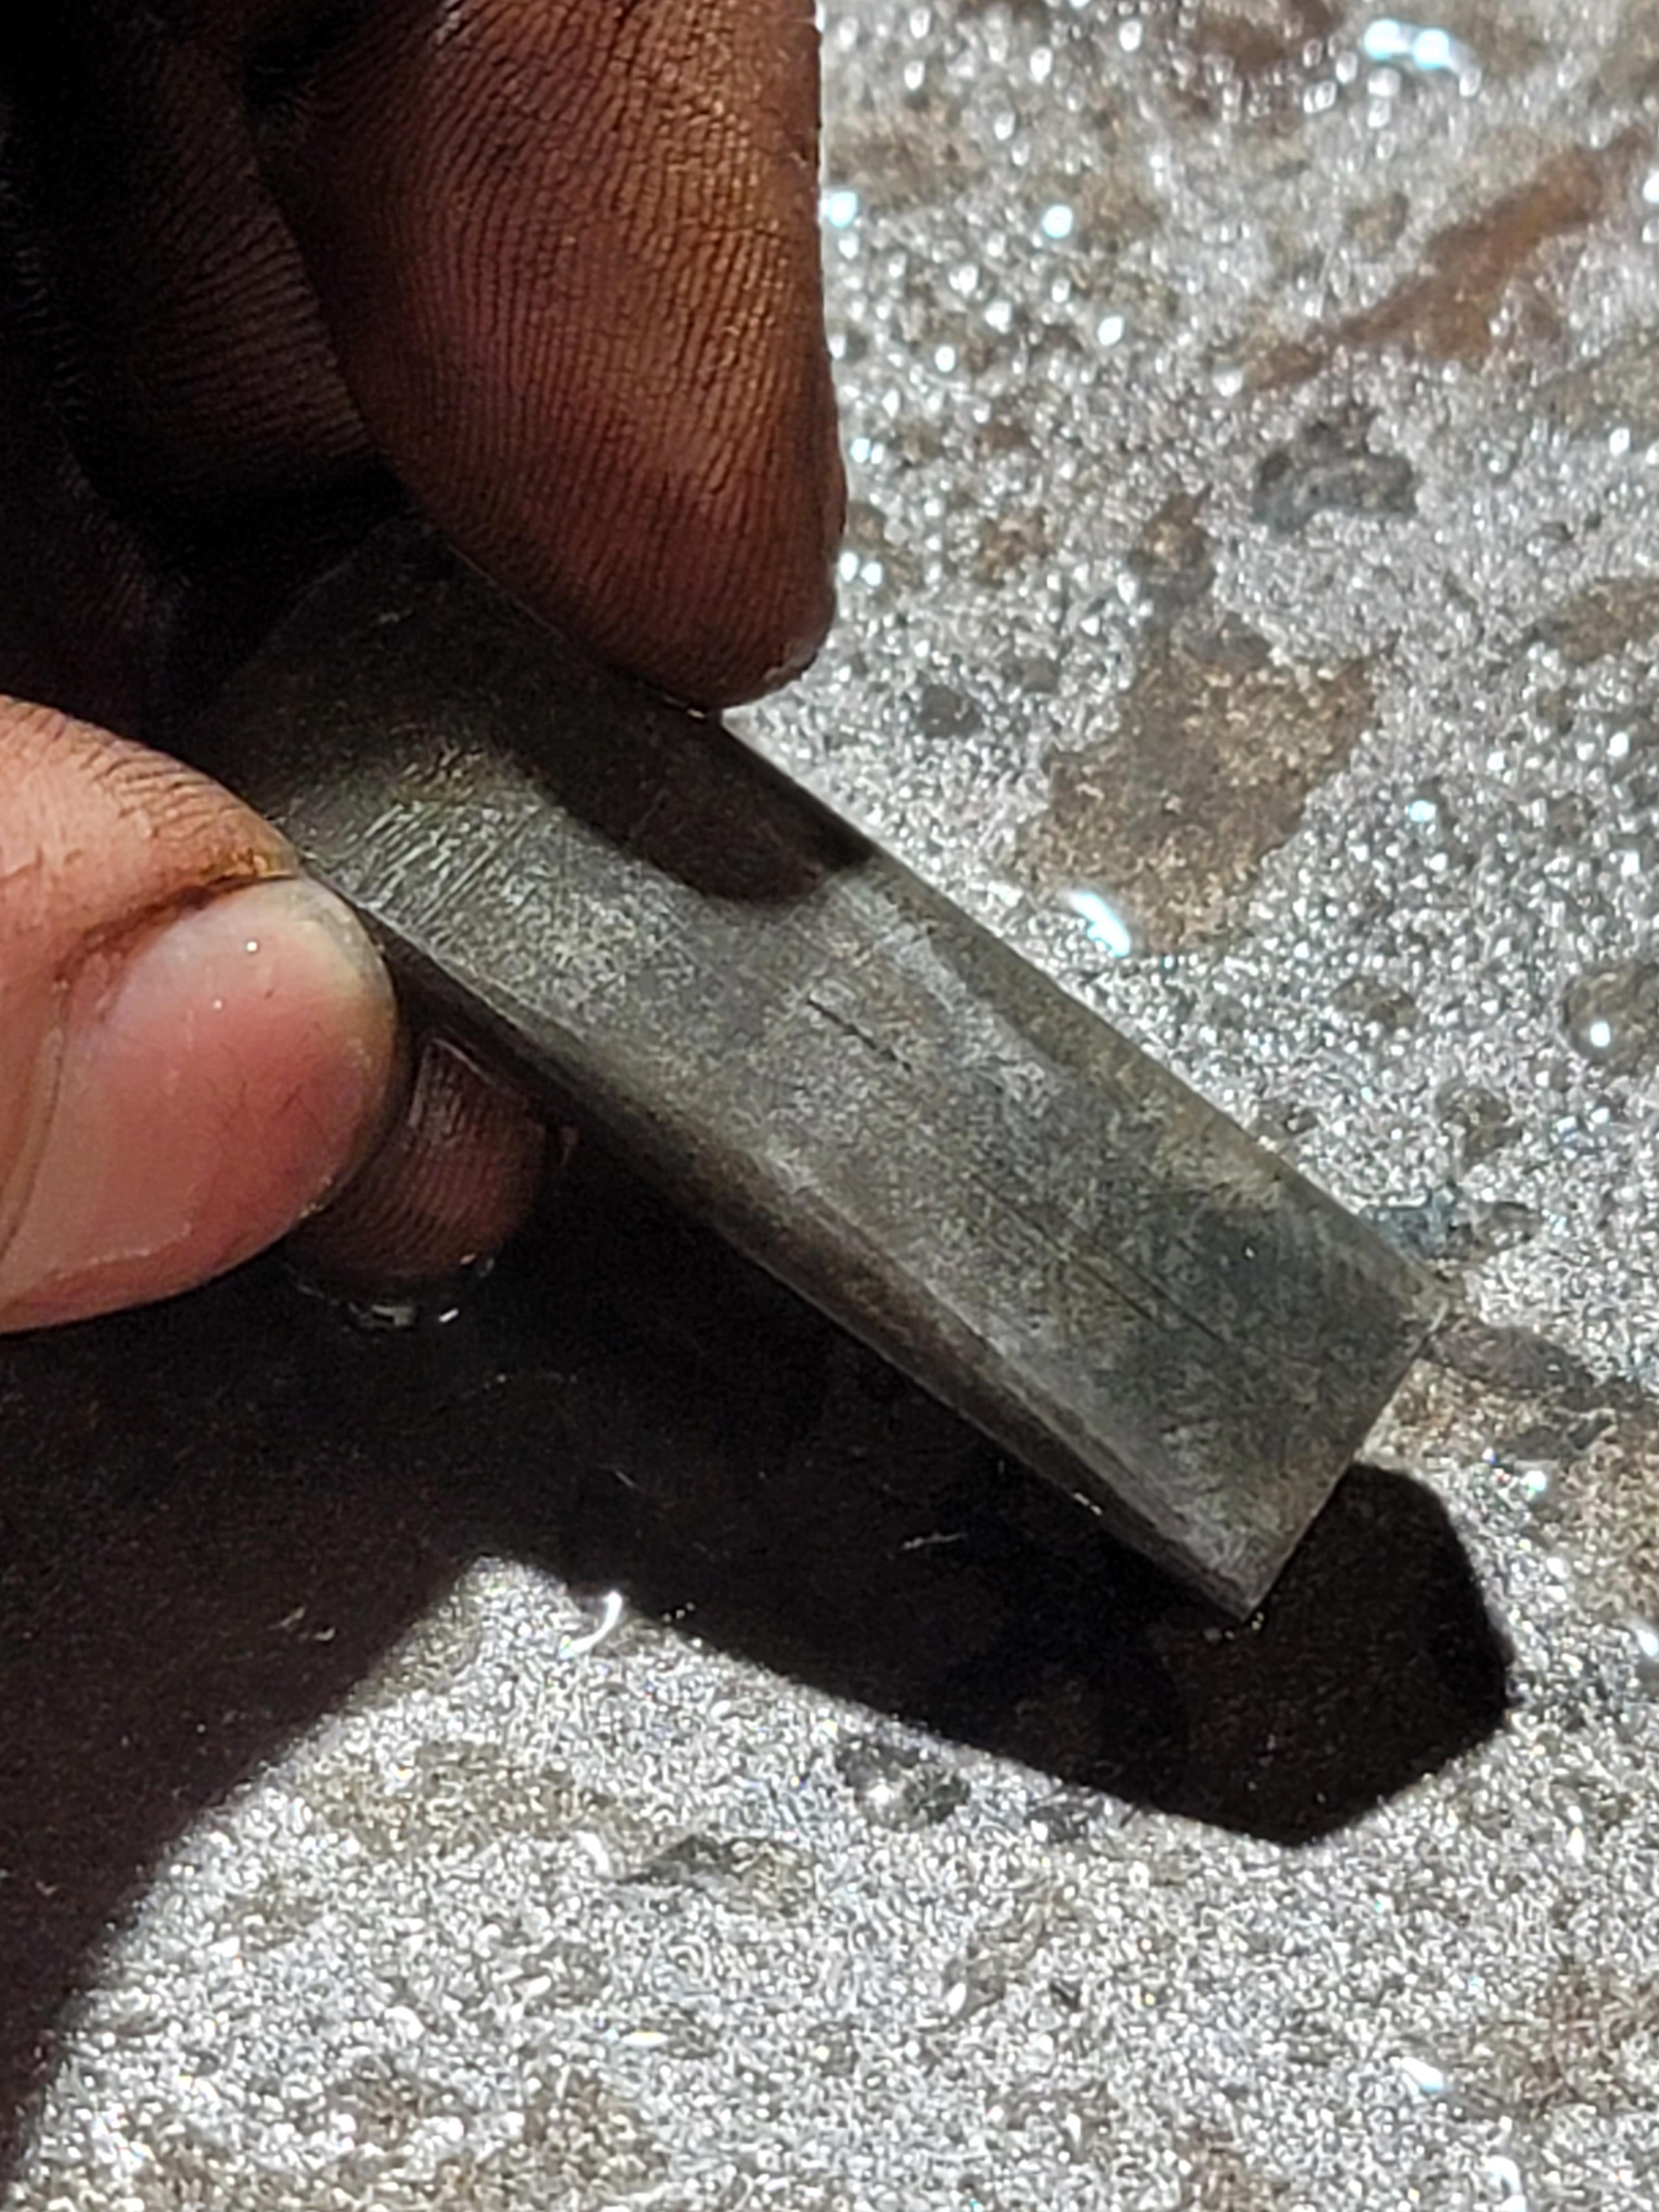
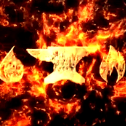
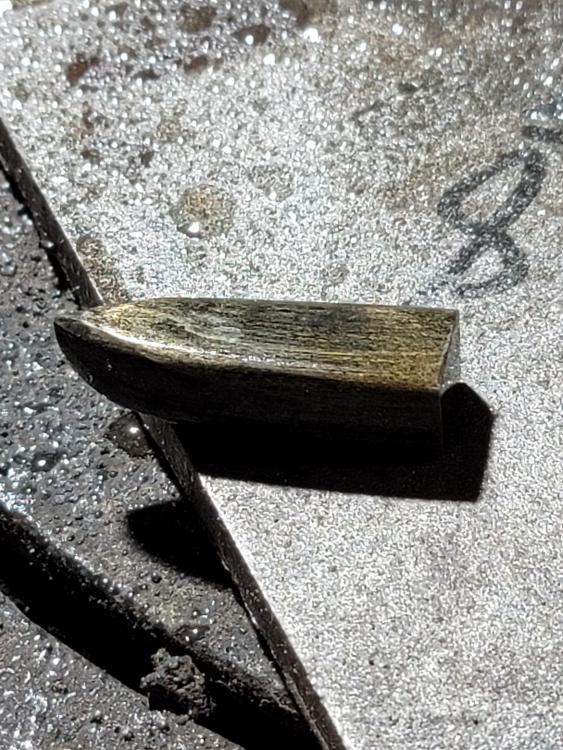
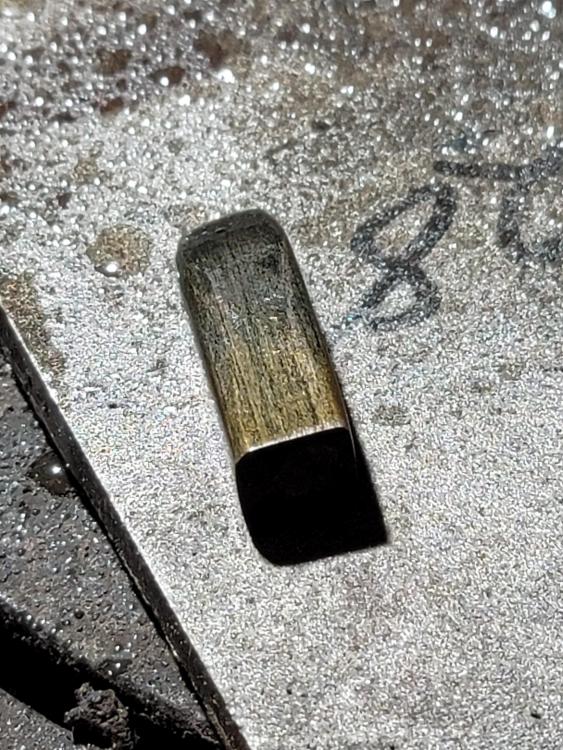
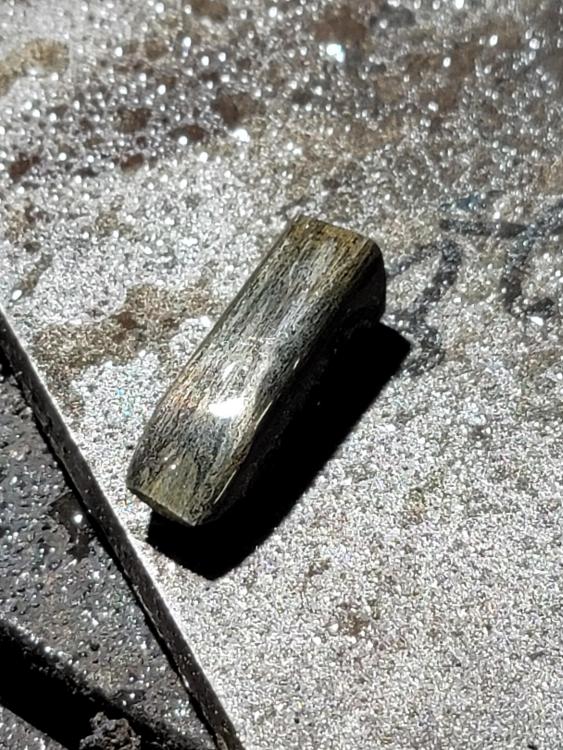
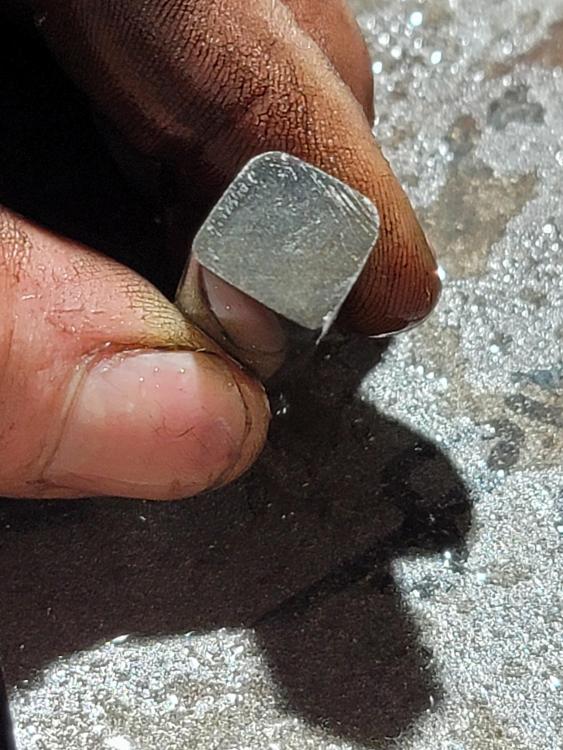
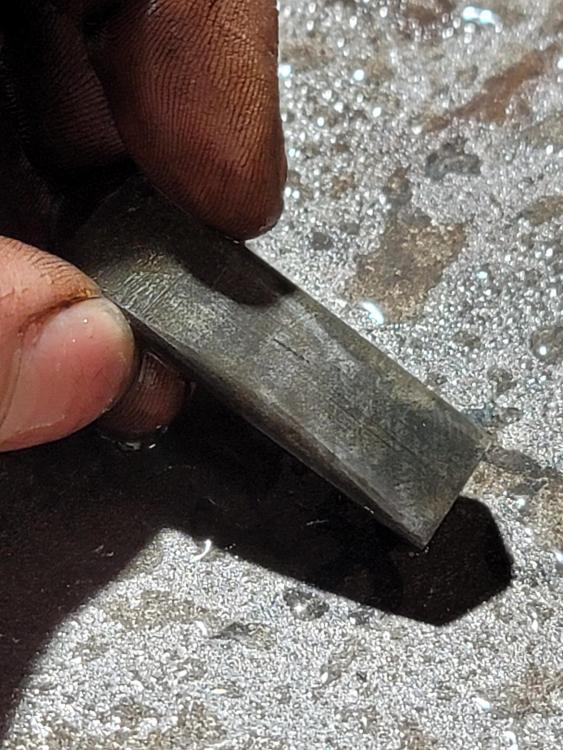
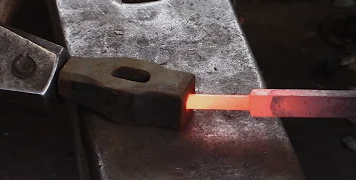
I had my brother stop by with his fancy phone to take some snazzy pictures for you all. Samples were ground and hand sanded to 800 grit prior to a deep etch in ferric chloride. Here is the WI spike (a very nice specimen IMHO; reasonably coarse grain and a mushroom cloud shaped pattern in the cross section): While it isn't nearly as exciting to look at, here is the steel spike: One thing that was interesting about the steel spike is that there were what I am going to describe as "tubular inclusions/voids" running down the length of the spike. After sectioning and sanding you could see them as dark spots in the cross section (nearly impossible to see in the pictures after the etch). I ground down to some of the most superficial inclusions and after sanding and etching they appeared as the streaks you see in the side view. Those are actually inclusions and in some cases voids within the material. I am left with the conclusion that the steel spikes are indeed steel. However they are of poor quality relative to modern steel we are used to today. (Note: for their purpose at the time they were probably more than adequate).

-
Most Machinery's Handbooks have a section on properties, treatment and testing of materials (this includes steel). I have the 30th edition which is relatively new. There might be a 31st edition now, but much of the information stays the same (including the older editions). Most notably, they removed the blacksmithing section that was found in earlier editions, but the trade off is more modern examples and applications. The nice thing is there is also a lot of additional info in there that is not specific to metallurgy. Some of the older versions can be found used much cheaper than new. It's commonly referred to as "The Bible of the Mechanical Industries". I will add that because it's not specifically a reference book for steels it is not as complete as the other sources already provided.
-
Even if it's not it might be interesting for people who haven't seen the WI grain to observe it after an etch. I'll see about borrowing a decent camera.
-
Hm.. That's a good idea. I'll cut and etch one of each and share what I find later this afternoon/evening.
-
I don't know enough about burners to help you troubleshoot, but I can tell you that 1500F isn't hot enough...
-
JLP, I got a whole tote of spikes ranging from small and relatively old to large and reasonably modern (MC, HC stamps etc.) from a rails to trails program by me. The small ones all look the same, but I've found roughly half of them are WI and the other half are a very low carbon steel. The latter group are (almost) equally fun to forge. Very soft under the hammer, but less of the "red short" that comes along with WI. These must have been taken from a line that was built with WI spikes, but over time they were replaced with steel ones of the same size.
-
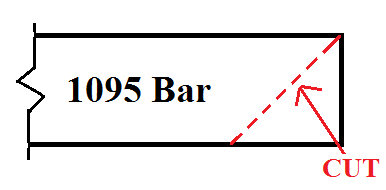
Quicker than when you first start? Yes. However, it's not nearly as fast and easy as nipping off the corner. IMHO the only reason to take the time to forge the corner back into the bar is with damascus where you're looking to let the pattern show that process.
-
Ah, with mine the rubber stem that holds the speaker in place tore and the speaker fell out. I've always considered the weakest link to be buttons. Frosty, I don't believe these have active noise cancellation. They work just as well as the normal pluggers you'll find at the hardware store etc.. The only difference is these have speakers in them.
-
They sent me a replacement set too. However, mine were still under warranty. What happened to your first pair?
-
Agreed on the need for some additional info. Another option to avoid a fishmouth while forming the tip of your knife is to simply hot cut the corner off. This lets you form the tip of the knife faster and in fewer heats which results in a better knife overall.
-
The smell is indeed uniquely unpleasant. The dust is also not good for your lungs so you should wear a respirator while you cut it. Question: Do you plan on leaving that gap between the ricasso and the antler?
-
Precision indeed! I like it. I have a little (equally precise) jig that I use during my tempering cycles. It's good to keep a magnet handy and check that the whole blade (or at least the whole edge) is non-magnetic before quenching.
-
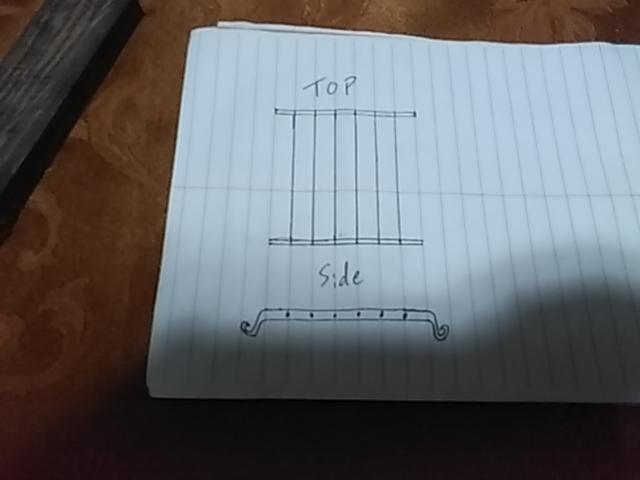
Like this? I know the feet aren't what you're describing... However, I do think this will be an easier way to do it. If my doodle is incorrect please make your own or send pictures of the actual piece you're working on. It's very hard to offer advise when I can't picture exactly what you're trying to describe...
-
The 19" handle finally came in for the 1lb 12oz axe head. It's a nice hatch-axe size. Large enough for 2 hands, but sufficiently light and wieldy to be used one handed.

-
Very cool.. I hope you'll share your progress as you go (or at least the final product).
-
A monkey tool slips over a tenon and allows you to square up the shoulder without damaging the tenon itself. I use a Mark Aspery style monkey tool (he has a youtube video on his channel showing how he makes them), but there are different varieties (like the one JHCC just showed). It's essentially a piece of steel with one hole drilled in it to accept the tenon and a second larger hole/slot to allow scale to be pushed through (clearing out of the hole for the tenon). Here's the thumbnail from Mark Apery's video on tenons.
-
A 7 foot trivet... That would be pretty large for my table! I'm guessing you mean inches not feet. If you could attach a couple of pictures of what you're trying to do it would probably help.. It sounds like you have the 1/4" rod passing through your drifted hole and your plan is to squeeze the hole to with the 1/4 inch stock in there hold it in place. That might work, but those joints aren't going to be very strong. I'm not as worried about it coming apart in use as loosening up on you during assembly. Is it an option to do a mortise and tenon for each 1/4" bar? The square shoulder of your tenon helps to hold the pieces together while you join them. Regardless it sound like torch work to me. If you need a very localized heat it's the best option. Again, some pictures would be helpful. Oh, and welcome aboard! Glad to have you.
-
The 40 knife number seems pretty arbitrary to me. The "real" number depends on the individual maker and how quickly they learn and apply what they learn to the next knife. That is to say there isn't a specific number of knifes you need to make before you start selling them. All that matters is that you and (perhaps more importantly) the customer are happy with the product you're trying to sell. Chad, I don't think he's done the grinds yet.
-
I don't know Slim, that looks pretty good to me. Nice job.
-
It's always a good idea to break your test piece(s) to examine the grain structure. If the grains are too large then adjust the quench medium and/or temperature(s) of your normalization cycles until you end up with a small grain stricture. This is just a picture I found online, but it's a good example of what to look for.
-
Hi Fatih, welcome aboard! Can please elaborate a little further? Your question is too vague as it stands..
-
The Does and Don'ts of using an angle grinder...
Frazer replied to Mod30's topic in Grinders, Sanders, etc
I think it destroys one component that you can buy replacement parts for and not the whole saw. My grandpa split his finger (not the whole finger, but enough of it) with a table saw in his younger years. I bet he would have traded a few dollars in parts to save himself a hospital trip. -
Was your test piece roughly the same cross-section as a knife or was it a piece cut off from one of the ends? Water might be too aggressive for a thin cross section.
-
It depends on what they're made of. I don't know how old these are, but most drill bits are made of high speed steel. However, there are many different kinds of HSS. I would do some testing to make sure you can even forge them and then decide what to use them for. If you're considering making a knife I would also harden and temper some test pieces. Some HSSs are oil hardening, others are air hardening, others are air hardening with a stream of compressed air... You'll want to know what you have before you forge a knife out of one.