

Goods
-
Posts
1,170 -
Joined
-
Last visited
Content Type
Profiles
Forums
Articles
Gallery
Downloads
Events
Everything posted by Goods
-
That is exactly where I stand George! David
-

What did you do in the shop today?
Goods replied to Mark Ling's topic in Blacksmithing, General Discussion
JLP, it was very good day. Thanks. Keep it fun, David -
What did you do in the shop today?
Goods replied to Mark Ling's topic in Blacksmithing, General Discussion
Alexandr, that’s the nicest umbrella stand I’ve ever seen! Rojo, I’m impressed with that fork. I have a hard enough time getting two prong forks to come out right! Well, today was the first day of my demo at the festival: (I thought I had more pictures…) To my surprise everything I made and brought, with the exception of the candle sticks and S-hooks sold today. Most of it by noon. Got another day to go. It looks like it will be another beautiful day to have fun forging and talking to the spectators. Keep it fun, David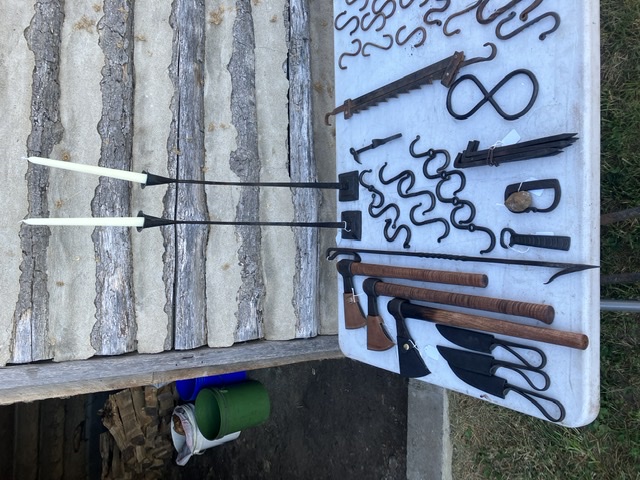
-
I love it the way it is! It has a kind of ethereal look to it. Keep it fun, David
-
Looks like a great purchase! I love my little marvel power hacksaw, but that one looks much more durable! Enjoy it, David
-
Quenching after induction tempering
Goods replied to Sivakumar's topic in Heat Treating, general discussion
Frosty, I’m guessing that the are just surface hardening large parts, then letting them self quench (like what you are think with fire damaged anvils). Then bringing the surface back up to a tempering range and by that time the base material is now too hot to cool down to a reasonable handling temperature. This is all a guess, but from some of the high production industrial processes I’ve seen it kind of make sense. The only that’s messing with me is the “polymer” quench. Bad translation of oil maybe, but who would use oil to cool from 80C? Still some strange inconsistencies… Keep it fun, David -
What did you do in the shop today?
Goods replied to Mark Ling's topic in Blacksmithing, General Discussion
Thanks Les and JLP. Not quite everything I wanted for it, but it’s my best to date! JLP, I probably have eight hours in it. My desire for a perfect item, doesn’t match my skill set just yet! Not that it’s perfect, but I try to do better with each one. Yes, I did use the hammer one these. Using a side set, I got the set down in front of the eye really clean, but not in the exact right spot every time. My large flatter also helped keep it nice and clean. Honestly though, maybe only a 1/3 of the forging was on the hammer and a lot of the was me trying to draw down the eye to 1/4” evenly. I’ve got this image in my head of how I want the eye transition to look (almost like an upset corner), but haven’t got it right just yet. Most of the important forging on these is hand hammer work. I sent more time fiddling with they eye than anything else. Keep it fun, David -
Beginner bladesmith making a DIY Forge. (Not heating fully)
Goods replied to CameronSeiger's topic in Gas Forges
You may also want to order some plistex to coat the soft bricks. That will drive the temperature up even more and add some protection to the bricks. It’s available on this site in reasonable quantities. Keep it fun, David -
What did you do in the shop today?
Goods replied to Mark Ling's topic in Blacksmithing, General Discussion
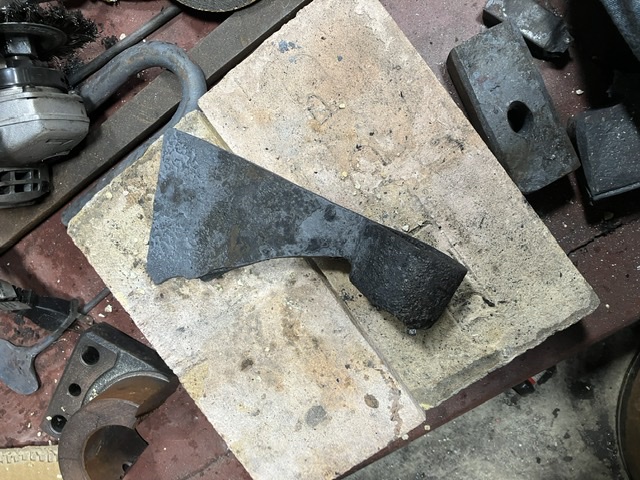
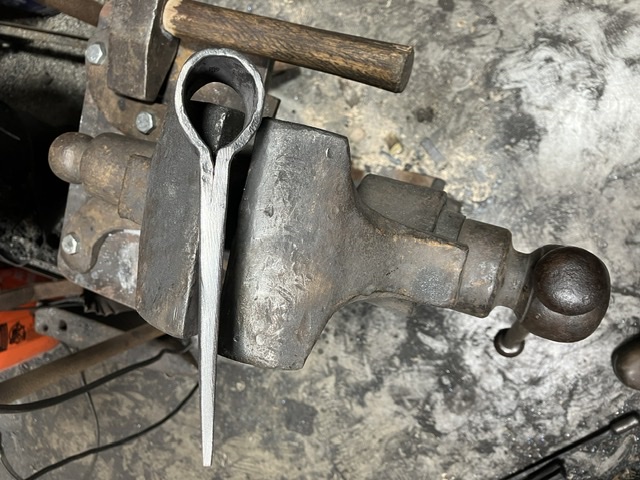
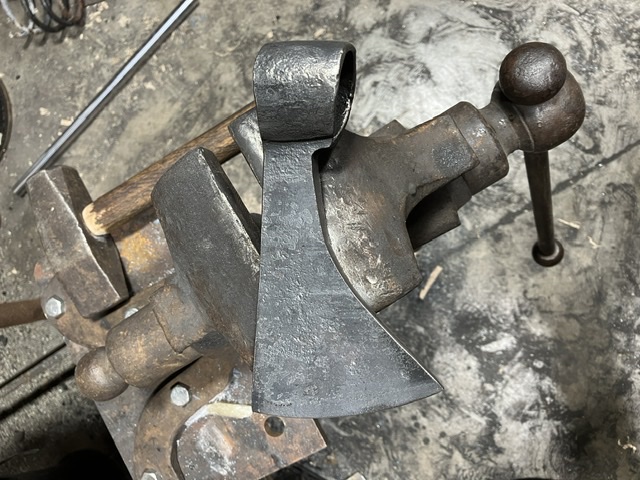
Ok, so I got the forging done on the 3rd hawk and it’s now normalizing: I may need to make more, because I kinda want to keep this one… Keep it fun, David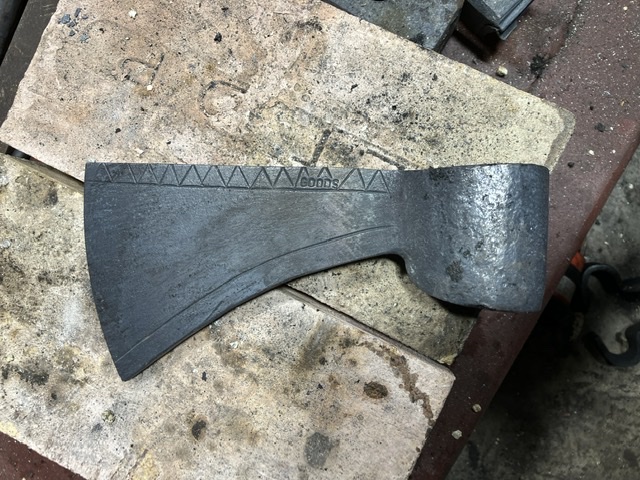
-
What did you do in the shop today?
Goods replied to Mark Ling's topic in Blacksmithing, General Discussion
Dave, no it pretty much due West of me. It’s Fort Vallonia Days in Vallonia, IN: https://fortvalloniadays.com/home.html I’ll be in the fort all day Saturday and Sunday with another smith and some of the other local Smith may stop by and hang out. I’m there to help out (do most of the forging) and don’t need to have inventory to sell, but it’s nice to have some sales to buy coal and steel both of which I’m running low on. Keep it fun, David -
What did you do in the shop today?
Goods replied to Mark Ling's topic in Blacksmithing, General Discussion
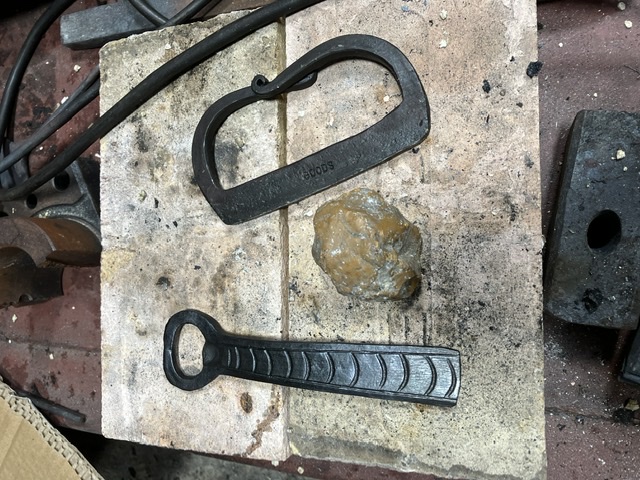
I managed to get the 2nd hawk to turn out and started on the 3rd. I tried the preform on it: In the end, it didn’t help much. 4-1/4” between the welds was short… At our hammer-in today, I worked on the 3rd hawk some more and made my first striker and a bottle opener that I’m pretty happy with: I’ve got a festival/demo next weekend and need to get more of these smaller items made up. (I’ll post pictures of the hawks once I get them finished up, not long now…) Keep it fun, David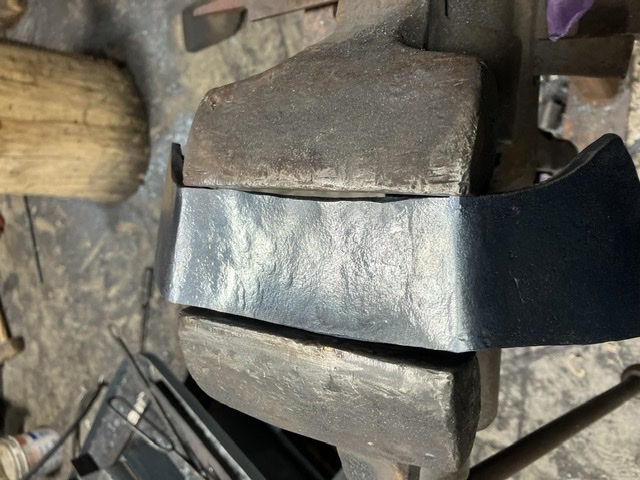
-
Real nice work Les! I like it!
-
What did you do in the shop today?
Goods replied to Mark Ling's topic in Blacksmithing, General Discussion
JLP, it depends on what you mean by preforming. I’m using 3/8” stock, so I forge the eye down to 1/4”. Similar to how one would do a wrapped axe. I personally like how it gives a defined point for the weld. (But it does mean I have to get the material measurement for the eye correct!) I’ve also been working on getting the shape developed for thickening the transition point at the front of the eye. Honestly, it’s just a looks/preference thing, but haven’t gotten it to be what I want yet. I just keep flattening it out somewhere in the process. On the other hand, if you mean preforming as putting a little bend in the eye material to setup for the taper of the eye and cupping the same area to compensate for the top and bottom of the eye flaring out when wrapping, then no. I always think about doing that. Then skip over those steps in the “heat” of the moment. I really need to remember that, it would definitely be a time saver on the back end, and I think it will result in a cleaner forging. When I was getting started, I spent a lot of time reviewing your videos, and was quick to review them as you posted new ones. I really appreciate the time you put into those. I rarely missed one of our hammer-in, and I learned a lot from those, but I have learned more of the fine details from you videos. When you have your school up and running, maybe I could swing getting time freed up for actual lessons. Not sure I can really work it out with the travel time included, but it would be great. (I really should plan to visit my sister in Connecticut anyway…) Keep it fun, David -
What did you do in the shop today?
Goods replied to Mark Ling's topic in Blacksmithing, General Discussion
I’ve been using cold rolled 1018 for the body and forge welding in a high carbon bit. Current batch has 1095 for the bit just because it’s what I have that works. I’d rather use 5160 and have a huge leaf spring lay around that would work, if I could ever get it to forge weld. I swear it’s cursed! (Could just just some crazy weld hating alloy…). Somewhere in my pile I’ve got a heavy file that I was using for bits, if I could find that, I’d use it. I’ve got a lot of old files laying around, but I can’t bring myself to sacrificing them, when I could clean them up and put them in service. Don’t know if I’ll ever get around to that though. David -
Ultimate swage block stand?
Goods replied to Machine shop's topic in Stands for Anvils, Swage Blocks, etc
But it’s so pretty! (Was the picture taken right after you finished the paint?) -
I’d either go with the double ending spikes with vertical straps or cut key groves 90degrees to one another and make wooden keys with along with vertical straps. That way if you using a hardie hole bending fork or hitting the side of the anvil to set a bend, all the stress won’t go into the straps. Of course glue may solve that, but what’s a little overkill! Keep it fun, David
-
What did you do in the shop today?
Goods replied to Mark Ling's topic in Blacksmithing, General Discussion
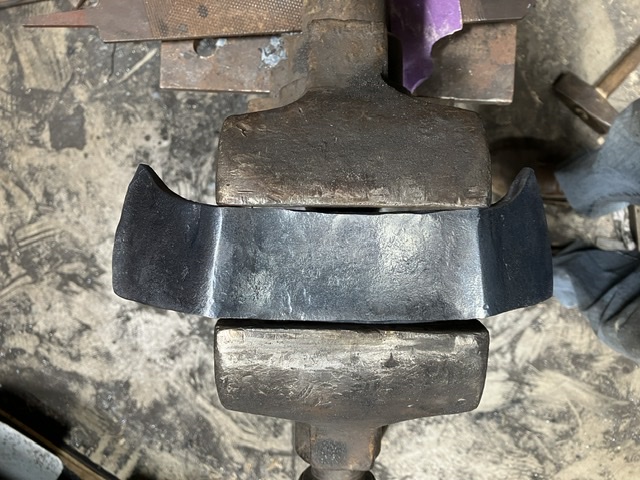
I started on my next hawk tonight. Not real happy with the results. The eye is a bit big, and the weld split while welded the bit in. I never thought the weld would break then. I already set the step in and the weld held then! I think I got the weld to take and some of my hawk handles are a bit oversized, so time will tell. Let see if it survives the final bit of forging, but that will have to wait a couple days. Keep the pictures coming, y’all are inspiring! Keep it fun, David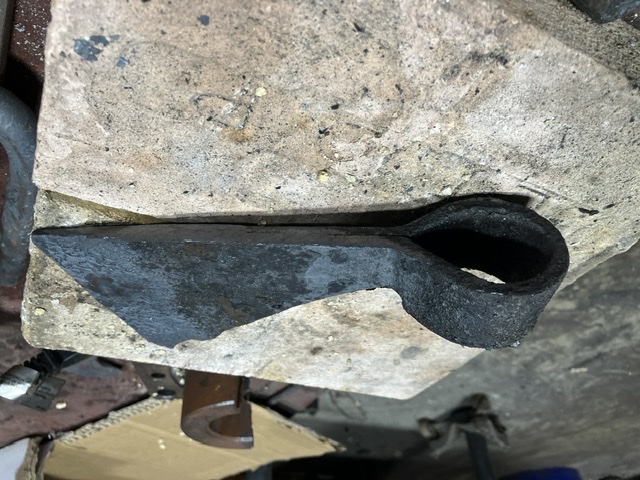
-
You all beat me to it!
-
What did you do in the shop today?
Goods replied to Mark Ling's topic in Blacksmithing, General Discussion
I got the first of 3 or 4 hawks wire wheeled tonight. Forged and anealed(sp?) yesterday. I’m going to have to leave a little more material for the eye. I thought I measured it out as 4” and checked before wrapping, but still had to draw out the eye walls quite a bit and popped a little bit of the weld. Should have added 1/4” in length to get to a centerline measurement, but it seemed like more than that. Maybe I’ll try 4-1/4” next time. I’d rather bet short than long. Keep it fun, David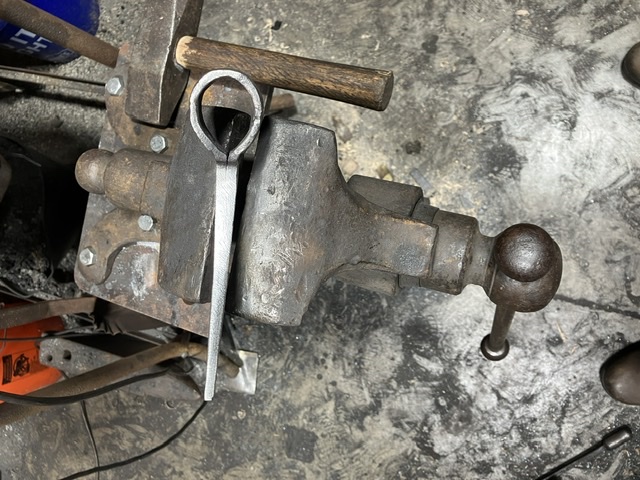
-
What did you do in the shop today?
Goods replied to Mark Ling's topic in Blacksmithing, General Discussion
Dewnmountain, they feel pretty good, but not as nice as a good wooden handle. Shainarue, looks like you had a good first day! Keep it fun, David -
What did you do in the shop today?
Goods replied to Mark Ling's topic in Blacksmithing, General Discussion
Never heard anyone say it was nice and neat… Here is a picture of a set similar to what I use: I usually hold this in a set of tongs. I really should have a custom stamp made. I could use this tool for other marks, but never want to take the time to reset the”type”. If I had one just for a touch mark, I’d be more likely to change this to a date, or material type (for marking tools).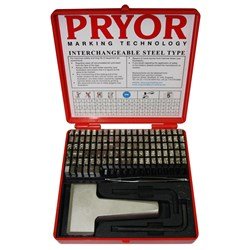
-
What did you do in the shop today?
Goods replied to Mark Ling's topic in Blacksmithing, General Discussion
Ok here’s the picture of the tripod: (Forgive the mess that is my shop.) Also hardened the blacksmith knives and they’re now tempering: Not sure if they got a hard as I would like, I wouldn’t be surprised if there’s quite a bit of decarbonization. Plan on just sharpening them up, leaving them pretty “rustic.” Keep it fun, David

-
Cleave, absolutely a great picture. I love it!
-
I would be worried about the elements in the coal that don’t cook of as it cokes up. I wouldn’t want to filter water with activated carbon that could contain significant levels of heavy metals. Keep it fun, David
-
What did you do in the shop today?
Goods replied to Mark Ling's topic in Blacksmithing, General Discussion
Not sure I can get much more width without upsetting the stock first. I calculated the volume first and 1/2” round and 1/4”x3/4” is close to the same. I’m sure I lost some volume to length increases though, the corners were a bit round in a couple places… My thoughts on heat treatment are one our two normalizations, then quench in oil (canola, it’s what I have), and finally temper in the over for 1hr at 400F. I’ll try to avoid getting the handle portion above magnetic before the question. I’d rather the handle end up normalized than hard. Keep it fun, David