HojPoj
-
Posts
290 -
Joined
-
Last visited
Content Type
Profiles
Forums
Articles
Gallery
Downloads
Events
Everything posted by HojPoj
-

66 lb. Chinese 'ACCIAIO' Anvil Unboxing and testing
HojPoj replied to HojPoj's topic in Anvils, Swage Blocks, and Mandrels
I ordered on 21 JAN, and it was delivered on the 25th. I can't say that your experience will be the same, for all I know I got someone's return. Shipped from Keasbey, NJ -
66 lb. Chinese 'ACCIAIO' Anvil Unboxing and testing
HojPoj replied to HojPoj's topic in Anvils, Swage Blocks, and Mandrels
Not saying I was hoping the horn would be hardened (they're usually softer anyways), just wanted to make note of it. Just one of those things where if a piece is cast and if they did an oven heat treat, one would reasonably expect the properties to be uniform throughout the piece (even on the waist of the anvil). Given that it's really only hardened over the face, this shows that the heat treating was more localized, and it'd be interesting to see just how deep the hardening actually goes. -
How to mount my beginner anvil?
HojPoj replied to Robotick's topic in Stands for Anvils, Swage Blocks, etc
As big as you can get, but I used an 8-pounder since it's what I had. I ended up taking a bit off the flanks so I could work some bends/corners a little easier. It works well enough for starting out. As
-
66 lb. Chinese 'ACCIAIO' Anvil Unboxing and testing
HojPoj replied to HojPoj's topic in Anvils, Swage Blocks, and Mandrels
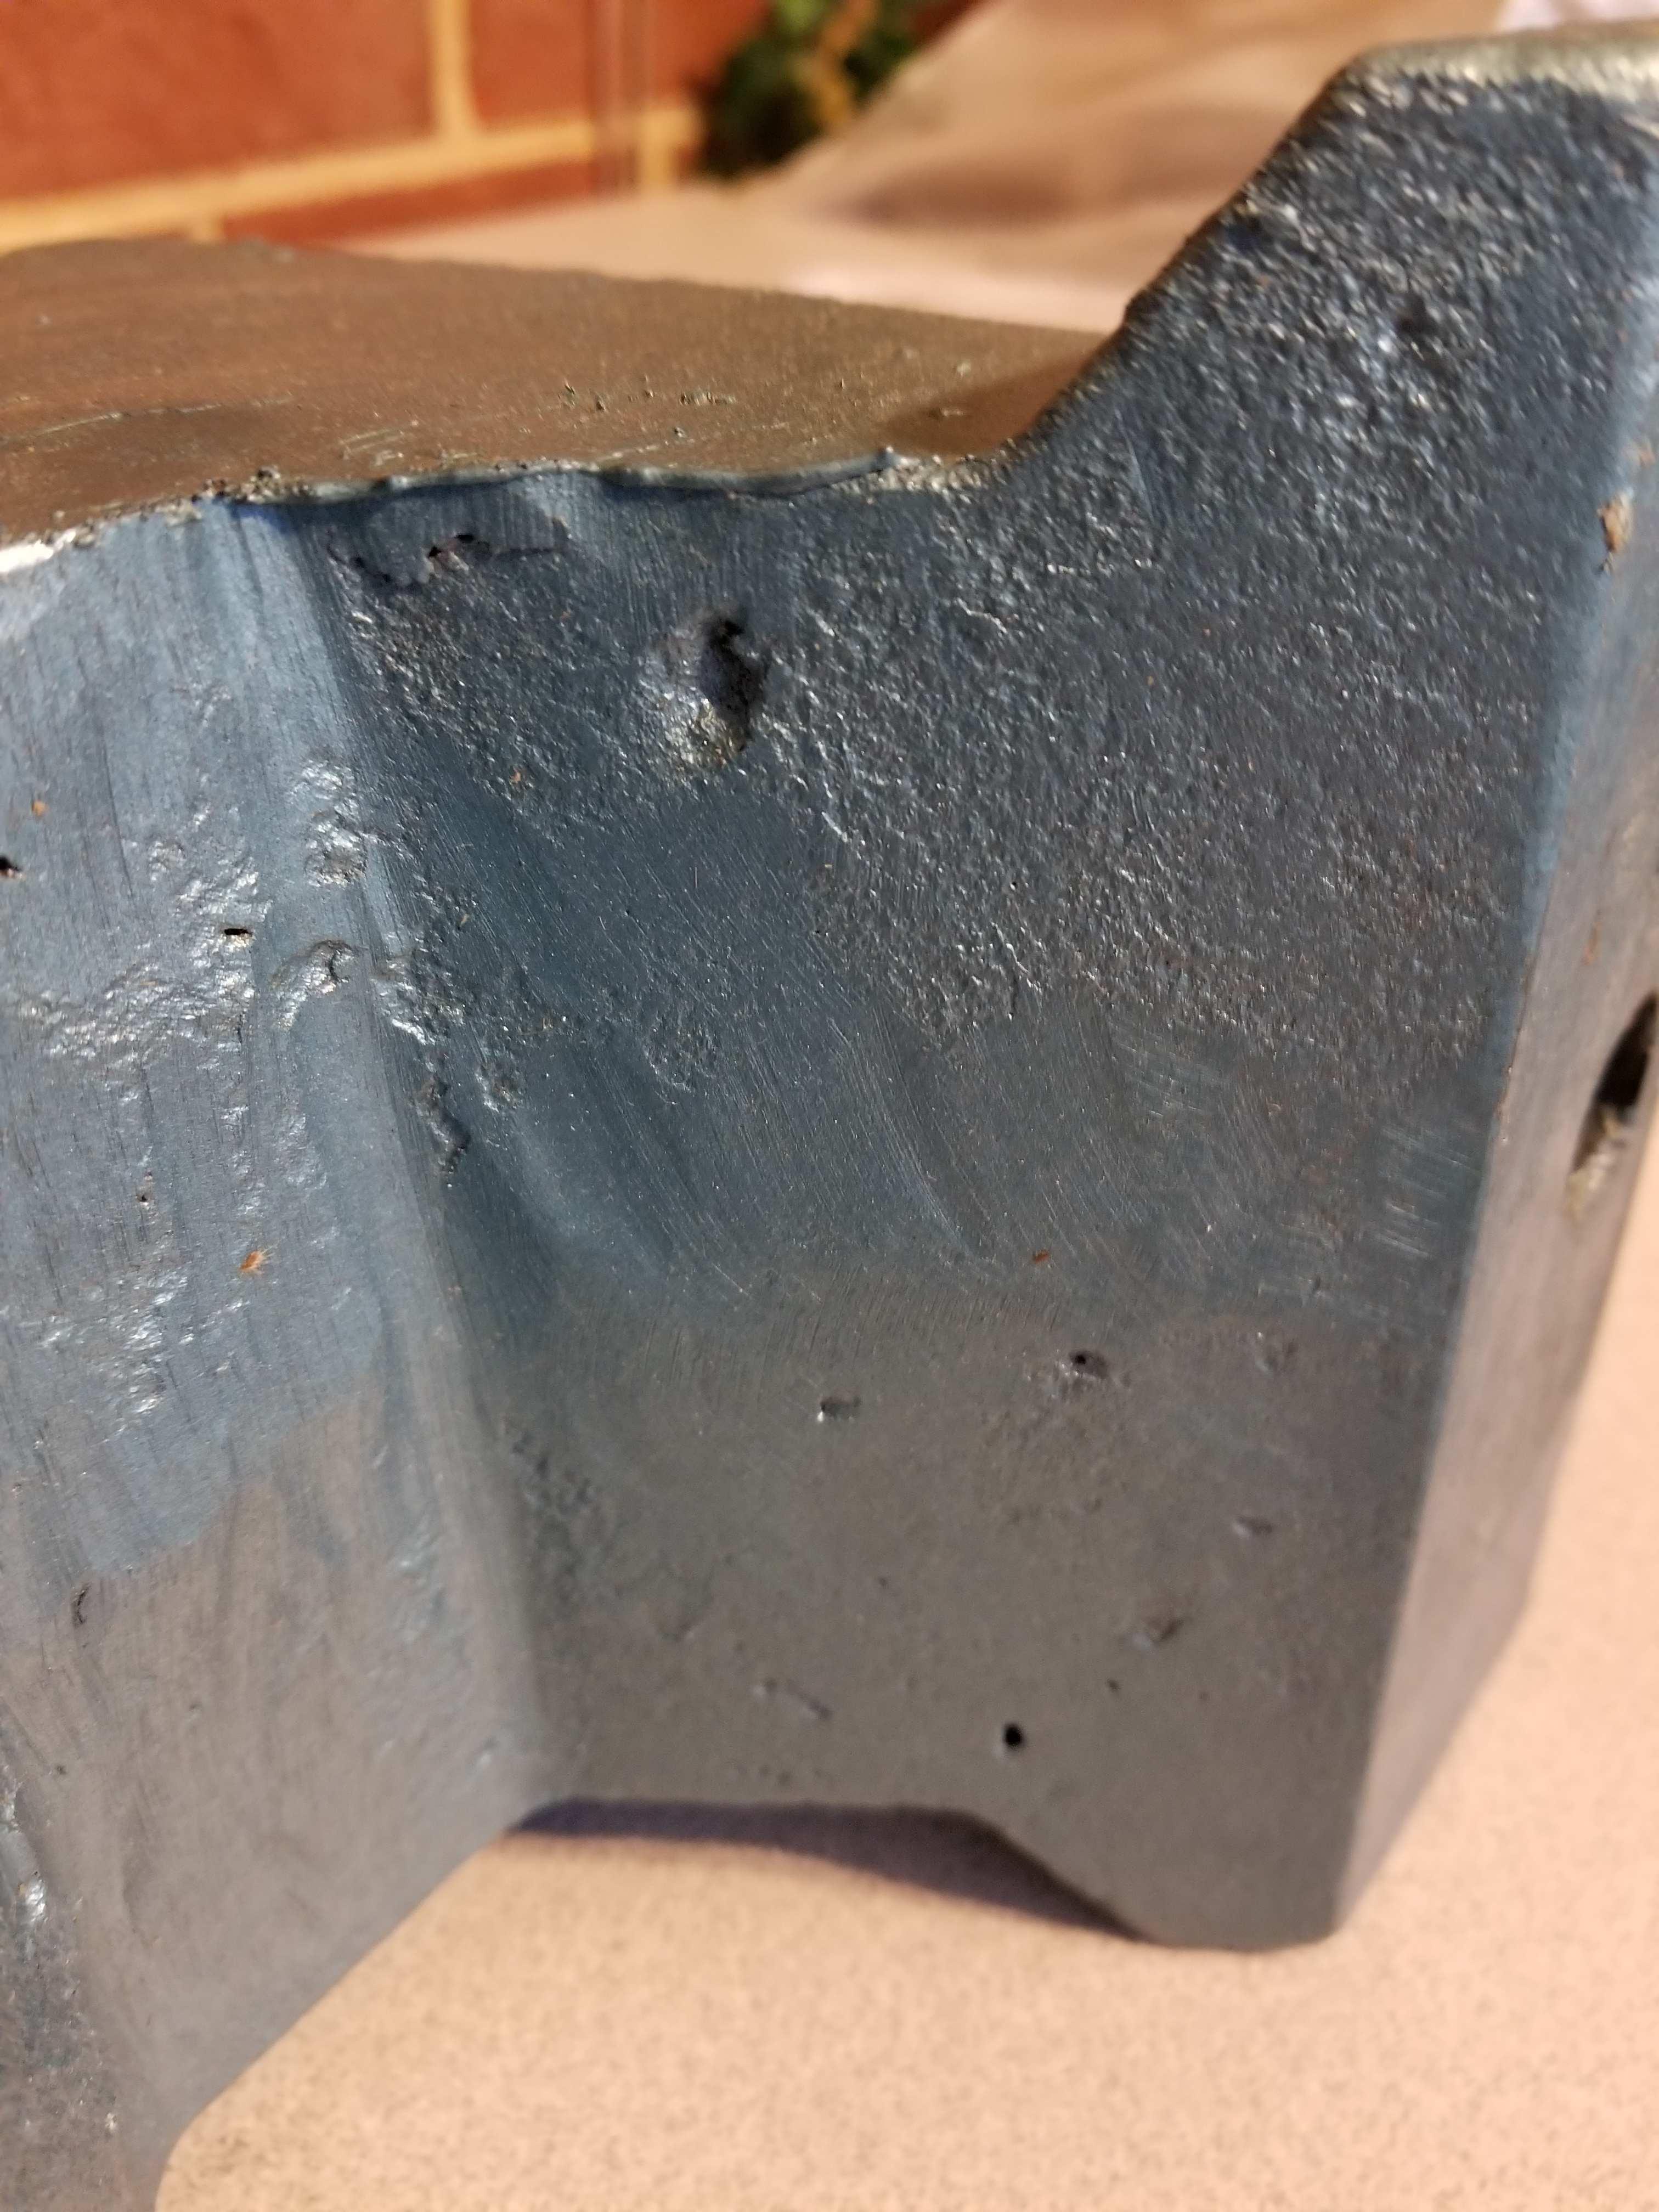
I spent a few minutes last night doing some cleaning in the garage, and have the following additional points: The horn is softer than the face of the anvil. This conclusion was arrived at through use of a file. I did a small amount of cleaning up the tip of the horn, and as I moved towards the face the material removal rate diminished to the point that the file was skating off the surface. Given that the file can bite in other parts of the body this leads me to believe that there is a significant differential in either the hardening or tempering that could be the result of uneven cross sections, or perhaps it was induction hardened over just the face. Upon closer inspection the void I referred to earlier didn't have a screw or anything in it, it was just the body filler that happened to have a dollop end that looked like a fracture. I'll still need to probe it to see how deep the void is. -
ASO (how well will this work?)
HojPoj replied to Eventlessbox's topic in Anvils, Swage Blocks, and Mandrels
Cast iron is brittle, so the vise body would likely fracture. Also, don't expect much success in welding to it- it'll crack around wherever you attempt to weld. -
What did you do in the shop today?
HojPoj replied to Mark Ling's topic in Blacksmithing, General Discussion
Ted, look up oxy fuel hose ratings. There are types that are for acetylene only, and others that are for both acetylene and propane. Propane in the acetylene-only lines will degrade the hose- leading to leaks or ruptures. I figured replacing my hoses was cheap insurance against catastrophe. -
66 lb. Chinese 'ACCIAIO' Anvil Unboxing and testing
HojPoj replied to HojPoj's topic in Anvils, Swage Blocks, and Mandrels
I'd say just get it and stop waffling about it. One nice thing is that it's easier to carry than many improvised options. If it's a lemon, you can just consider it a combined bick and portable hole to accompany a scrapyard improvised anvil. Ohhhh, thanks for that, Kozzy! That at least makes investigating it a bit easier (rather than scratching my head wondering just what the HECK I'm looking at). -
66 lb. Chinese 'ACCIAIO' Anvil Unboxing and testing
HojPoj replied to HojPoj's topic in Anvils, Swage Blocks, and Mandrels
Oh, I know how to make a good stand for it. The current one is a field- expedient lashup just so I could give it a trial run. We'll say the steel i have exceeds my welder's capabilities -
66 lb. Chinese 'ACCIAIO' Anvil Unboxing and testing
HojPoj replied to HojPoj's topic in Anvils, Swage Blocks, and Mandrels
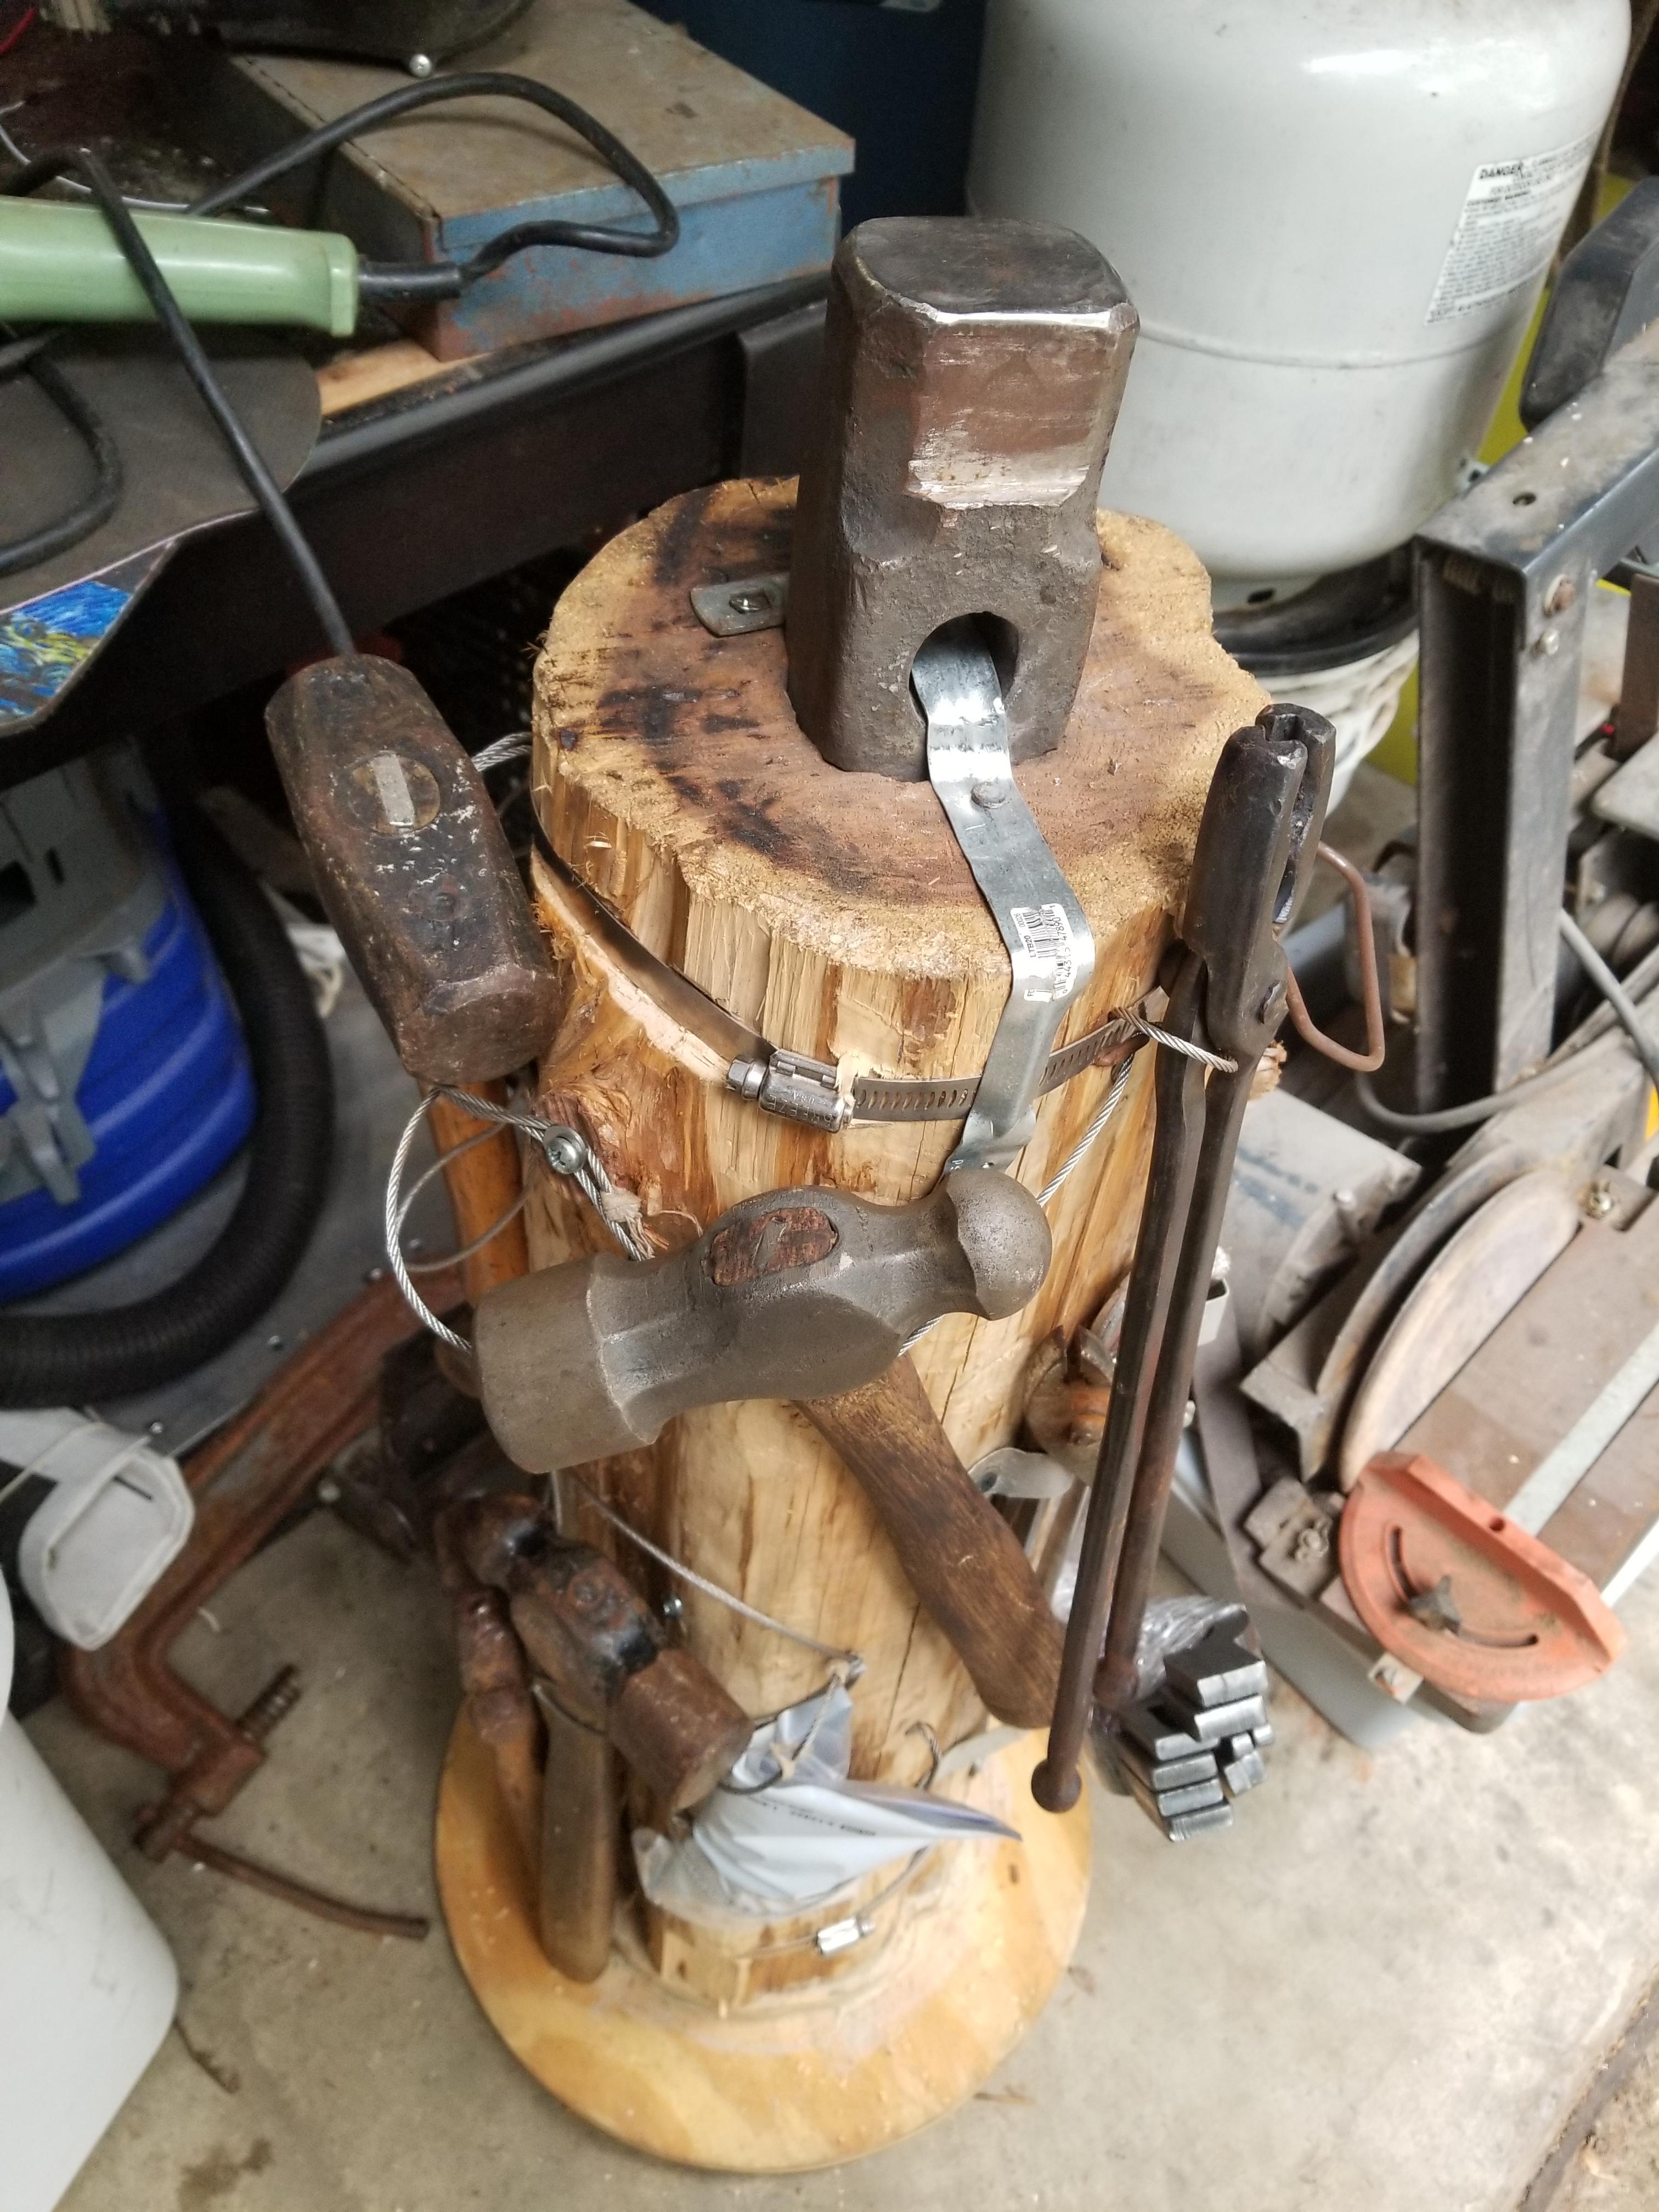
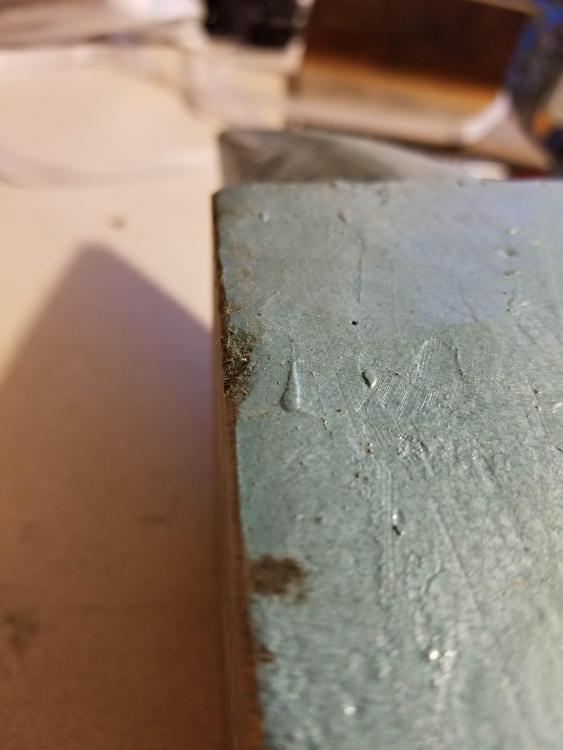
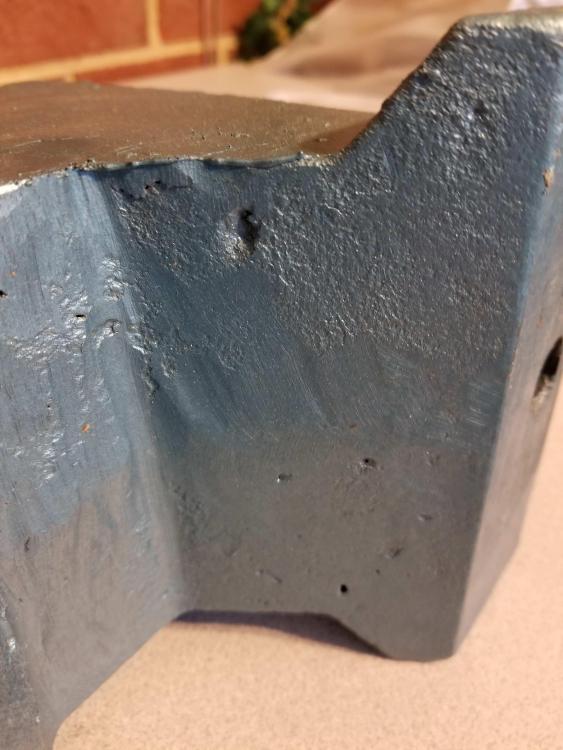
So, quick report. Spent a lot of time today using the anvil, but not a whole lot on documenting, unfortunately. This quick summary is more qualitative from the first time using the anvil, and not much in the way of numbers or photos (sorta busy at the moment, will document and post more later this week). I had given the corners a quick swipe with a flap wheel, but found that even then it was too sharp after doing a bit of hammering hot steel on it. I went back and put a more generous radius on about 2.5 inches of the left part of the face, this gave me an area that didn't mark the steel so much when working near the edges. While not as lively as some of the student anvils I've used at the local ABANA club's setup, it seemed to perform fairly well for something of its size and pedigree. The ring on it was fairly bothersome, and was somewhat dampened by a magnet from a microwave's magnetron. Screwing it down to the stand helped a little bit too, but my method for securing wasn't as robust as I'd like (there's plenty of stuff of I'm going to need to fabricate in the future). Funny enough, an impact hammer bit that I had fit nicely in the pritchel hole. The round shank portion fit inside the hole, and it rested on the shoulder created by the transition to the hex portion of the bit shank. After a while of using this for a rough n' ready hot cut, the shoulder started to deform the mouth of the hole, at which point I stopped using it this way. I did try my hand at upsetting the shank to see if I could do it (not on the anvil, but on another big hunk of metal), the answer was 'Not today'. All parting off of material was done by chisel for the rest of the day. Proper hardy tooling is first on the list for the next time I get to do some fabrication. After finishing my practice forging session, I took a knotted wire wheel on a grinder and started stripping the paint from certain sections of the anvil. The horn and upper part of the sides got stripped, and I also gave the face a brushing so I could see how it was holding up. At this point there were a few disappointments: While the surface finish on the unground sides and horn was expected to be rubbish, the paint hid just how bad it was in certain areas. On one side of the anvil, there's an anomaly in the surface that I can't tell if it's a void that got filled, or if it's something that was in the scrap that went into the melt that did not melt before it was poured. It looks like it might be the end of a broken off screw or something, though if it really IS an inclusion it'd likely be something like a carbide tool or something that doesn't melt at steel casting temps. Further study required. I know I'm still fairly new to smithing, but there were a fair number of very noticeable hammer marks left on the face of the anvil at the end of the session. What's curious though is that they're in spots that don't tend to work on much, and their shape indicates I was using a hammer that I KNOW is softer than it really ought to be (thanks, Blacksmith Depot Czech hammer :-\ ). I'll need to pay better attention next time to see what I was doing and why the face is getting marked. That I know of, I only had one blatantly obvious missed strike that hit the anvil face. It may be partly due to the anvil being an inch or two higher than I'd like- yet another thing to check. I also did a spark check. The sparks from a grinder wheel traveled far, and had some starbursts consistent with that of a medium carbon steel. I checked this against a cast-iron dumbbell, and I can at least say it is unequivocally NOT cast iron. The horn's taper and tip are fairly blunt. This limited the size of the features that could be tweaked on the horn, and for what I was doing it's apparent I'll need to make a bick to work the smaller stuff that I was able to do on one of the local guild's student anvils. On the bright side the horn worked reasonably well as a fuller for drawing out some 3/8 stock using the Fiskar's 3lb straight peen demolition hand sledge (see JLPServices' review of those hammers). I'm happy to report that even with some too-cold stock and vigorous blows the horn stayed attached to the body. The tail of the anvil wasn't as nice to work on, as it didn't seem to return the energy that the other surfaces did. The taper WAS, however, helpful for working on sections between features that I didn't want to have to fix later, so that was nice. First impressions- it's a decent anvil that does what it's supposed to. Would I say it's worth it? For the price, yeah, I'd say it's worth getting if your work doesn't exceed the size it's meant to handle and you lack the time or patience to find a secondhand anvil (genuine or improvised). For well under 200 bucks it's a viable option. Do I have some gripes about it? Yes, but in the face of the current anvil market I can deal with them for the price. The unfortunate bit about the source, however, is that the product quality is very inconsistent, so where one person might get a great one, there'll be others that get lemons. This is an inherent risk to procuring tooling from far-east sources. Now that I've got the primary tools needed to get practicing, I'm less focused on trying to make-do with the stuff I scrounged and can actually focus on getting set up properly and actually USE the stuff I have. And THAT, my friends, is well worth it to me. More thoughts and pictures to come after this week's important work deadline. Cheers, Eric Leatherbury -
66 lb. Chinese 'ACCIAIO' Anvil Unboxing and testing
HojPoj replied to HojPoj's topic in Anvils, Swage Blocks, and Mandrels
On the horn definitely, and will strip it wherever the finish looks suspect (looking for body filler). Not in the mood to strip the whole thing without cause, though. -
66 lb. Chinese 'ACCIAIO' Anvil Unboxing and testing
HojPoj replied to HojPoj's topic in Anvils, Swage Blocks, and Mandrels
Not yet, that will be a part of tomorrow's test. Though the burr that I took off the hardy had some malleability to it- which is something i wouldn't expect if it were really cast iron. -
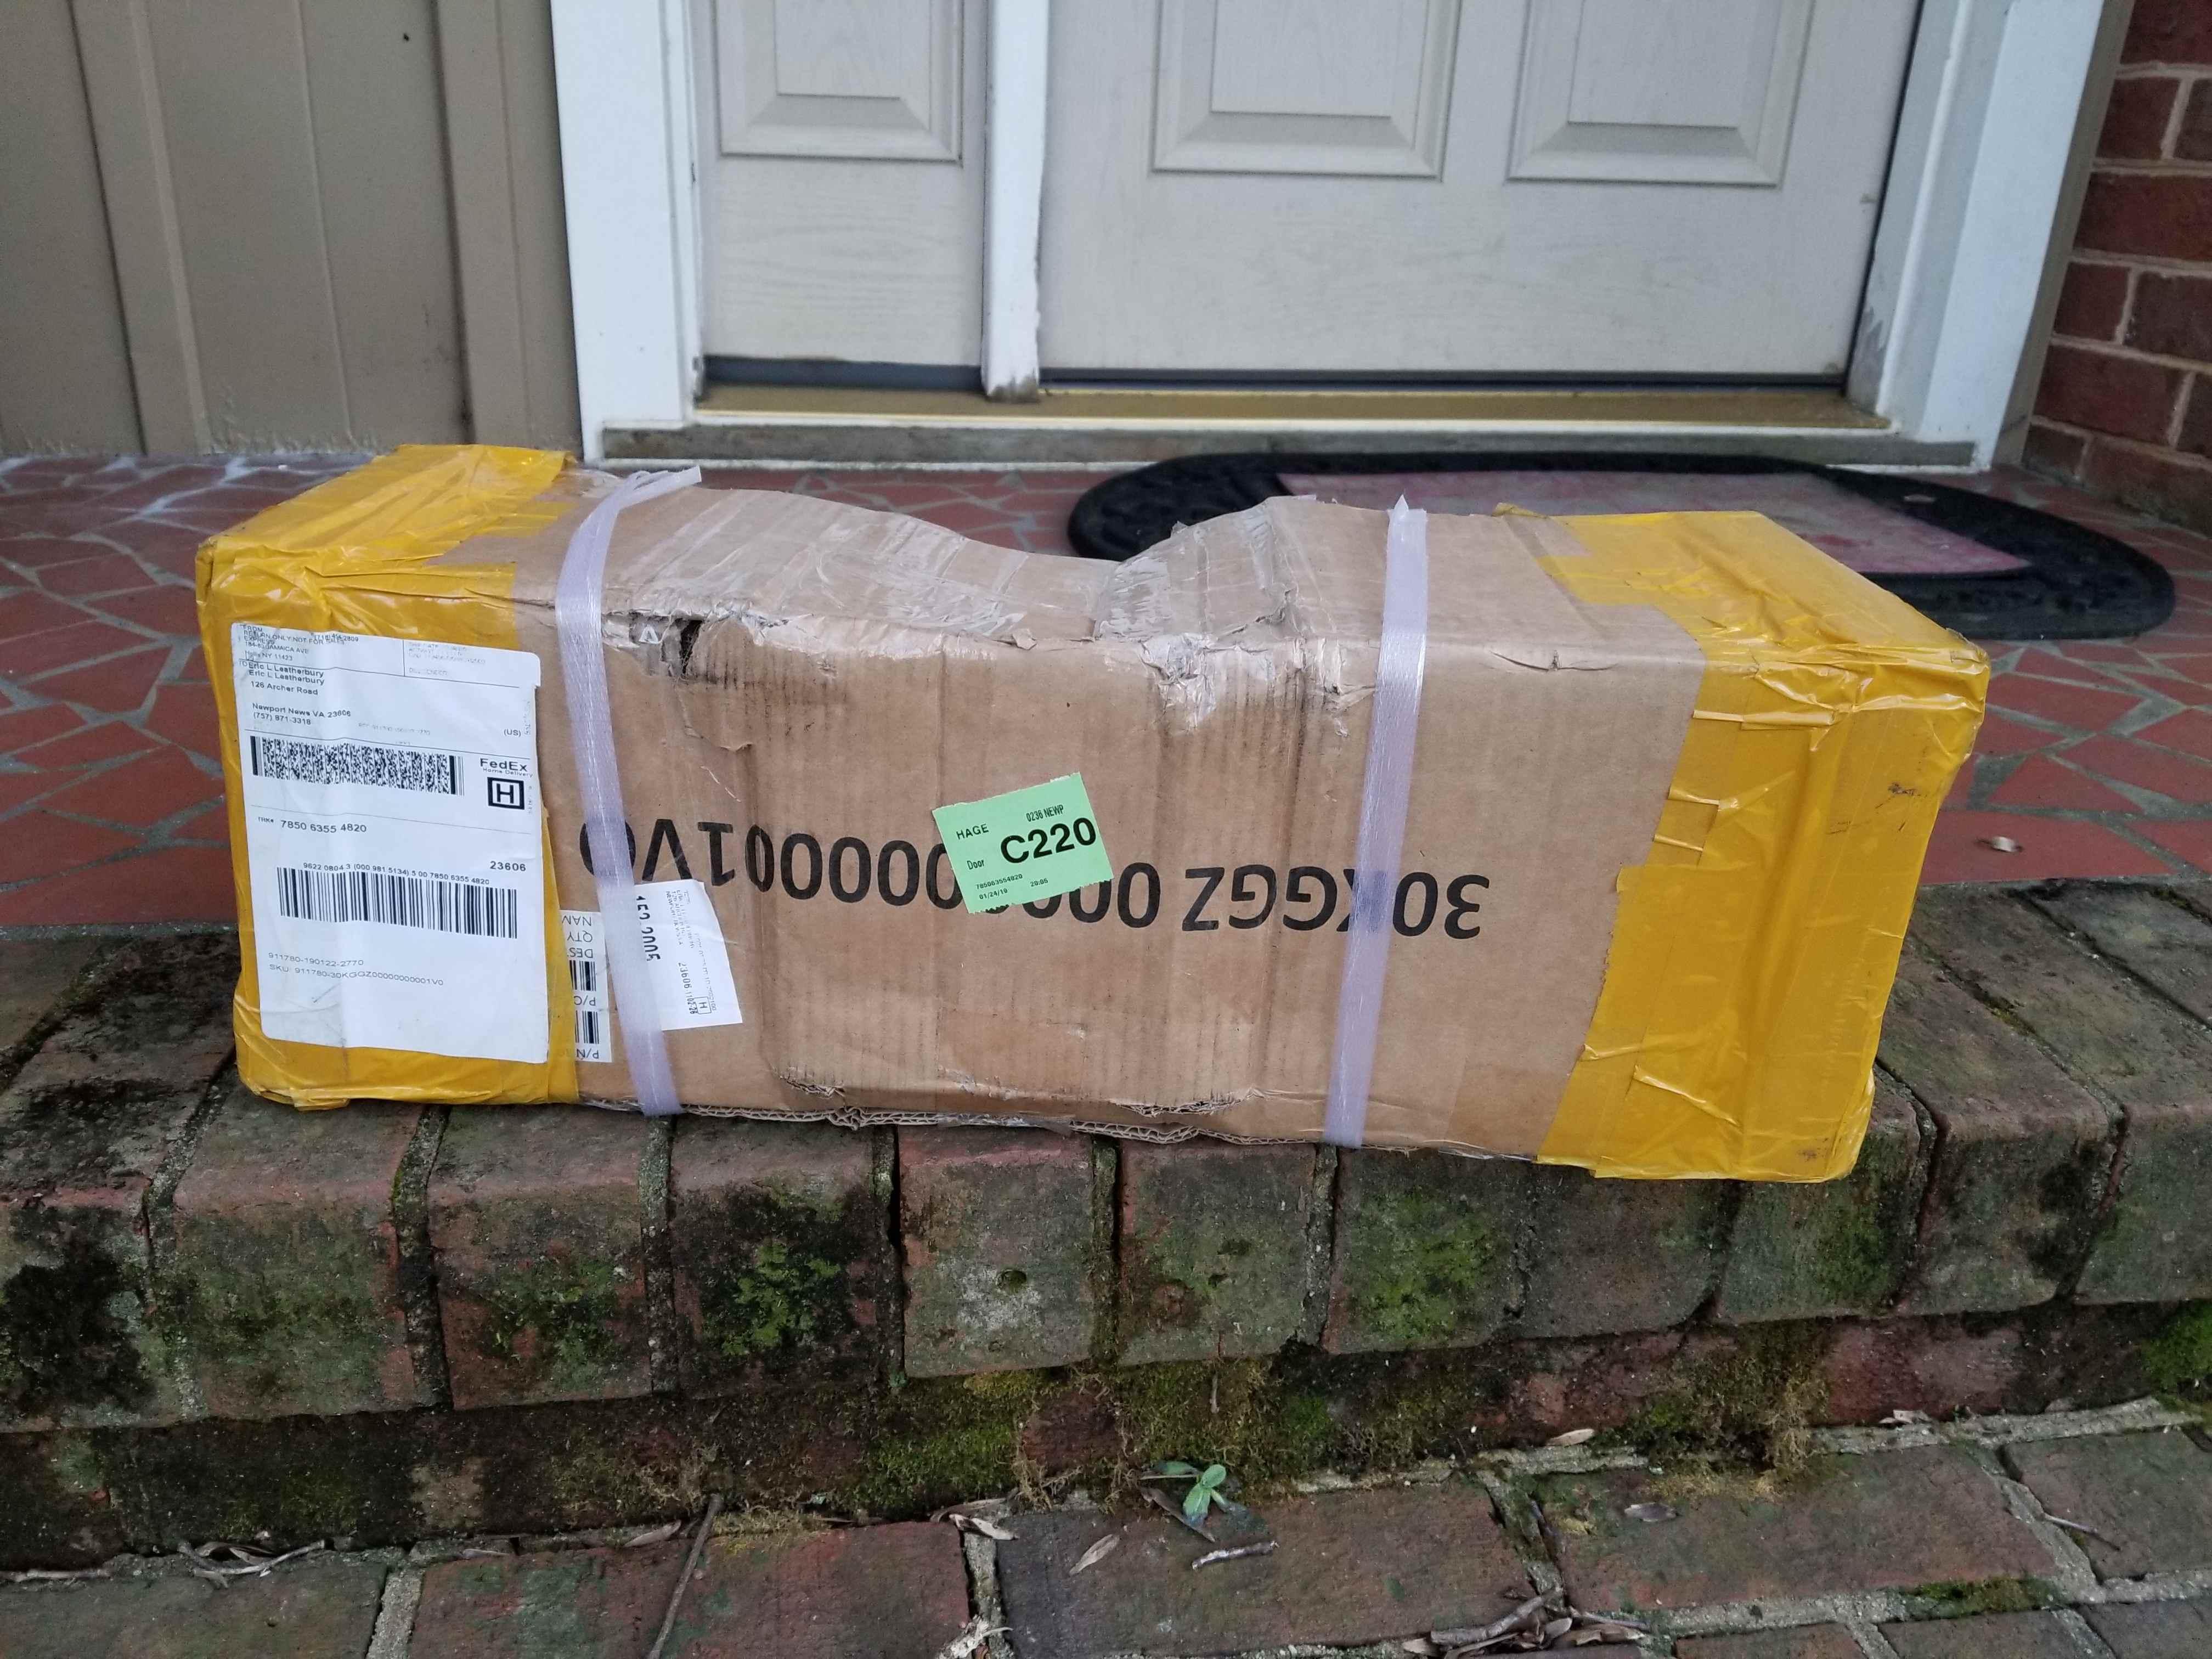
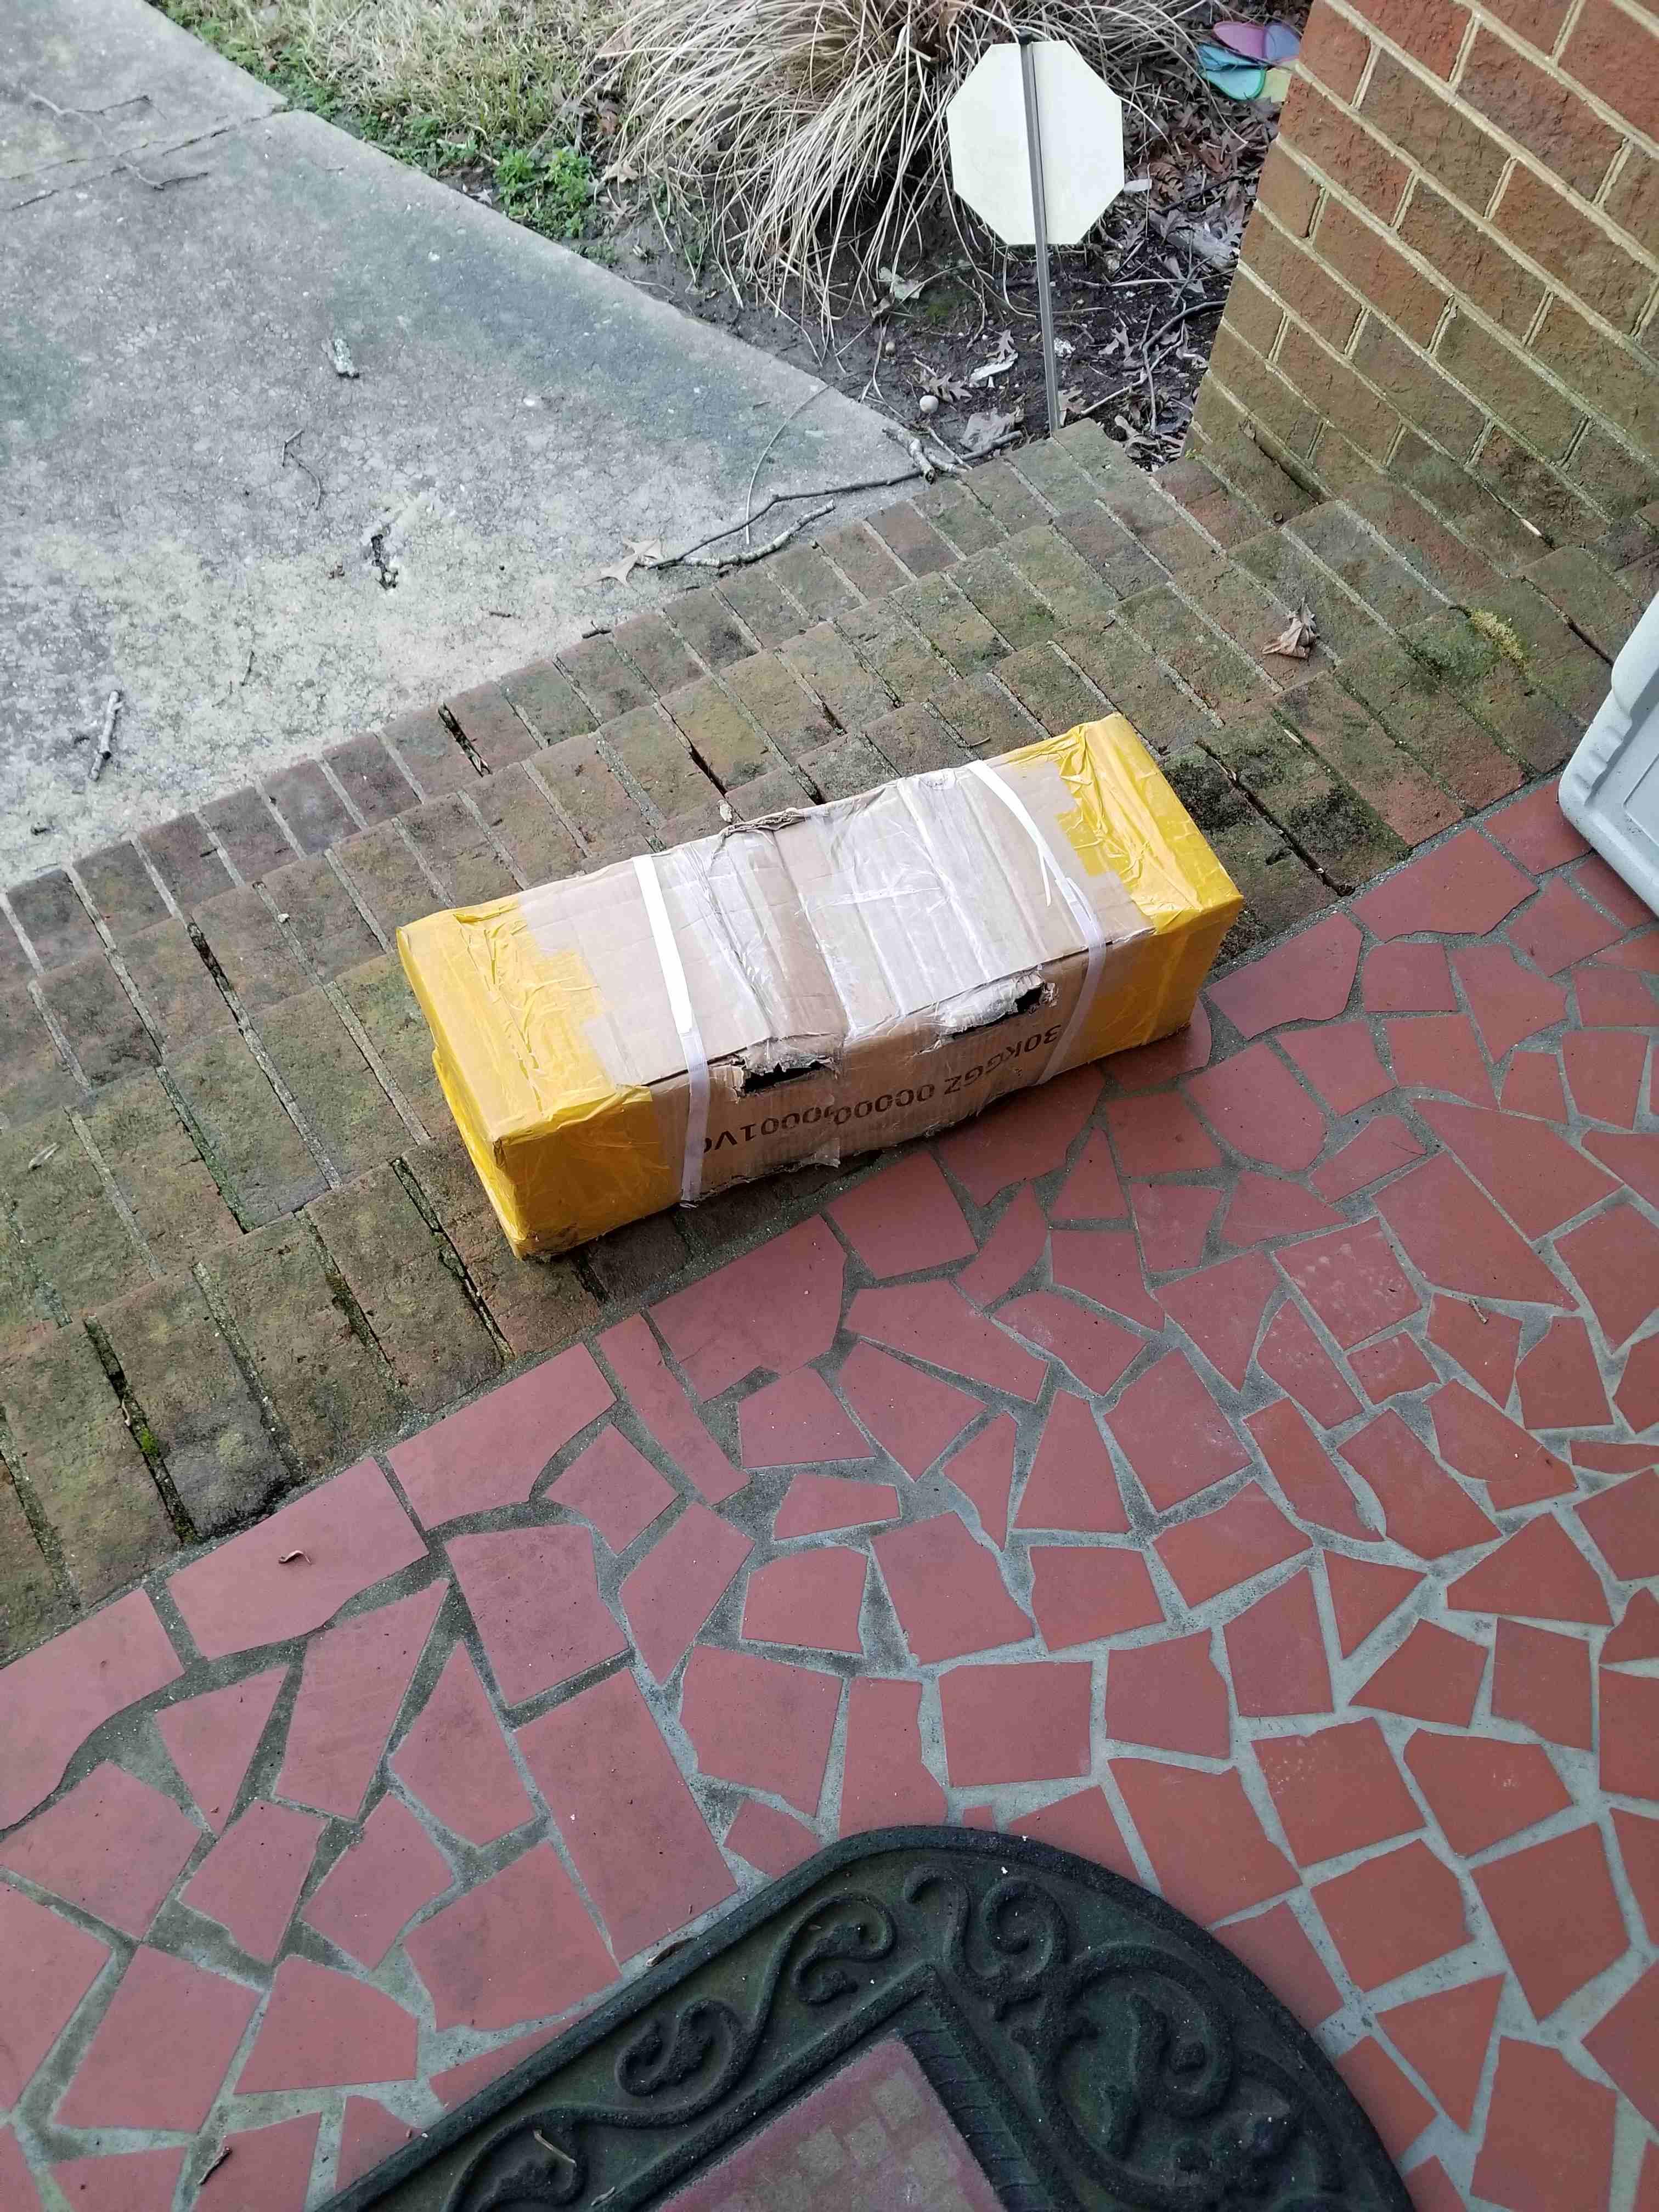
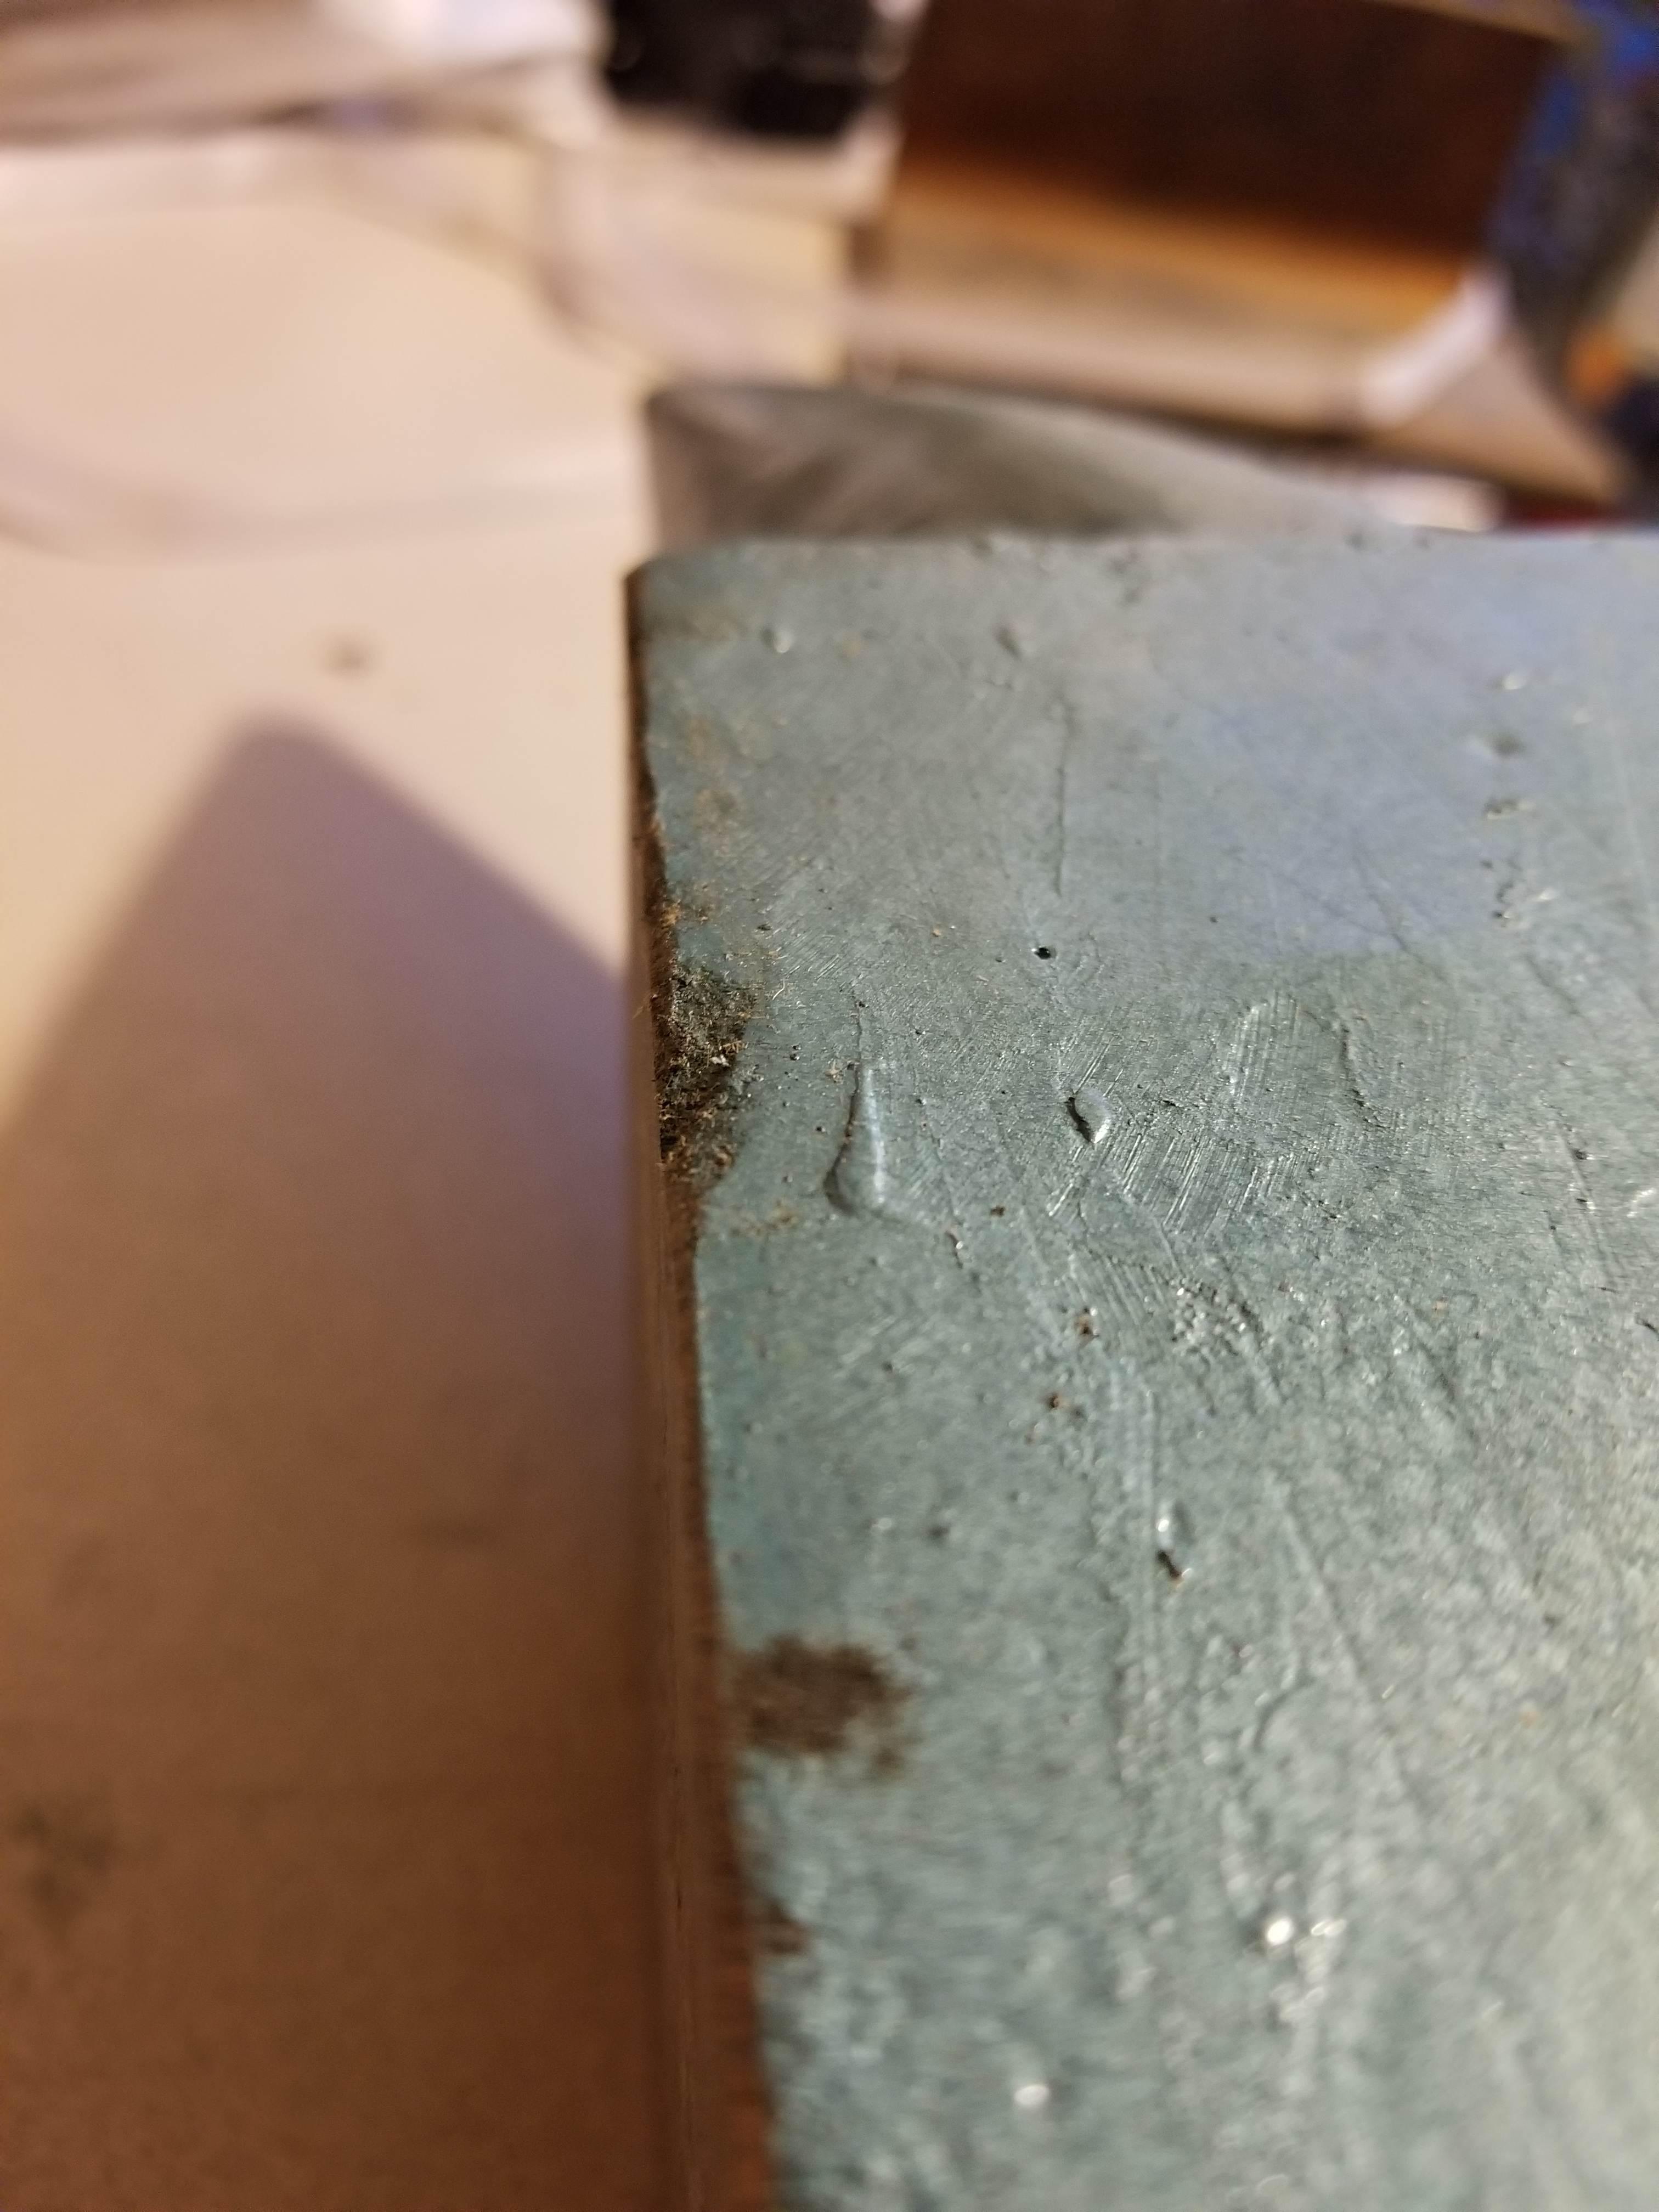
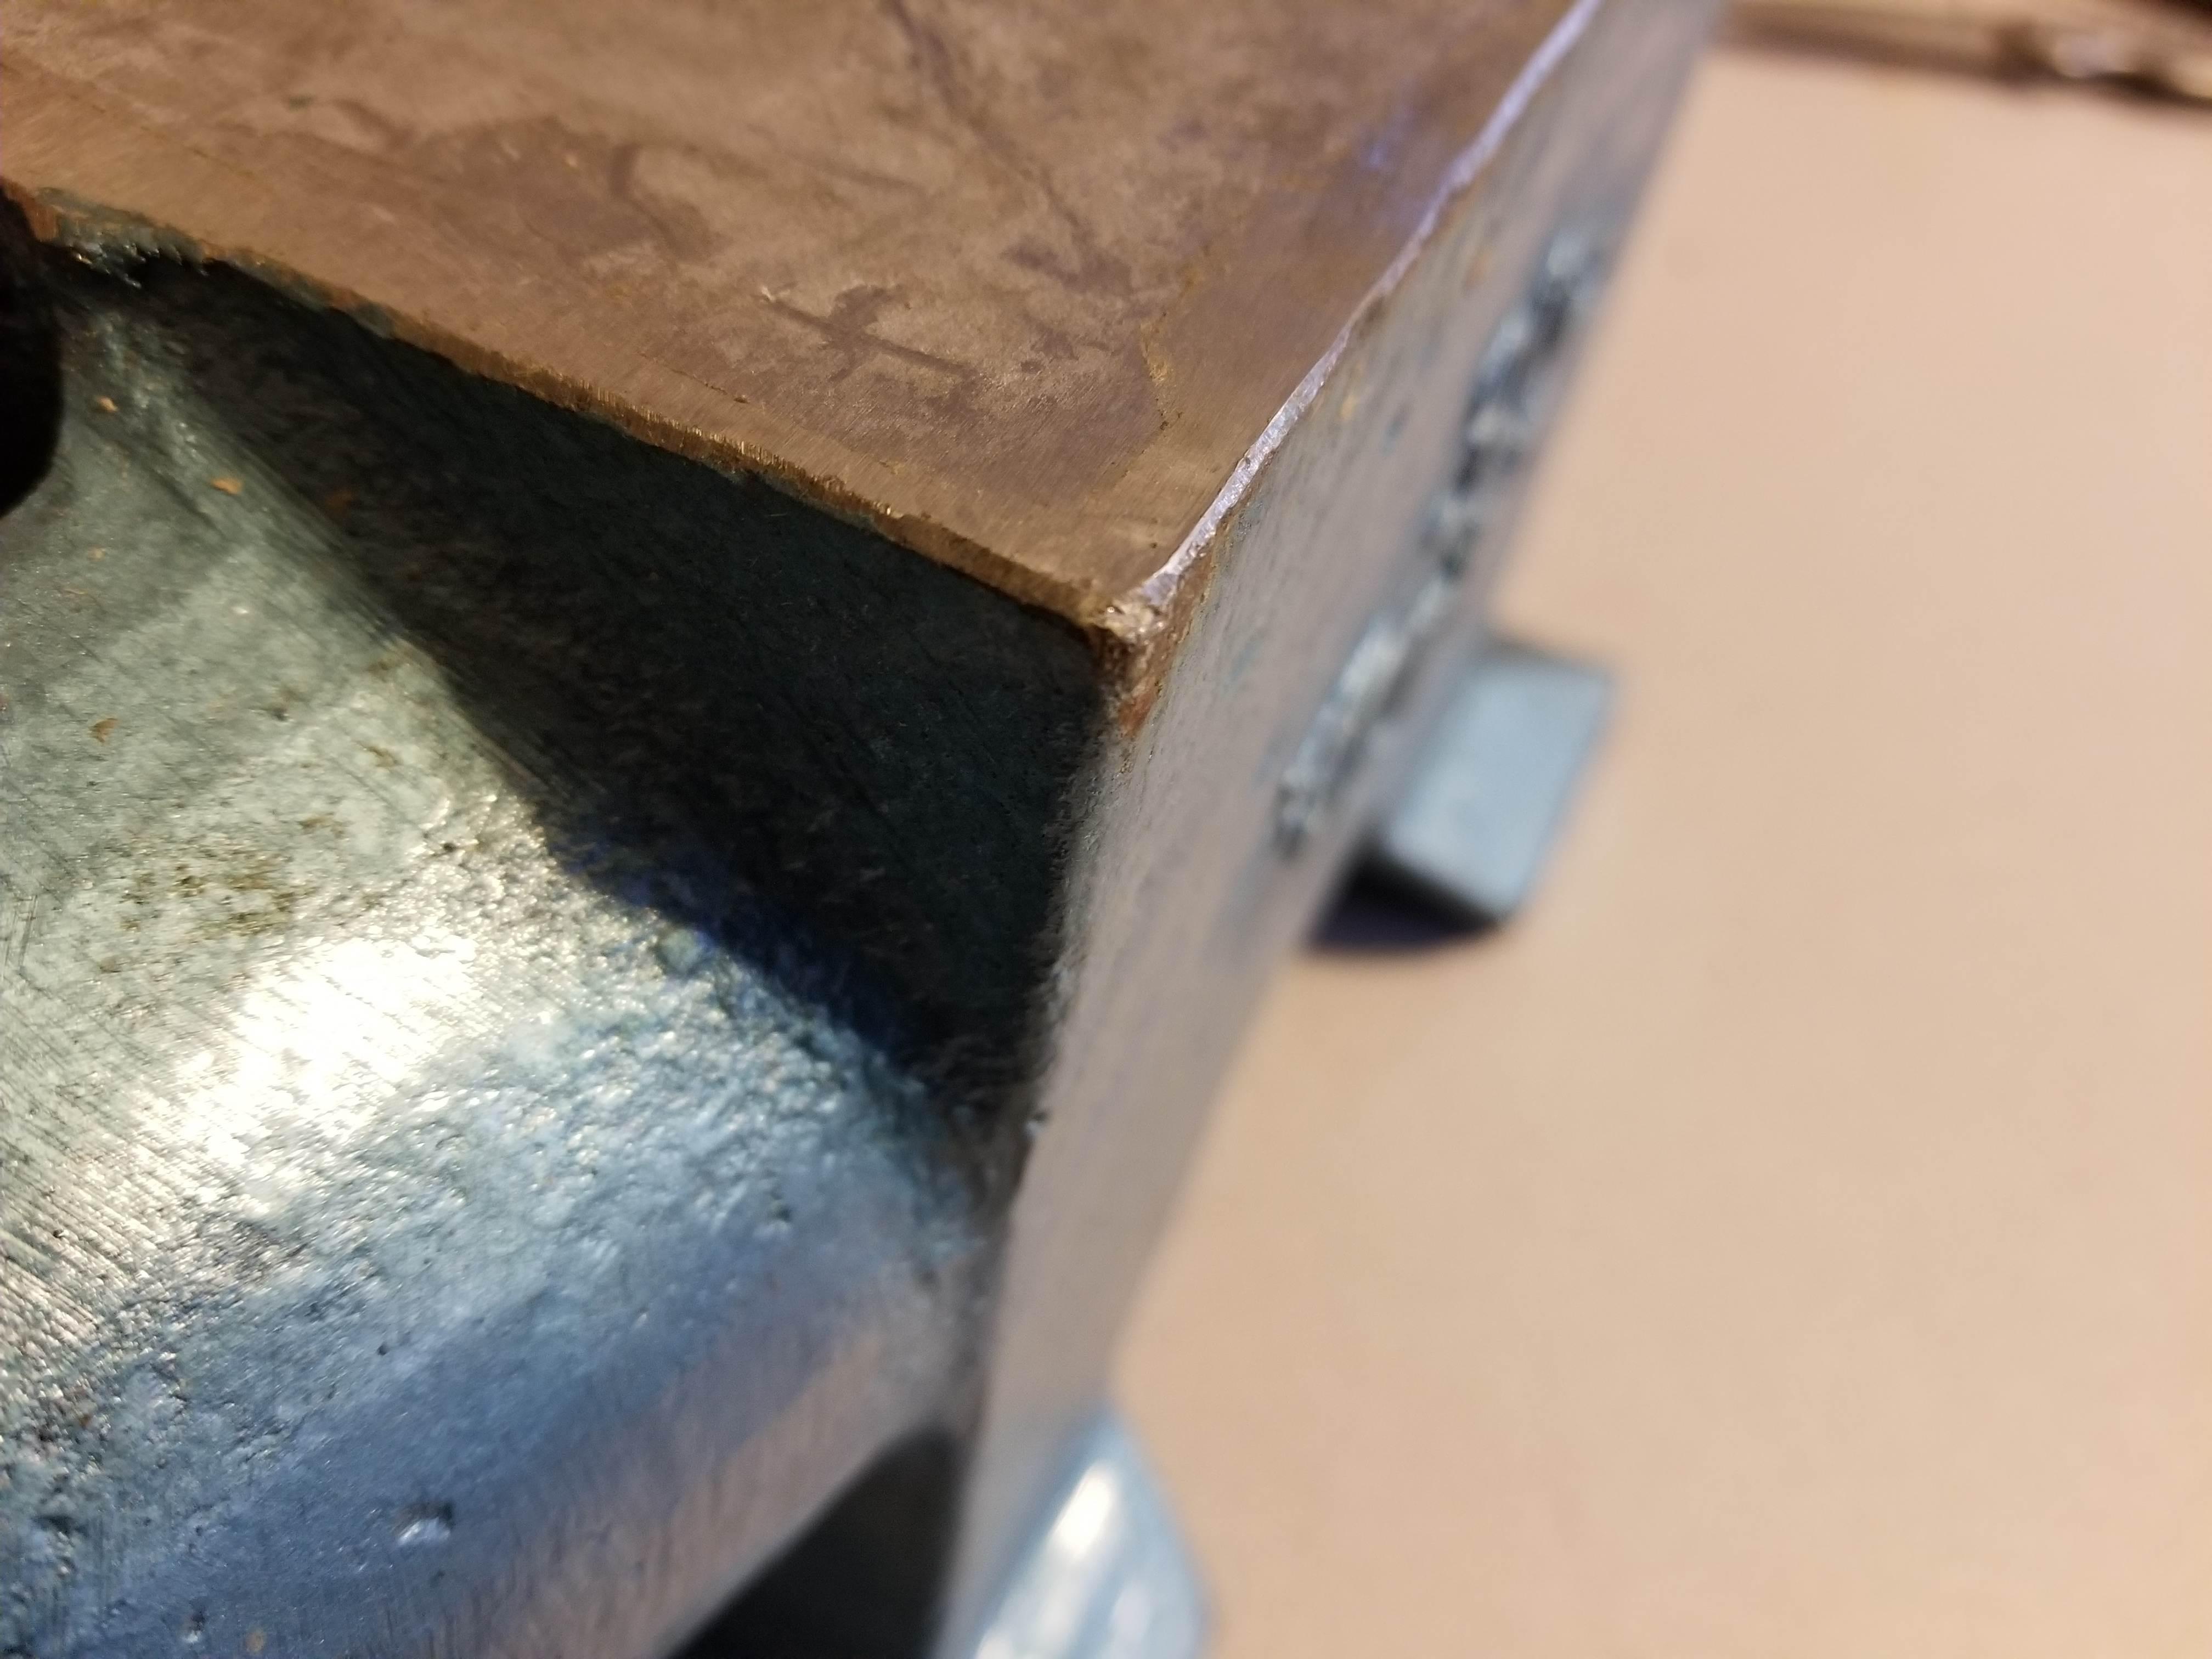
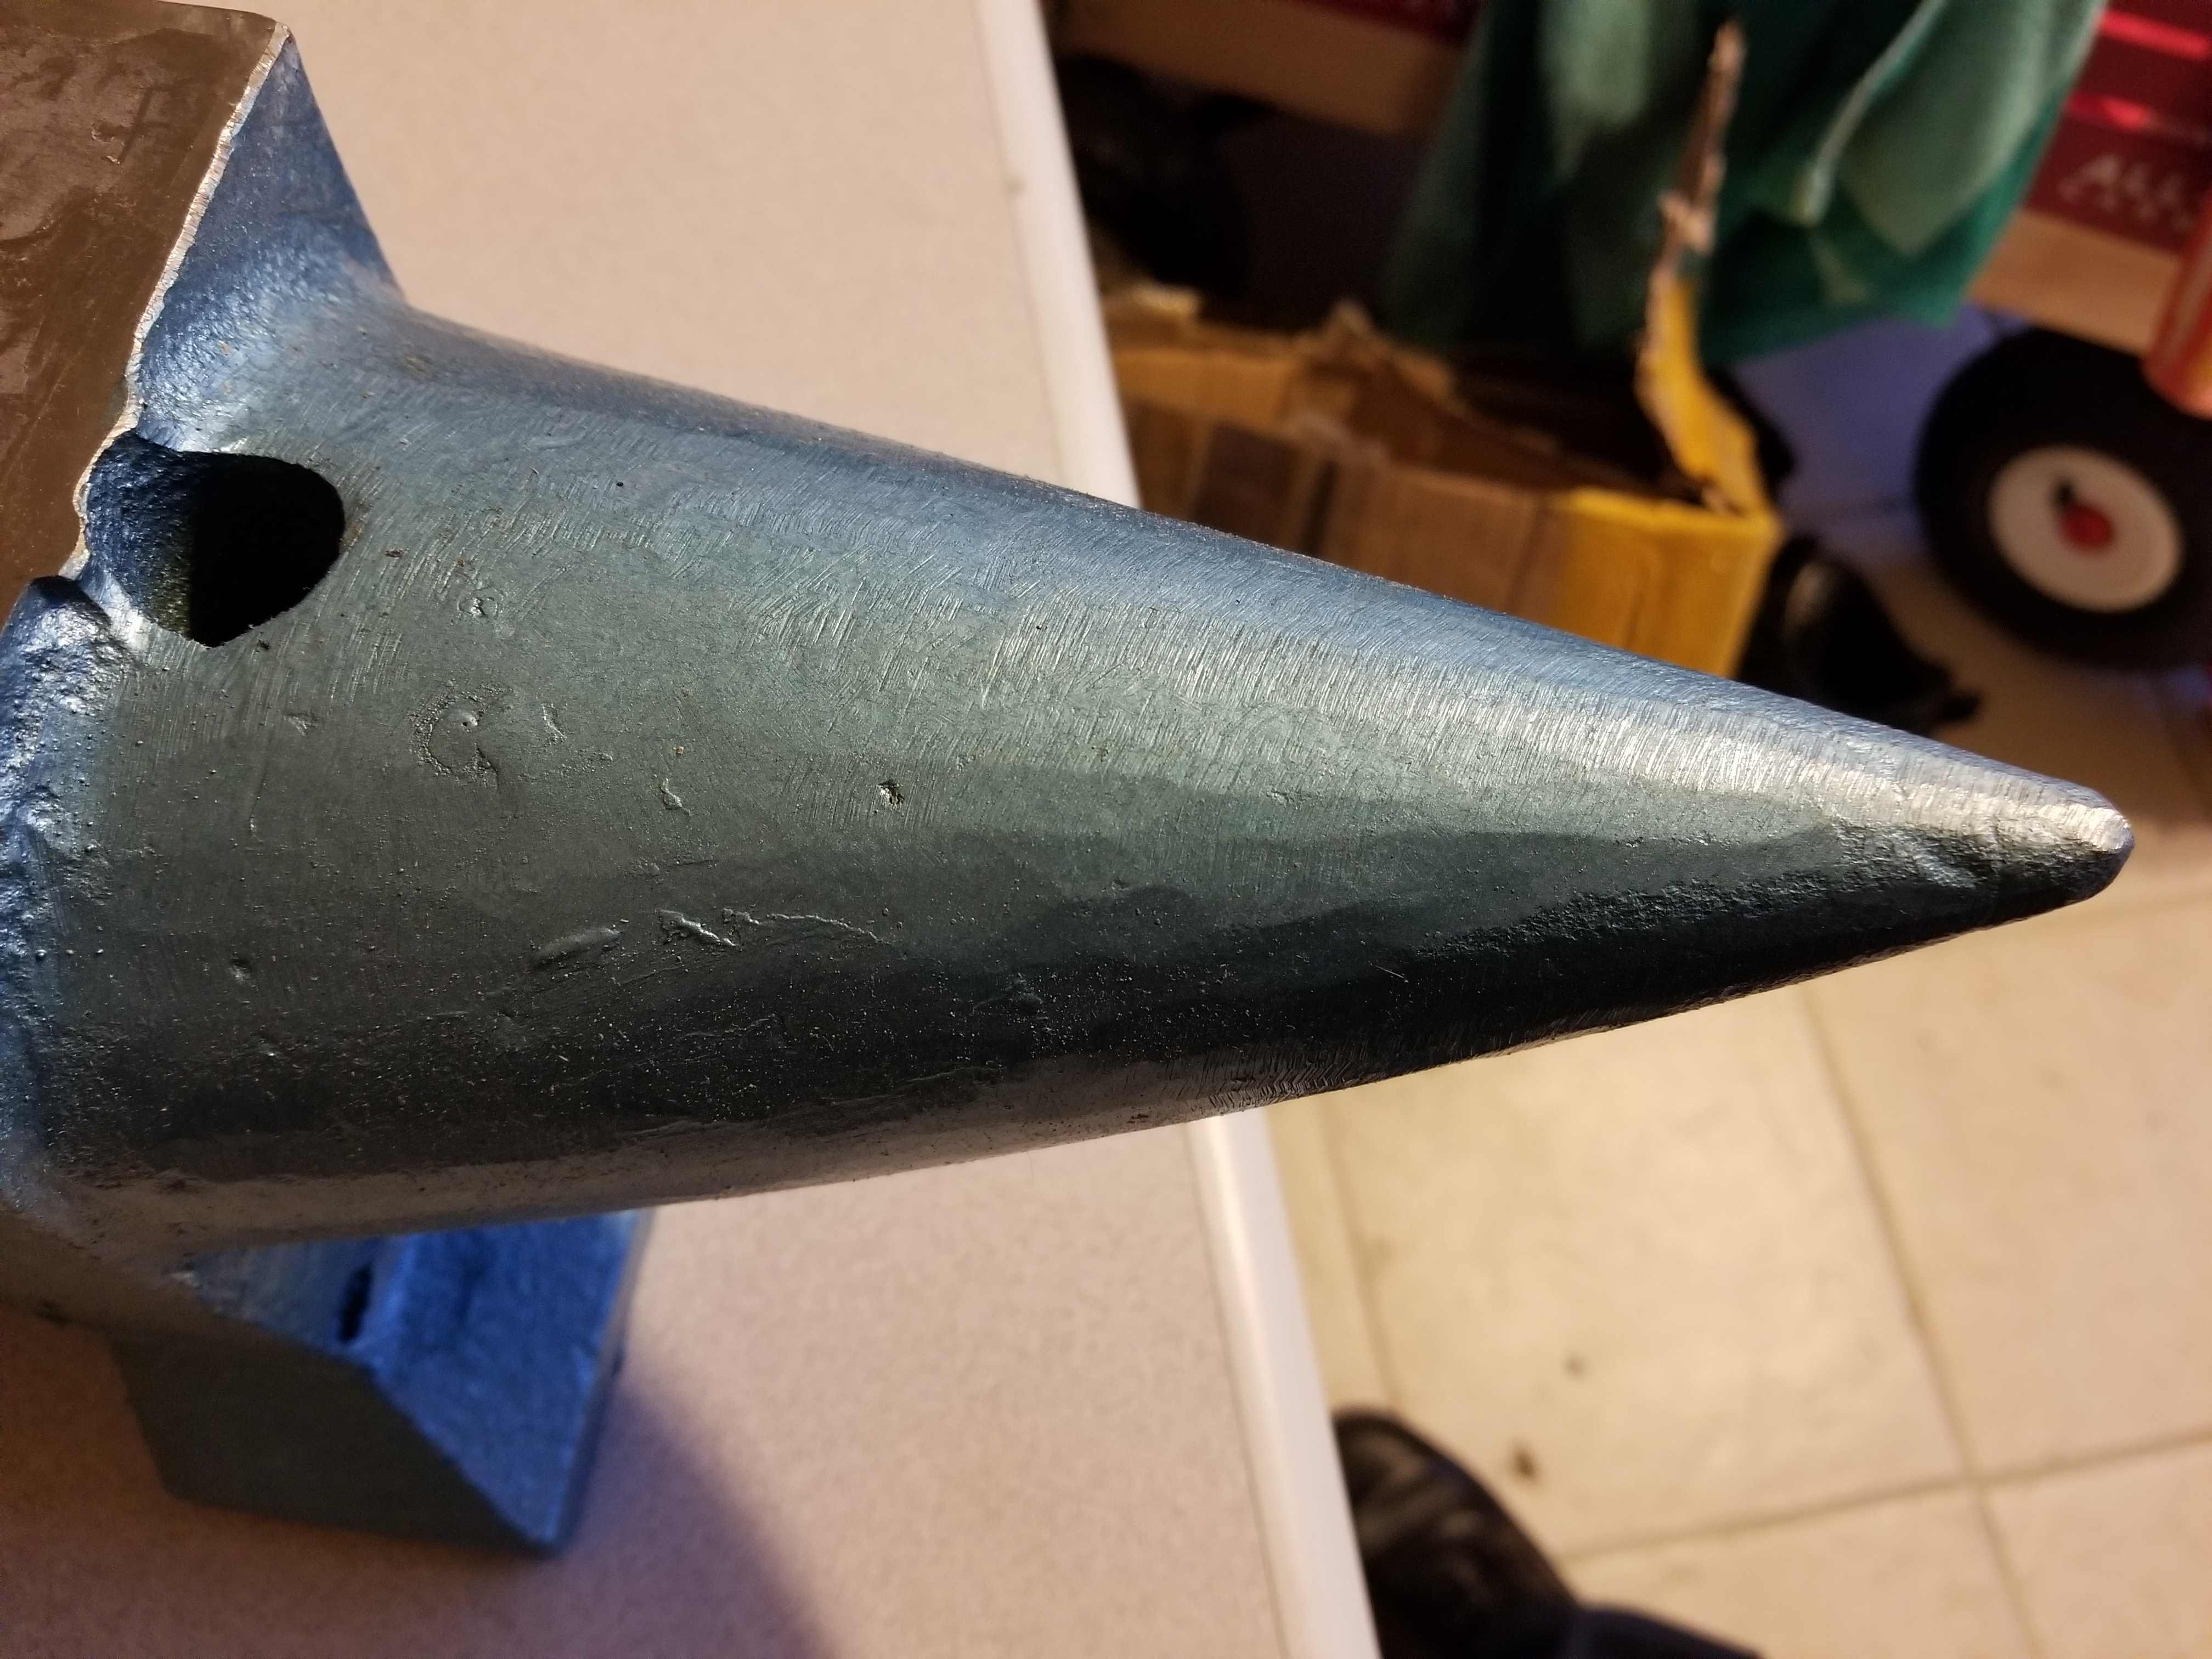
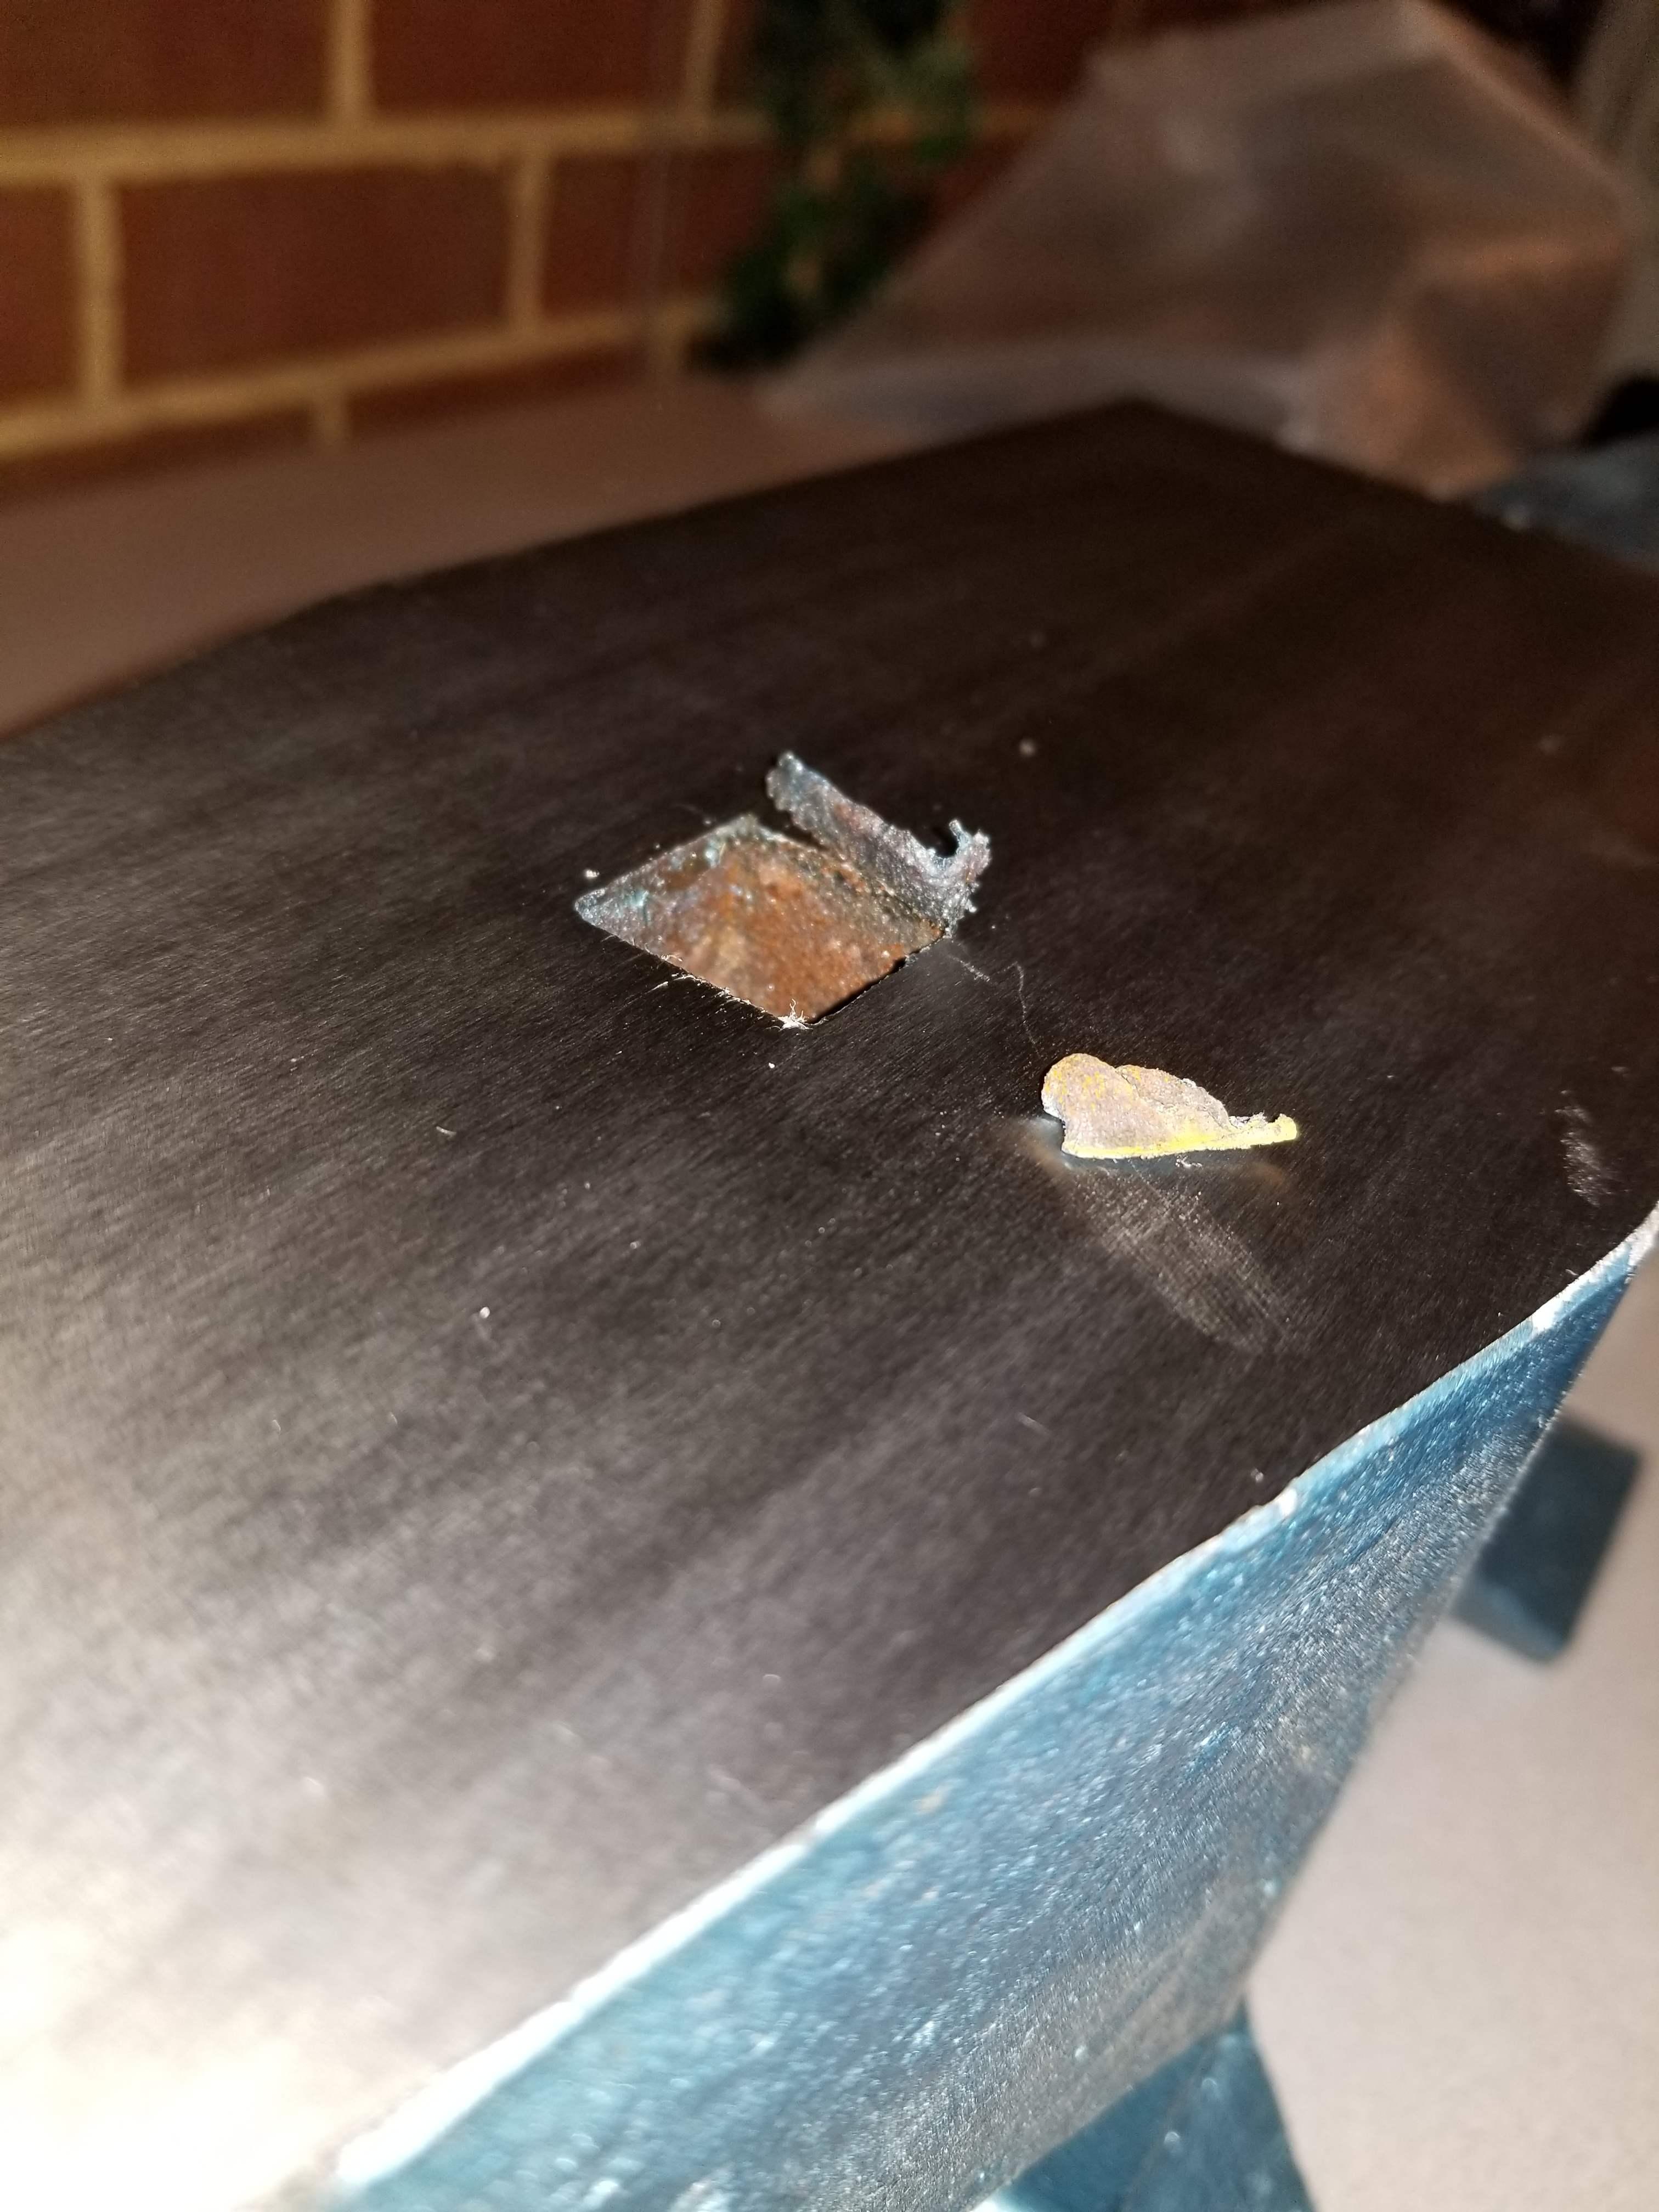
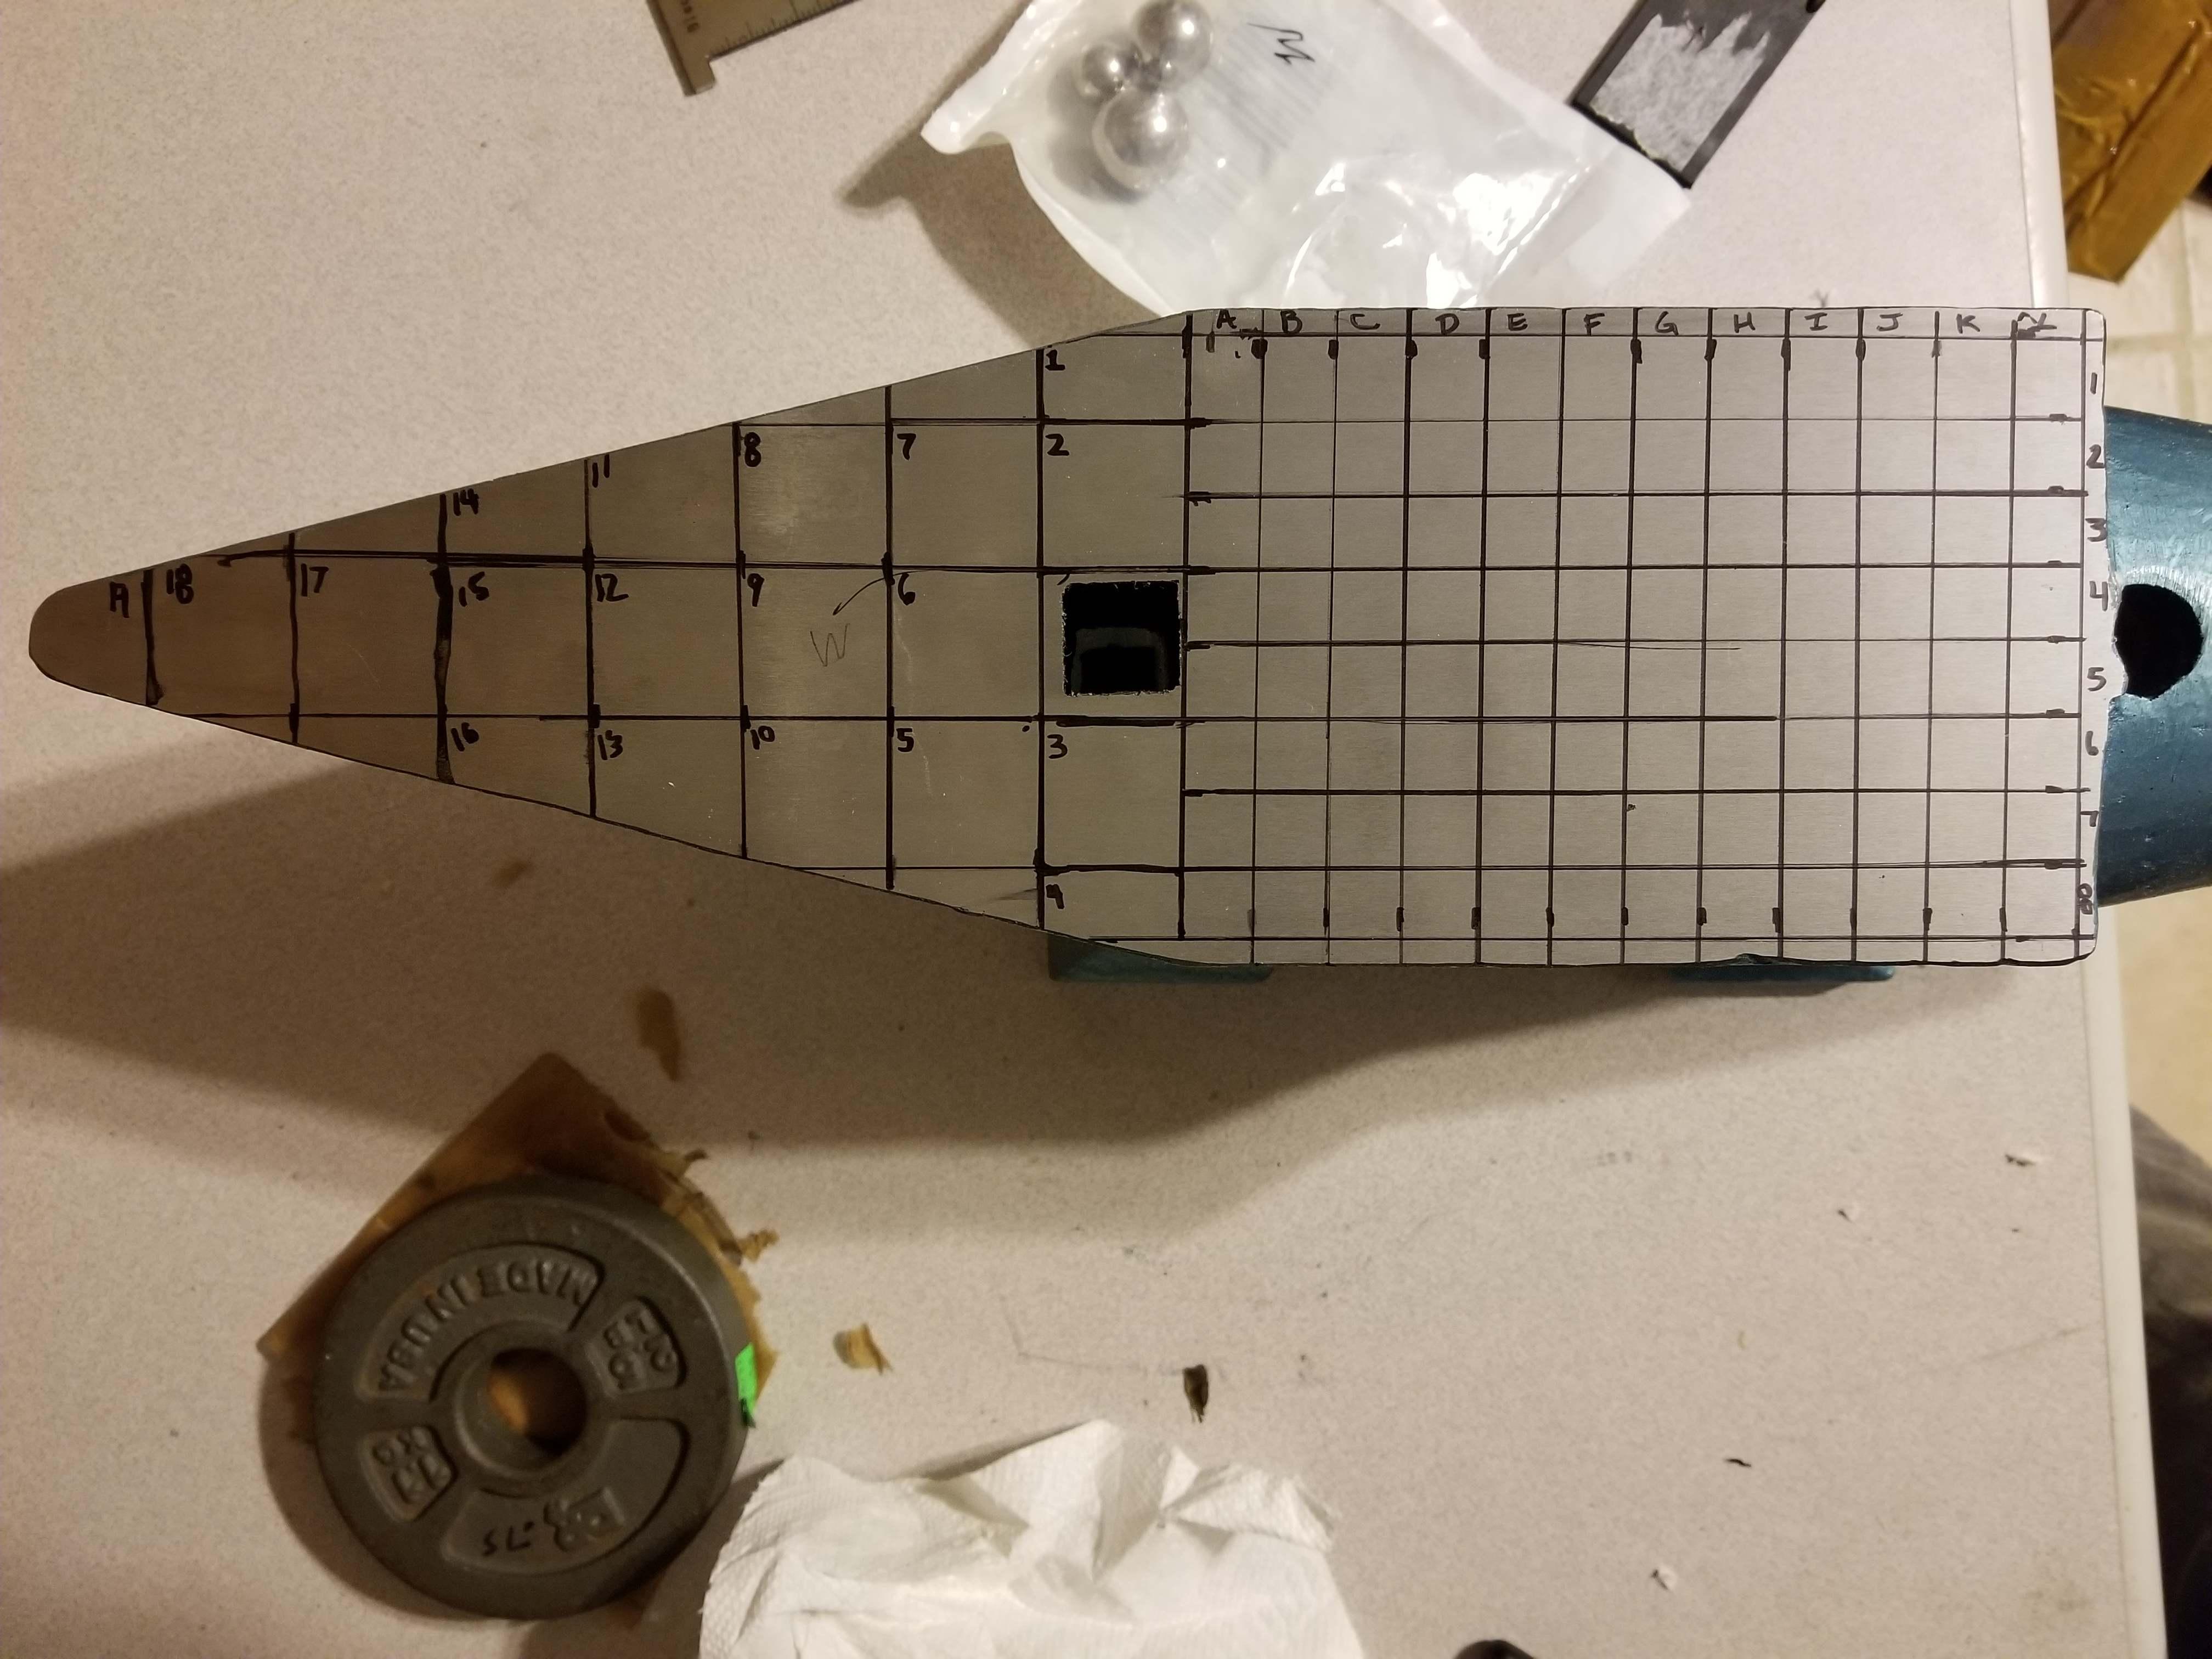
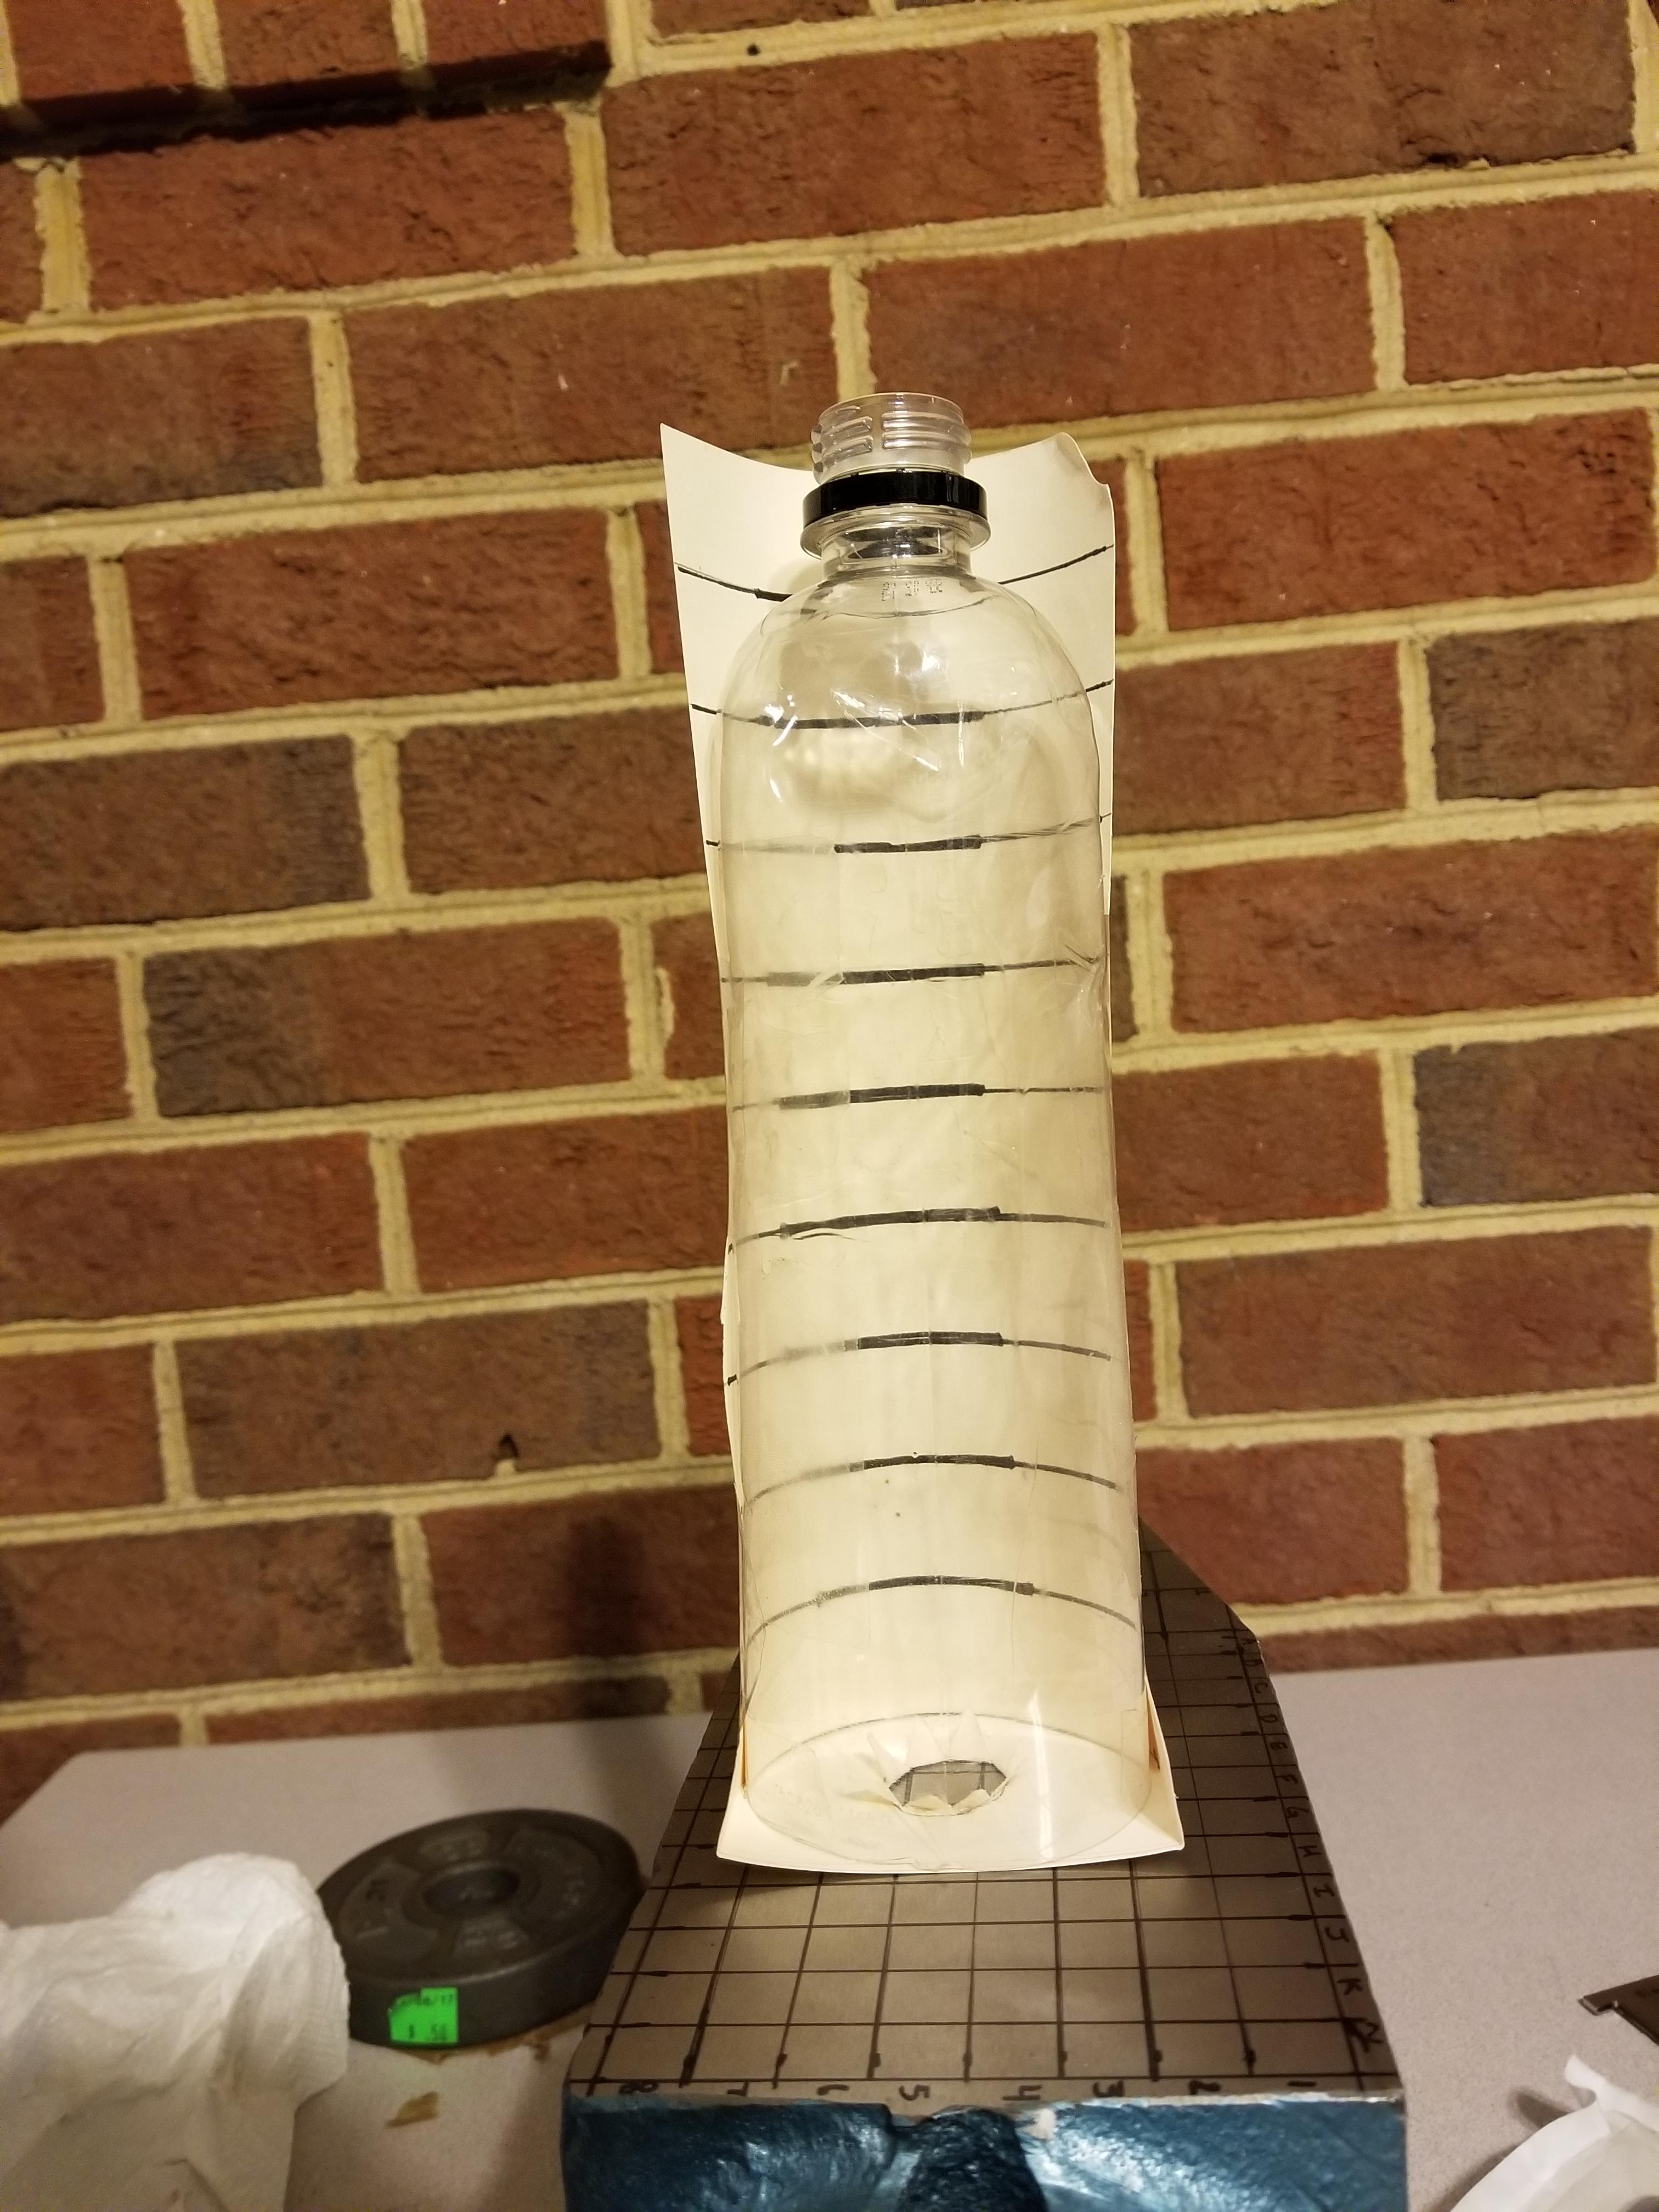
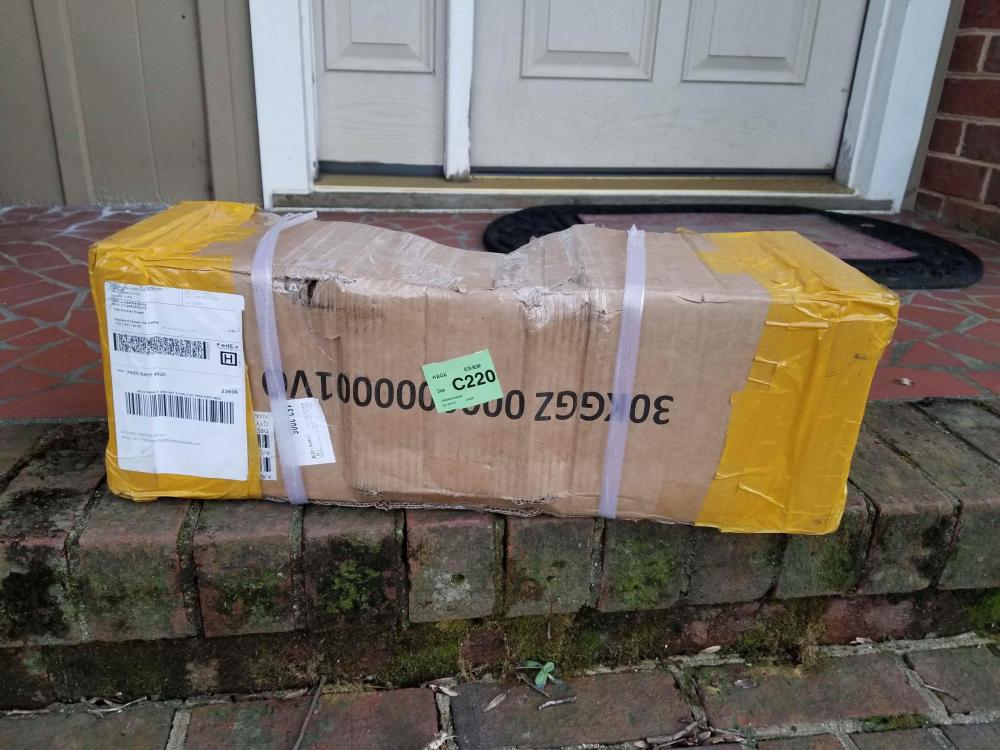
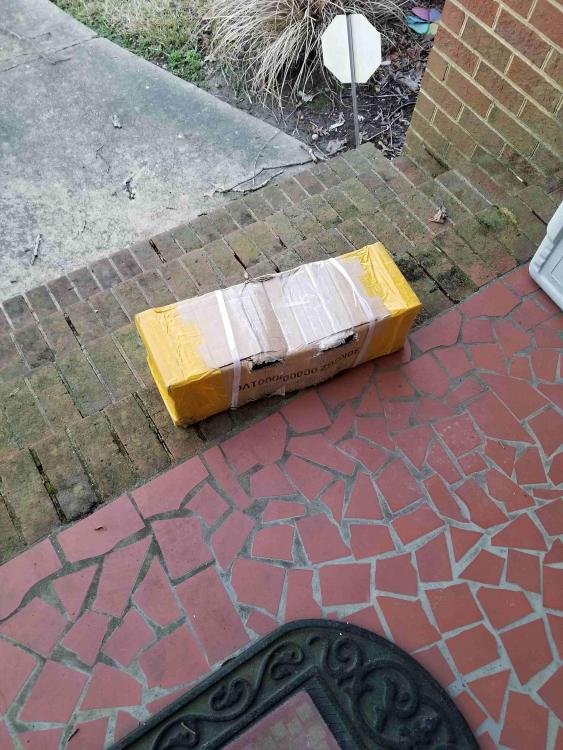
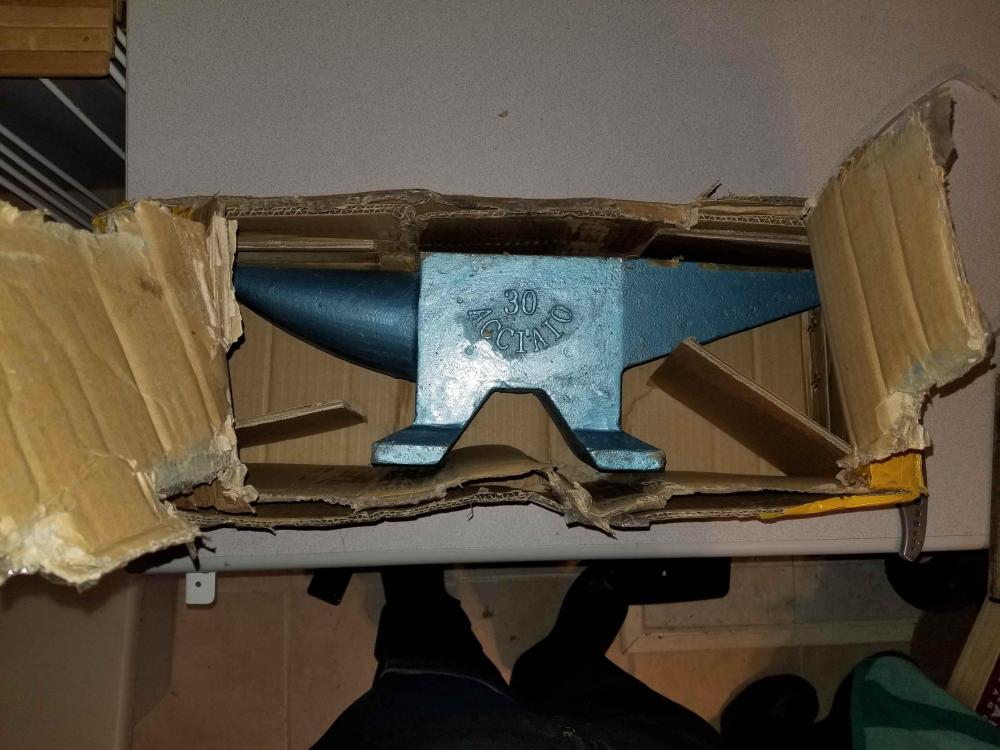
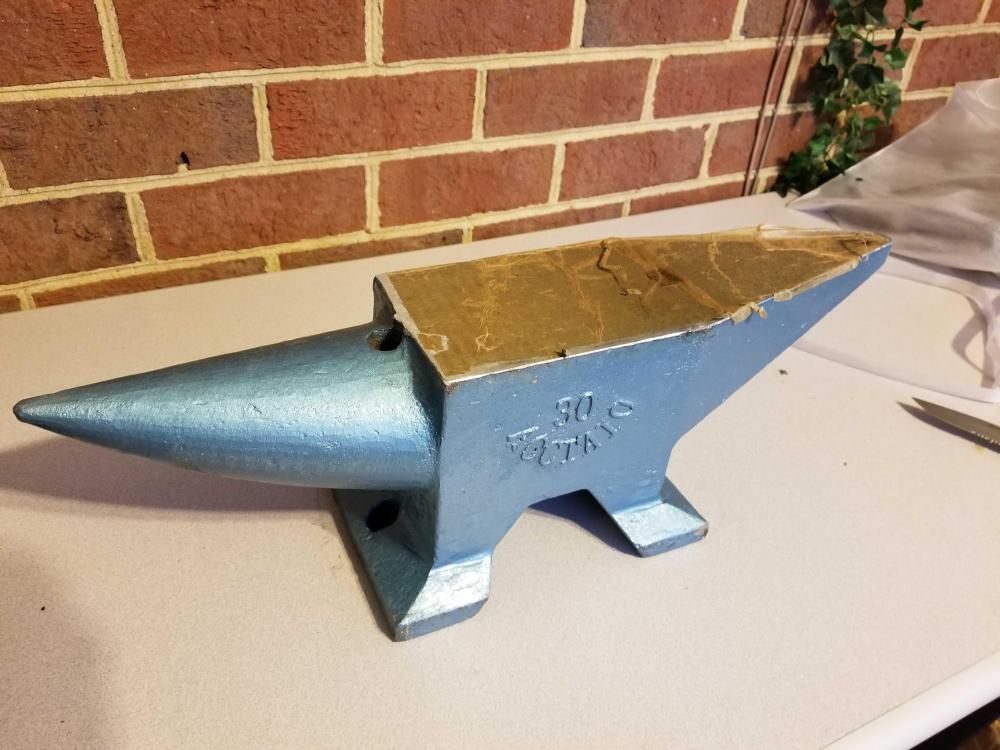
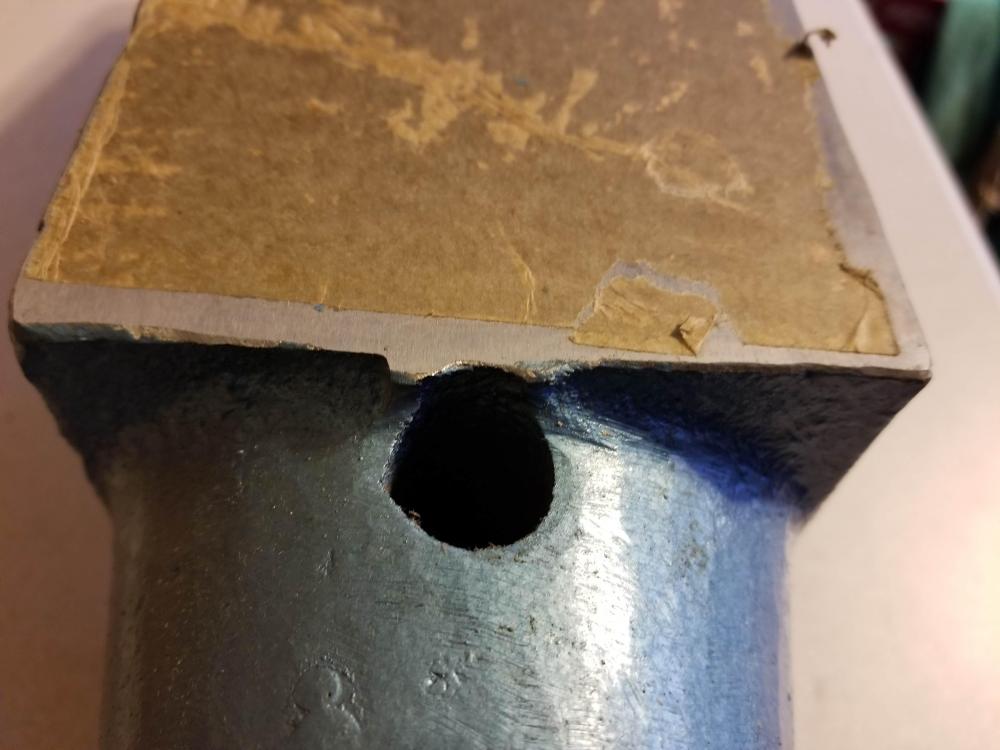
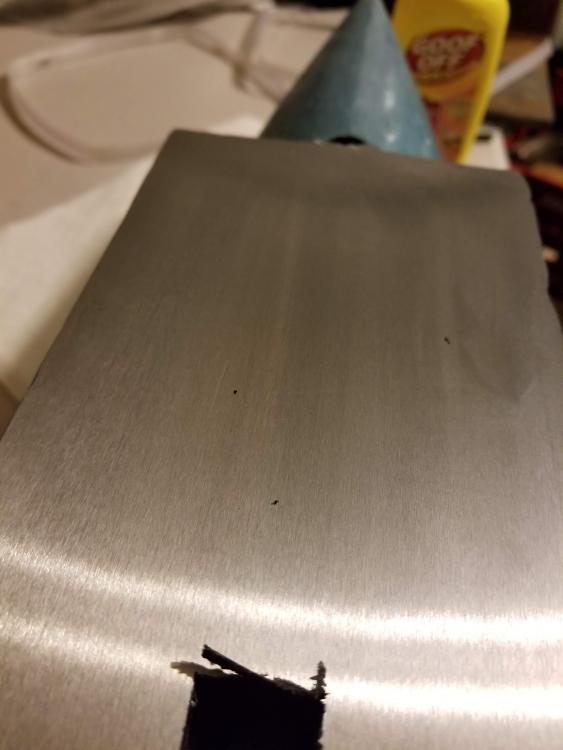
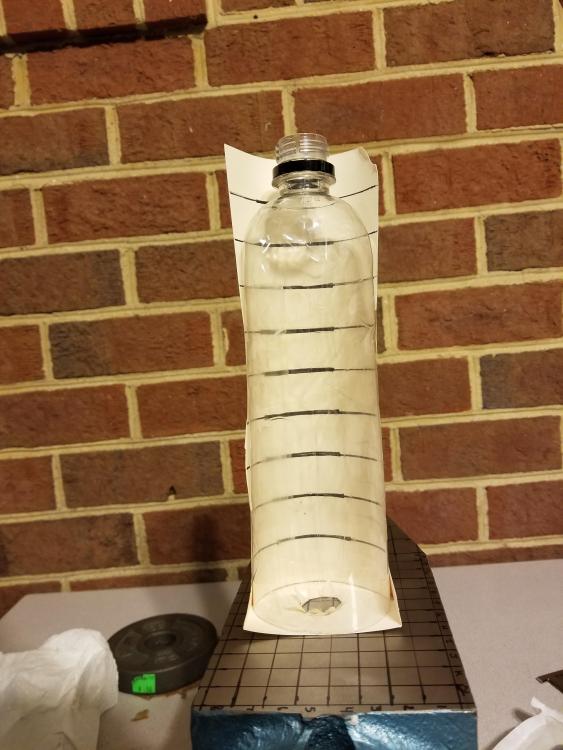
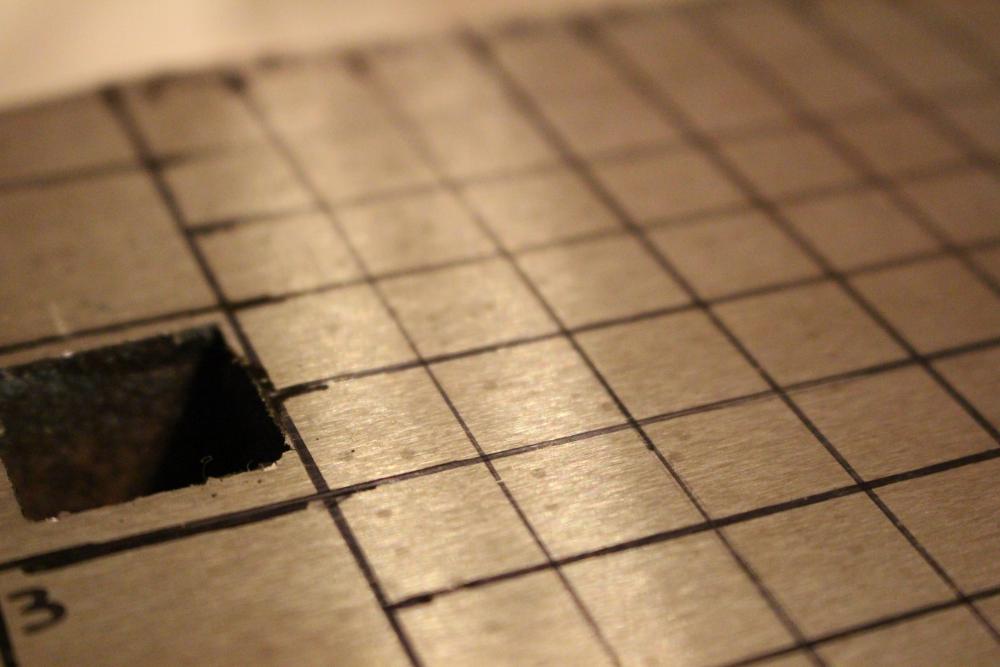
A short while back I ordered one of the 66 lb Chinese 'steel' anvils that used to be quite ubiquitous on everyone's favorite auction site, but as of late are no longer offered in the US. Instead I grabbed it off of Amazon as it was the only place I could find one in the sub-$200 range. The availability and delivery timelines were completely false, as it shipped well before they claimed there'd be more in stock, and lo and behold, I find this on my doorstep this evening: Looks like the package has seen better days: Opening the box this was contained therein: I extracted the lump of metal from the box, and found it to have a grease and wax paper attached to the surface. Surprisingly, there was no rocking, it sat flatly on the tabletop. Inspecting more closely, I came across a few blemishes that I wasn't particularly surprised to find. There's some ugliness next to the pritchel hole, and a few corner dings on a corner and edge of the anvil. Fortunately these dings shouldn't be a big deal when I dress the edges to take the sharpness off them. . Next, a closer look at the horn: And there was some ugliness in the undercarriage, the flashing and voids make me question whether there are voids just waiting to be found under the working surfaces. I may eventually look at stripping the paint off this to see if body filler was used to hide a multitude of other sins. Next, I used some Goof Off to clean the top surface of the anvil. There appear to be some pinhole voids in the surface, hopefully there's not more behind them: Taking a closer look at the hardy hole, it's 3/4" 'square', but had some serious burrs inside as a result of the grinding of the anvil suface. Here you can see a big burr I bent up, as well as a dingleberry that was stuck to the bottom part of the hardy hole. Needless to say, the hardy hole will require extensive cleaning with a file prior to use. Next, I laid out a grid on the anvil to do some rebound measurements. The grid size over the main part of the face is 1/2", the tail of the anvil had 1" nominal size blocks. Next, I rigged up a quick scale apparatus to do rebound measurements. I thought I had some clear polycarbonate tubes that would fit a 1/2" ball bearing, but it seems that I did not, so I had to resort to a plastic bottle. The manila folder piece at the bottom has a cutout for the bearing to impact, this made sure that the testing stayed close to the point I wanted to test, and avoided excessive marks to the anvil face in case it wasn't hard enough to resist. I proceeded to get at least 2 measurements on every point on the grid, this was collected via video. Unfortunately I didnt realize my autofocus kept hunting the whole time so there are a few points where I can't get a read on the bearing rebound during the test. I can say that for most of the face of the anvil the rebound was in the 80-85% percent rebound range using a 1/2" bearing that was dropped from about 9-9.5 inches above the anvil face (the scale is segmented into 10 divisions). Unlike some other reviewers of this anvil, the part around the hardy was no worse than the rest of it. The bearing *did* leave some small marks in the face, but I wasn't really able to feel them, so I'd say the face is likely to be sufficiently hard (we'll see when I get to do more testing later this weekend. I'll be sure to update this thread as I conduct more tests. I should note that I chose this particular anvil because it was readily available and relatively inexpensive. By investing in this I can proceed with setting up my moveable anvil + vice bench and get on with life. When a deal on a more substantial anvil comes along this one will be relegated to 'travel anvil' status. Right now I'm still working on the basics and my hammer control, so the limited mass shouldn't put me at a severe disadvantage. Plus, if I REALLY need a big anvil, there's a 387 lb chunk of steel sitting on a stump behind my shed I can use- but I won't be dealing with anything bigger than 1/2" stock for awhile anyways.


-
Thanks AFB, those were the tidbits I was after. My original rationale was that domestic water can get up to 60 psi and the joints hold fine with soft solder, and that short of a catastrophic failure of the regulator the LPG line would never see more than 30 psi anyways. However, I was completely ignorant of the myriad of locale-specific codes regarding that type of joint. While I'm free to take my chances with the lead-free stuff (typically a higher melting point), I'll probably refrain from doing so. I was hoping I would be able to get away with not using silver solder as the cost of flux and wire are considerable when you only need to do a couple joints- I unfortunately don't have any HVAC friends that'd be able to help me out, either :-\ I suppose if I go ahead and buy the stuff I'll at least be able to do some brazed tooling for my lathe. Side thought, have you done any hearth brazing using your forge?
-
Alright, I wanted to throw that out there because I've got a fair number of tubing to MPT adapters that appear to be solder/braze sockets for direct joining to tubing (they were in a big lot of miscellaneous hardware I got at thrift store).
-
AFB, bit of a thread hijack here, but how would you normally make permanent joints? I've got a notion in my head to do some permanent plumbing on my forge stand, but needed to know whether soft solder was acceptable for LPG (that's not in a hot zone), or is a brazed joint the only acceptable way to do it?
-
But the goats? Not so much.
-
Easy! You just grab an angle grinder and put the pass-through wherever it's needed.
-
An additional idea would be the inclusion of the ability to anchor the tripod. On softer ground one could use one of the corkscrew-style ground anchors used for tying off a dog leash, or on harder ground something you can set some weight on- this could help reduce the overall splay without compromising safety. The anchor point would ideally be located at the center of the triangle. Though now that I think about it, on soft ground you could also use tent pegs in the feet to keep it from moving, too.
-
Then I'd see about drilling some shallow holes to weaken it, then go at it lightly with the air chisel. Unless it's keyed to the cast iron in a lot of places you should only need to get a few big chunks out to clear the lot of it. Even though cast iron is fairly brittle, it's still more ductile than cement, take it easy with the chiseling and there should not be an issue with it cracking.
-
Get an air chisel or hammer drill. If it's cement it shouldn't be an issue, if it's true refractory then you might have some trouble depending on the variety, but then again you may want to consider whether the addition is actually impacting your ability to use it. I second the suggestion to fire it up (slowly) to drive off any trapped moisture, then crank it up to see if it can take the heat.
-
Most of the refractory products have a firng schedule to reach max performance. Typically a ramping profile starting at candling flame slowly working up to full blast. Given that this level of flame control is difficult at this scale, it will involve firing it up for a minute, turn off, and turn back on for shorter periods of 'off' time to modulate the heat input. The hobby metal casting guys generally do this over an hour's time if they're impatient.
-
Don't call it a forge, it's a 'raised fire pit'.
-
JHCC, that'd look WAY too professional! I want my MacGuyver credits!
-
4140 dies turned out to not be 4140. What next?
HojPoj replied to Adair's topic in Heat Treating, general discussion
Sounds to me like you're stuck with whatcha got. The only other thing that pops into my head would be attempting to hardface the dies, but that'd pretty much eliminate the precision you got with the machining, and I (not having any experience with cold working) don't know if the less-hard substrate would hold up to the abuse and not mushroom. -
Depending on your local climate and the equipment you plan to put in there, I've seen a lot of guys say that the dirt floors result in a lot higher humidity in the shop- mostly an issue for transitional times of the year when you don't want condensation all over your mill or lathe (should you have that kind of equipment). Having just added a lean-to to the rear of my shed and used it as a top coat, I'd say you'd do just fine with crusher fines (or 'stone dust' as some might refer to it). once you do the initial wet-down the dust isn't much of an issue. Only ~$20 a ton, too!