HojPoj
-
Posts
290 -
Joined
-
Last visited
Content Type
Profiles
Forums
Articles
Gallery
Downloads
Events
Everything posted by HojPoj
-

Dressing my Sledge hammer head anvil
HojPoj replied to Eventlessbox's topic in Anvils, Swage Blocks, and Mandrels
That sort of fix doesn't really require the mass of an anvil, so a small plate of reasonable thickness could be used for knocking out small bends. -
Dressing my Sledge hammer head anvil
HojPoj replied to Eventlessbox's topic in Anvils, Swage Blocks, and Mandrels
The only thing I would suggest for modding the hammer face is to have one of edges ground with a more generous radius than the rest, it certainly made it nicer for drawing out than the corners that were already on mine. You can see where i did that on mine, it's the closest edge to the camera. -
I just said 'London' because I don't know a catch-all term for "made and sold to be an anvil, and has a horn and hardy hole"
-
Thanks for documenting your go at this, Daswulf. Even though I could afford more starting out, I chose to go this route to see how it works and try my hand at smithing to see if i wanted to continue. This sort of arrangement is certainly sufficient for making that assessment. Certainly gave me an appreciation for the utility of a London pattern, though.
-
Dressing my Sledge hammer head anvil
HojPoj replied to Eventlessbox's topic in Anvils, Swage Blocks, and Mandrels
Ratchet straps aren't likely to help prevent splitting since they're fairly elastic. It looks like your log is bigger than the one I have, so splitting may not be an issue. Now go heat n' beat some metal! -
Dressing my Sledge hammer head anvil
HojPoj replied to Eventlessbox's topic in Anvils, Swage Blocks, and Mandrels
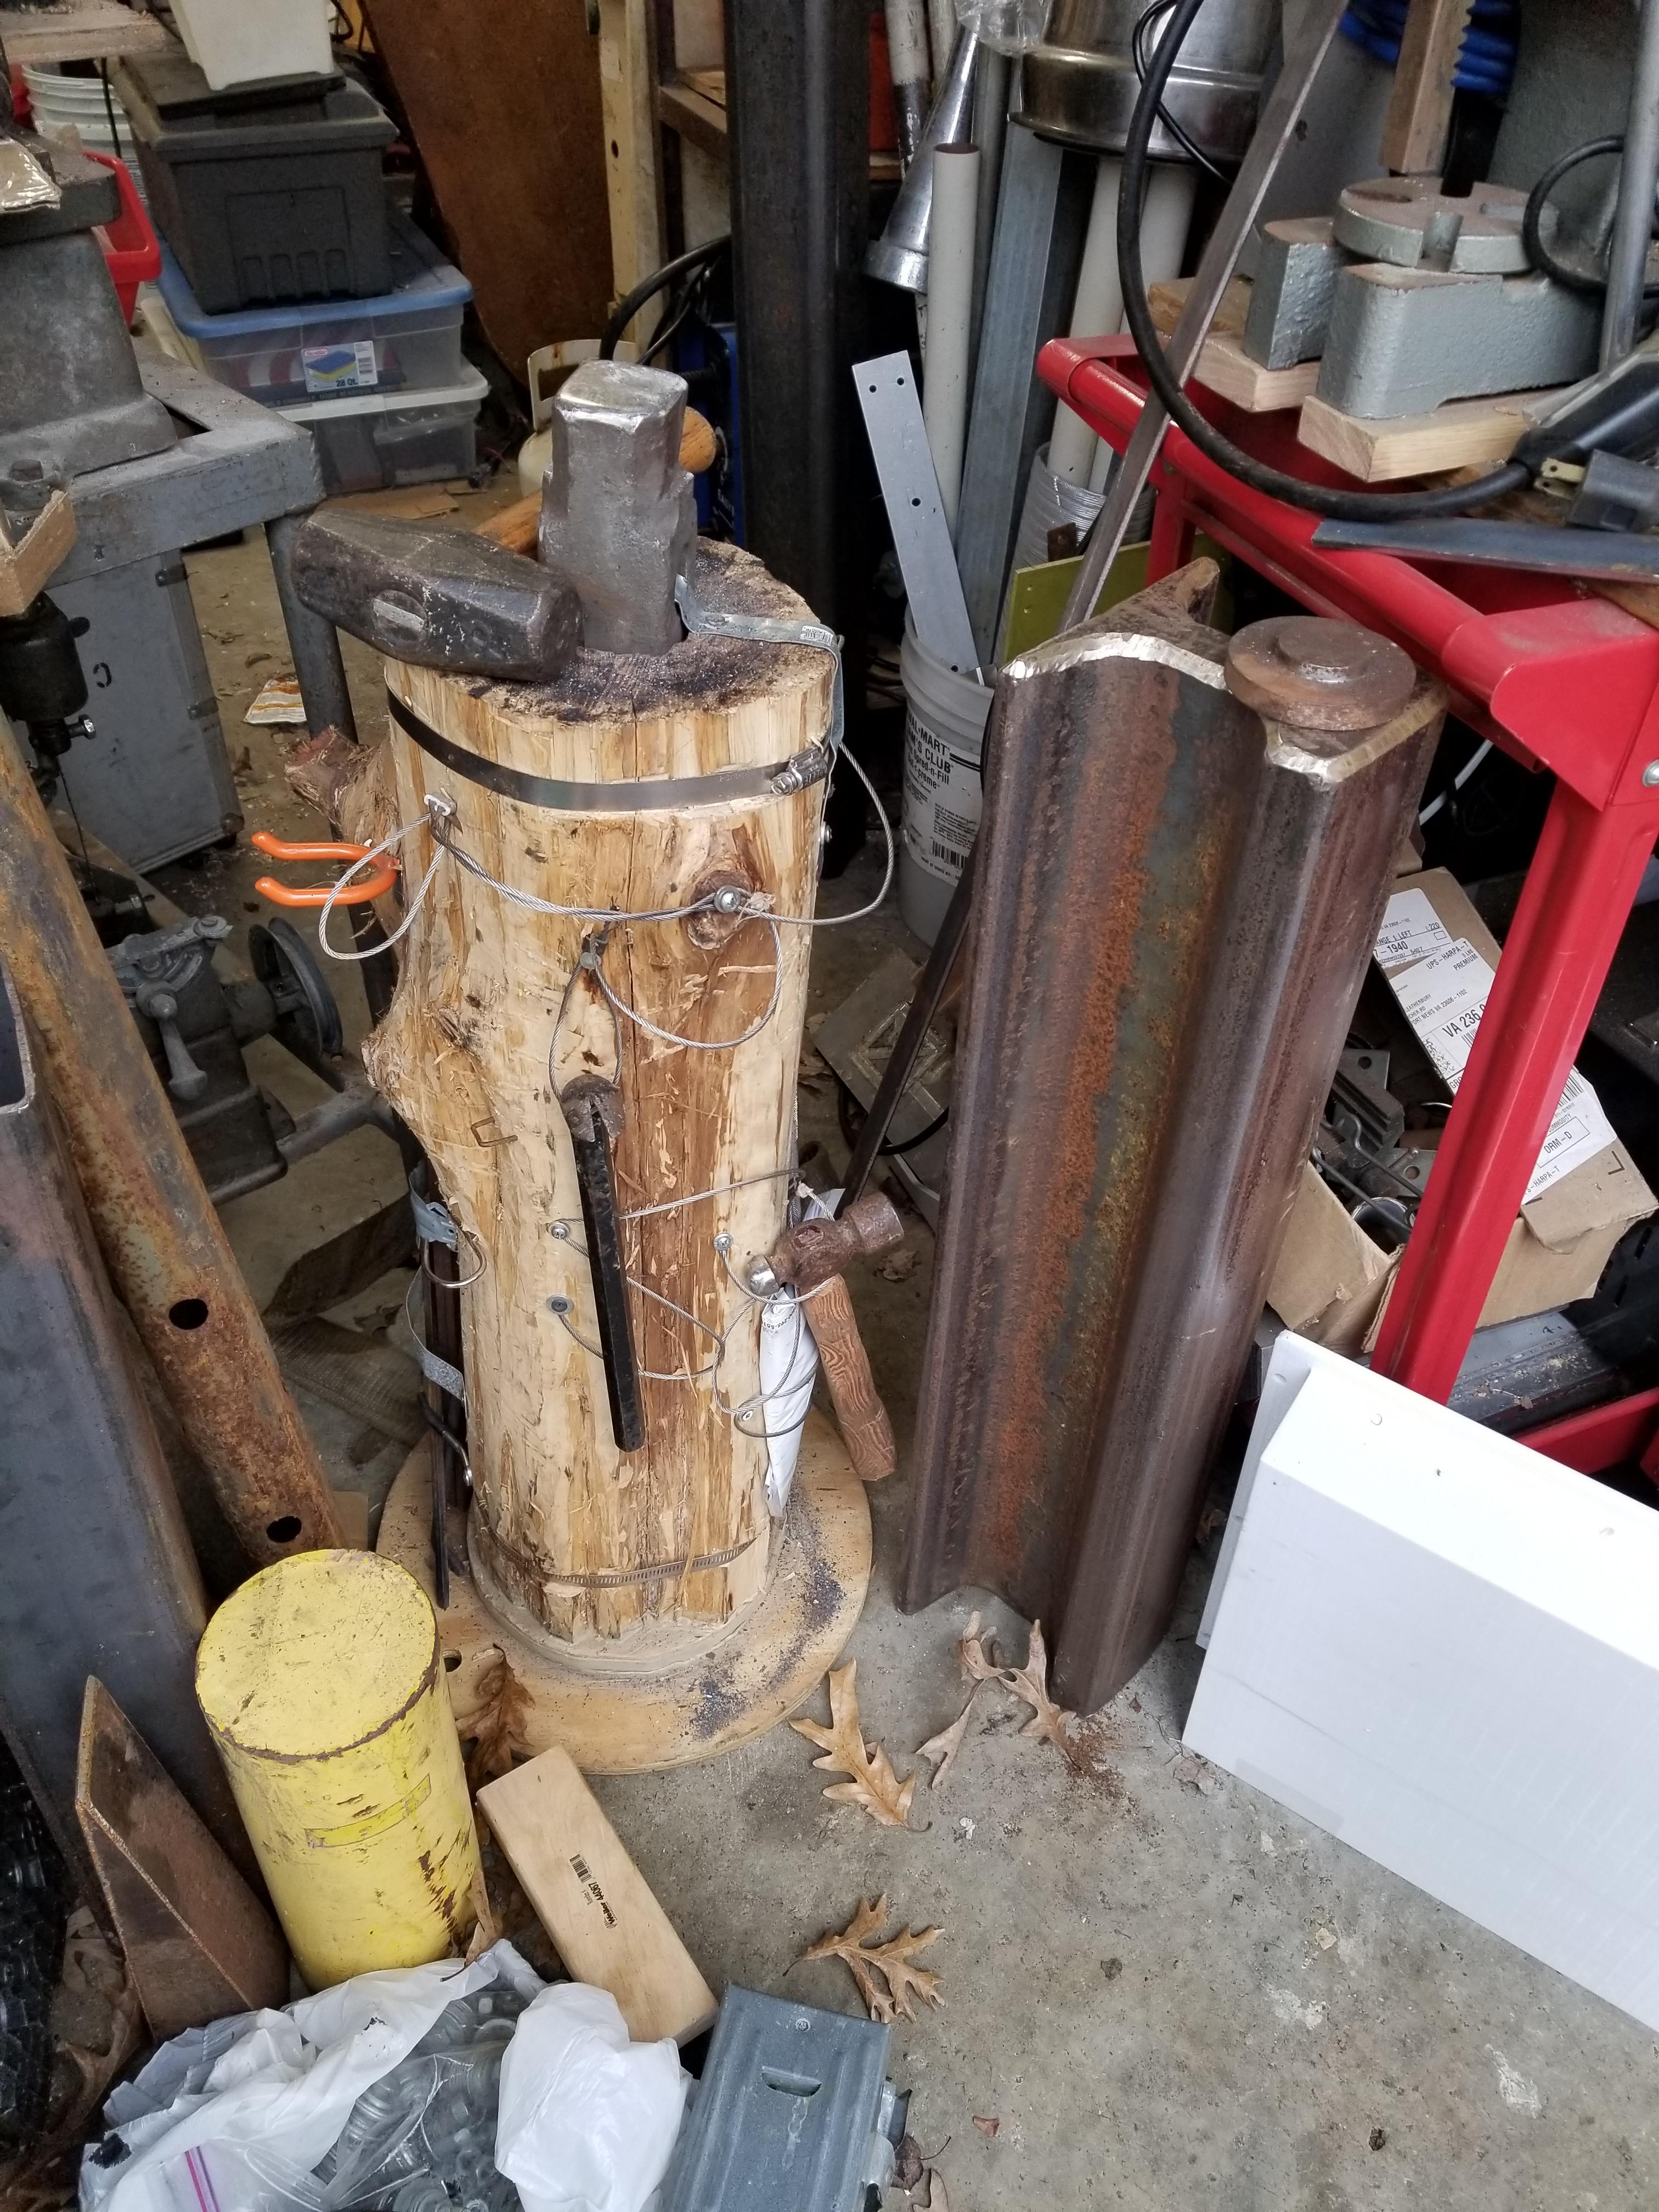
The log I'm using is also made of cedar. Spongy is bad, as it's a wood that's already prone to splitting easily (which is why I have banding on mine to mitigate that). -
Dressing my Sledge hammer head anvil
HojPoj replied to Eventlessbox's topic in Anvils, Swage Blocks, and Mandrels
I found the importance of the bar tying it down is if you've bent something over the edge and are doing some side hammering then things like wedges didn't hold it securely enough and the sledge head tended to move a bit. I leveled the bottom of the hole with some dry sand, and over time it became *really* powdered. Regardless it's an easy way to get the bottom to conform to the tool. Oh, and unless you have two levels of cutout, give a tiny bit of clearance between the octagonal and square cross sections (with the square slightly proud), if you don't cut out the square then the head may start to wedge it- good for securing it, but it may not do it level, or depending on the log may act more like a splitting wedge. the other thing I was able to do was slide a small bick into the handle hole to use for tweaking some small bends, take such an ability into consideration when designing a strap-down. As an addendum here's a quick cross-section of what I did (minus the better method of securing).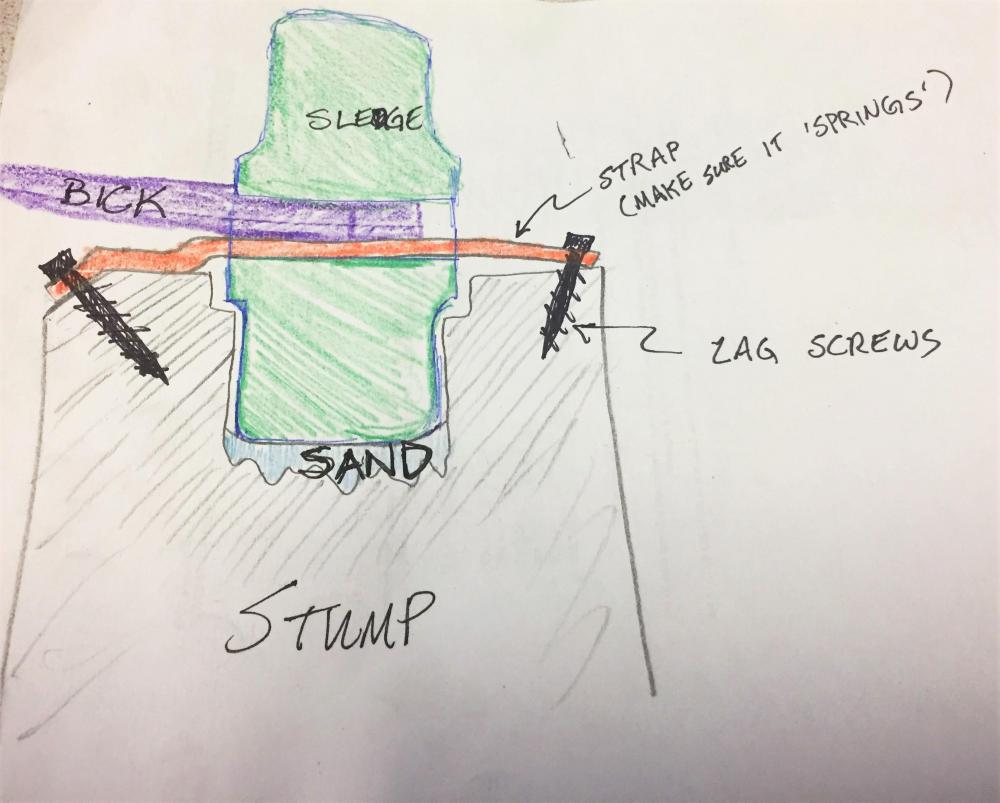
-
Dressing my Sledge hammer head anvil
HojPoj replied to Eventlessbox's topic in Anvils, Swage Blocks, and Mandrels
I just used a drill to dig out as much of the hole as I could, then cleaned the hole up with a chisel. Be sure to make a provision for strapping it in to the log (like a bar through the handle hole lag screwed into the log). Mine was obviously lashed together from what was on hand, and could have been more rigid. I'd just start using it as is until you get a feel for how it works, I found that I needed to grind a bit off two of the sides so that I hade a reasonably square edge for making right angle bends, but your needs may vary. Most commercial heads tend to be hardened pretty deep, so flattening it shouldn't be a huge concern, but once again I'd hold off on doing that to start with.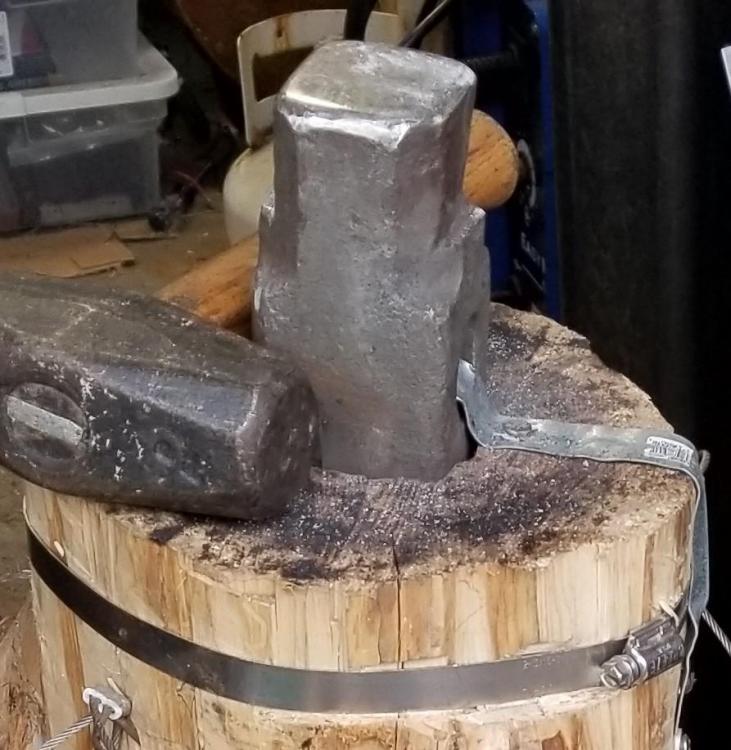
-
What did you do in the shop today?
HojPoj replied to Mark Ling's topic in Blacksmithing, General Discussion
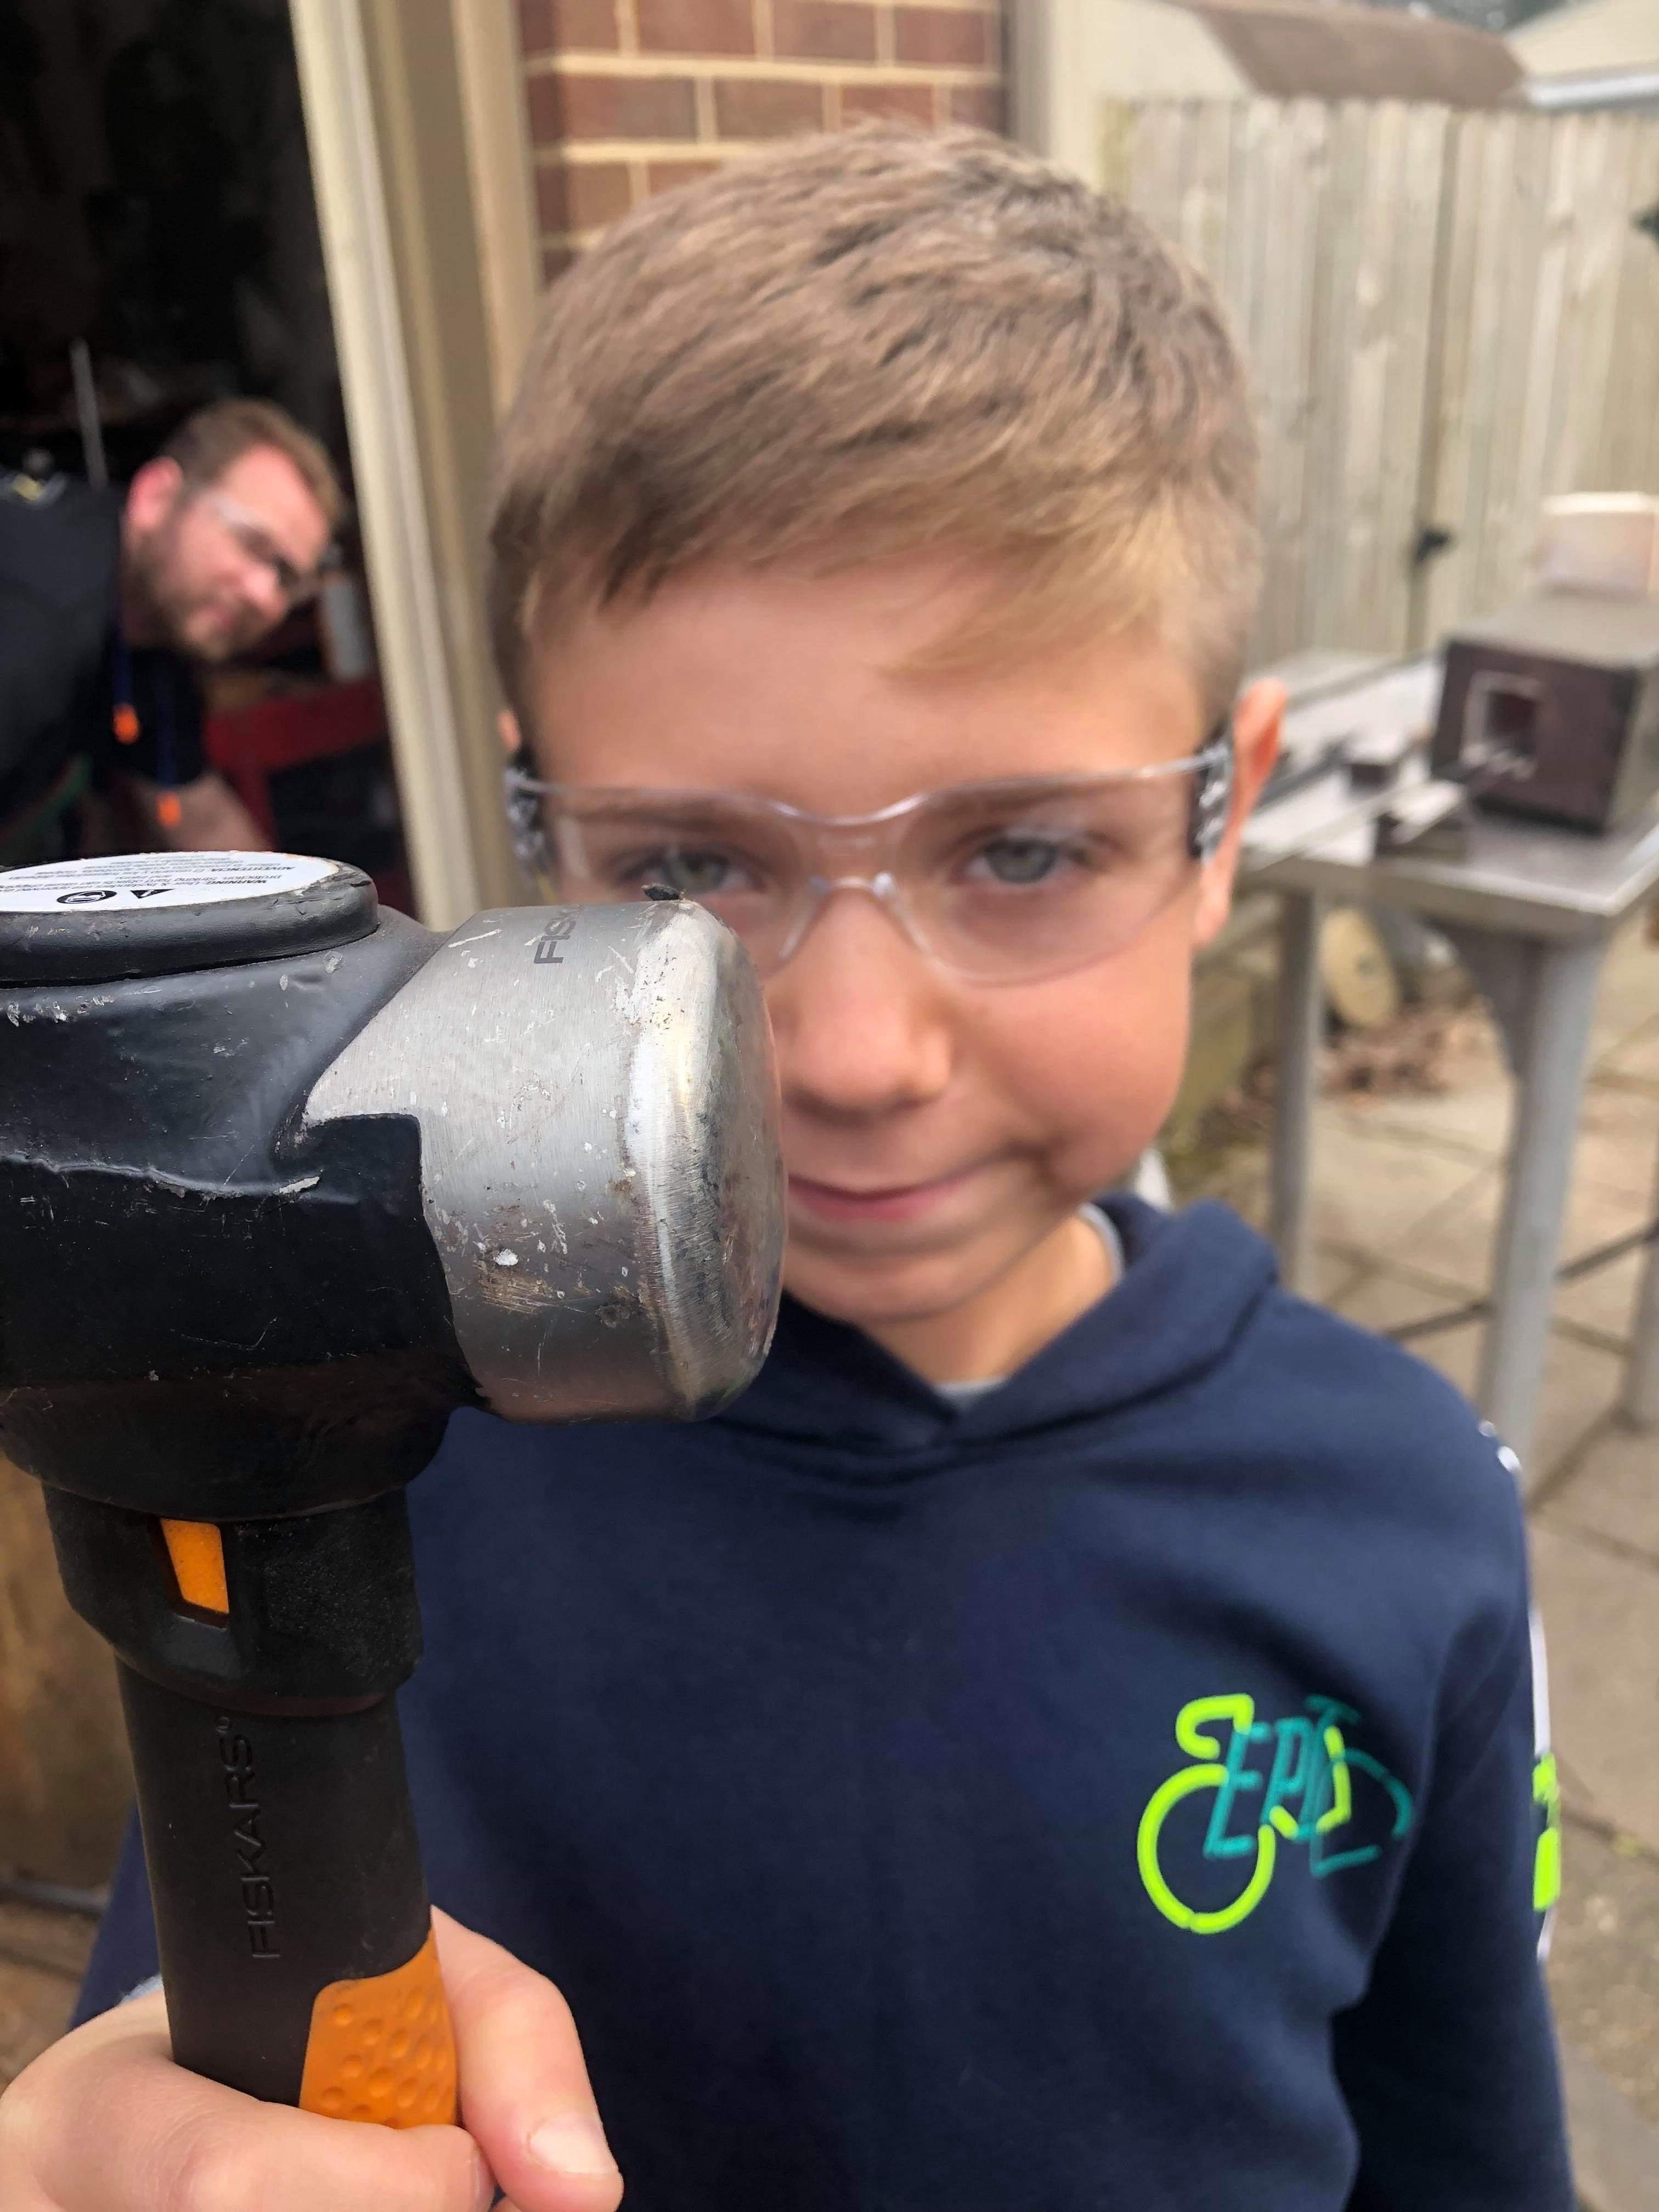
Yeah Das, tried flame coloring it. It's more visible in person, but it still subtle. Getting it to stay at that nice purple I saw will take some doin, that's for sure. I left the stem and base untouched to try and contrast the petals. -
What did you do in the shop today?
HojPoj replied to Mark Ling's topic in Blacksmithing, General Discussion
Wife and I took a workshop on making a copper rose. Earlier in the day I gave my nephew from Florida a quick intro to making a hook. My sister got in on the action as well, it would seem.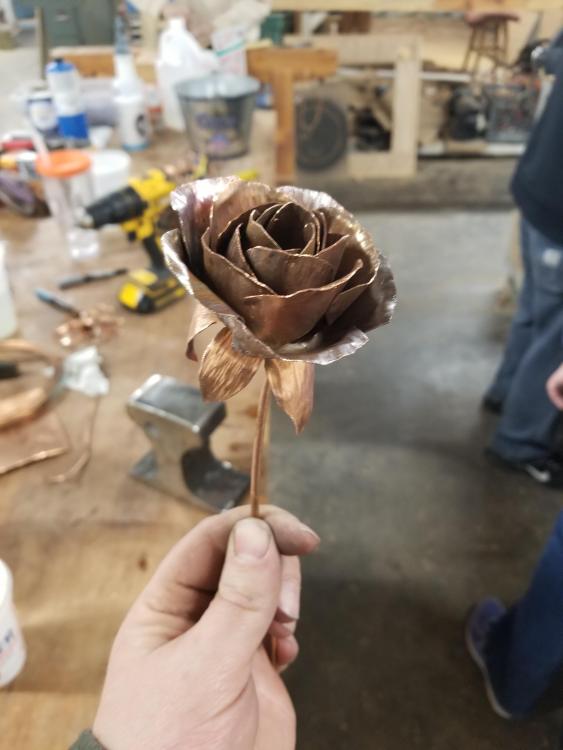


-
VainEnd84, those S shaped edges are similar to what is called a labyrinth seal. If the S is extreme enough then it should prevent any flames from blowing past. Fragility of a thin casting should be a consideration, though.
-
I can say from experience the weld doesn't get prettier... just different. And that's AFTER grinding.

-
RR Spike Hardie Tool
HojPoj replied to John Becker's topic in Hot Cuts, Anvil devils, metal cutting on the anvil.
I've posted it before, but for reference that's a sledgehammerhead sunk into a log.
-
Thanks a bunch for going through the effort, David! That's quite helpful!
-
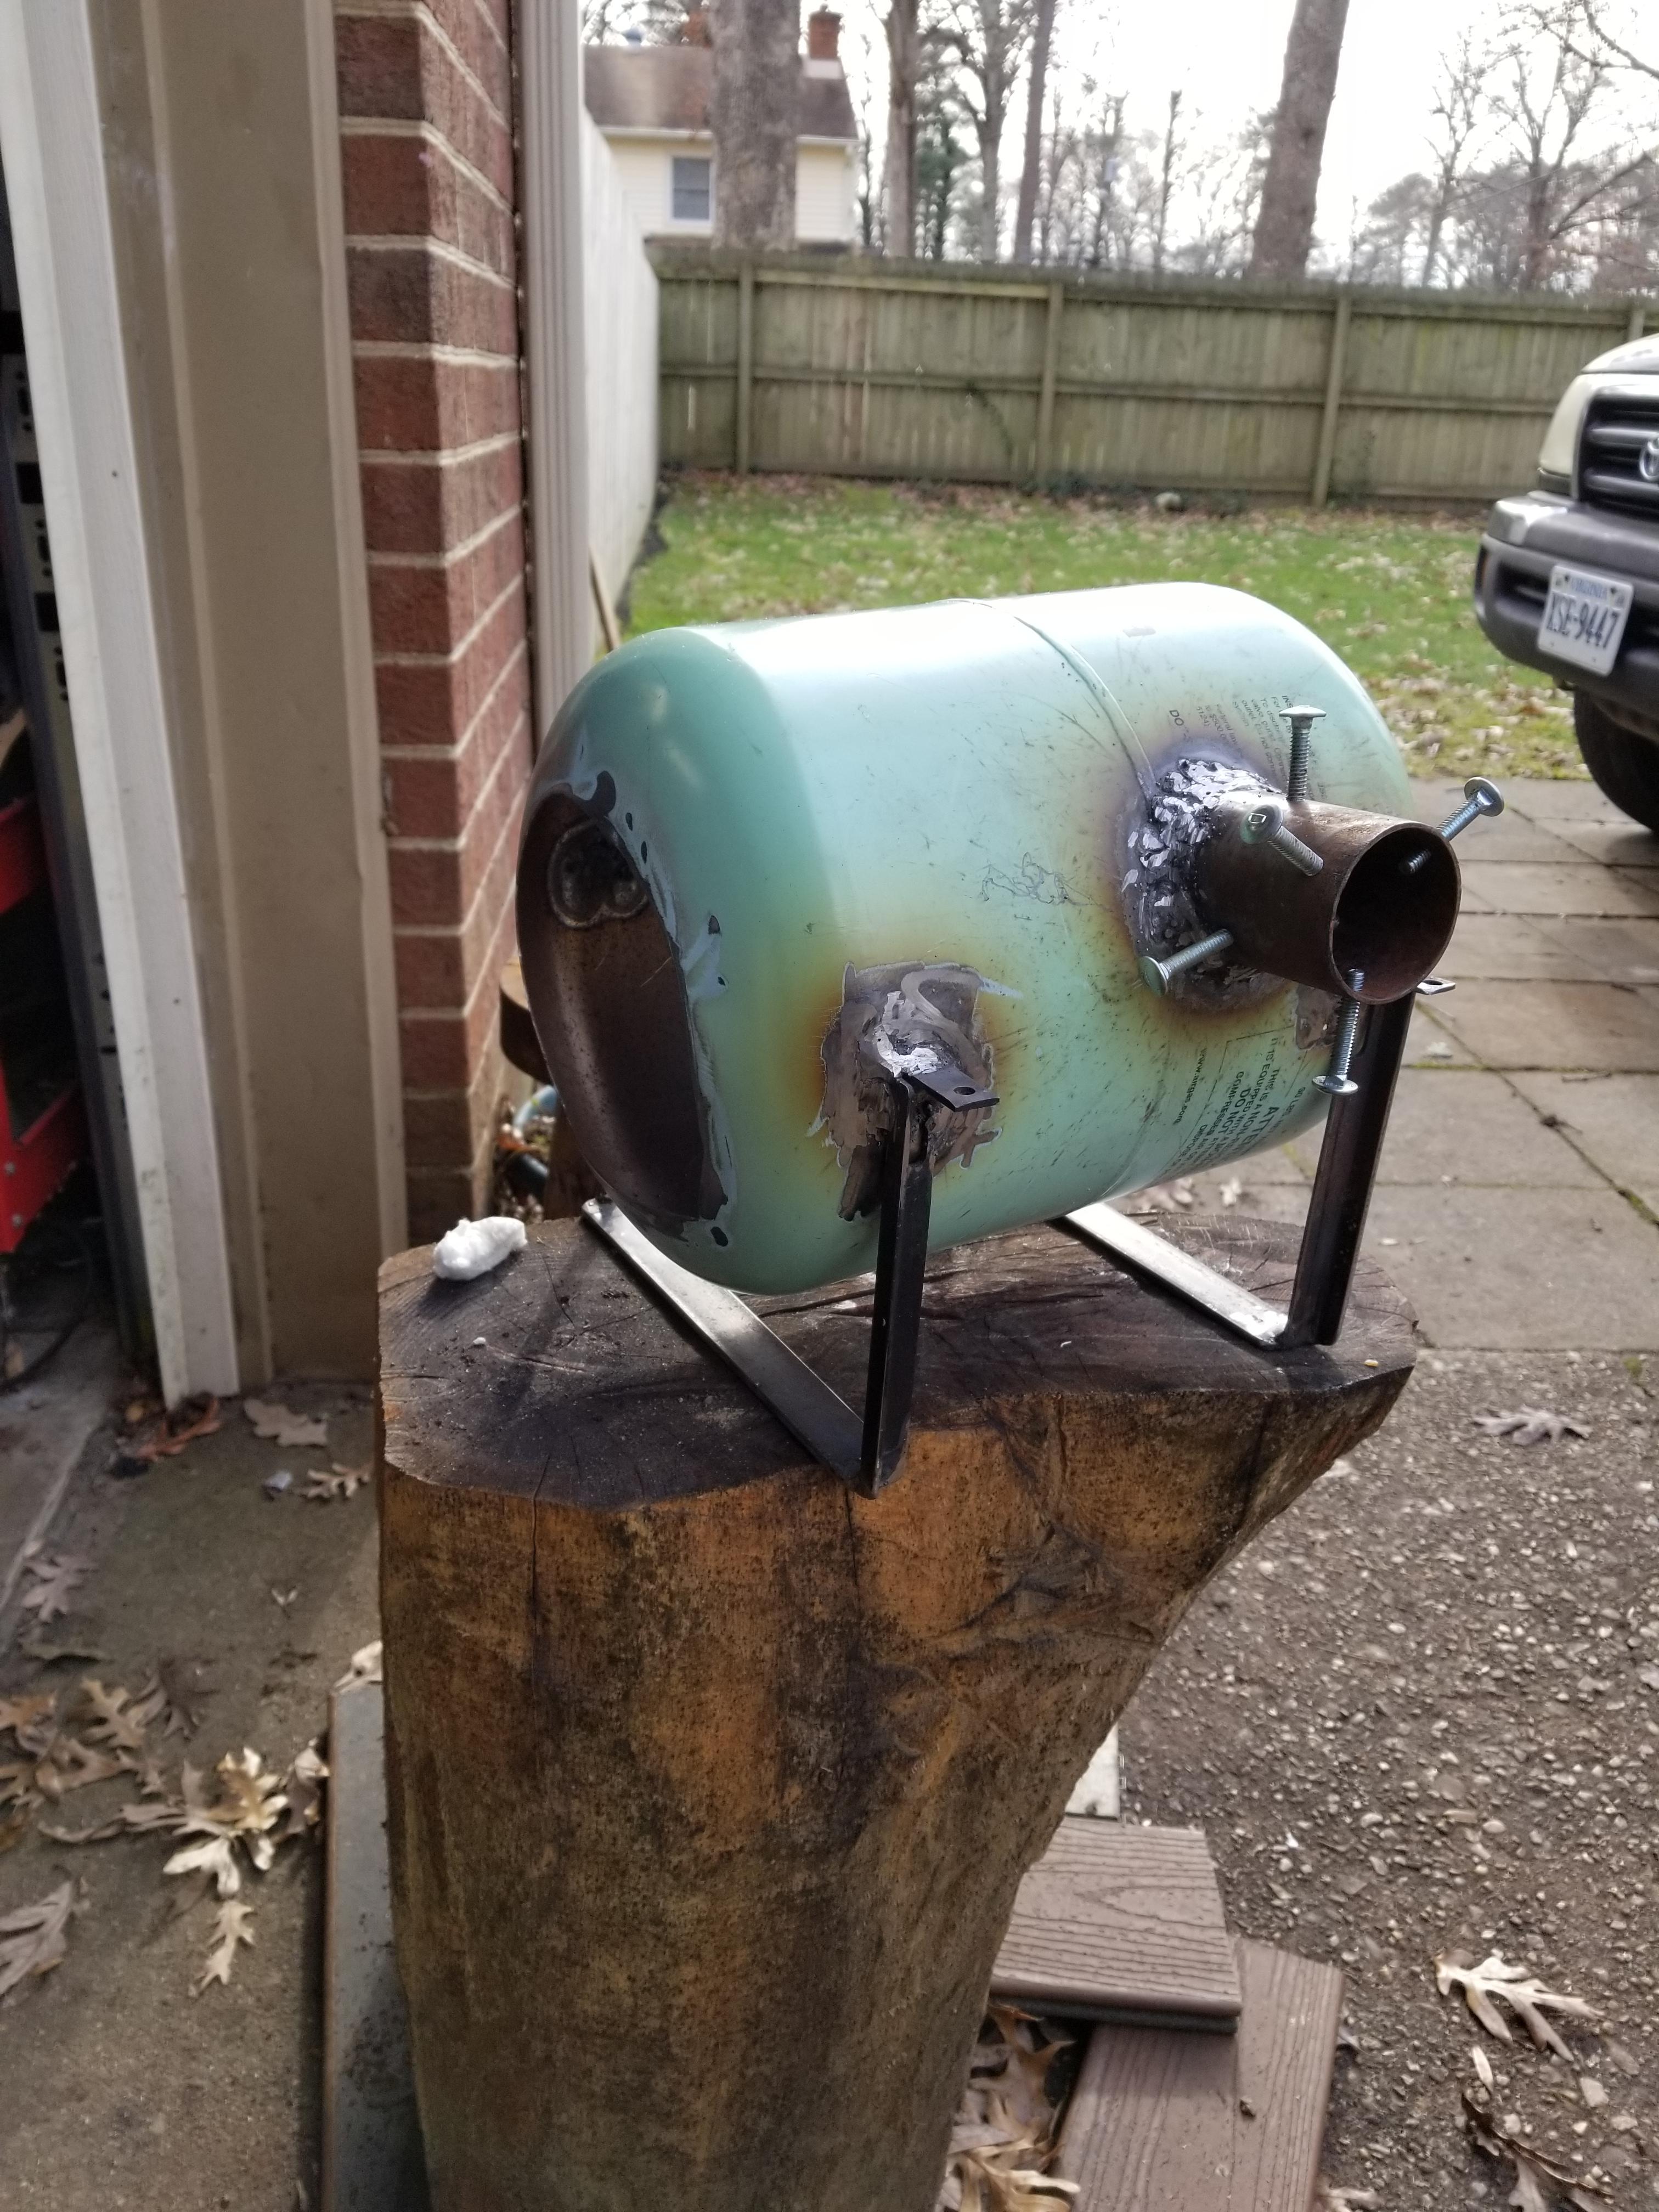
Sometimes things work the way we plan, but oftentimes some experimentation will be required. Compare the small tuyere to some larger ones, and if it doesn't seem like its getting the job done, THEN move on to the bigger blower.
-
Aubrey, it might be worth trying a larger size tuyere before anything else. If the opening is too restricted then you might not get the flow you otherwise could, and the air velocity might be too high as it exits the tuyere. Moving up a size in pipe might get you adequate airflow while still being 'soft' enough to not blow the fuel out.
-
Just a box of dirt, or a simple side blast forge
HojPoj replied to Charles R. Stevens's topic in JABOD - Just A Box Of Dirt
Nico, if you're looking for clay, bentonite clay gets used in a number of applications: Well Drilling Pond lining Livestock Feed additions Wine Clarification Ceramics (Pottery) As noted: Cat Litter, or any other cleanup application that calls for clumping-up spilled stuff While your options may be limited where you are, one of those applications is bound to be in your general vicinity, it's just a matter of talking to the right person to get access to a supply. All that being said, as JHCC stated, 'Any dirt will do'. -
What did you do in the shop today?
HojPoj replied to Mark Ling's topic in Blacksmithing, General Discussion
Ted, I believe he shows it in the sculpture threads... 'Roses 101' I think it was titled. Looked like small bits welded to the stem, then ground/filed smooth. -
I'd advise not having water glass (sodium silicate) anywhere exposed to the flames. You have options for flux resistance. Yes, a kiln wash is one way to achieve it- though you'd have to be very gentle in handling to account for its fragility. Another choice would be a sacrificial floor piece (or 'pan') made of flux resistant material that only gets put in when needing to forge weld. Given that it's probably a hard firebrick that'll make up the floor, that's a fairly expendable item anyways. You could get a flux-resistant refractory and just cast additional floor pieces. I think the more important thing here would be keeping flux off the walls since they're not as easily replaced... and flux getting into ceramic wool melts it like water on cotton candy.
-
For it to have that level of draft would require a vertical section... which is probably on the exterior of the building.
-
Don't fire it first, it's easier to apply outside the forge and install than after the fact. Once you fire it then that's when it'll give off the little nasties that are huge respiratory hazards.
-
66 lb. Chinese 'ACCIAIO' Anvil Unboxing and testing
HojPoj replied to HojPoj's topic in Anvils, Swage Blocks, and Mandrels
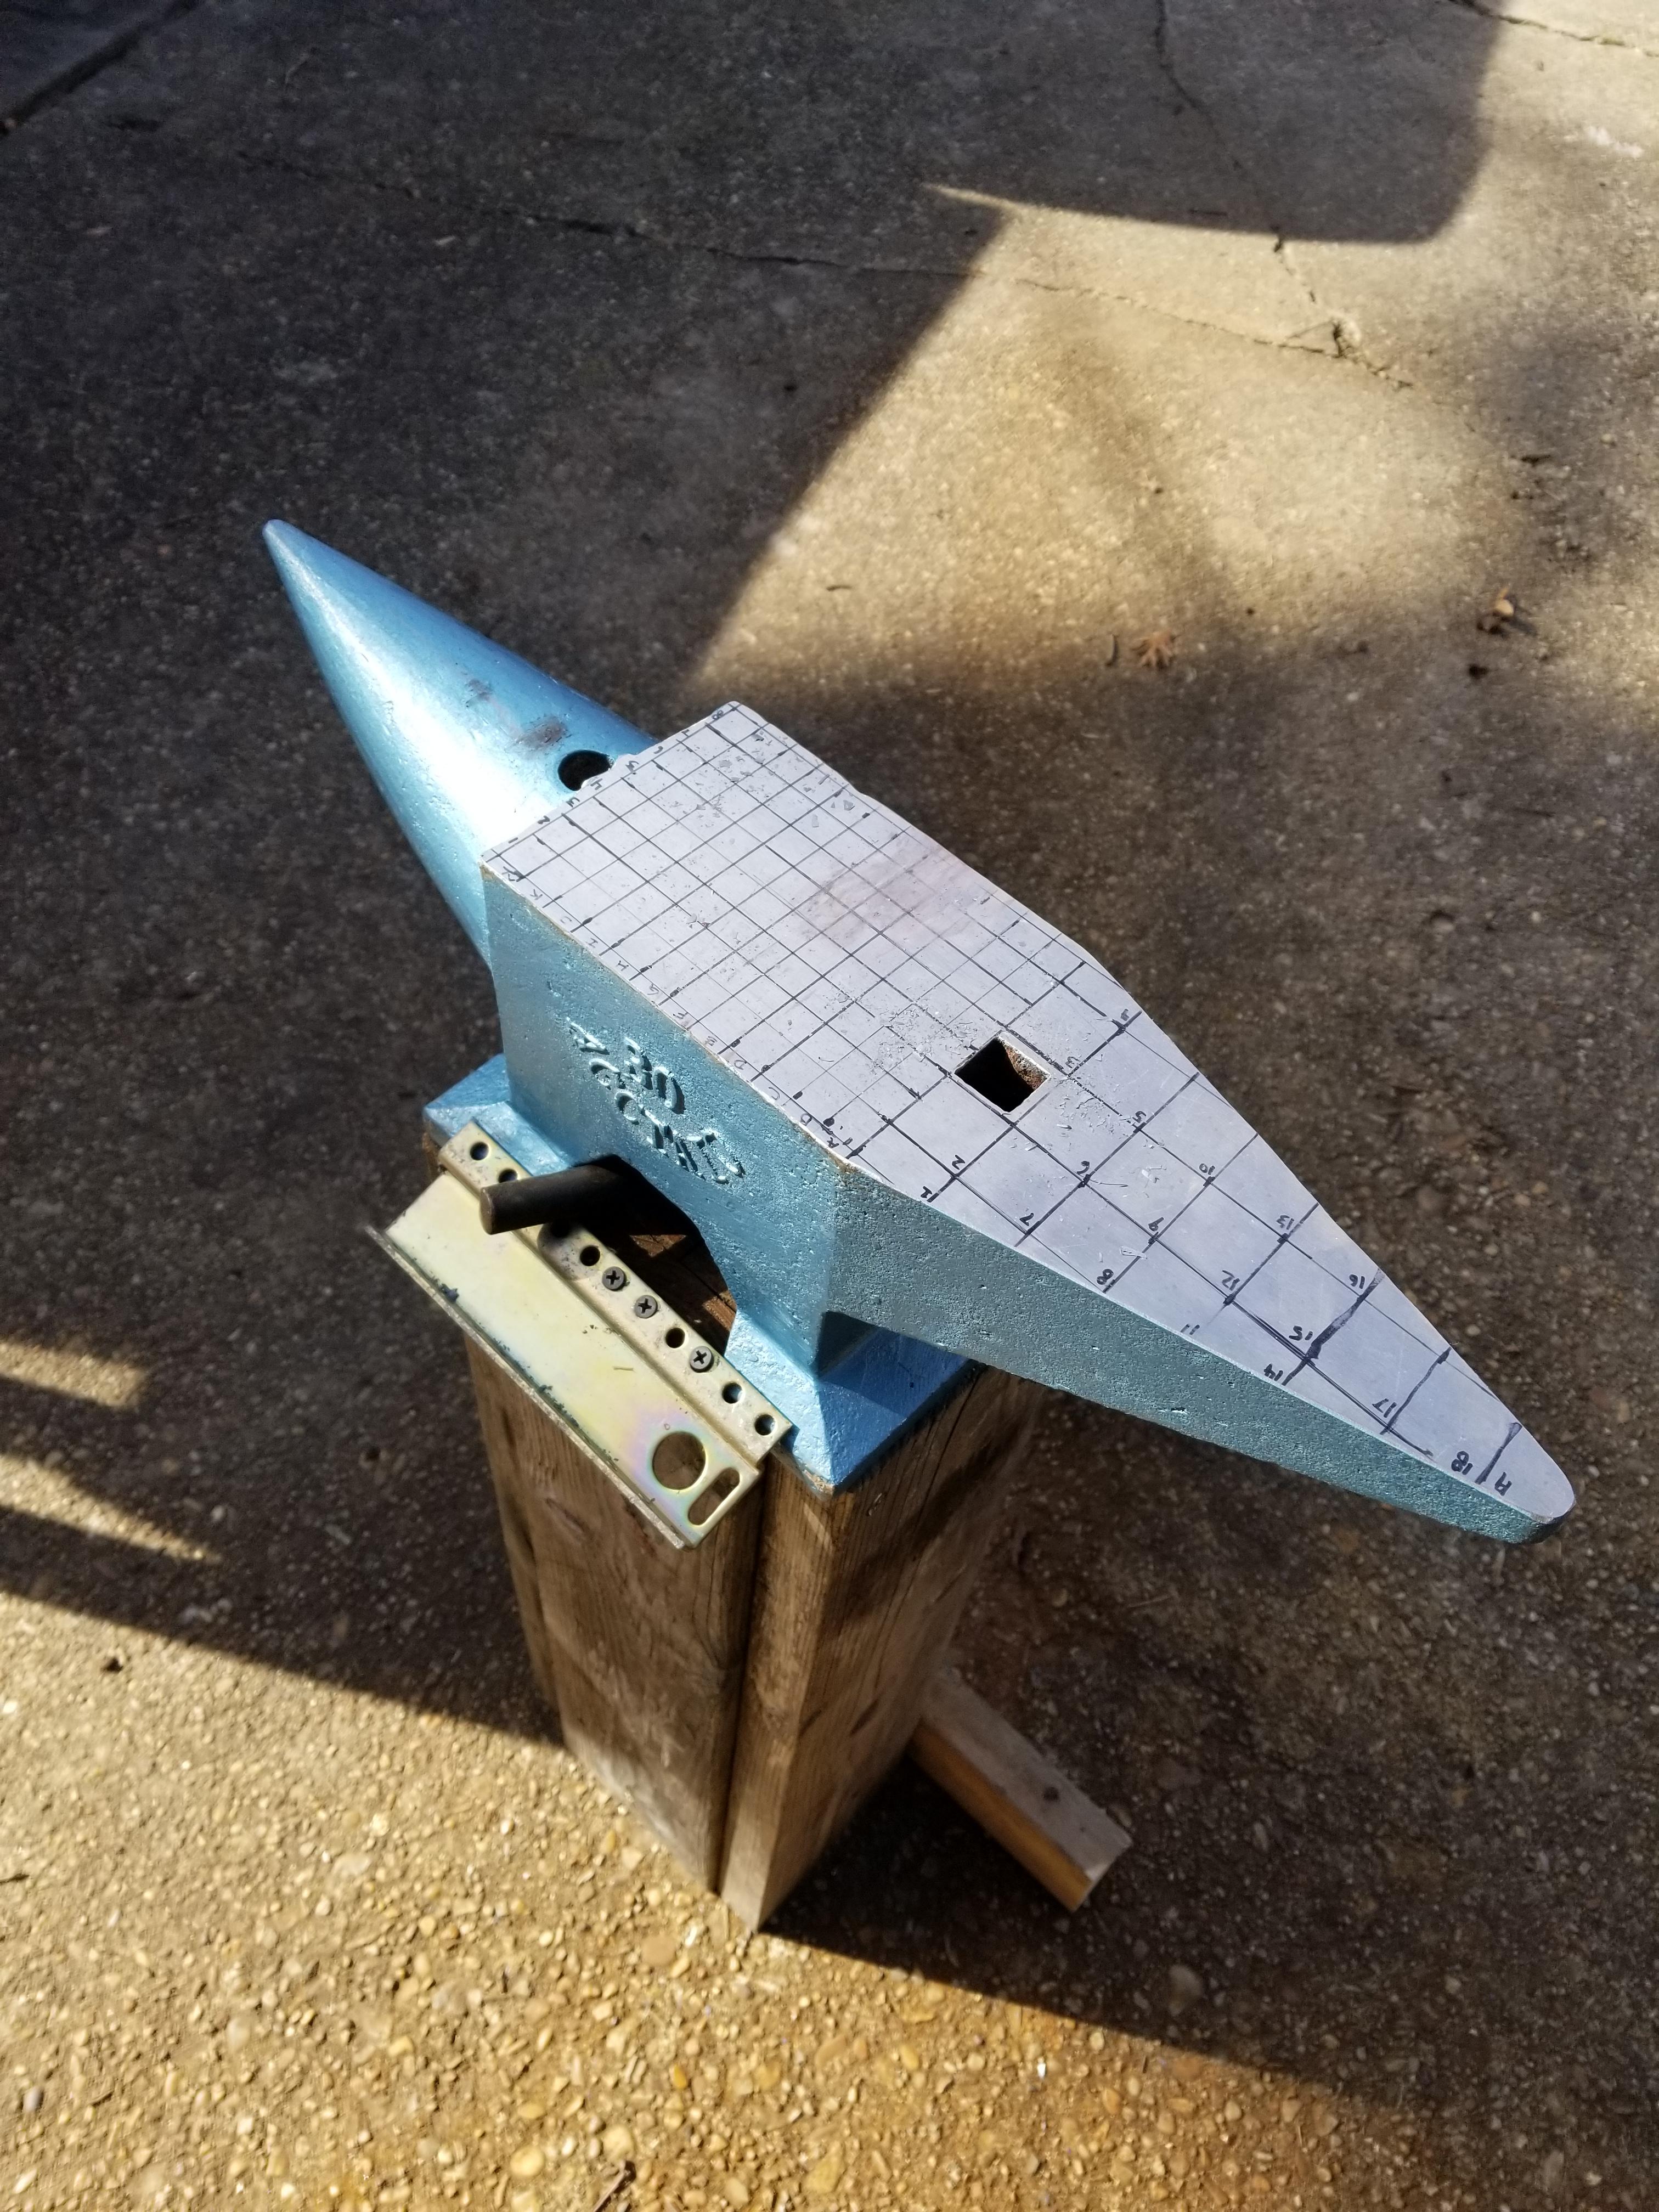
There was still noticeable ring with my setup, but it wasn't nearly as robust as I am planning. With earplugs in it didn't bother me at all, though I've yet to ask the neighbors what they thought As far as feedback: Wood wont ring to any appreciable degree, so any filler will only add weight. For that design, I'd still sandwich more lumber between the uprights (just keep space for tools to drop through the pritchel/hardy holes). Not much purpose in concealing the feet unless you're planning to cast something around it to retain it (plus, think about where all that scale from the hot metal goes). This very much becomes a 'horses for courses' sort of thing. If I continue to use dead tree carcasses, then: Anvil interface all the way to the floor would ideally be end-grain only. The method of securing it to the anvil should allow for appreciable pre-load (i.e., be able to really crank it down). The fastening method should not be so cumbersome as to incur significant time costs in removing the anvil from the stand (for travel). The stand should have sufficient geometry to remain stable in use but not interfere with use of the anvil. My preference for a very large preloaded fastening schema is that it allows for a tighter coupling of the anvil to the stand, which in turn makes the two pieces act as a system instead of individually. This has an advantage (depending on design) of lowering the resonant frequency of the anvil, thereby making the ring less annoying. Wood would add a damping component to this. Additionally, the anvil wouldn't rock or move relative to the stand no matter *what* you're doing on it- that becomes important when doing stuff further out on the horn of a light anvil. The tail of the anvil is the only thing that rings loudly, I didn't find the horn to be bad. The magnet on the tail did significantly reduce the ring. Don't overthink it, pick something and try it out. Lumber is cheap enough that you should *expect* to make another stand as a part of converging on a design that works best for YOU. -
Hardy hole in Anvil Stand
HojPoj replied to Thursigar's topic in Stands for Anvils, Swage Blocks, etc
Likewise, you can find these on the popular Auction site. Apparently they reproduce some styles of stuff in ductile iron- there are also stake plates and others that aren't cantilevered like the picture. They certainly cost more than scrounging it together yourself, but sometimes the Time Value of Money comes into play (at which point it's well worth the investment). One smith I know uses this style of stake holder with great success. I had purchase the set with the armorer's stakes before I ended up with my 66 lb anvil, though I haven't used them. I can say, however, they're quite robust and would only require minimal fiddling to set up well (just drill the mounting holes and grind down the cast surface finish).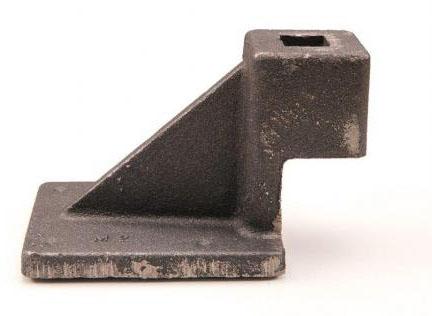
-
66 lb. Chinese 'ACCIAIO' Anvil Unboxing and testing
HojPoj replied to HojPoj's topic in Anvils, Swage Blocks, and Mandrels
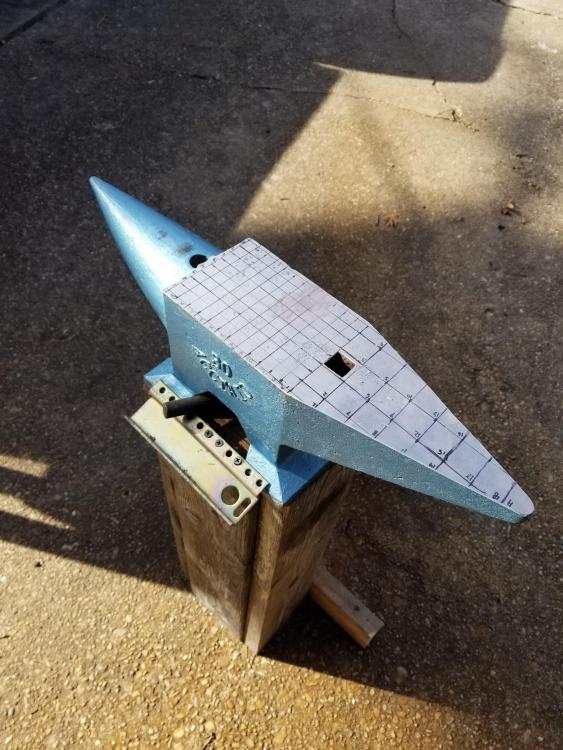
As far as mounts go, I'd just screwed together some boards id cut for making an improvised anvil stand. Worked well enough for initial use, though it stood a little higher than I wanted it to. Slapped on a couple pieces to stabilize its footprint (no, this won't be used for much longer). I used some steel channel that was on hand as temporary tie-down brackets (it's stuff that's used for making server racks, it conveniently already had holes in it). A slightly larger footprint and some lag bolts and angle iron would likely be more than adequate for this.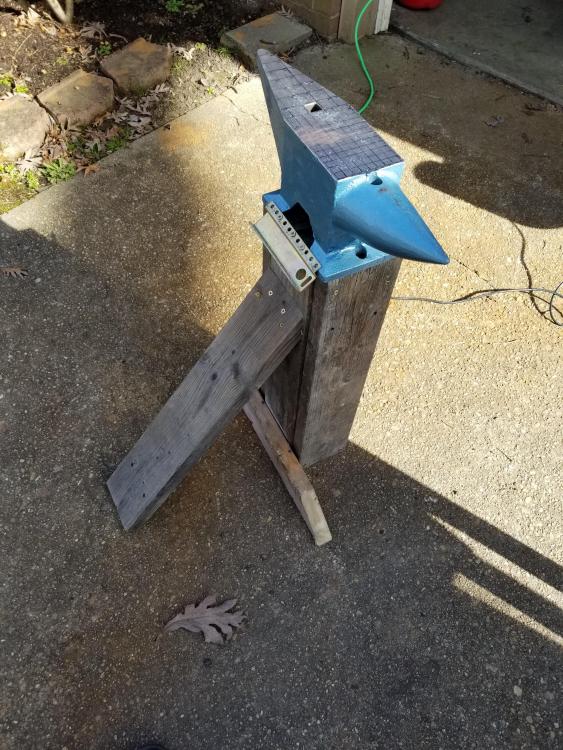
-
How to mount my beginner anvil?
HojPoj replied to Robotick's topic in Stands for Anvils, Swage Blocks, etc
Maybe you should be more careful when walking around there, TP!